Collaborative drawing workshop:
During this task we each wrote a series of words to describe a boundary and a way of making a mark. We used these to generate 2 minute sketches creating quick ideas and broadening our own ideas as to the concept of a boundary. This task helped me to look at the unit differently and collect my ideas of each type of boundary from both location.

Limits

Flowing, dainty, imperfect circles

Exclusion

Restrictive

Dotting division

End
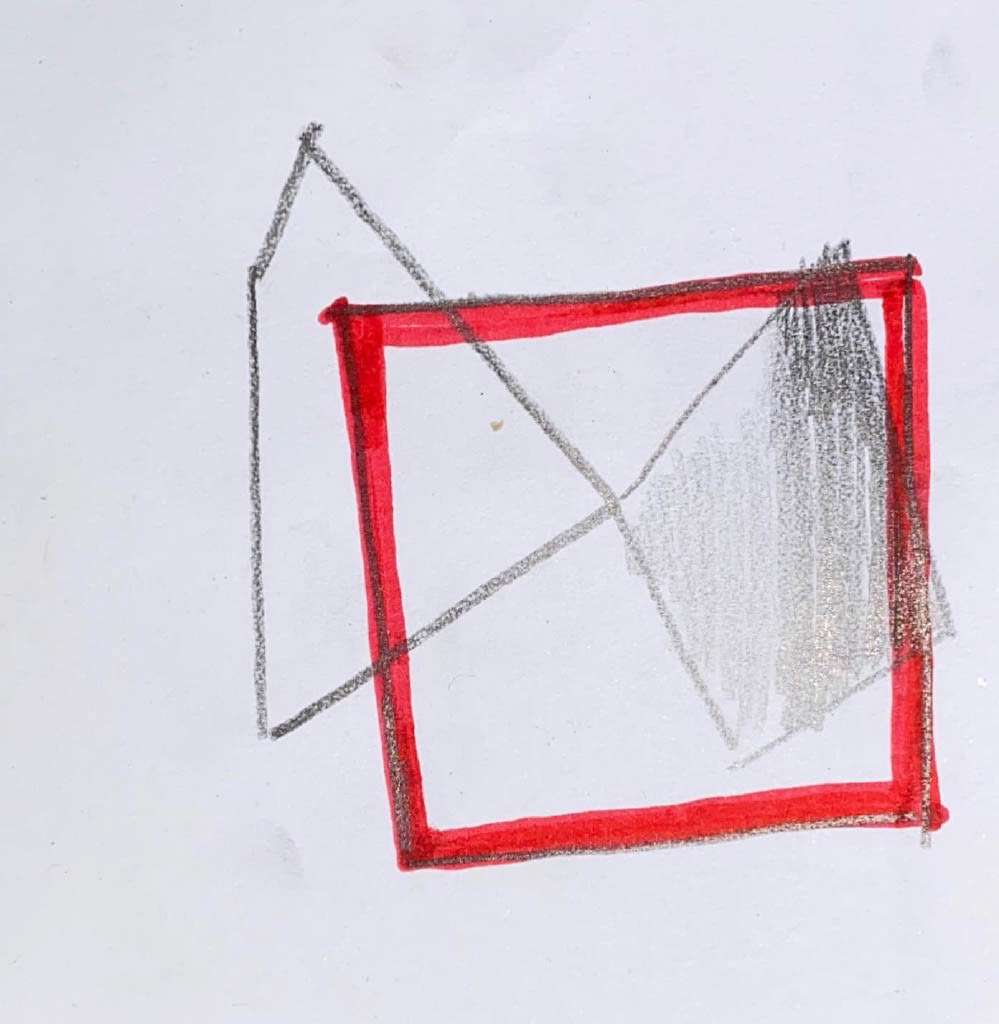
Sharp, taper, bold squares

Decisive planes
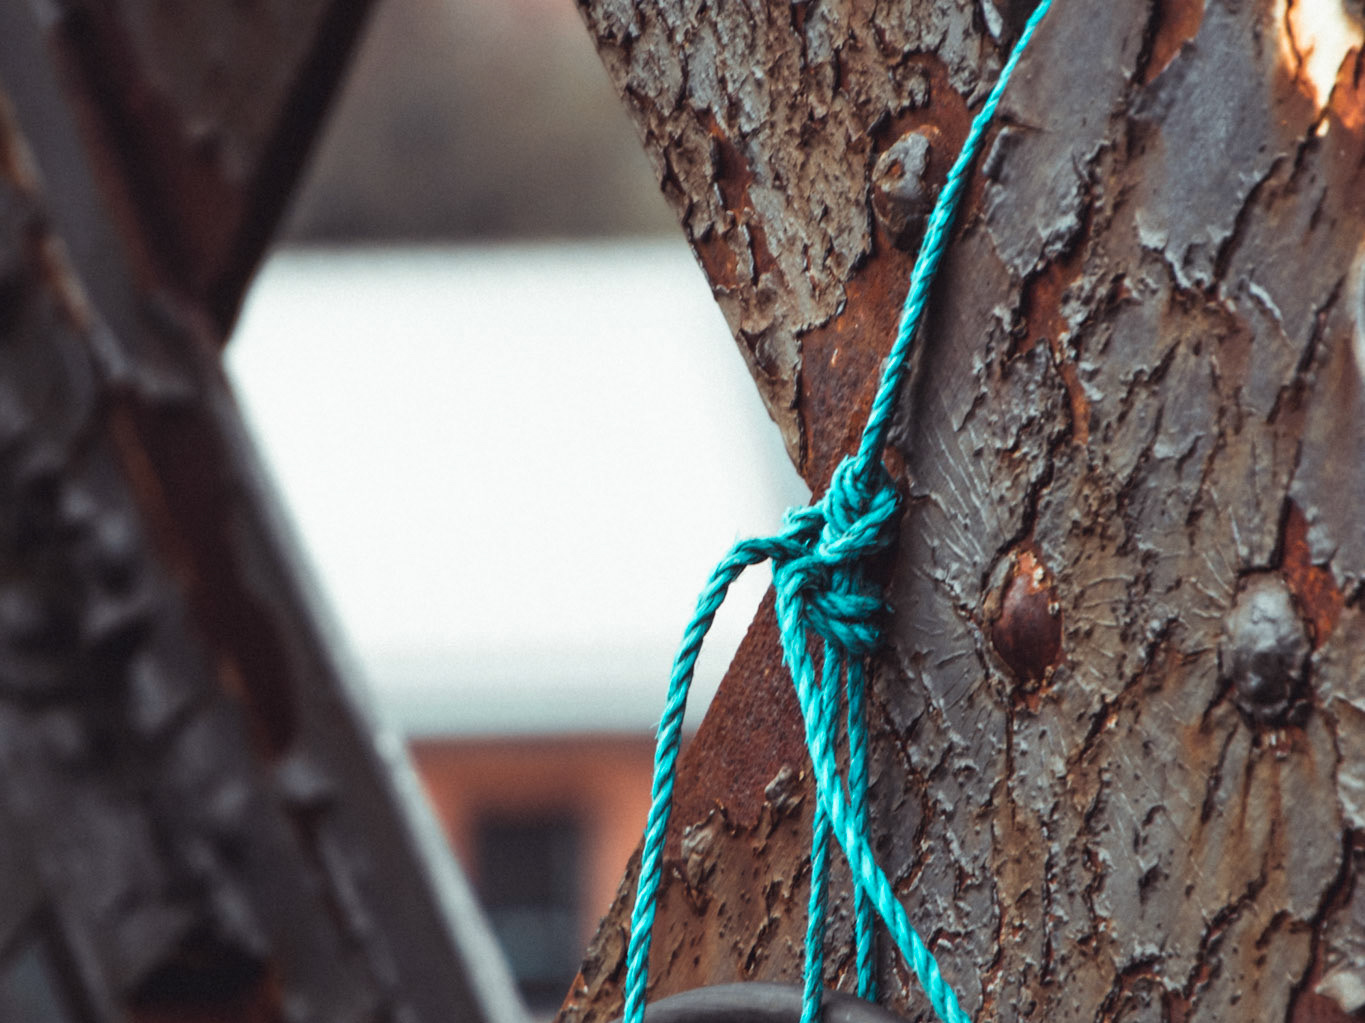
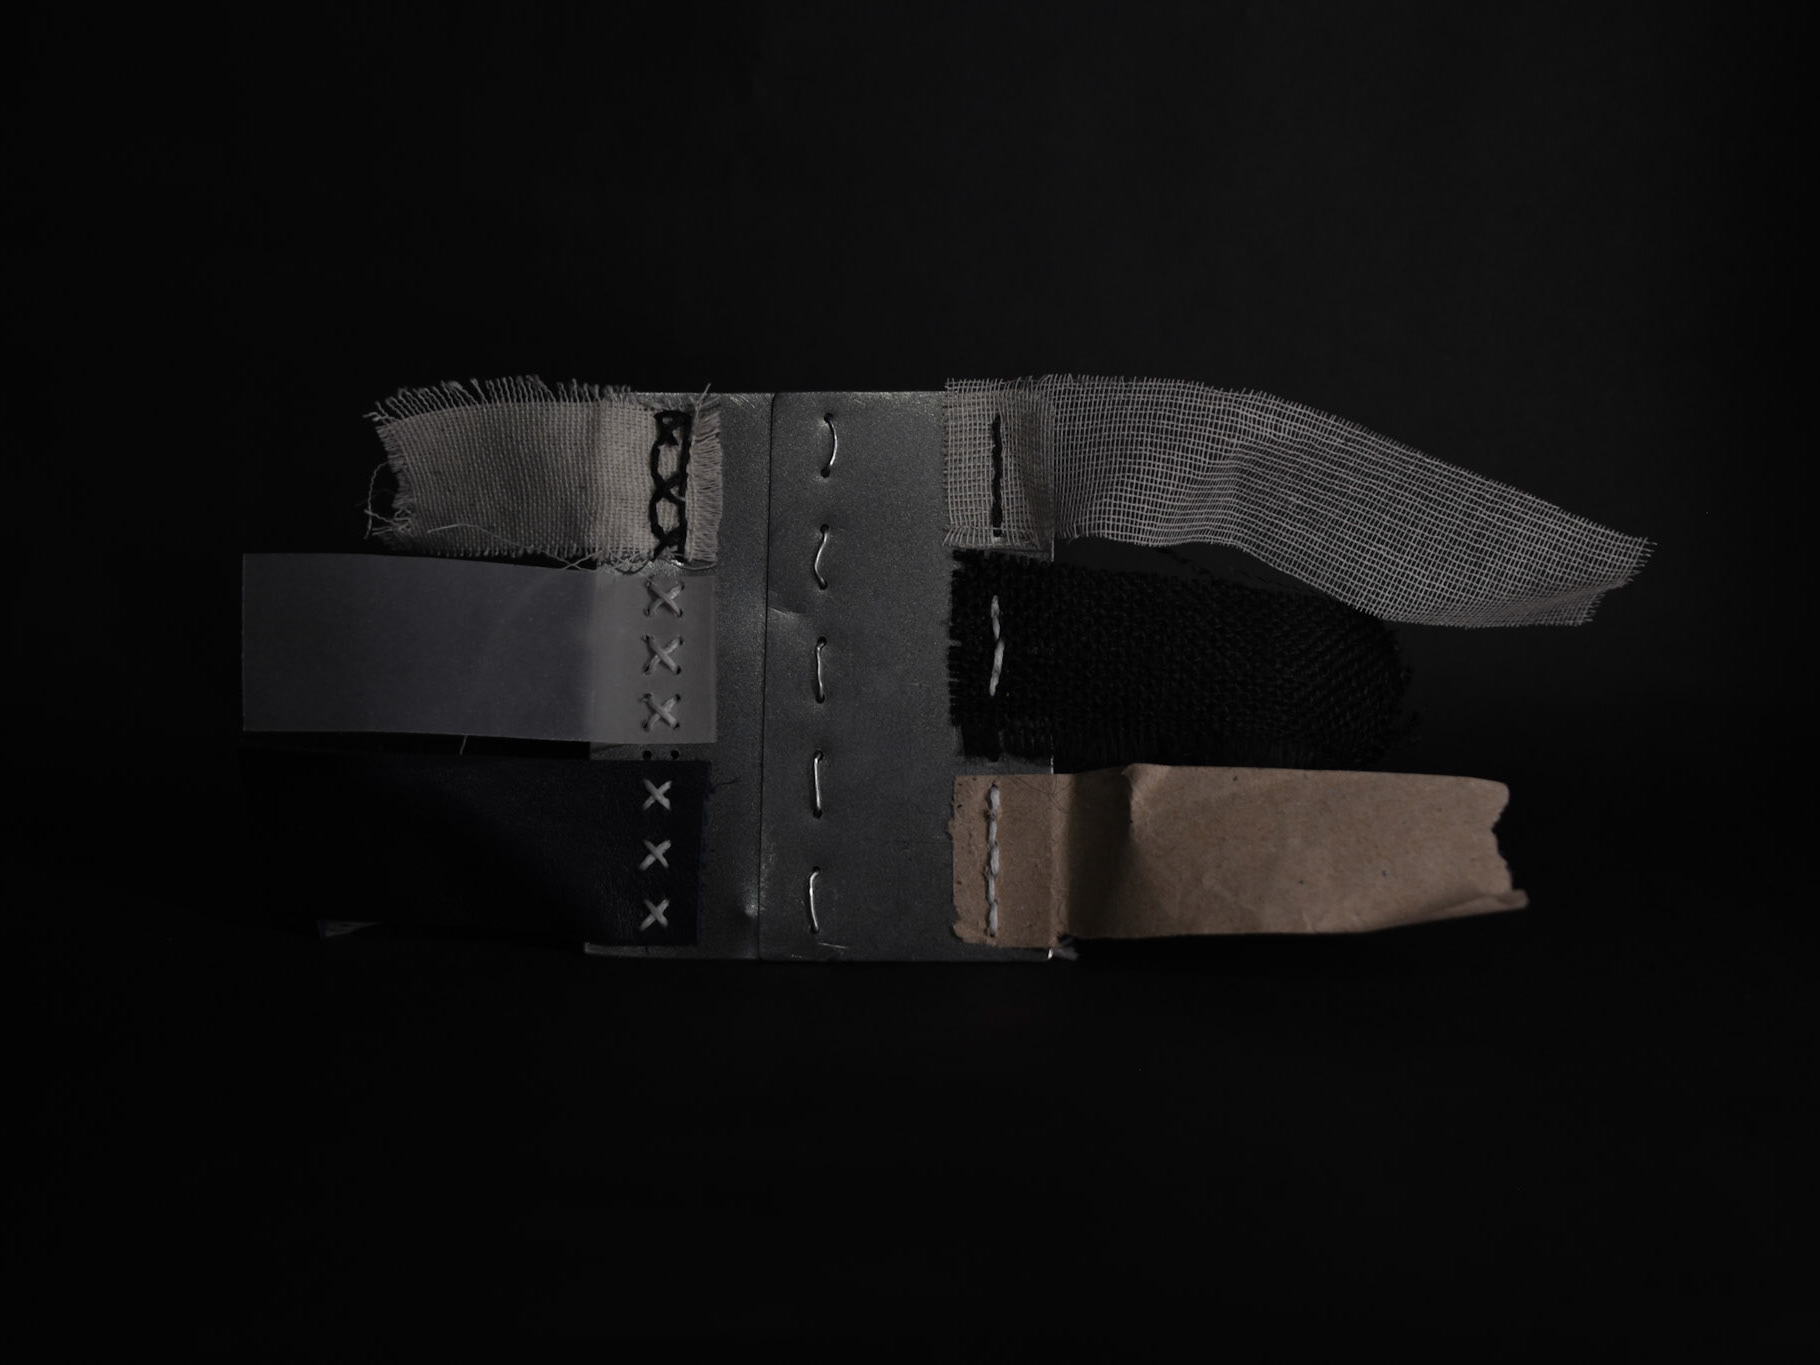
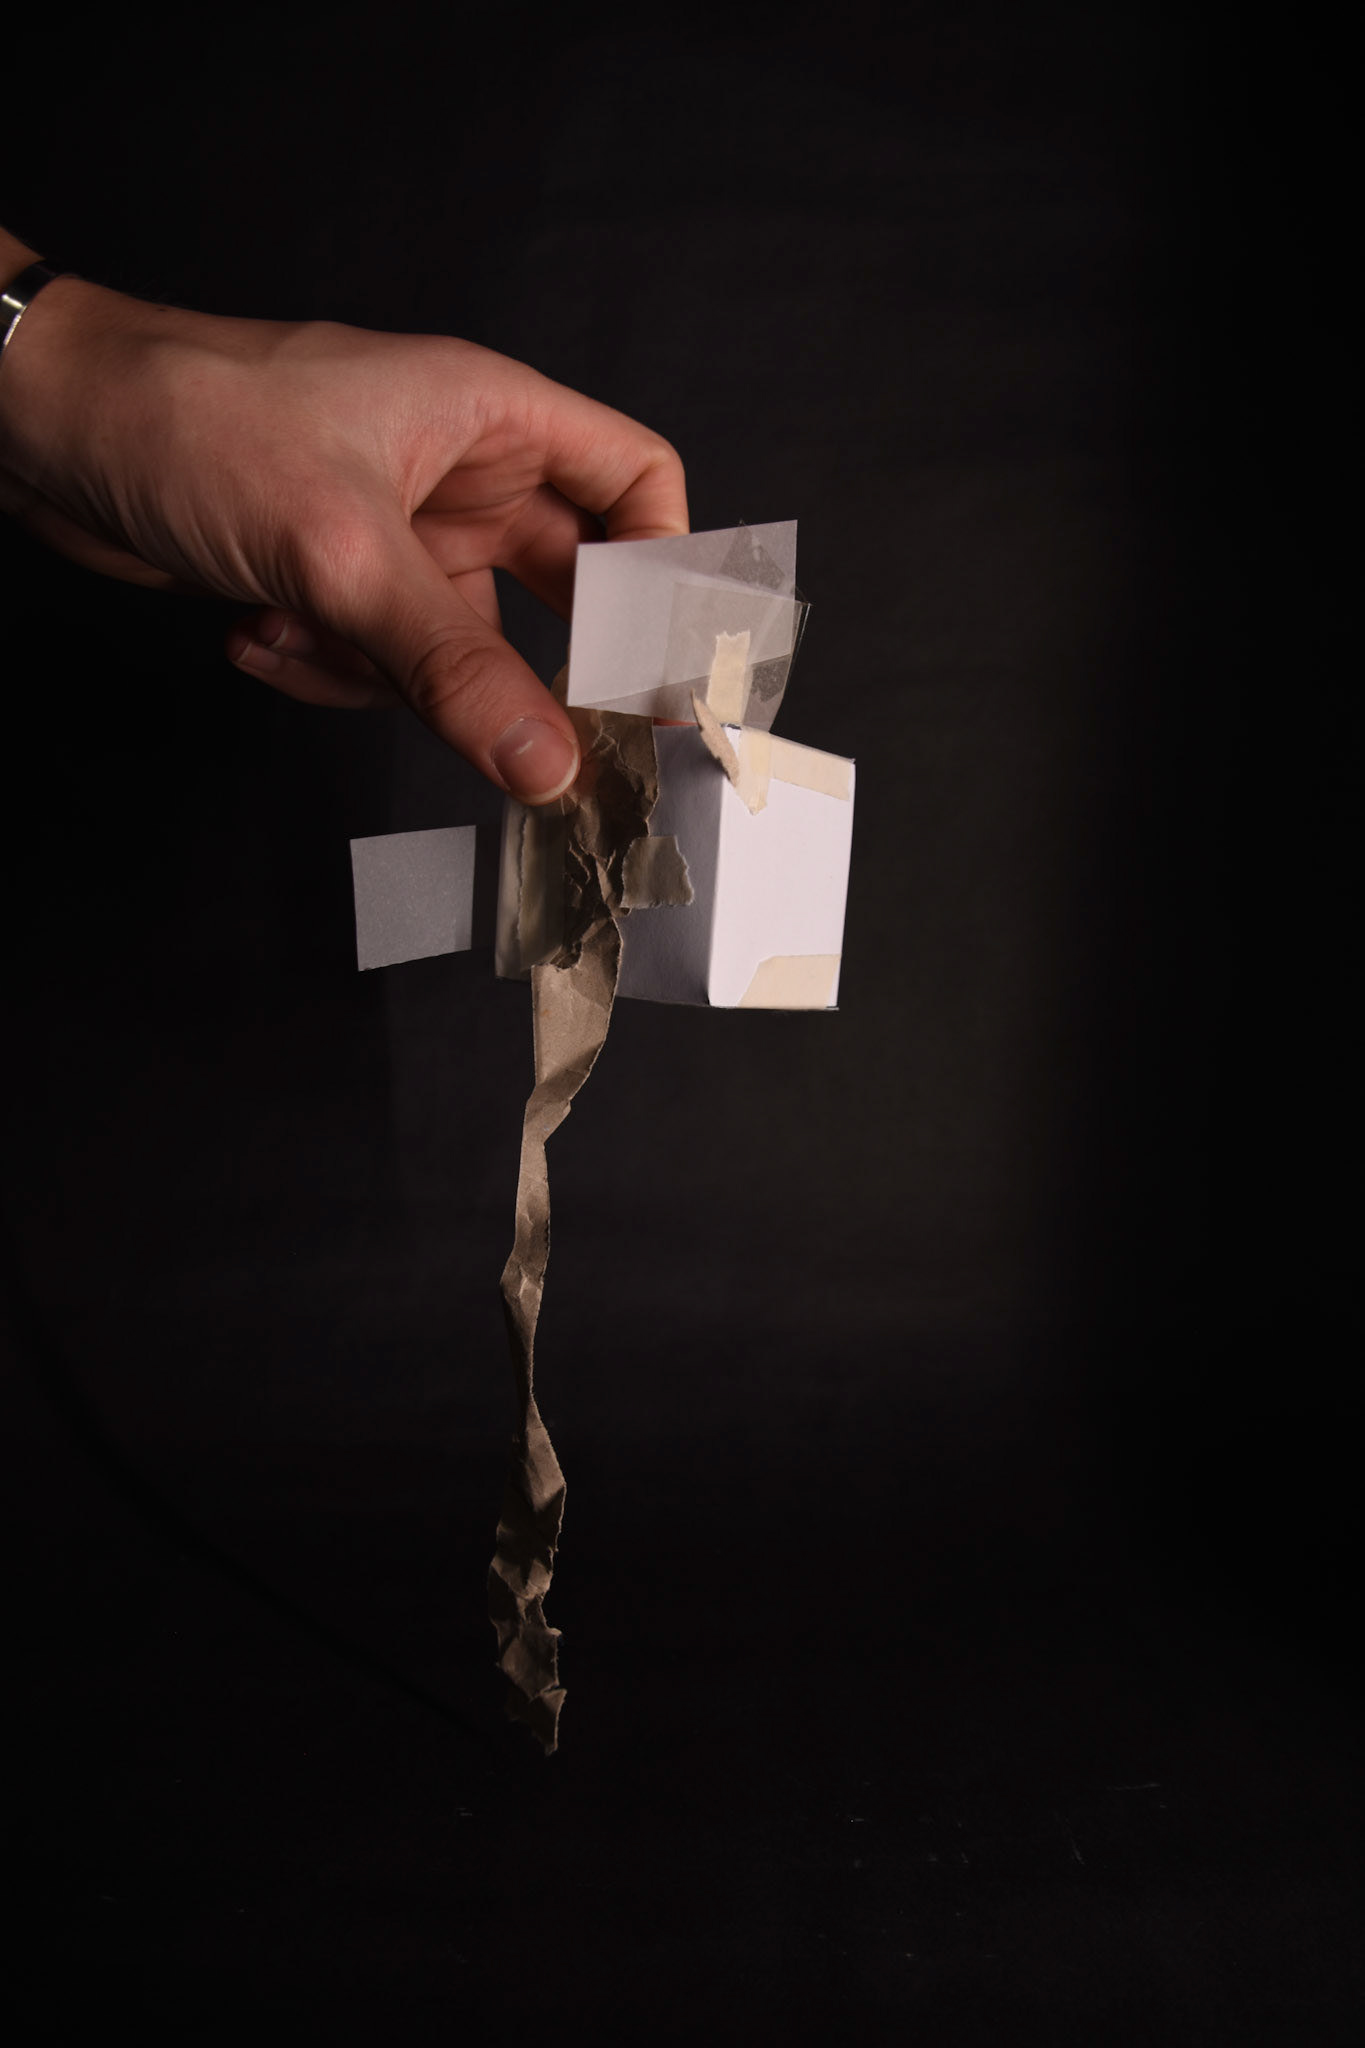
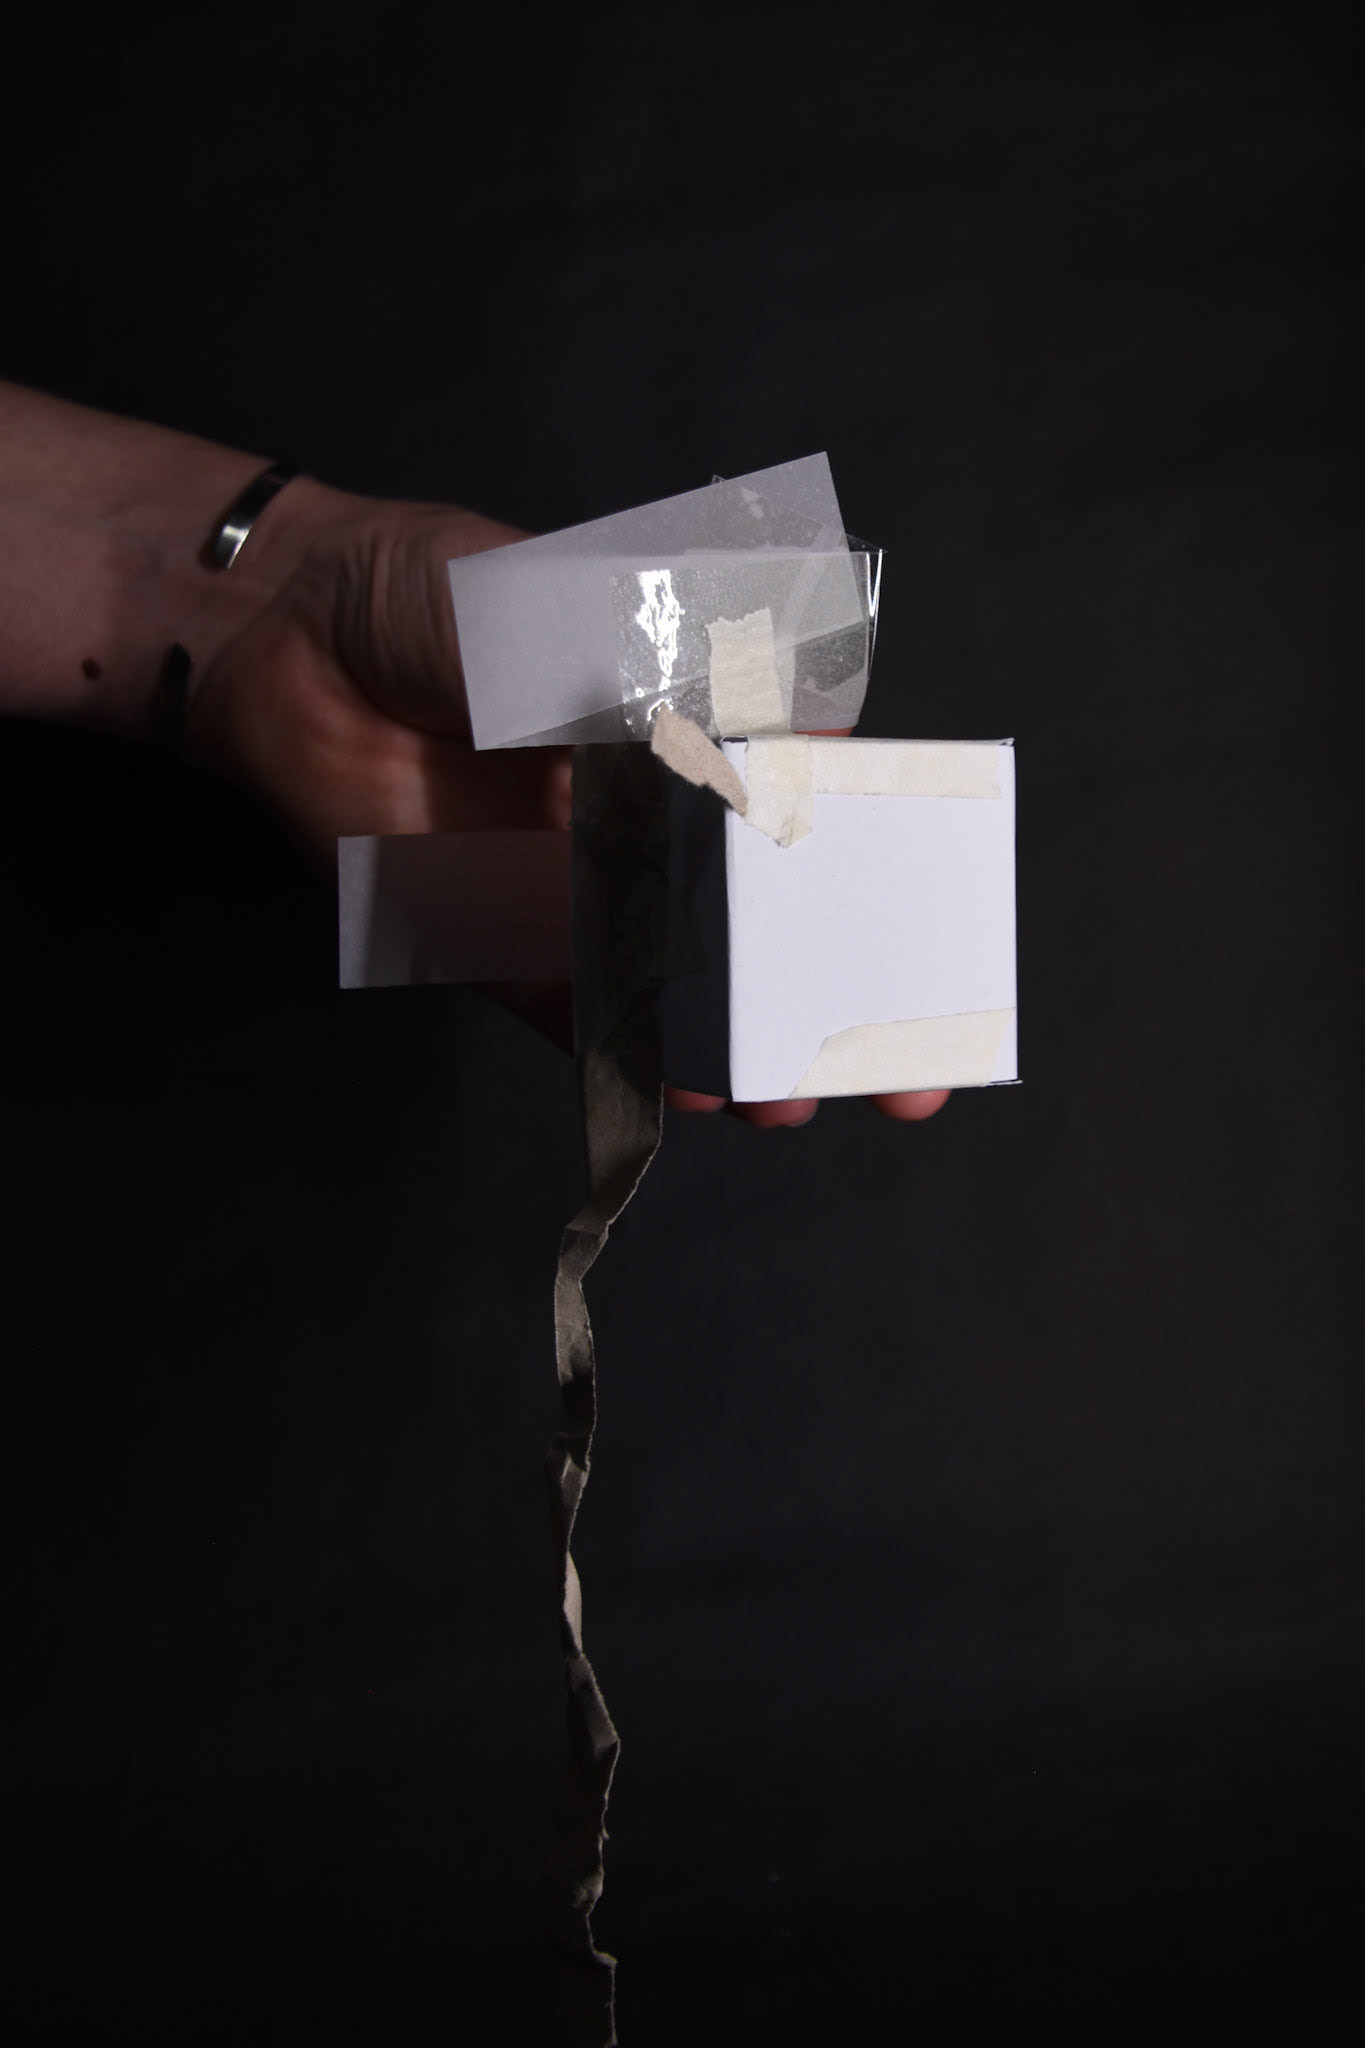
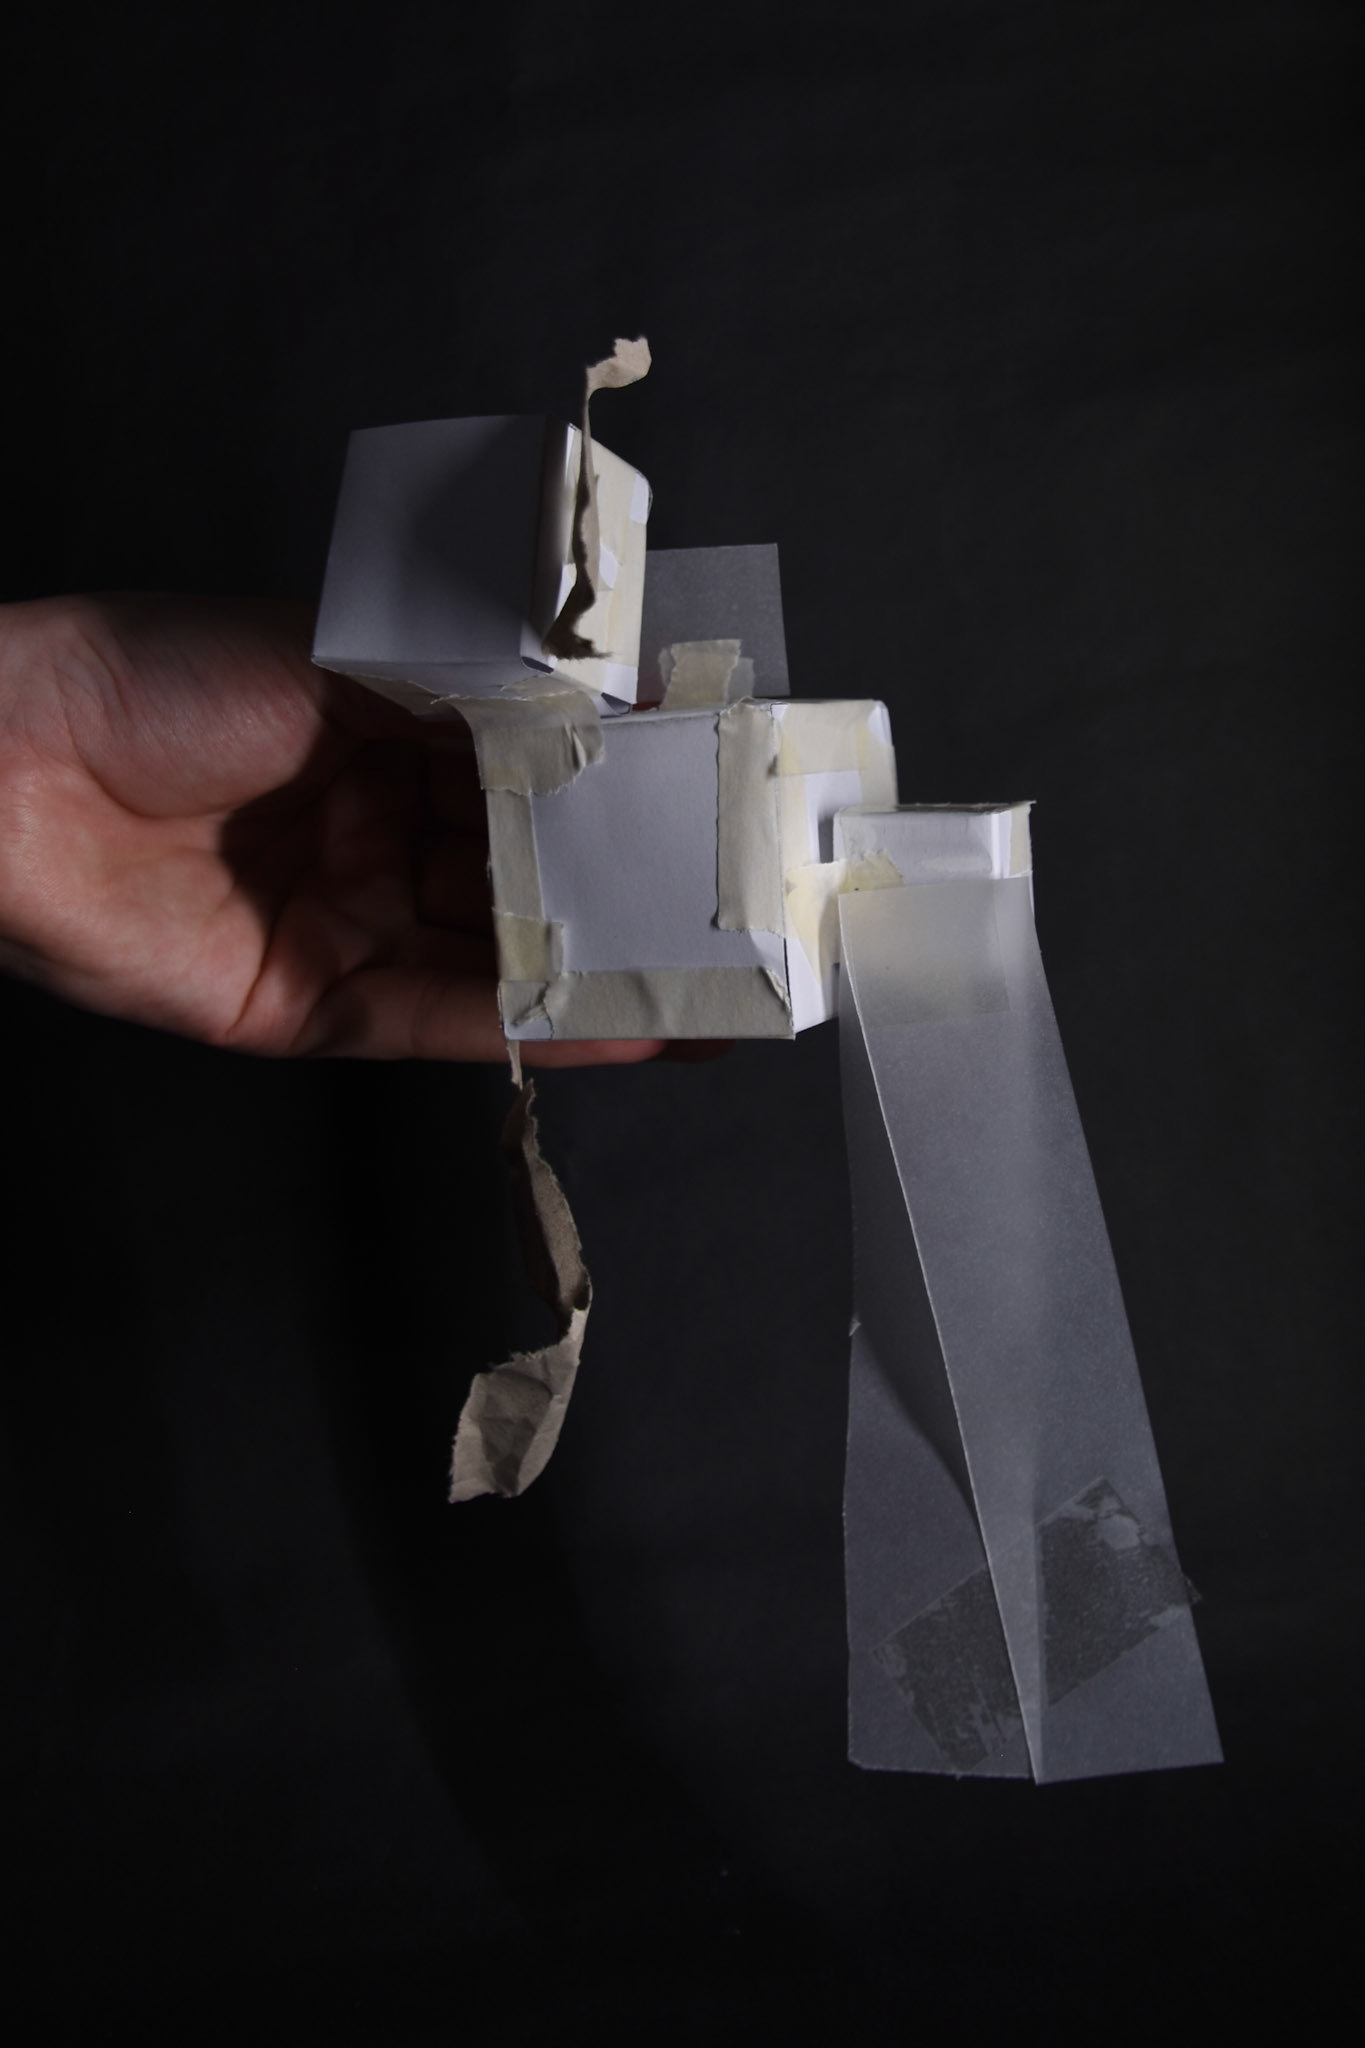
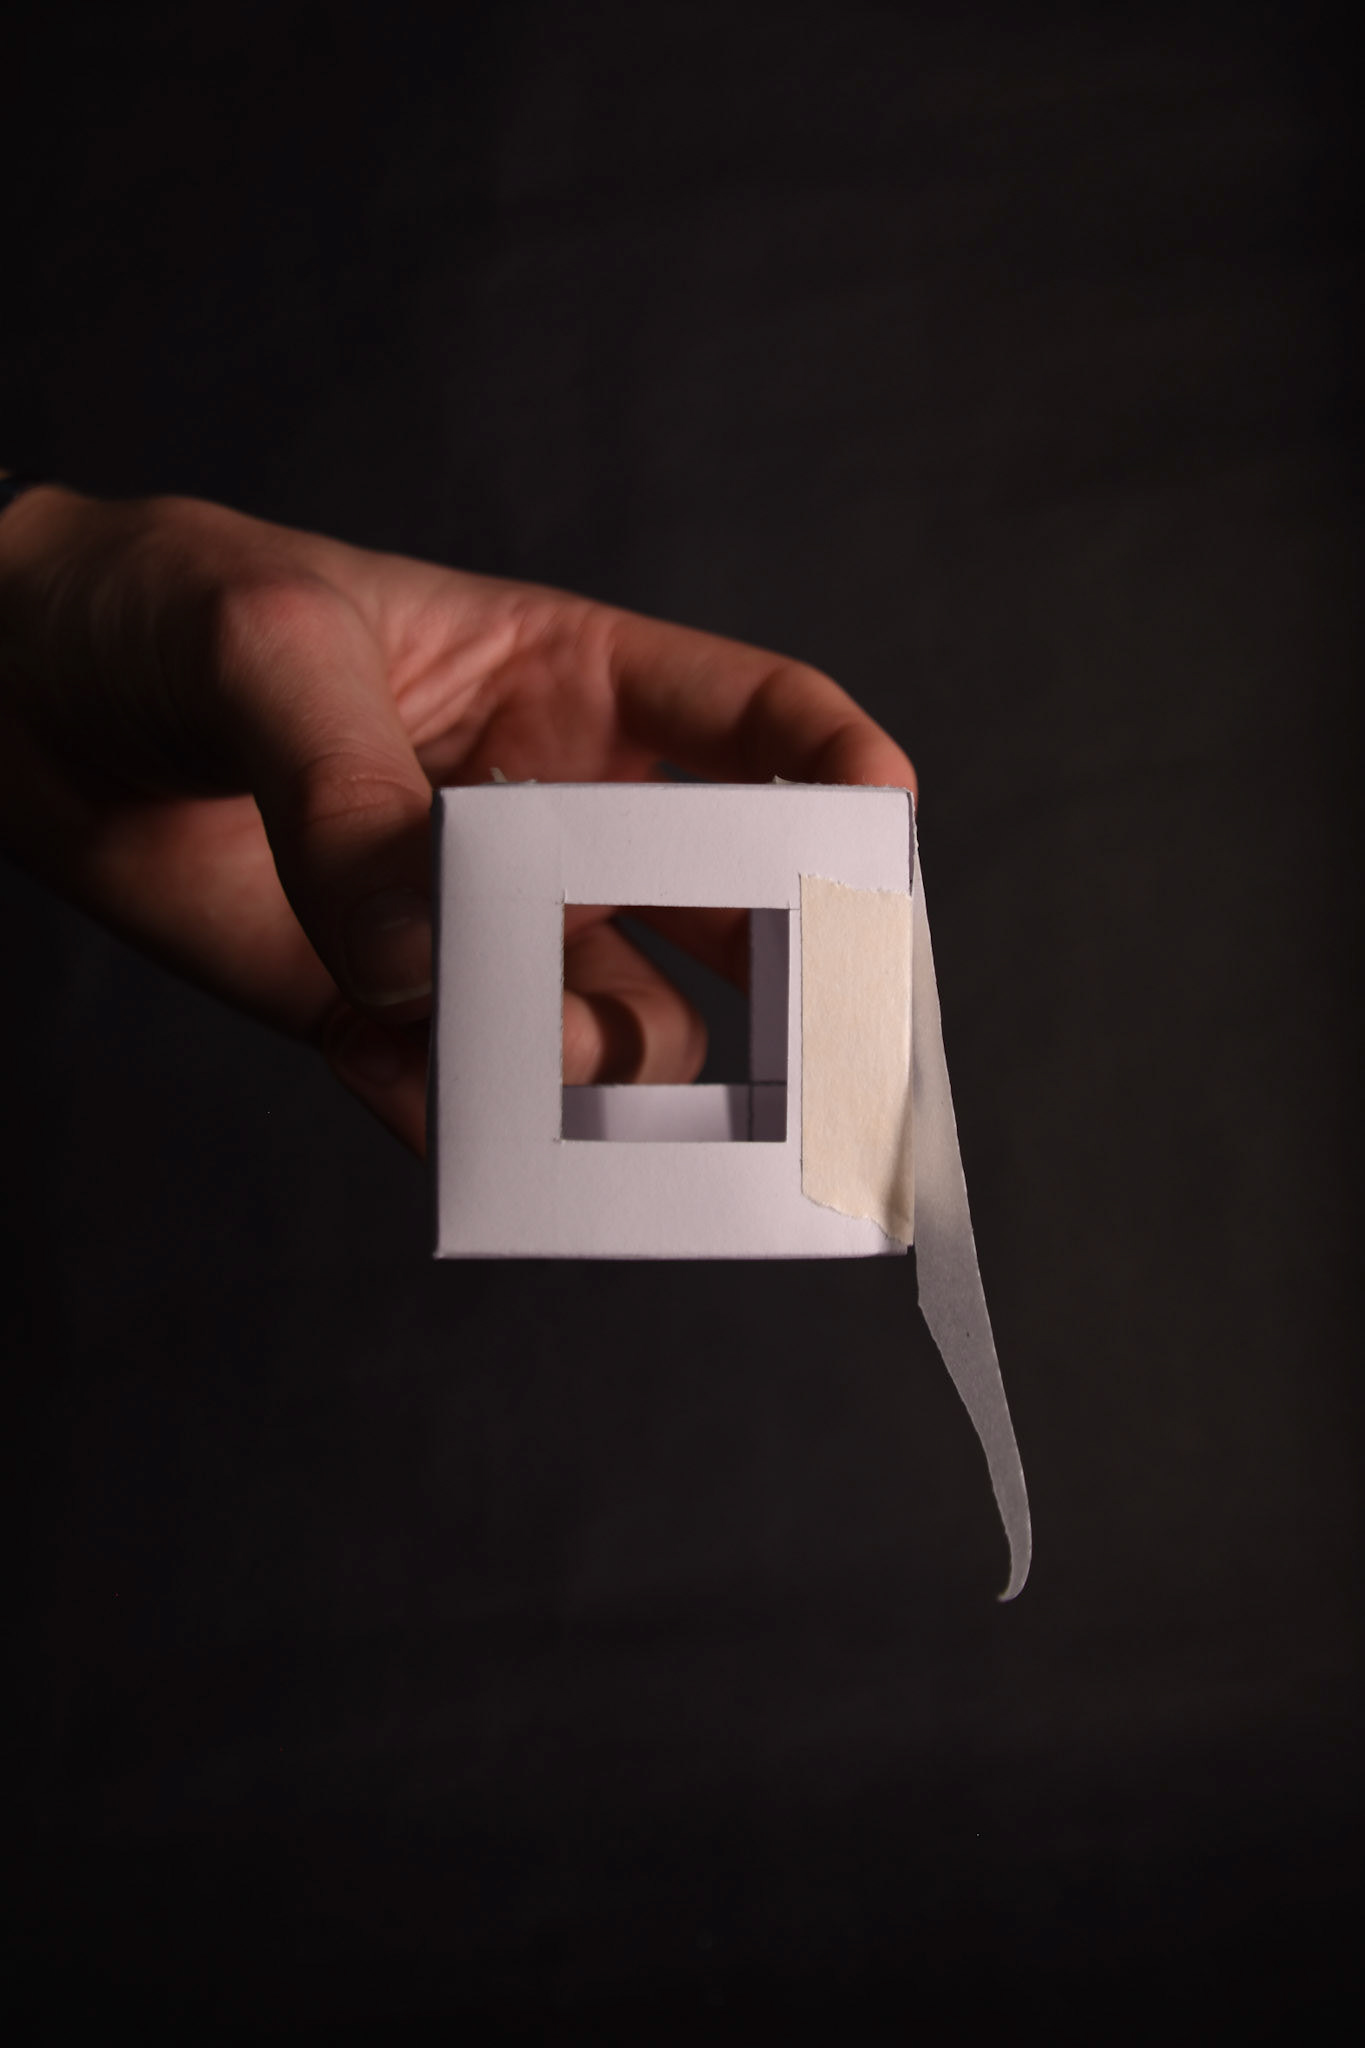
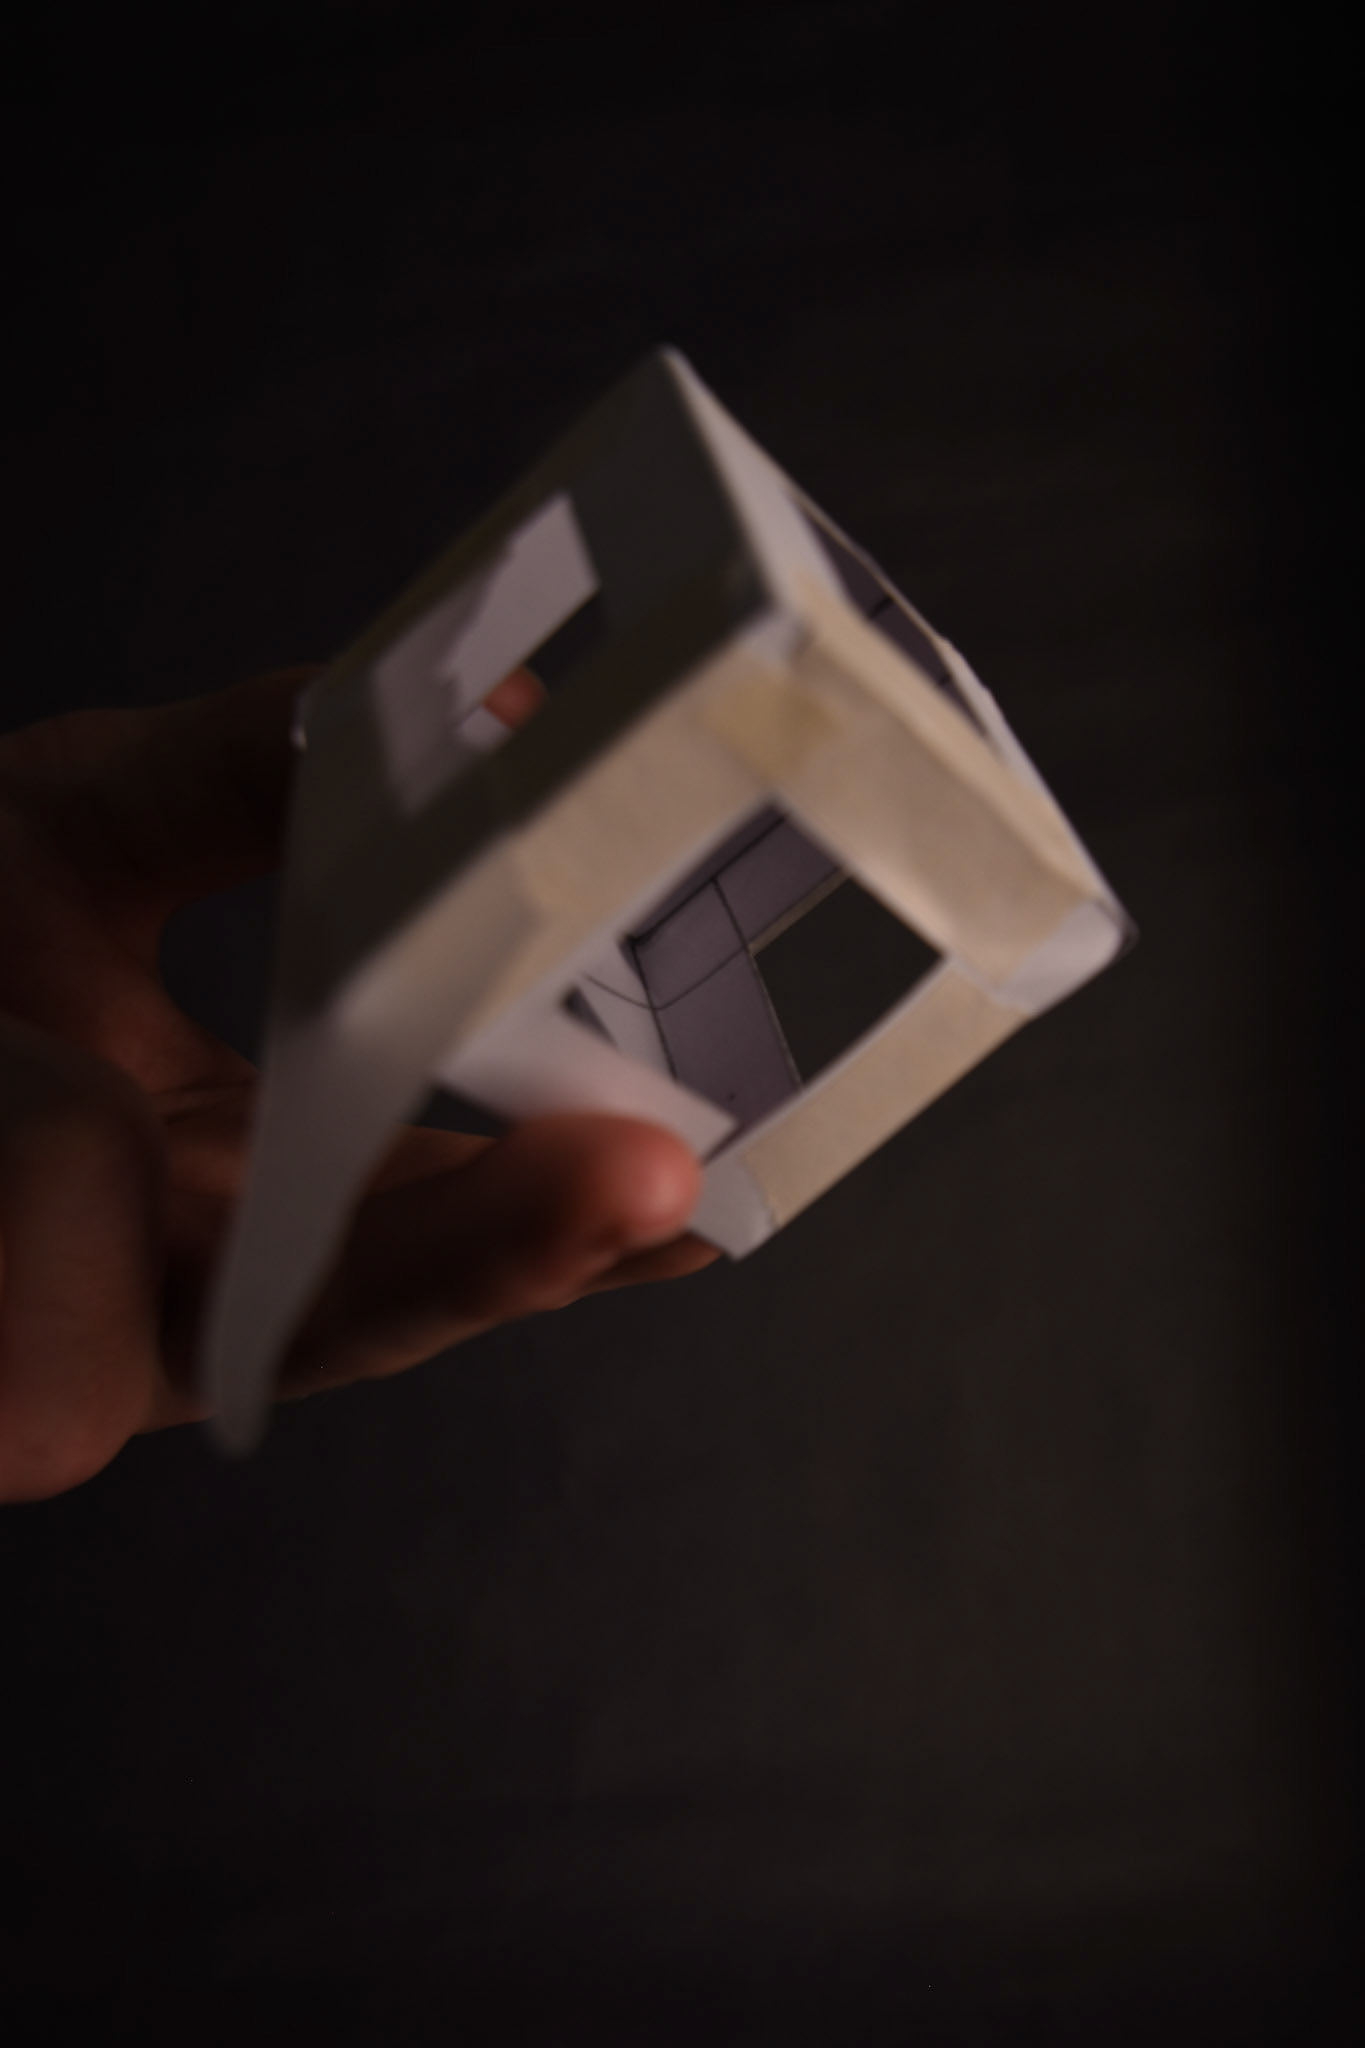
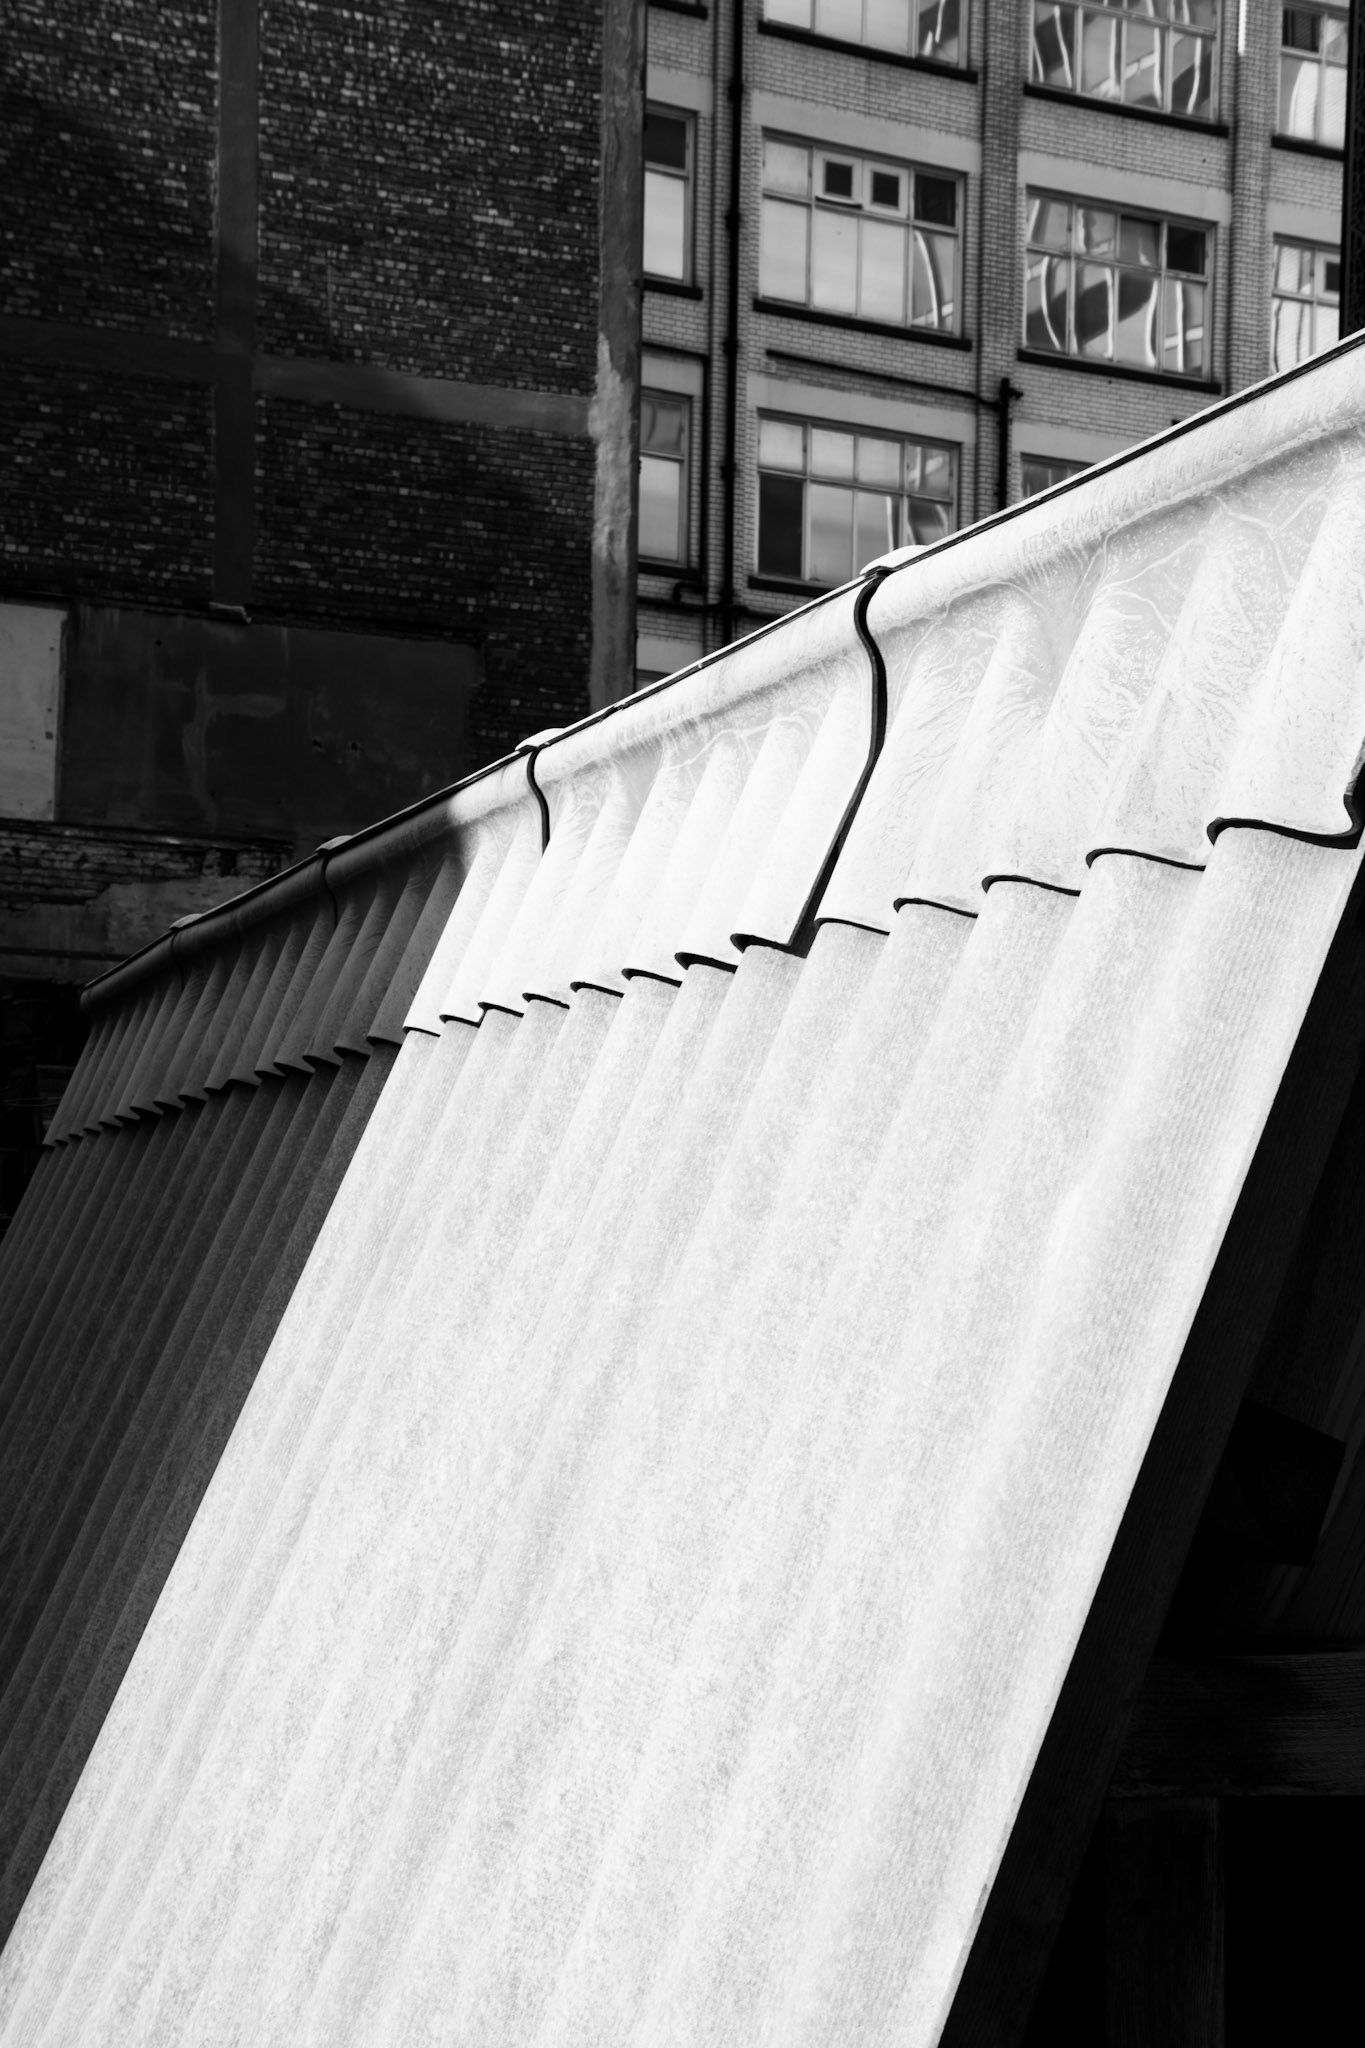
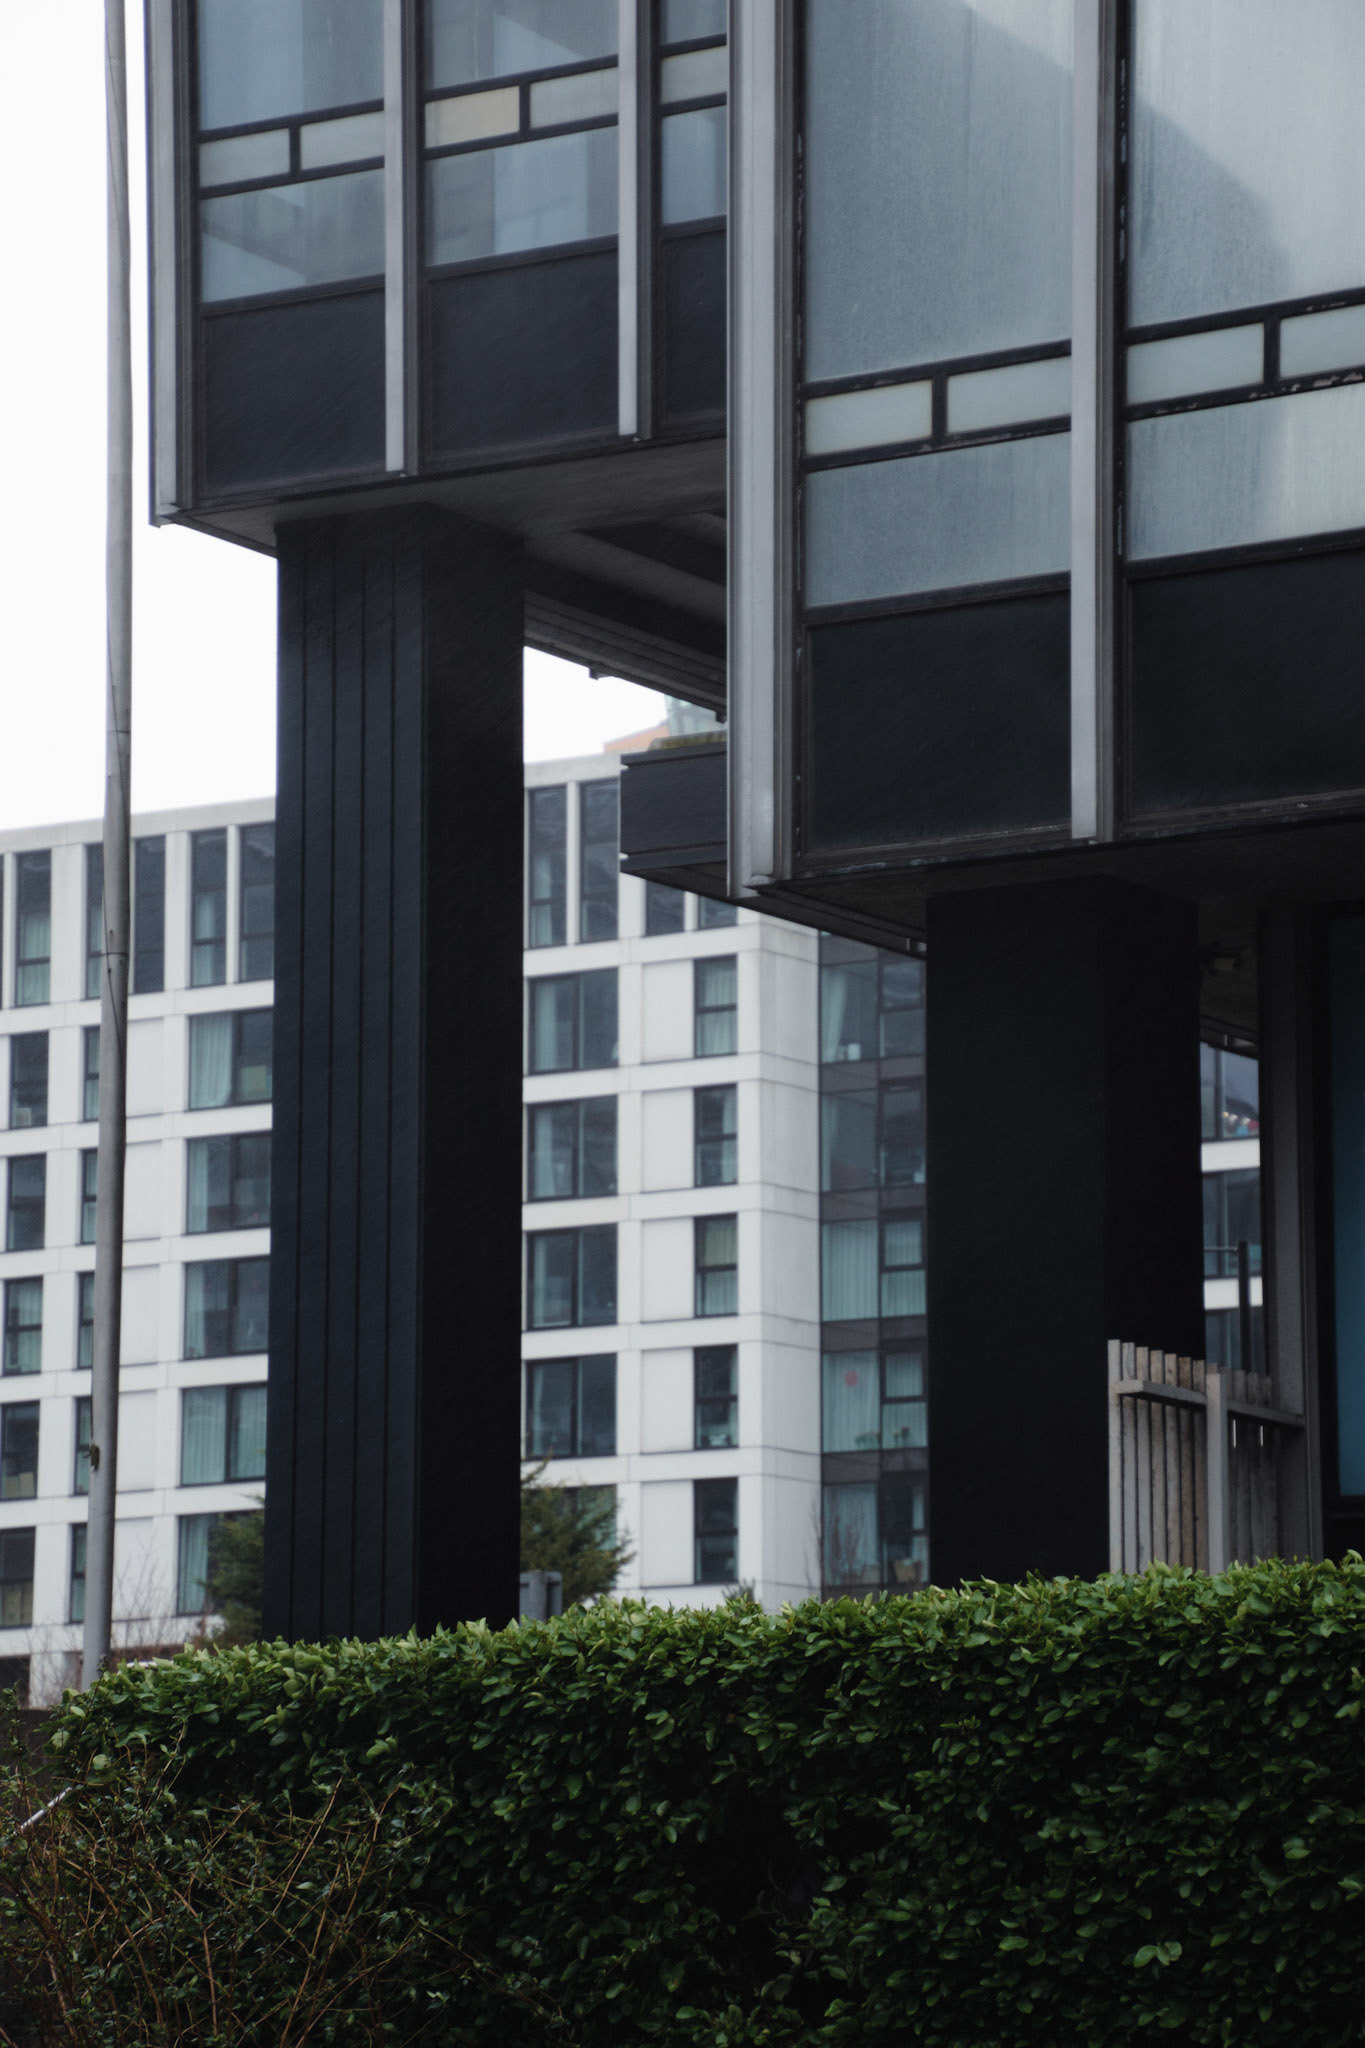
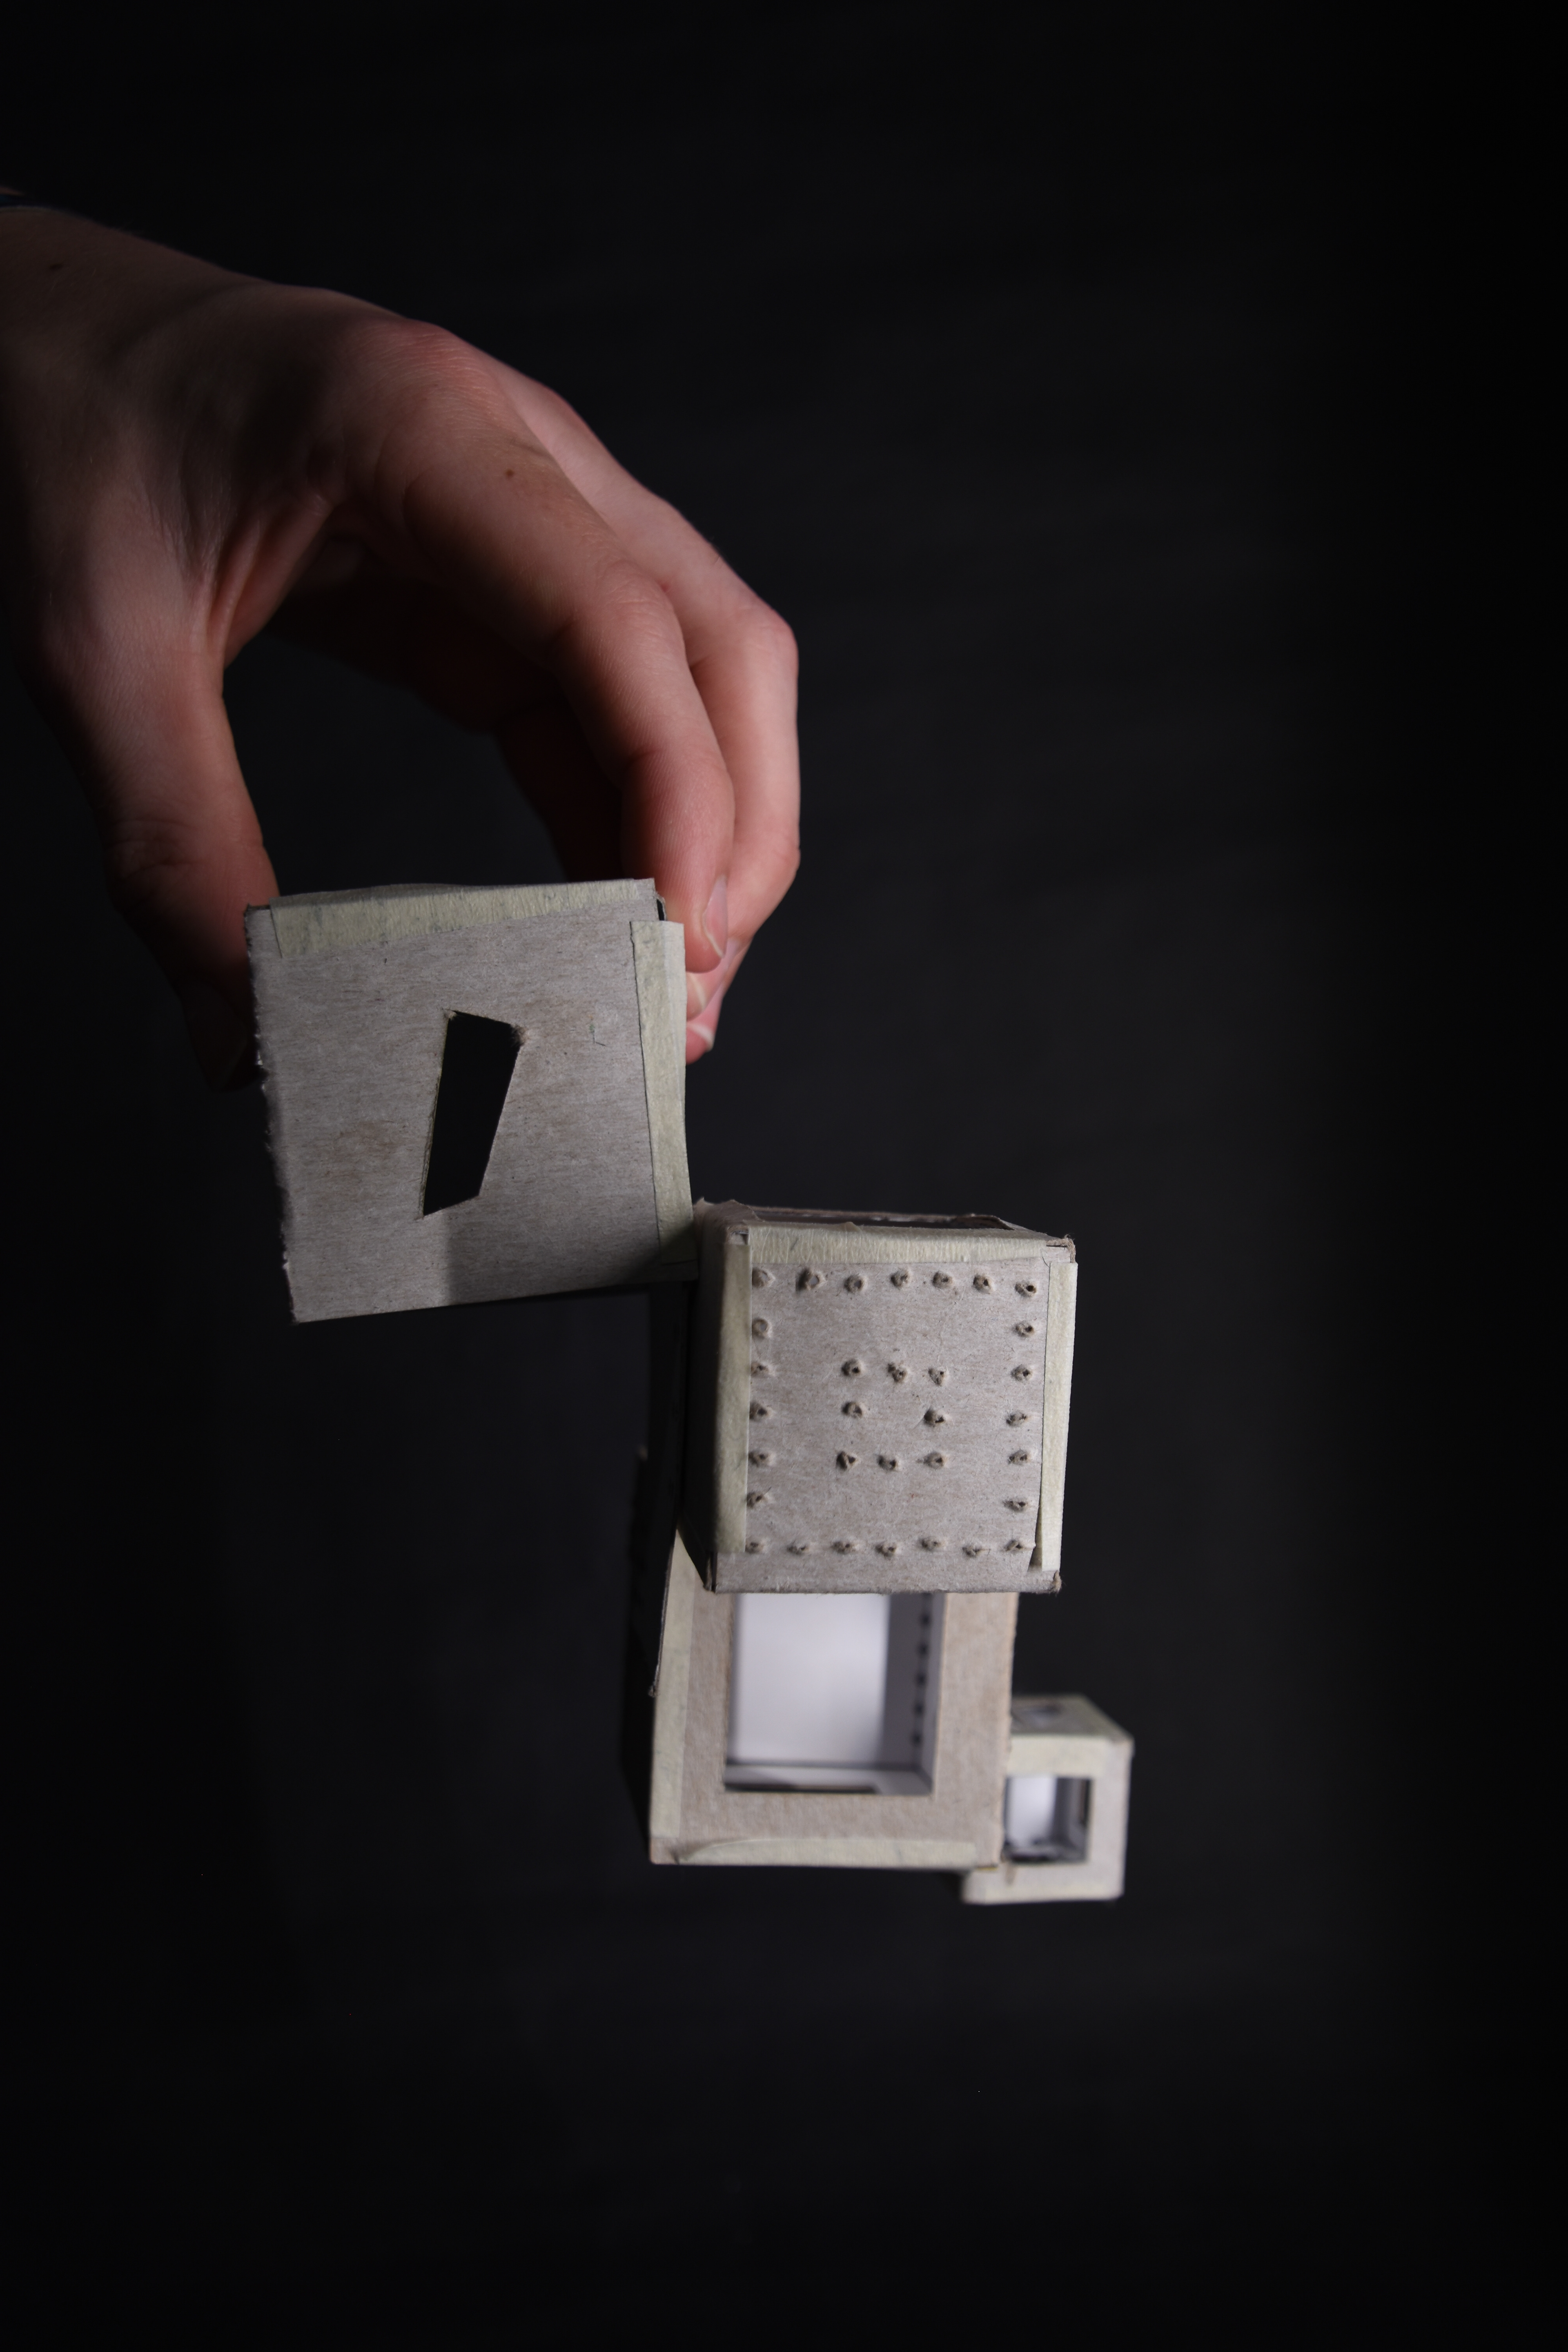
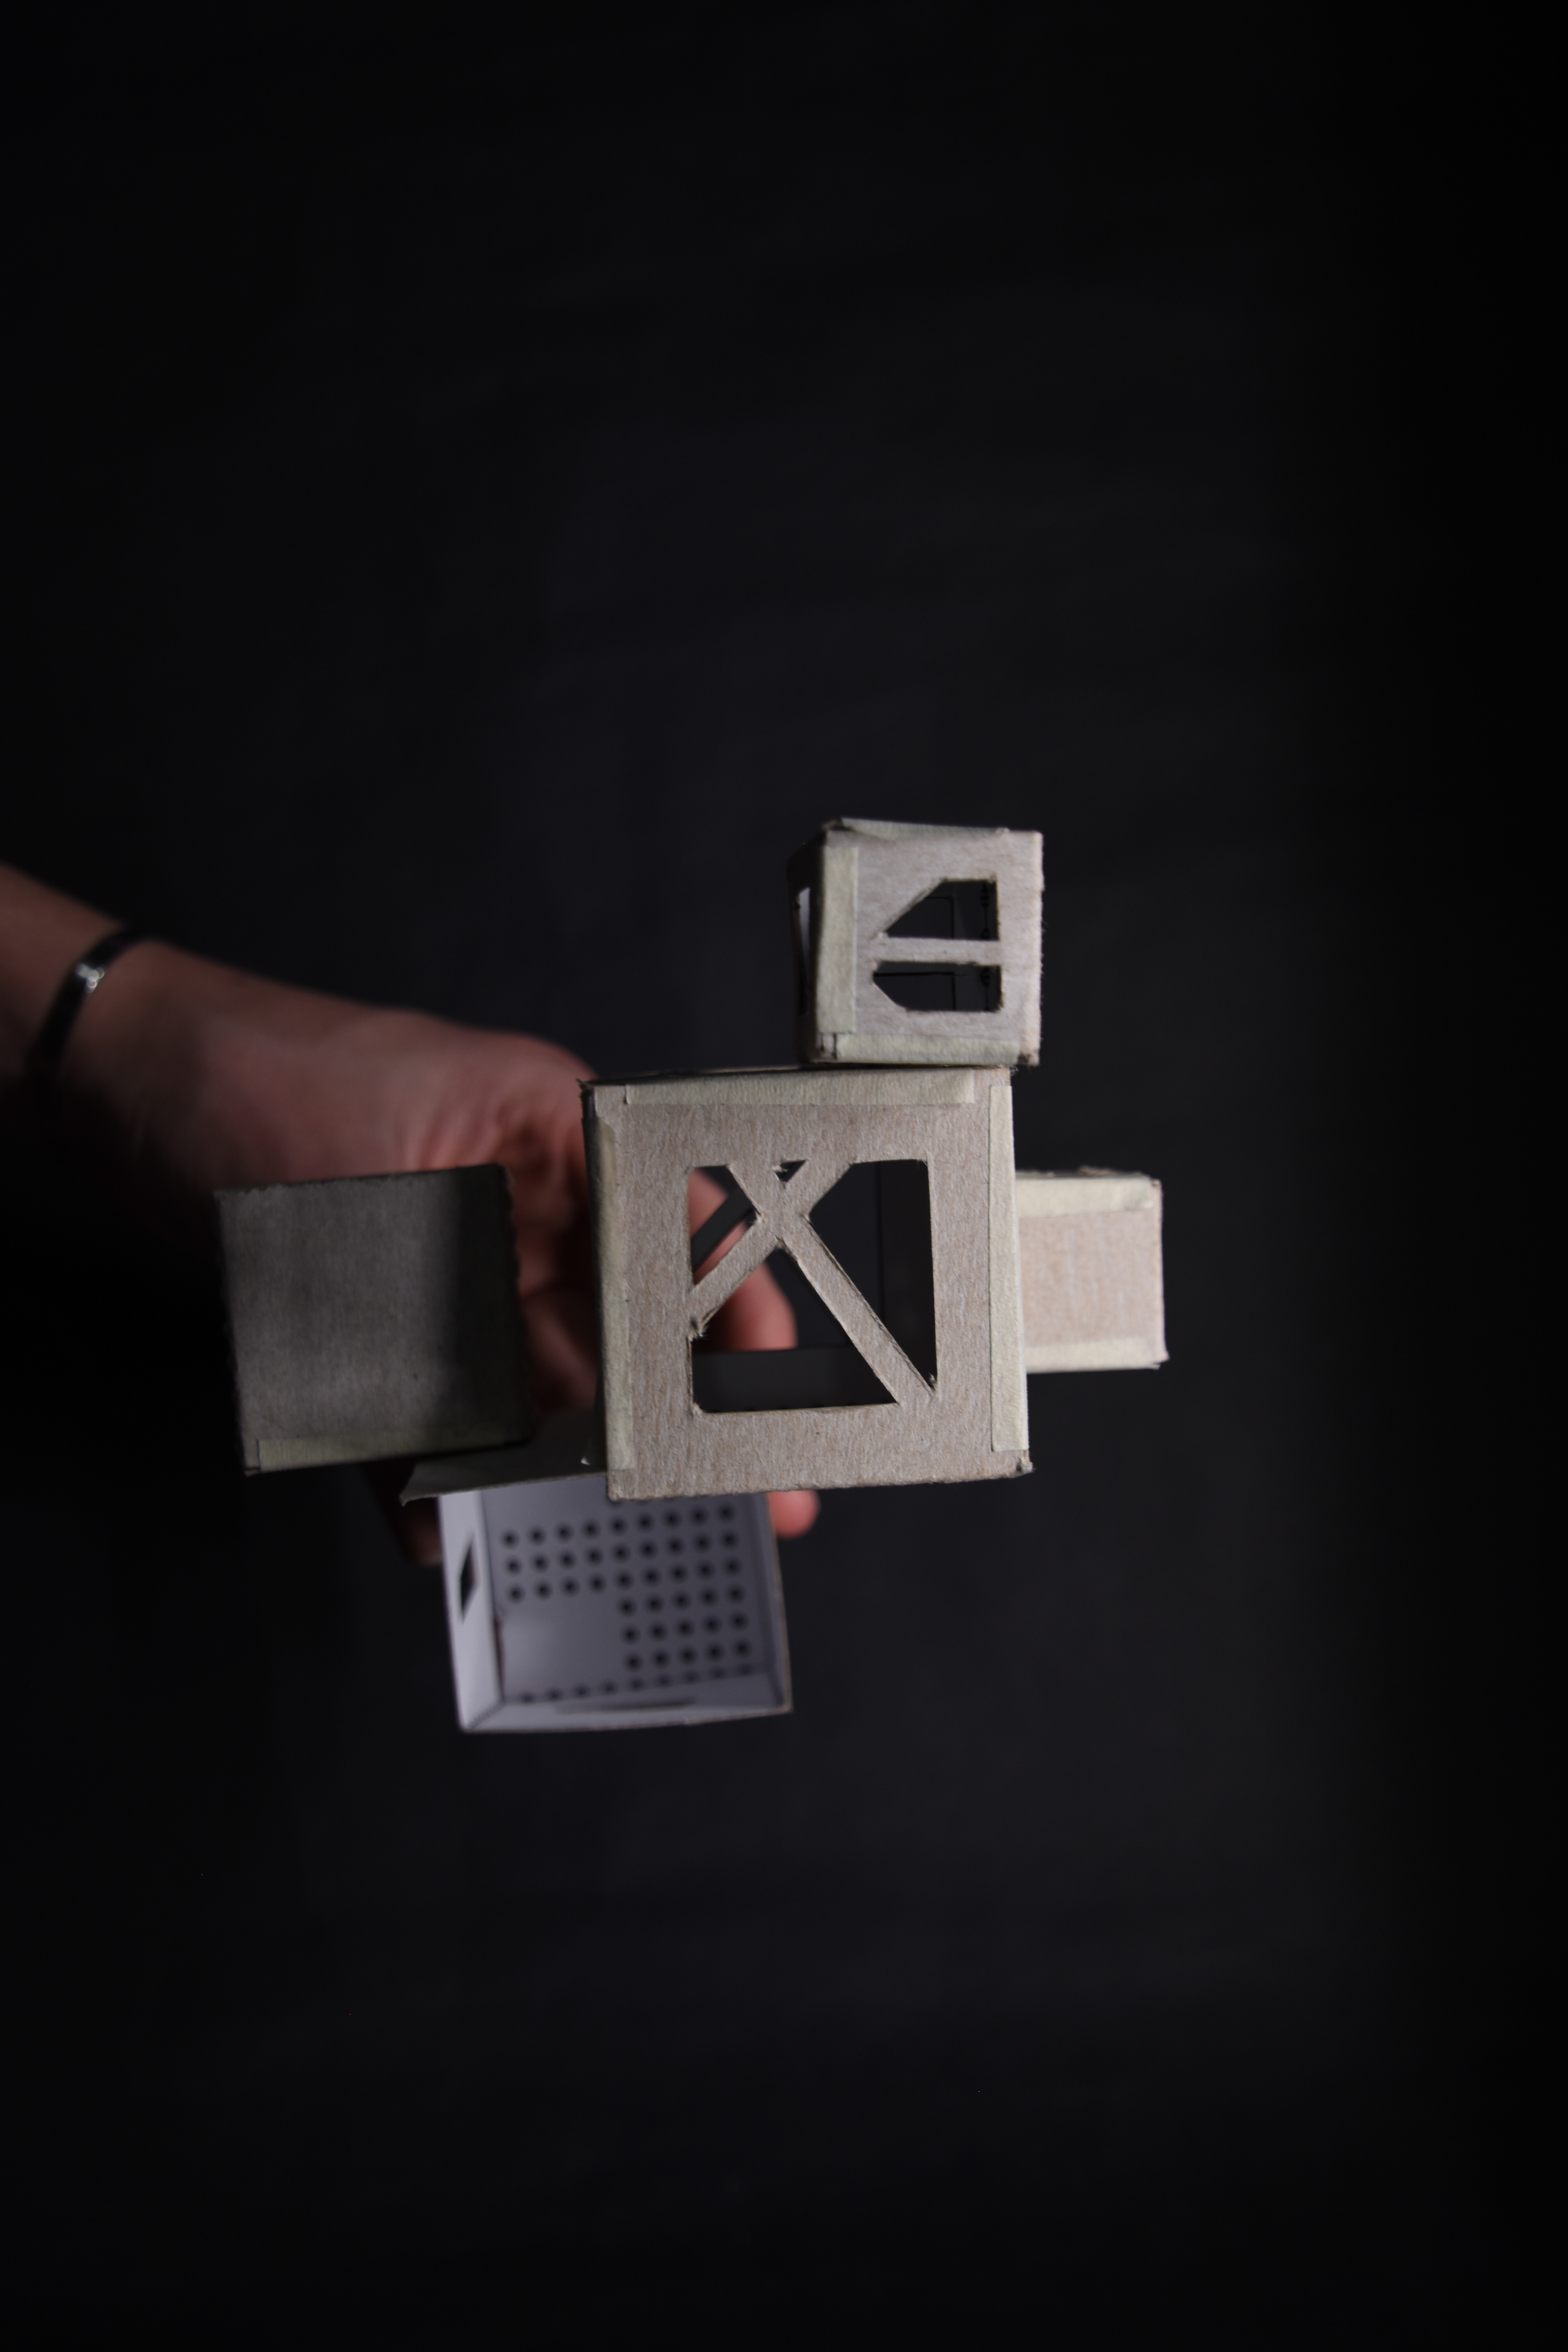
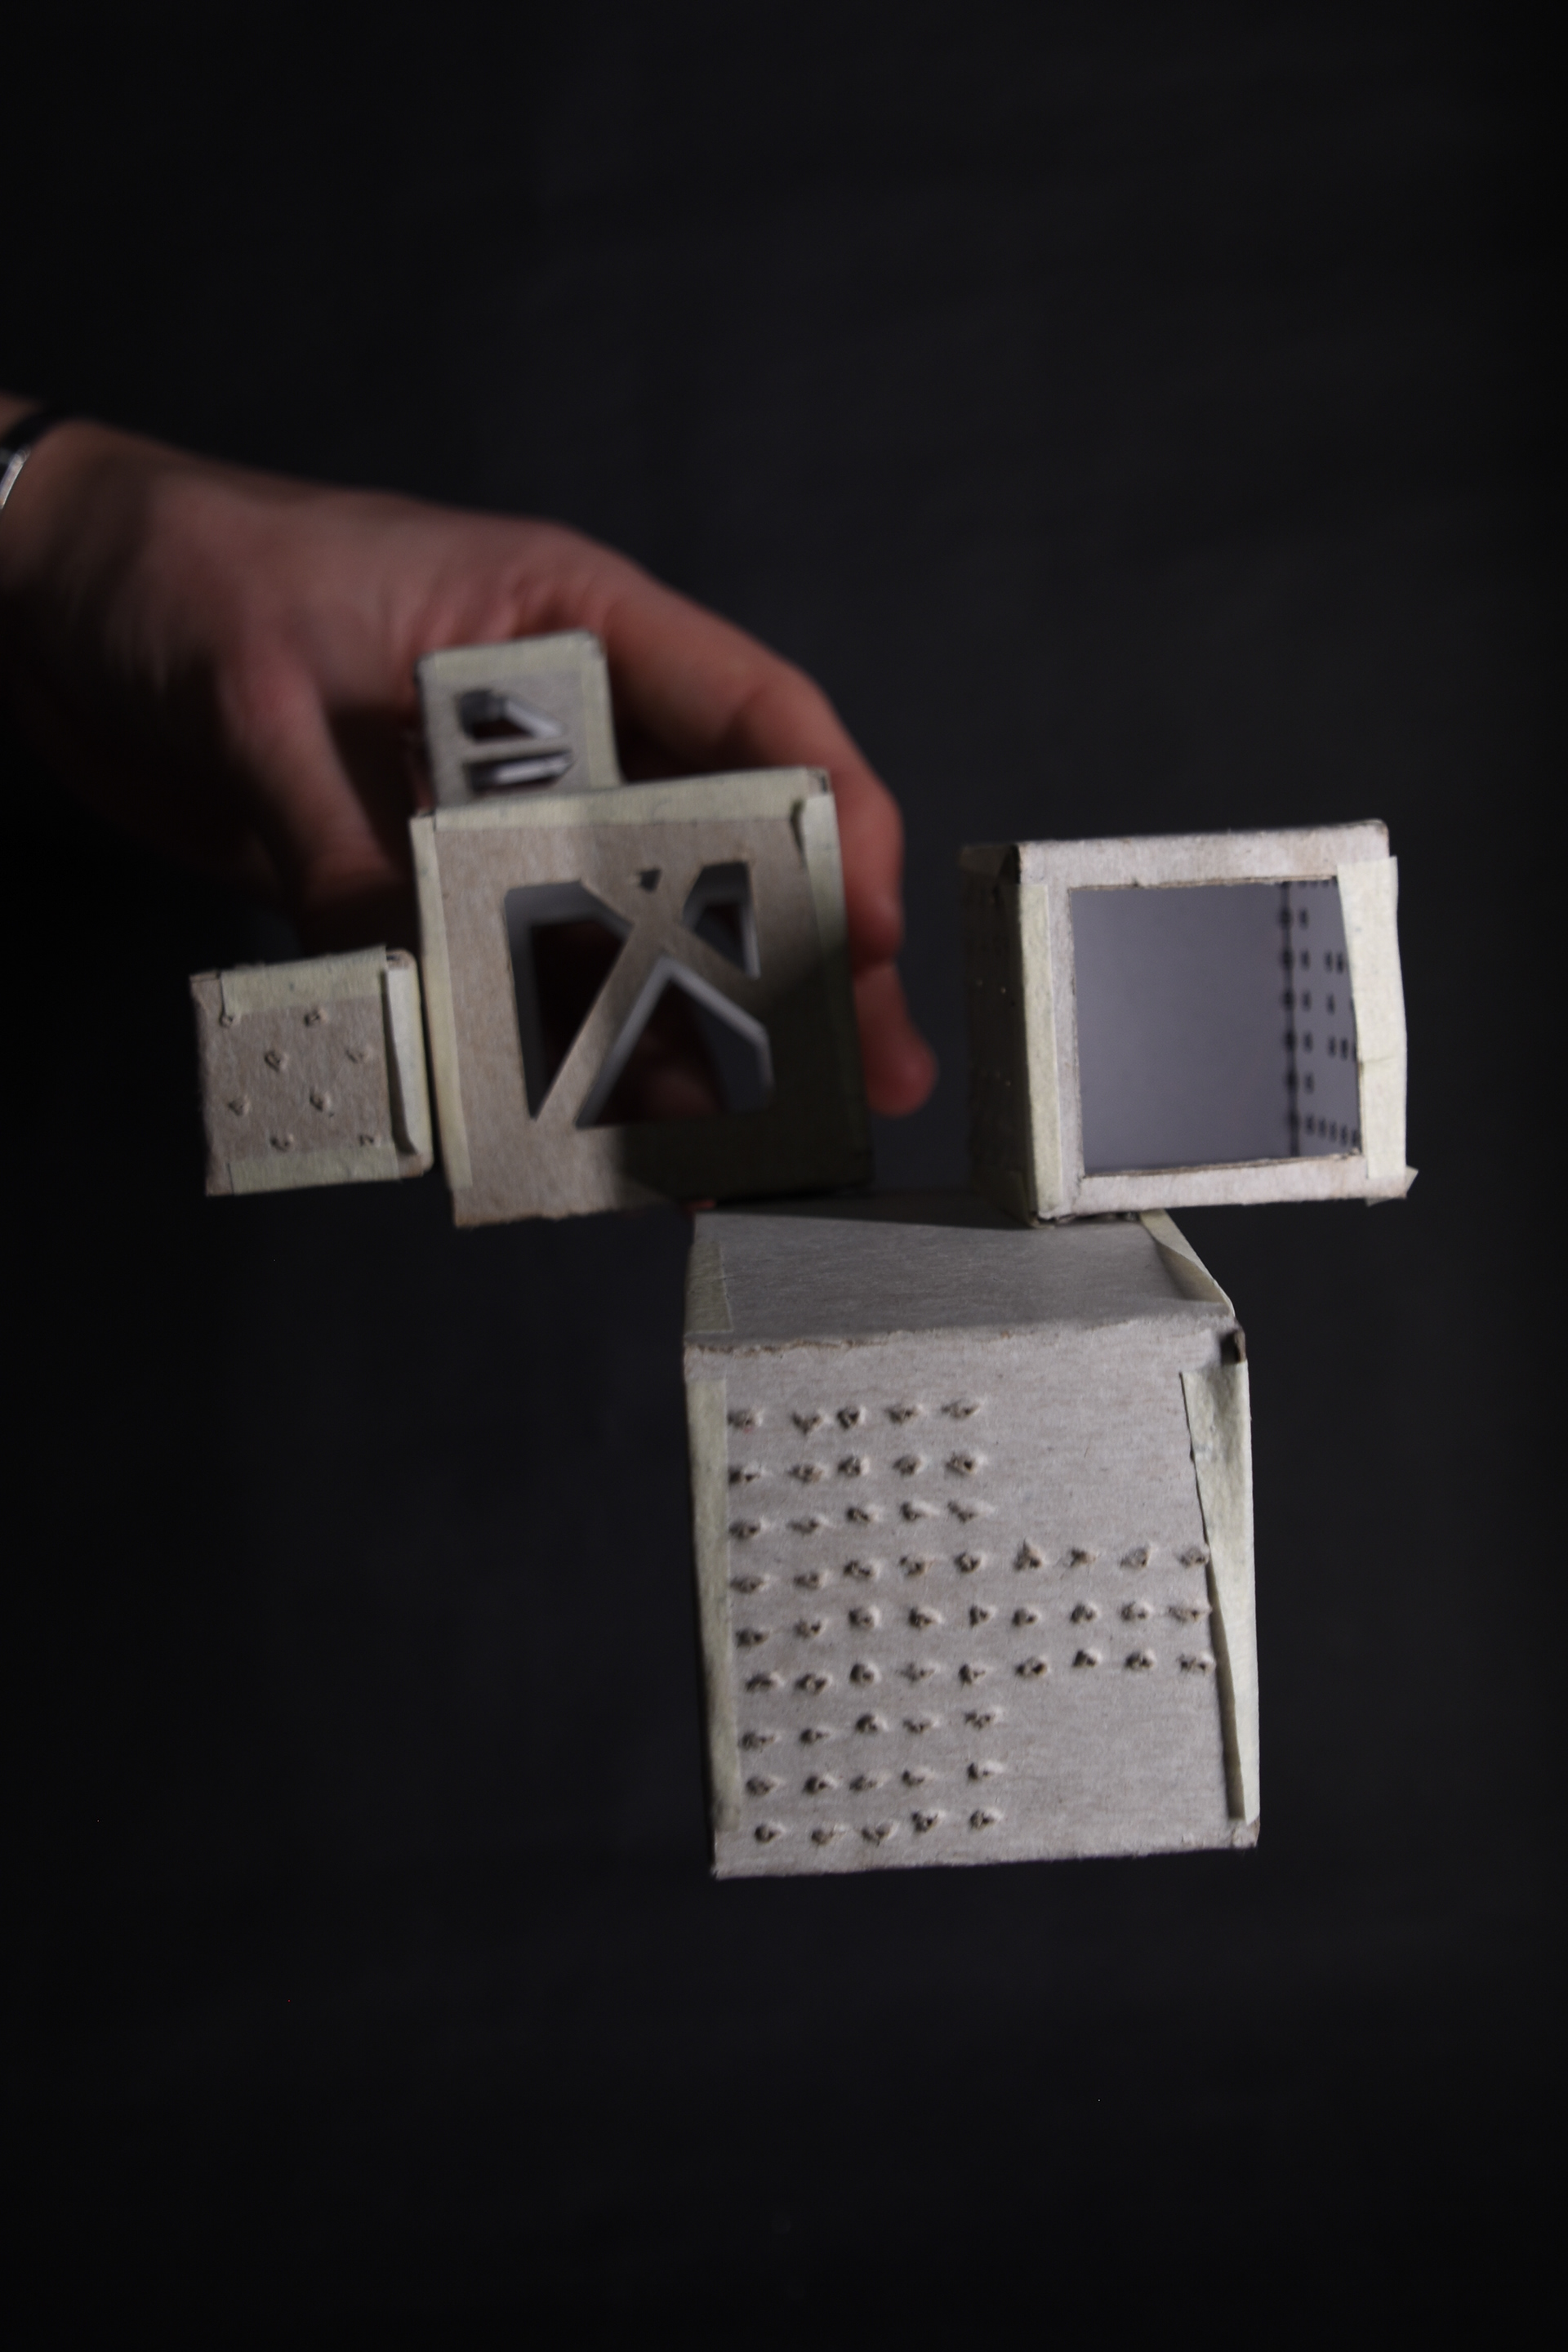
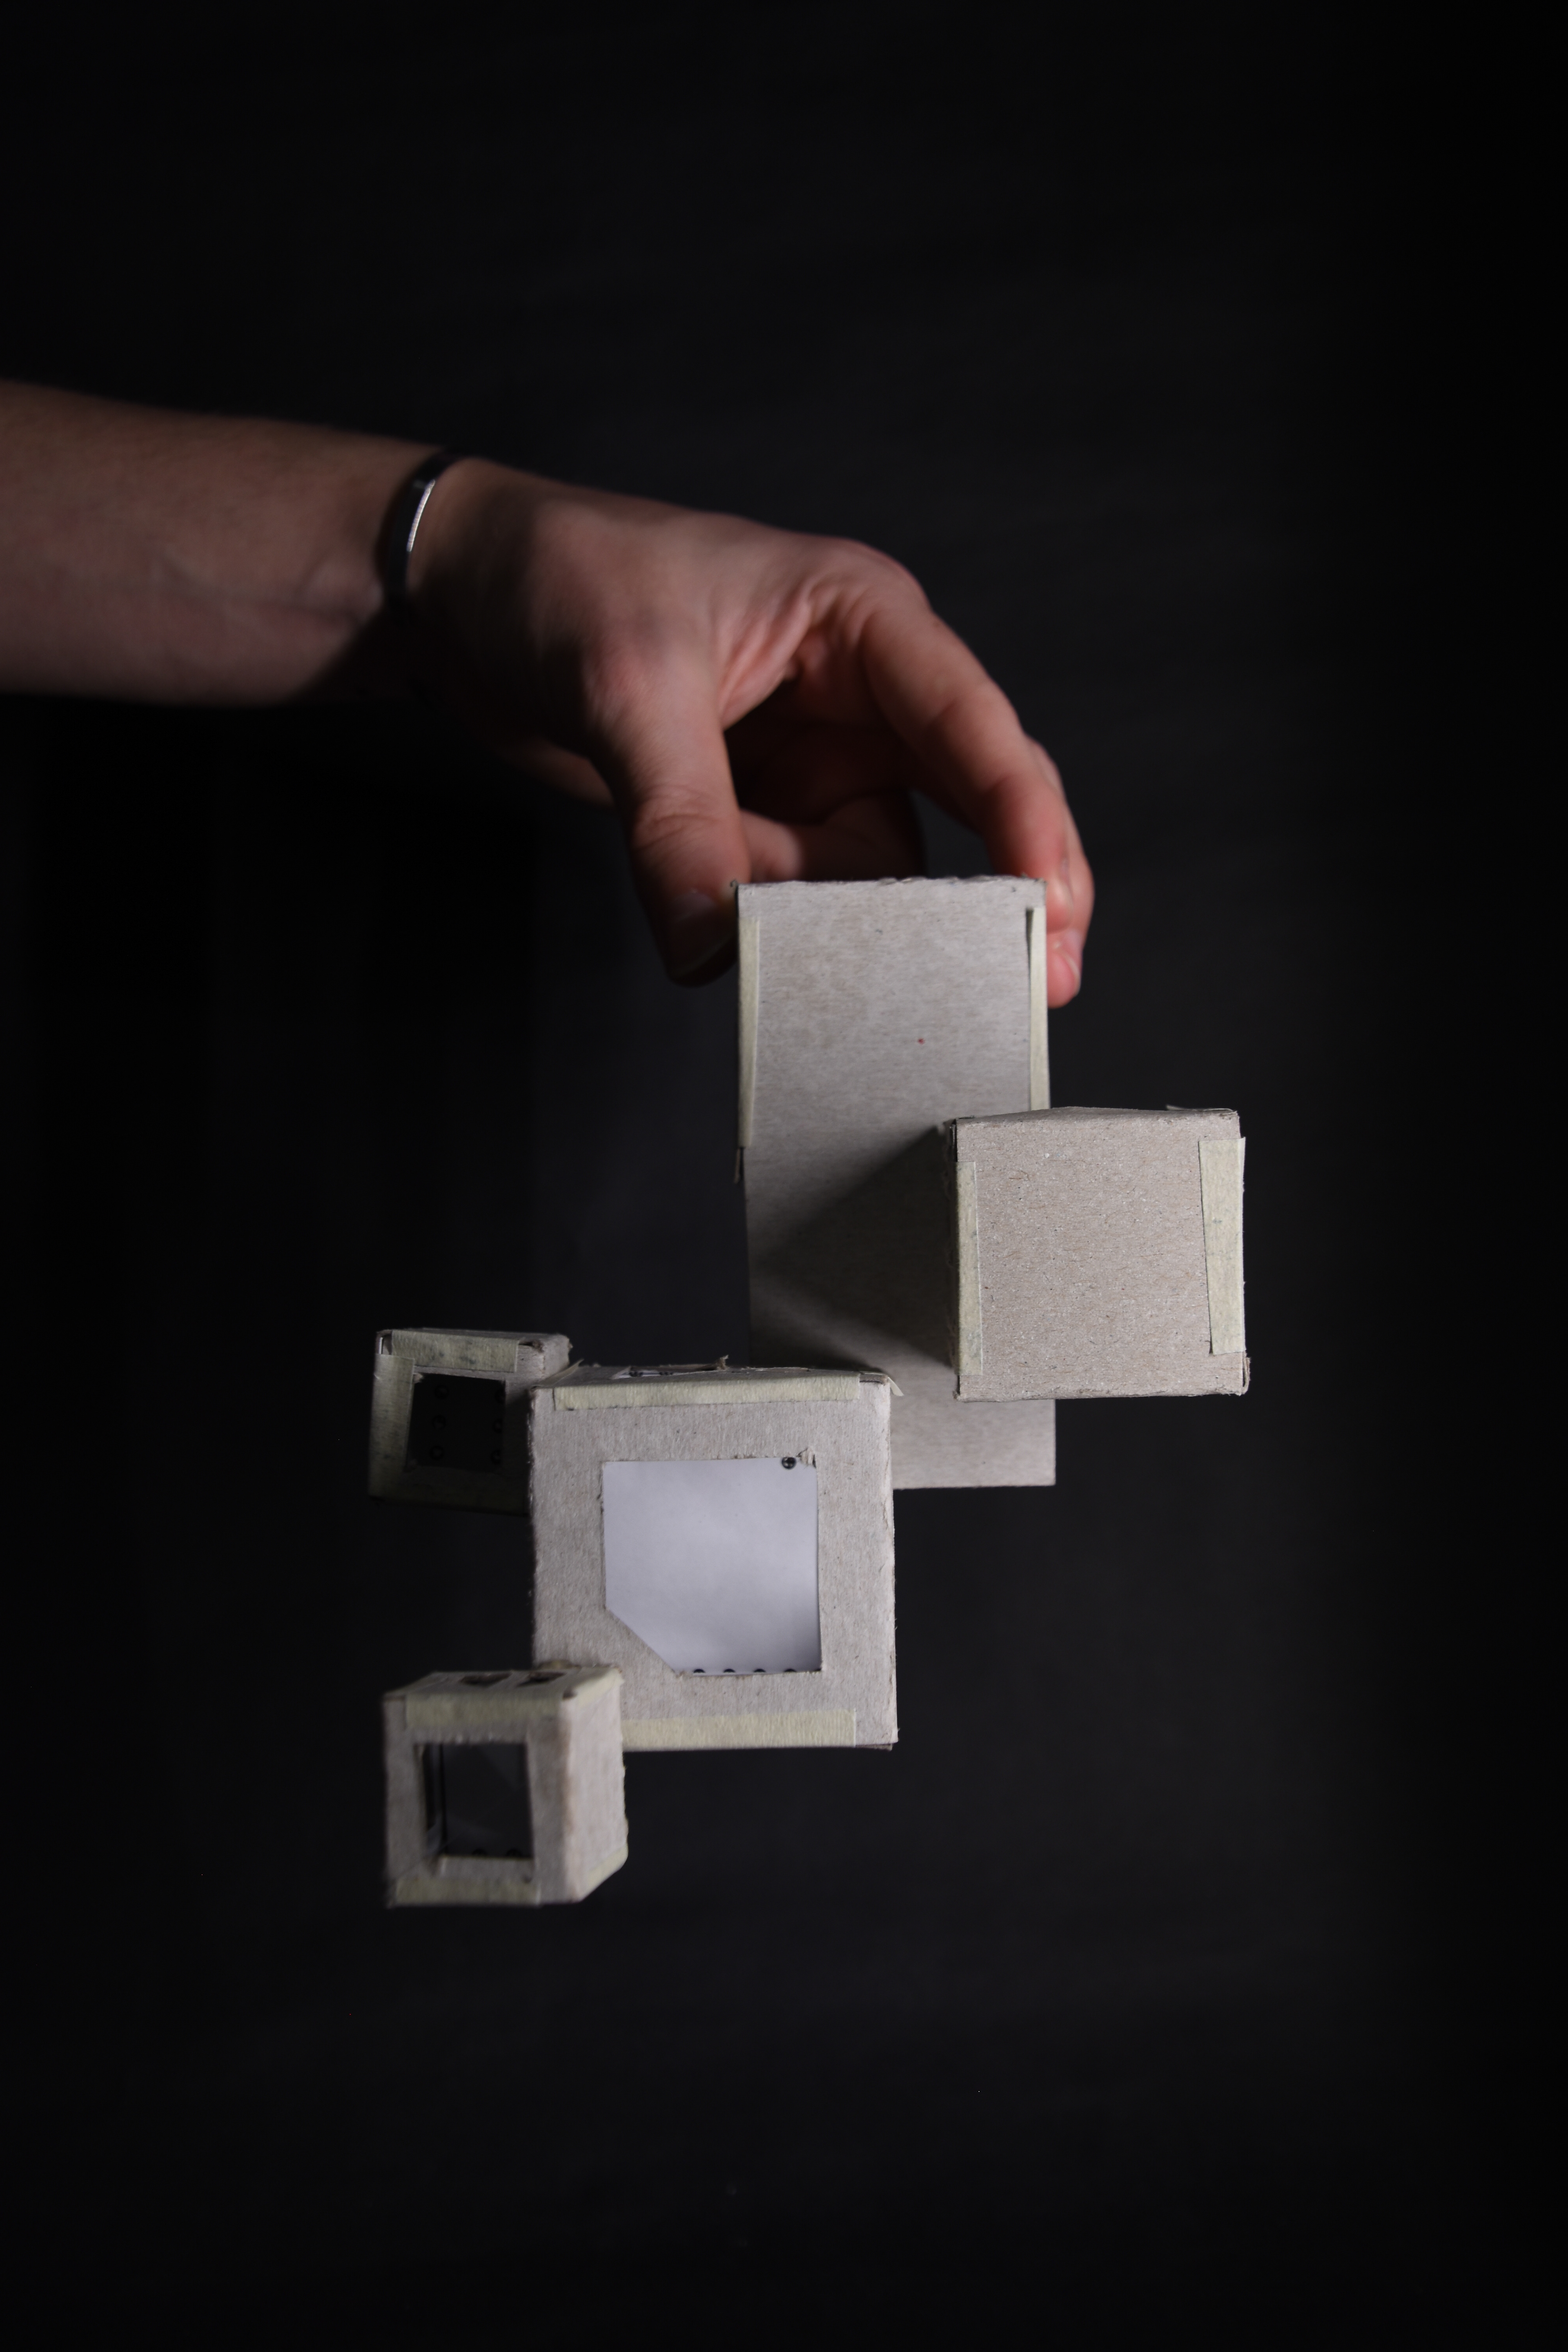
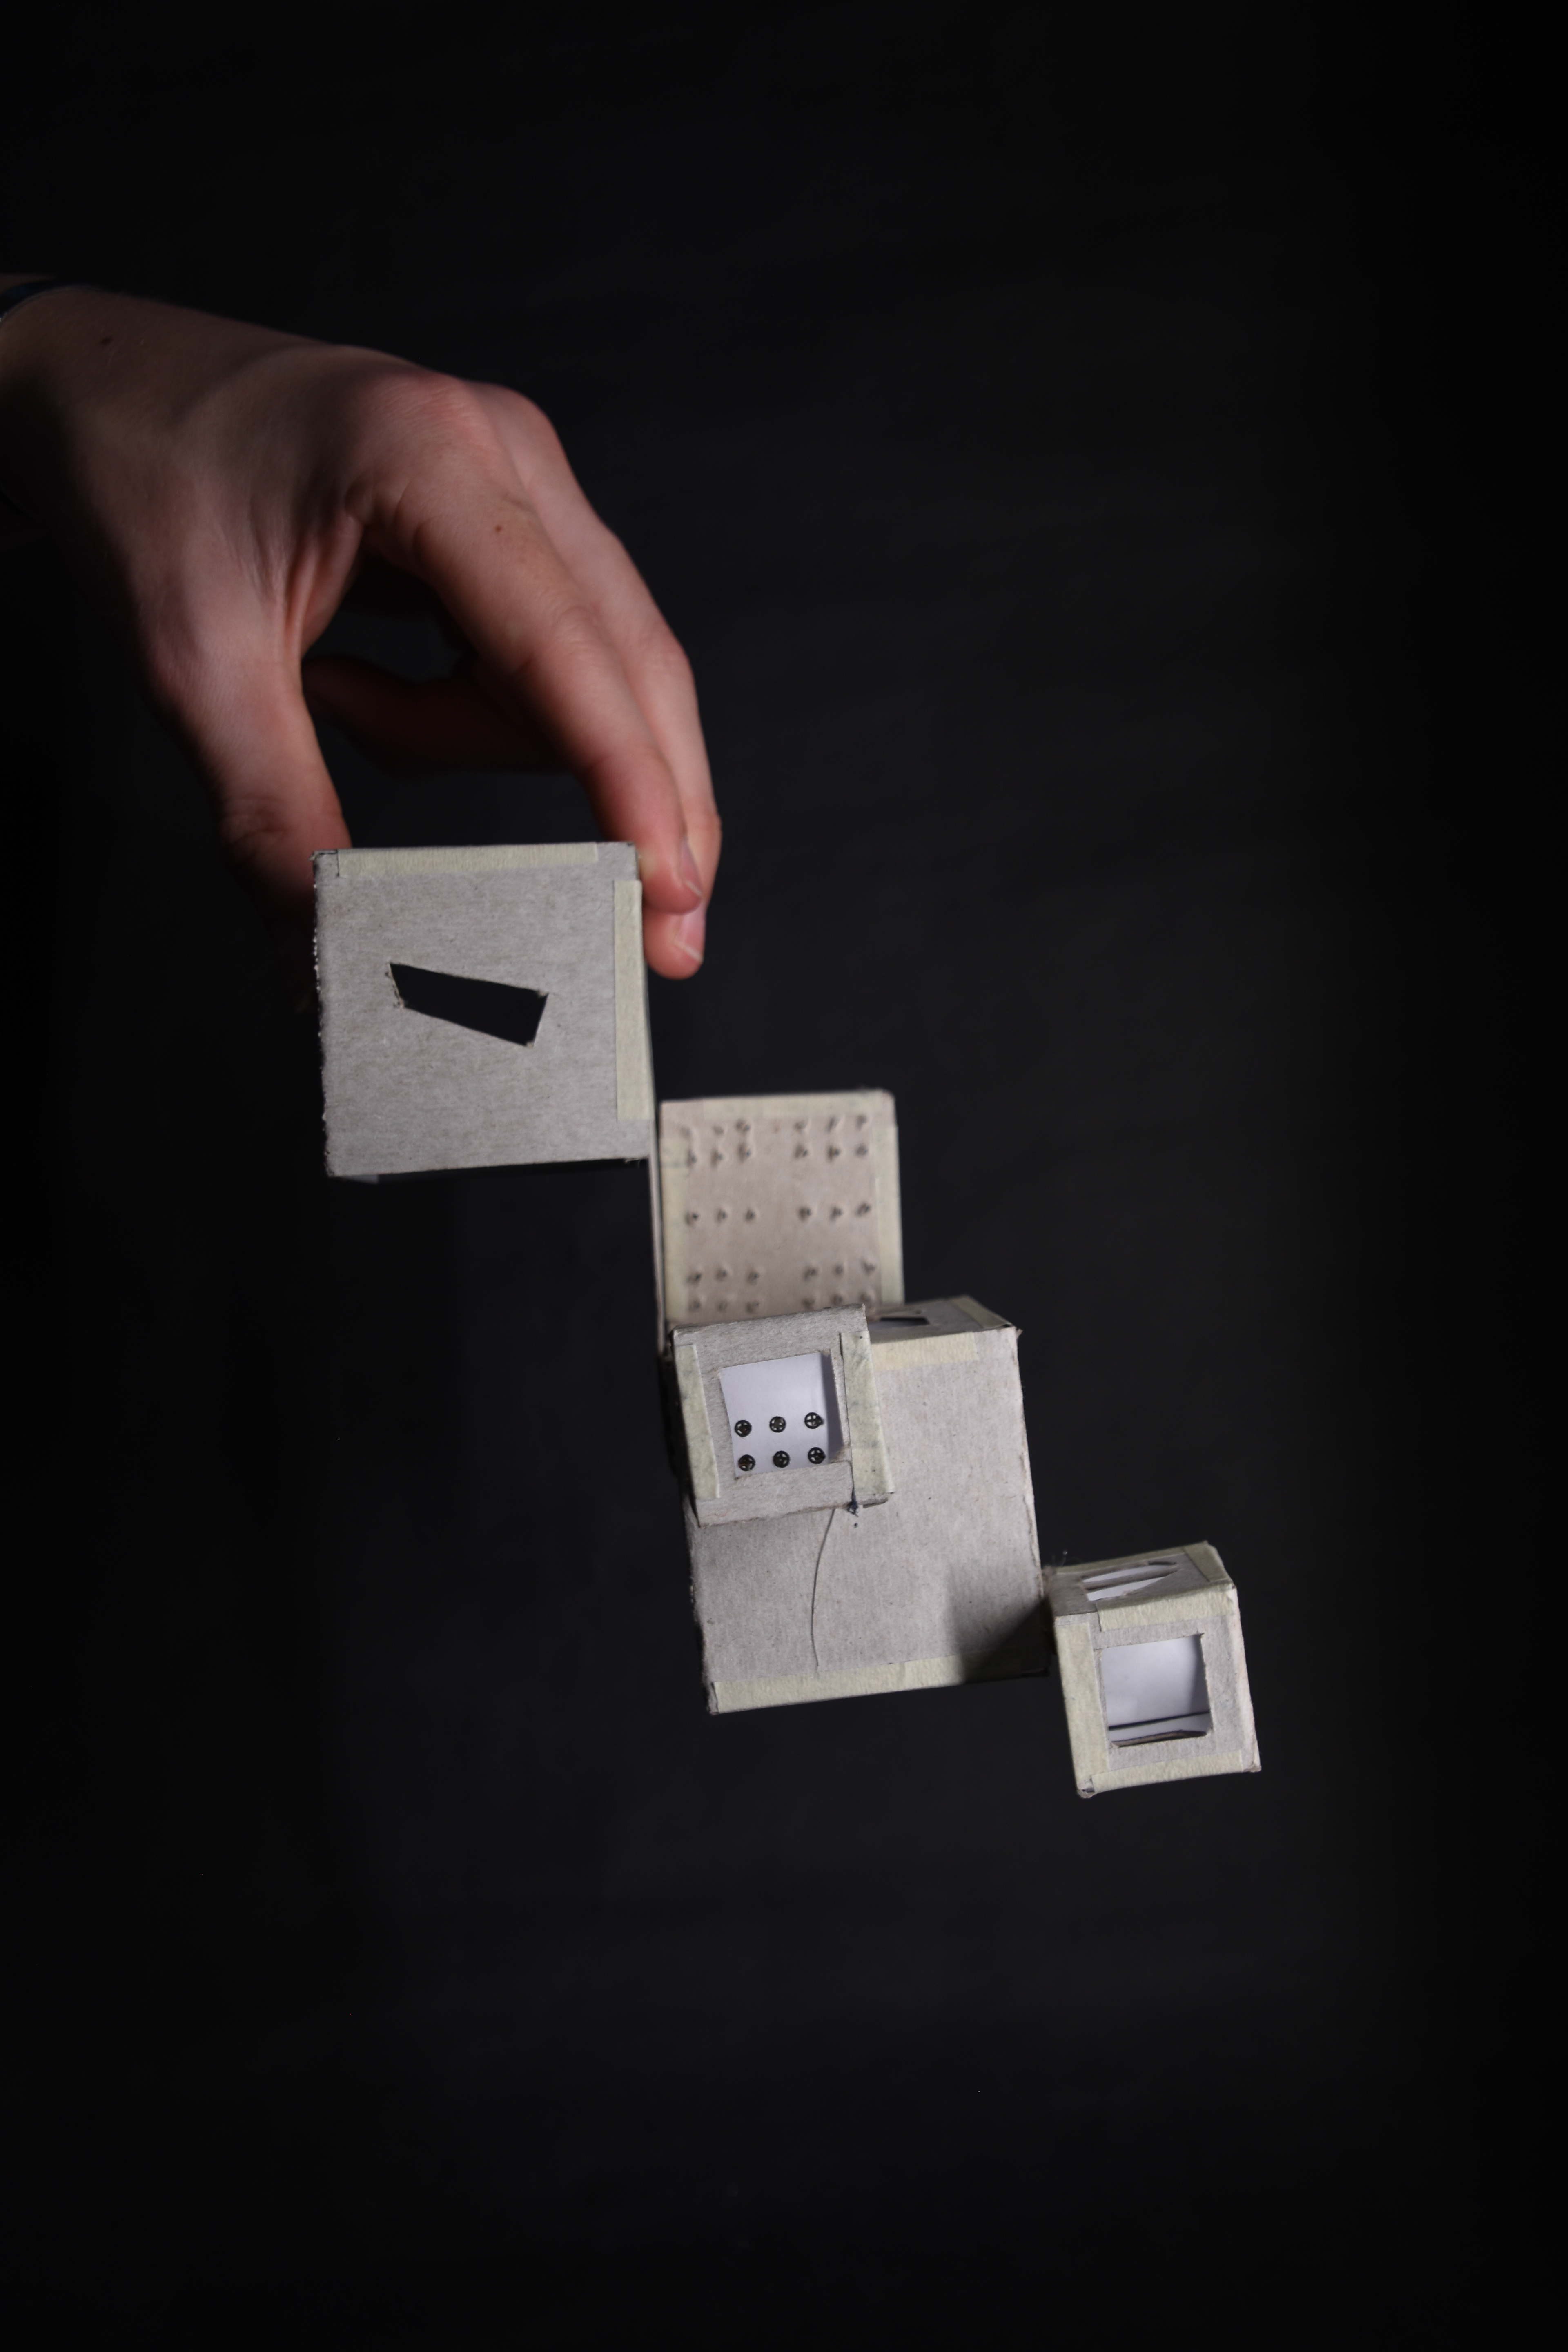
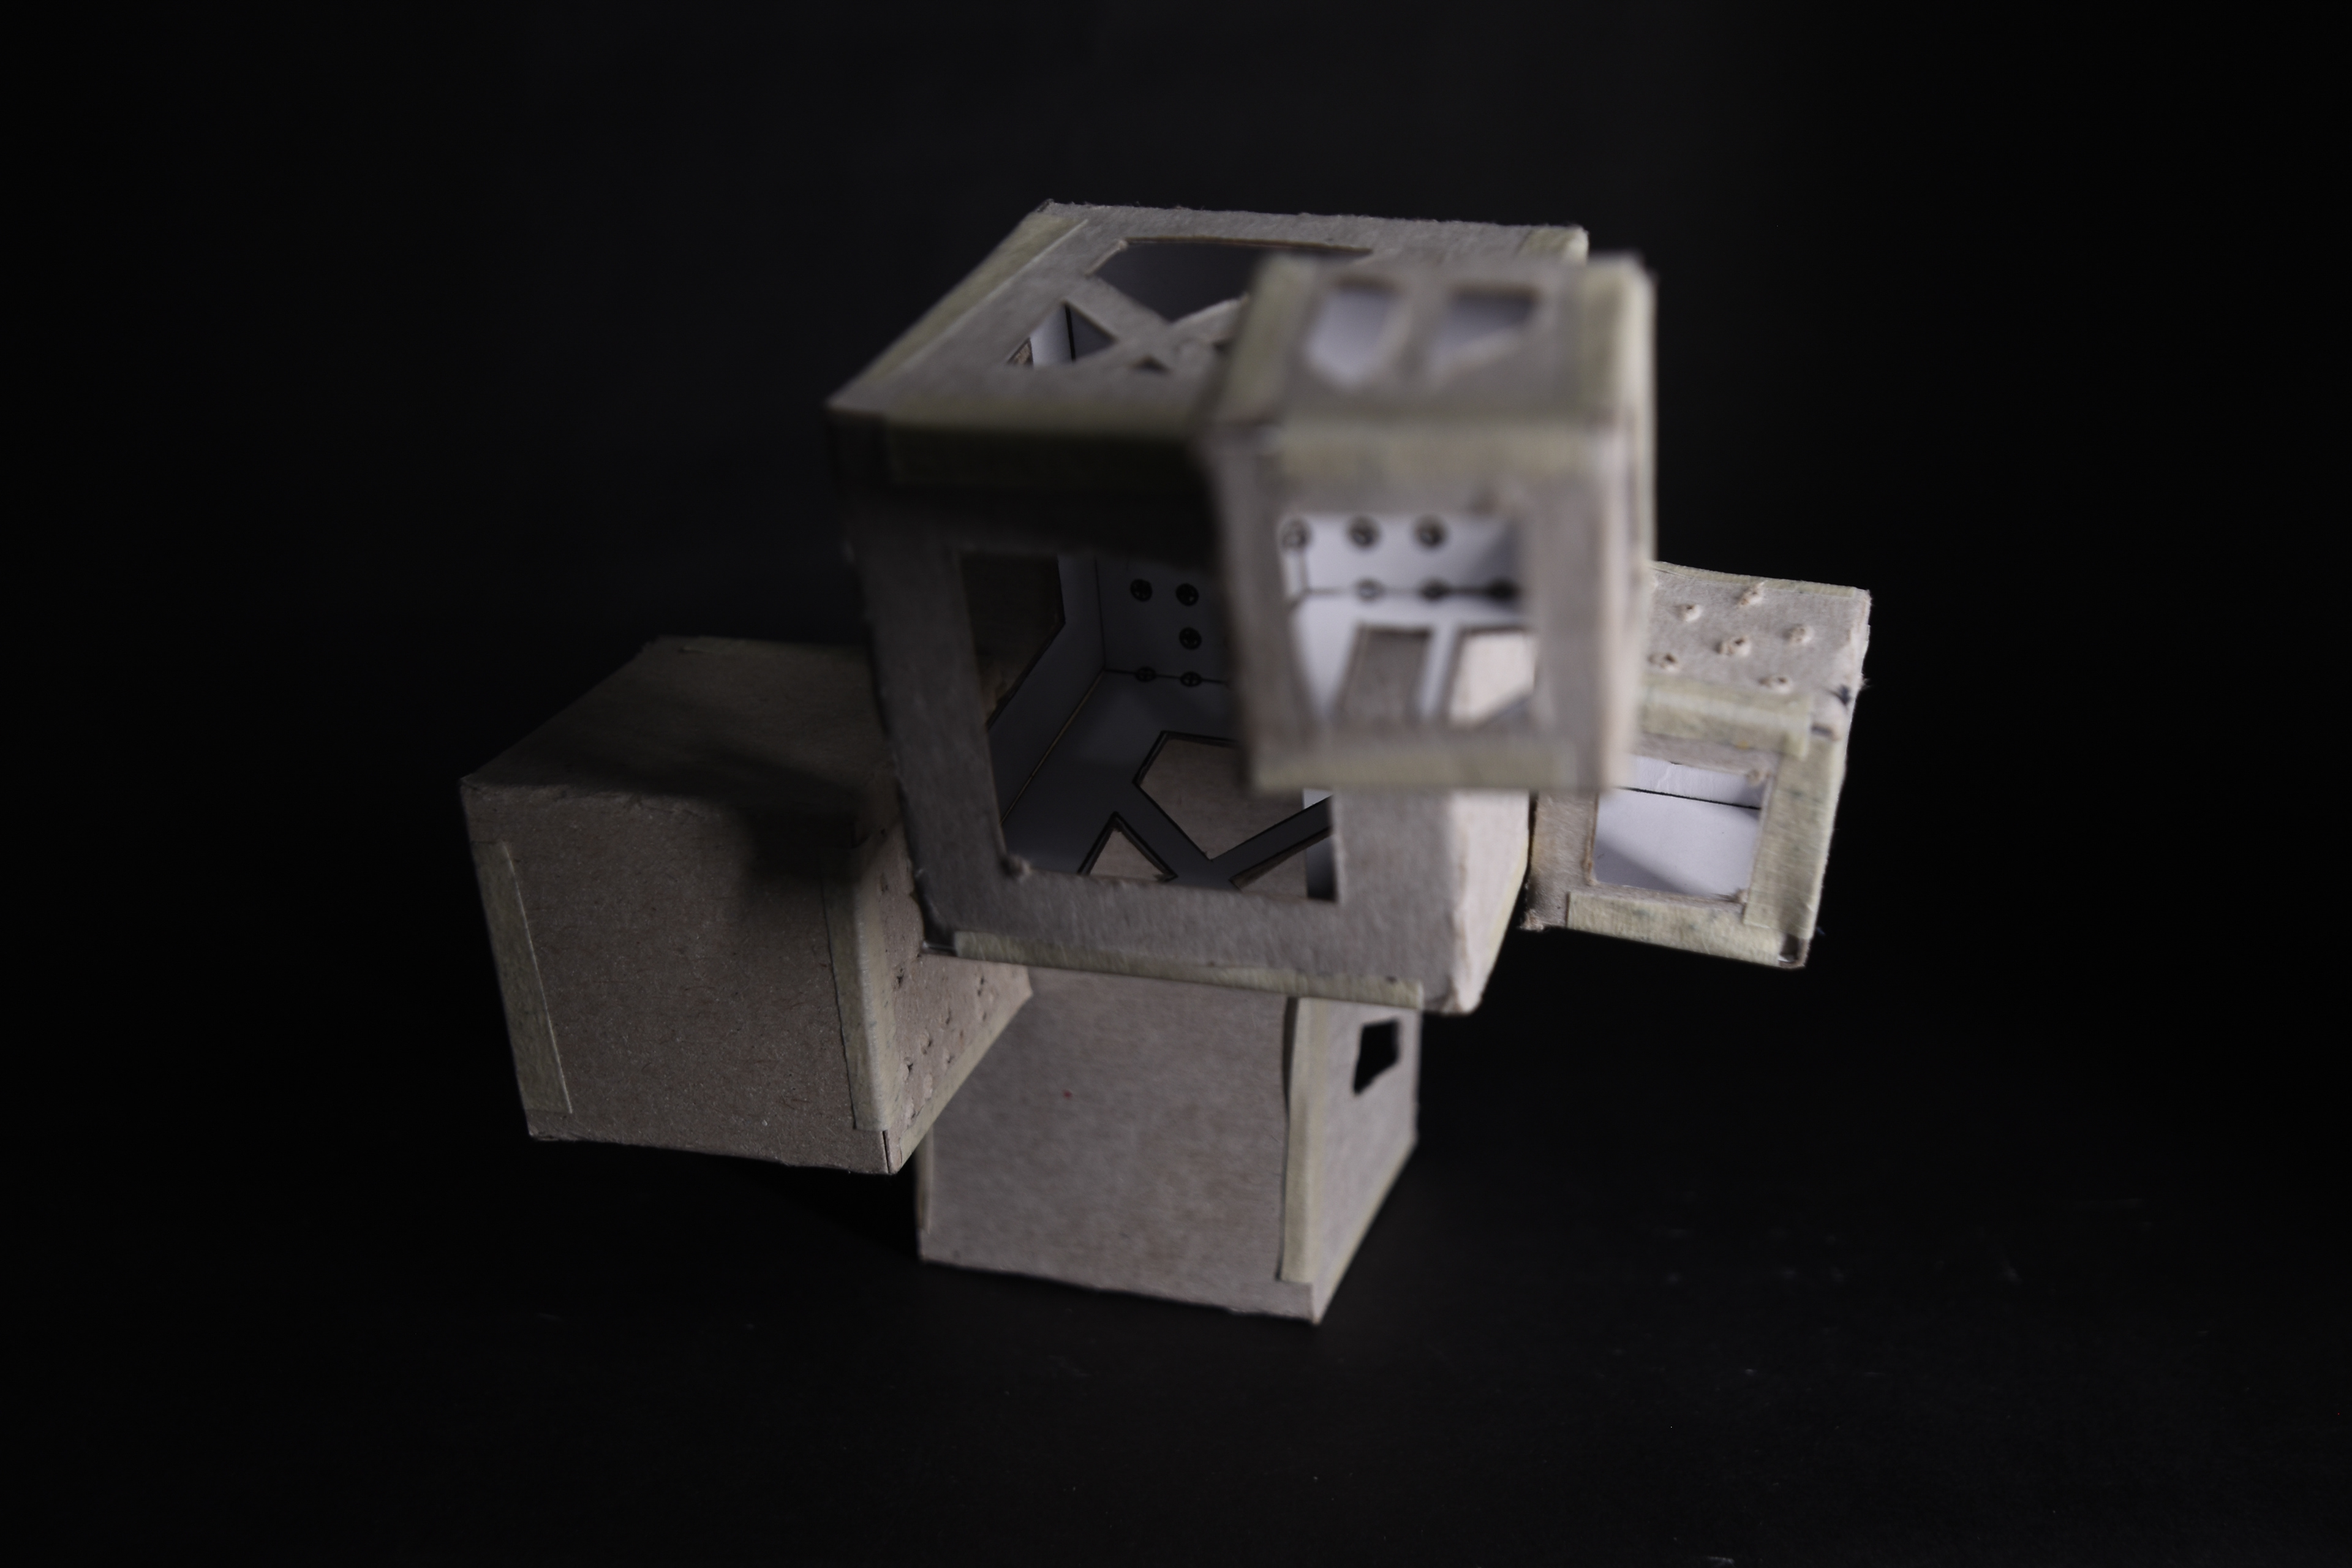
From the drawing task, I took from the image above and made a series of quick paper models looking at creating simple forms on different planes. I focus on the ideas of connections generated from my primary research at Castlefield. I investigated the connections and seams made as the paper cubes met, also the addition of different textured papers. I would like to take this further and introduce elements of the leather work that I explored alongside my photography from NOMA.
I like the ideas that these objects are hand-held and that the viewer can pick them up, and by rotating, there is a similar exploratory experience reflecting my relationship with NOMA and Castlefield.


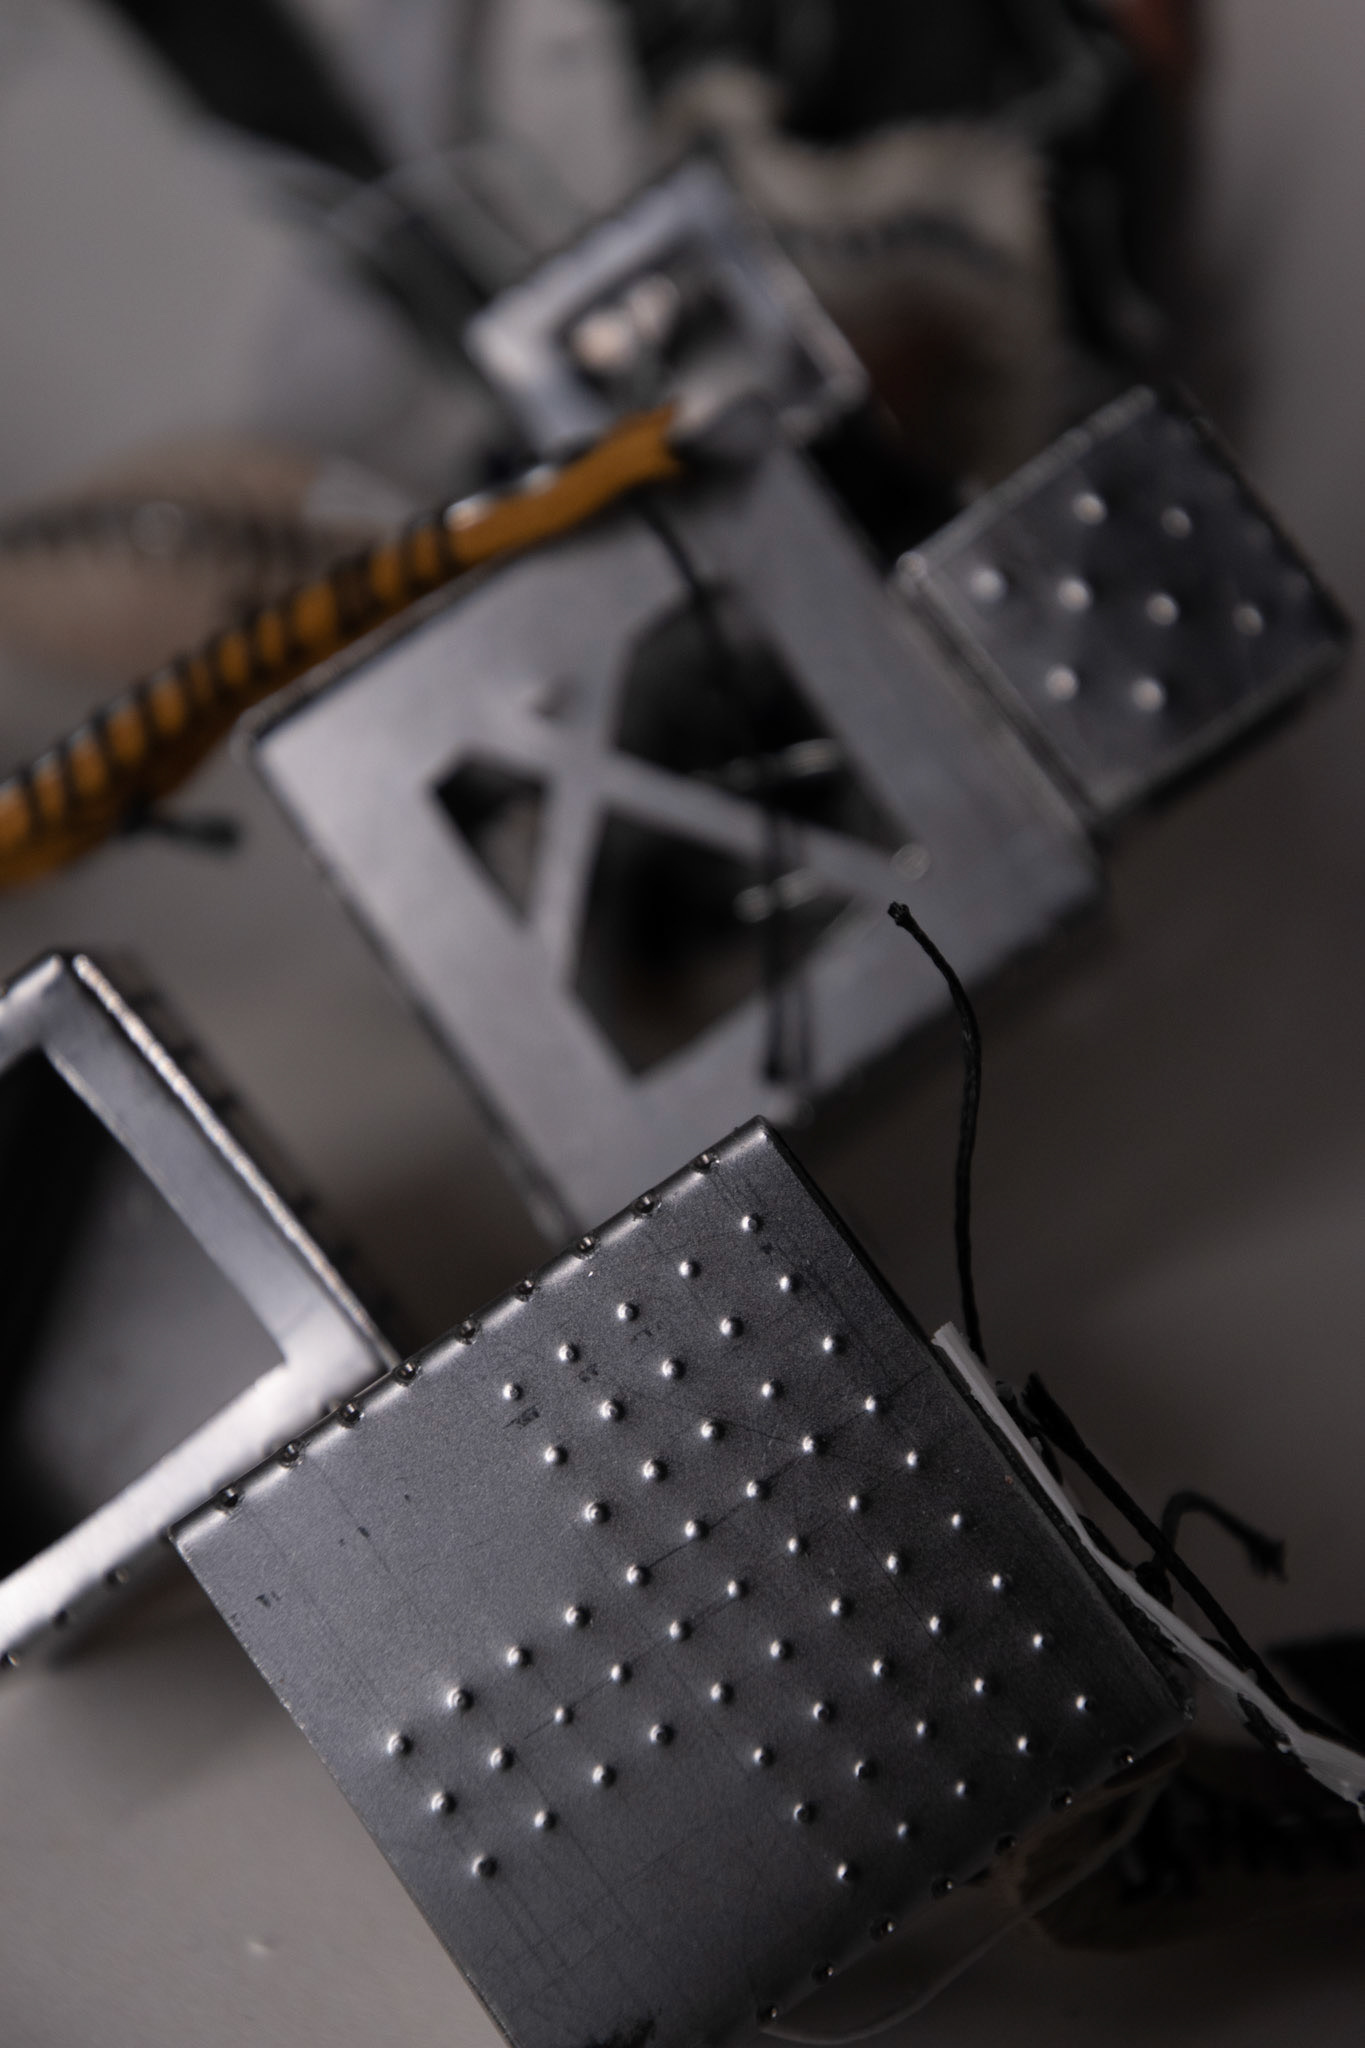
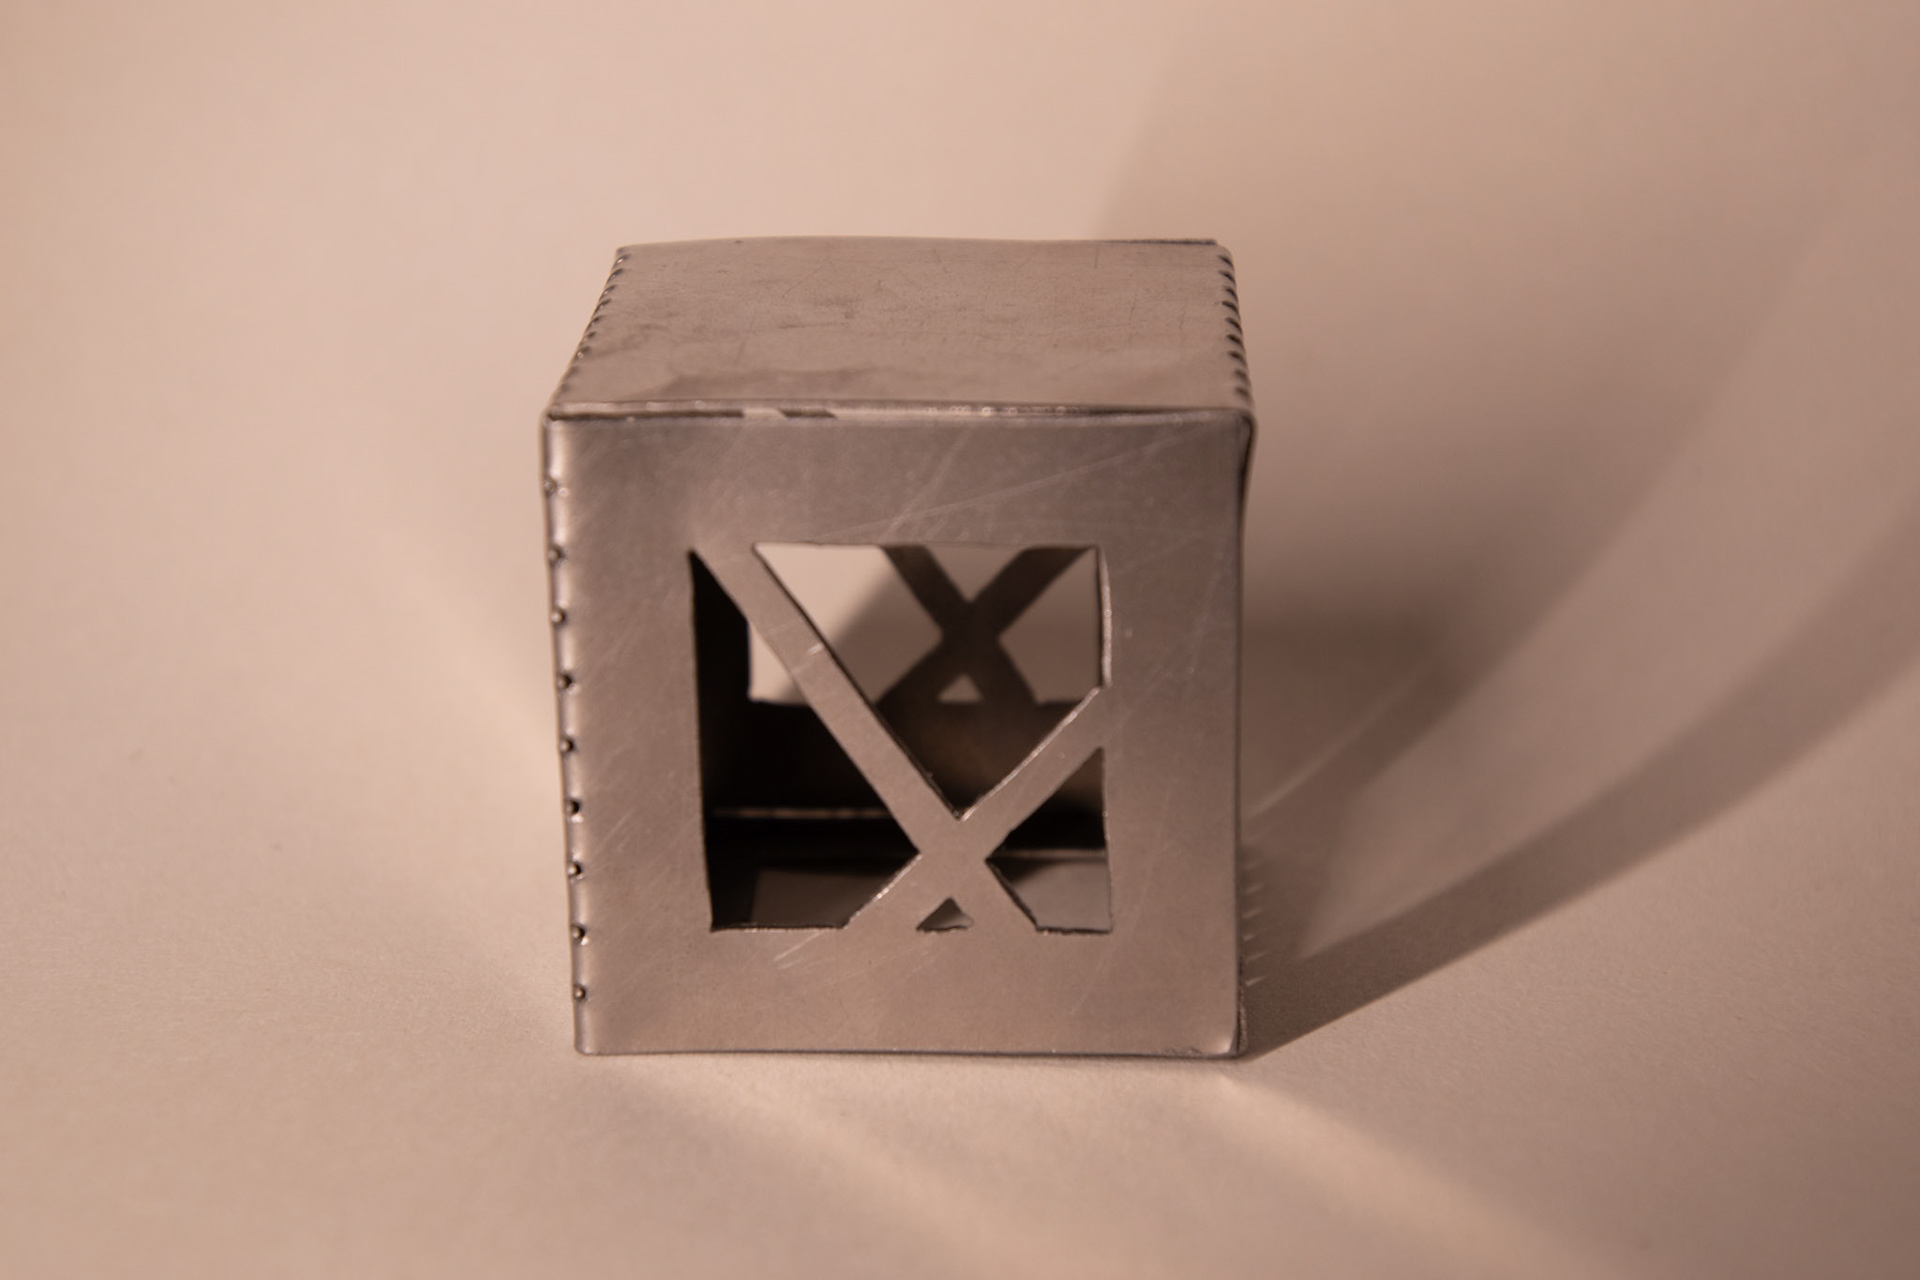
Progressing from these simple paper experiments, I explored making cubes out of a resistant material. I worked with 0.7mm steel to allow for easy bending and so that the surface would gain a patina over time, reflecting the steel work of the Castlefield viaduct. I also wanted to explore the relationship with size and weight of the cubes in the hand.
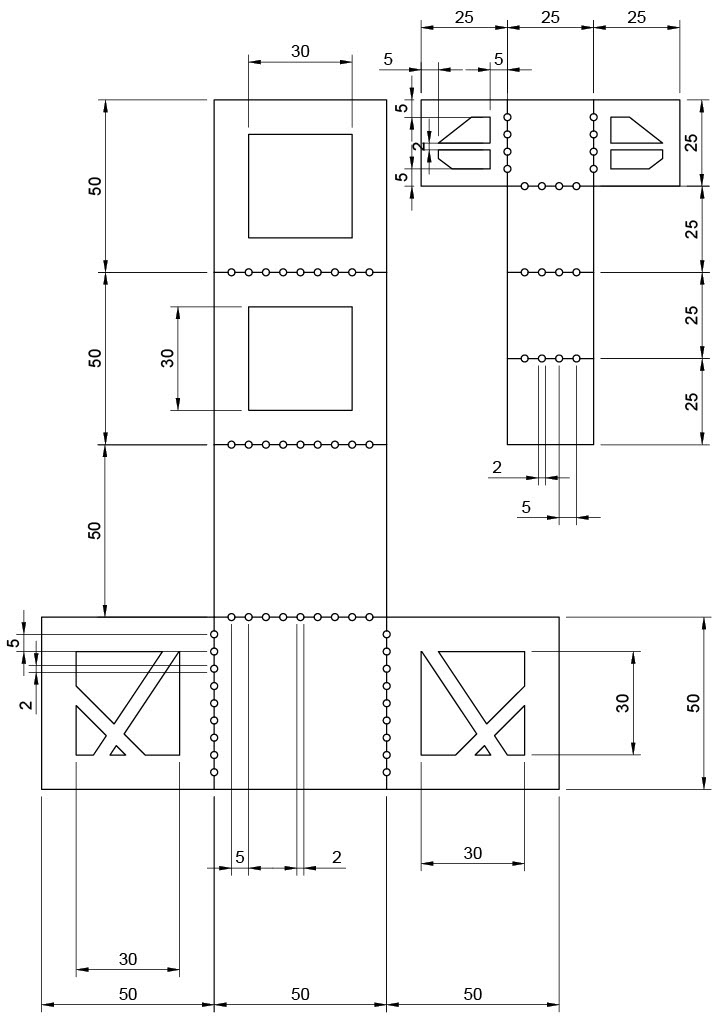
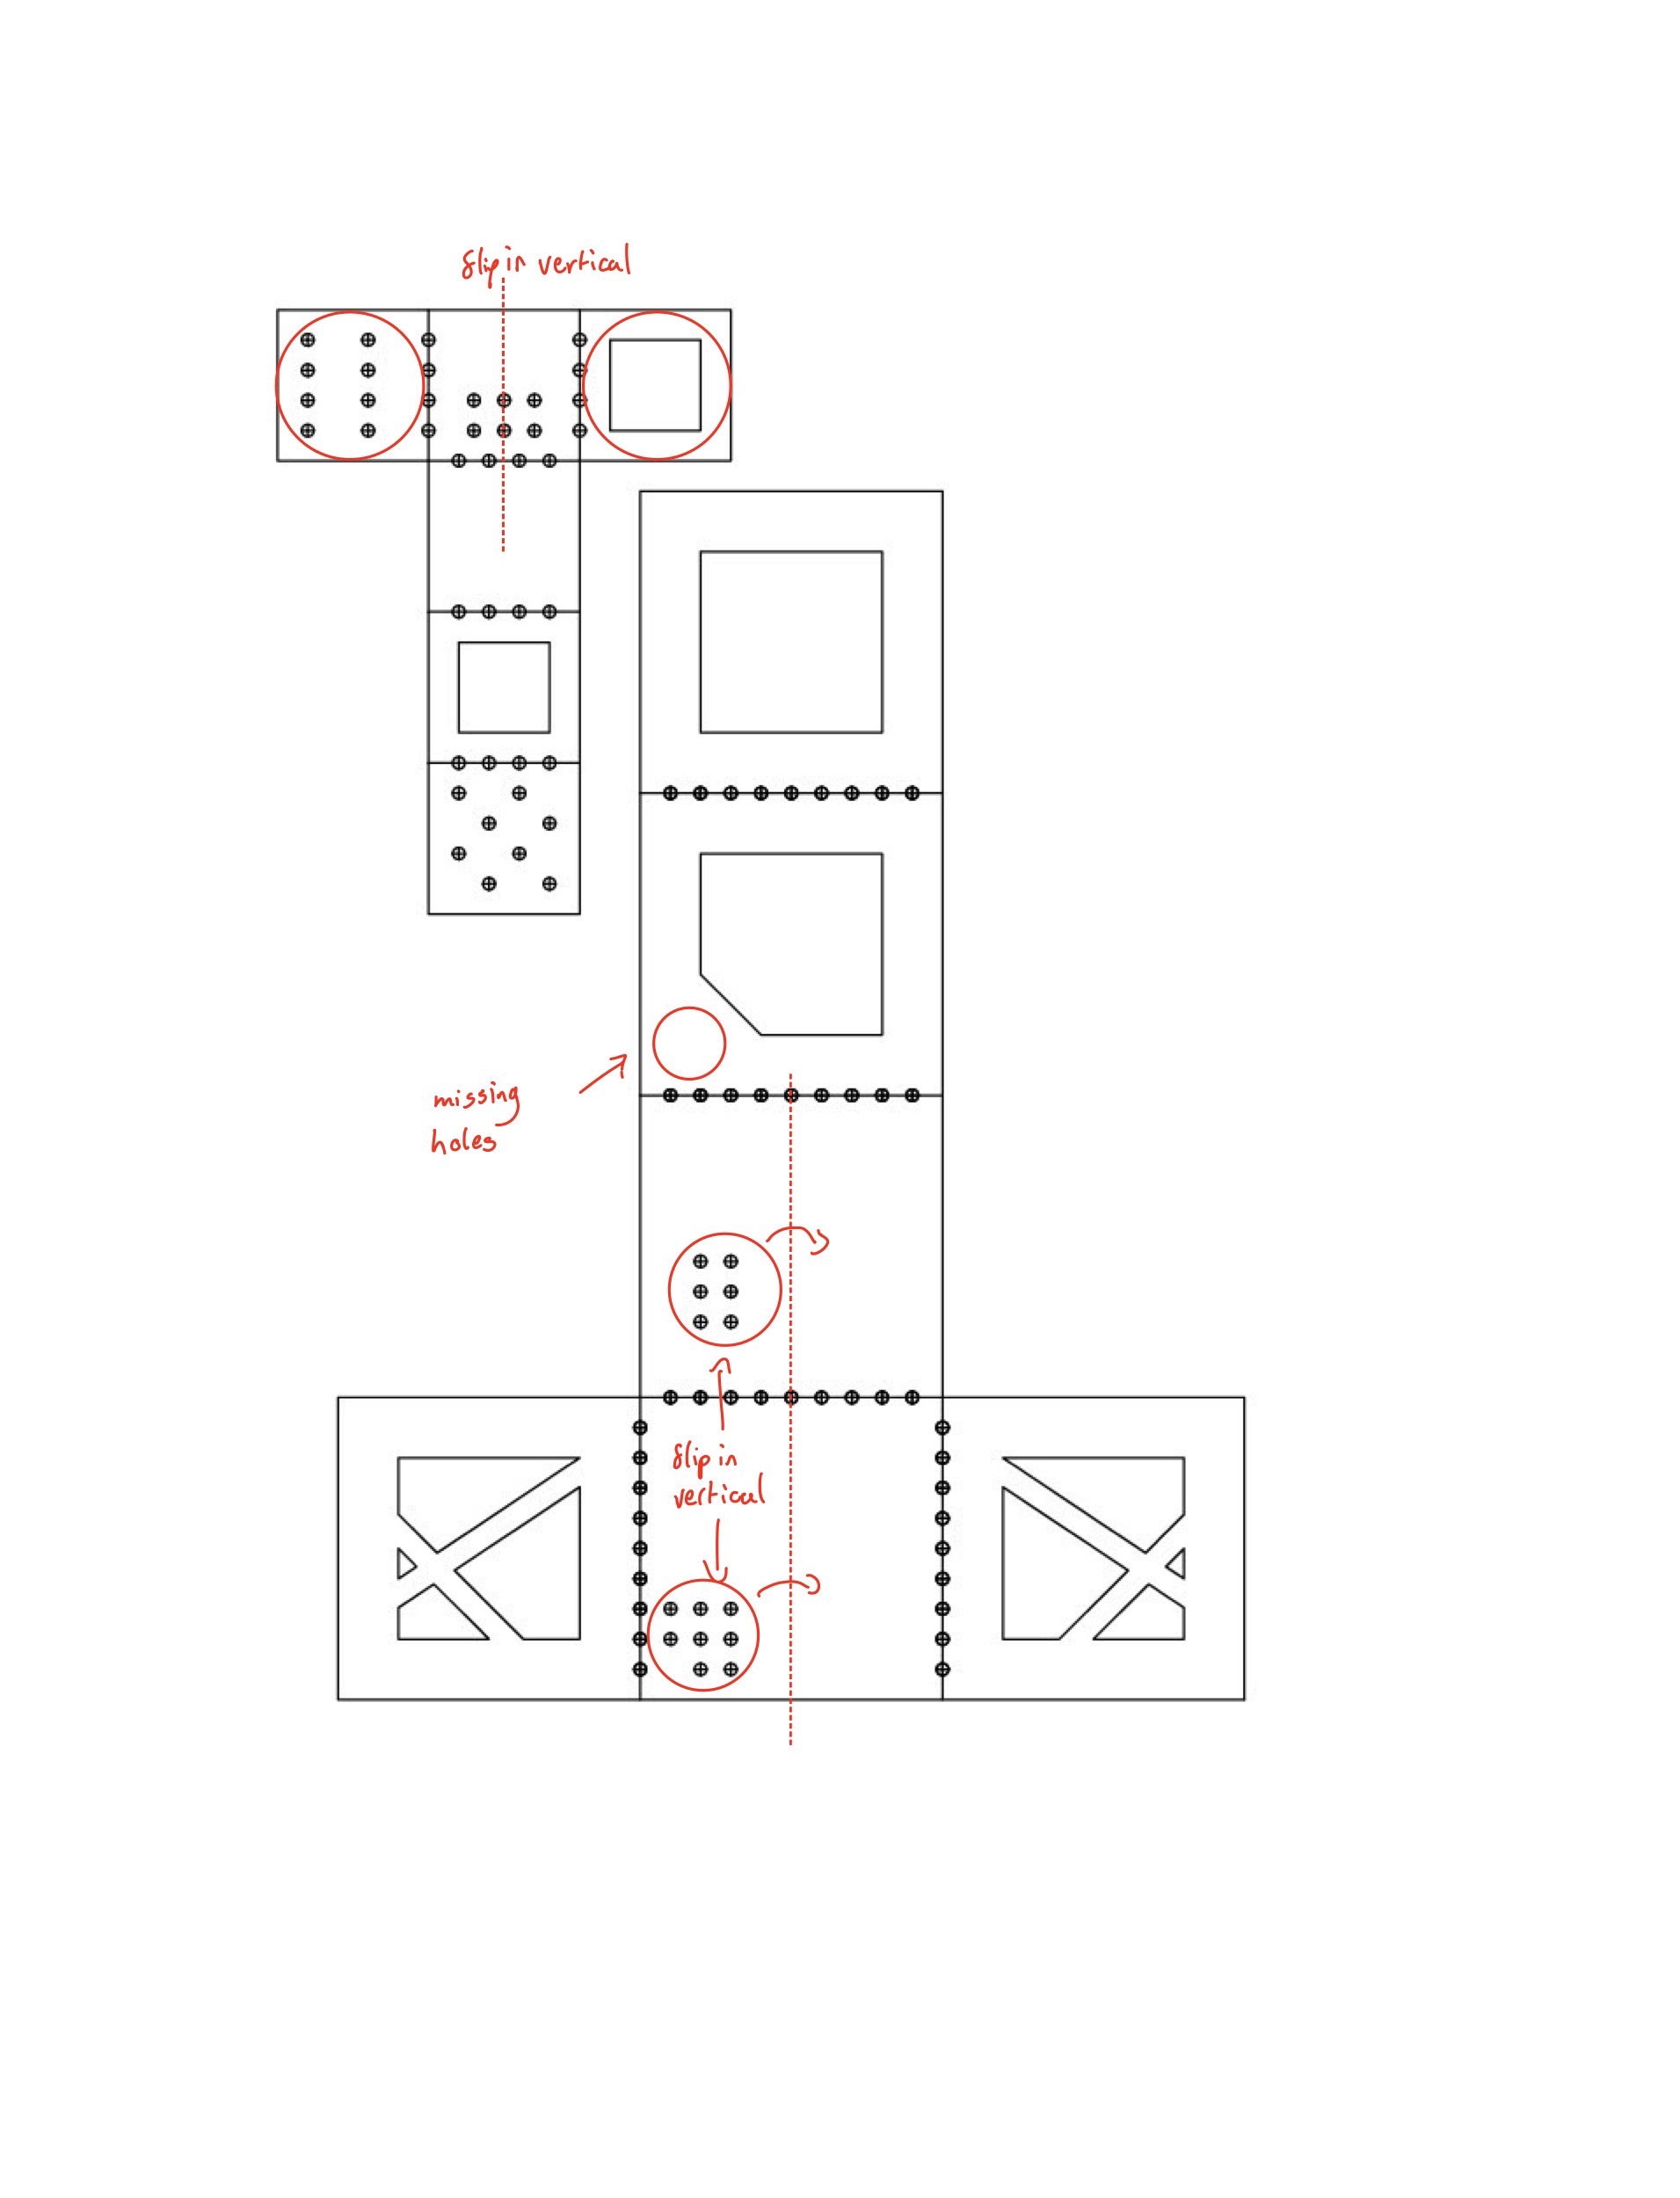
In CAD I designed a series of nets that I used as a template to cut the sheets of steel on the bandsaw and then precise locations to fold.


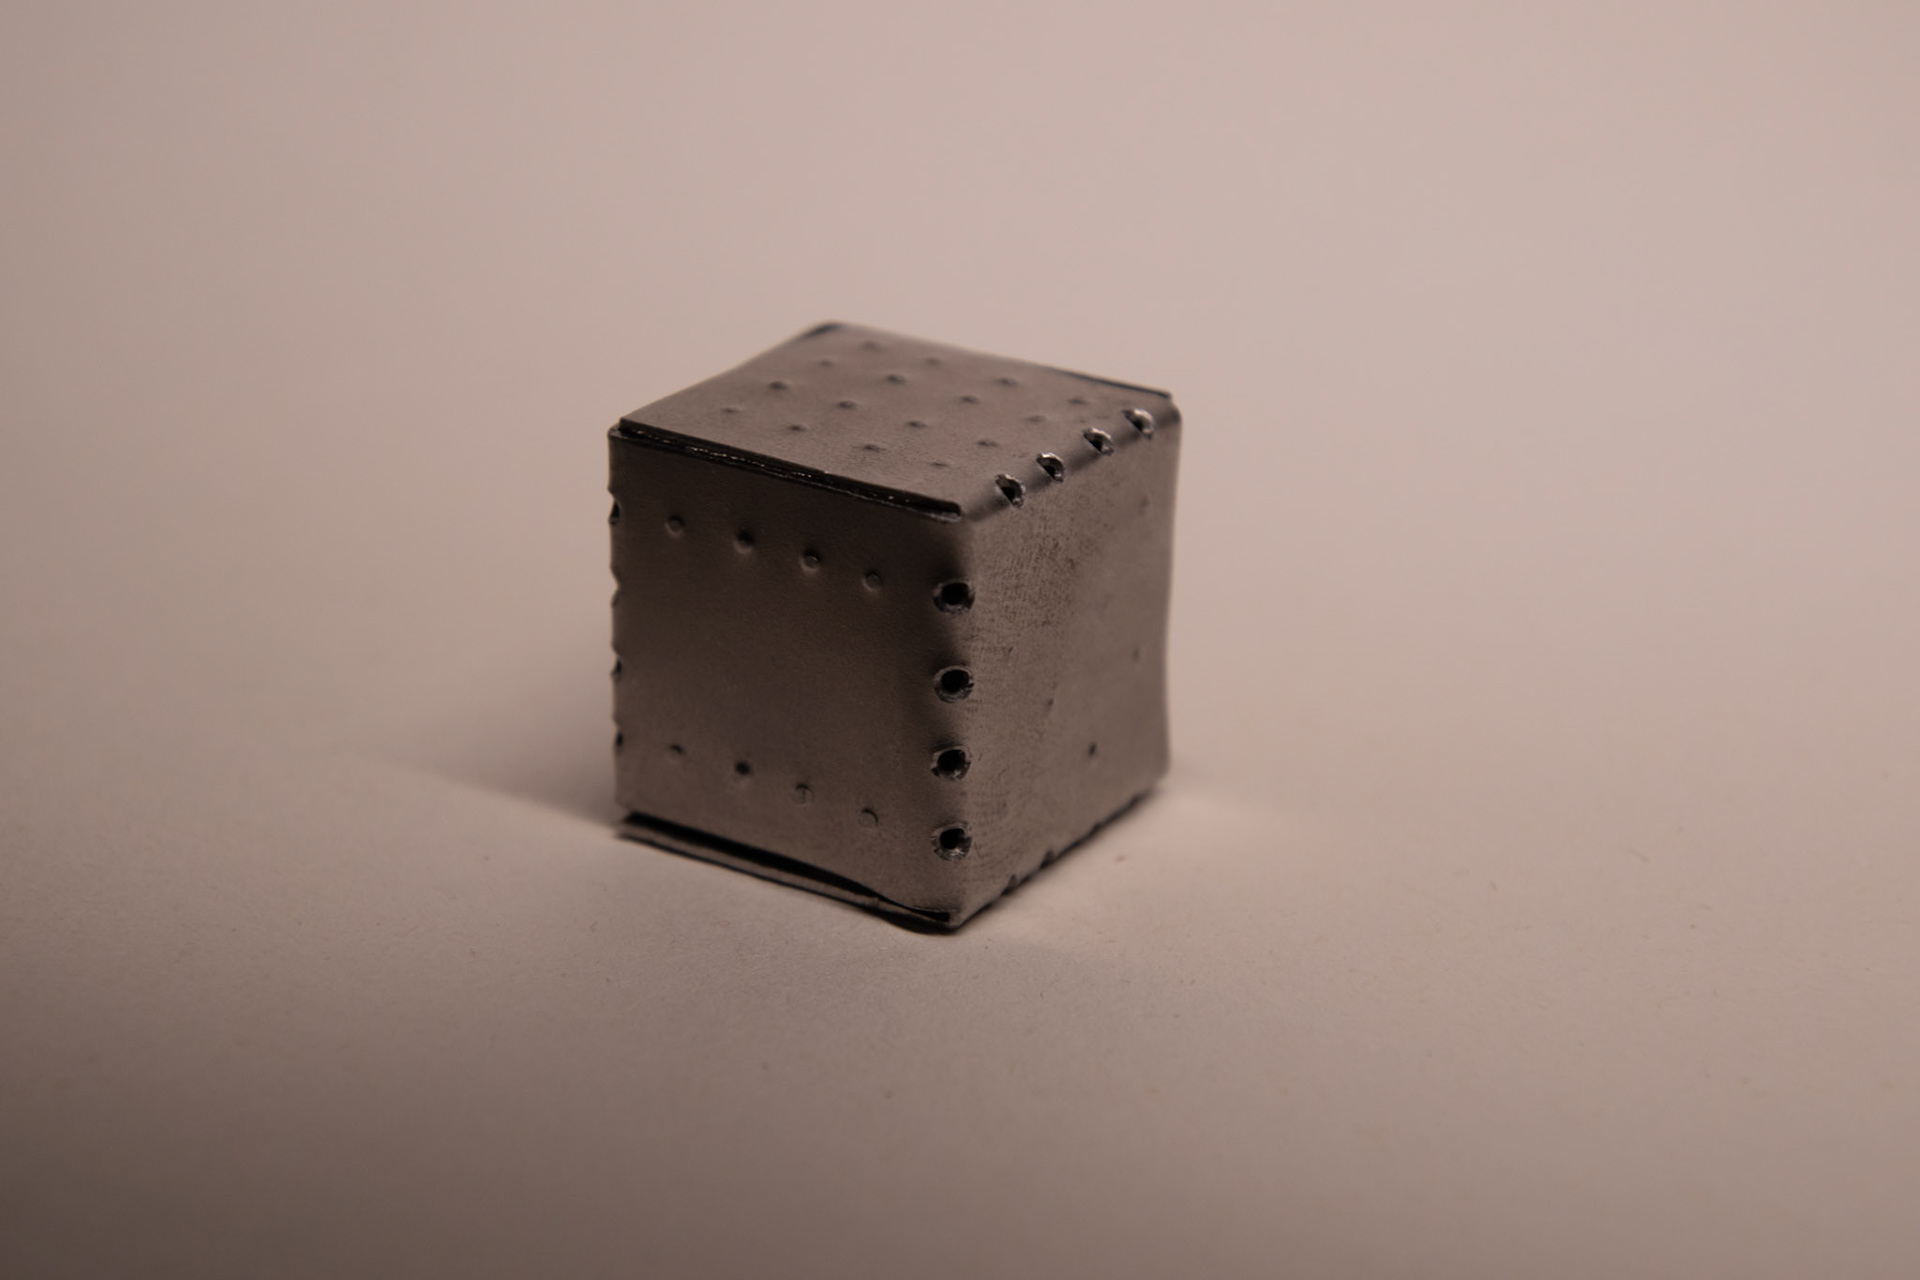

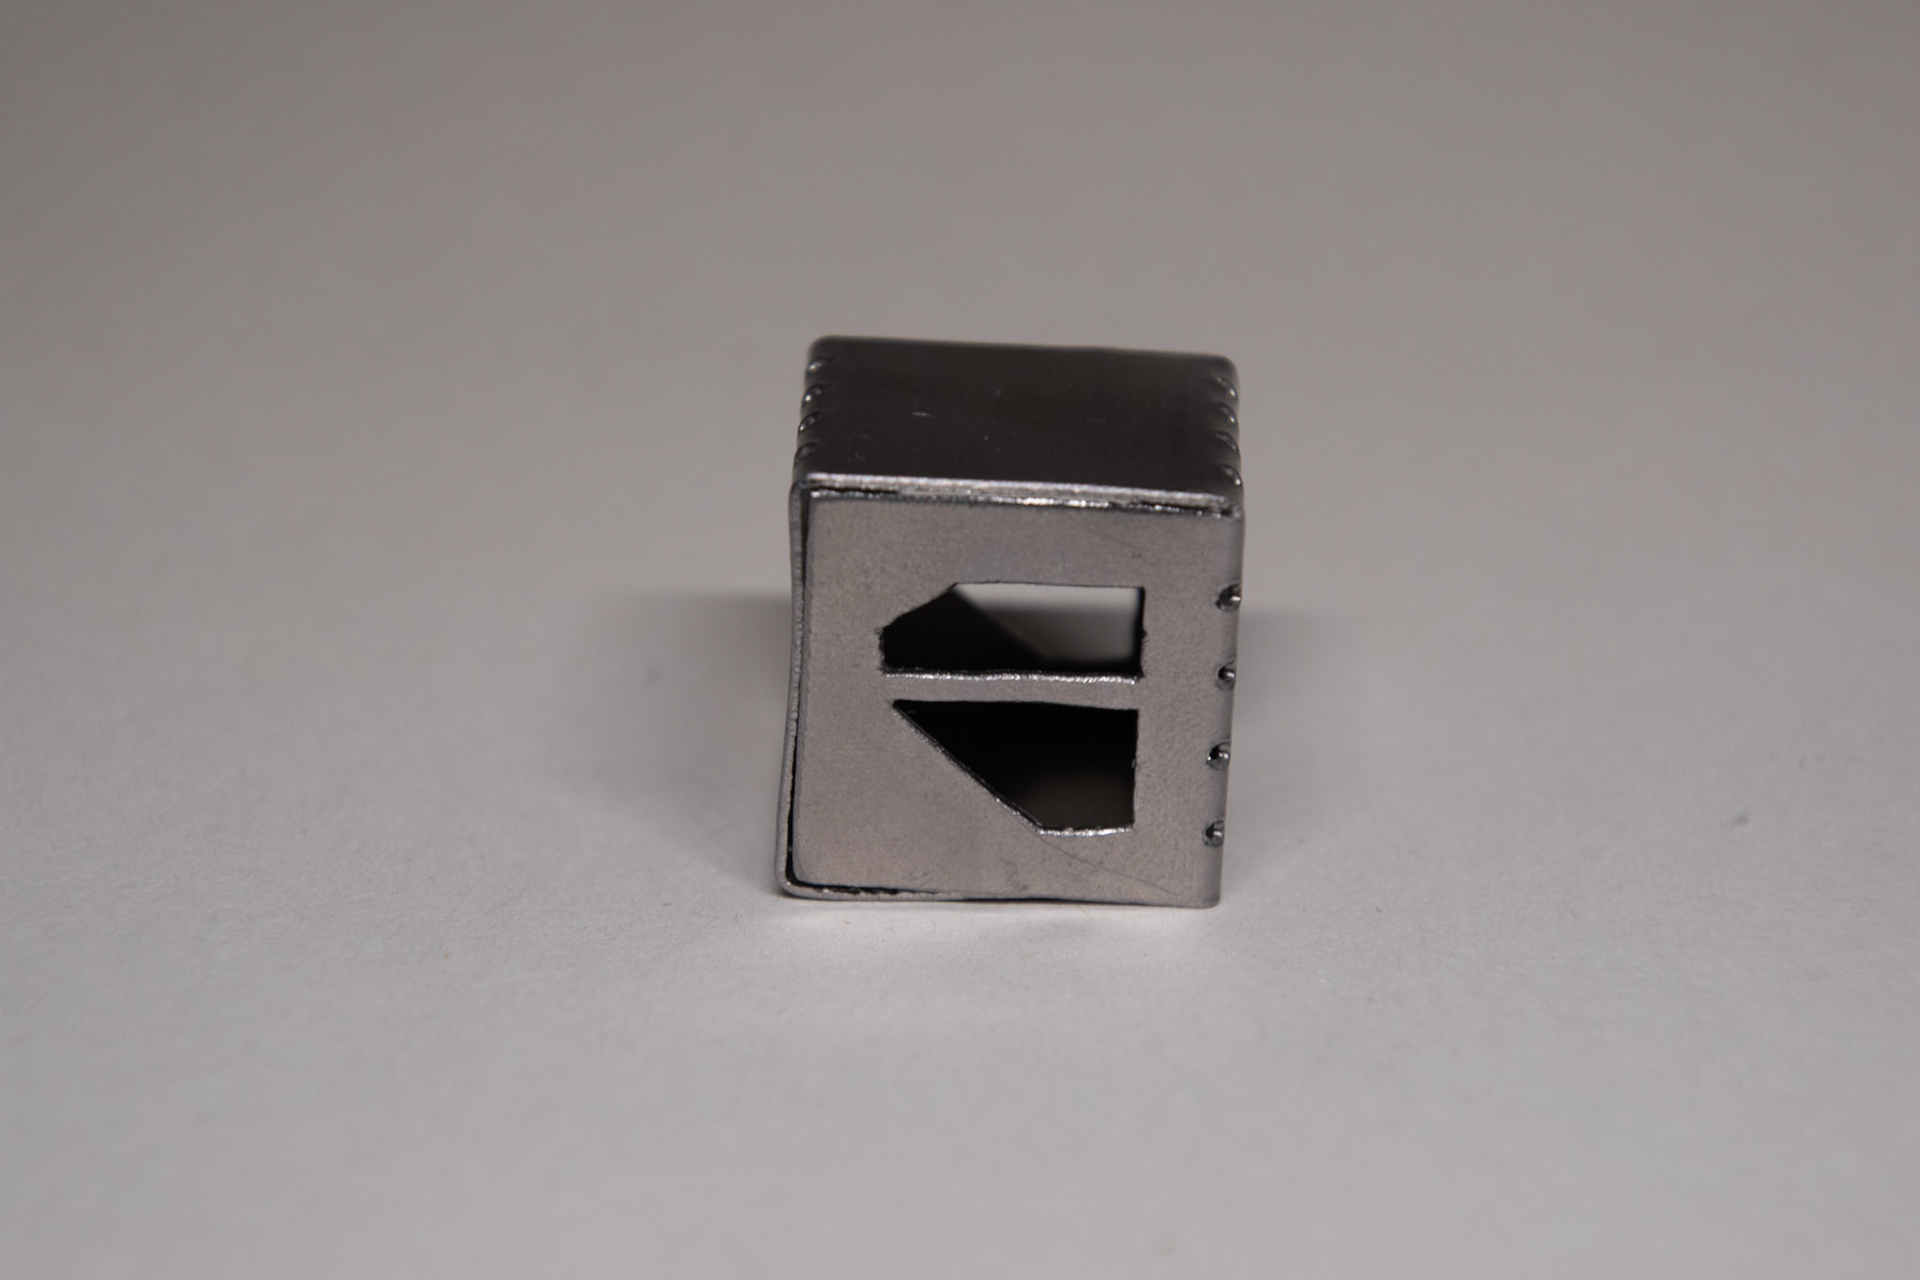
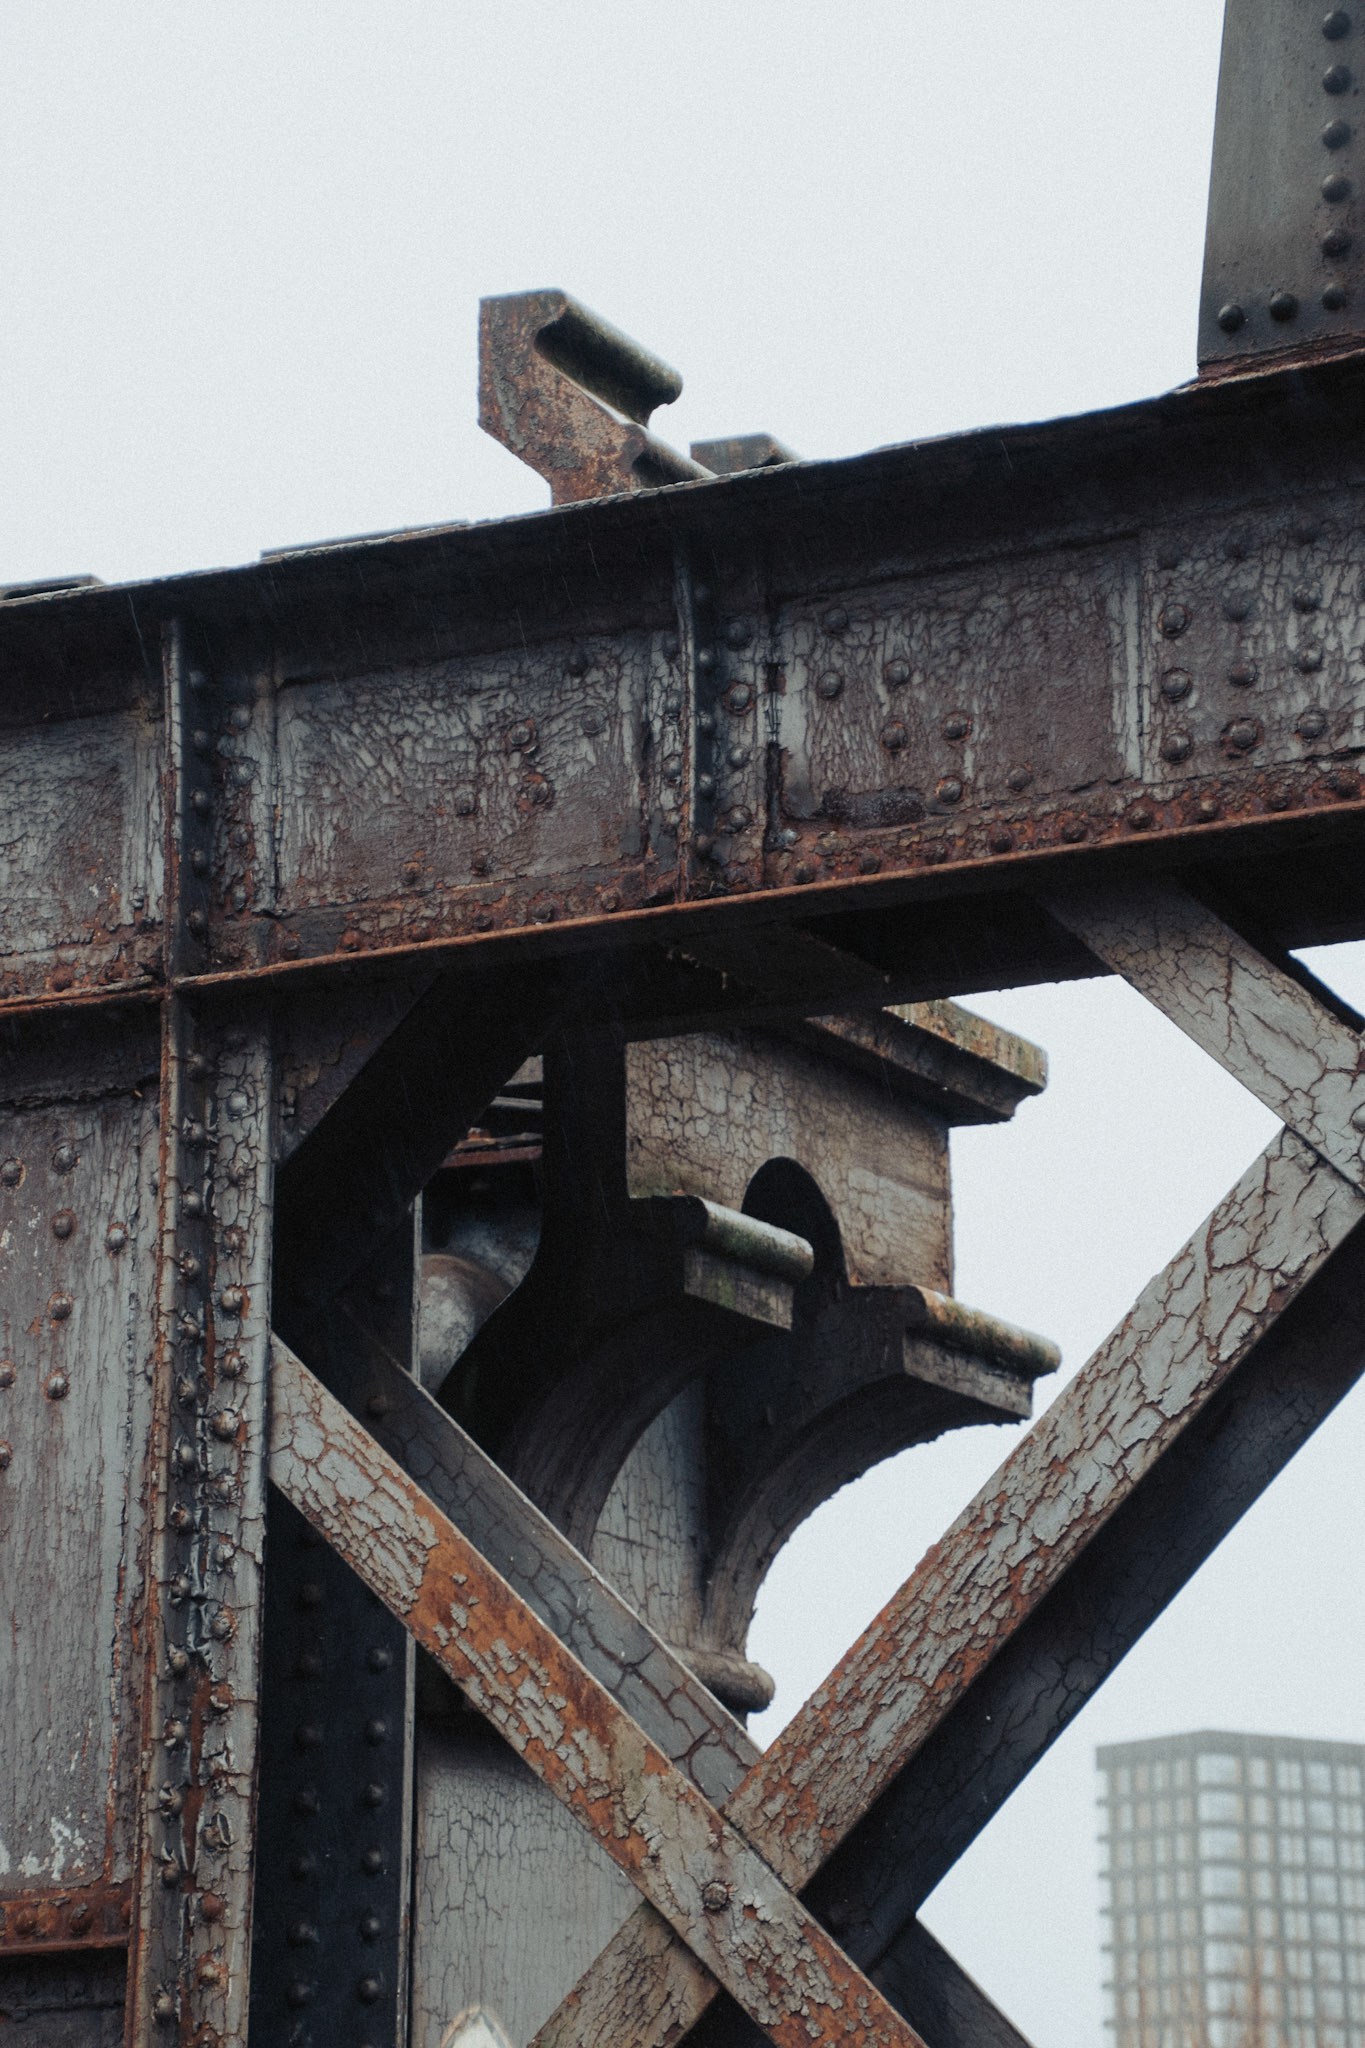
Through my testing I found that the brake used to bend the sheet steel at 90 degrees angle deforms some of the sides of the smaller cube design. However, this can be fixed by using a hammer and a thin piece of box steel to flatten the curved sides against an anvil. I also discovered that drilling small holes along the seam lines helped to bend the steel easily as it creates a weakness. Whilst doing the process of drilling the holes, I found that I could use the center-punching technique for its aesthetic qualities to mark the surfaces of the cubes, mimicking the rivets from the Castlefield viaduct.
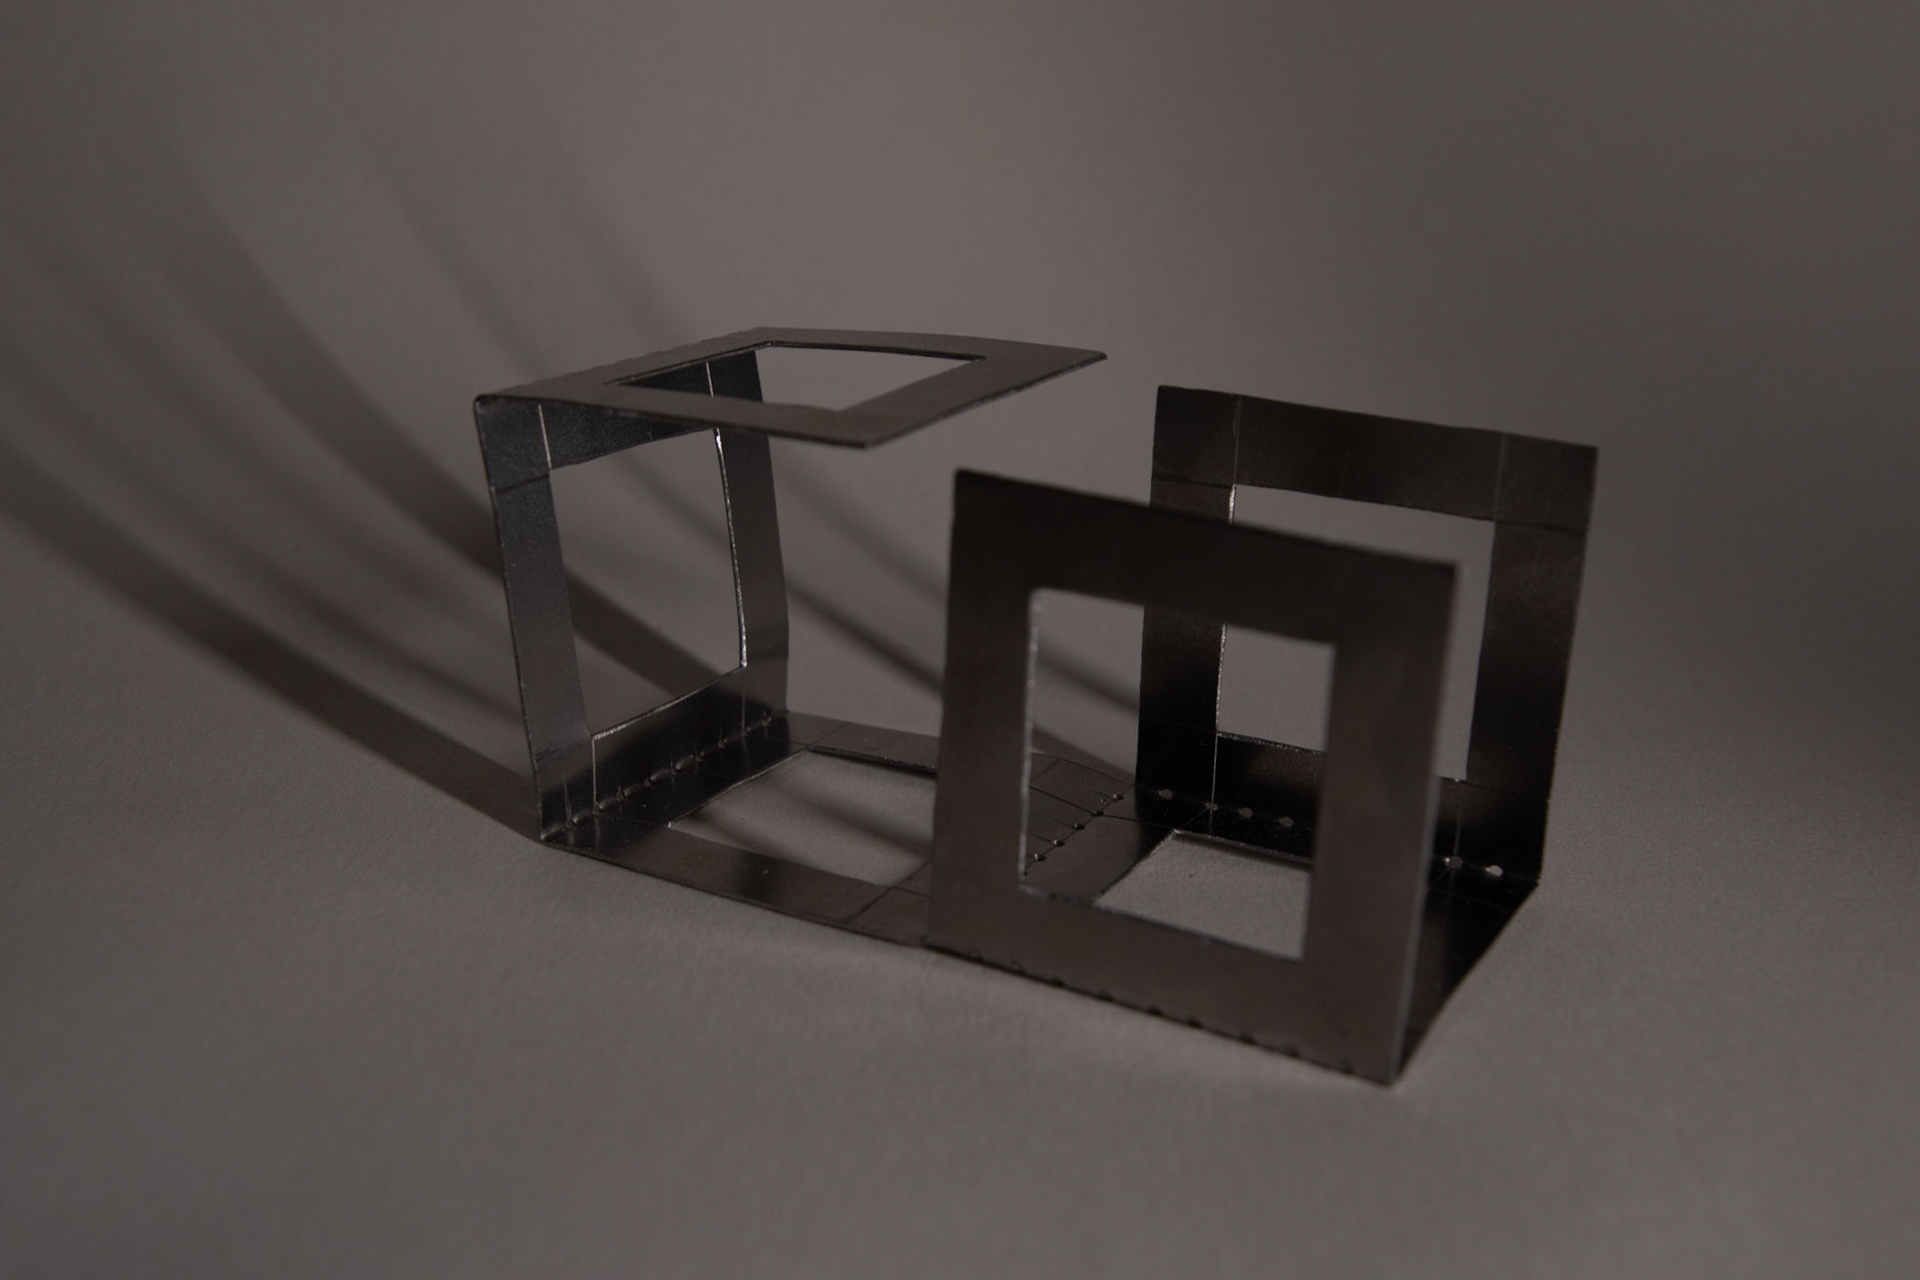
I experimented with removing sections from the faces of the cube, using a piercing saw to remove the internal material. I like the aesthetic of this and believe I could further this by introducing imagery from my primary research. However, when I tried to bend the last edge together to complete the cube, the material wanted to fold along the thinnest point where I had cut away. This wasn’t a problem with the other cubes as I could gently bend the face down using pliers and hammering the edges. Therefore, I need to keep the faces where the last fold is whole, so that I can hammer the edges without worrying about it deforming.

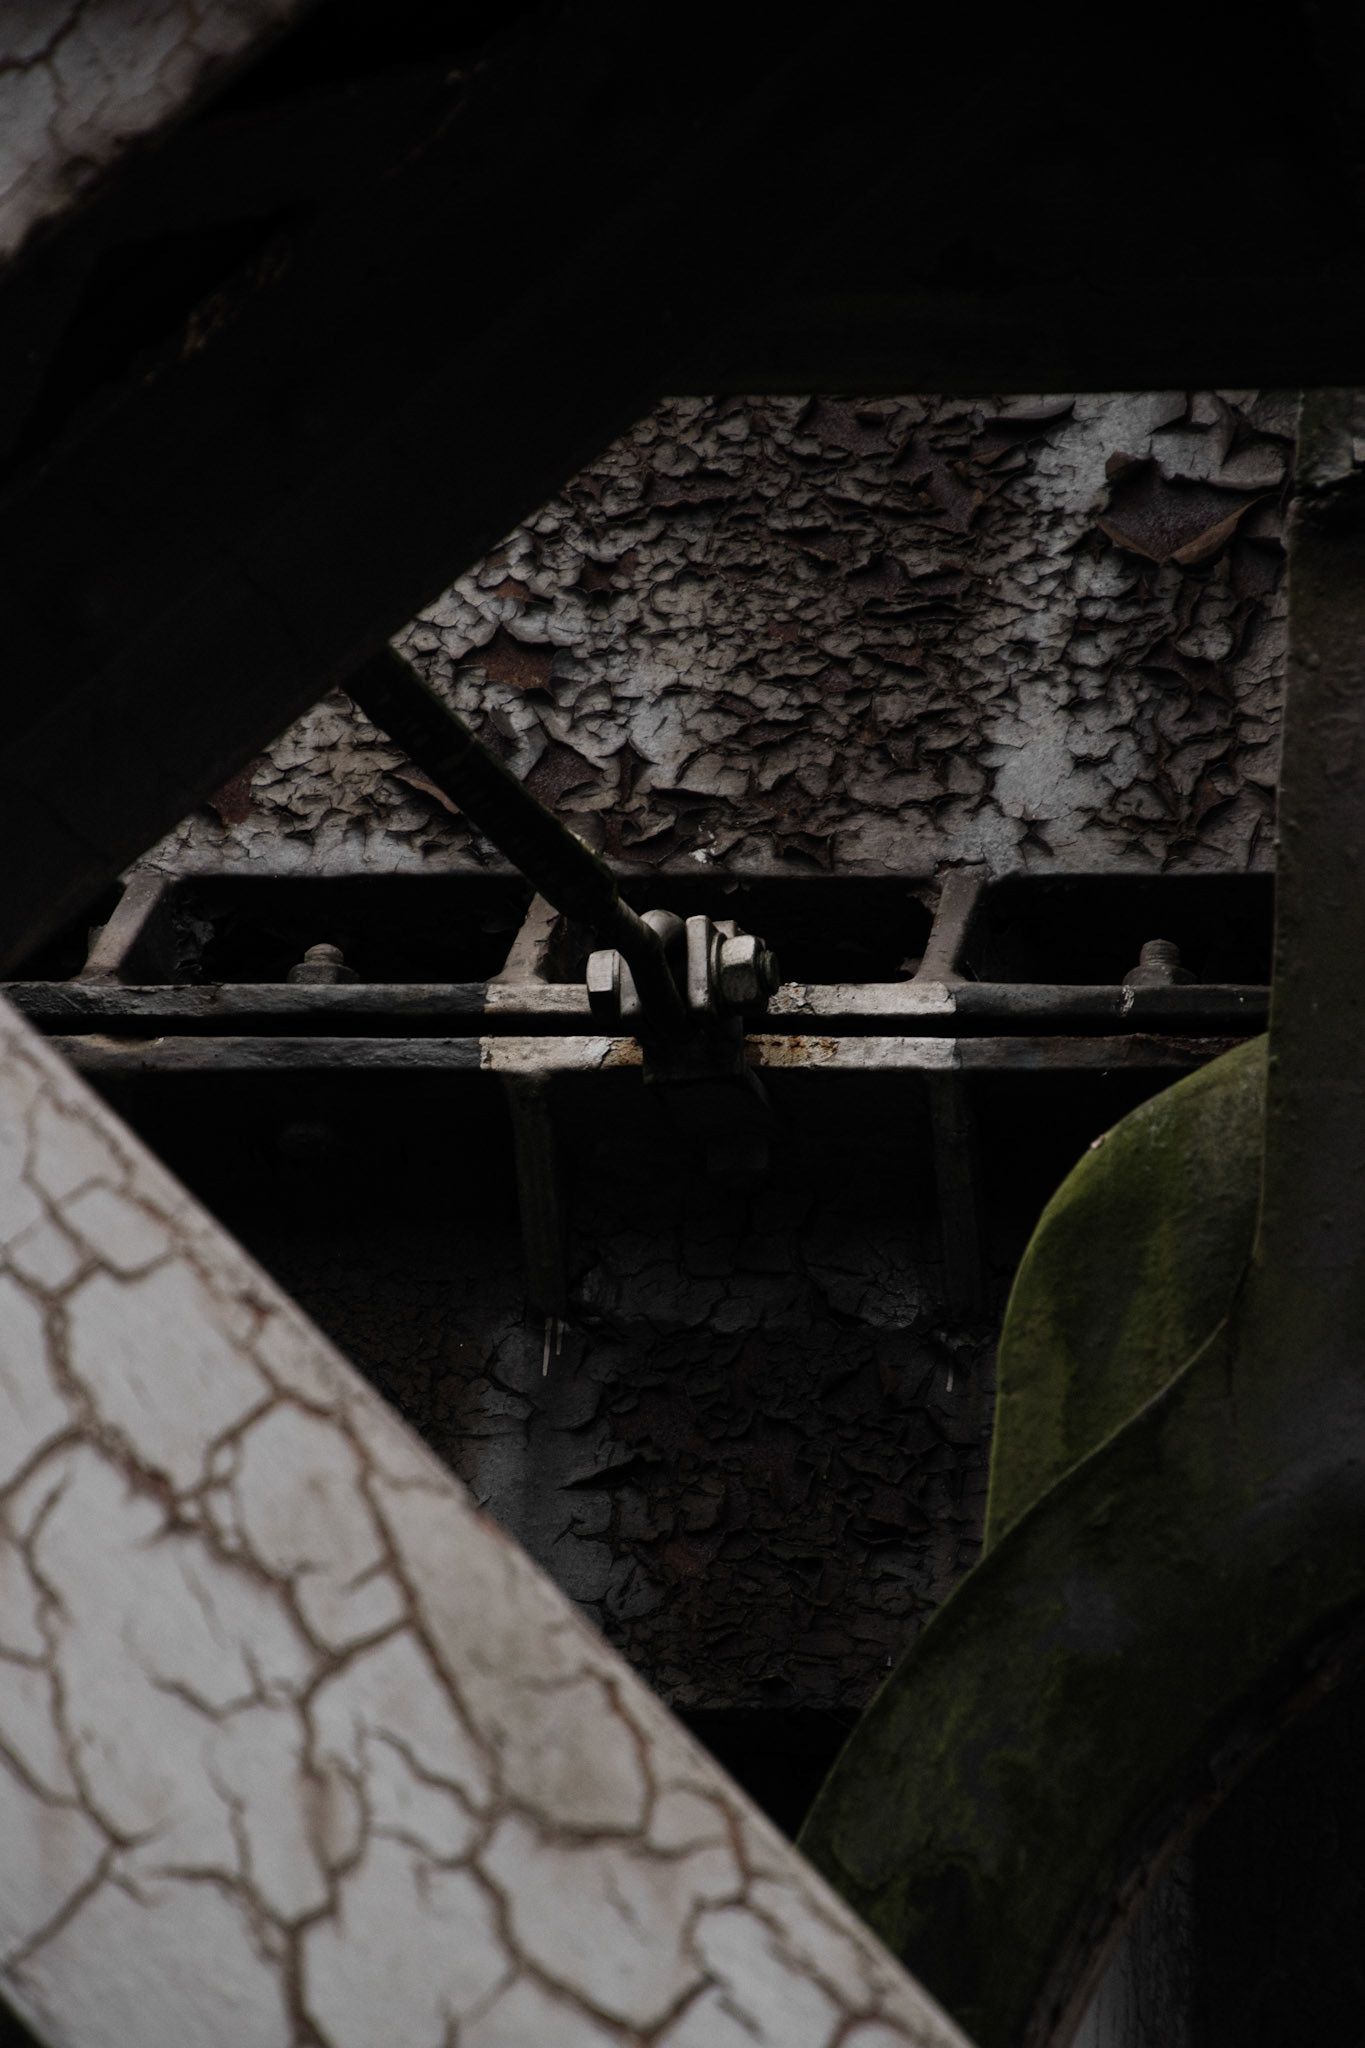
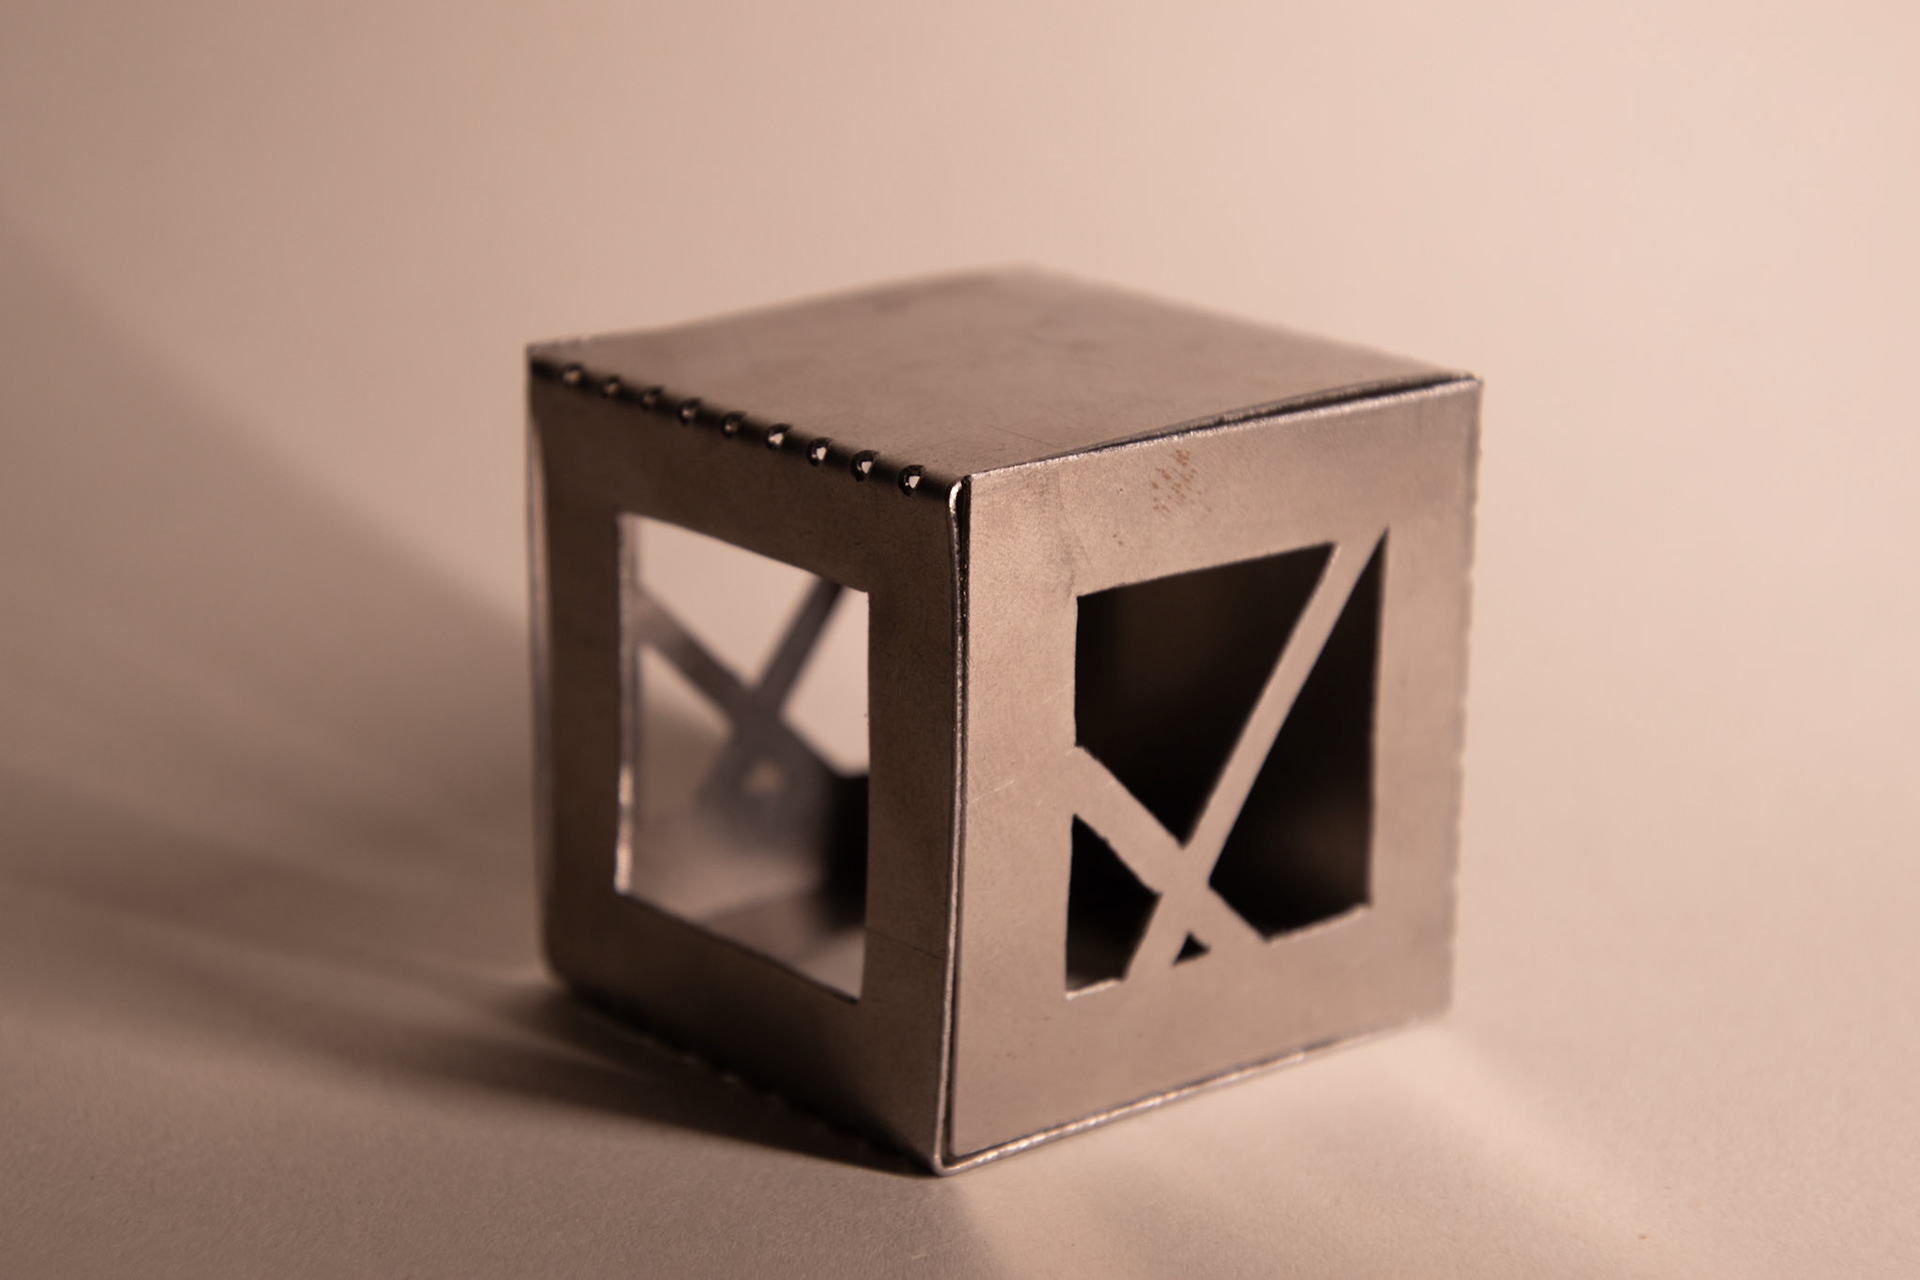
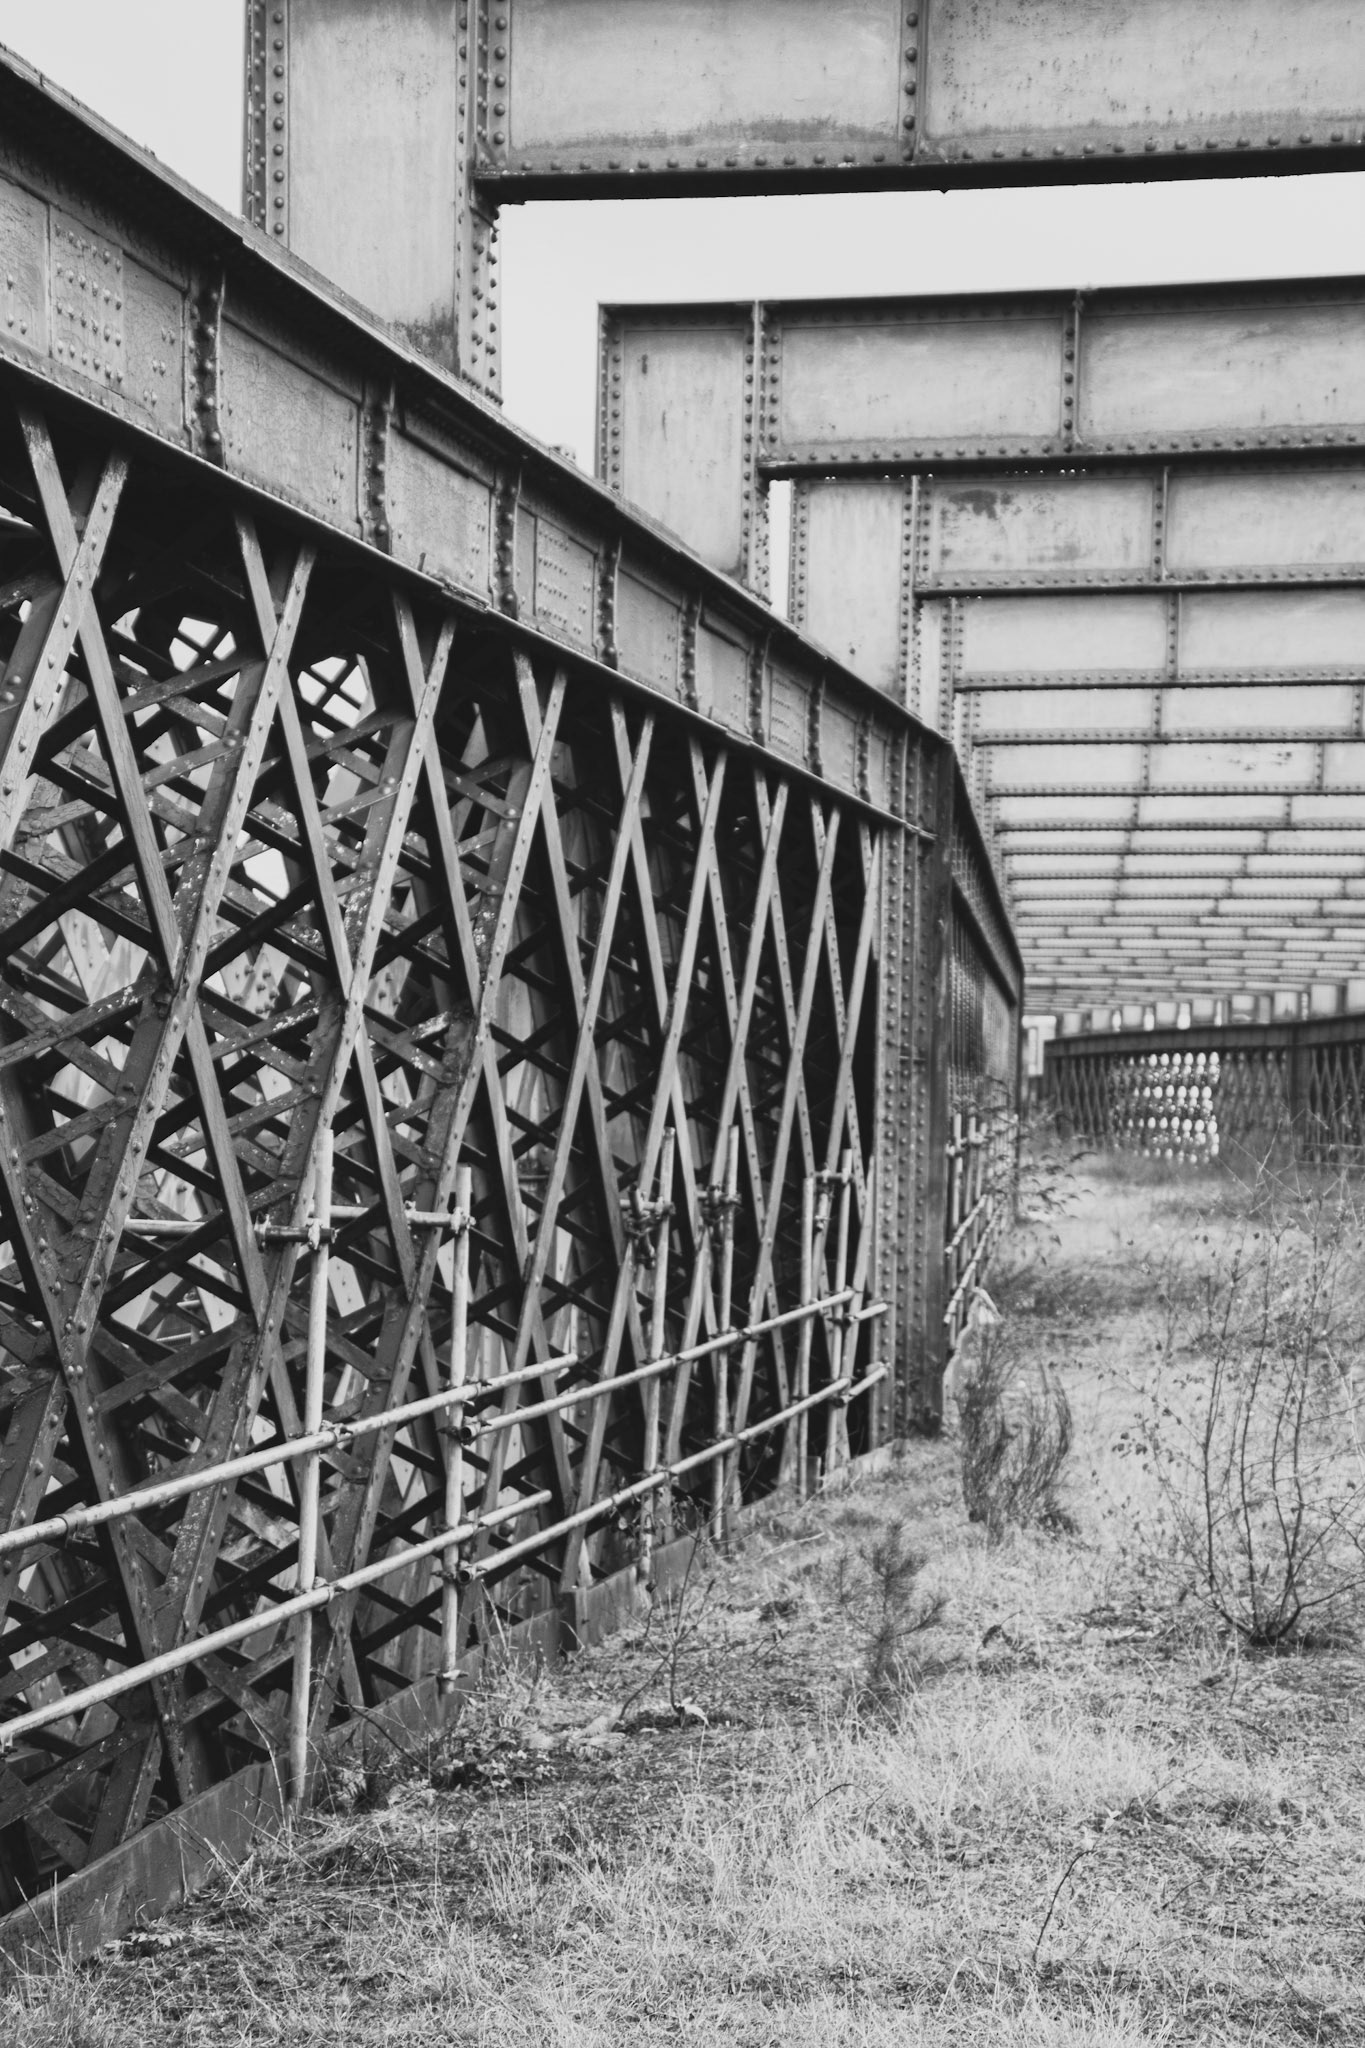
I took inspiration from the steelwork at Castlefield viaduct to create cut outs in the sides of the steel cubes.


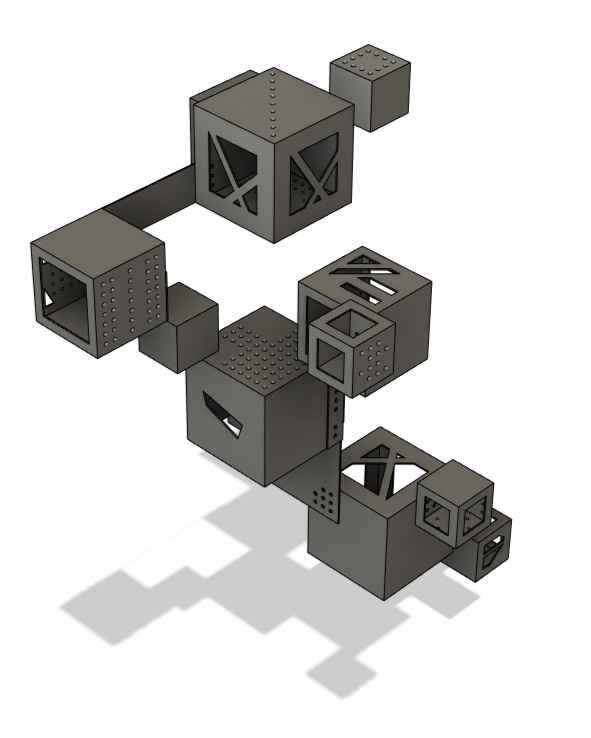
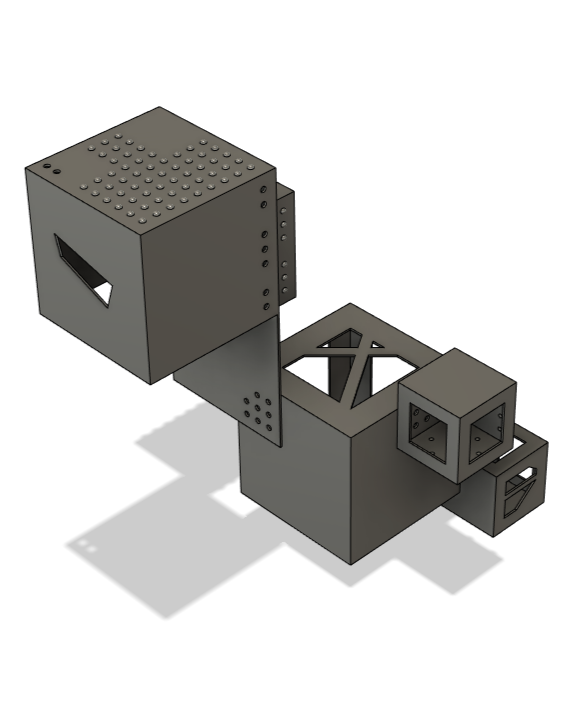
I investigated the relationship between adding multiple cubes together and adding cutaways and texture through CAD.


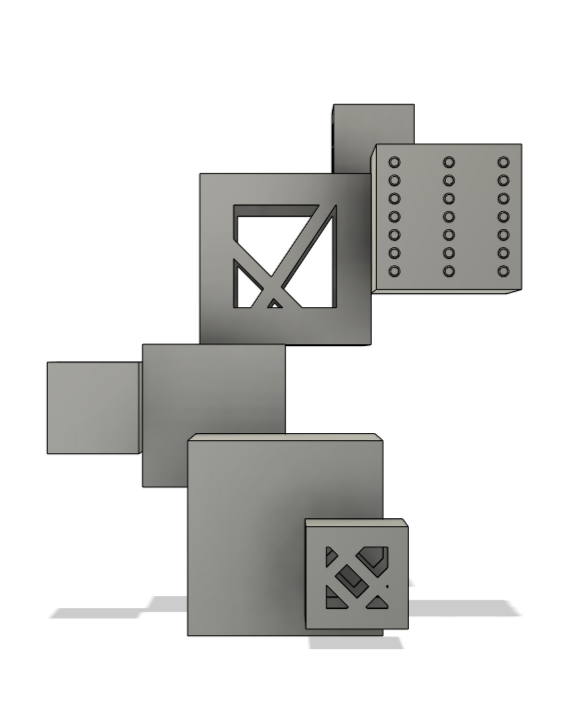

Although I like the outcome of my CAD designs, making this out of steel wouldn't be possible as there is no way to join the individual cubes together using a mechanical connection. I could explore welding the cubes together however, I don’t have the skills to create a neat and accurate connection. Also, I would like to highlight this between each element. Therefore, in my material testing I looked at binding the steel together using wire which mirrors the aesthetic of the stitching I used to connect other materials together.
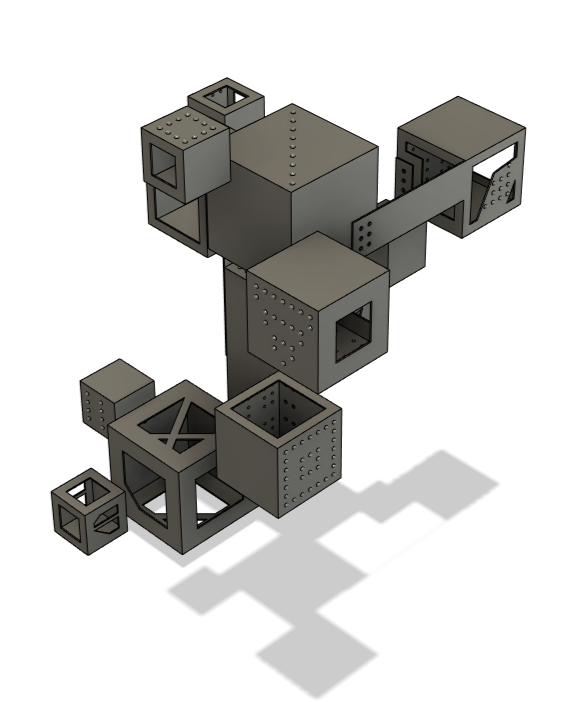
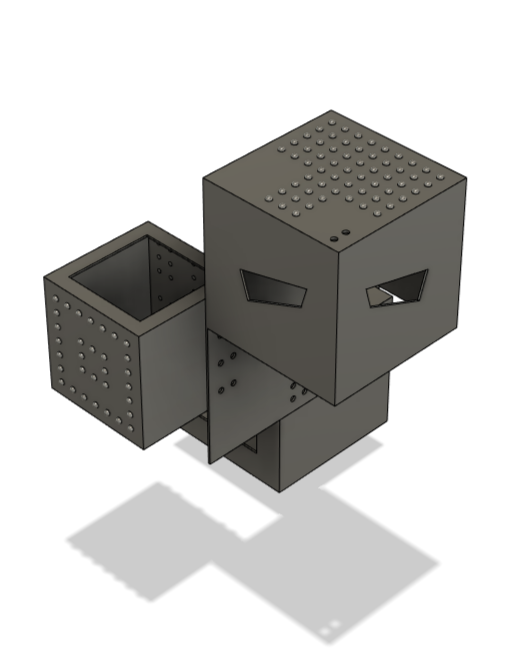
I then looked at creating a simple block design focusing on how the cubes connect using the wire binding method. In most areas I tried to overlap the cubes so that holes could be drilled through both, and wire threaded through. In some areas I explored the idea of extending one of the sides so that there could be a distance between each cube. These extended elements would be additions to the net design ensuring structural stability.


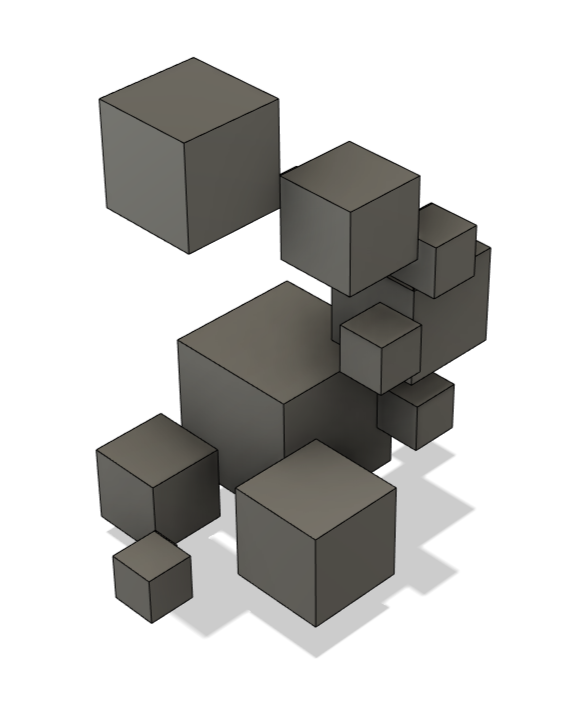

Extending sides of the net design
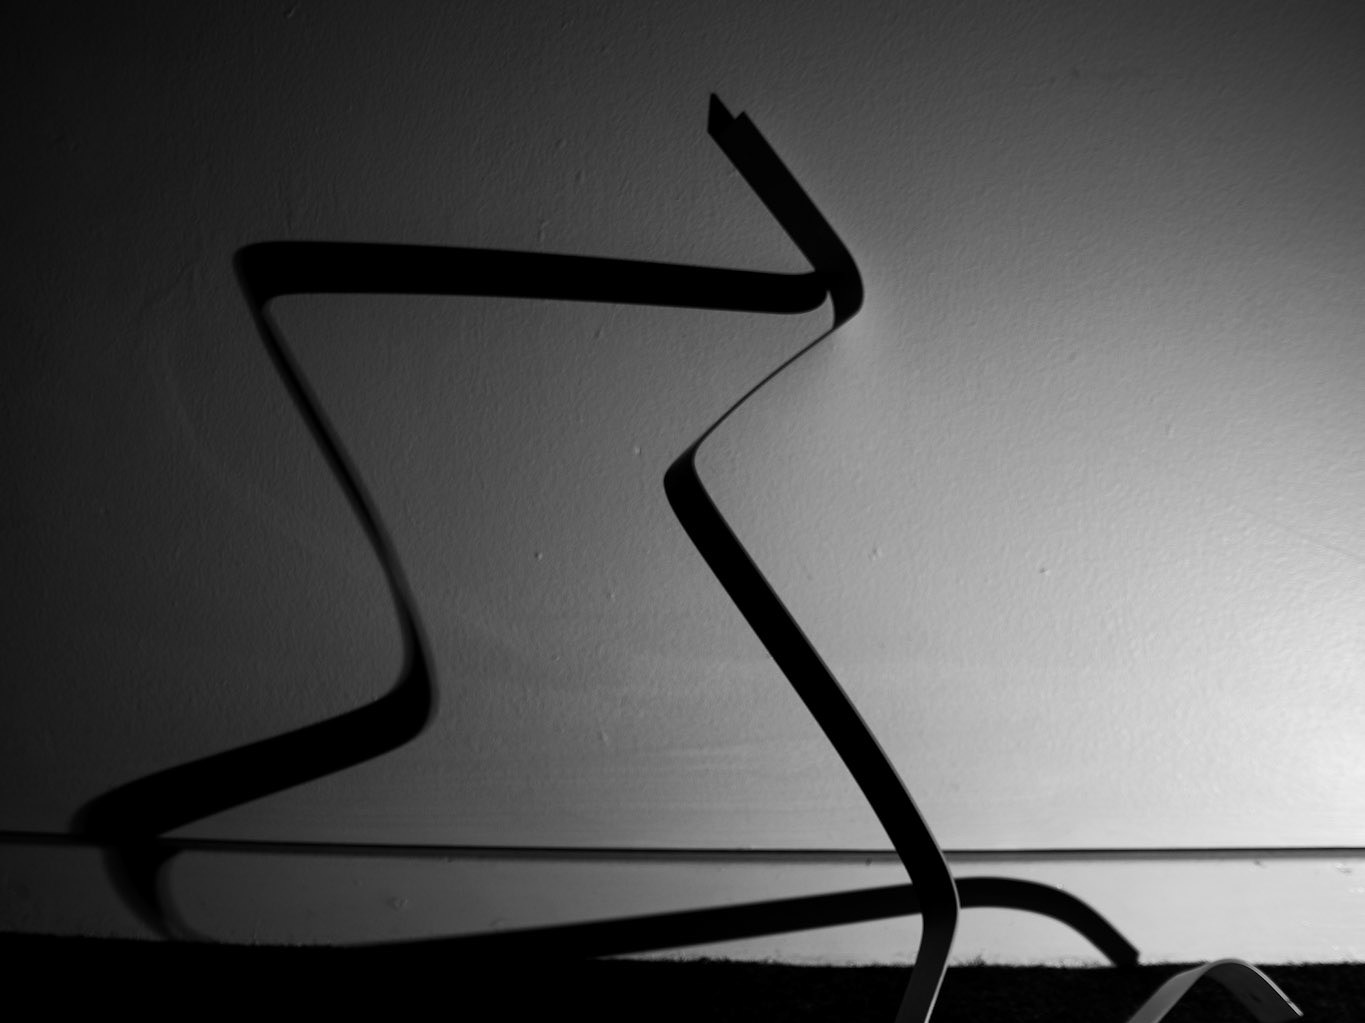
This system is one I want to take forwards however the composition of the design felt disconnected. I believe that I focused too heavily on including a curved motion reflecting the expression of my charcoal drawing from NOMA. This resulted in a awkward spiral step aesthetic.
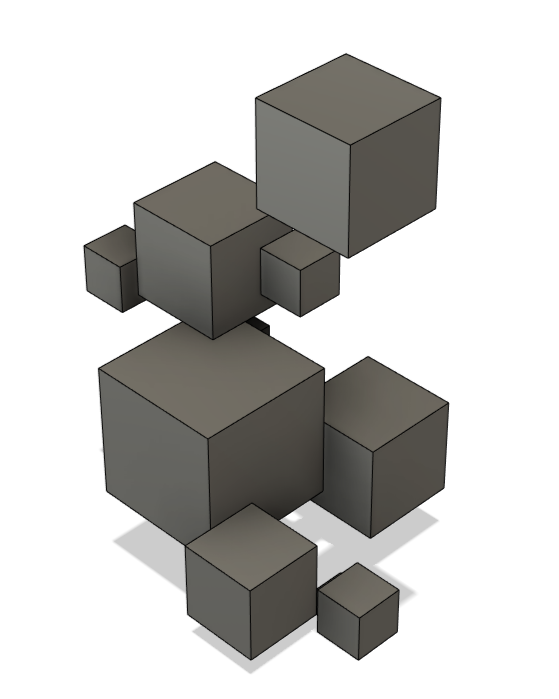
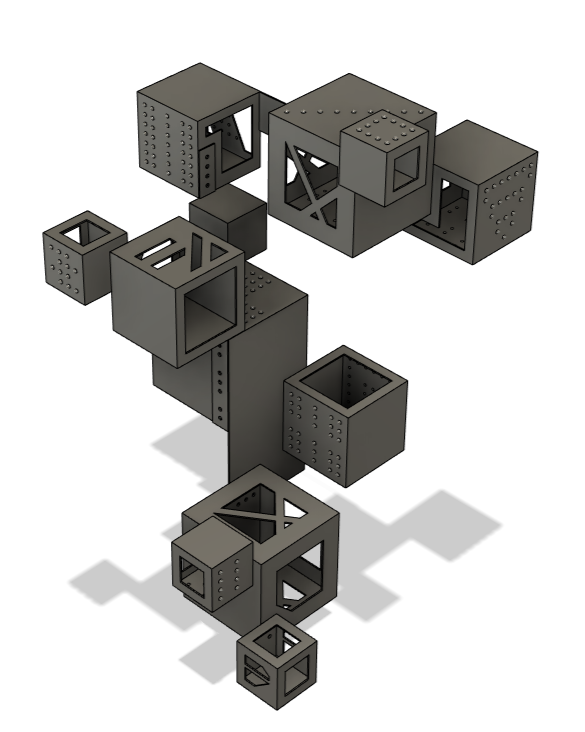
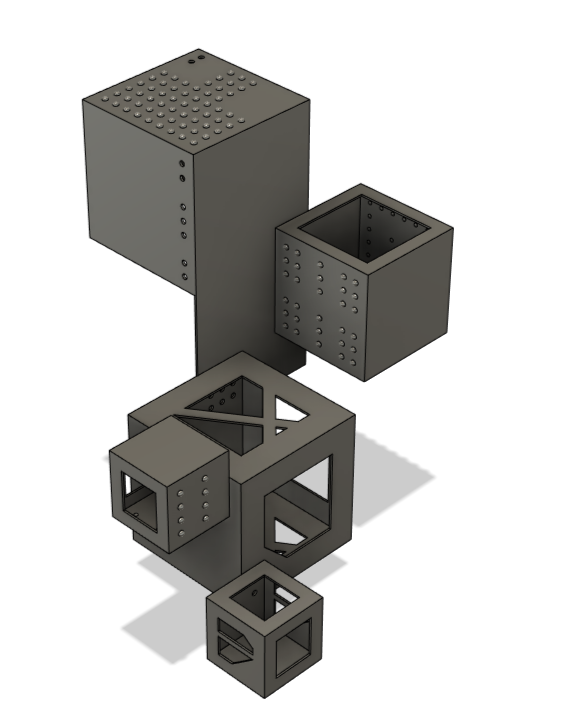
I created a third design returning to the ideas of a decisive plane and working in the X Y Z axis rather than trying to create motion. I explored using the steel cubes to extract the architectural elements of Castlefield and NOMA to create a micro world like object. Reflecting on my paper cube designs, I realised I like the small scale as it could be held and rotated to explore different components. Working in CAD helped with the design for this as I could easily move and rotate the individual cubes to constantly adjust the composition.
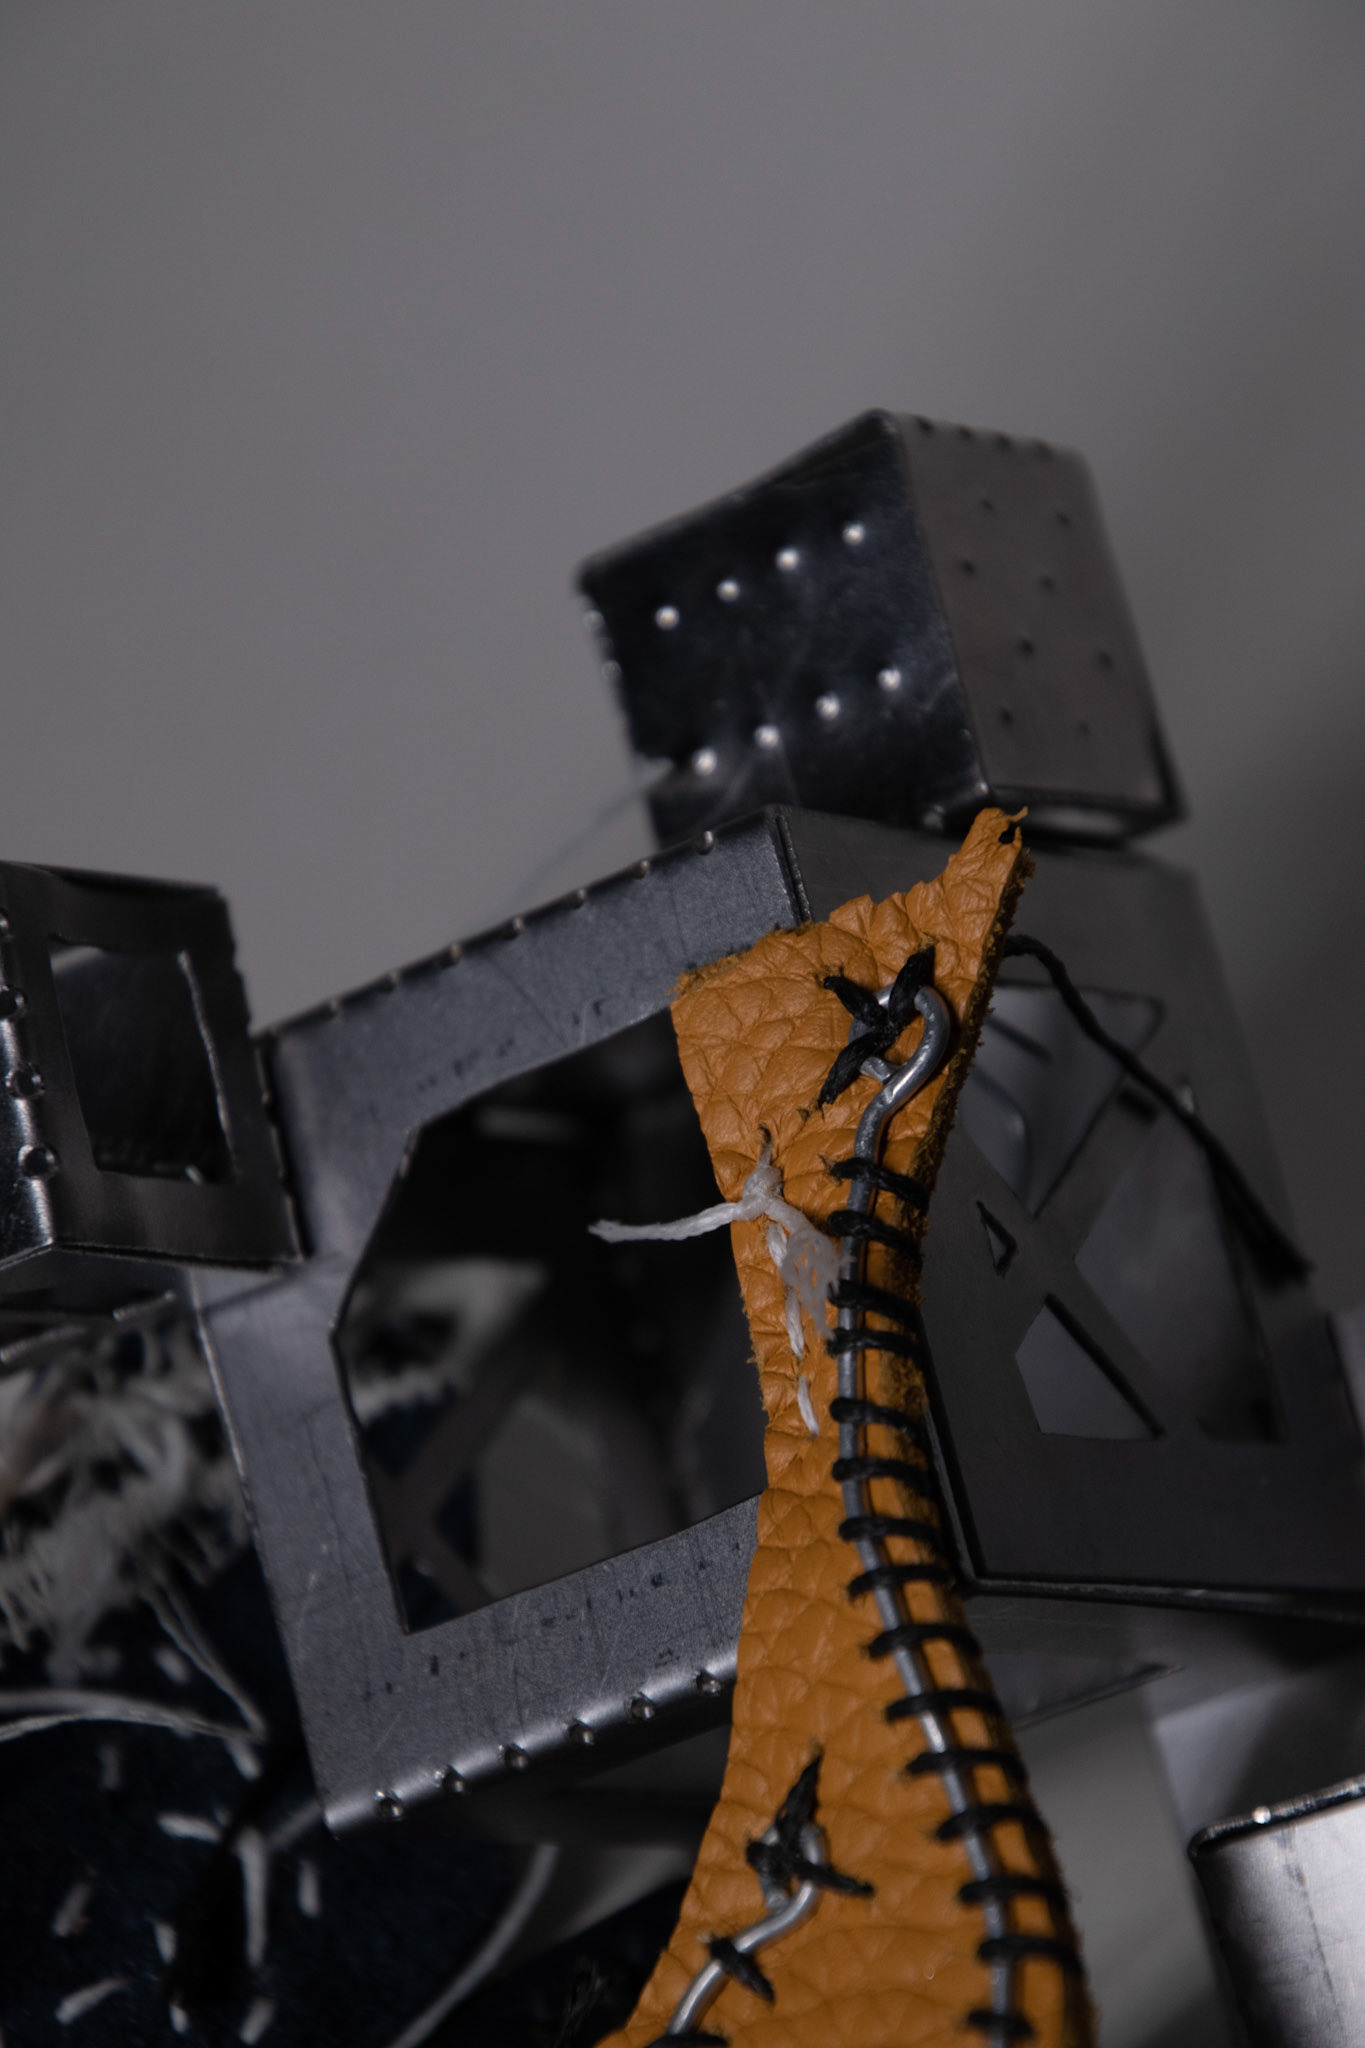
A key element of my design was to incorporate the visual architectural boundaries for Castlefield and NOMA. I used the same simplified cut out design I explored earlier and added in texture through patterned center-punched marks that reflect the rivets on the viaduct. One main part of this process was ensuring that the cubes could be folded using the brake press by leaving two faces whole. I also ensured to overlap the cubes or create extended areas so that the piece could be bound together. Furthermore, I added in holes in areas where I wanted leather and other materials to be stitched into the steel.

I integrated the physical boundaries from my photography into the faces of the cubes. I imported the images into fusion 360 and traced over them and extrude cut the negative space.


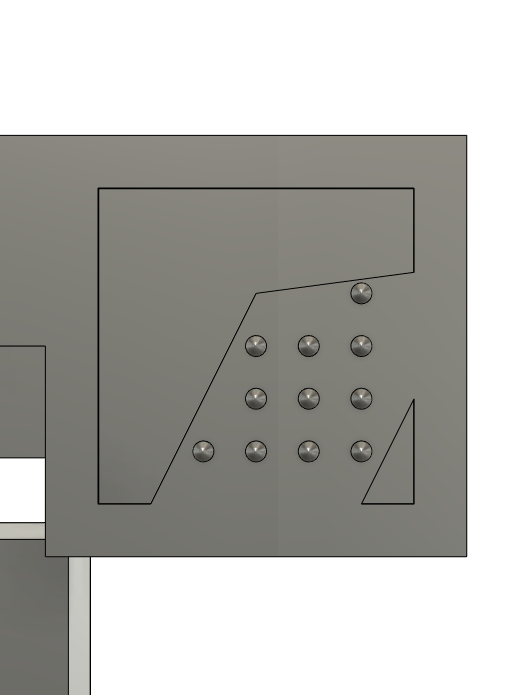


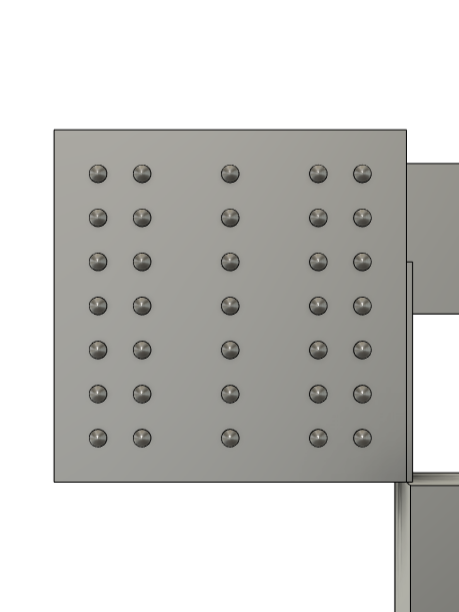

Throughout the design I created pattens of centre punched marks that emulate the rivets in the steel work at Castlefield.

As the design is so large and complex, I reduced the area that I was going to make to the bottom half. I chose this area as it incorporated a range of intricate cut outs and a variety of connections. Also, I think that the composition still creates unity whilst allowing the viewer to explore the object.

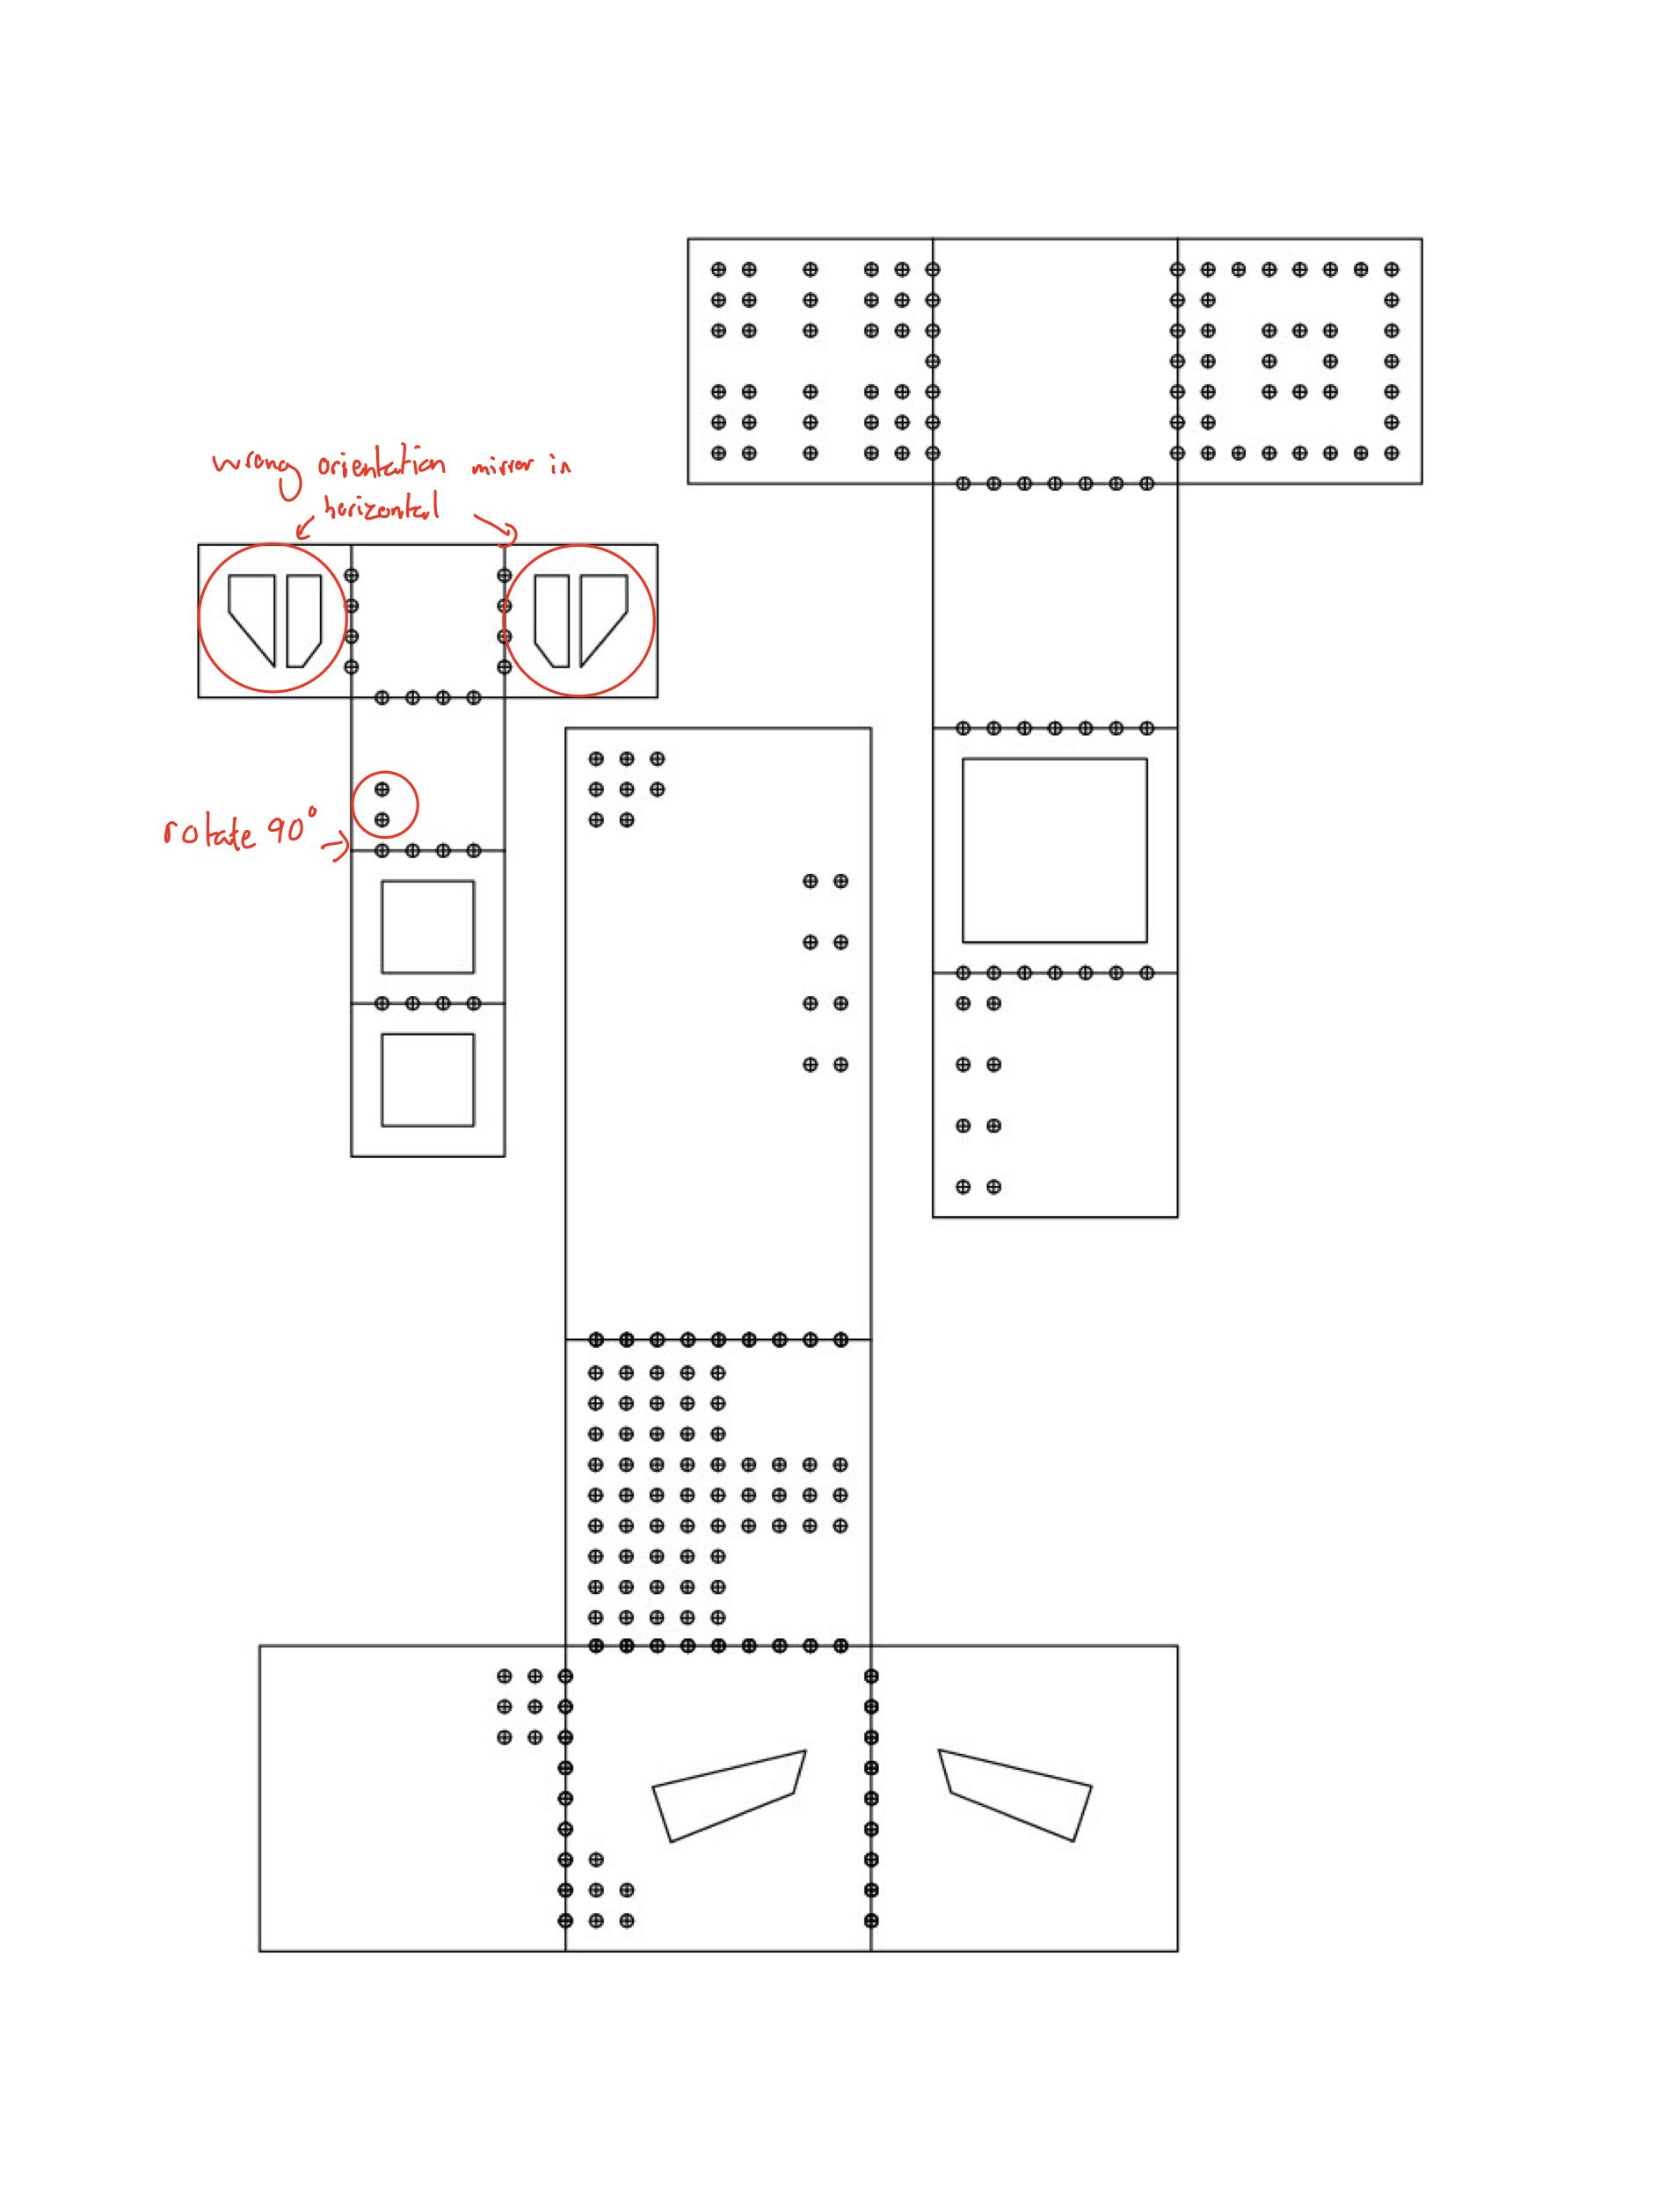
Creating a series of nets for the chosen design was harder than I initially thought due to the complexity of each piece. having to rotate and work out have orientation and location of each component took the most time. I created a cardboard test of the template to test if the connection holes lined up and all the cut outs and pattens were correct. The first test showed many mistakes which I then corrected.


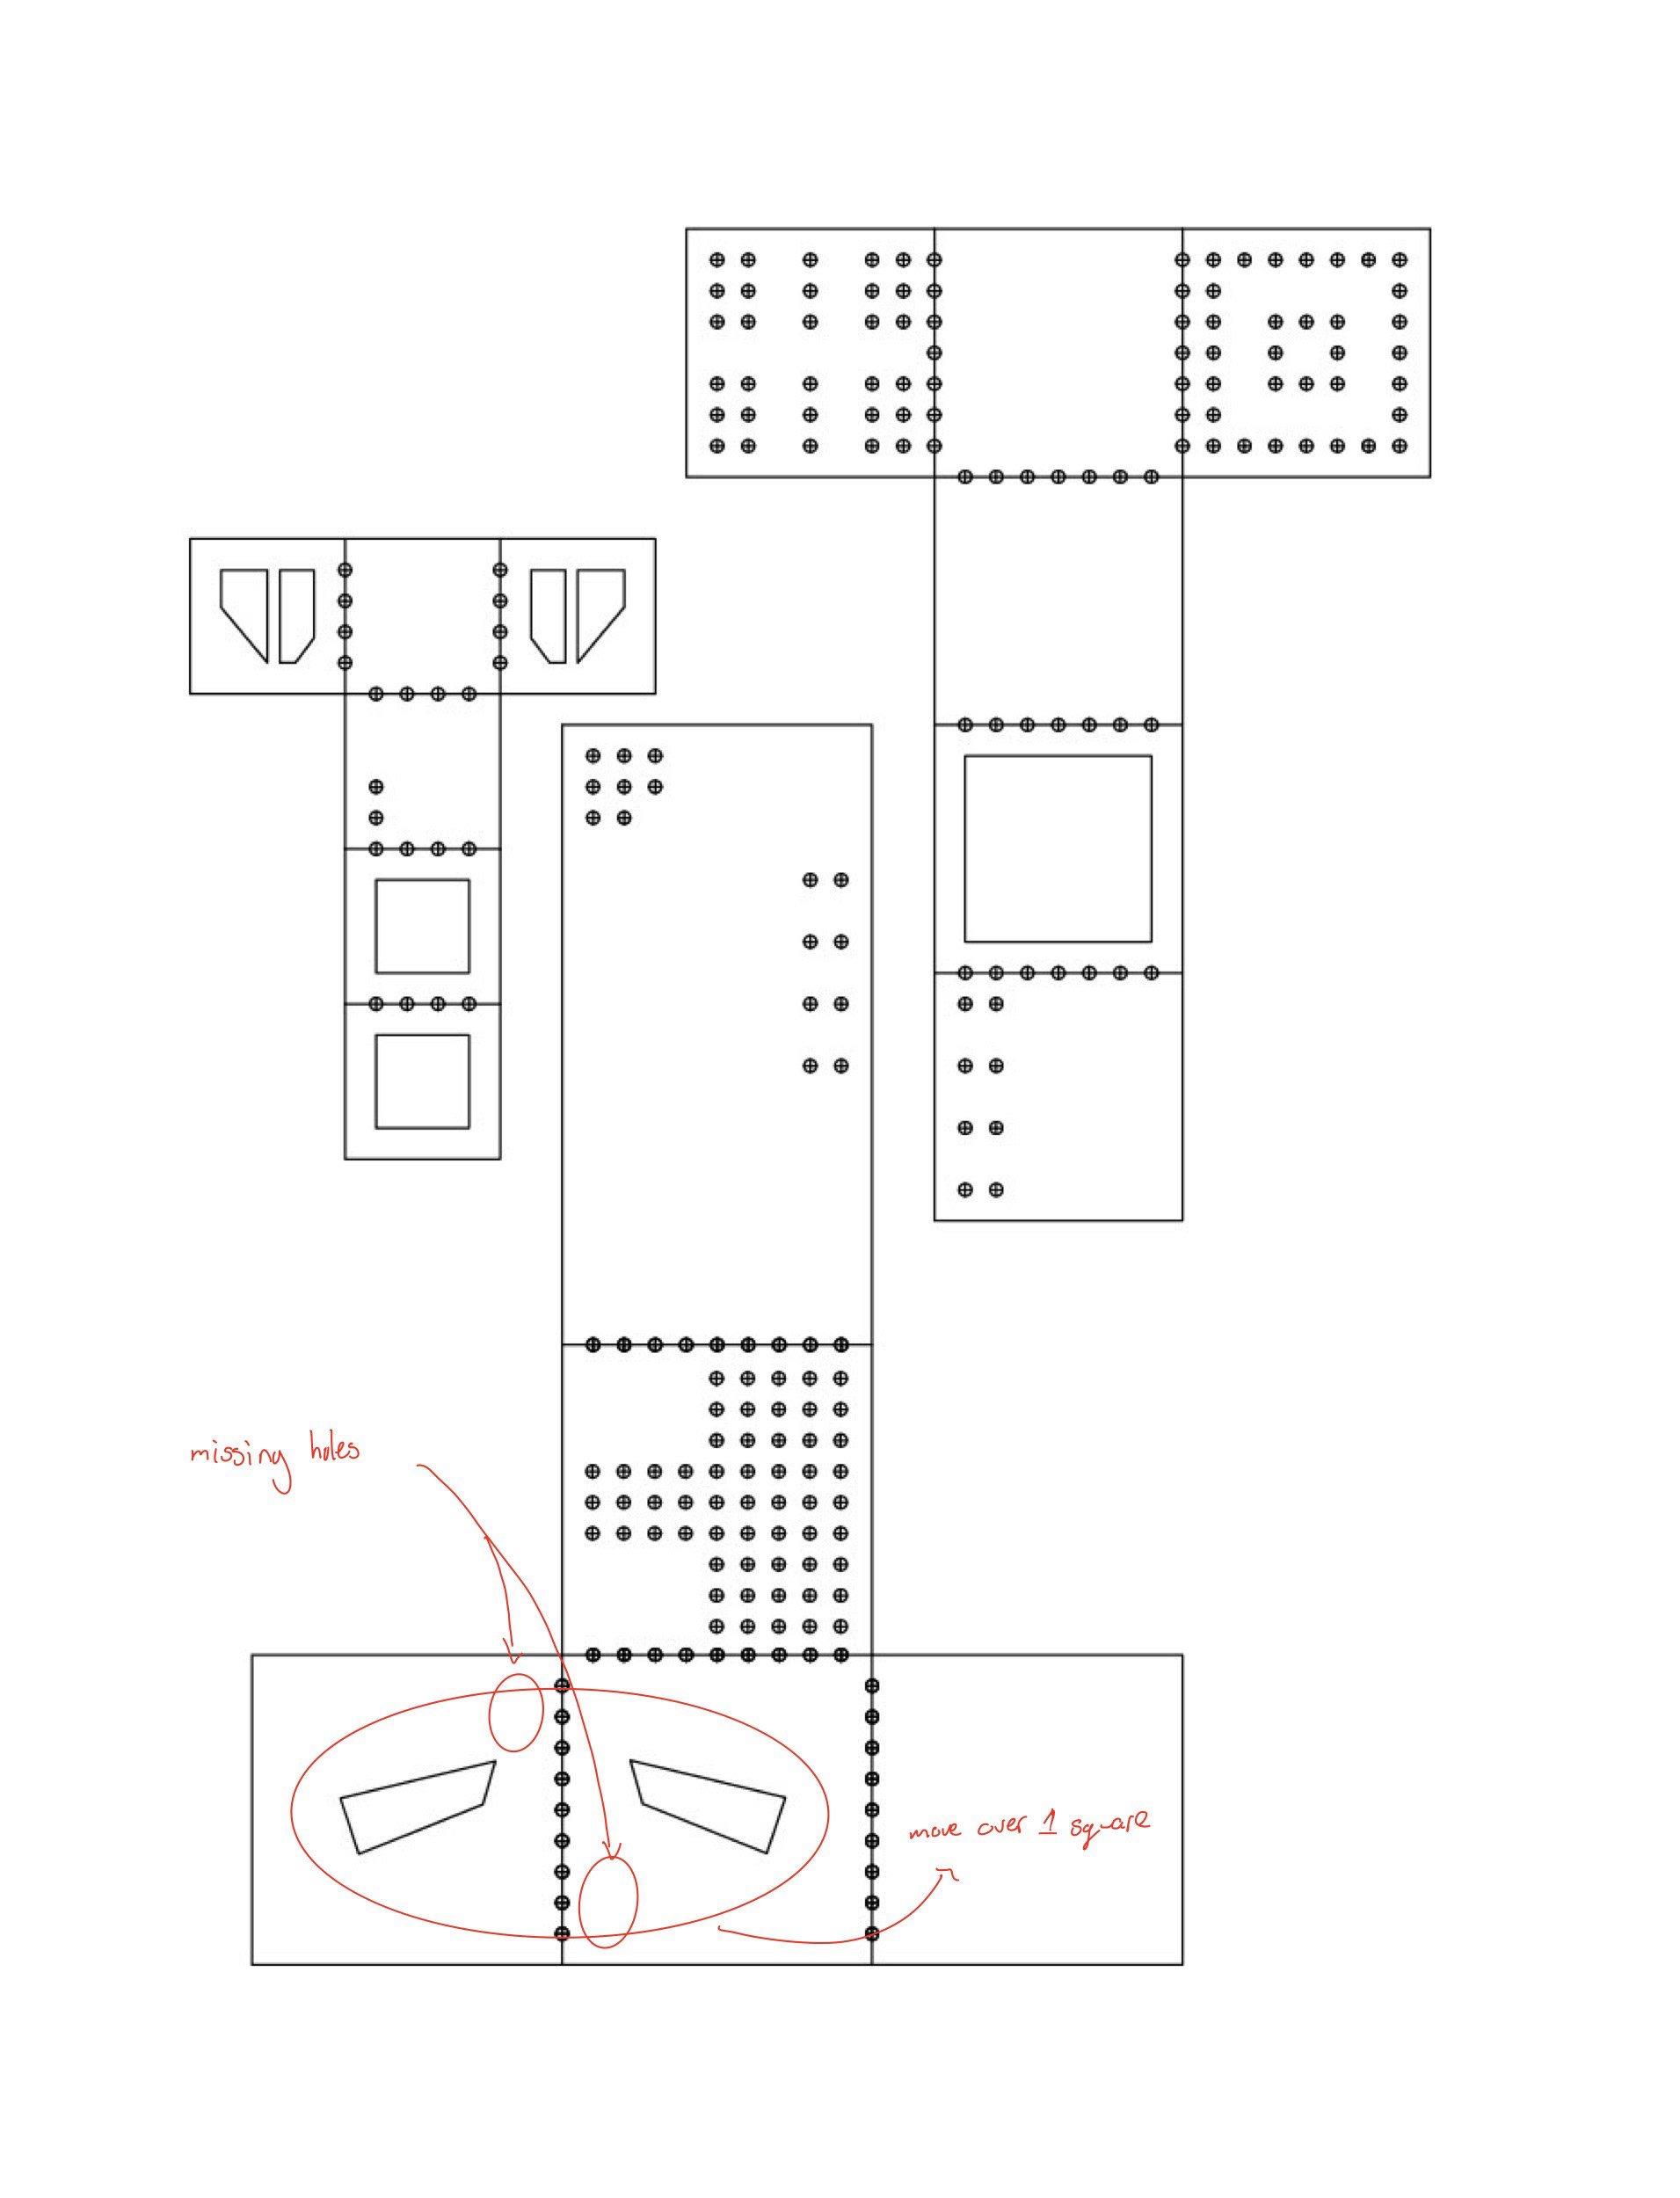
Second cardboard test.


Iteration of nets


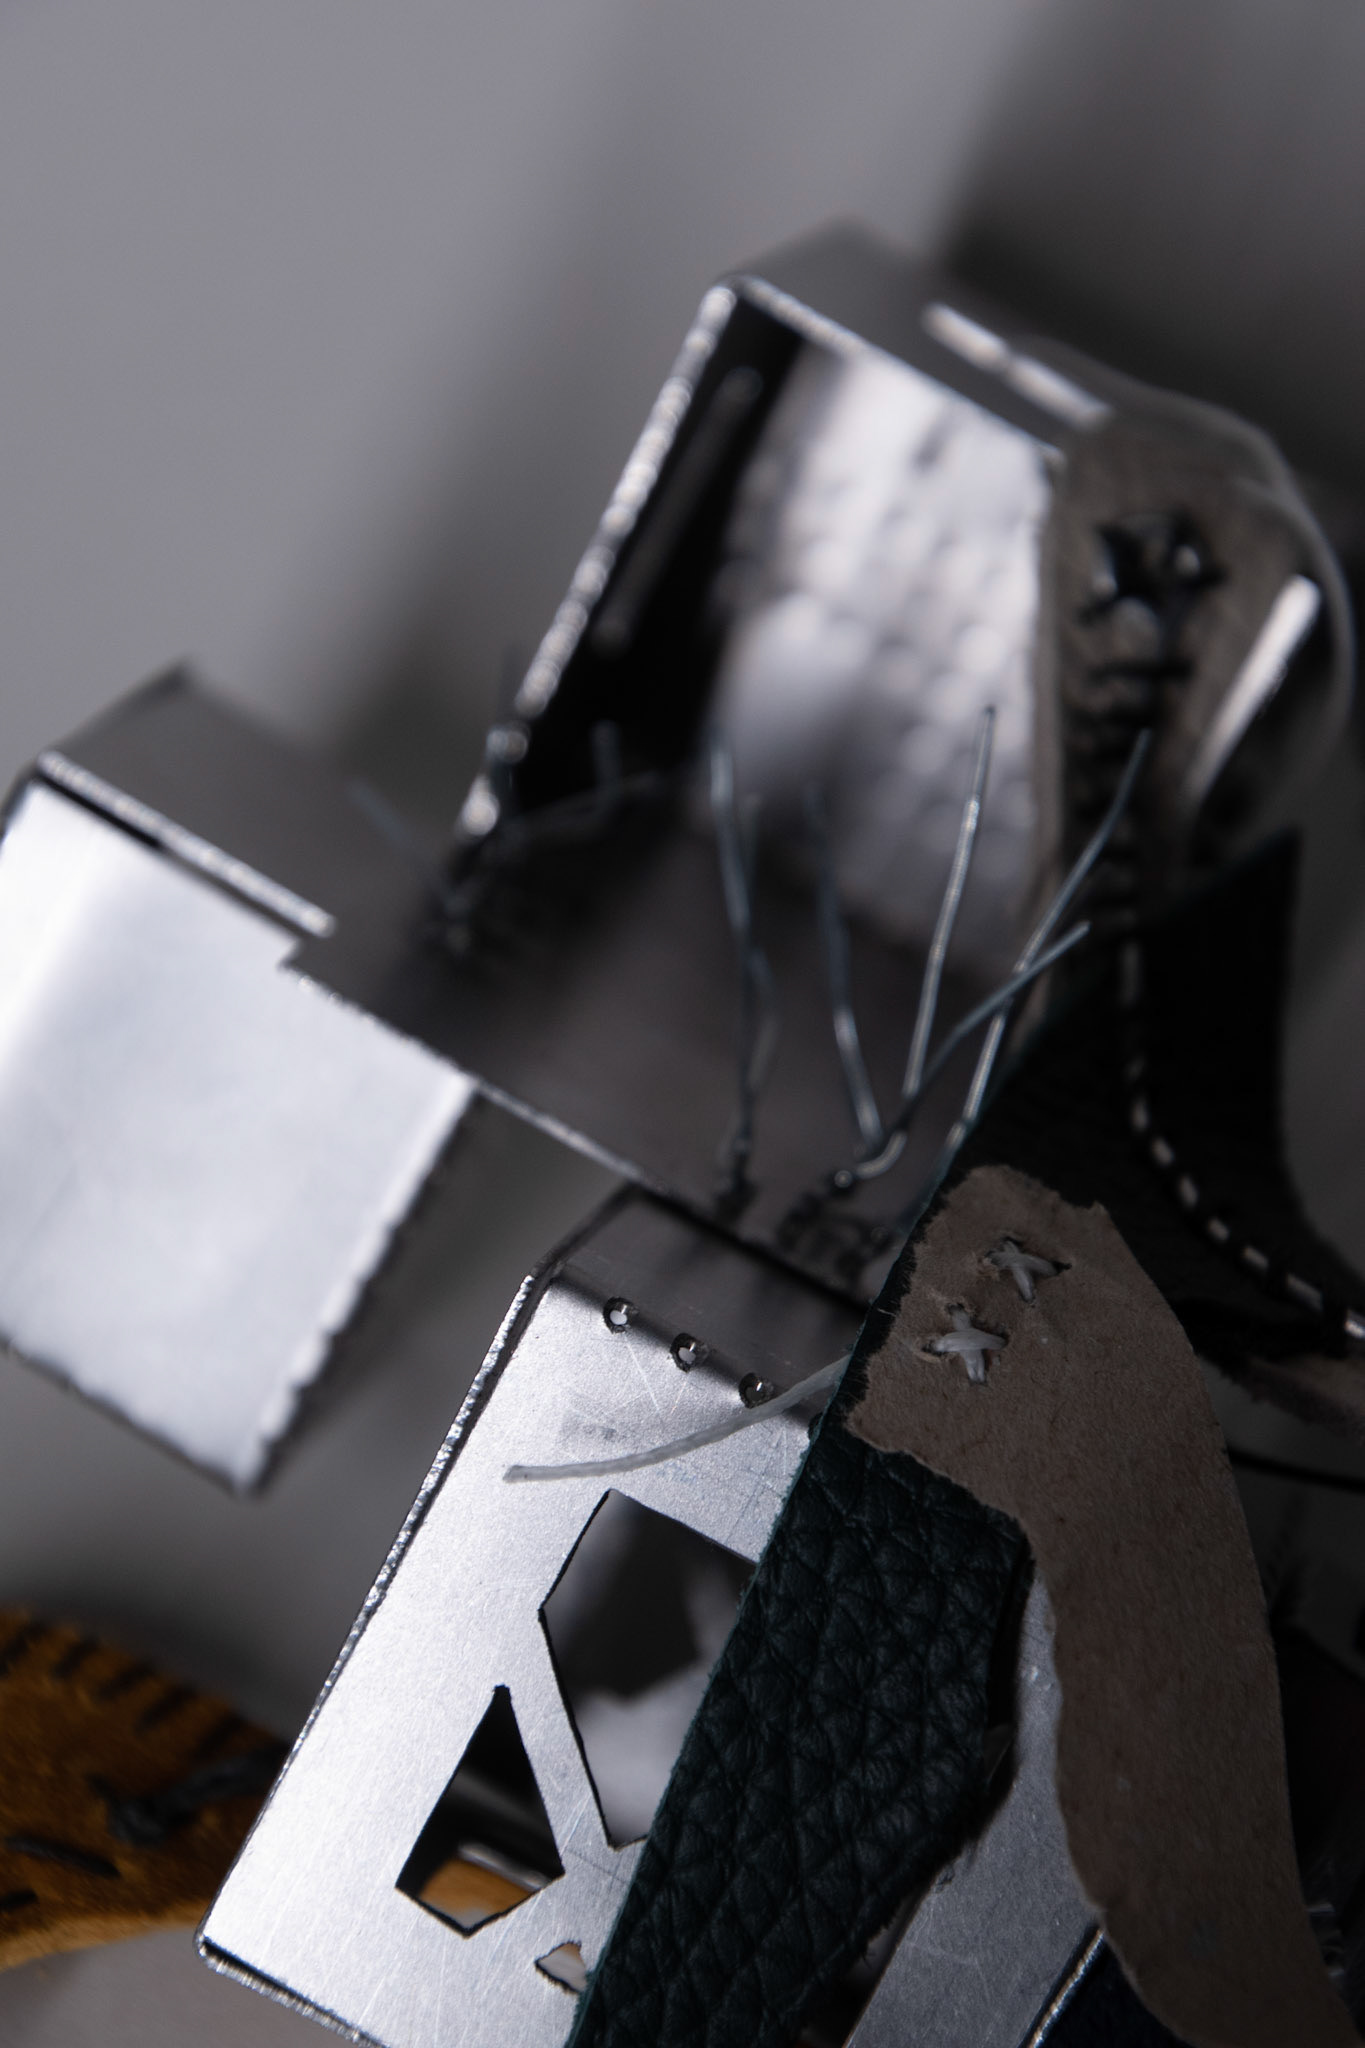
Once I had corrected all the nets, I then cut the templates out of 0.7mm steel using the metal bandsaw and a piercing saw for the internal sections. I also centre punched the surface for the patterned areas; drilled holes for the connections and to weaken the metal at the bends. I filed all the edges to clean up the burs and flatten any imprecise cut lines.


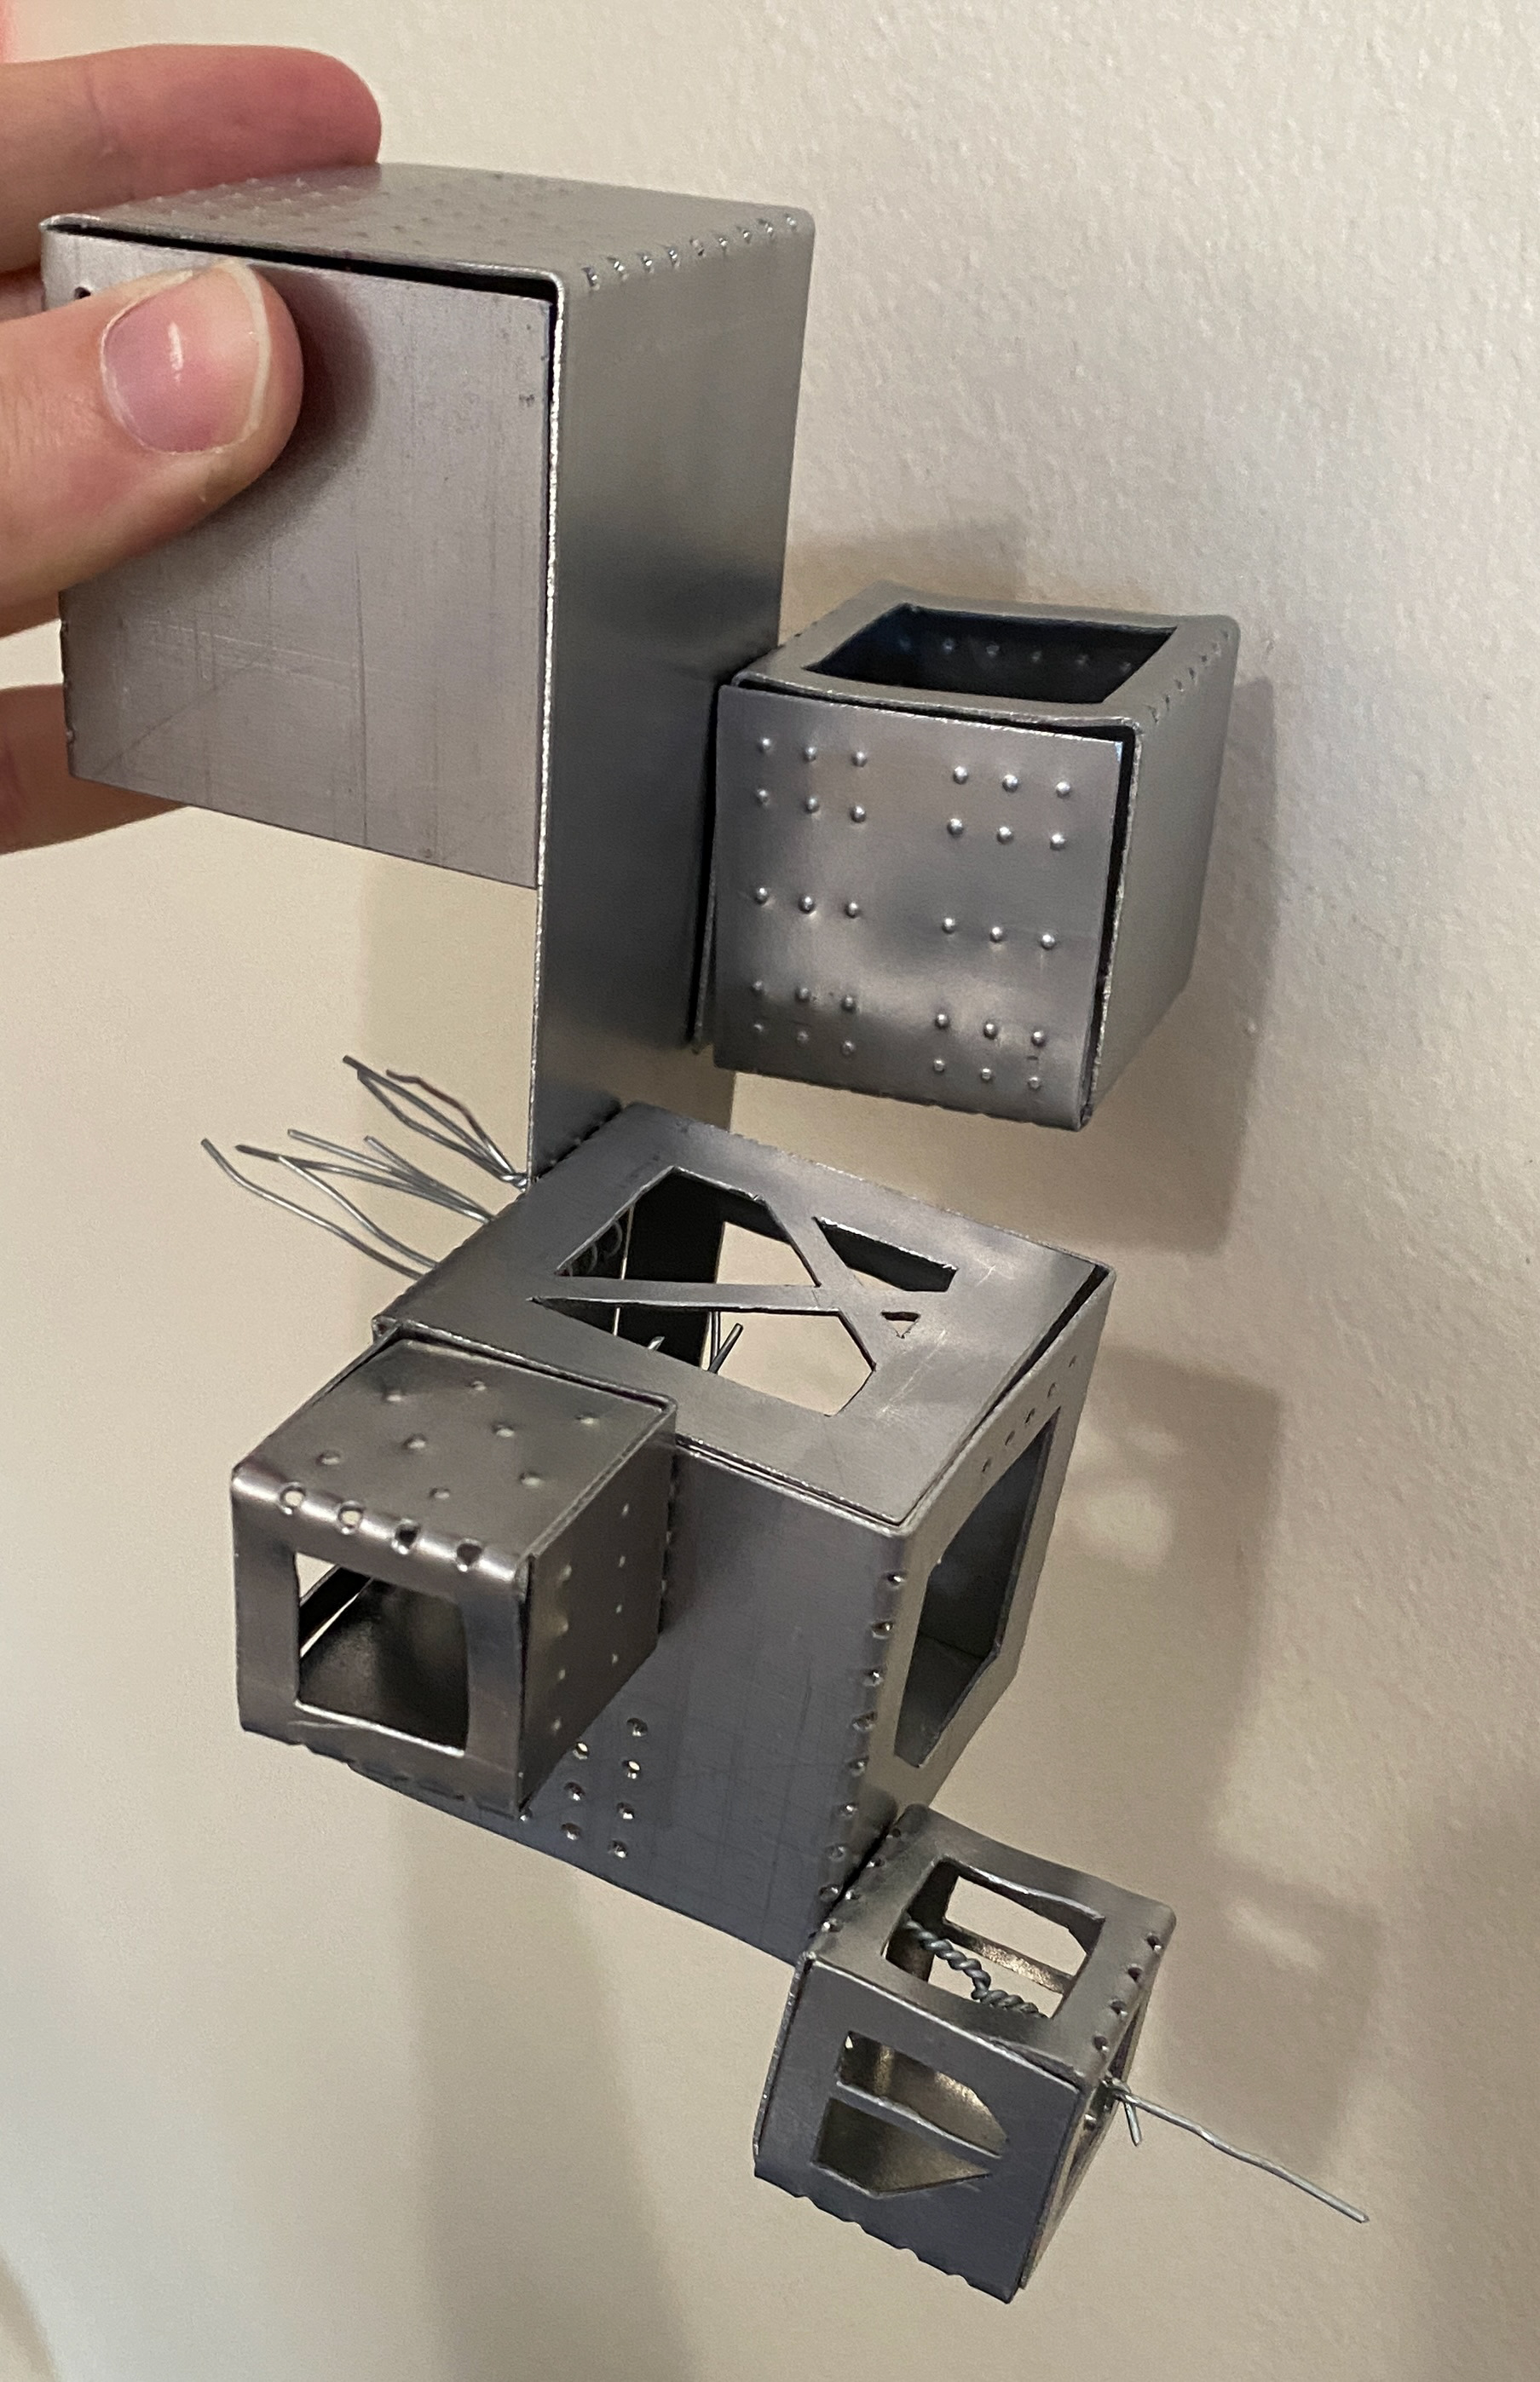
When folding the smaller cubes, the break misshaped some of the faces as the space between the faces were too small. Therefore, after all sides that could be folded, I hammered these flat again. I also found that bending the edge of the last fold over a square steel block created the start of a neater fold, which could then be hammered closed.
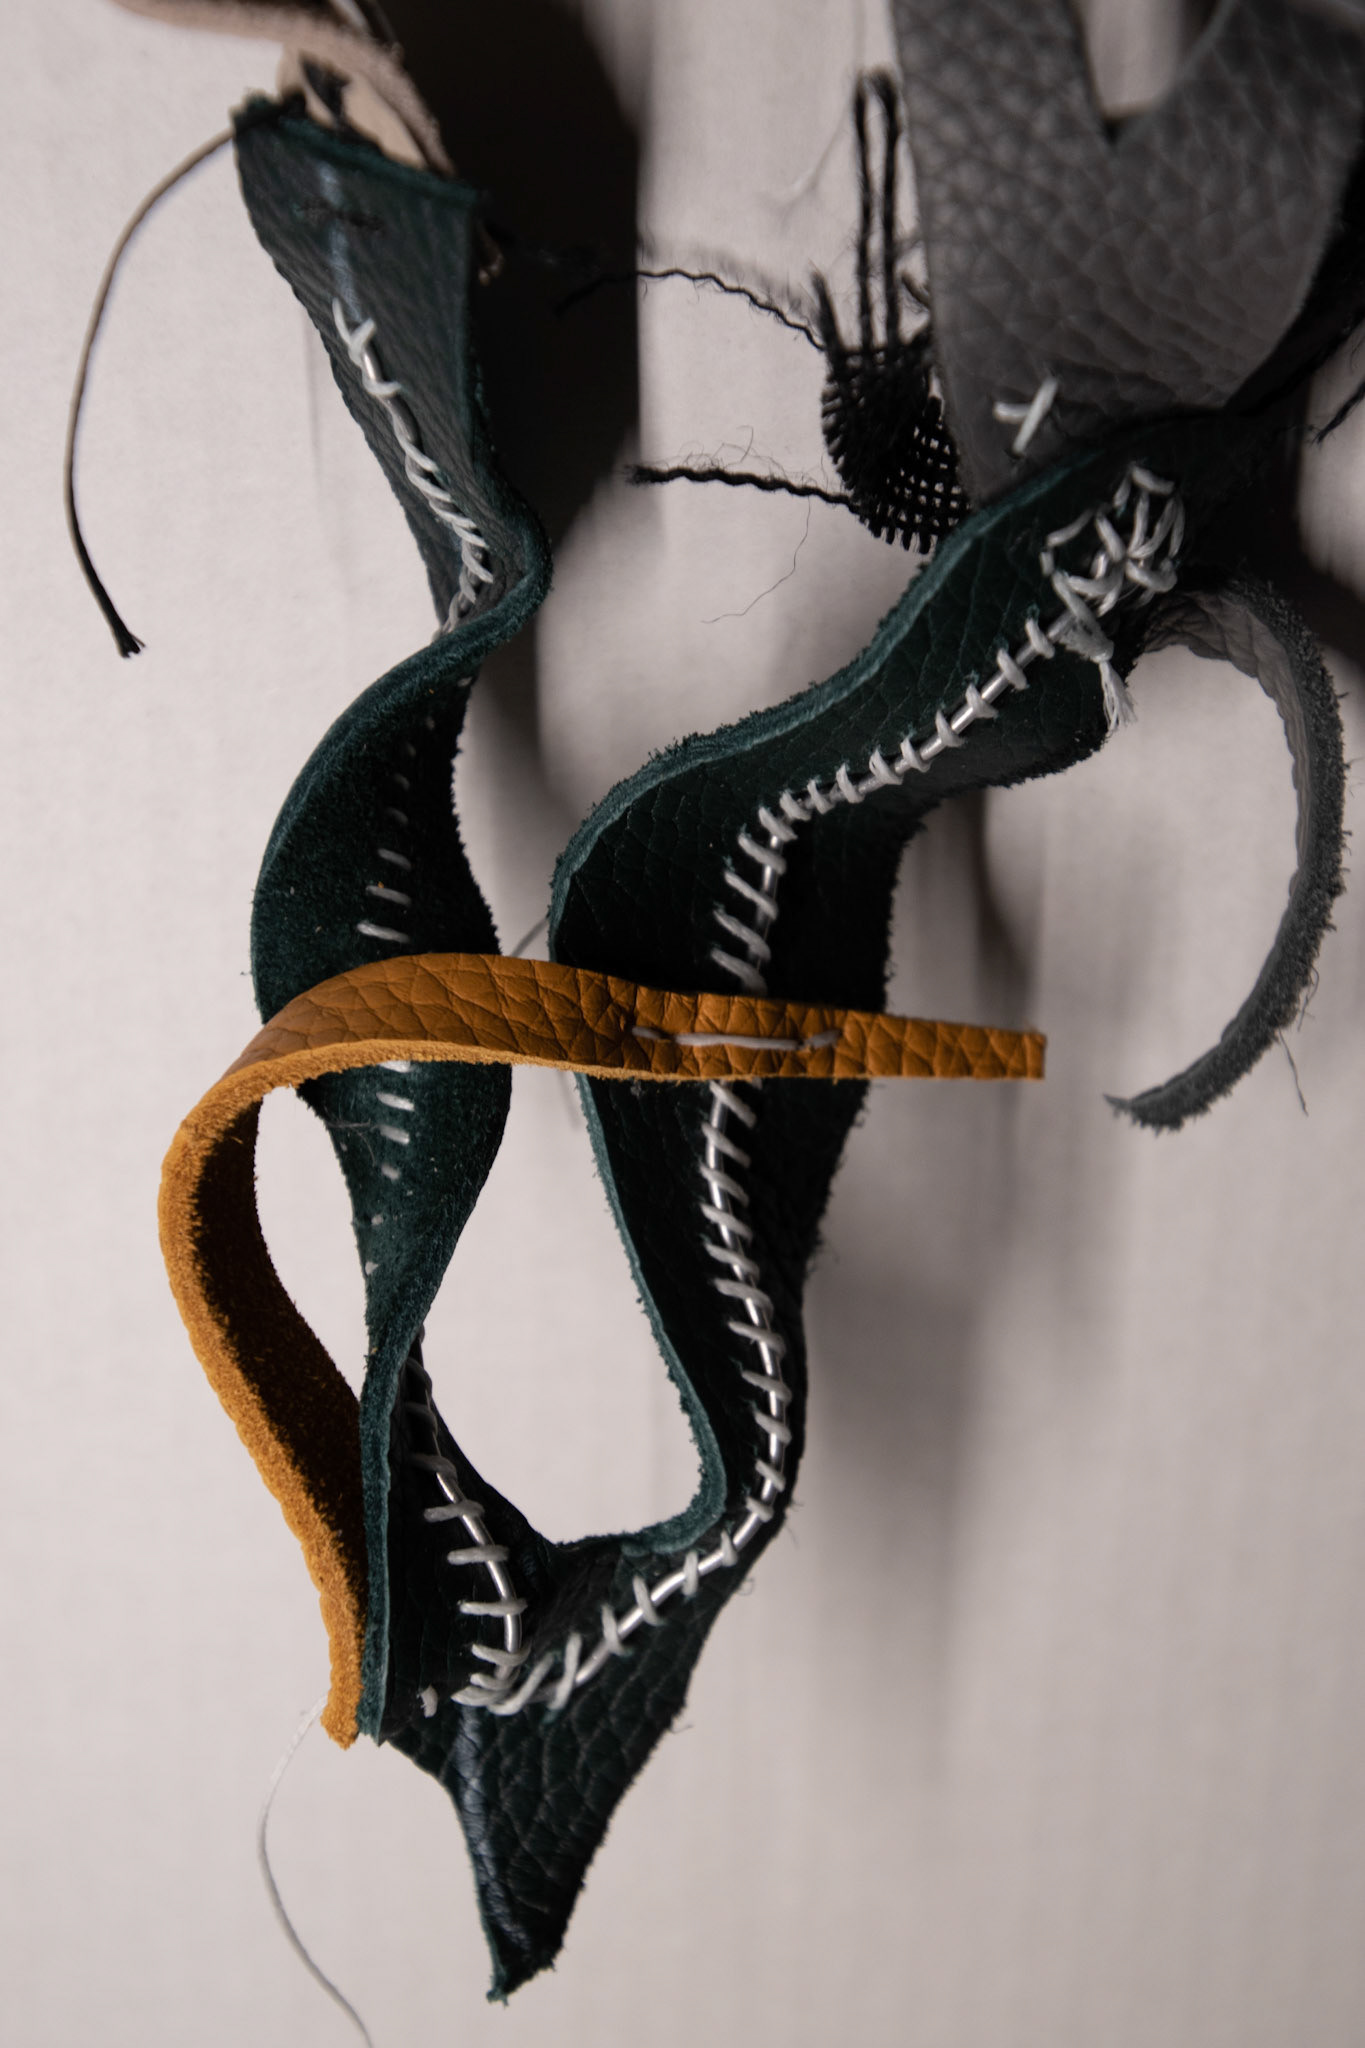
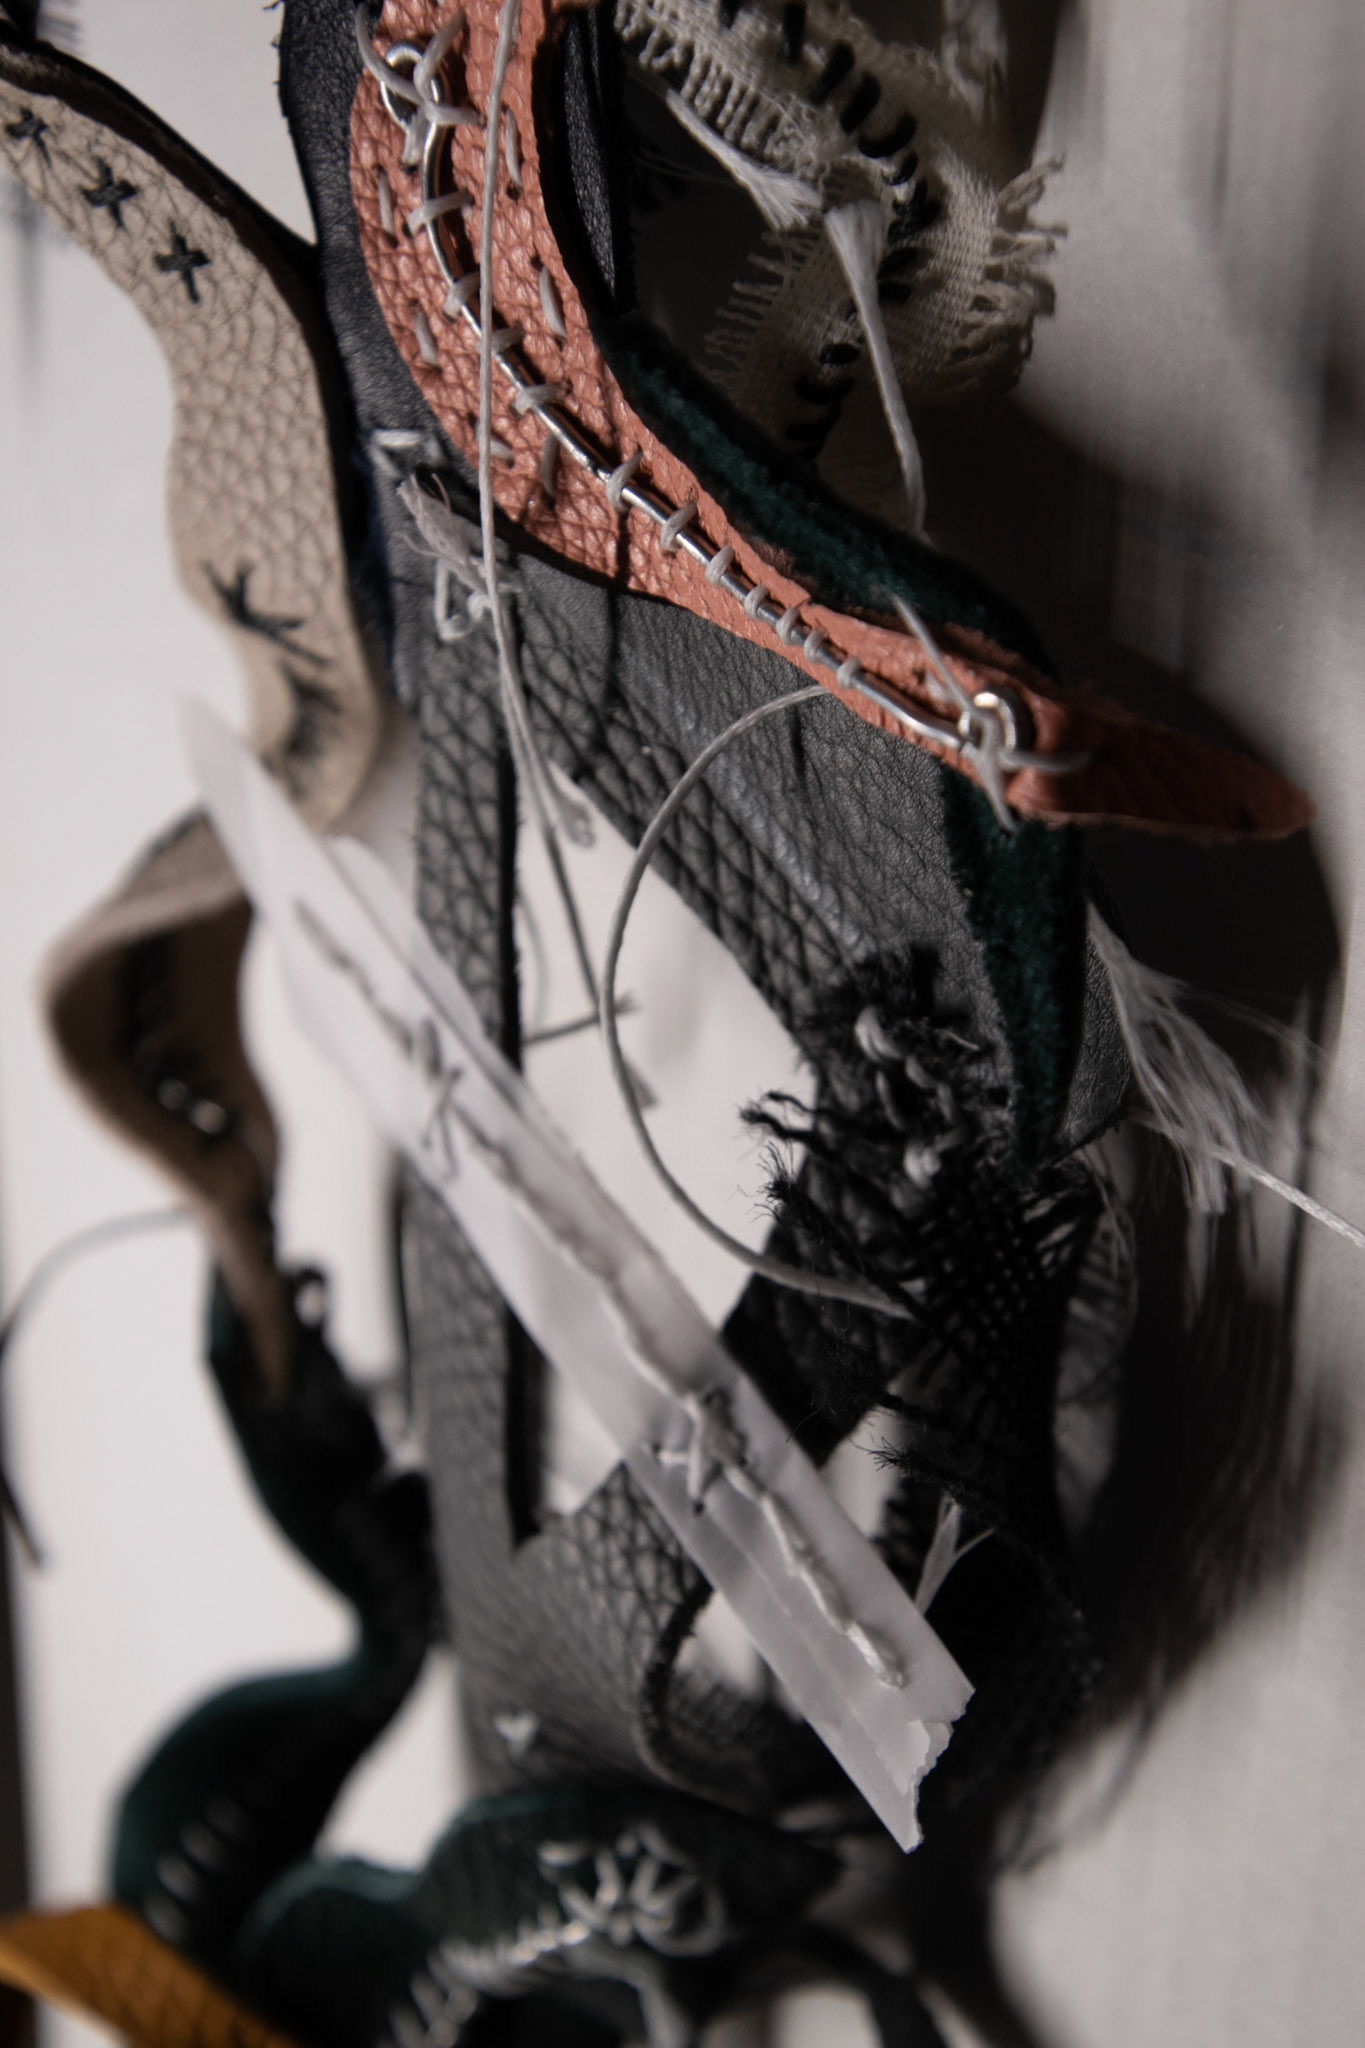
After each cube was folded, I used steel wire to connect them together by threading it through the pre-drilled holes and twisting it tight with pliers. This process was very difficult as in some areas there wasn't enough room for my hands to fit inside the cubes to, I had to relied on using the pliers only. Also, the wire could only be twisted so much before it was work hardened too far and snapped. I had to learn how far I could push the wire to achieve a tight and secure connection. I then worked directly onto the structure creating a composition using leather as a base structure and introducing other fabrics and papers were a less heavy and intrusive material was needed. I used my original charcoal drawing alongside my initial leather and photo experiments to capture dynamic movement.