Contemporary soldered chain making.
I wanted to initially look at furthering and refining my skills making soldered chain as this was the most accessible process which I already understood. Also, I wanted to explore copper chain making as I could solder additional elements onto it to create further narrative.
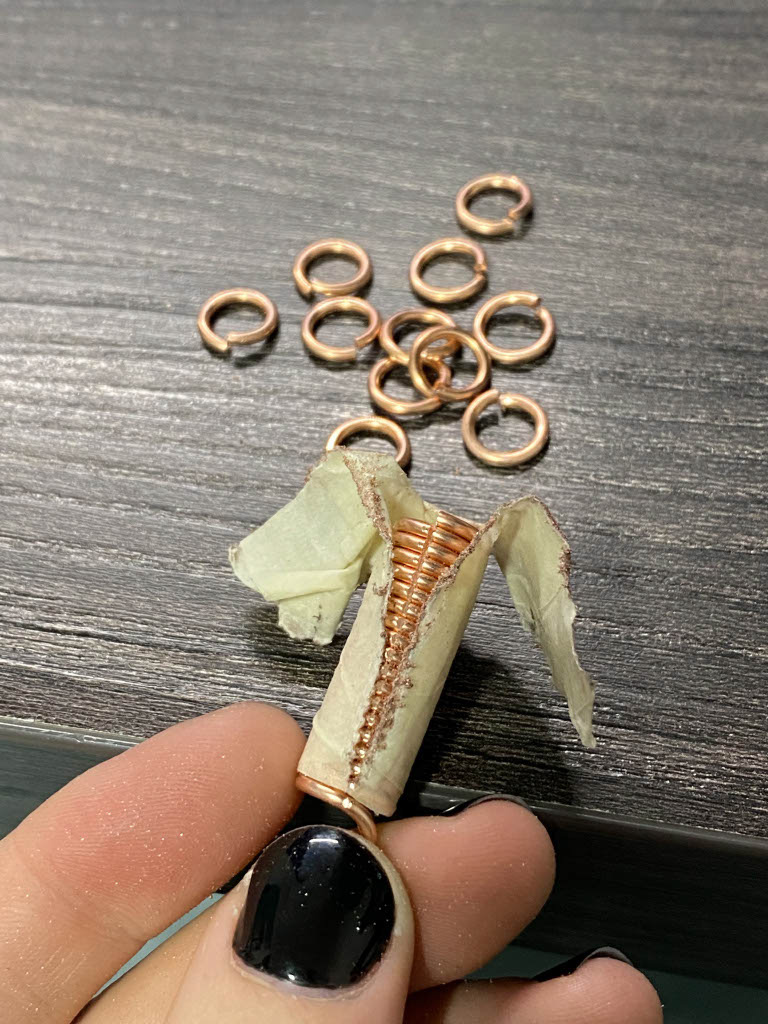
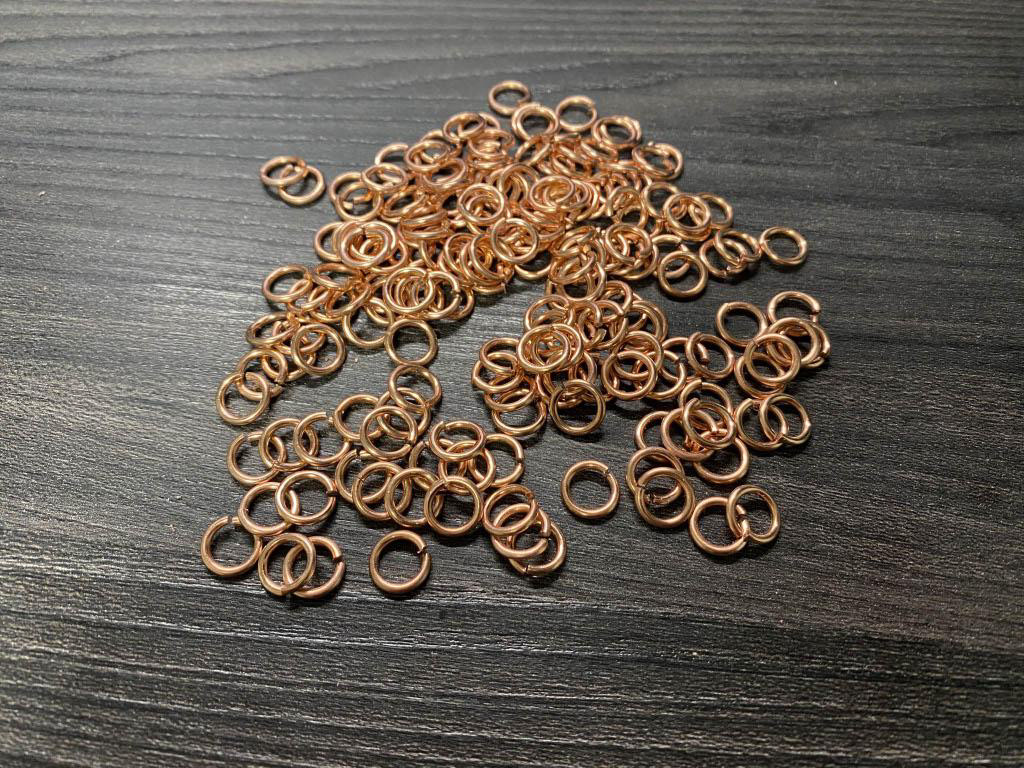

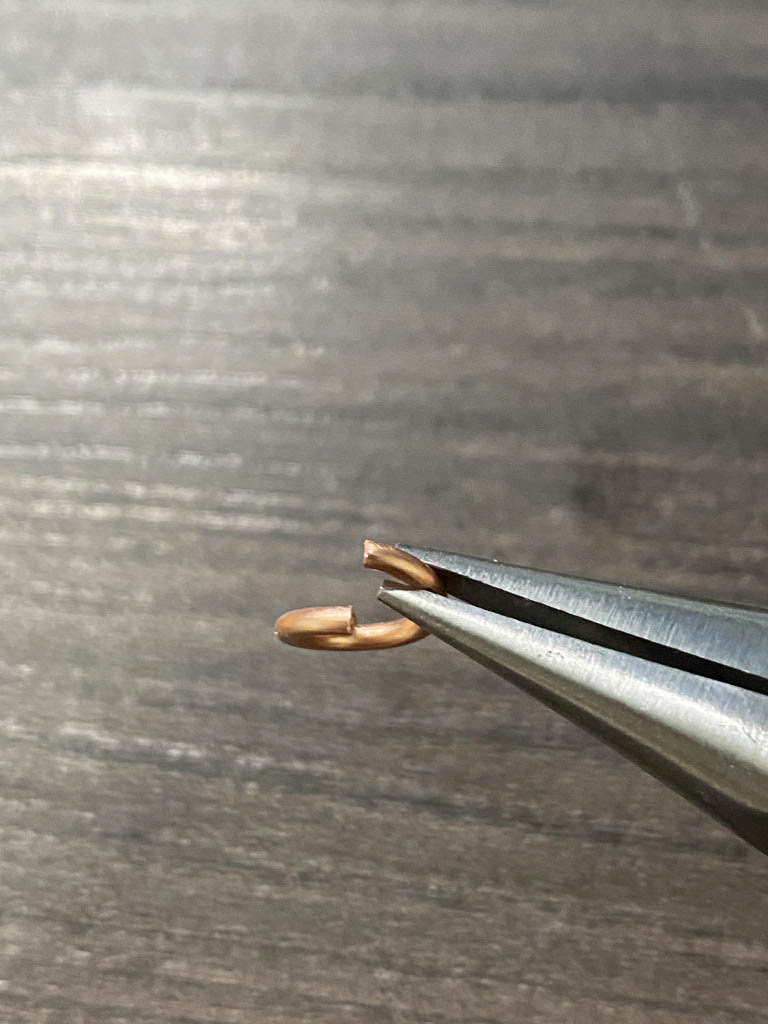
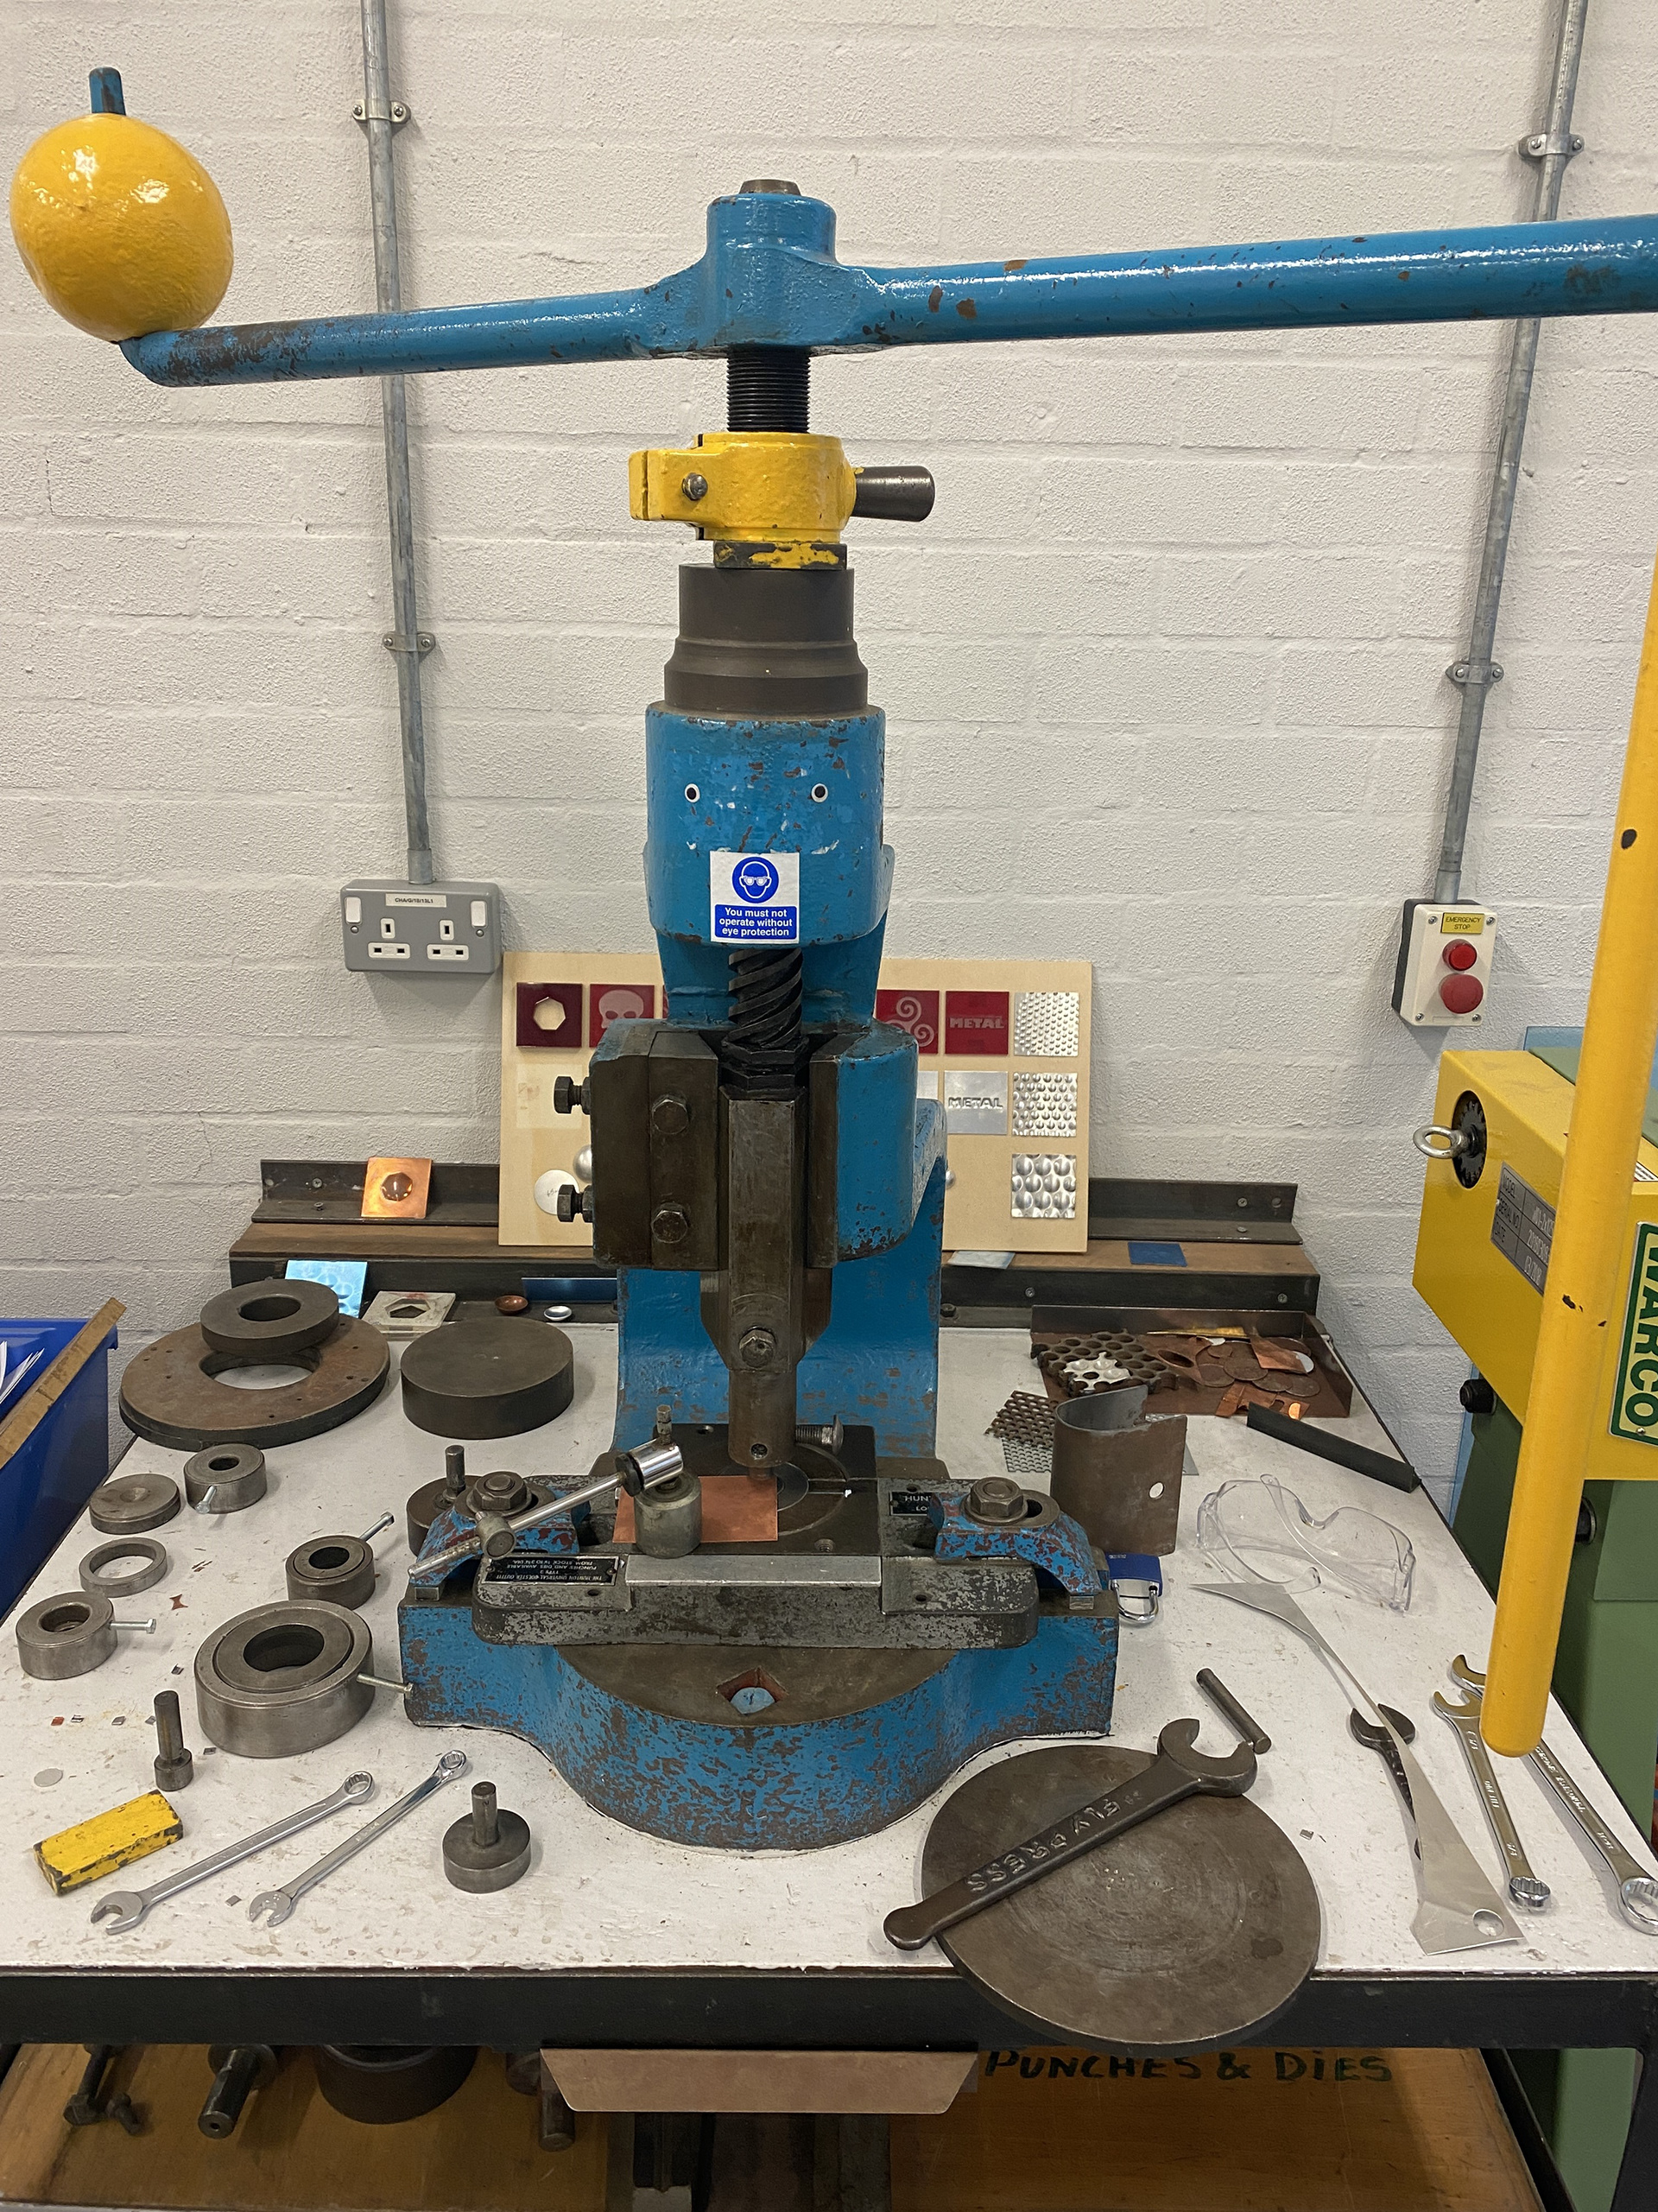
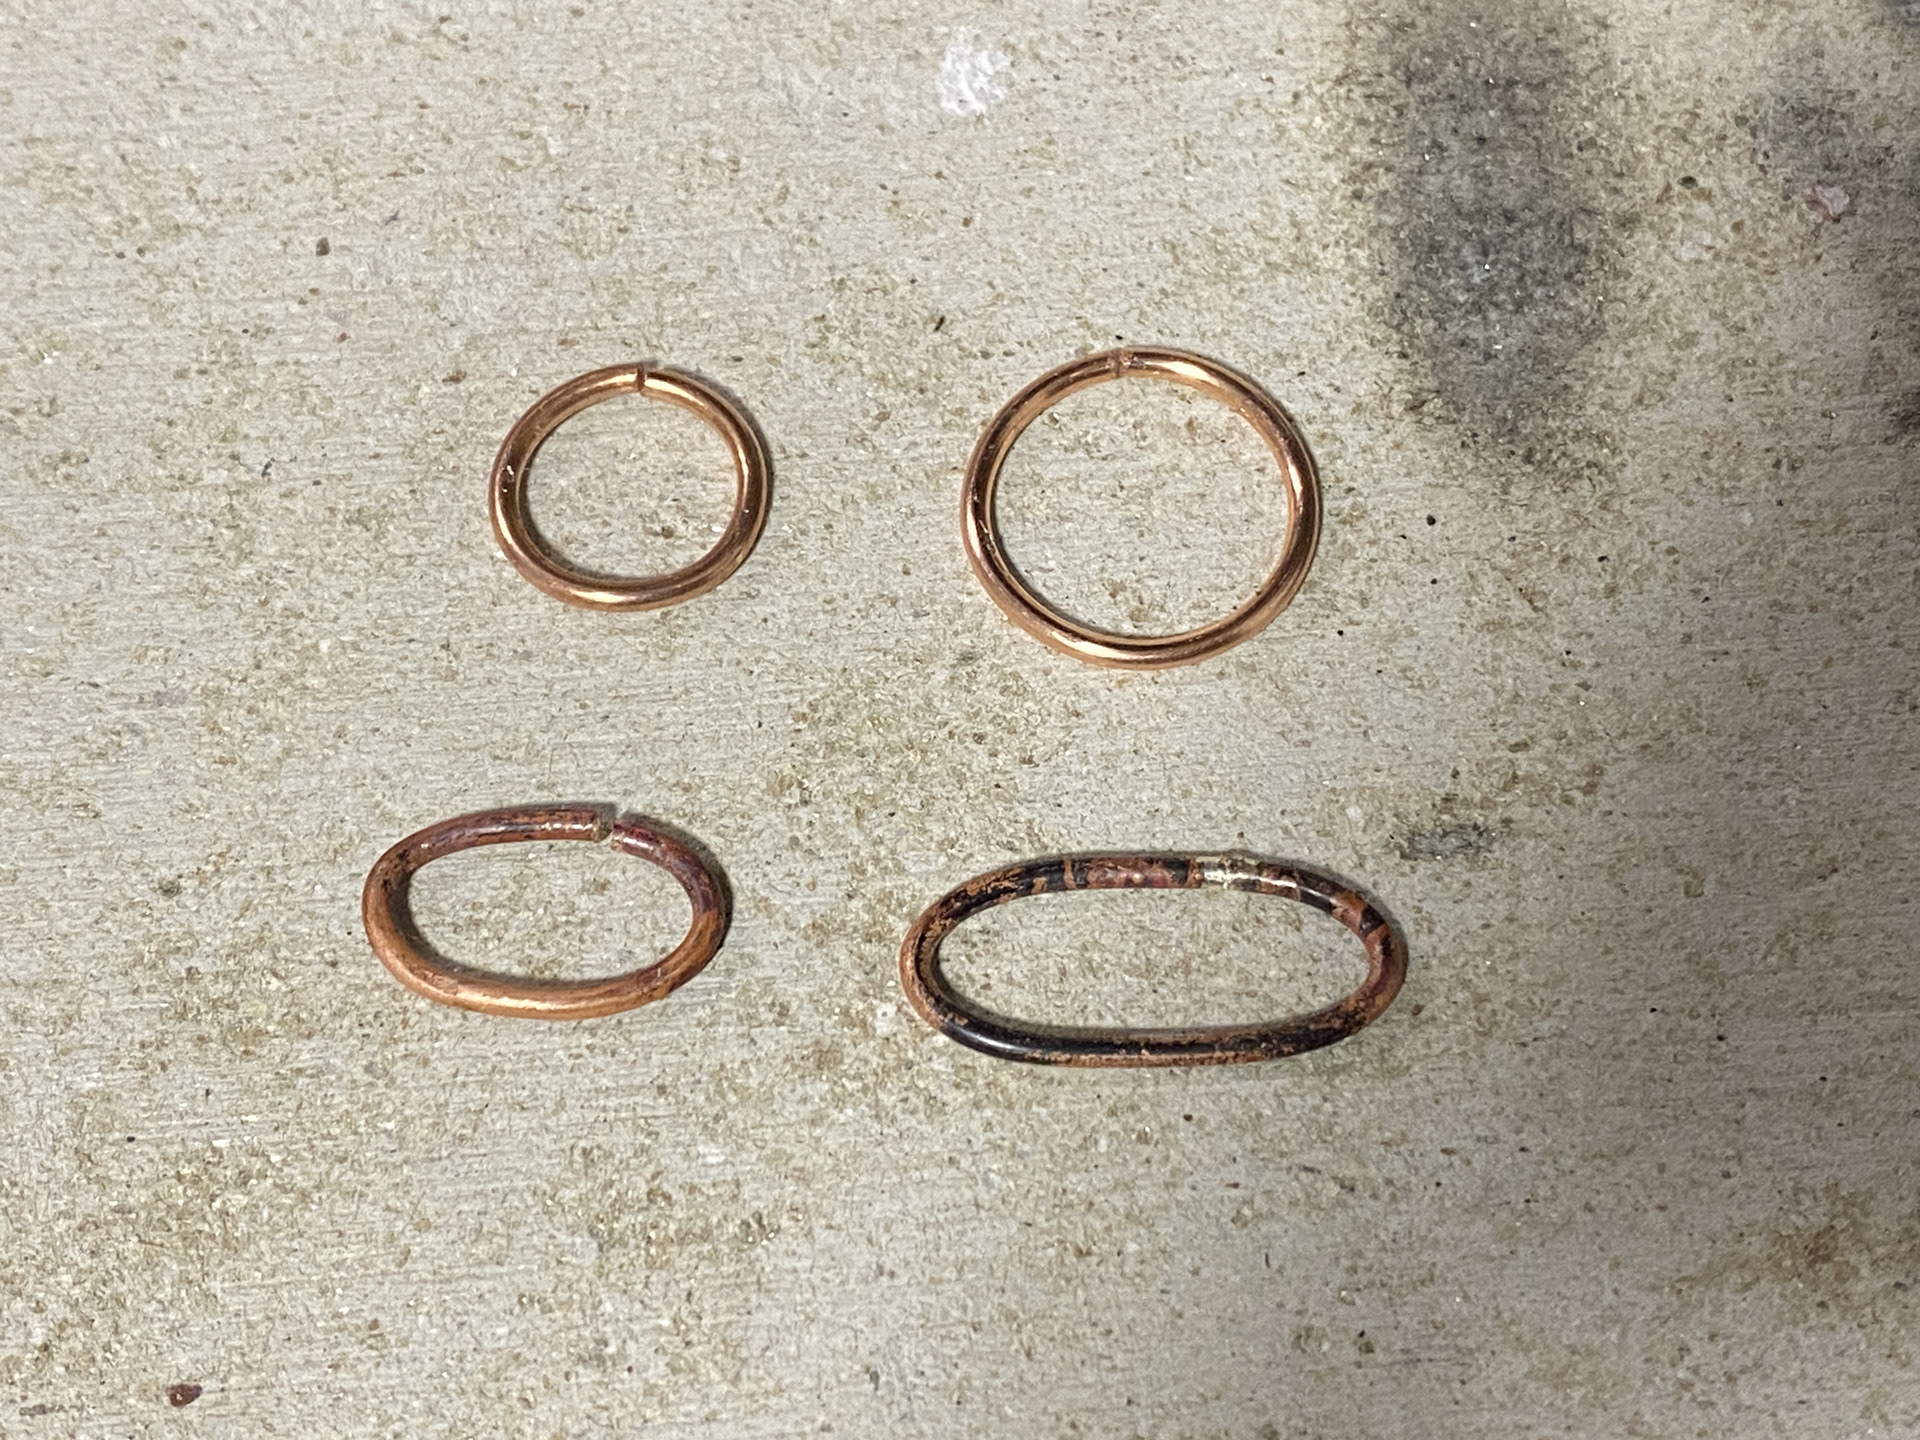
Testing a contemporary jewellery chain making process using 1.6mm copper wire and solder. First, I spiral the wire around an 8mm mandrel using a drill and then cut these coils into jump rings using a jewellers saw. I found that wrapping the coils in 2 or 3 layers of masking tape helps to hold it together and reduces movement when pushing and pulling the blade. After cutting I open each ring using pliers and then link them together ensuring a tight and snug alignment to give a clean solder.

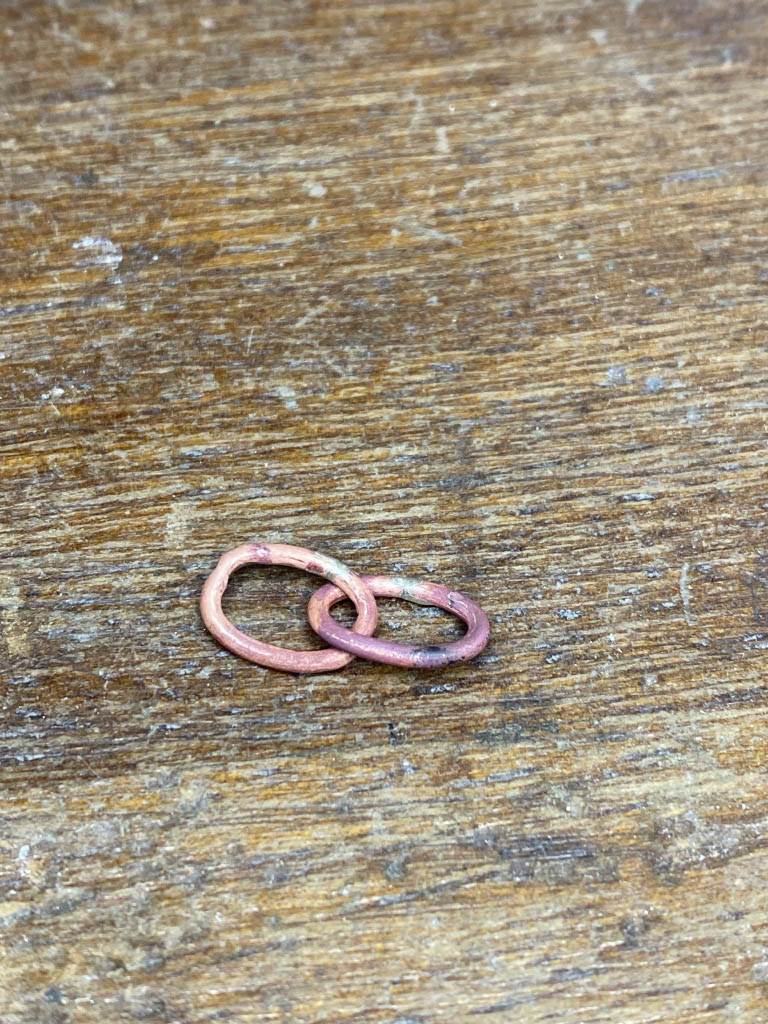
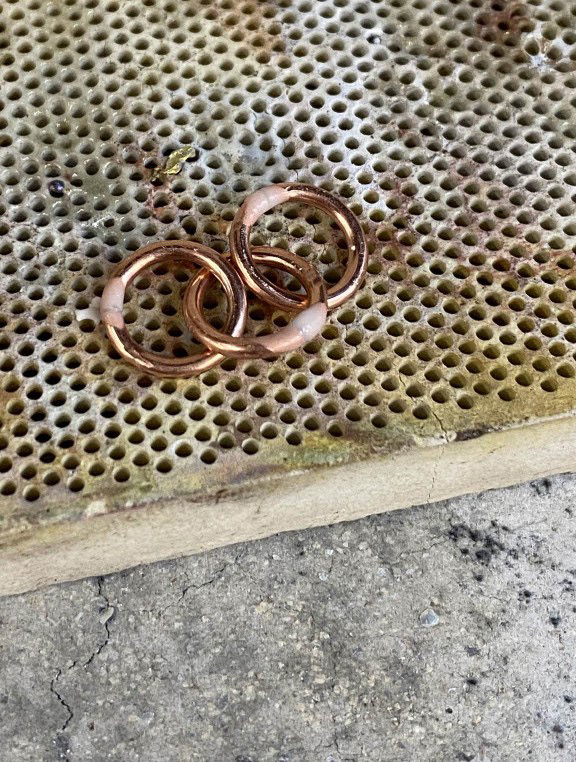
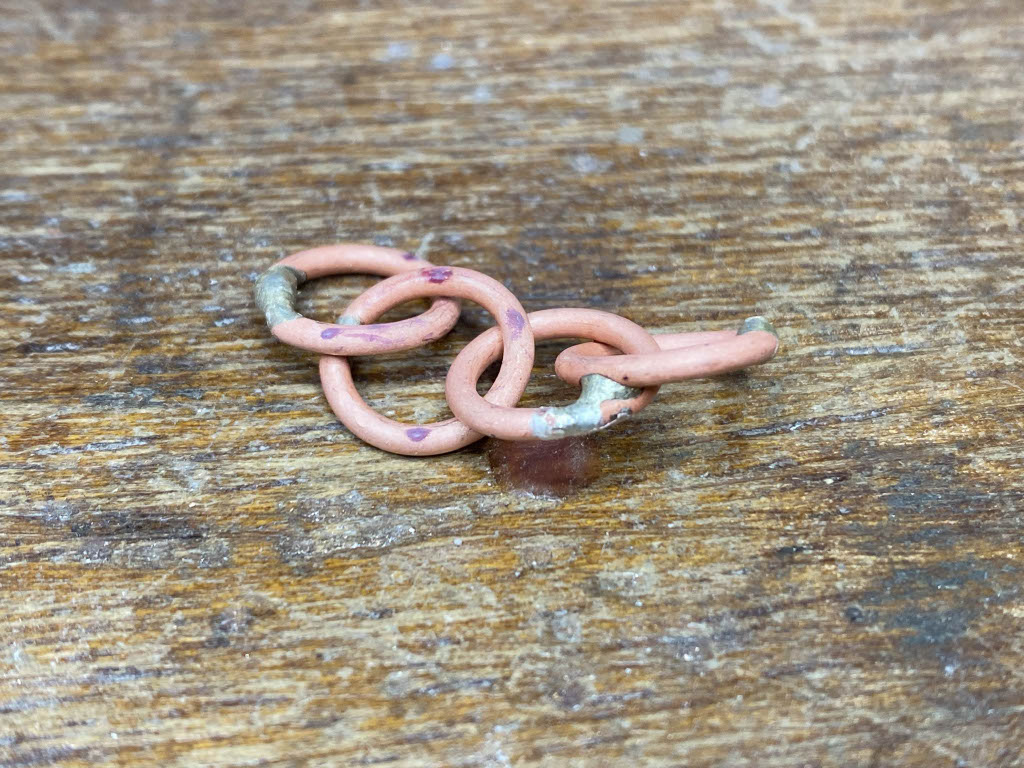
I then explored the process of dabbing the solder rod onto the connection whilst the copper was at its cherry red stage. The images above show my first tests which I pulled apart using round nosed pliers to ensure a strong connection.

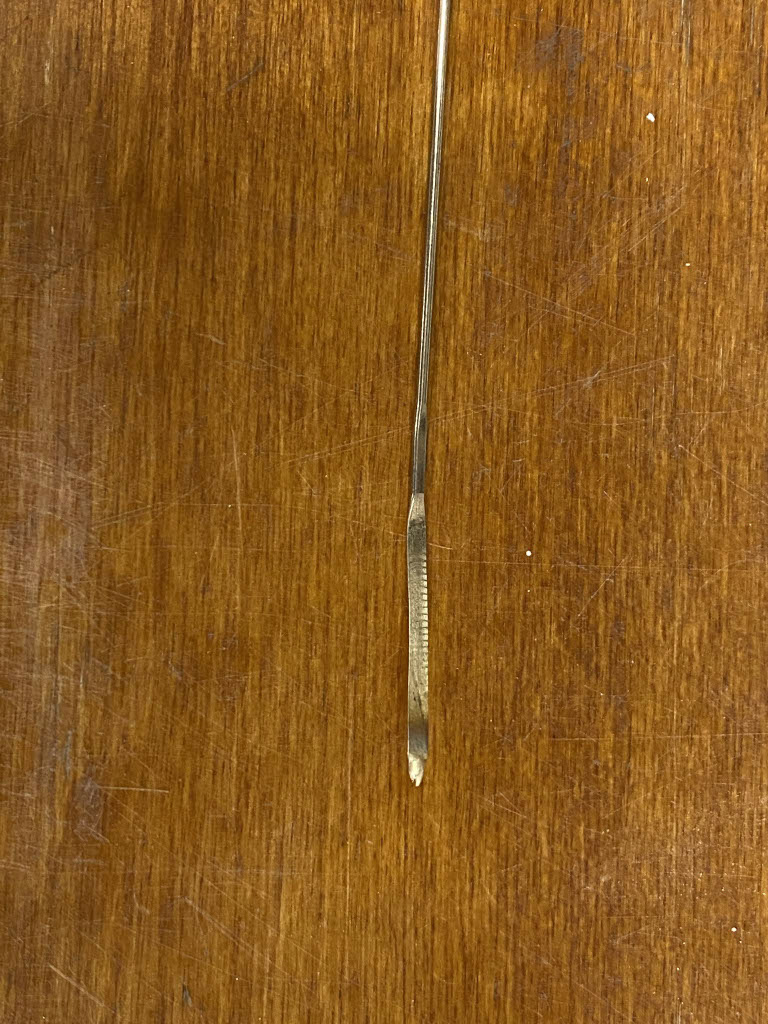
I then experimented with different ways of laying out the chain so that the connections would be easily accessible but not overlapping. I found this the hardest part initially but discovered that laying it out with all the connections facing the same direction the easiest. Also, poor placement resulted in links being soldered together. Another problem I was facing was too much solder being applied to each connection. Therefore, I thinned the rod of solder out using the roller.
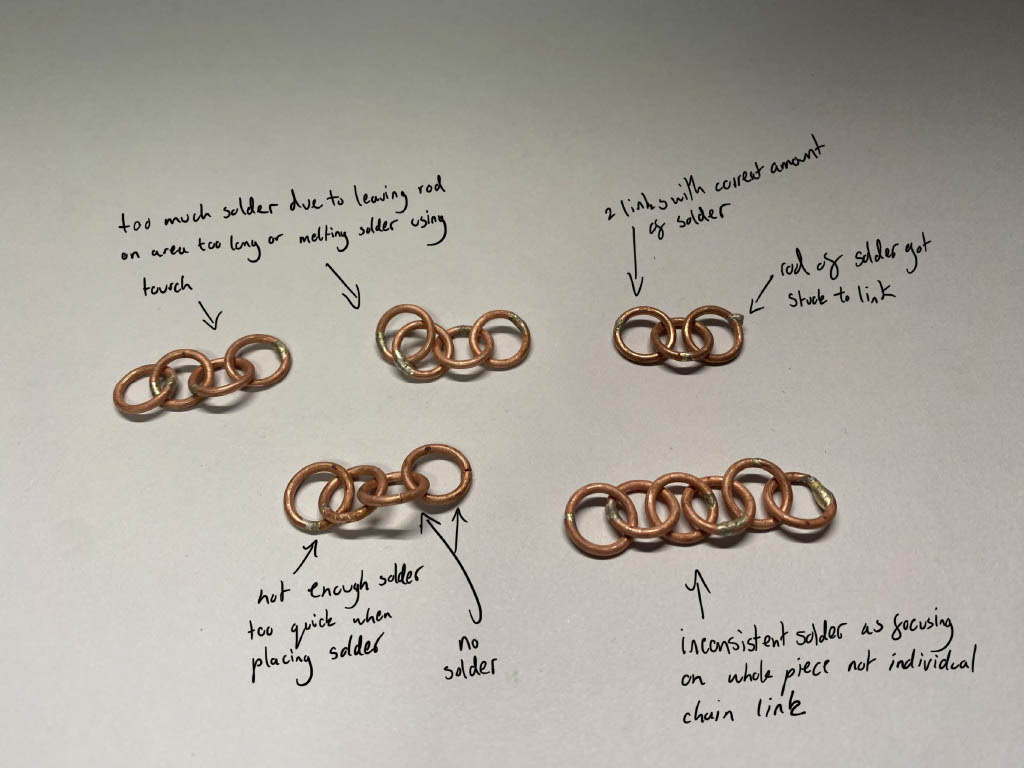
After many attempts and testing different techniques, I found that doing a quick dab of a thinned-out rod of solder onto connections that were all laid facing the same way gave the best results. Also, to increase consistency with larger lengths of chain, I found that heating the entire length consistently whist the flux finished boiling and the copper had gone through its many colour changing states before turning dull and blackening, worked well. But after this, concentrating on bringing 1 or 2 links to the cherry red stage needed for soldering, allowed me to focus on each connection and the precise placement of the solder.
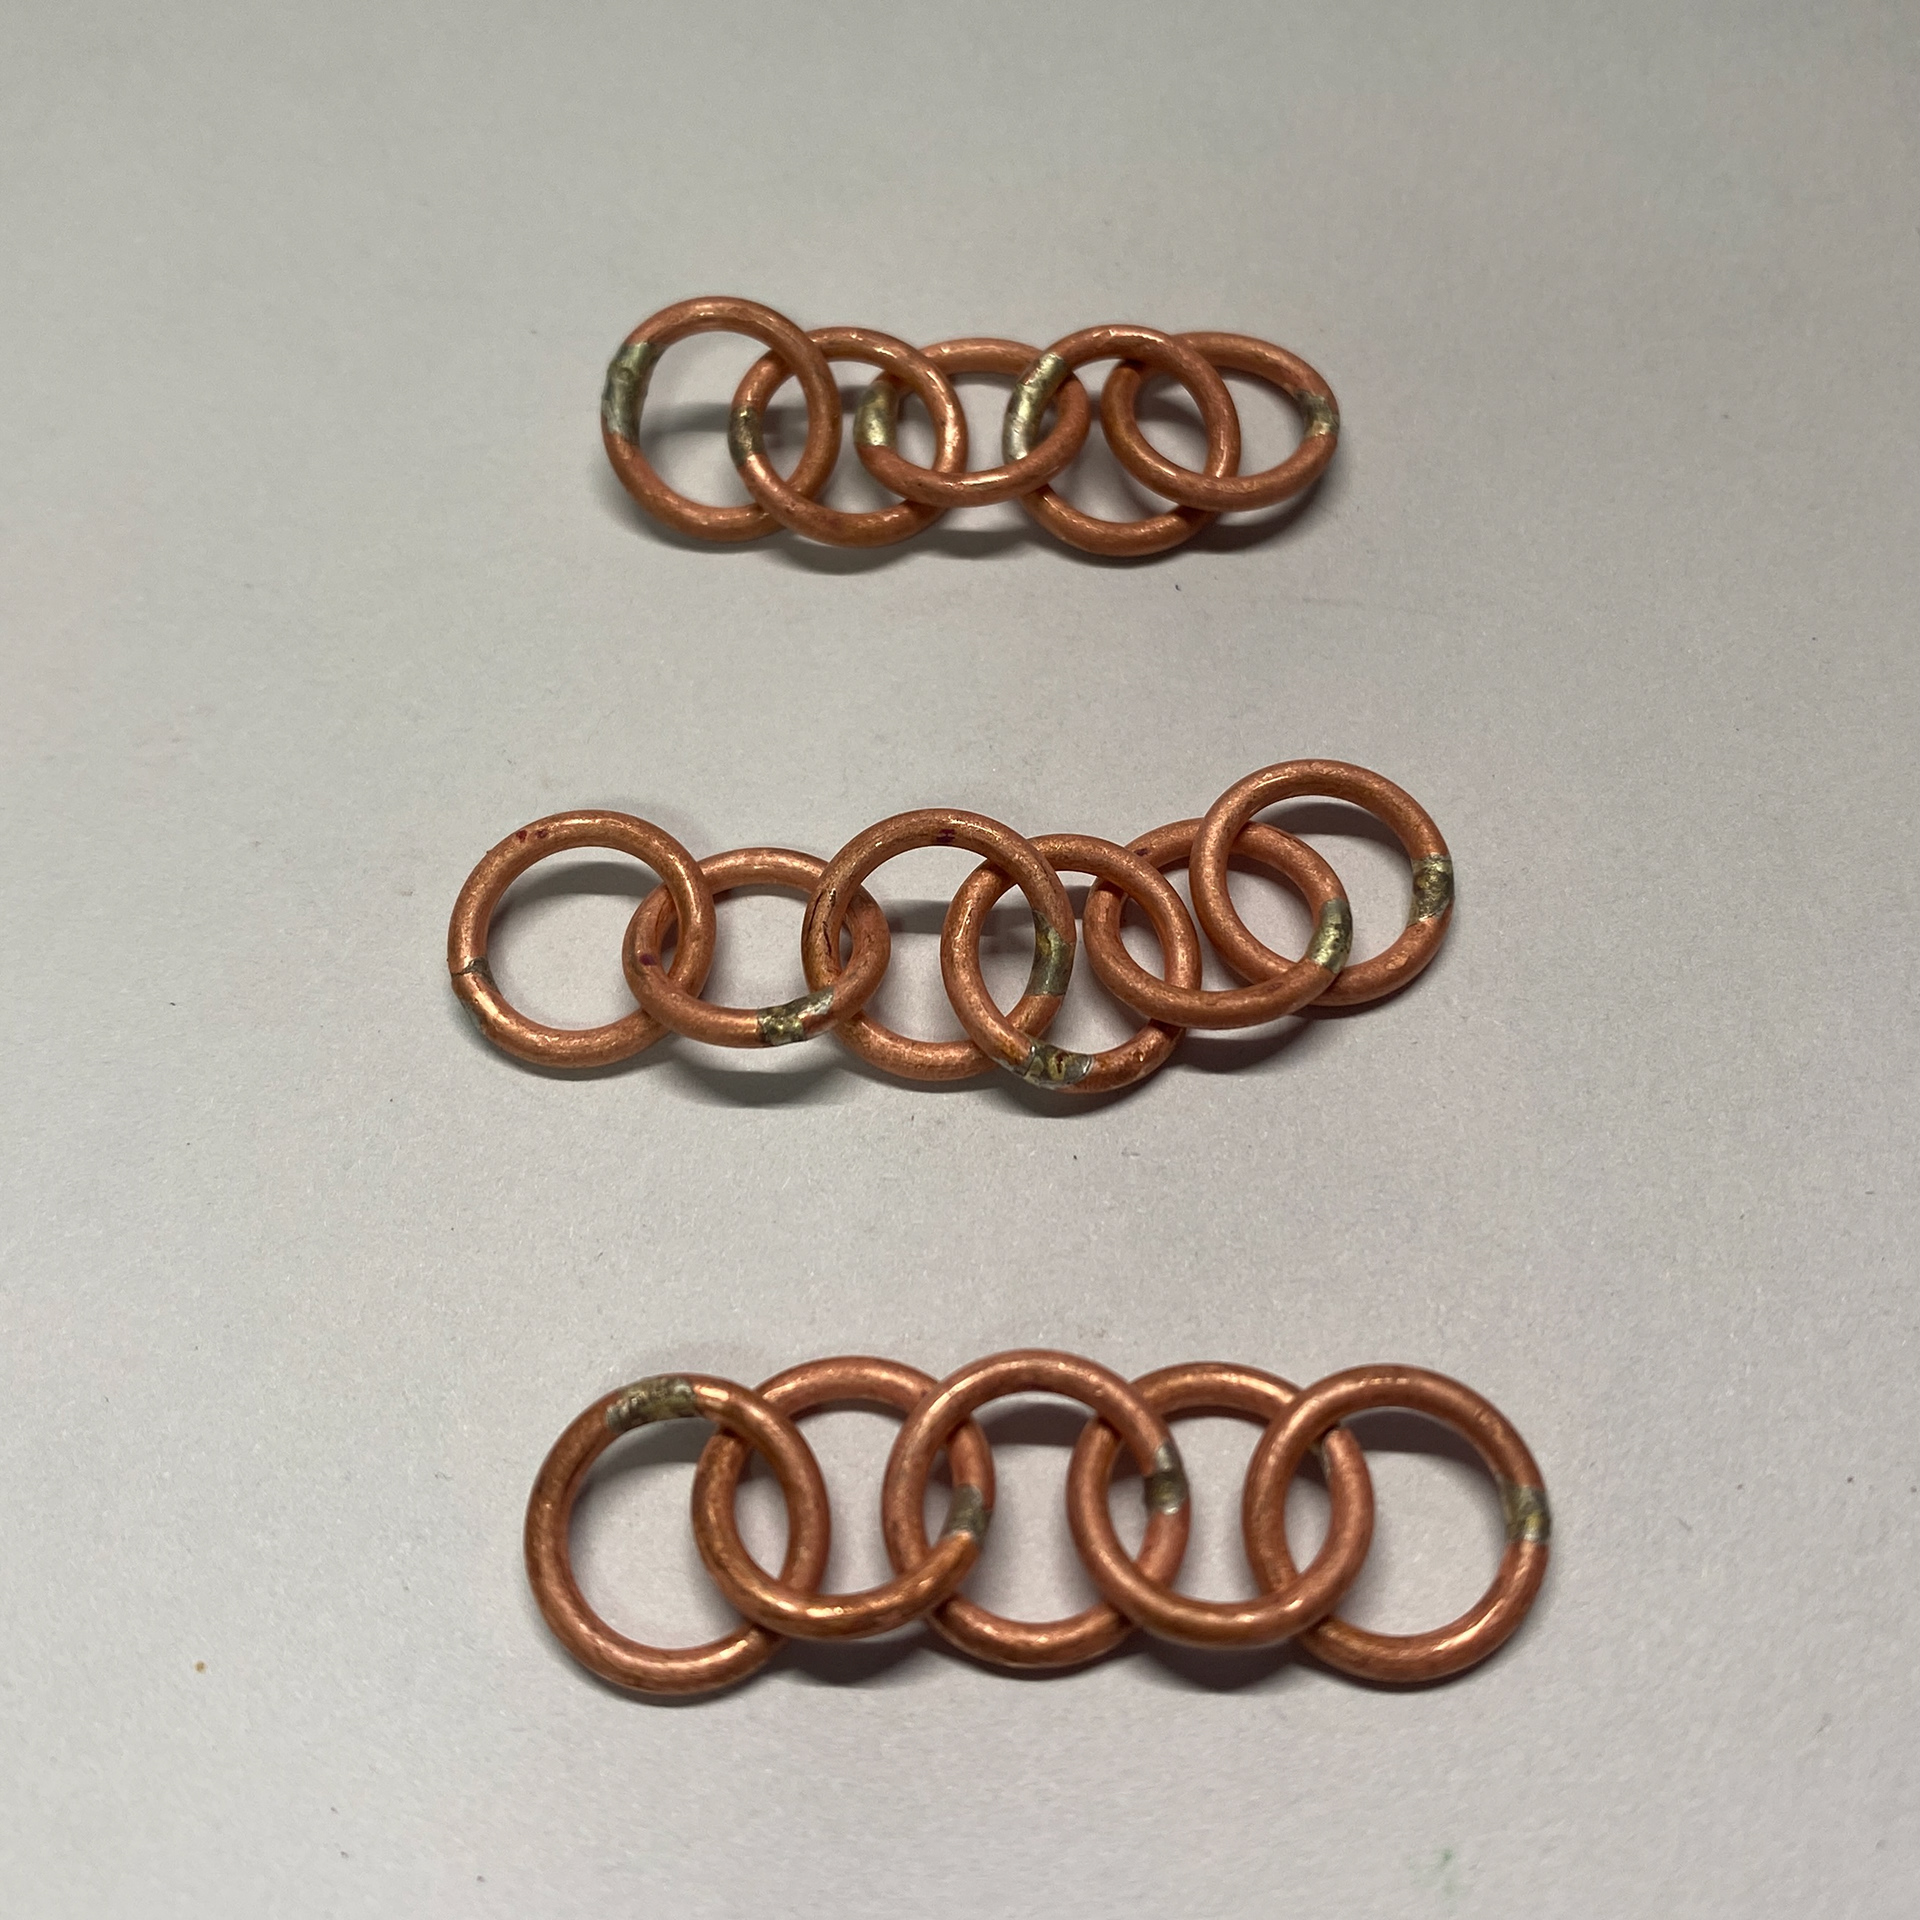
Practicing further and trying to increase consistency of solder applied.

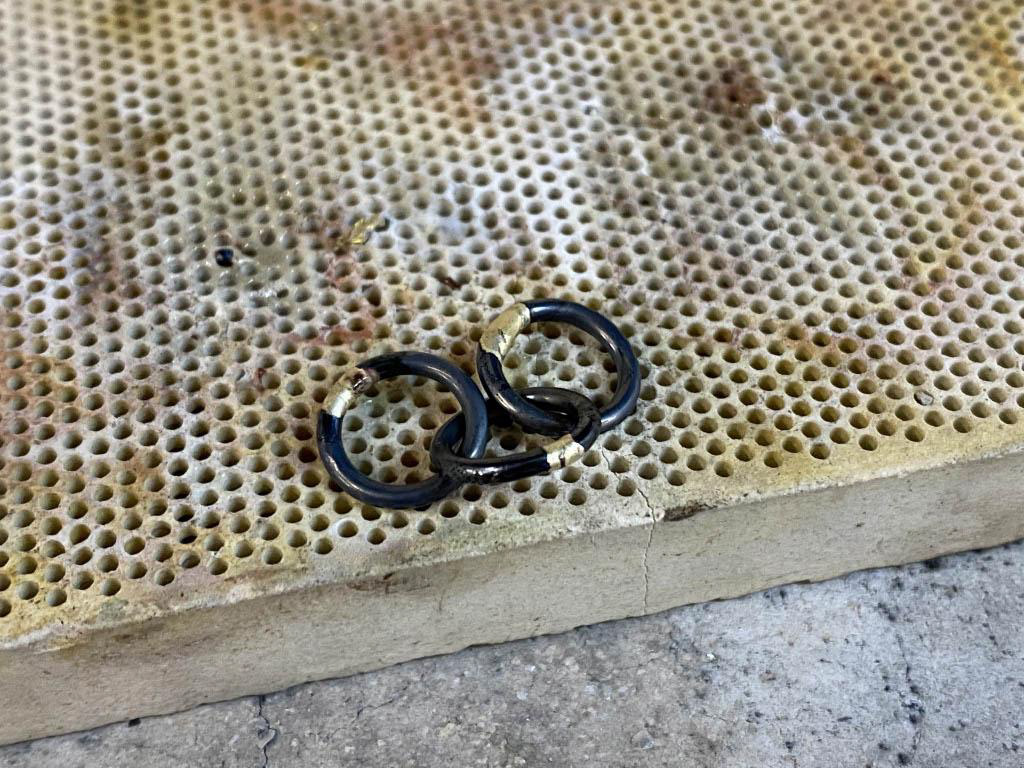
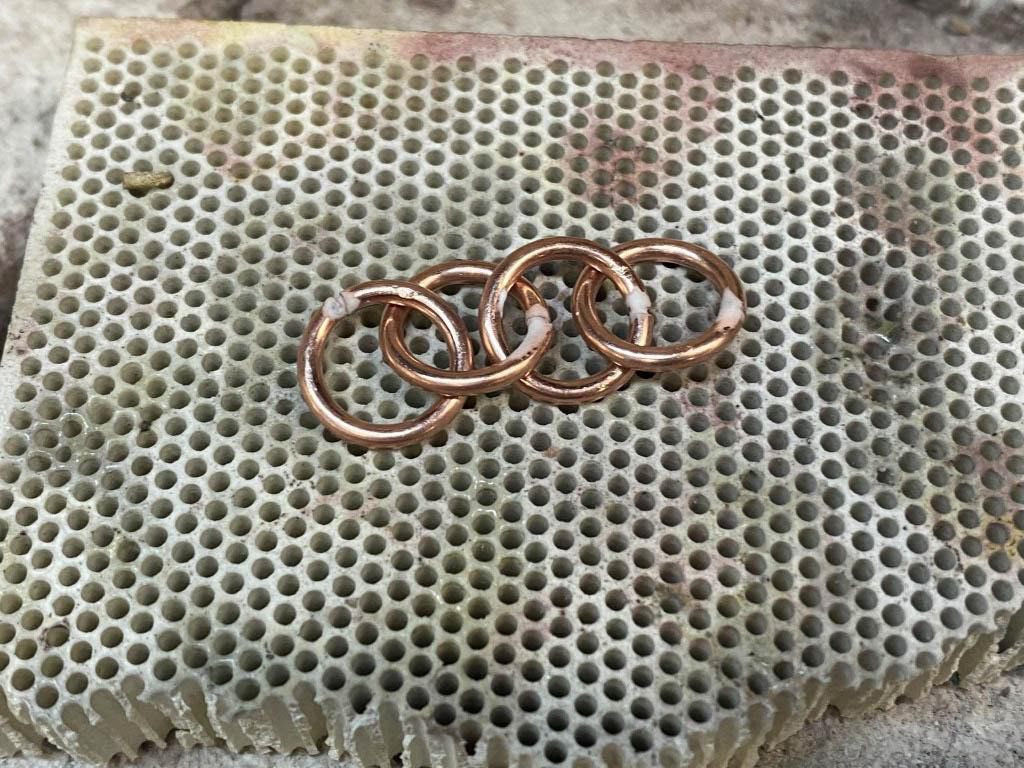
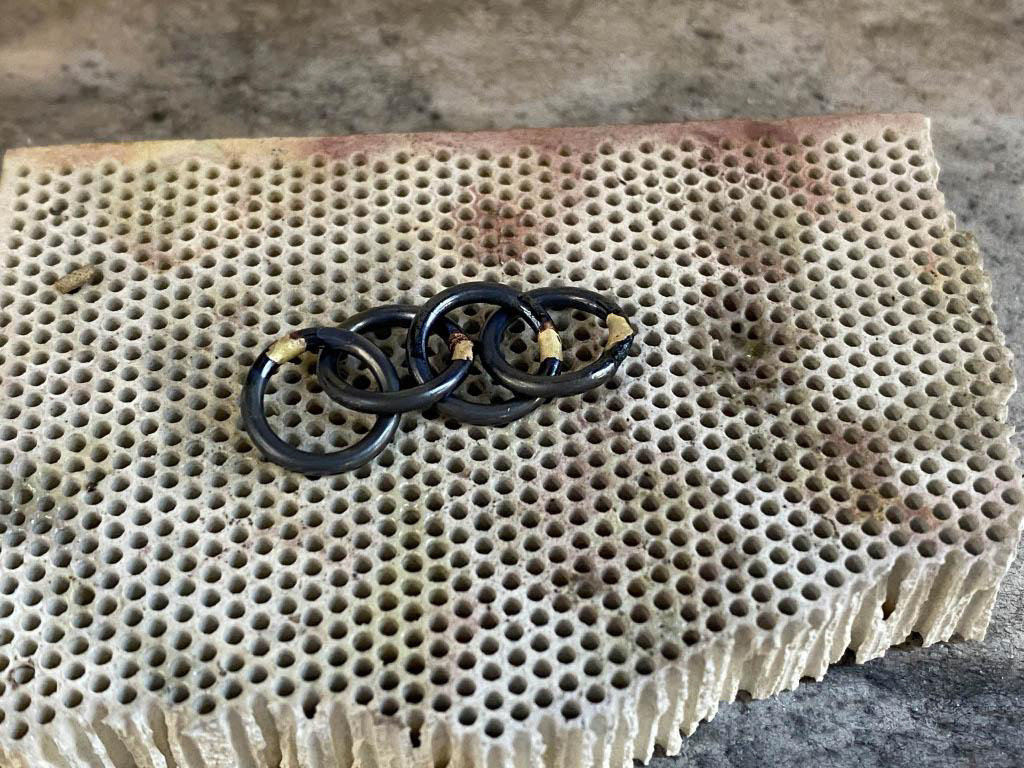
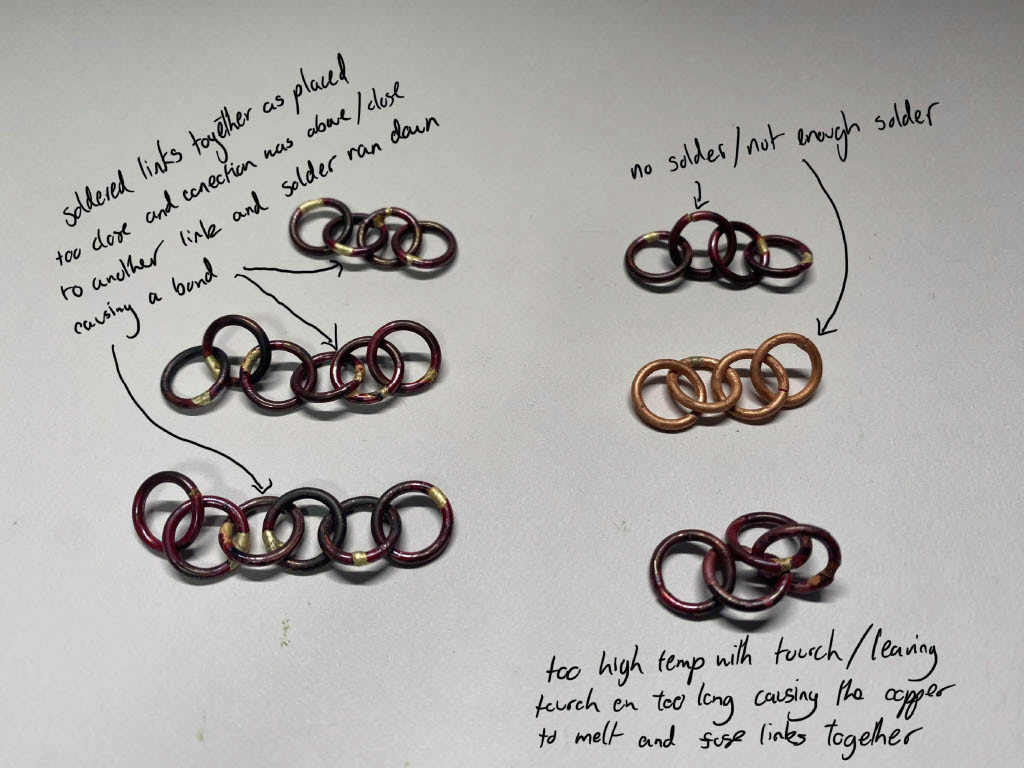
I tested how many links I could solder together at once. I found that I was most comfortable with 9 links as this would be the most efficient but also, I found 10 too challenging to keep an even heat and clean solder. However, further testing showed that despite practice and repeating the same steps, this process was just not giving similar results when I repeated the process multiple times, as shown on the right.
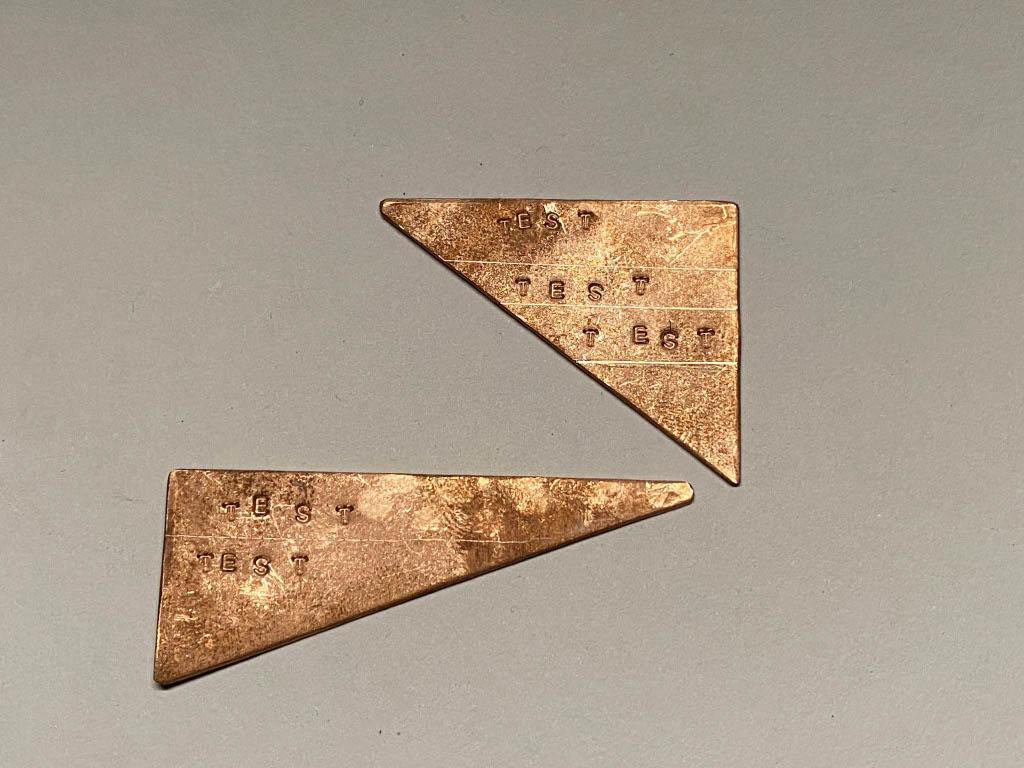
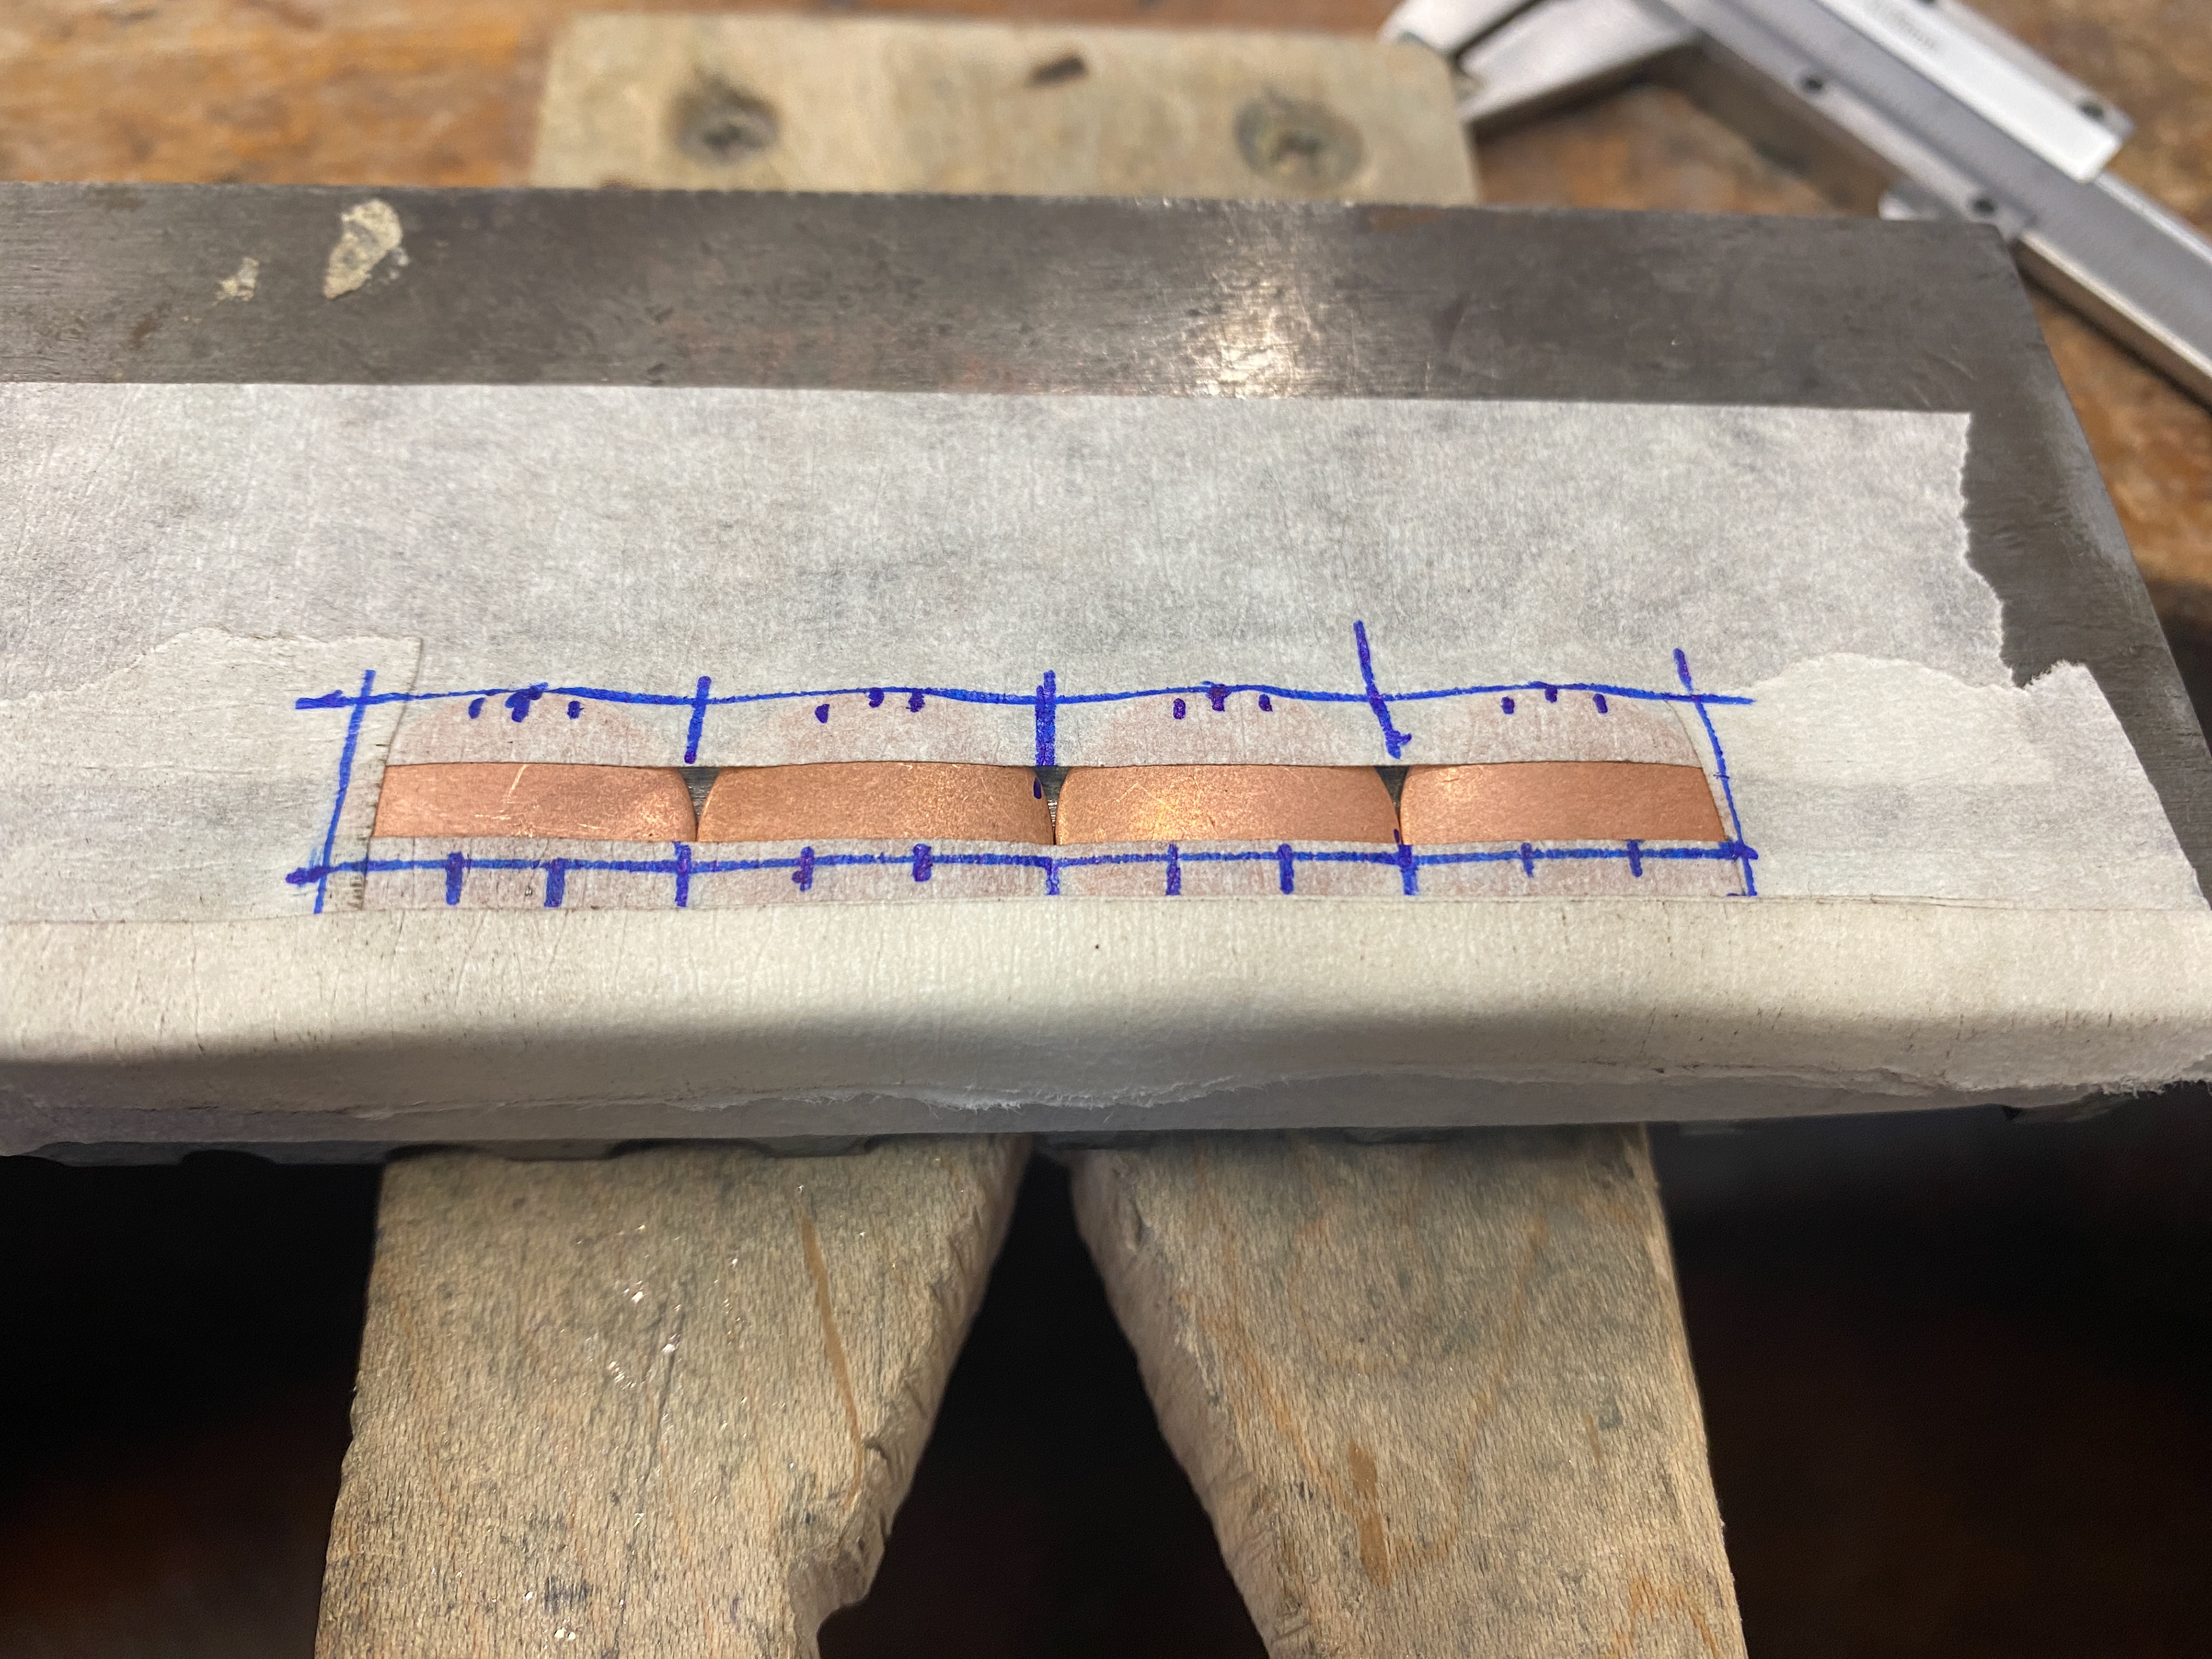
I wanted to experiment with adding text into my 3D work so explored using letter stamps. I annealed scrap copper sheet and tested different sized letters alongside practicing the placement of each. I found it difficult to get consistency of height and width between the letters. Drawing lines using a scribe the width of the stamp helped with vertical alignment but not the kerning.
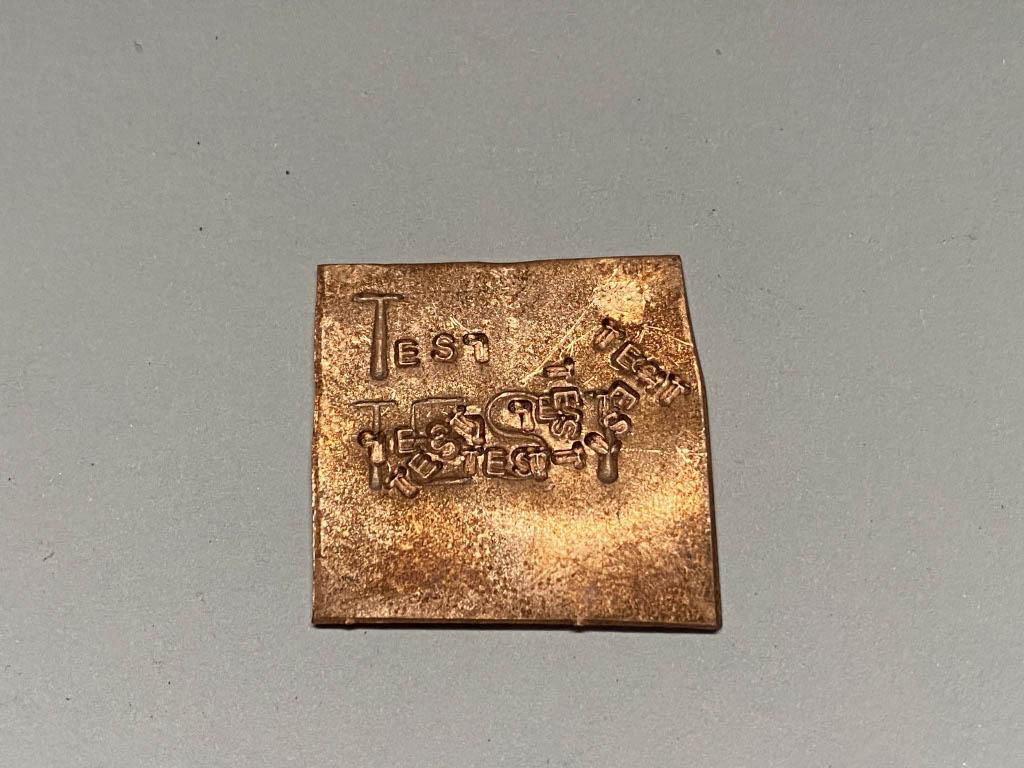

I also wanted to explore layering text and creating interference between each word almost creating a 3D collage into the surface of the copper. I think taking this forward and exploring adding textures using the roller could be a way to bring my sketches into a final piece.
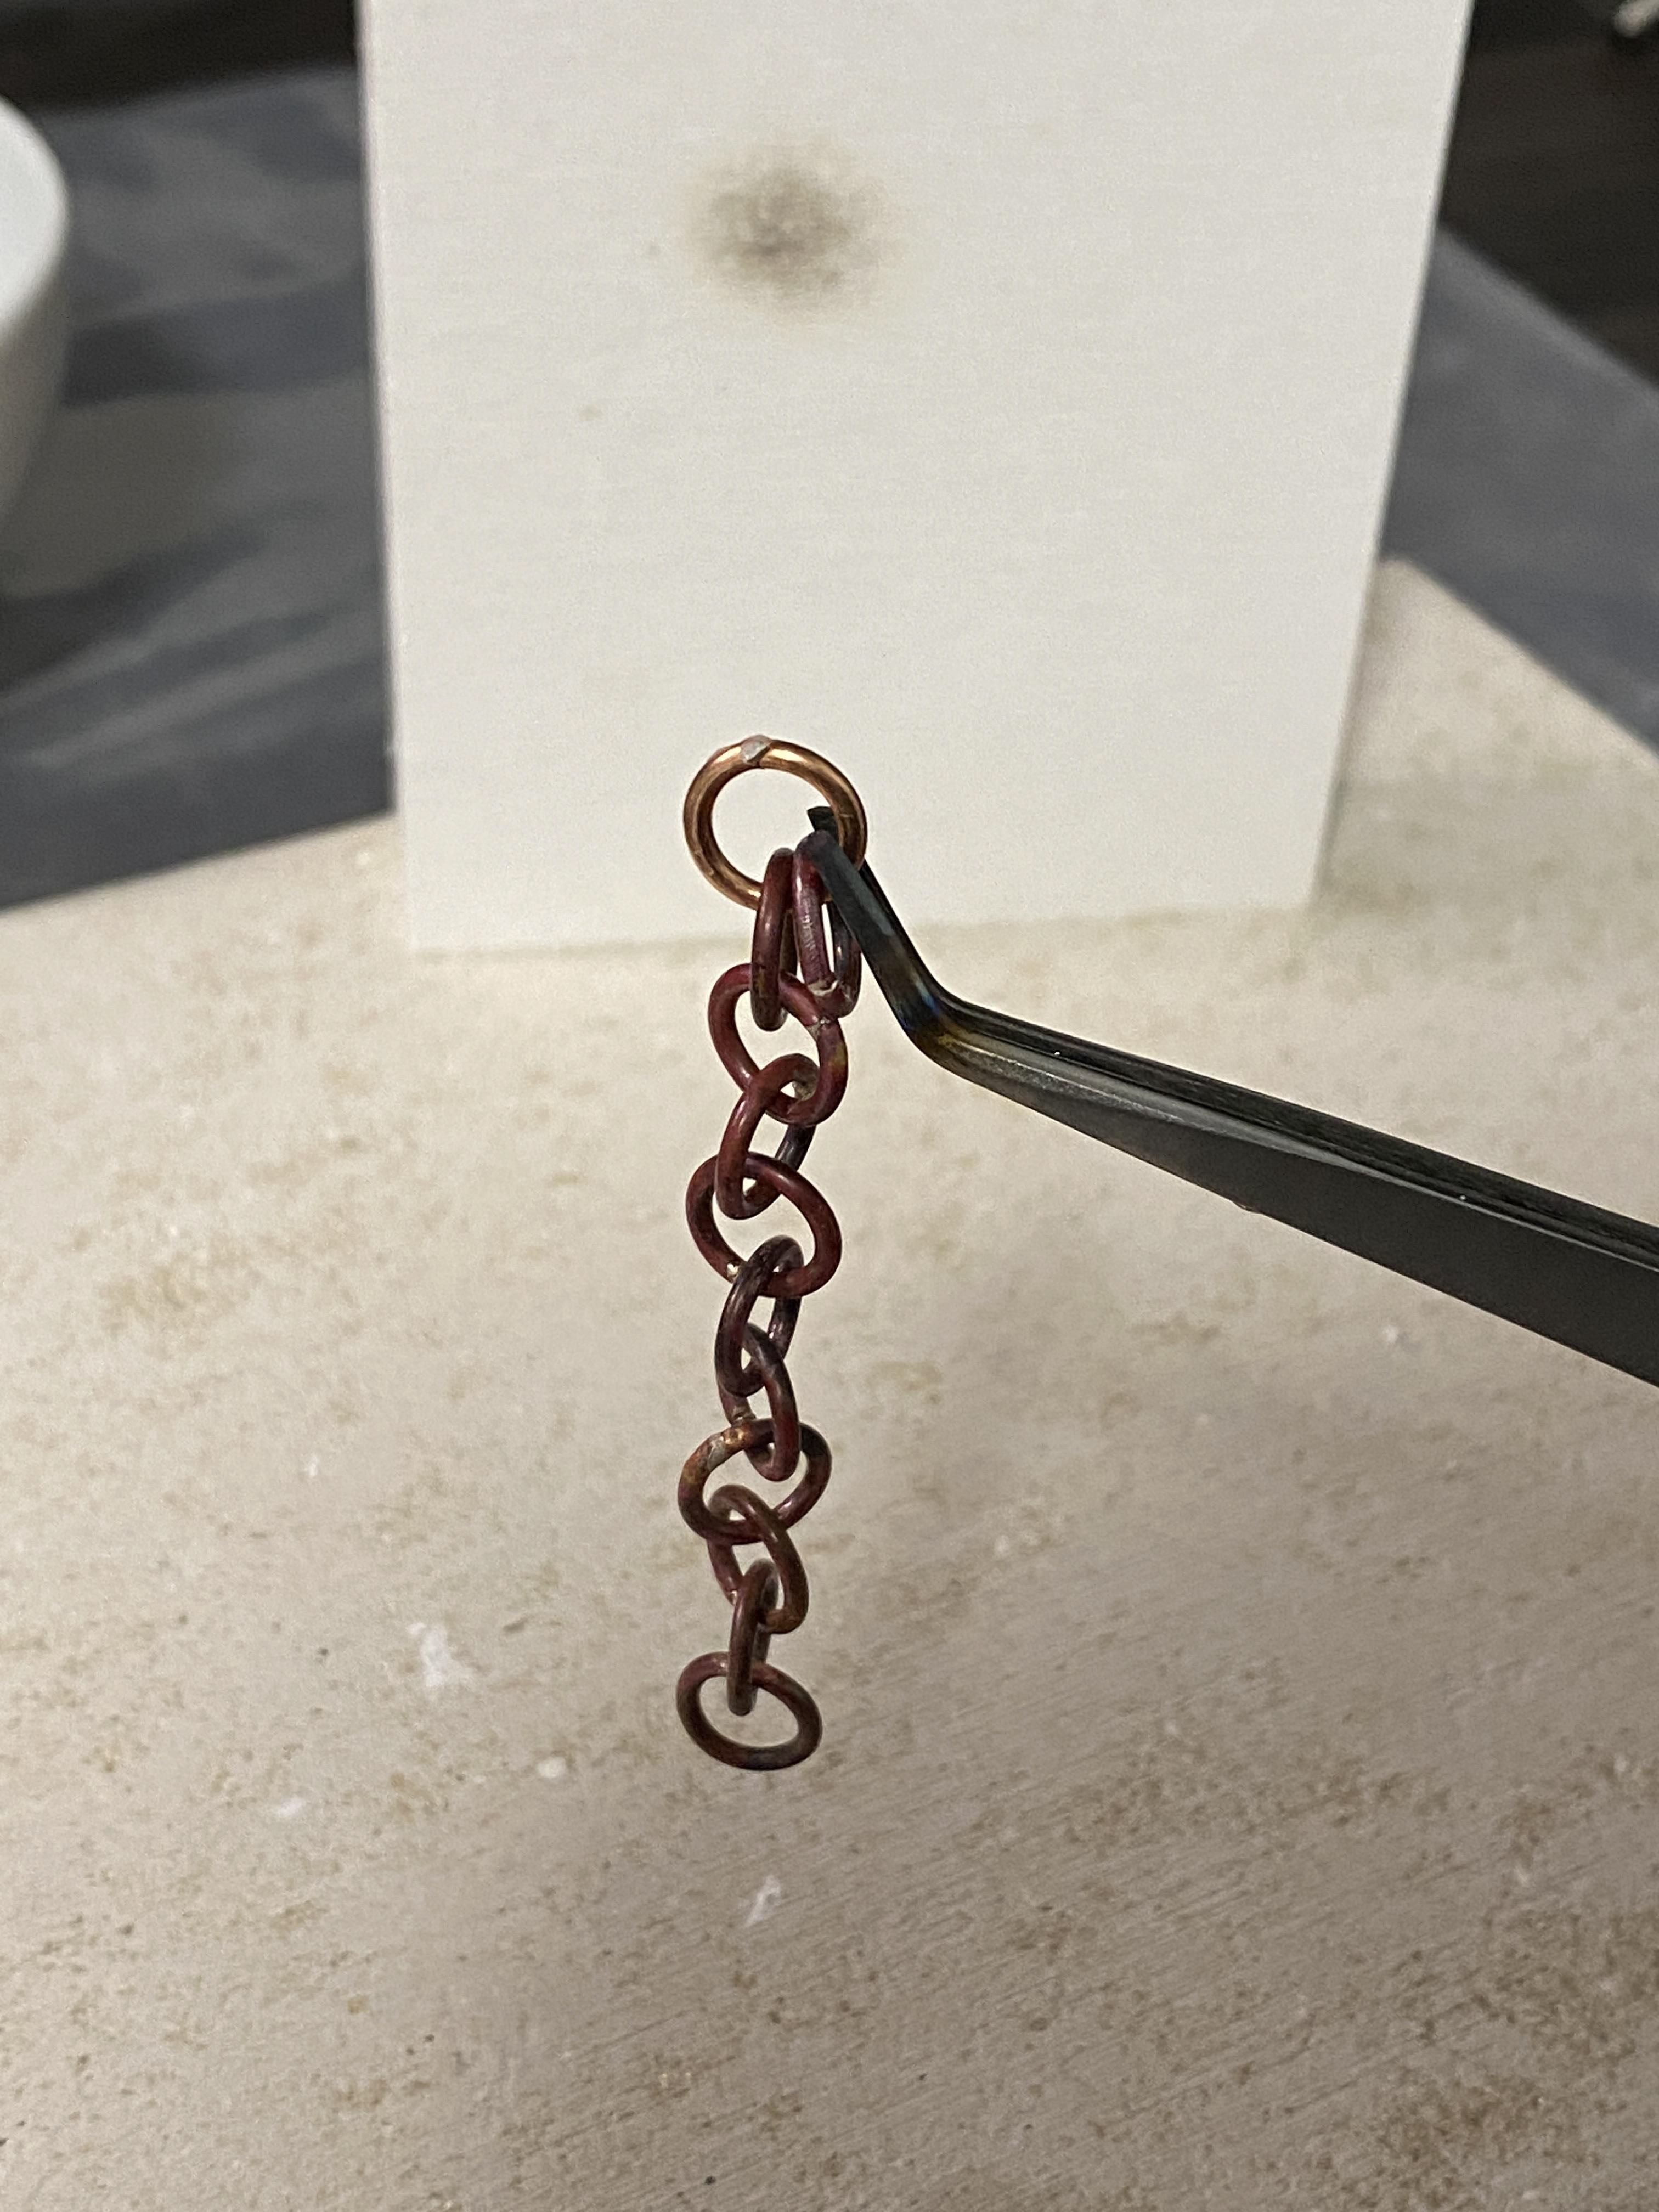
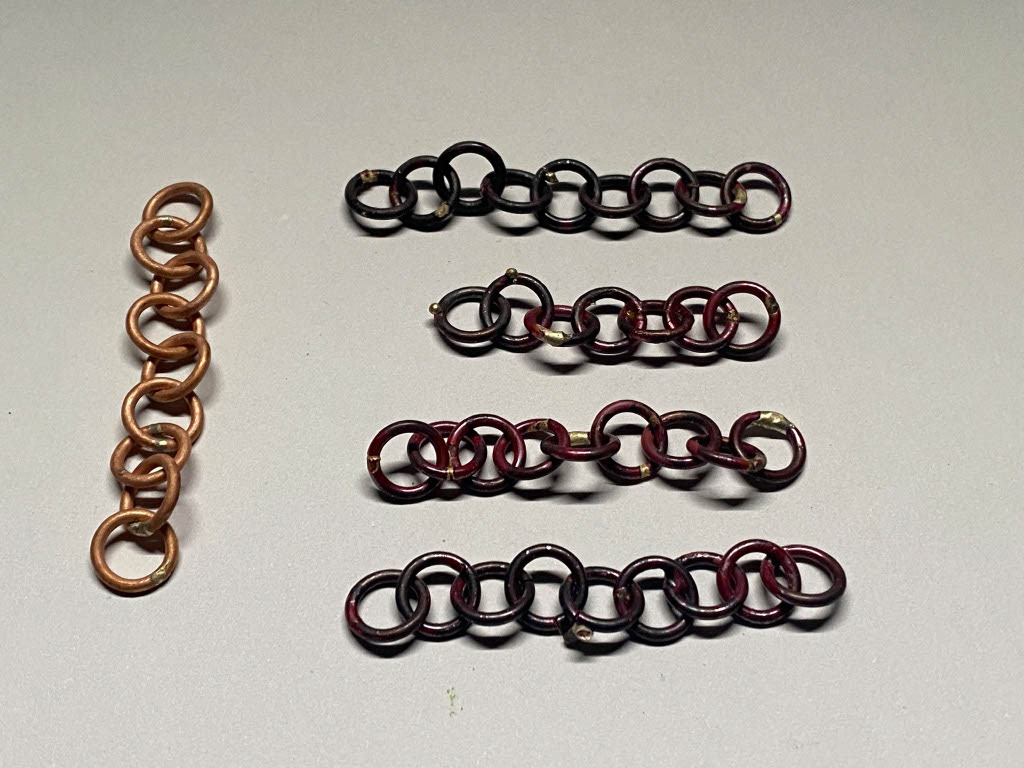
I re-evaluated my soldering technique and realised that is just wasn't producing a clean enough result and would mean lots of unnecessary cleanup. Therefore, to achieve a refined and seamless aesthetic I changed my process. I focused on soldering one ring at a time and then linking these singles together as seen in the photo above. I also changed my solder application, placing a small flack onto the seam using a paintbrush loaded with flux. This allowed me to regulate the quantity of solder. Also, using a spear arm to suspend the ring gave me greater control over the heat and I found that evenly heating each side of the connection was easiest by alternating from one to another, as seen in the video. When connecting the rings together I placed the previous soldered sections facing the floor to create as much distance between old and new solder so that previous connections wouldn’t come undone.
Introducing the traditional making of hammered chain.
Whist making the soldered chain and exploring the conceptual side of the project through research and drawing I found that the missing element was the traditional hammered chain. Therefore, I wanted to investigate this process and replicate it in the workshop. I also want to create contrast between the harsh rough aesthetic of forged chain with the refined copper soldered chain.

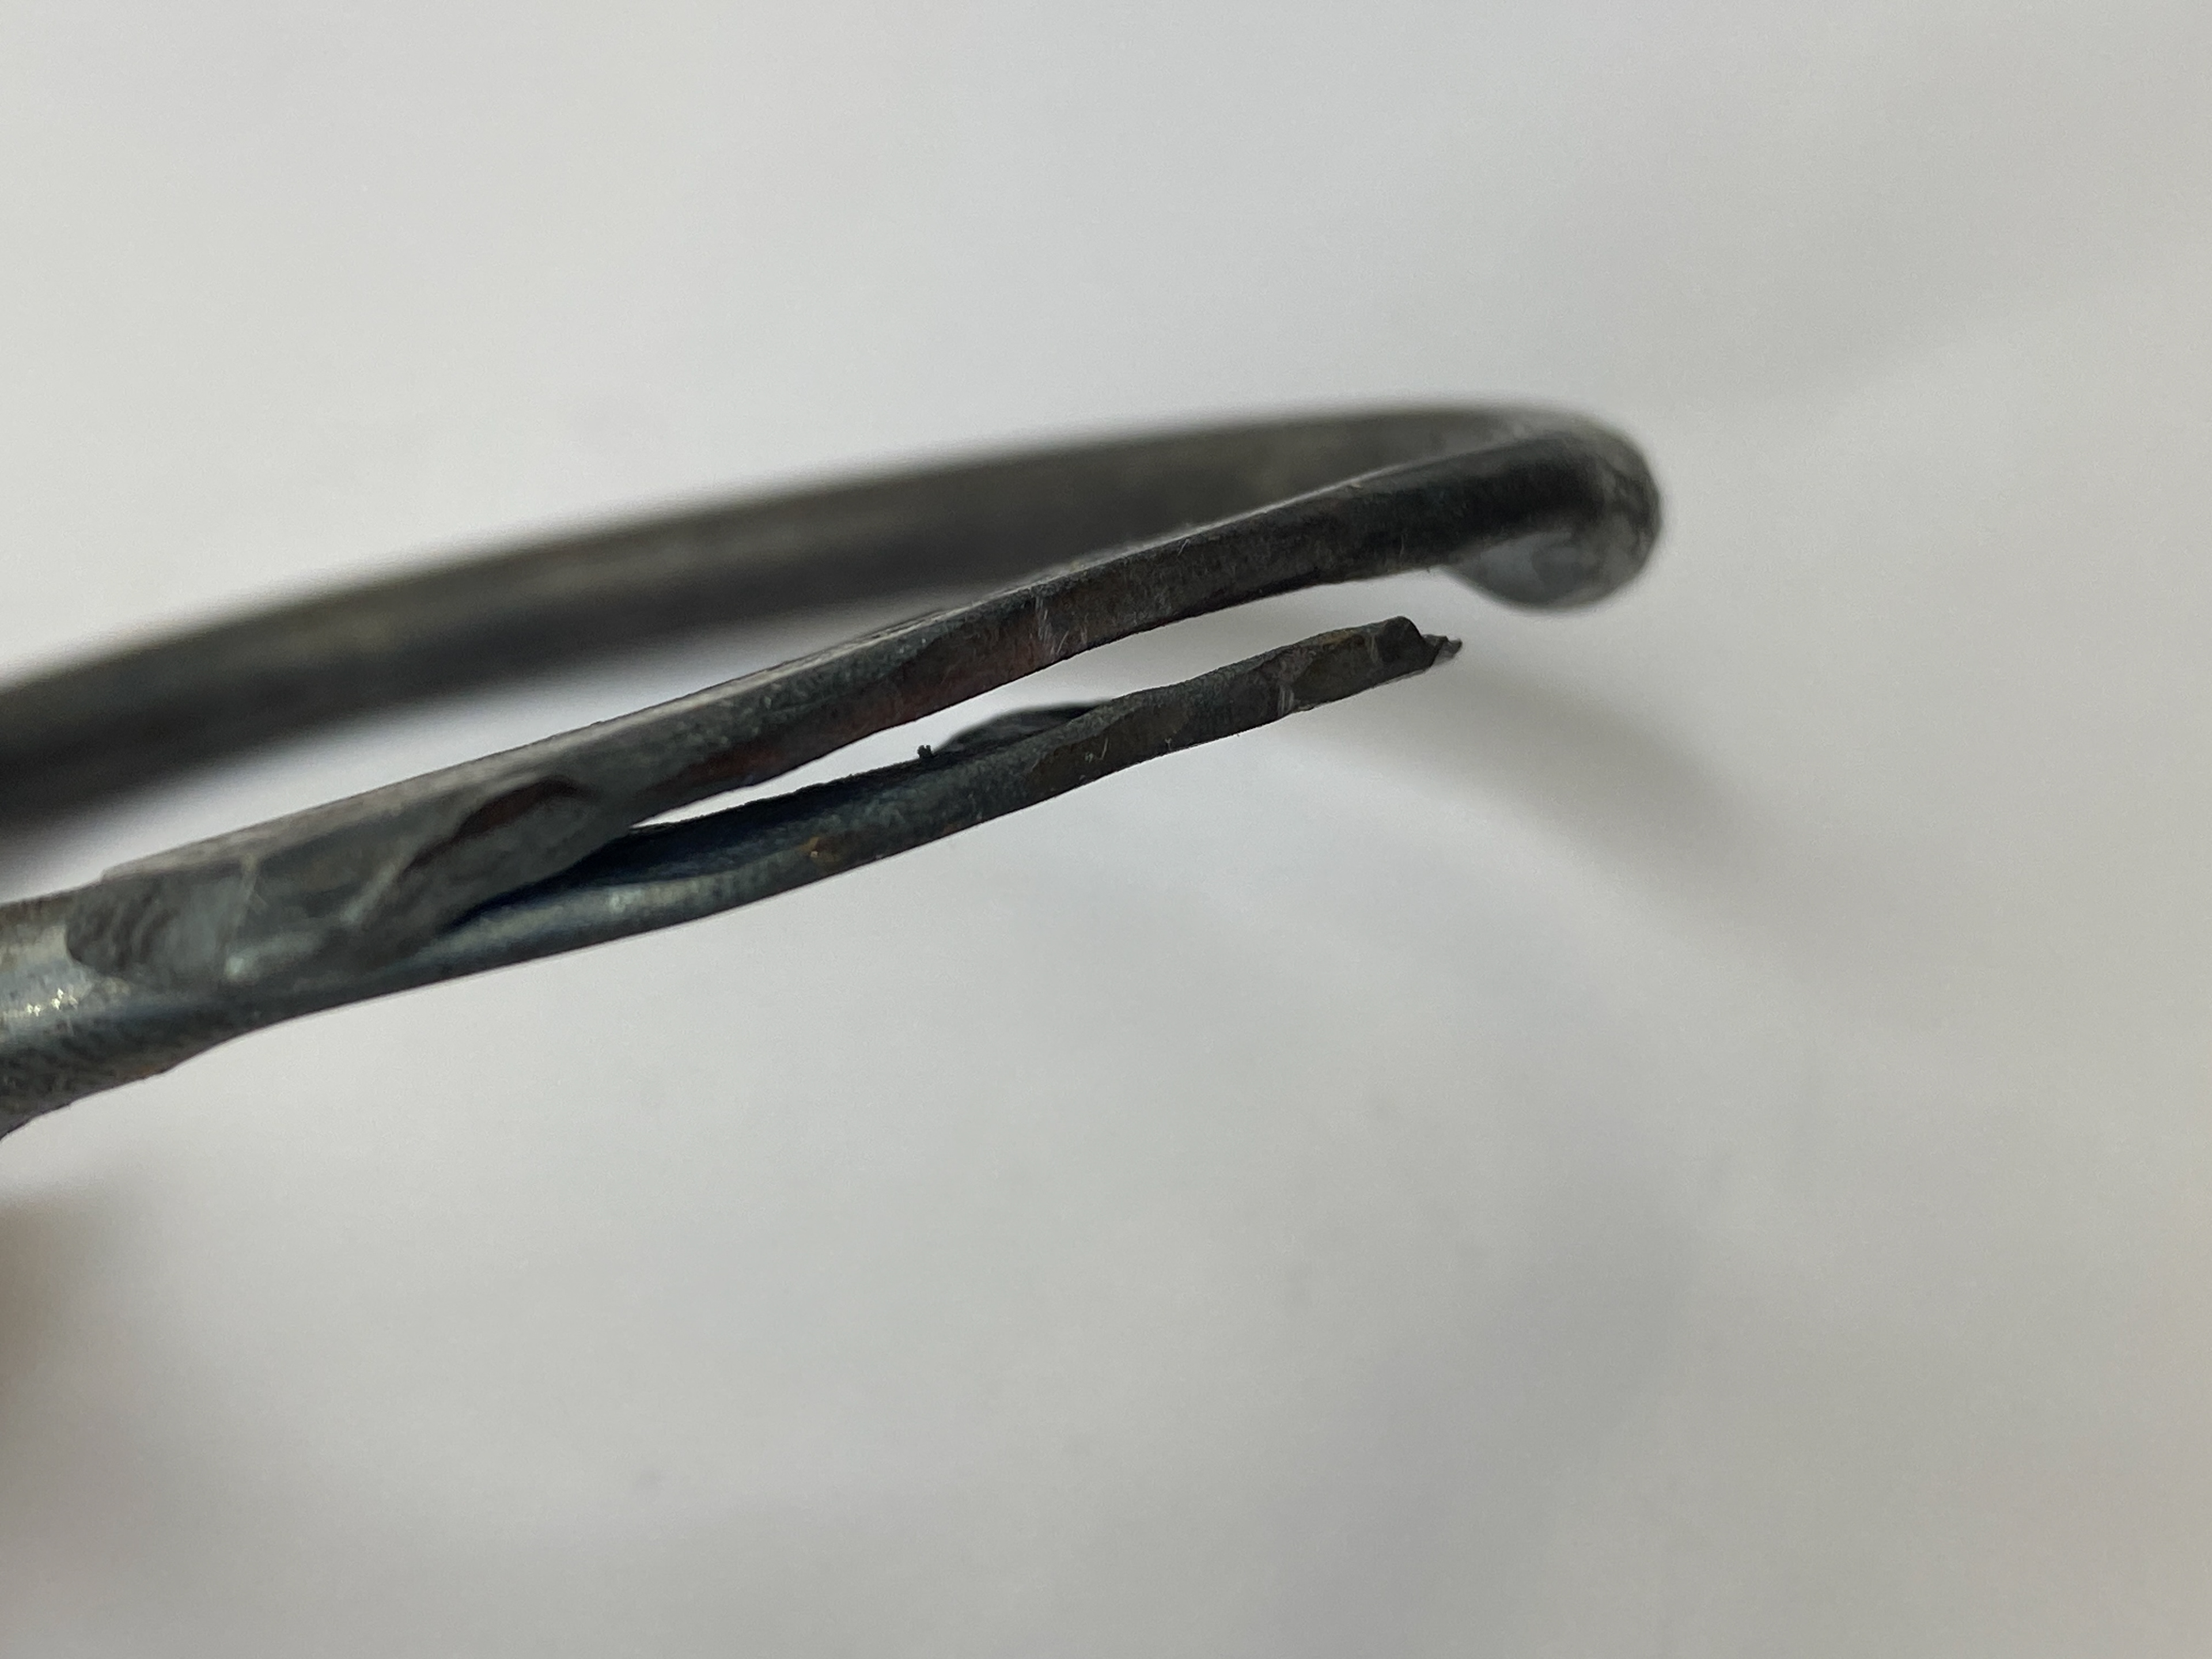
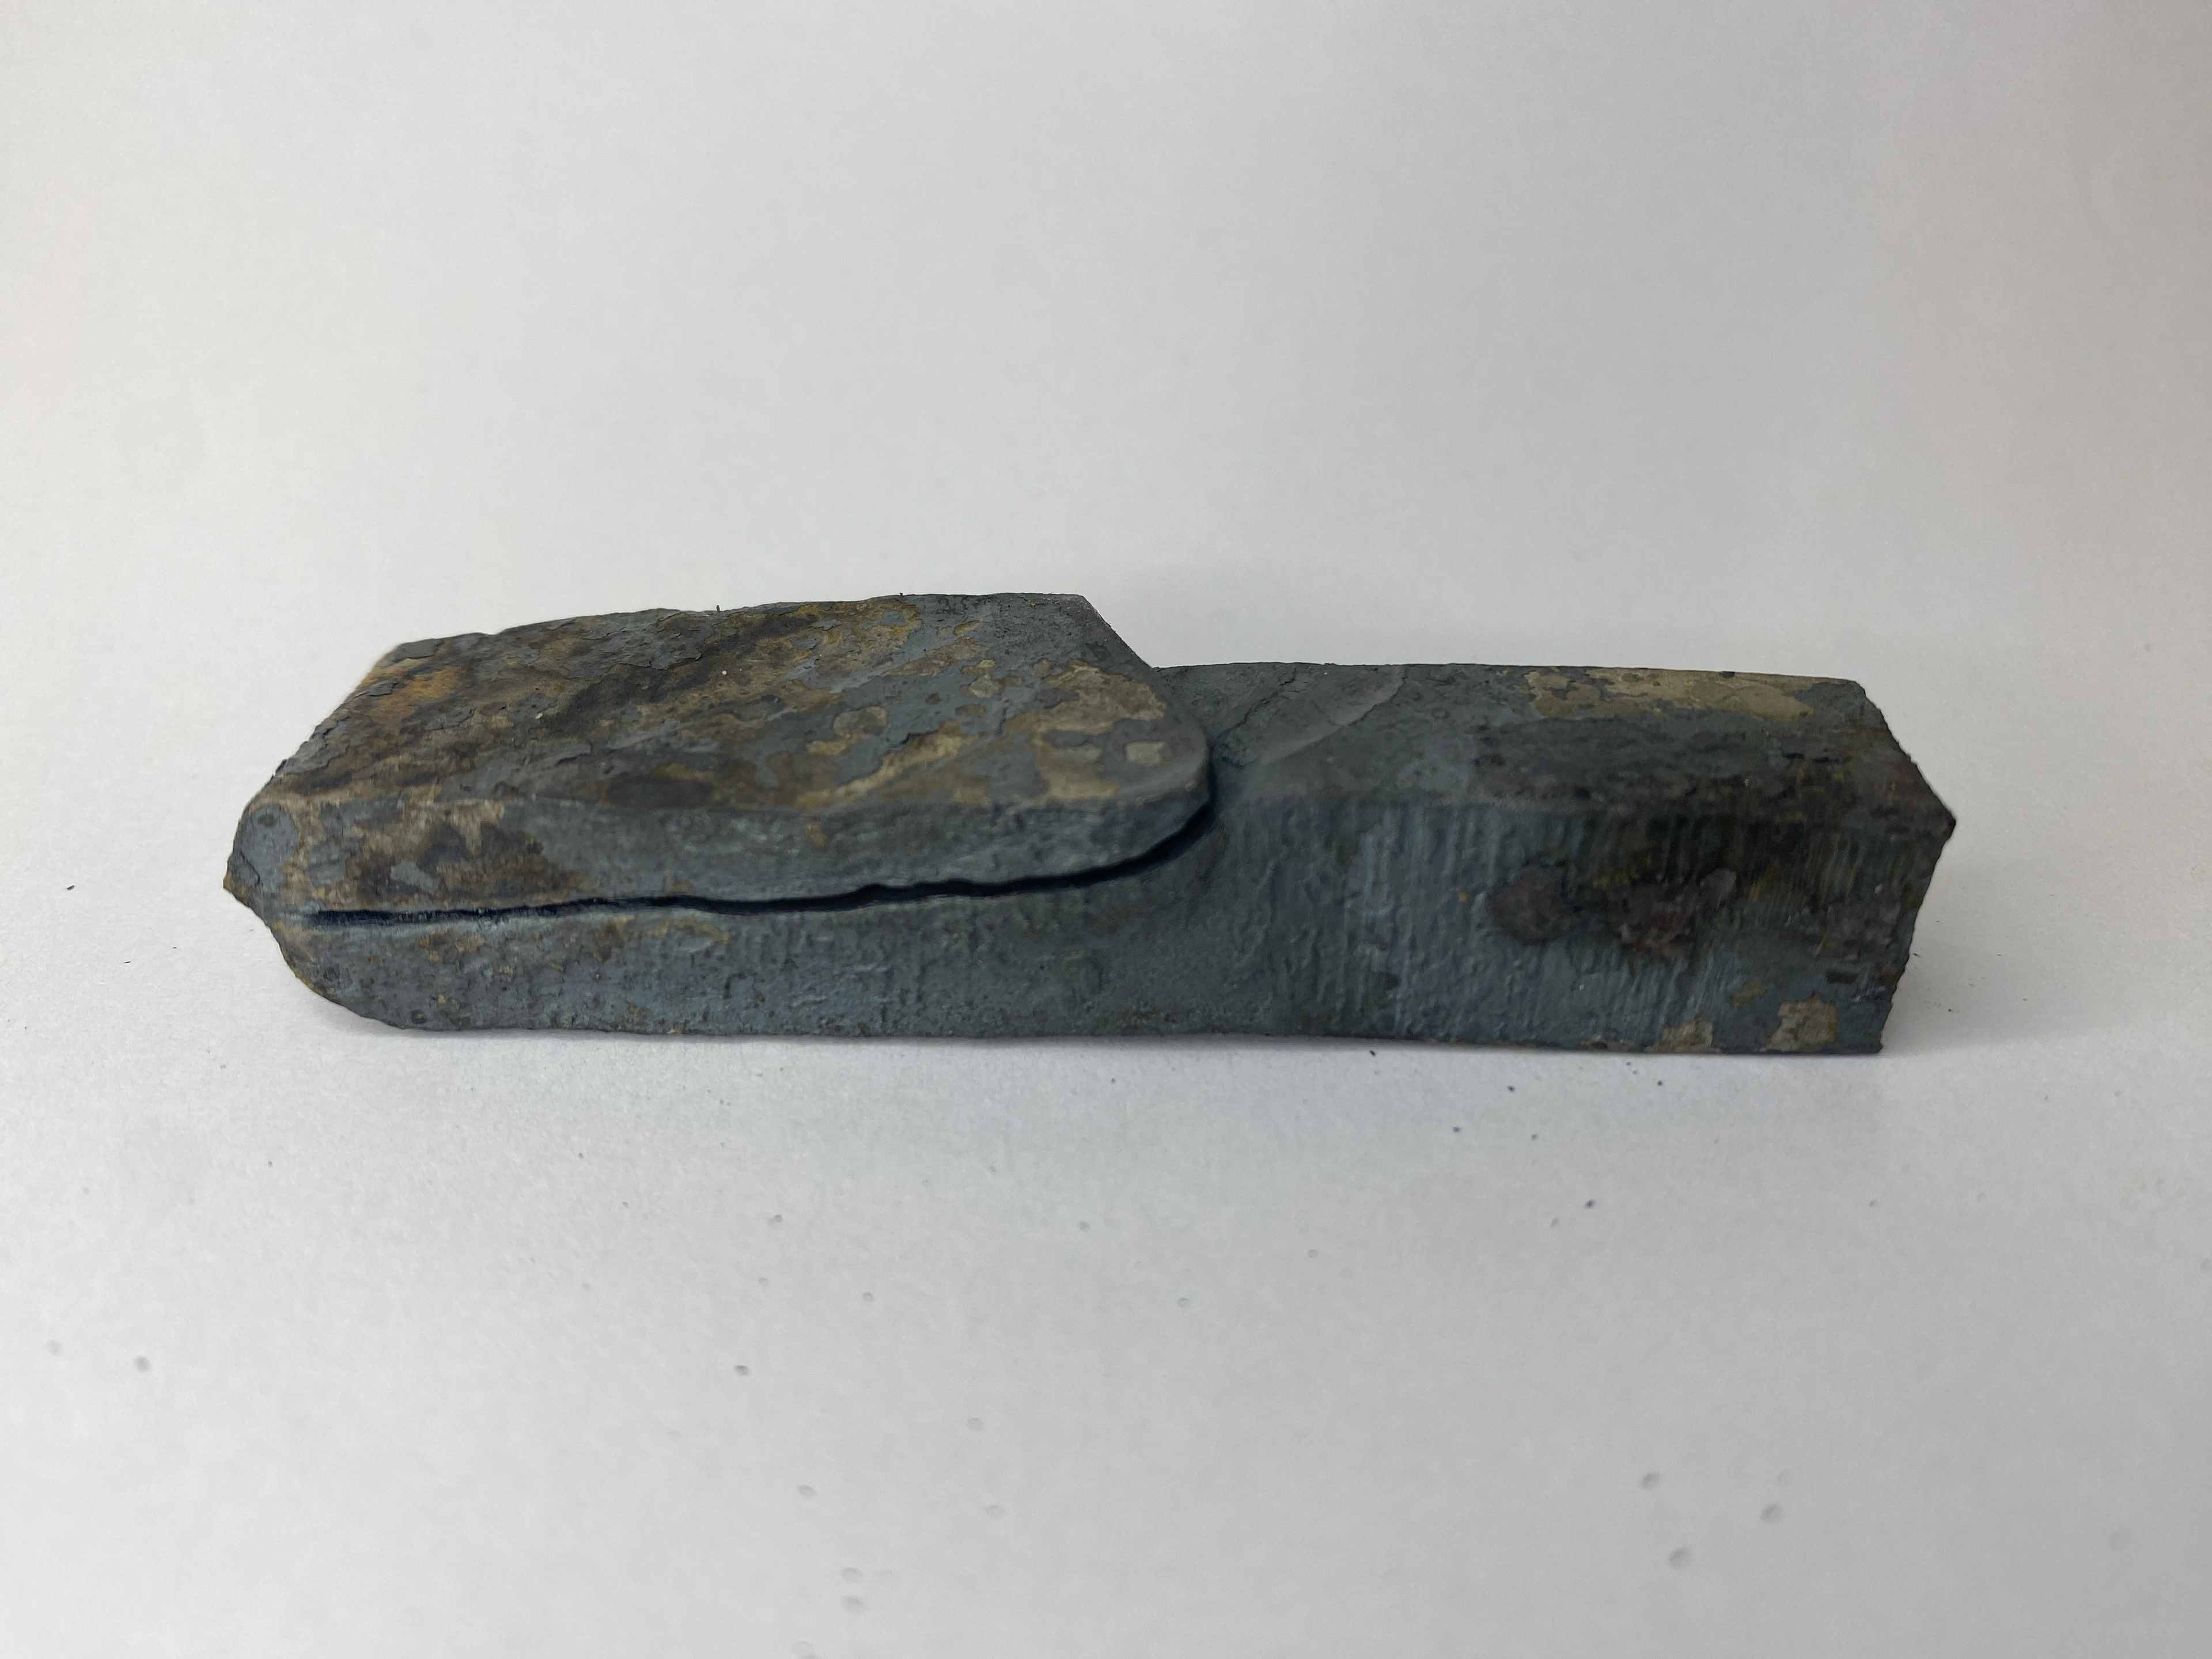
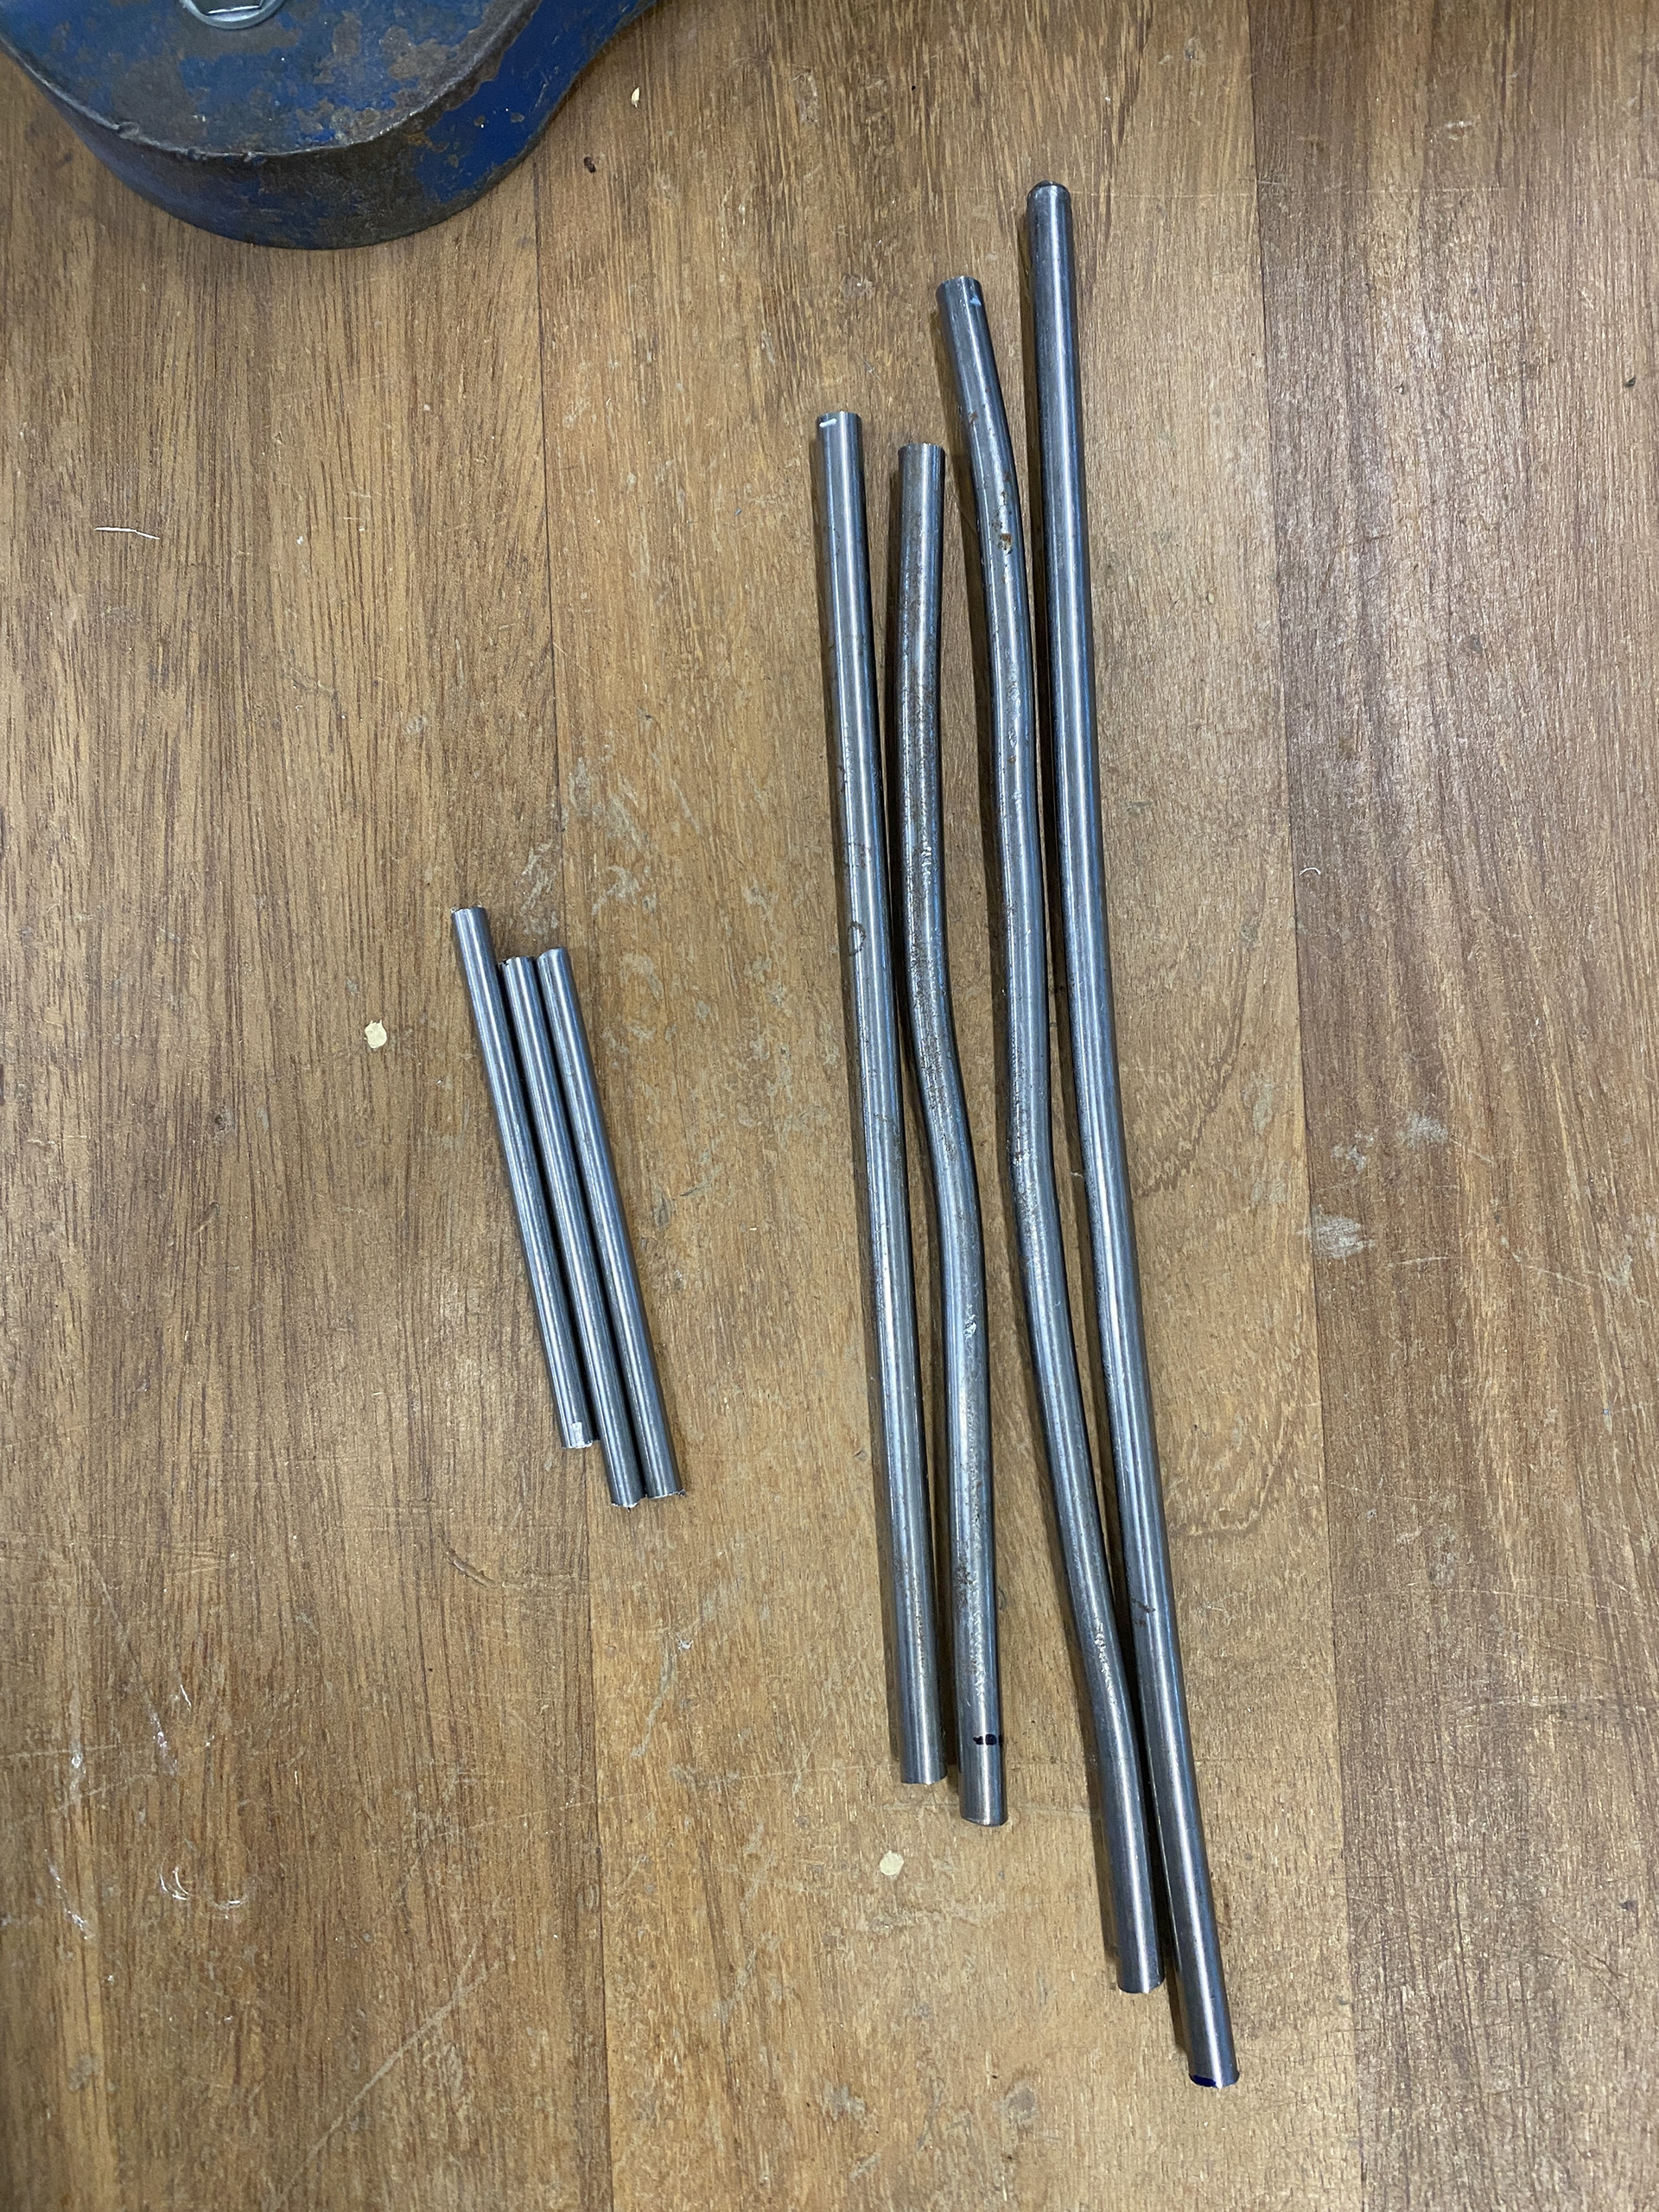
For my first initial test I used a pre-bent circle of scrap mild steel rod. I tapered down the ends and attempted to forge weld them together. However, this was a failure as I didn’t use any flux or know the proper process and technique.
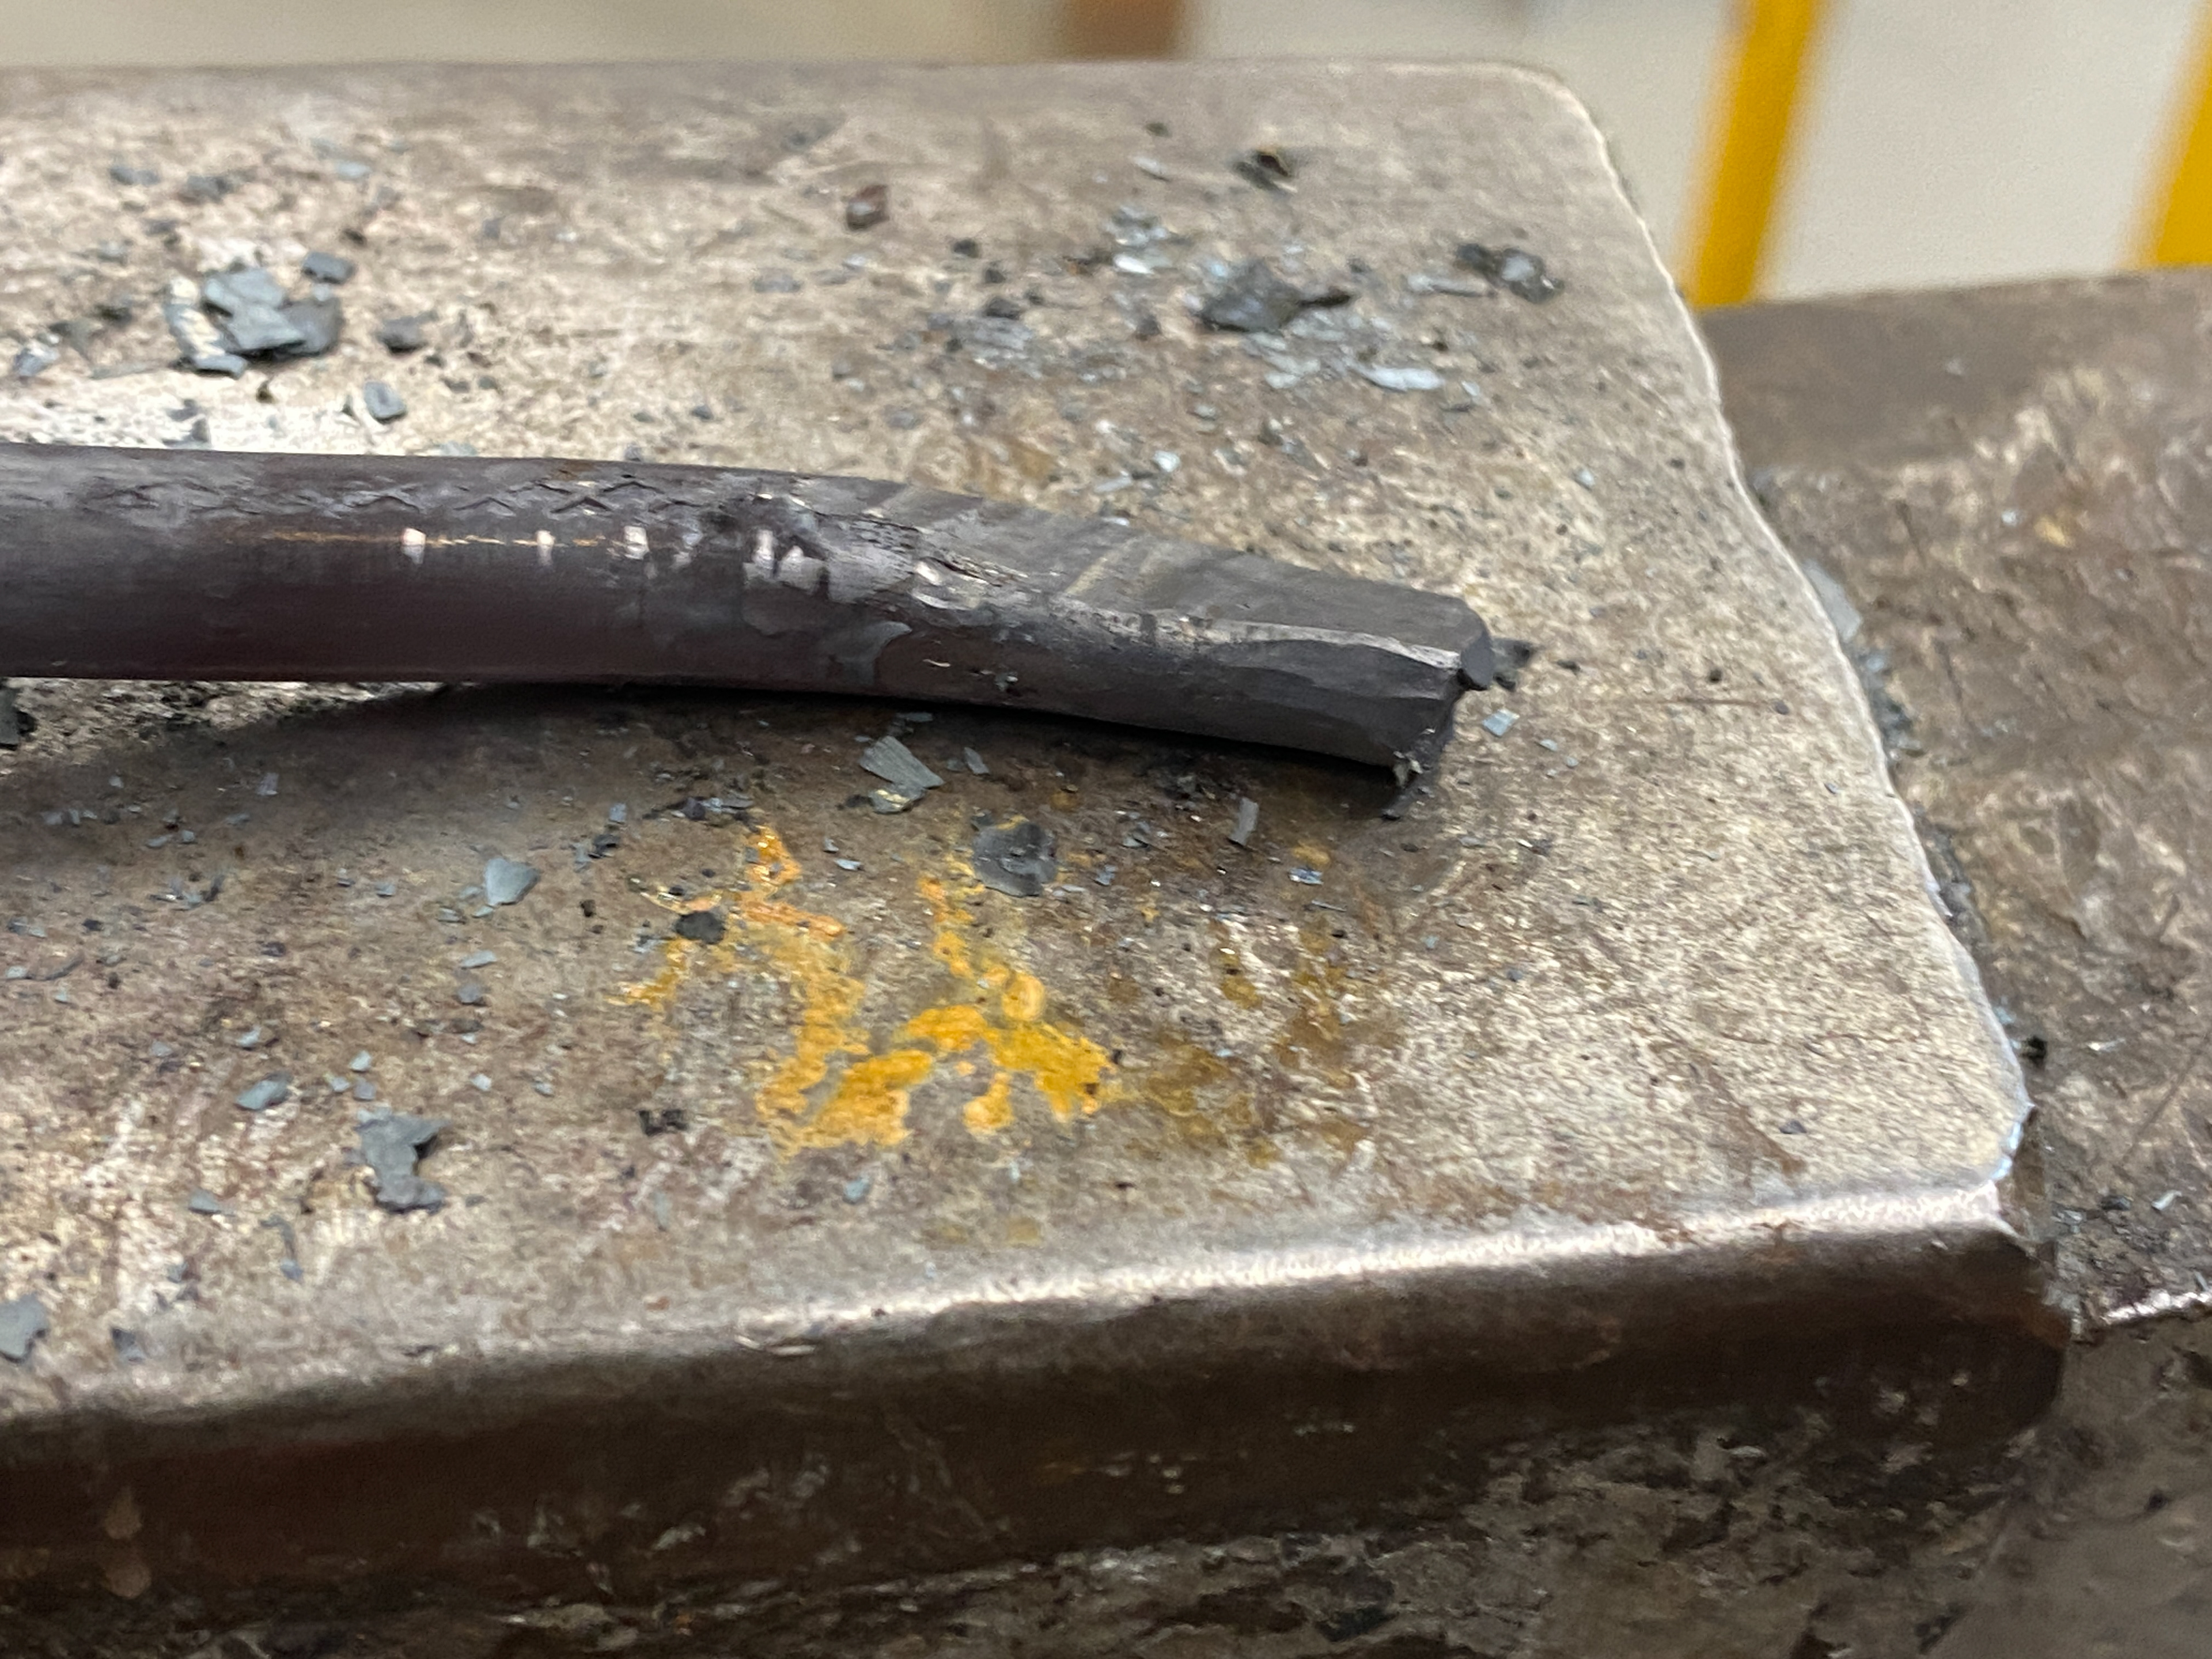
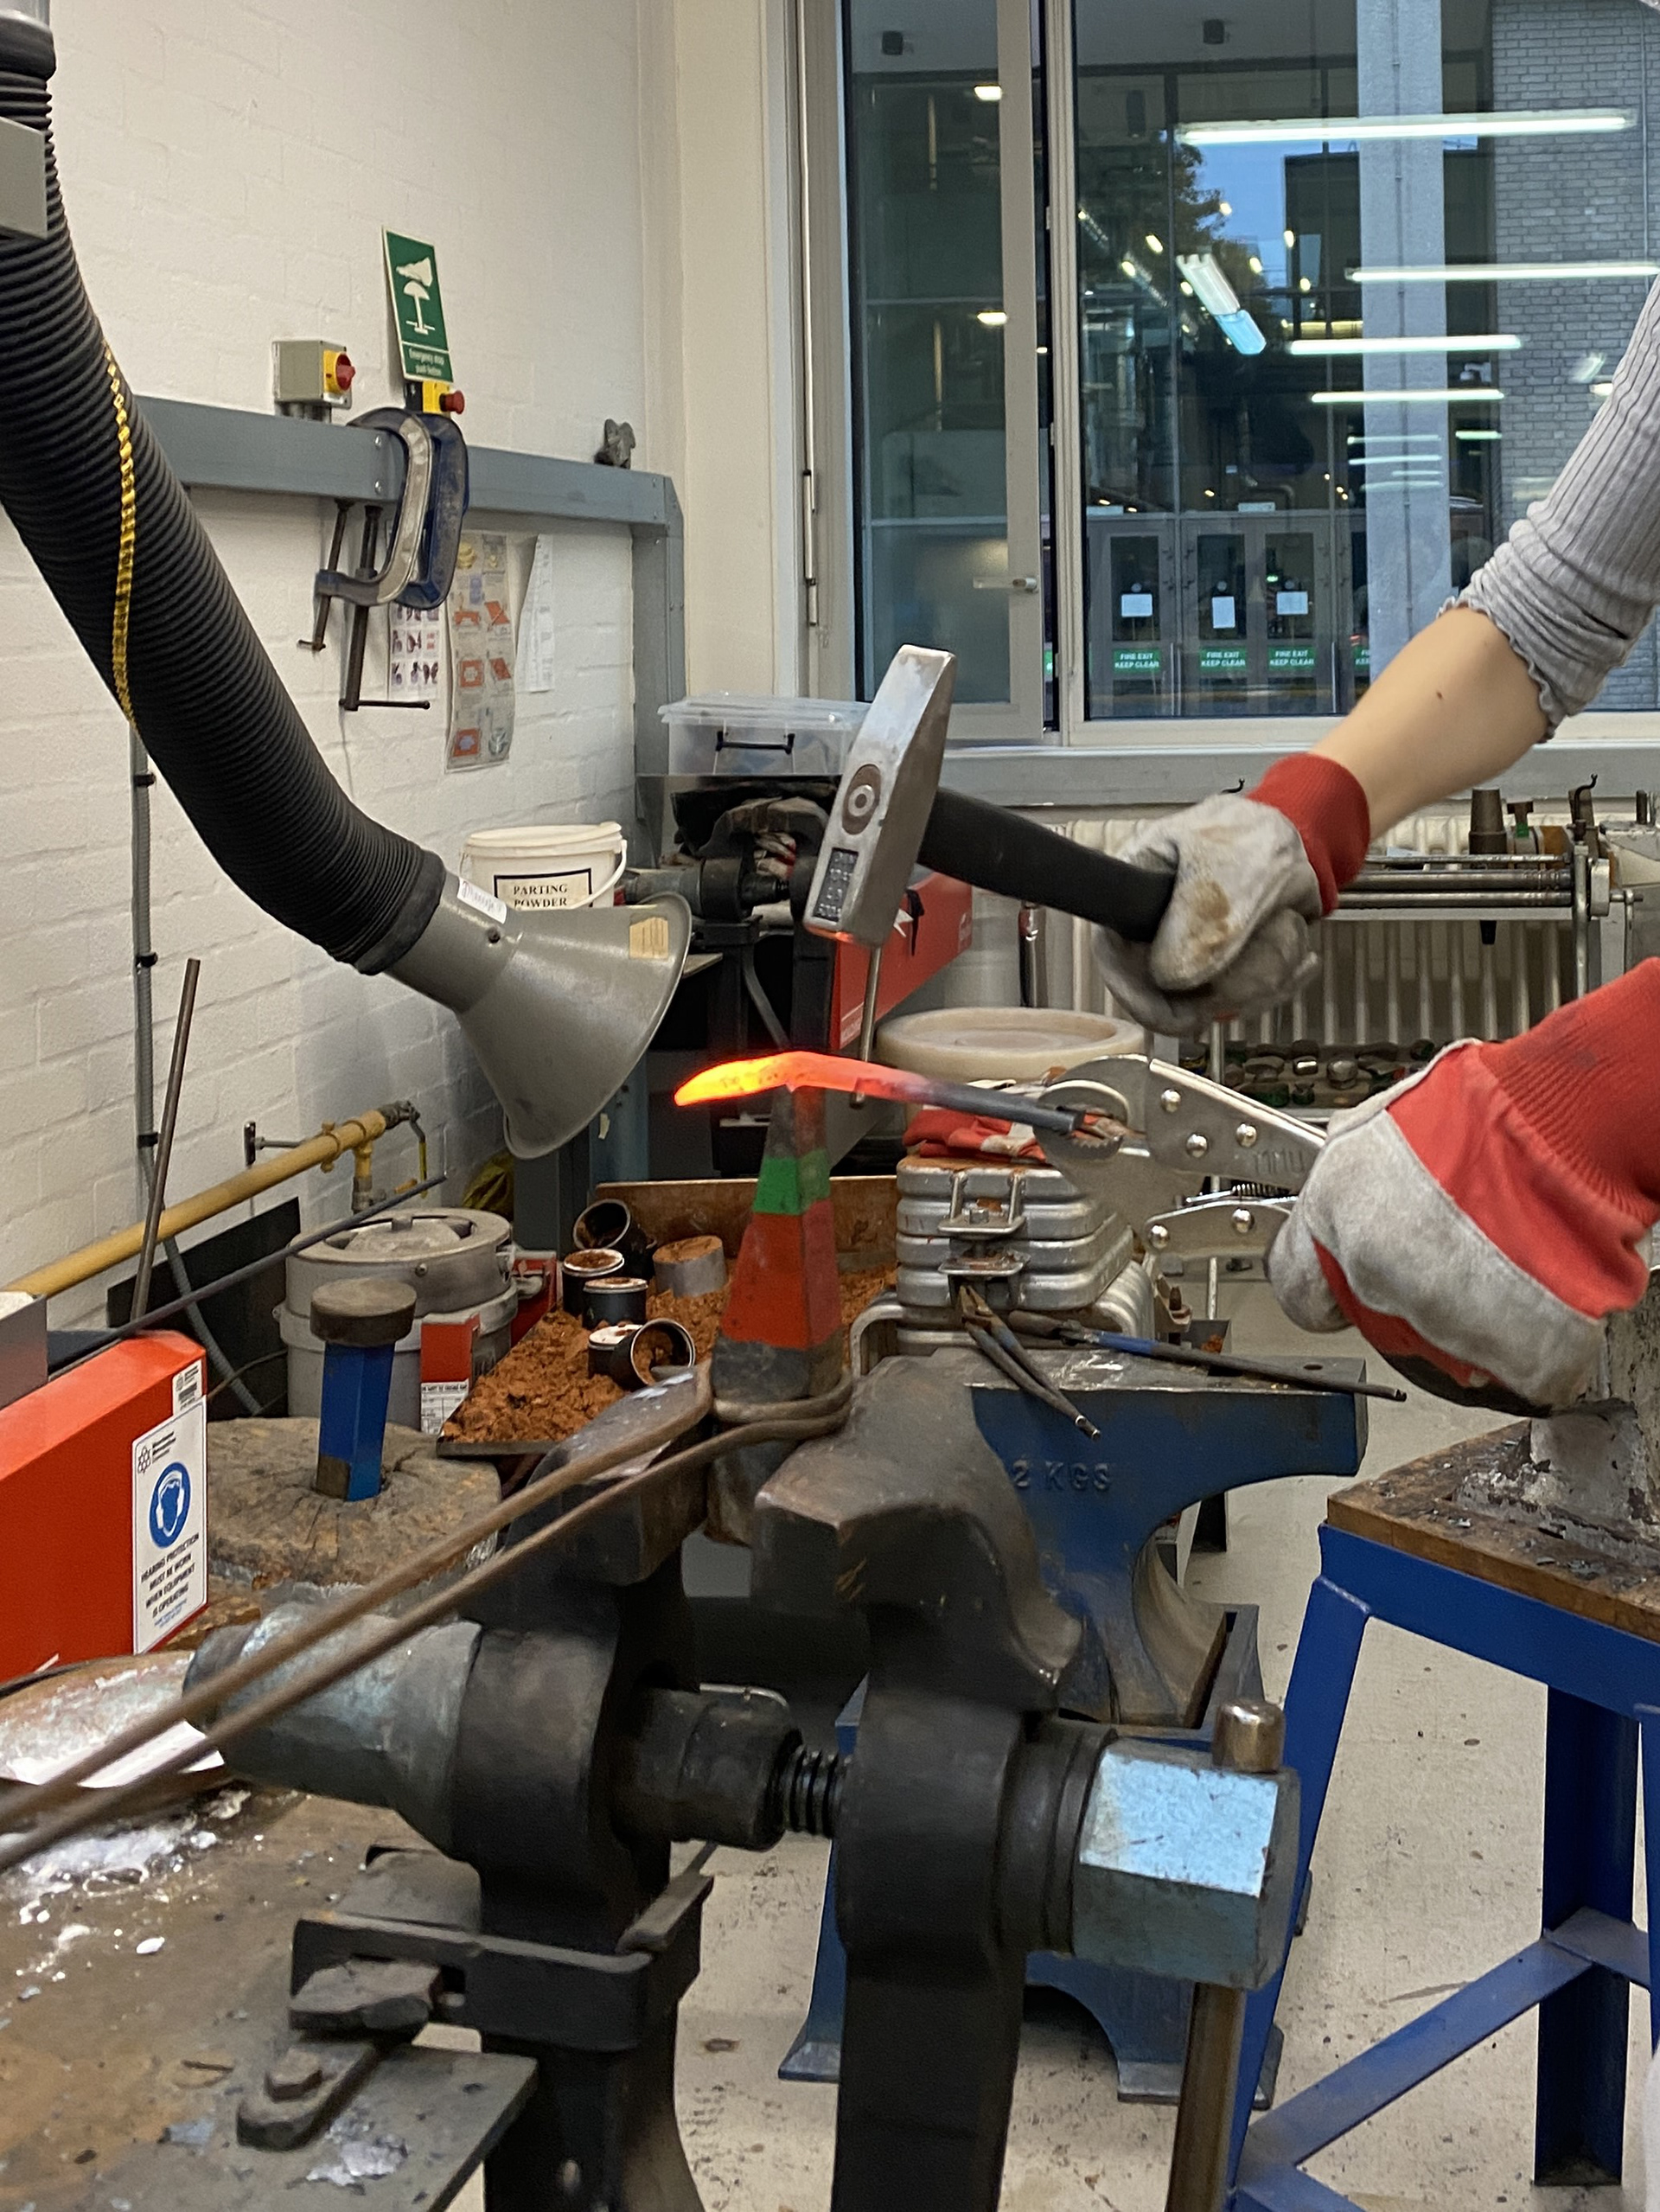
I then looked at forging out the whole chain loop from a short section of 10mm mild steel rod. I tapered the ends down to create a scarf joint and bent the length around the horn of the anvil. Once again, the joint didn’t weld. However, from this test I was predominantly focusing of practicing holding the piece in the tongs and working around the different areas of the anvil. Furthermore, I was practicing thinning out the ends for the scarf joint and the placement of each hammer blow.
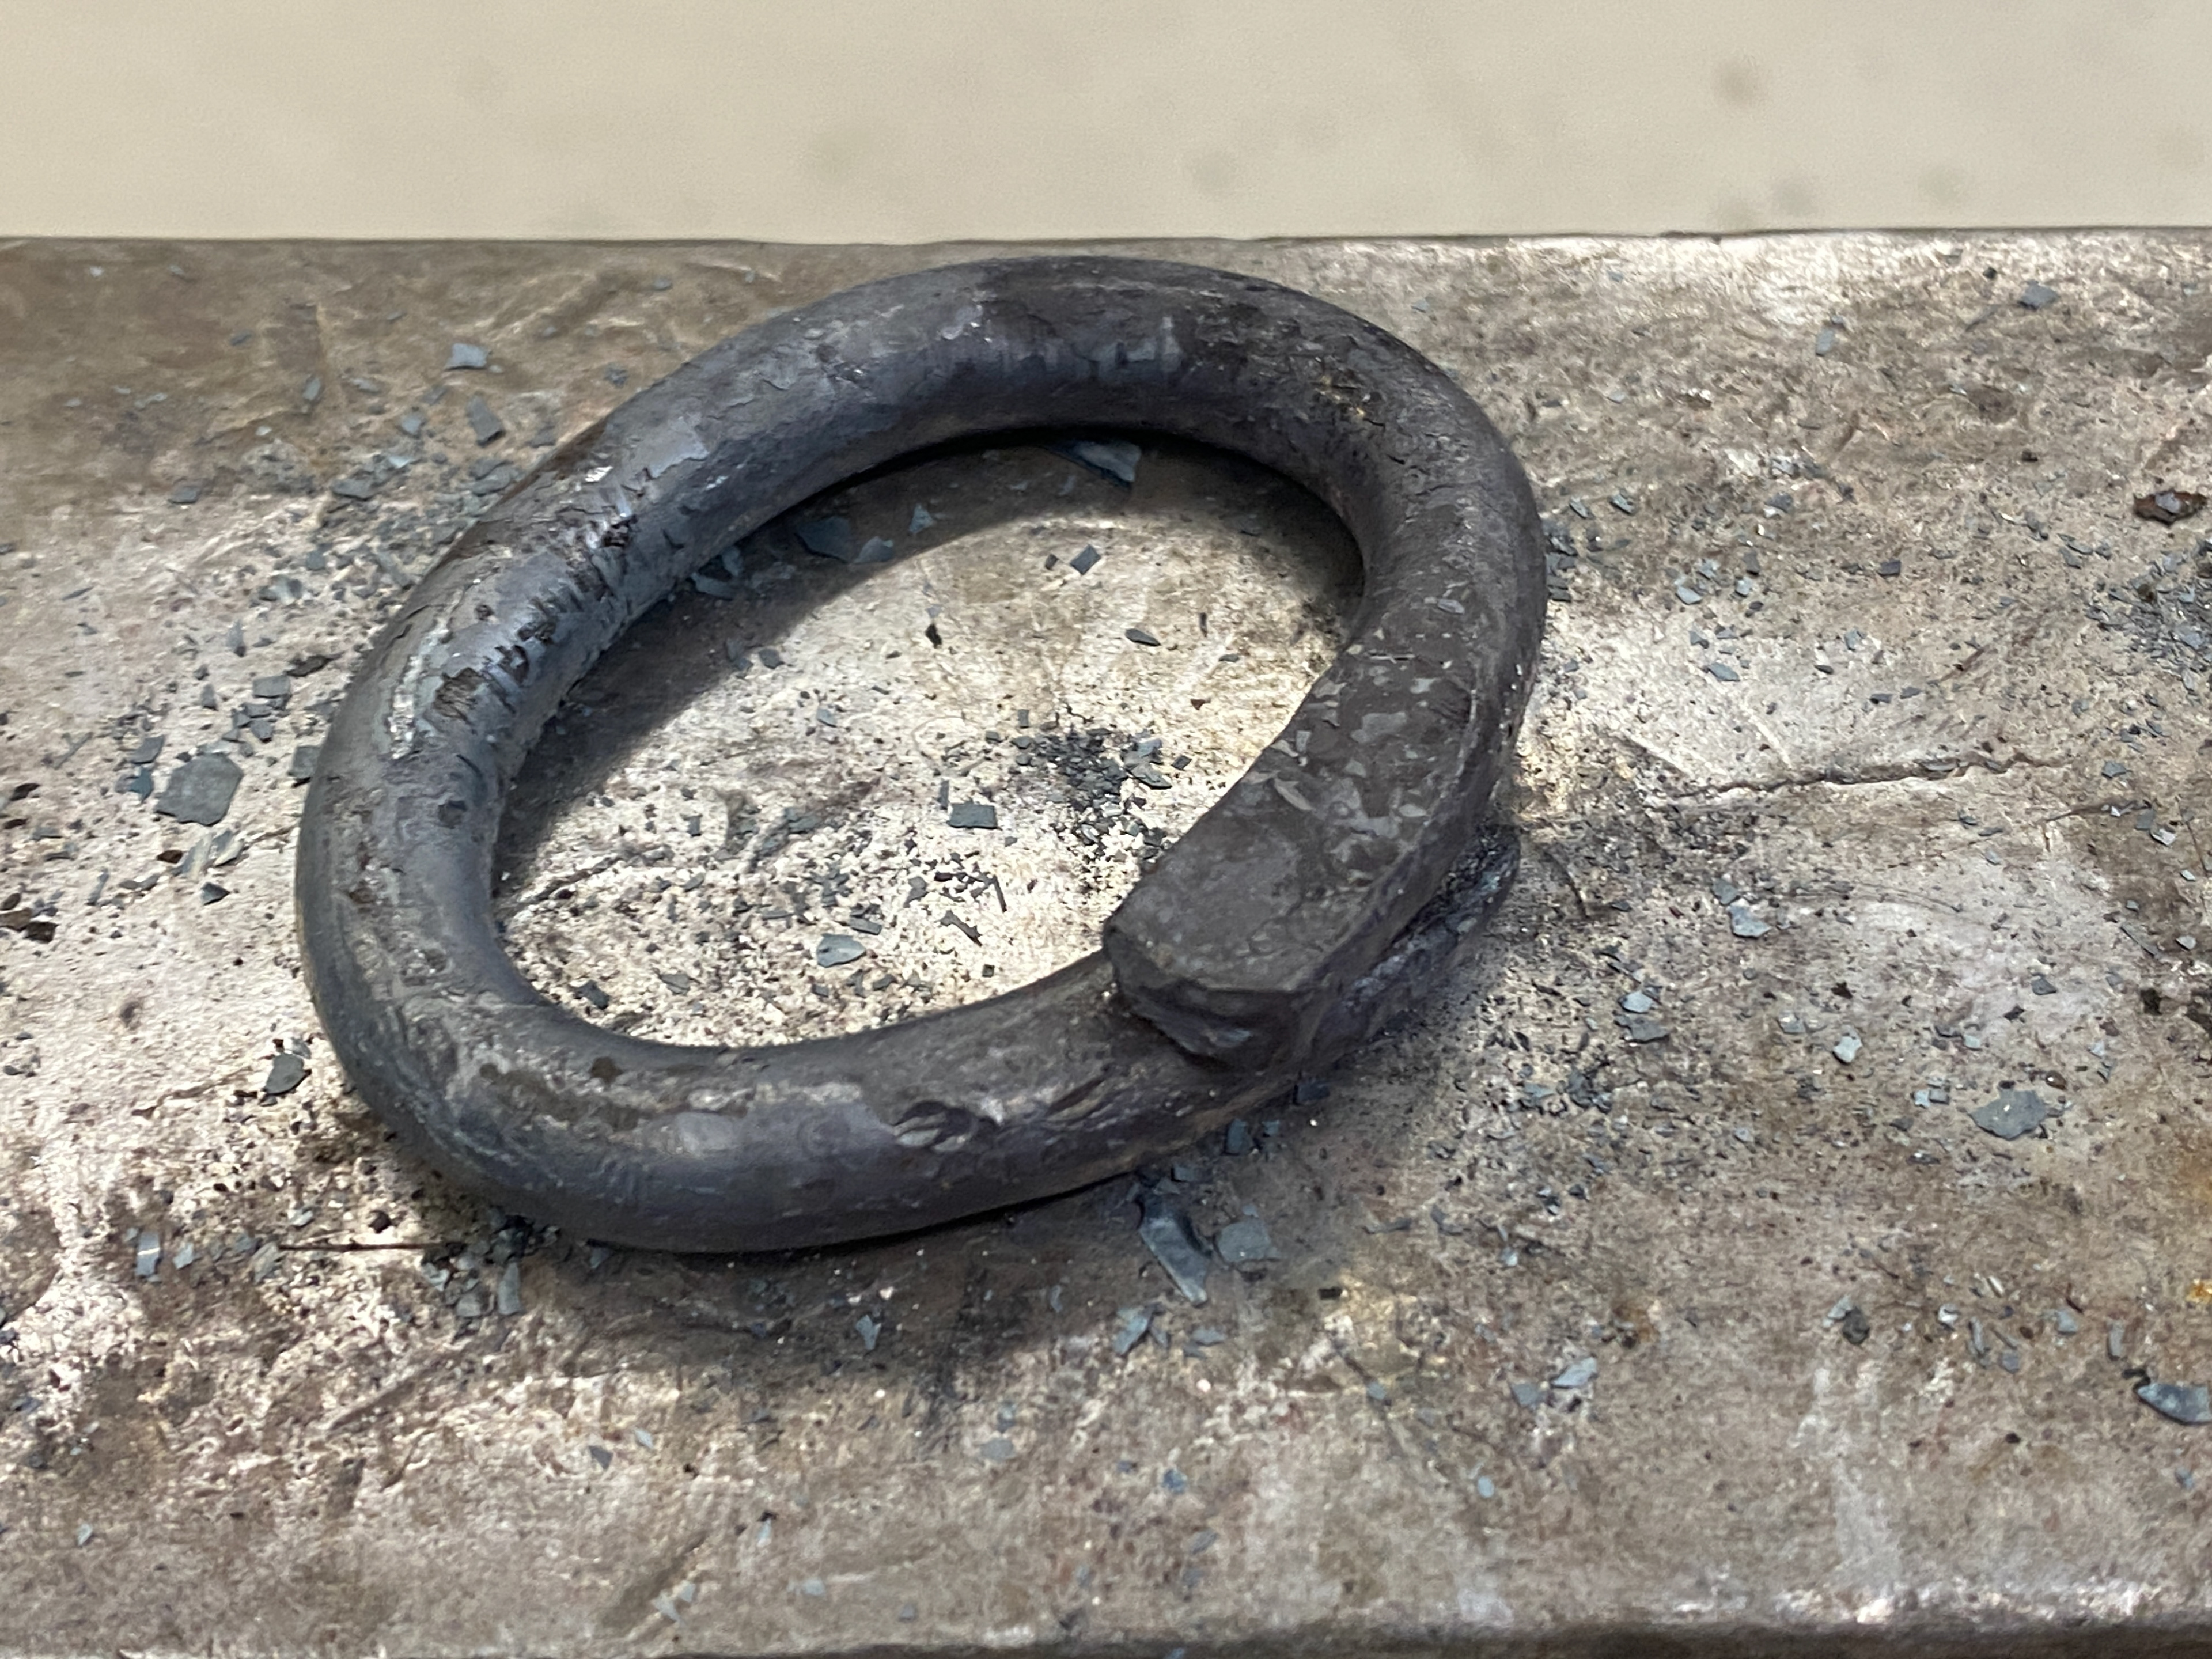
Another test where forming the ring was more successful but the weld didn’t form, and the ends slipped as the placement of the hammer blows pushed them in opposite directions. Therefore, I need to test the process of forge welding separately to focus and improve this skill.
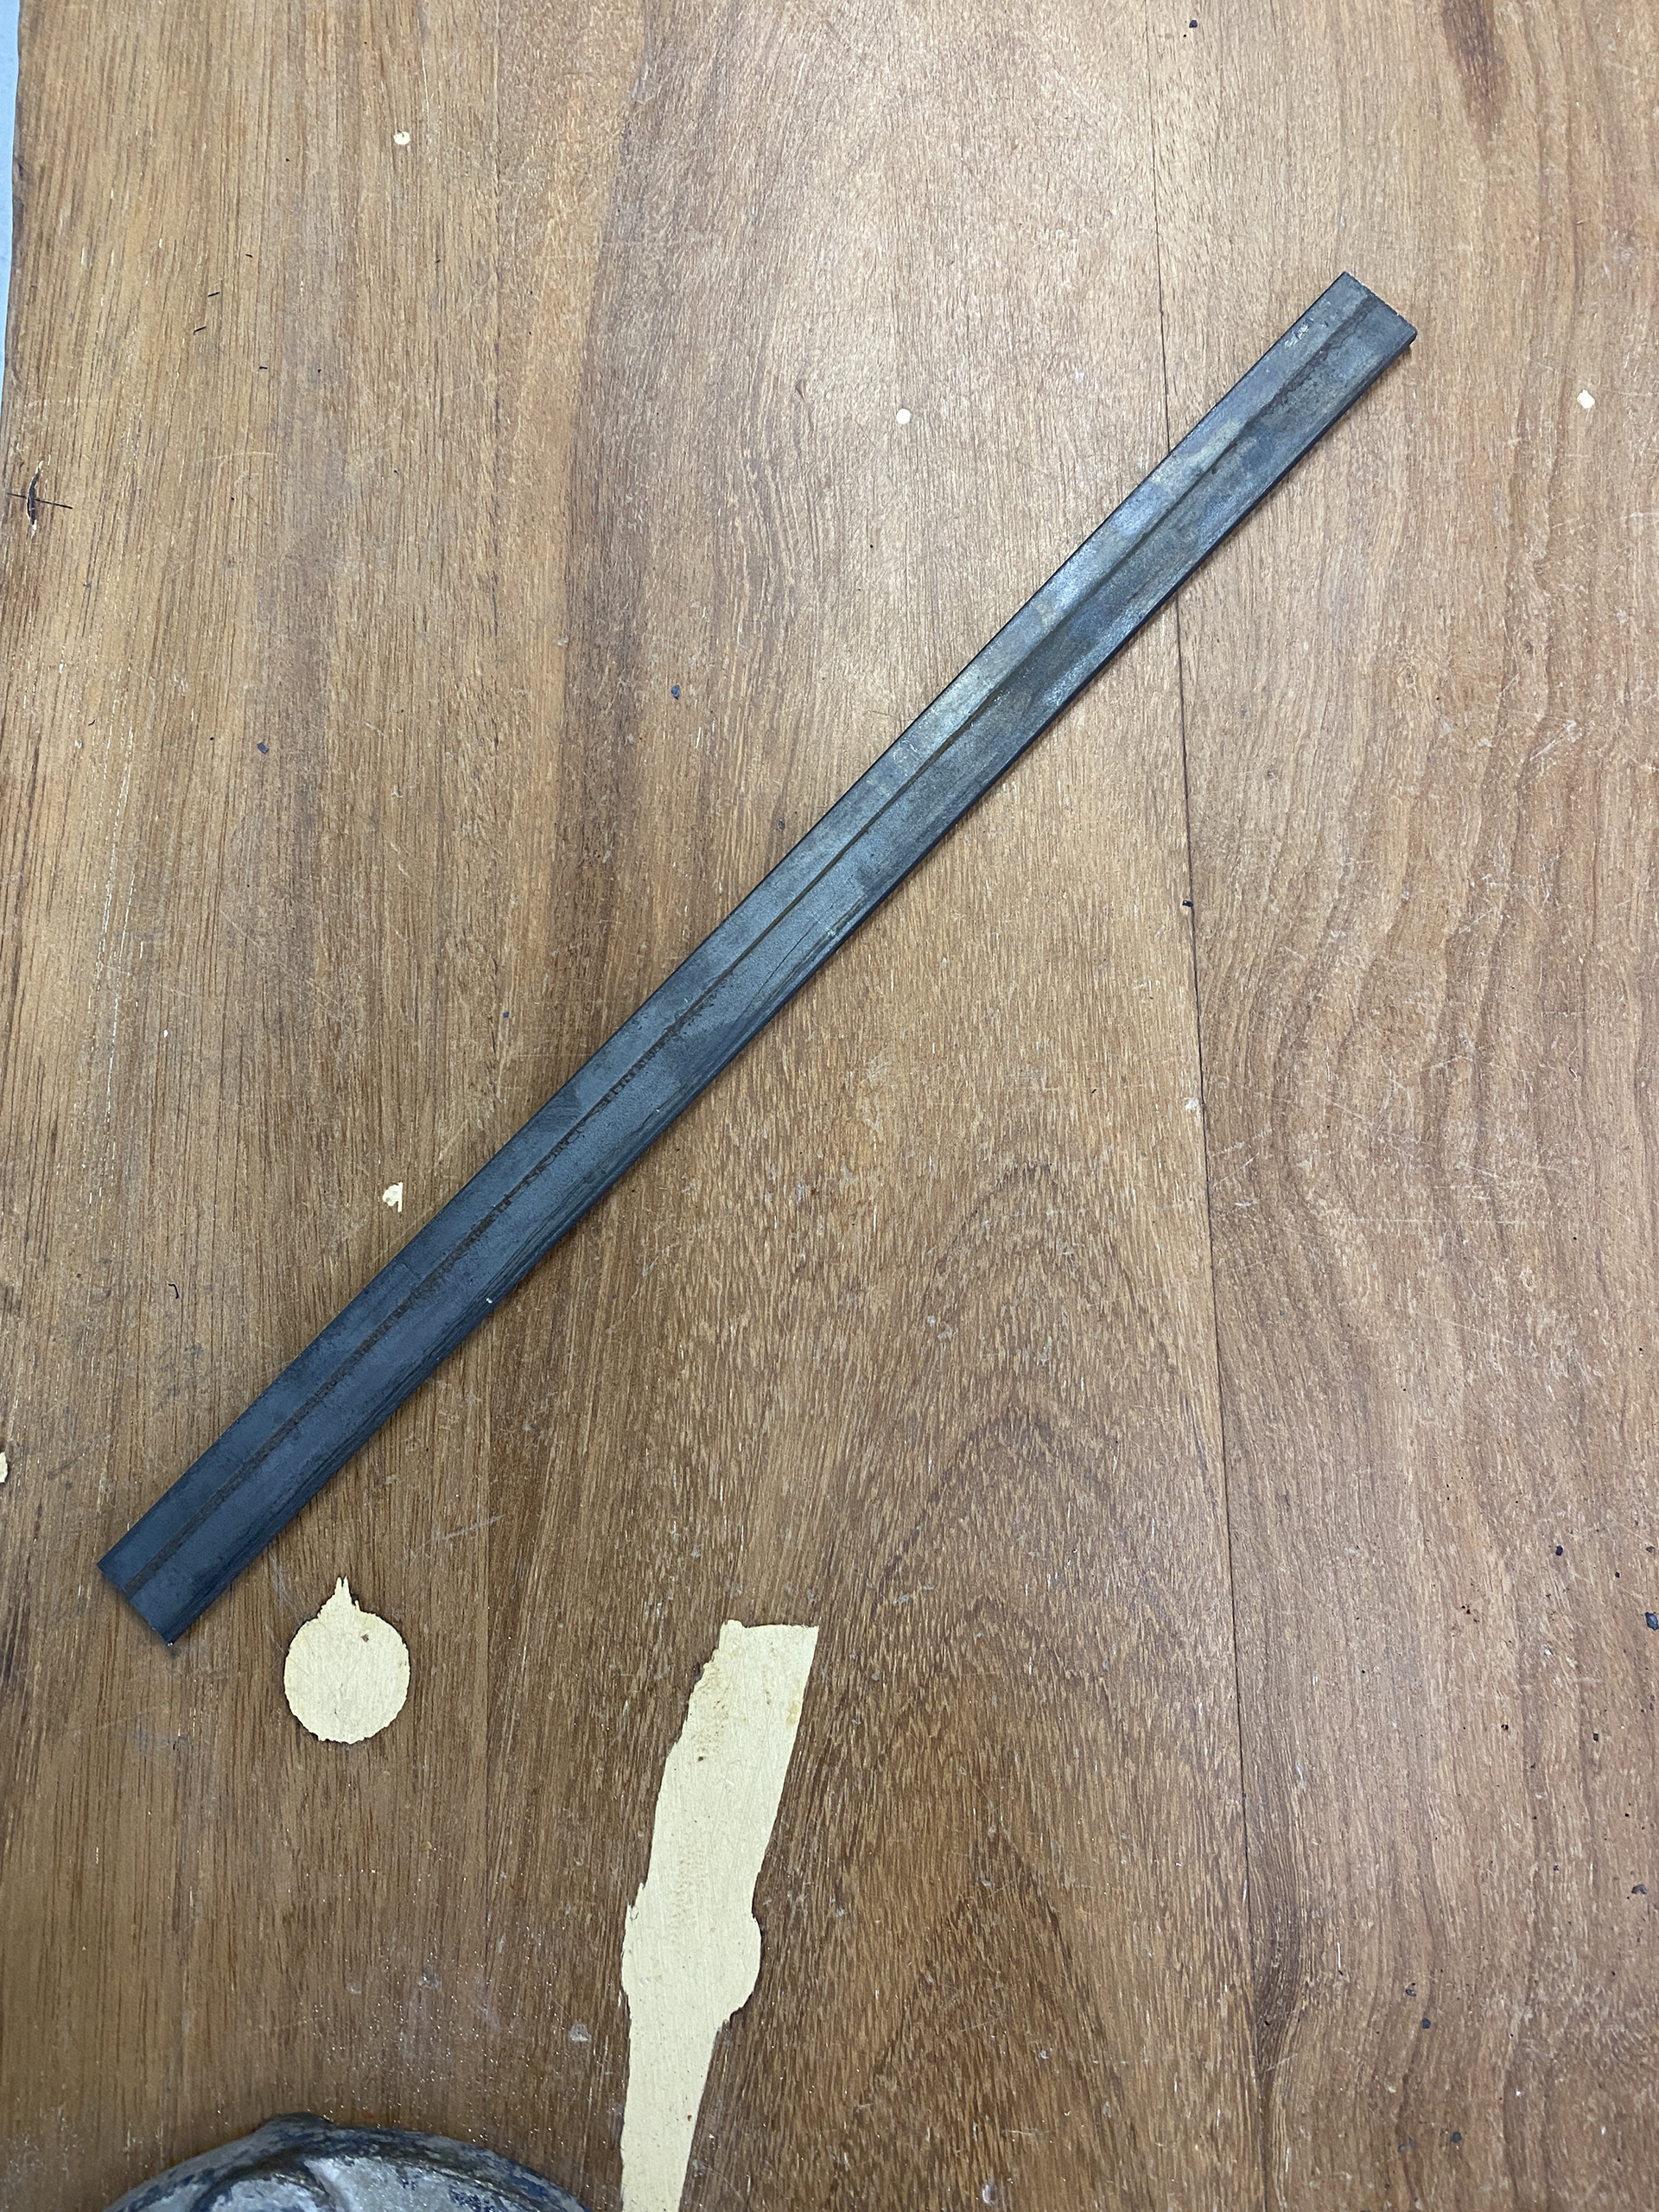

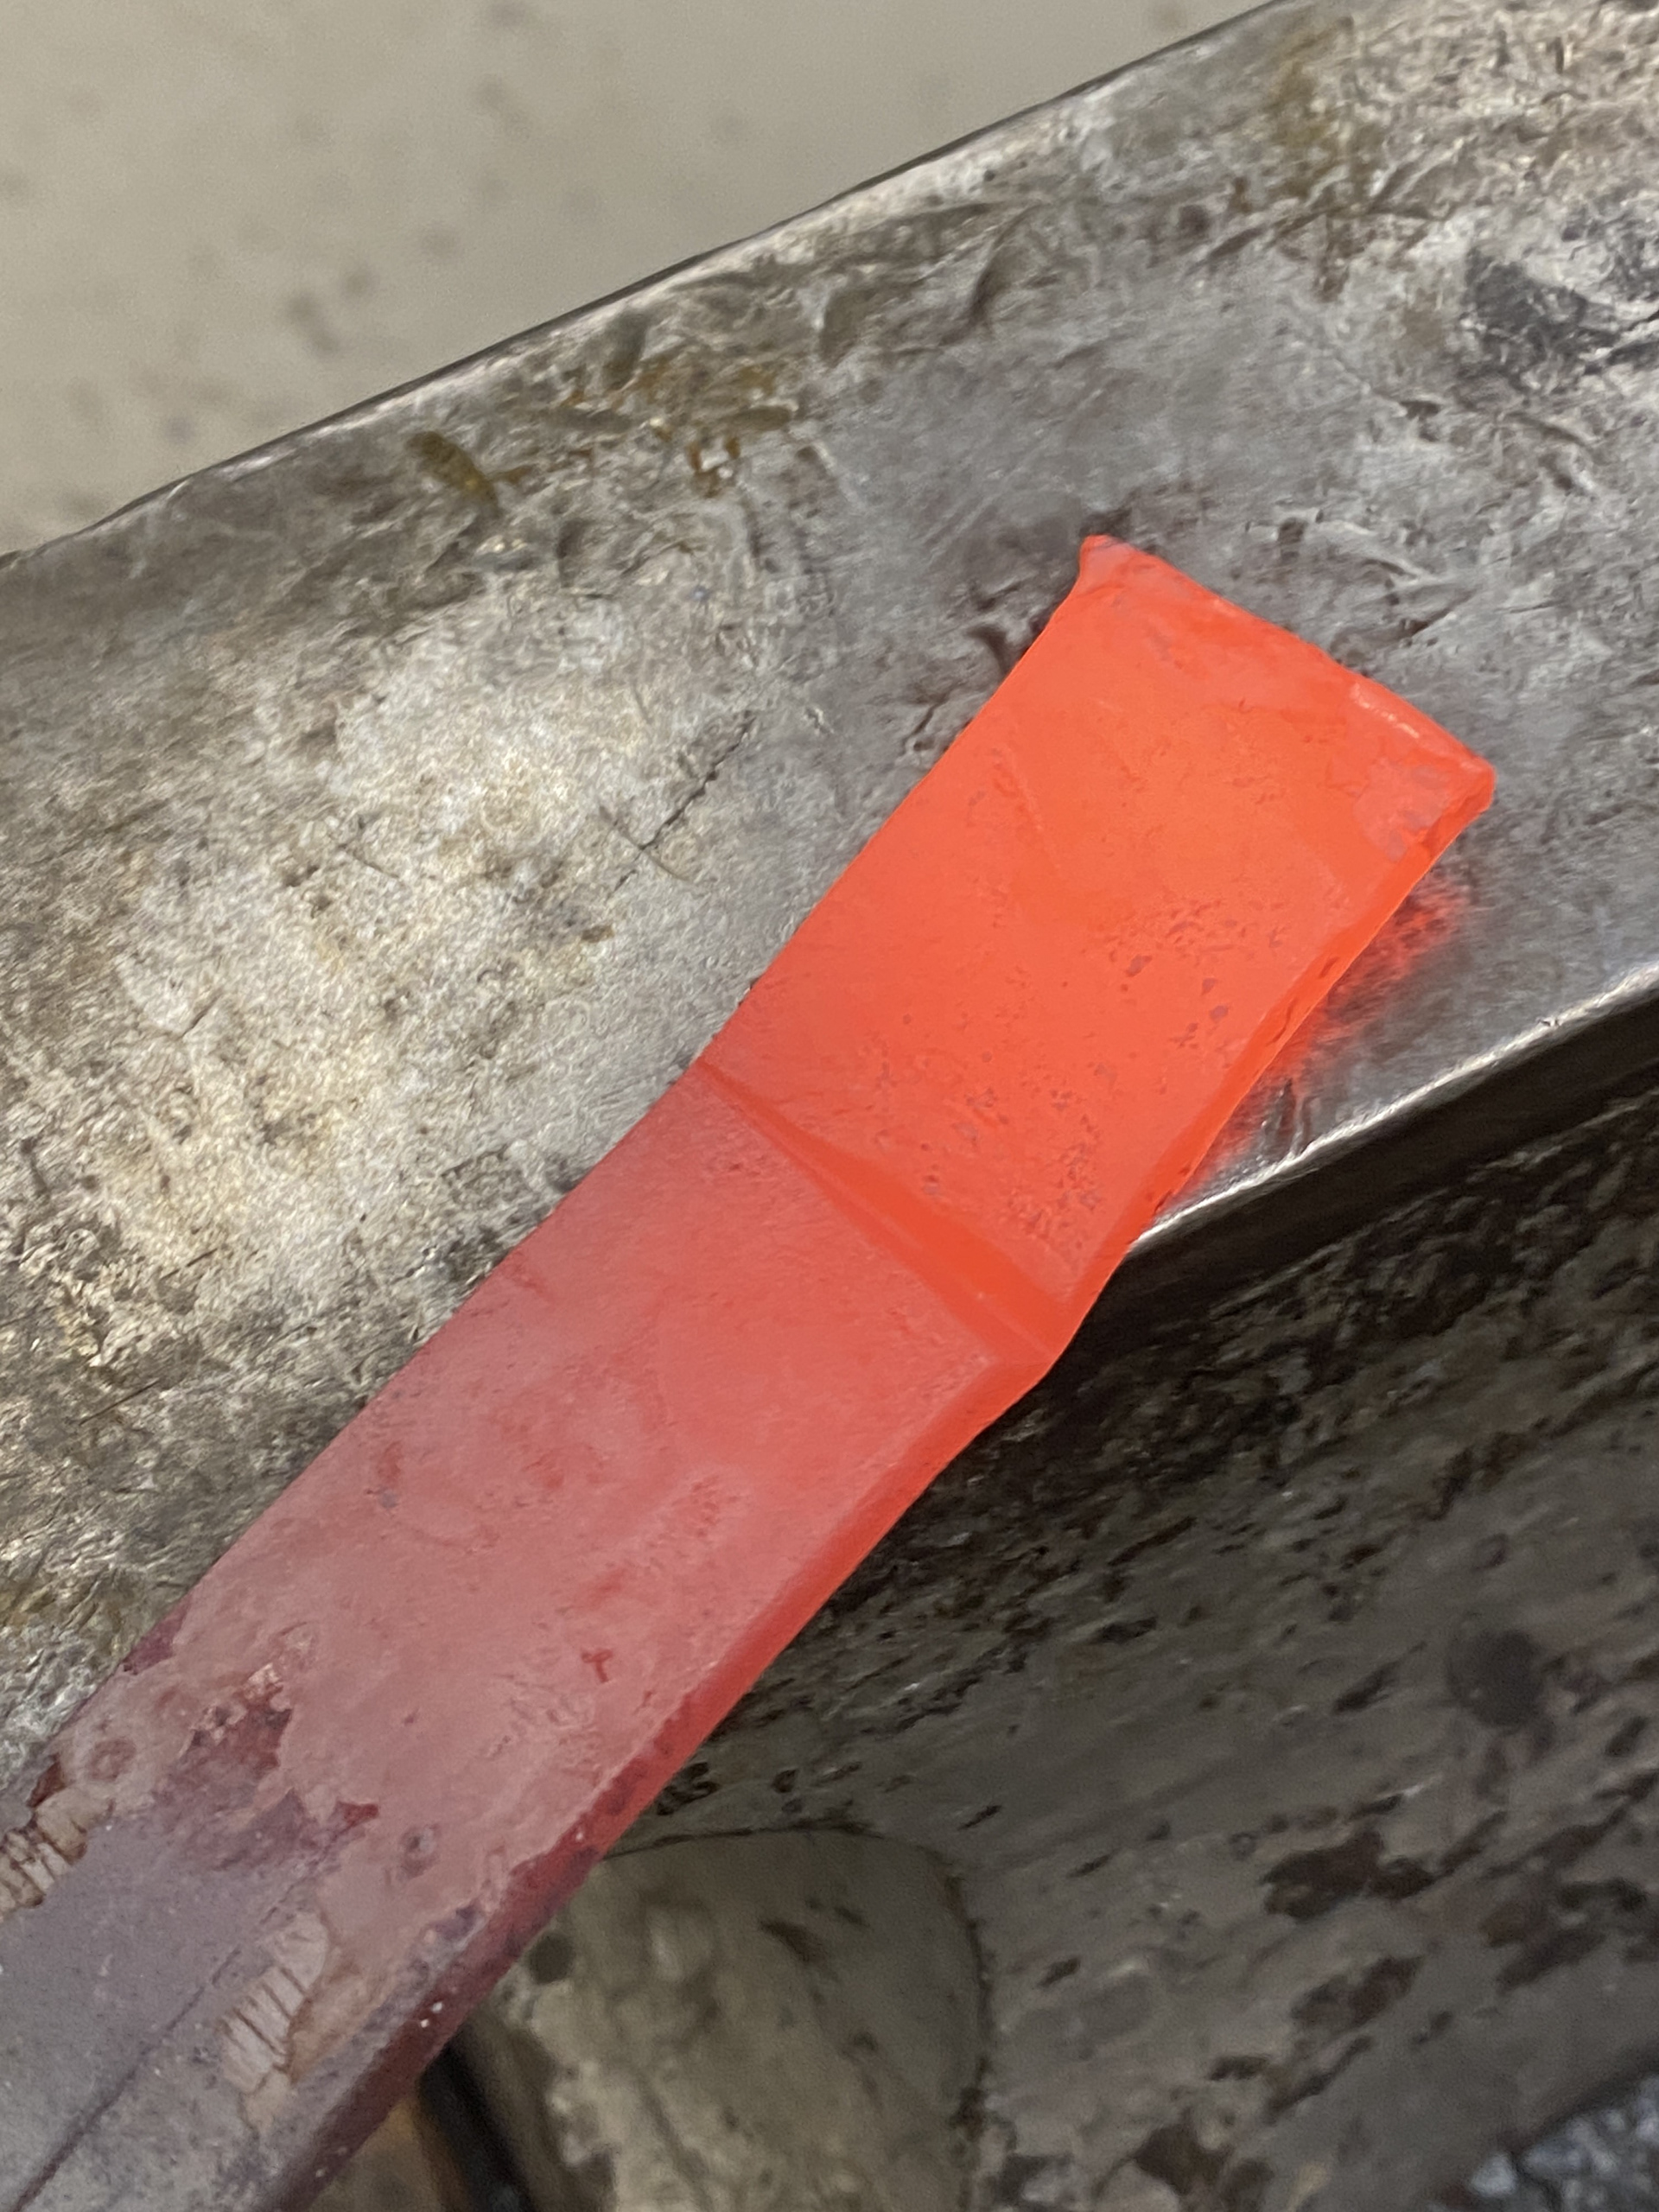
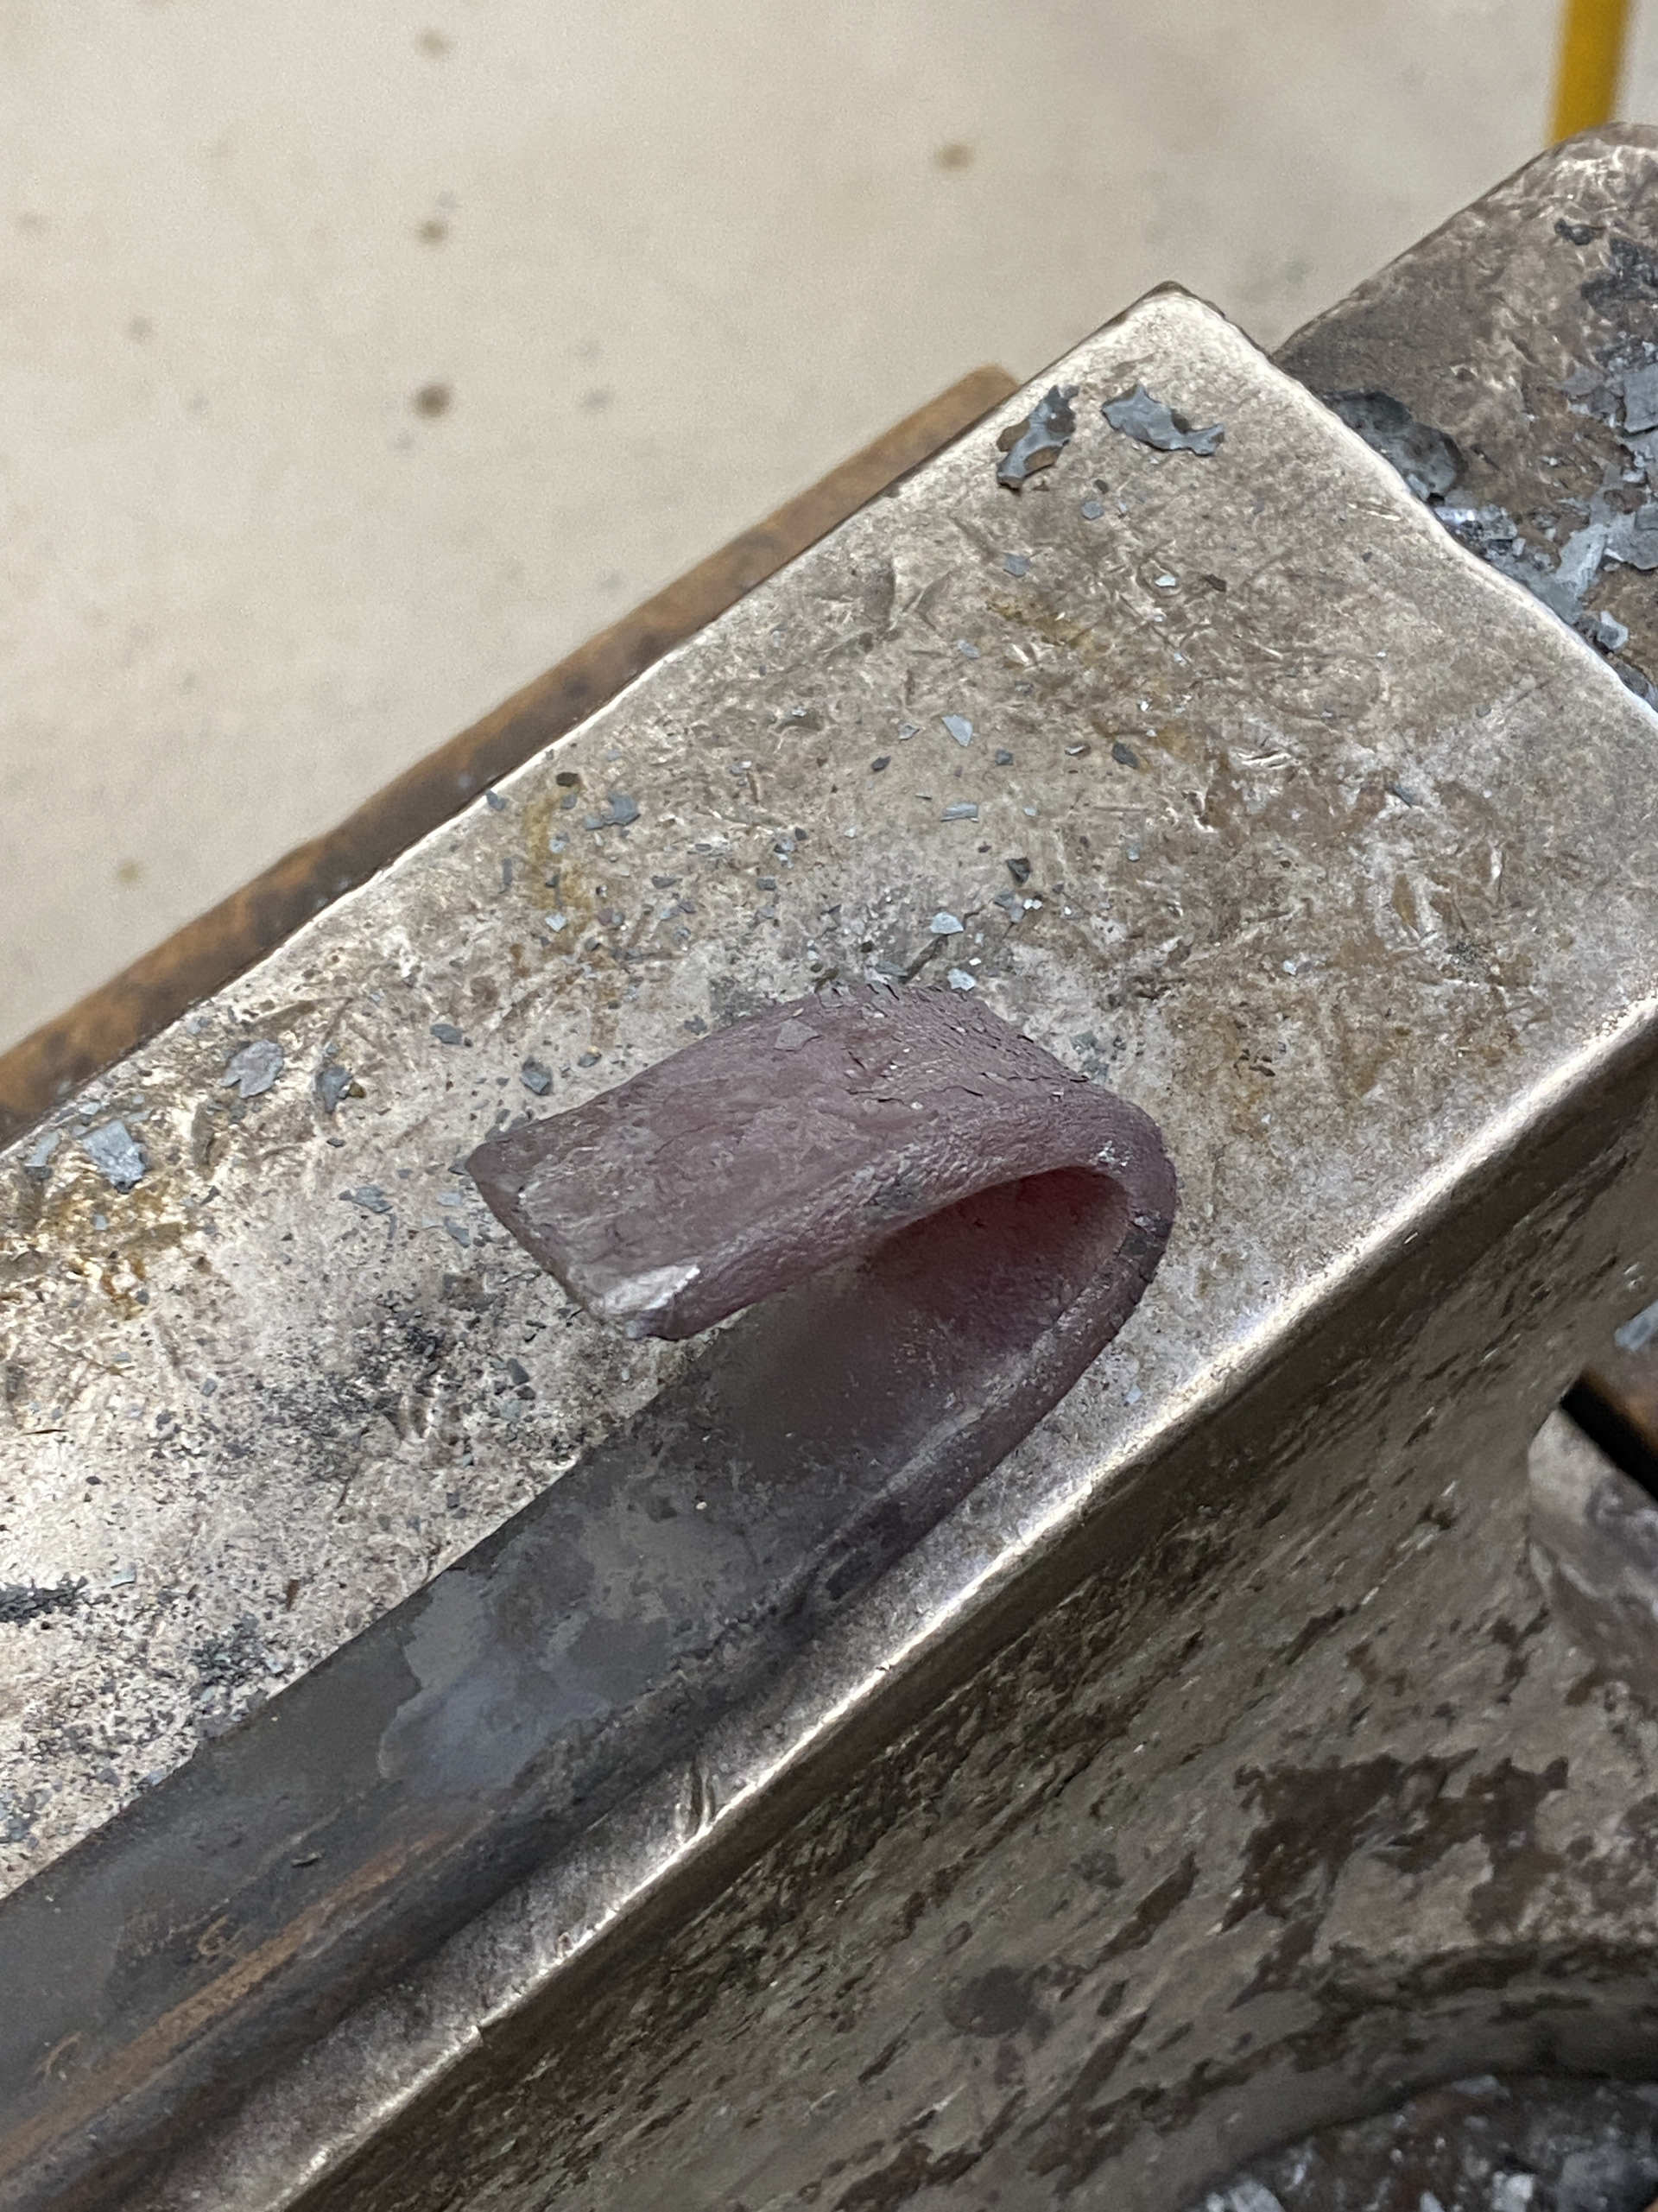

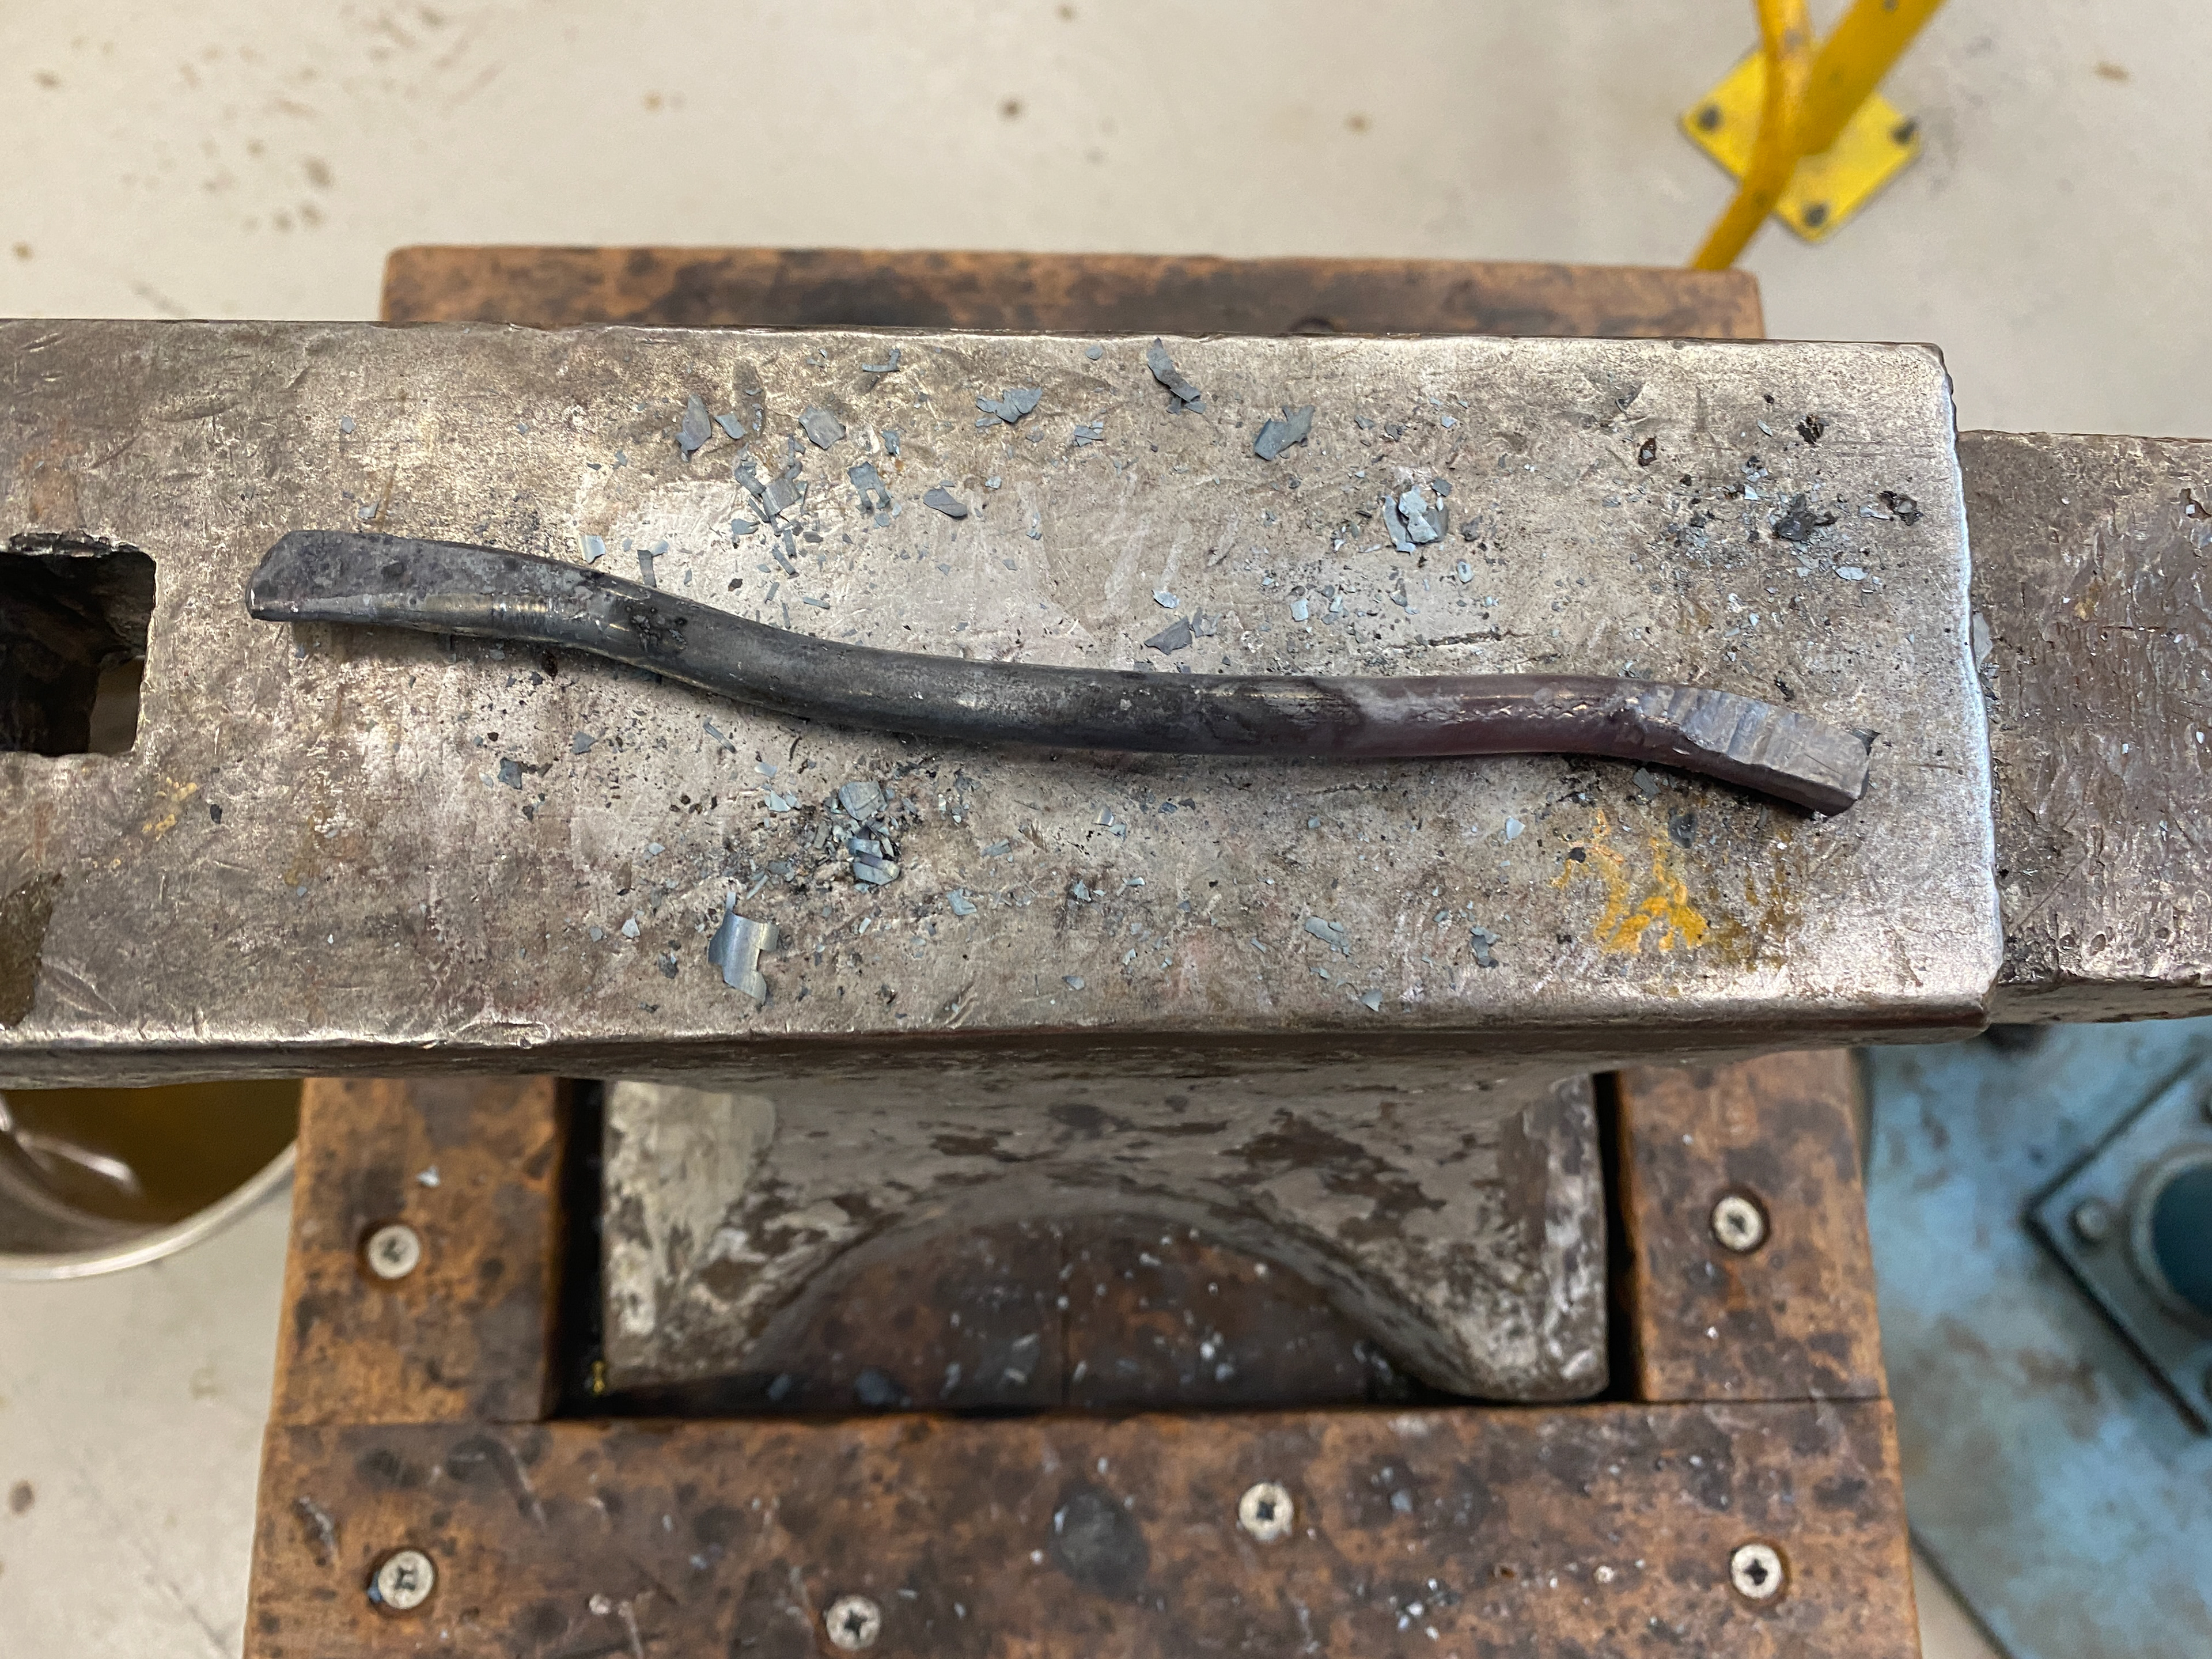
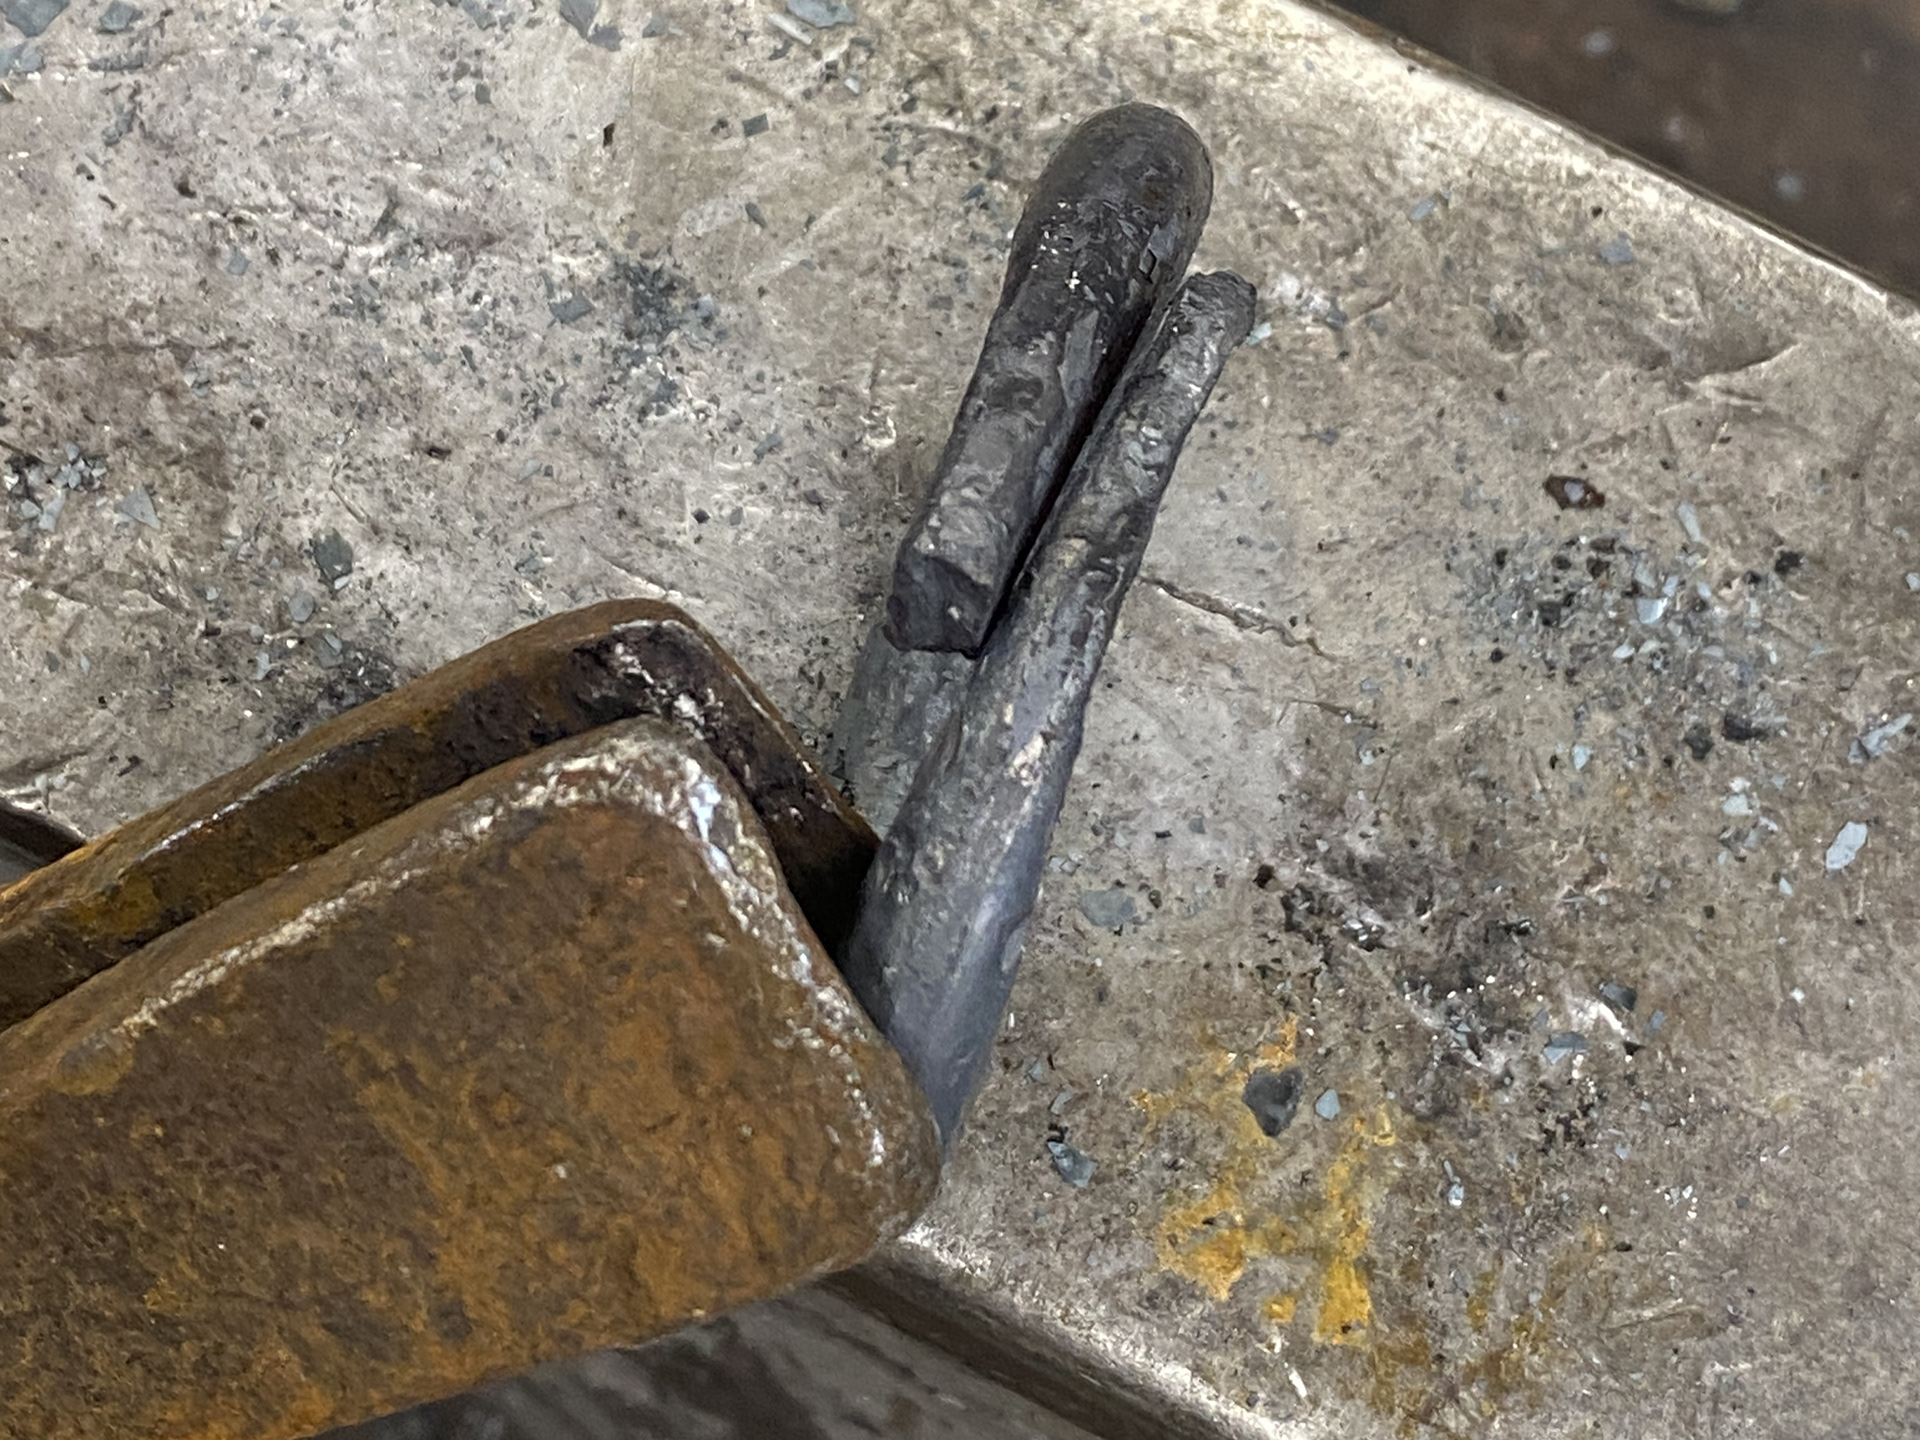
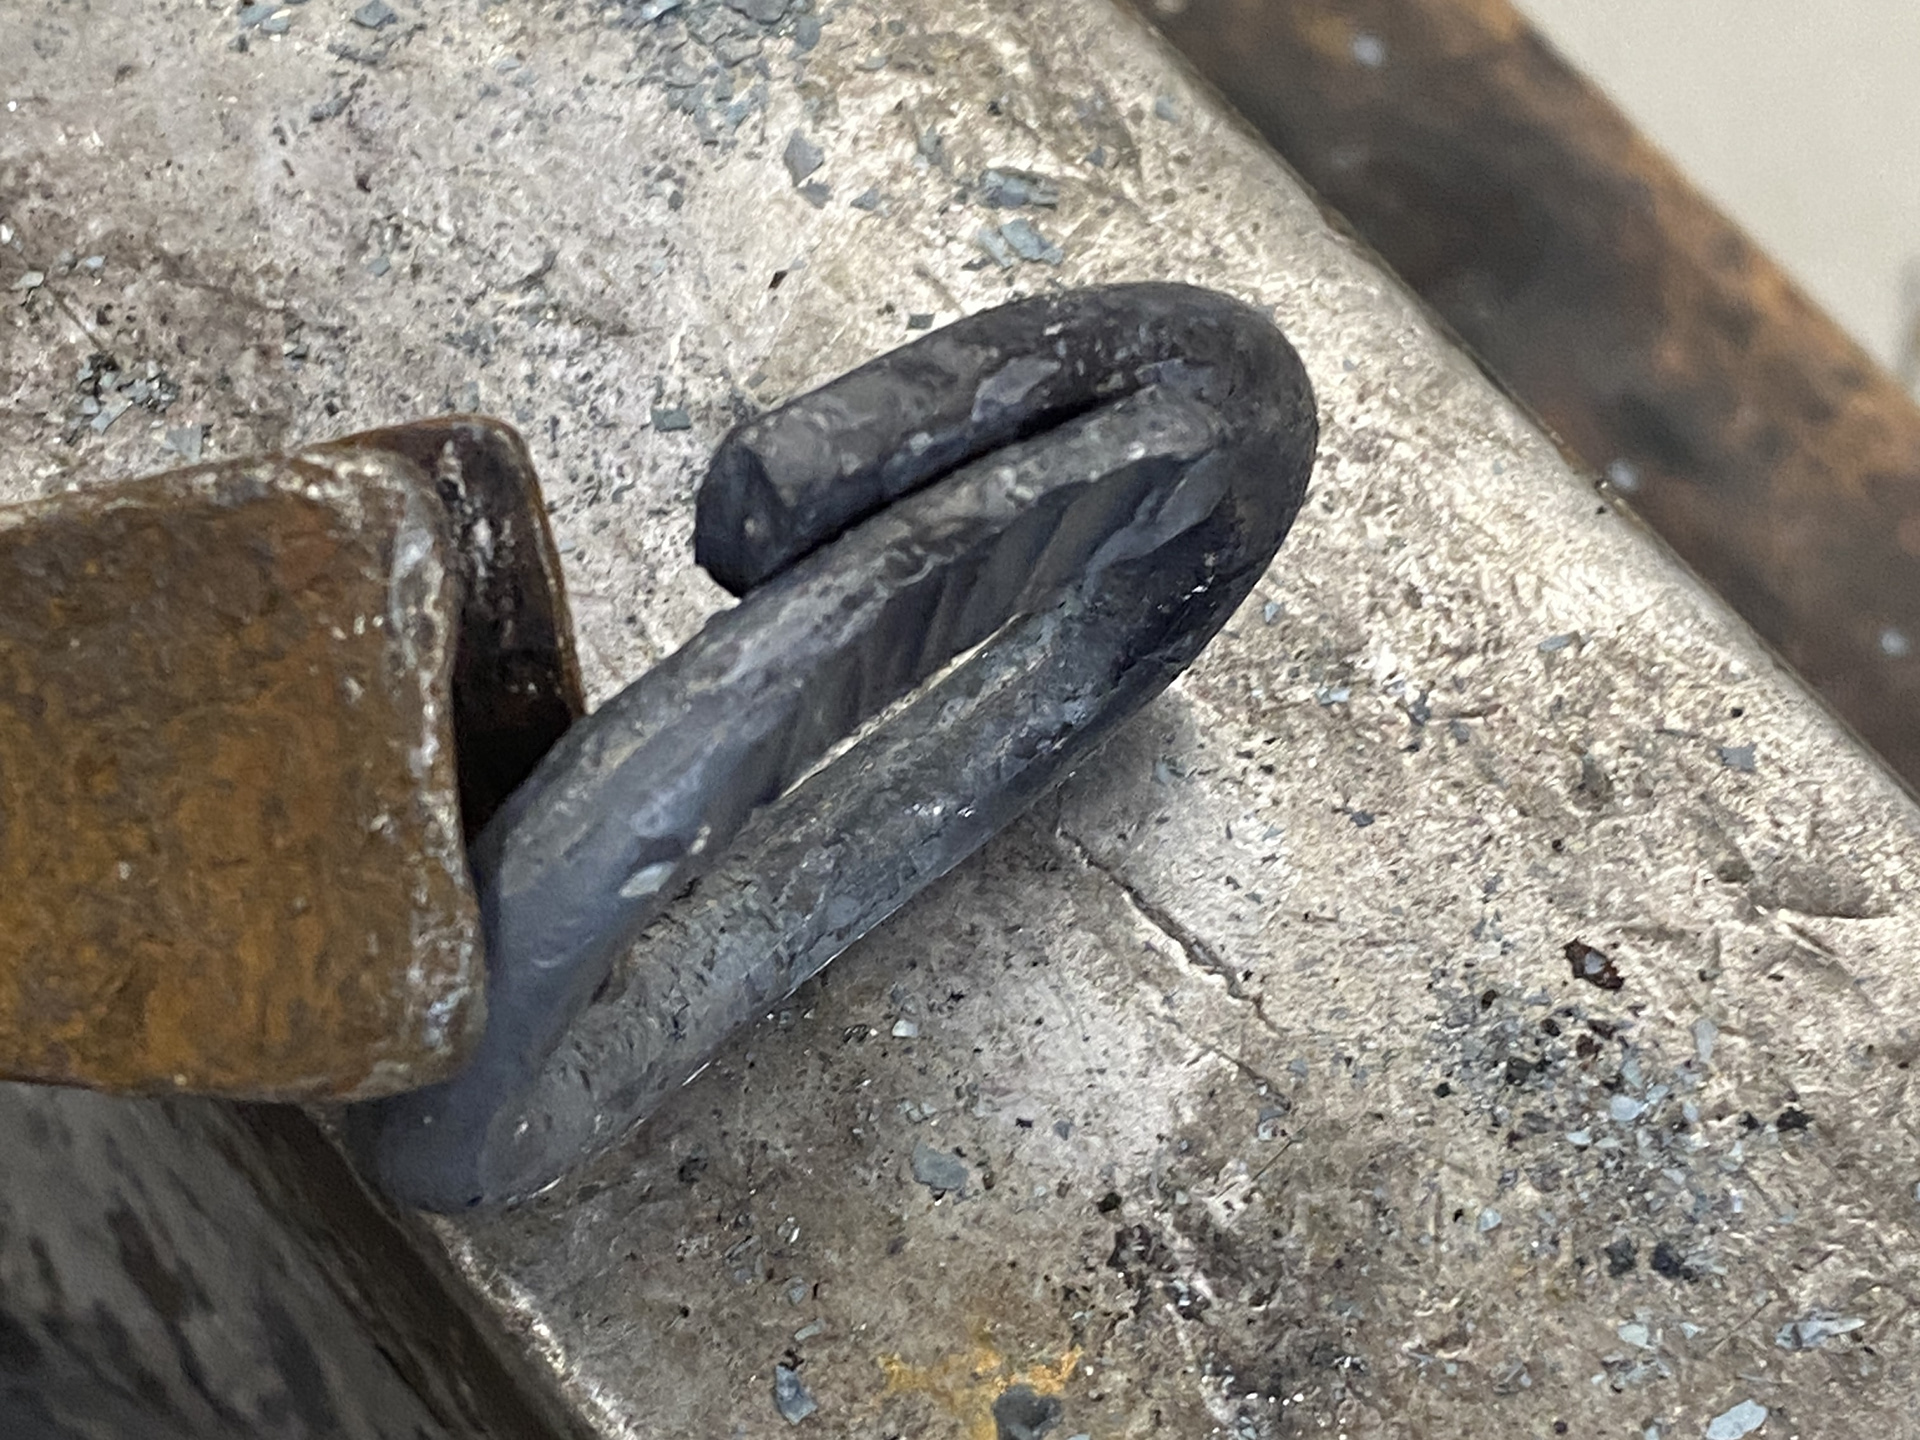
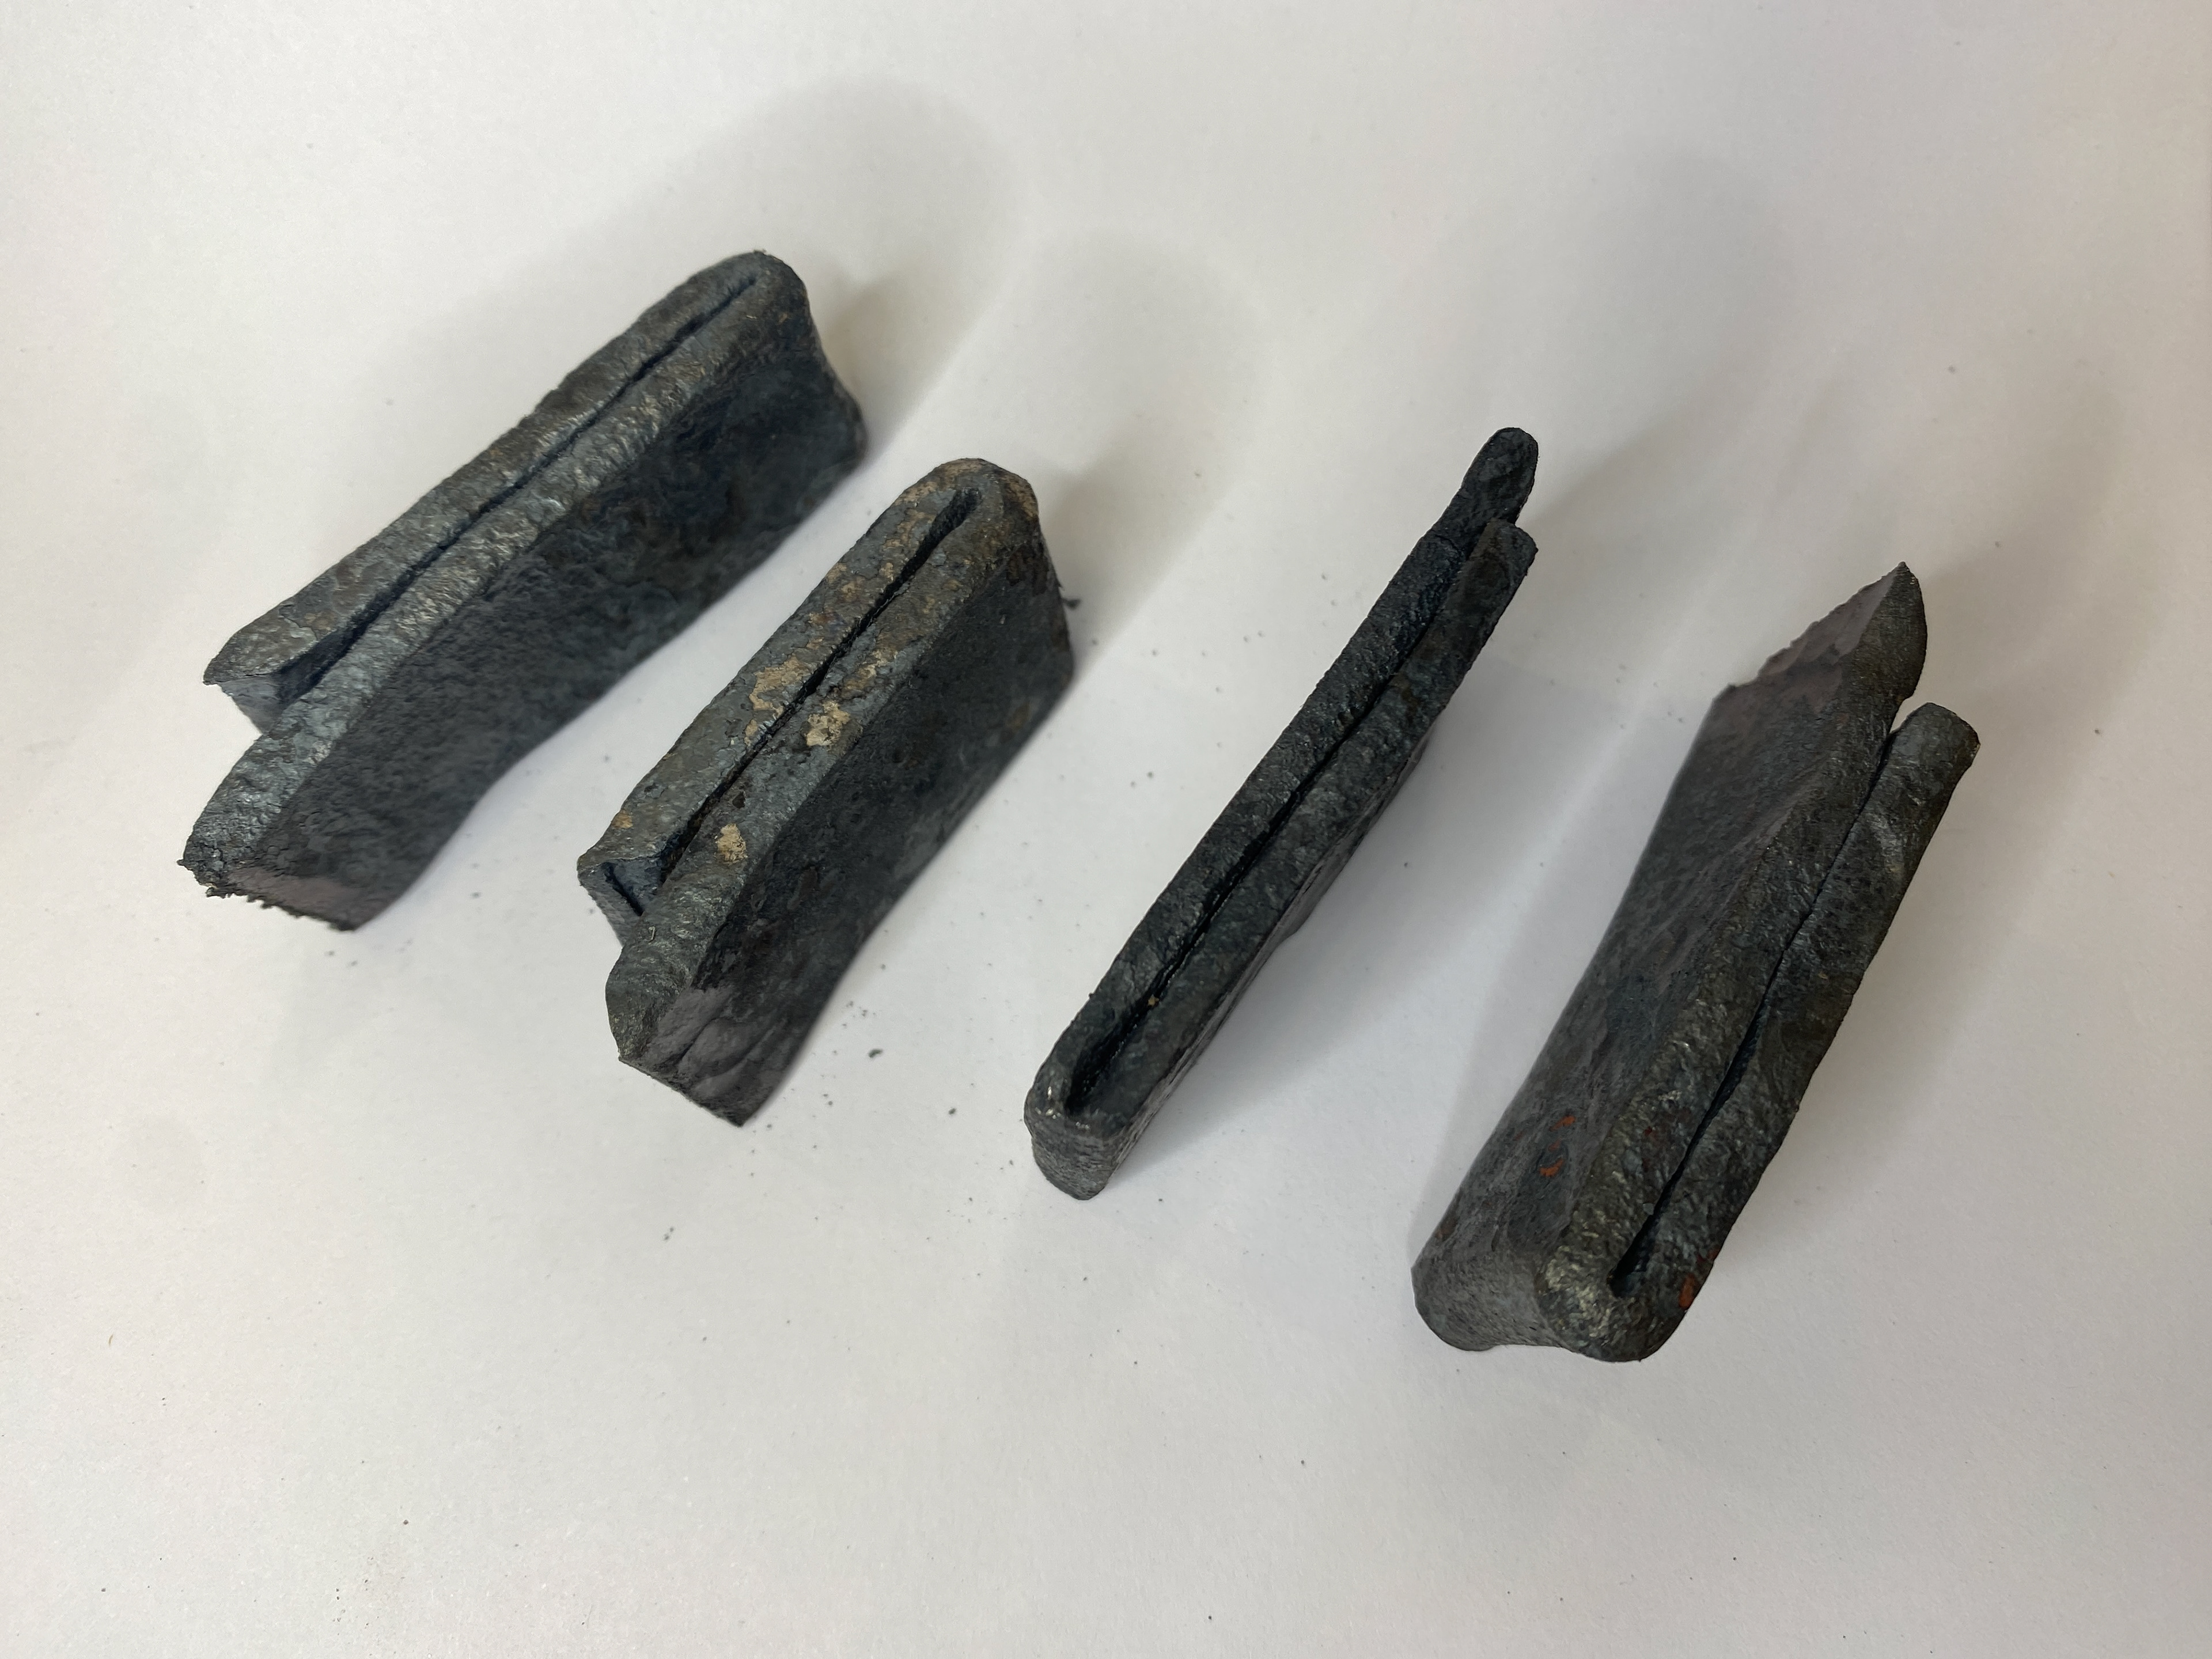
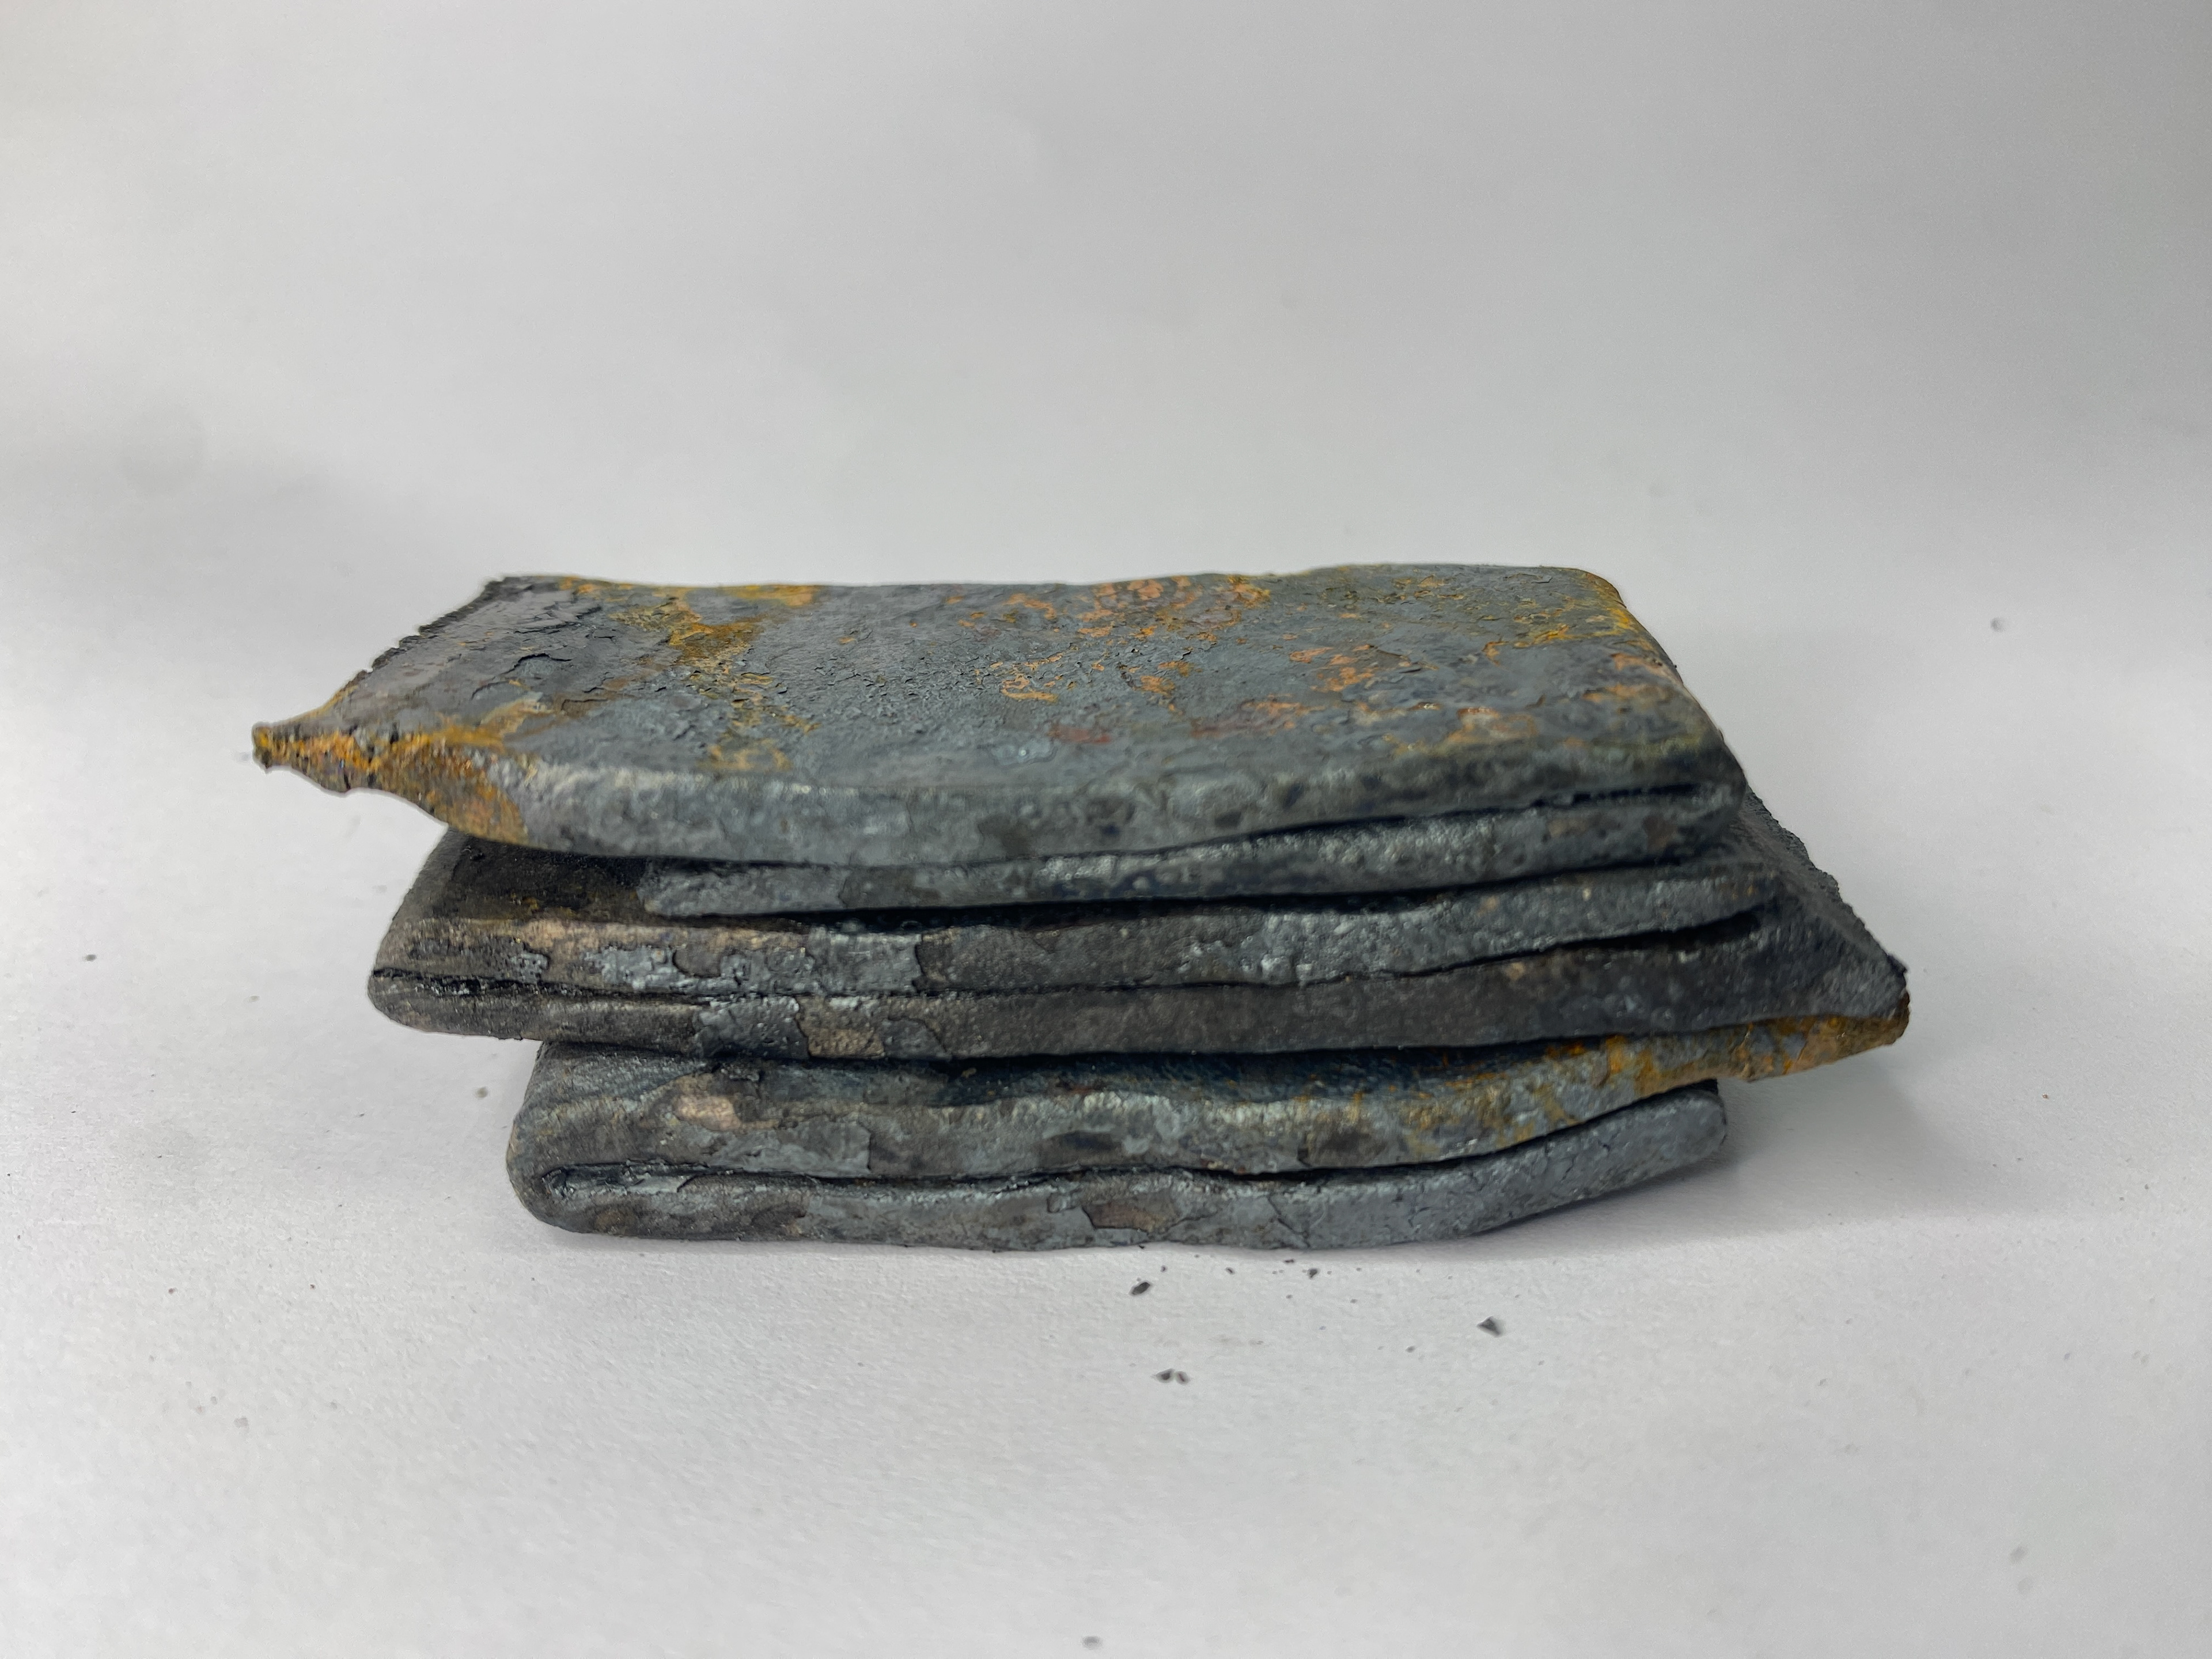
To practice forge welding I used flat bar and bent it over onto itself to practice a method called faggoting. This meant that I only had to hold onto one piece of metal at time. I created a cut halfway through the width of the bar by hammering down onto a cut off hardy in a leg vice. I then folded this back onto itself using the edge of the face of the anvil. Once it was bent over but still had a slight gap I brought the piece up to temperature and poured the flux into the gap to stop oxidisation from building in between the welding sections. I then brought this up to a high heat and hammered down to attempt to create a bond.
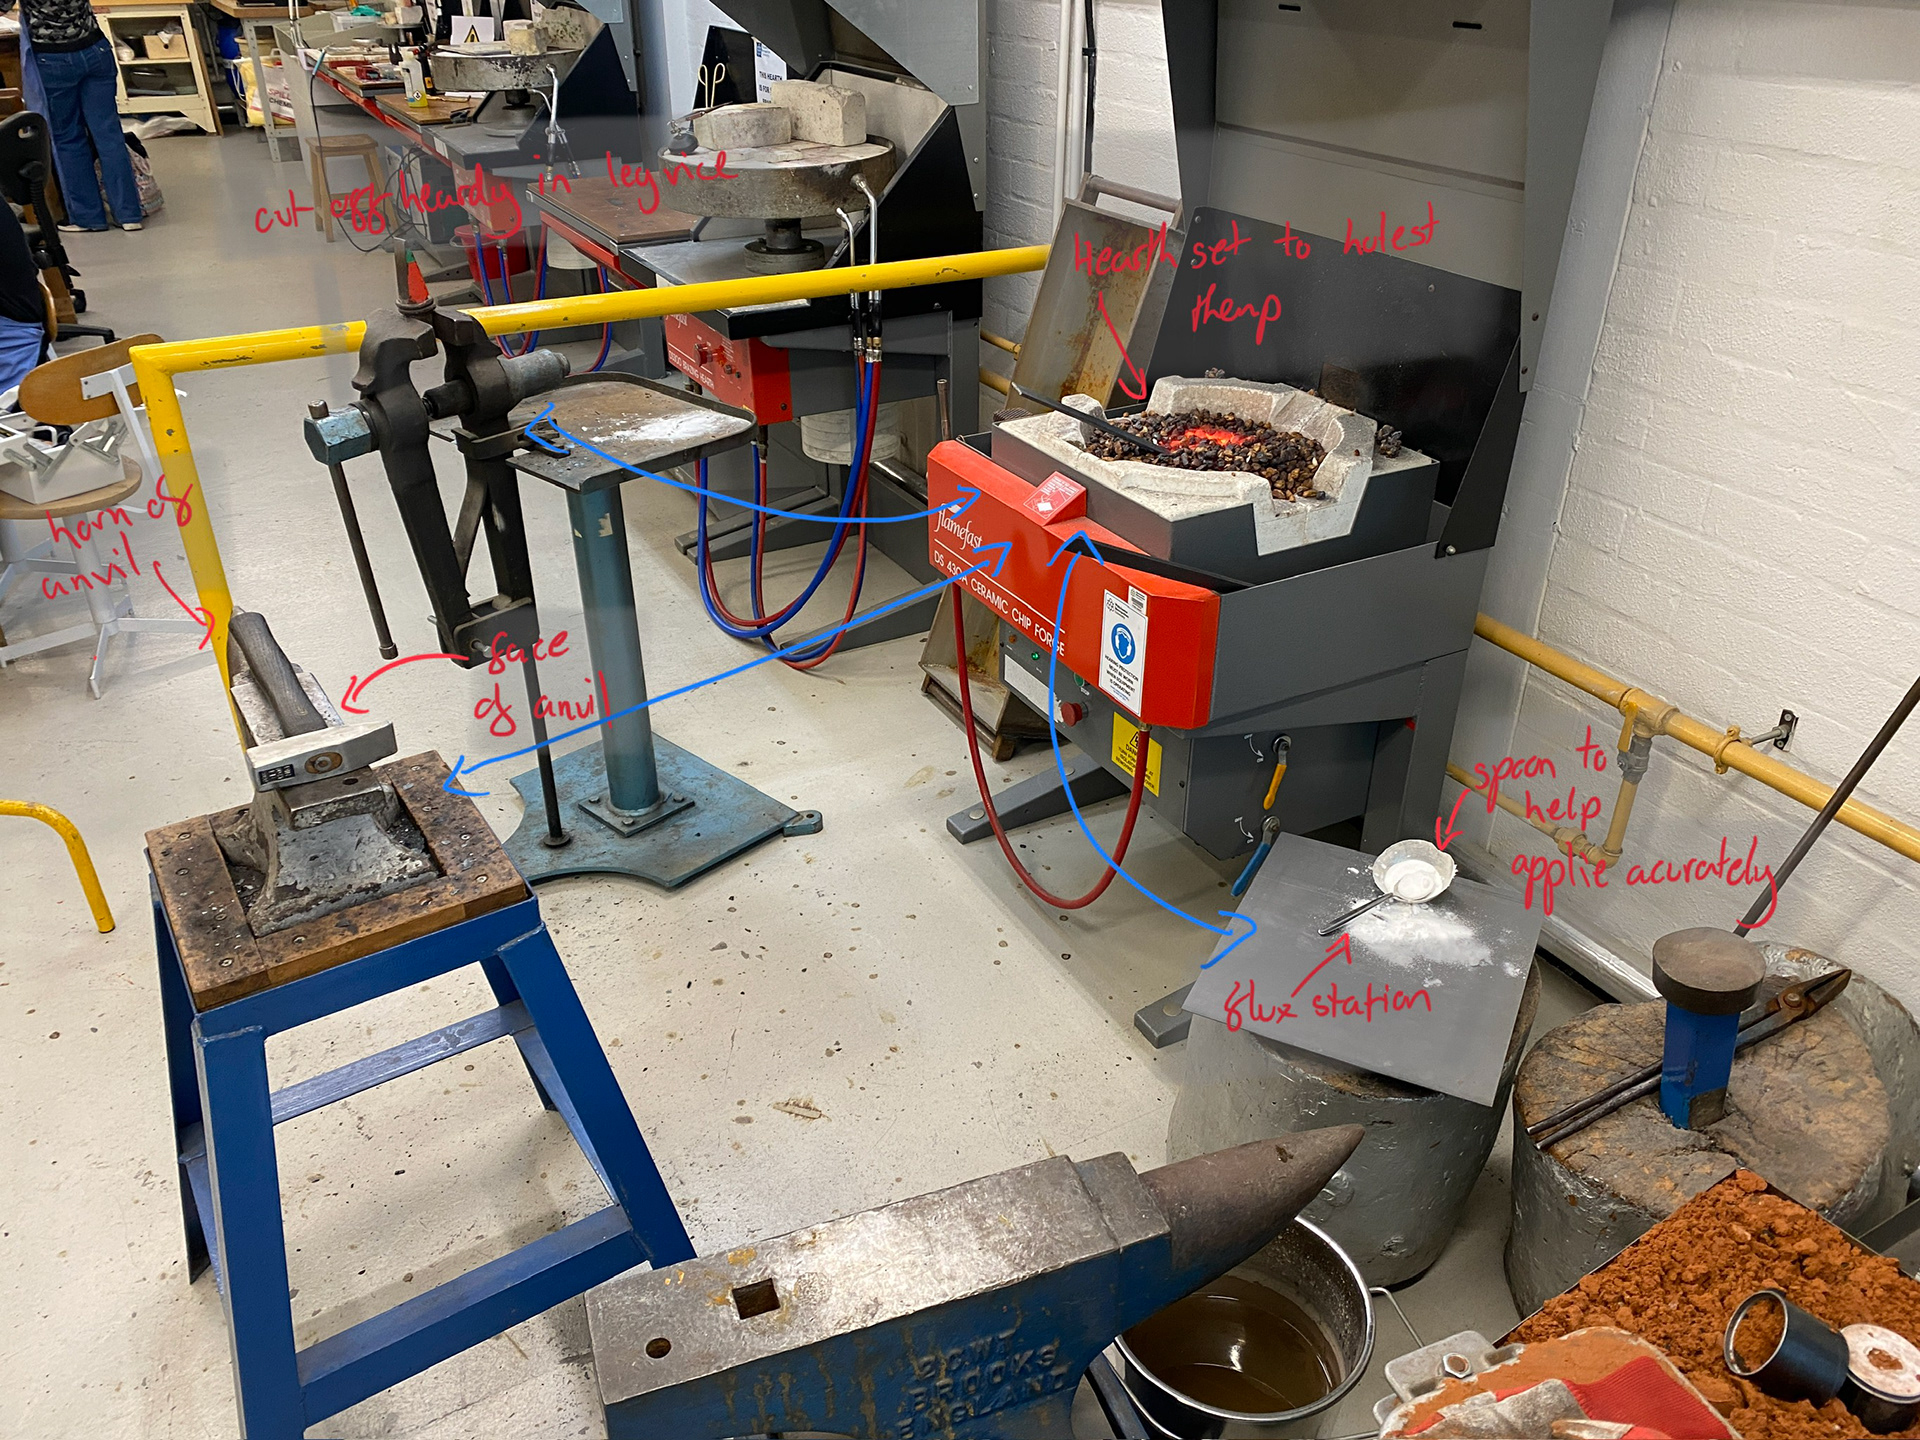
I also rearranged my working area to reduce travel time between each process and the forge which increased the forging time the steel had whilst hot.

I practiced thinning and flattening out a square bar section, working on my hammering skills before attempting a weld which was unsuccessful.

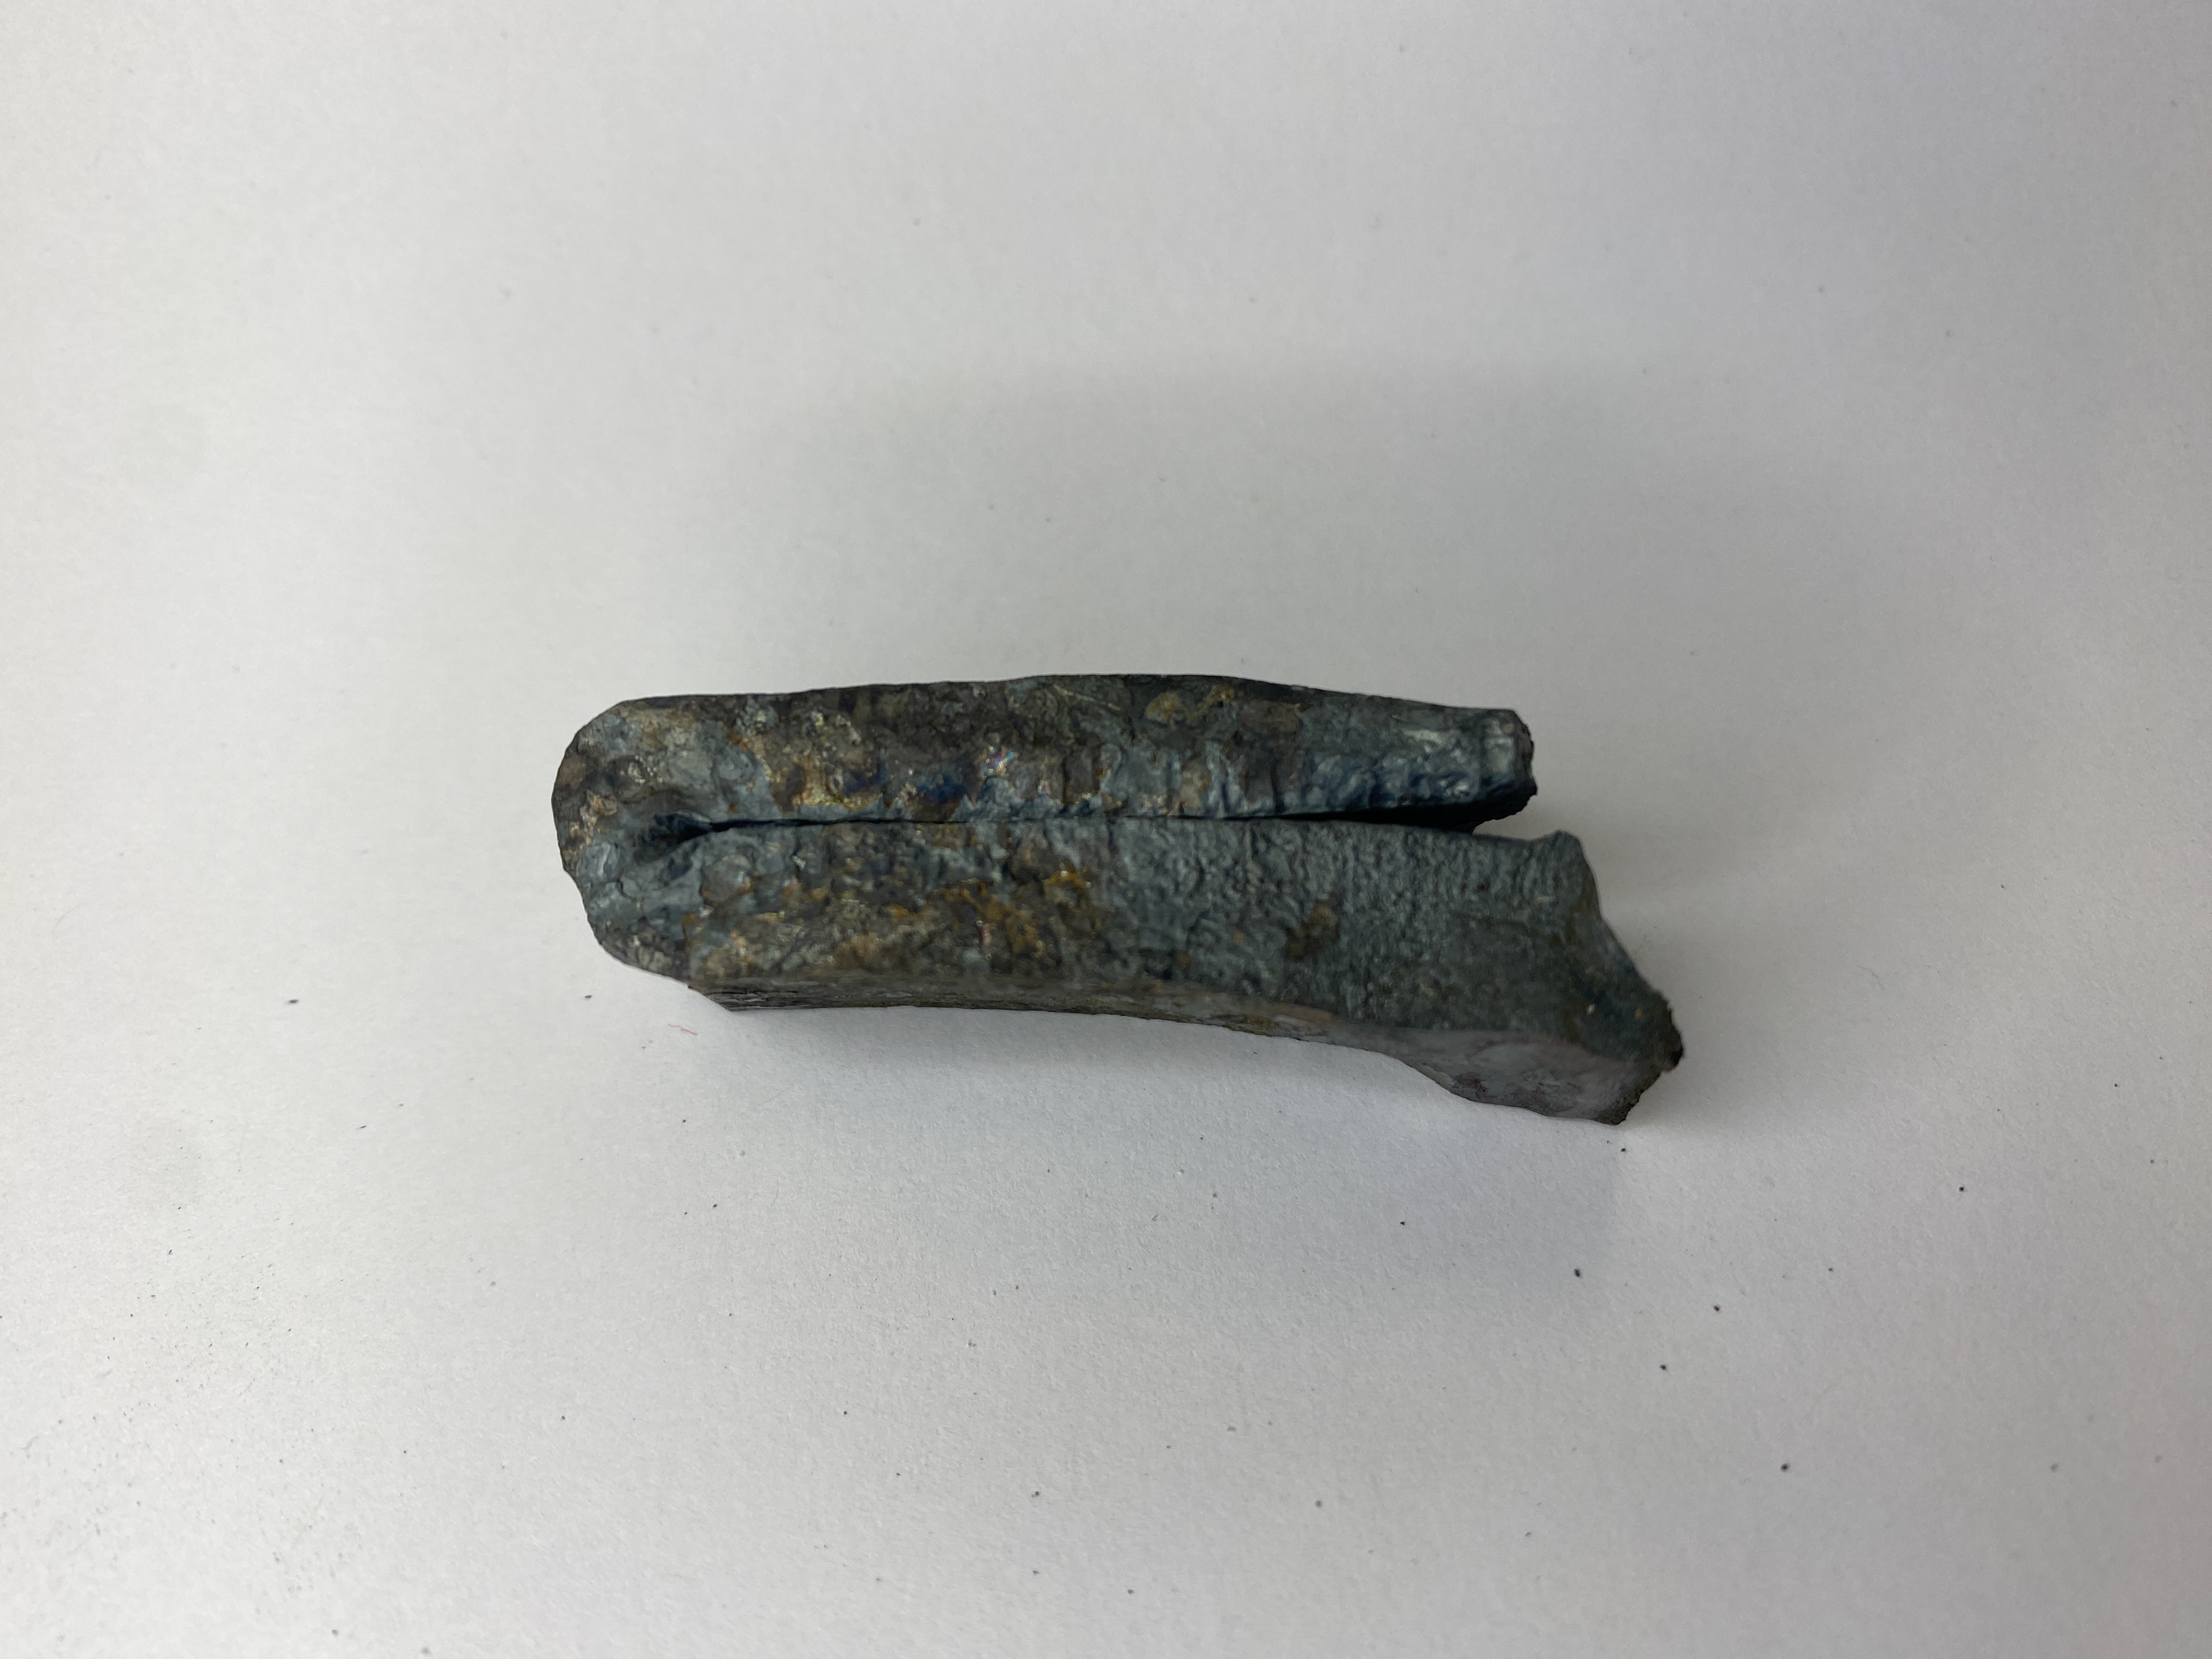
I repeated the process of testing forge welds with all of them failing. However, I learnt a lot from the experimental process. On the left, I was using a powdered flux used in steel preparation for brazing, which didn't work to create the barrier for oxidation. In the middle, I turned up the heat but went too far and the flux didn’t work, so the steel bent out of shape. On the right, I tried turning the forge up to full heat and changed the flux to a borax powder as recommended in my research. Although the tests failed, I learned how to prepare the piece for welding by evenly distributing the flux with the help of a spoon. Also, the force and placement of my hammer blows in the later test proved more consistent and gave a closer finish towards a successful weld.
Having little luck with the forge welding tests, at the same time, I was practicing my chain making skills focusing mainly on trying to achieve a consistent shape. However, to create perfectly round or oval links, I would need to forge weld these together, as this would allow me to shape the whole link without the ends twisting away from each other and distorting.
I increased the temperature of the forge and practiced heating temperatures and had closer results to a fully bonded forge weld.
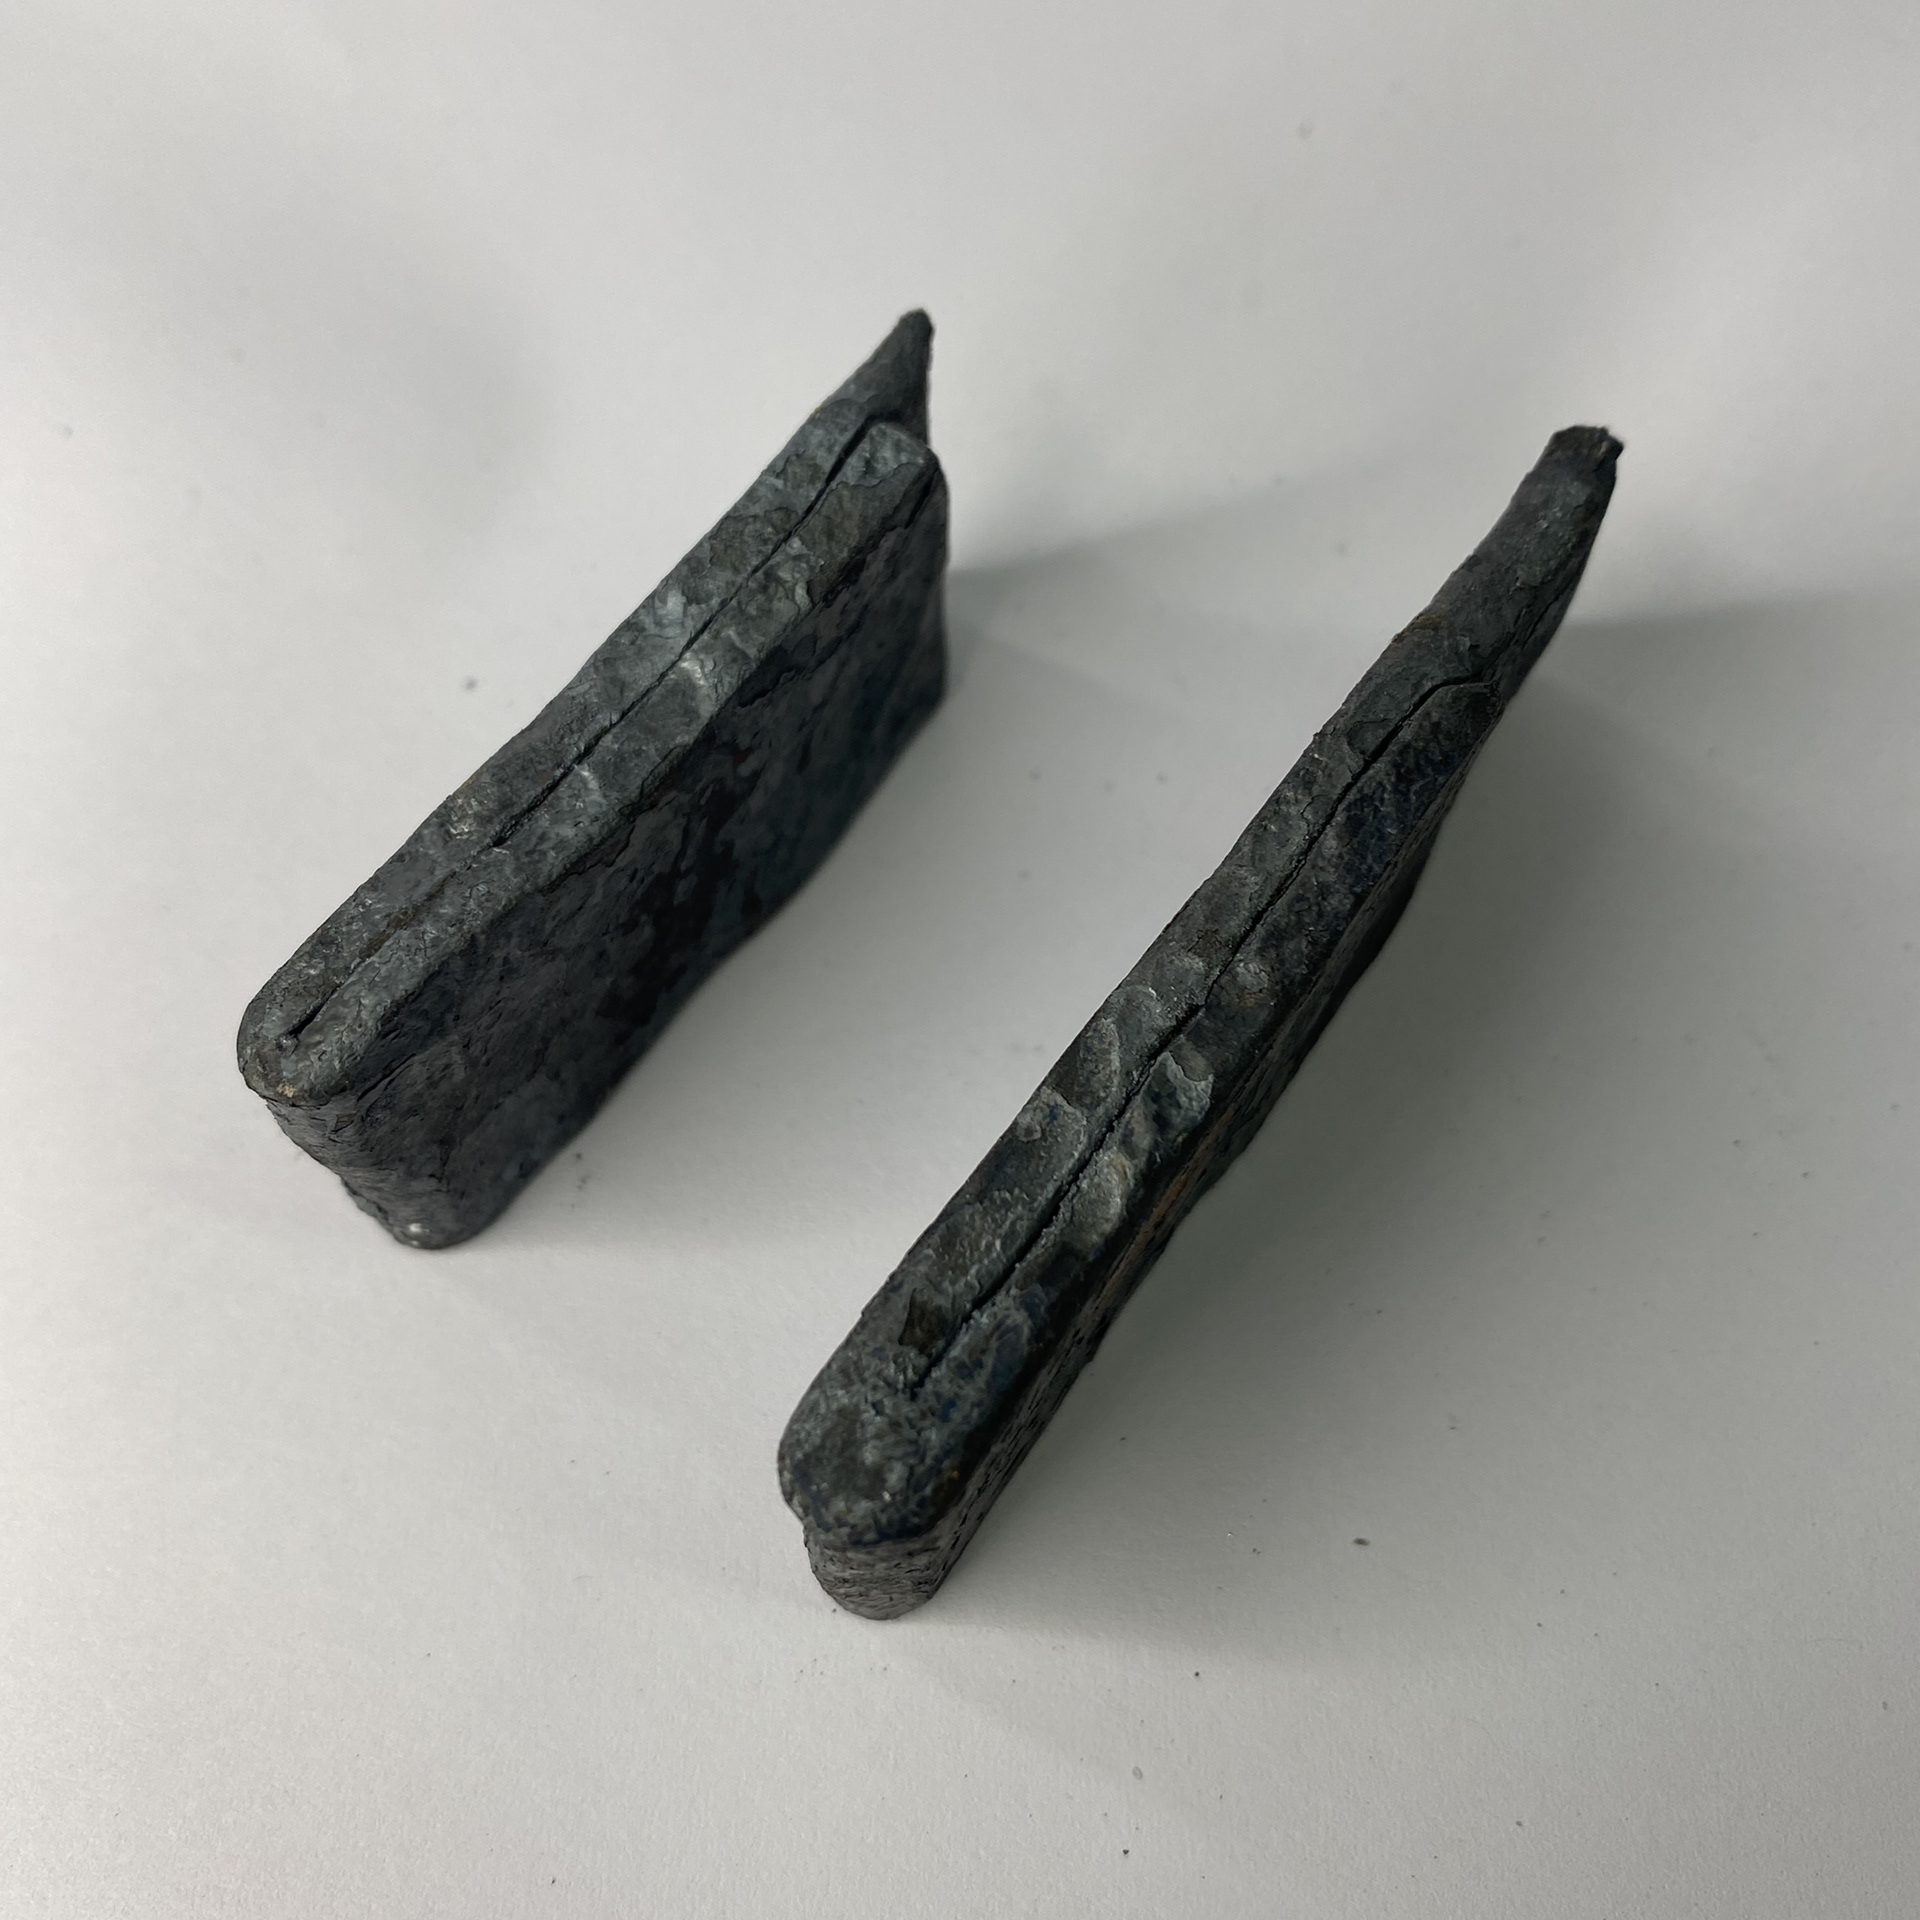
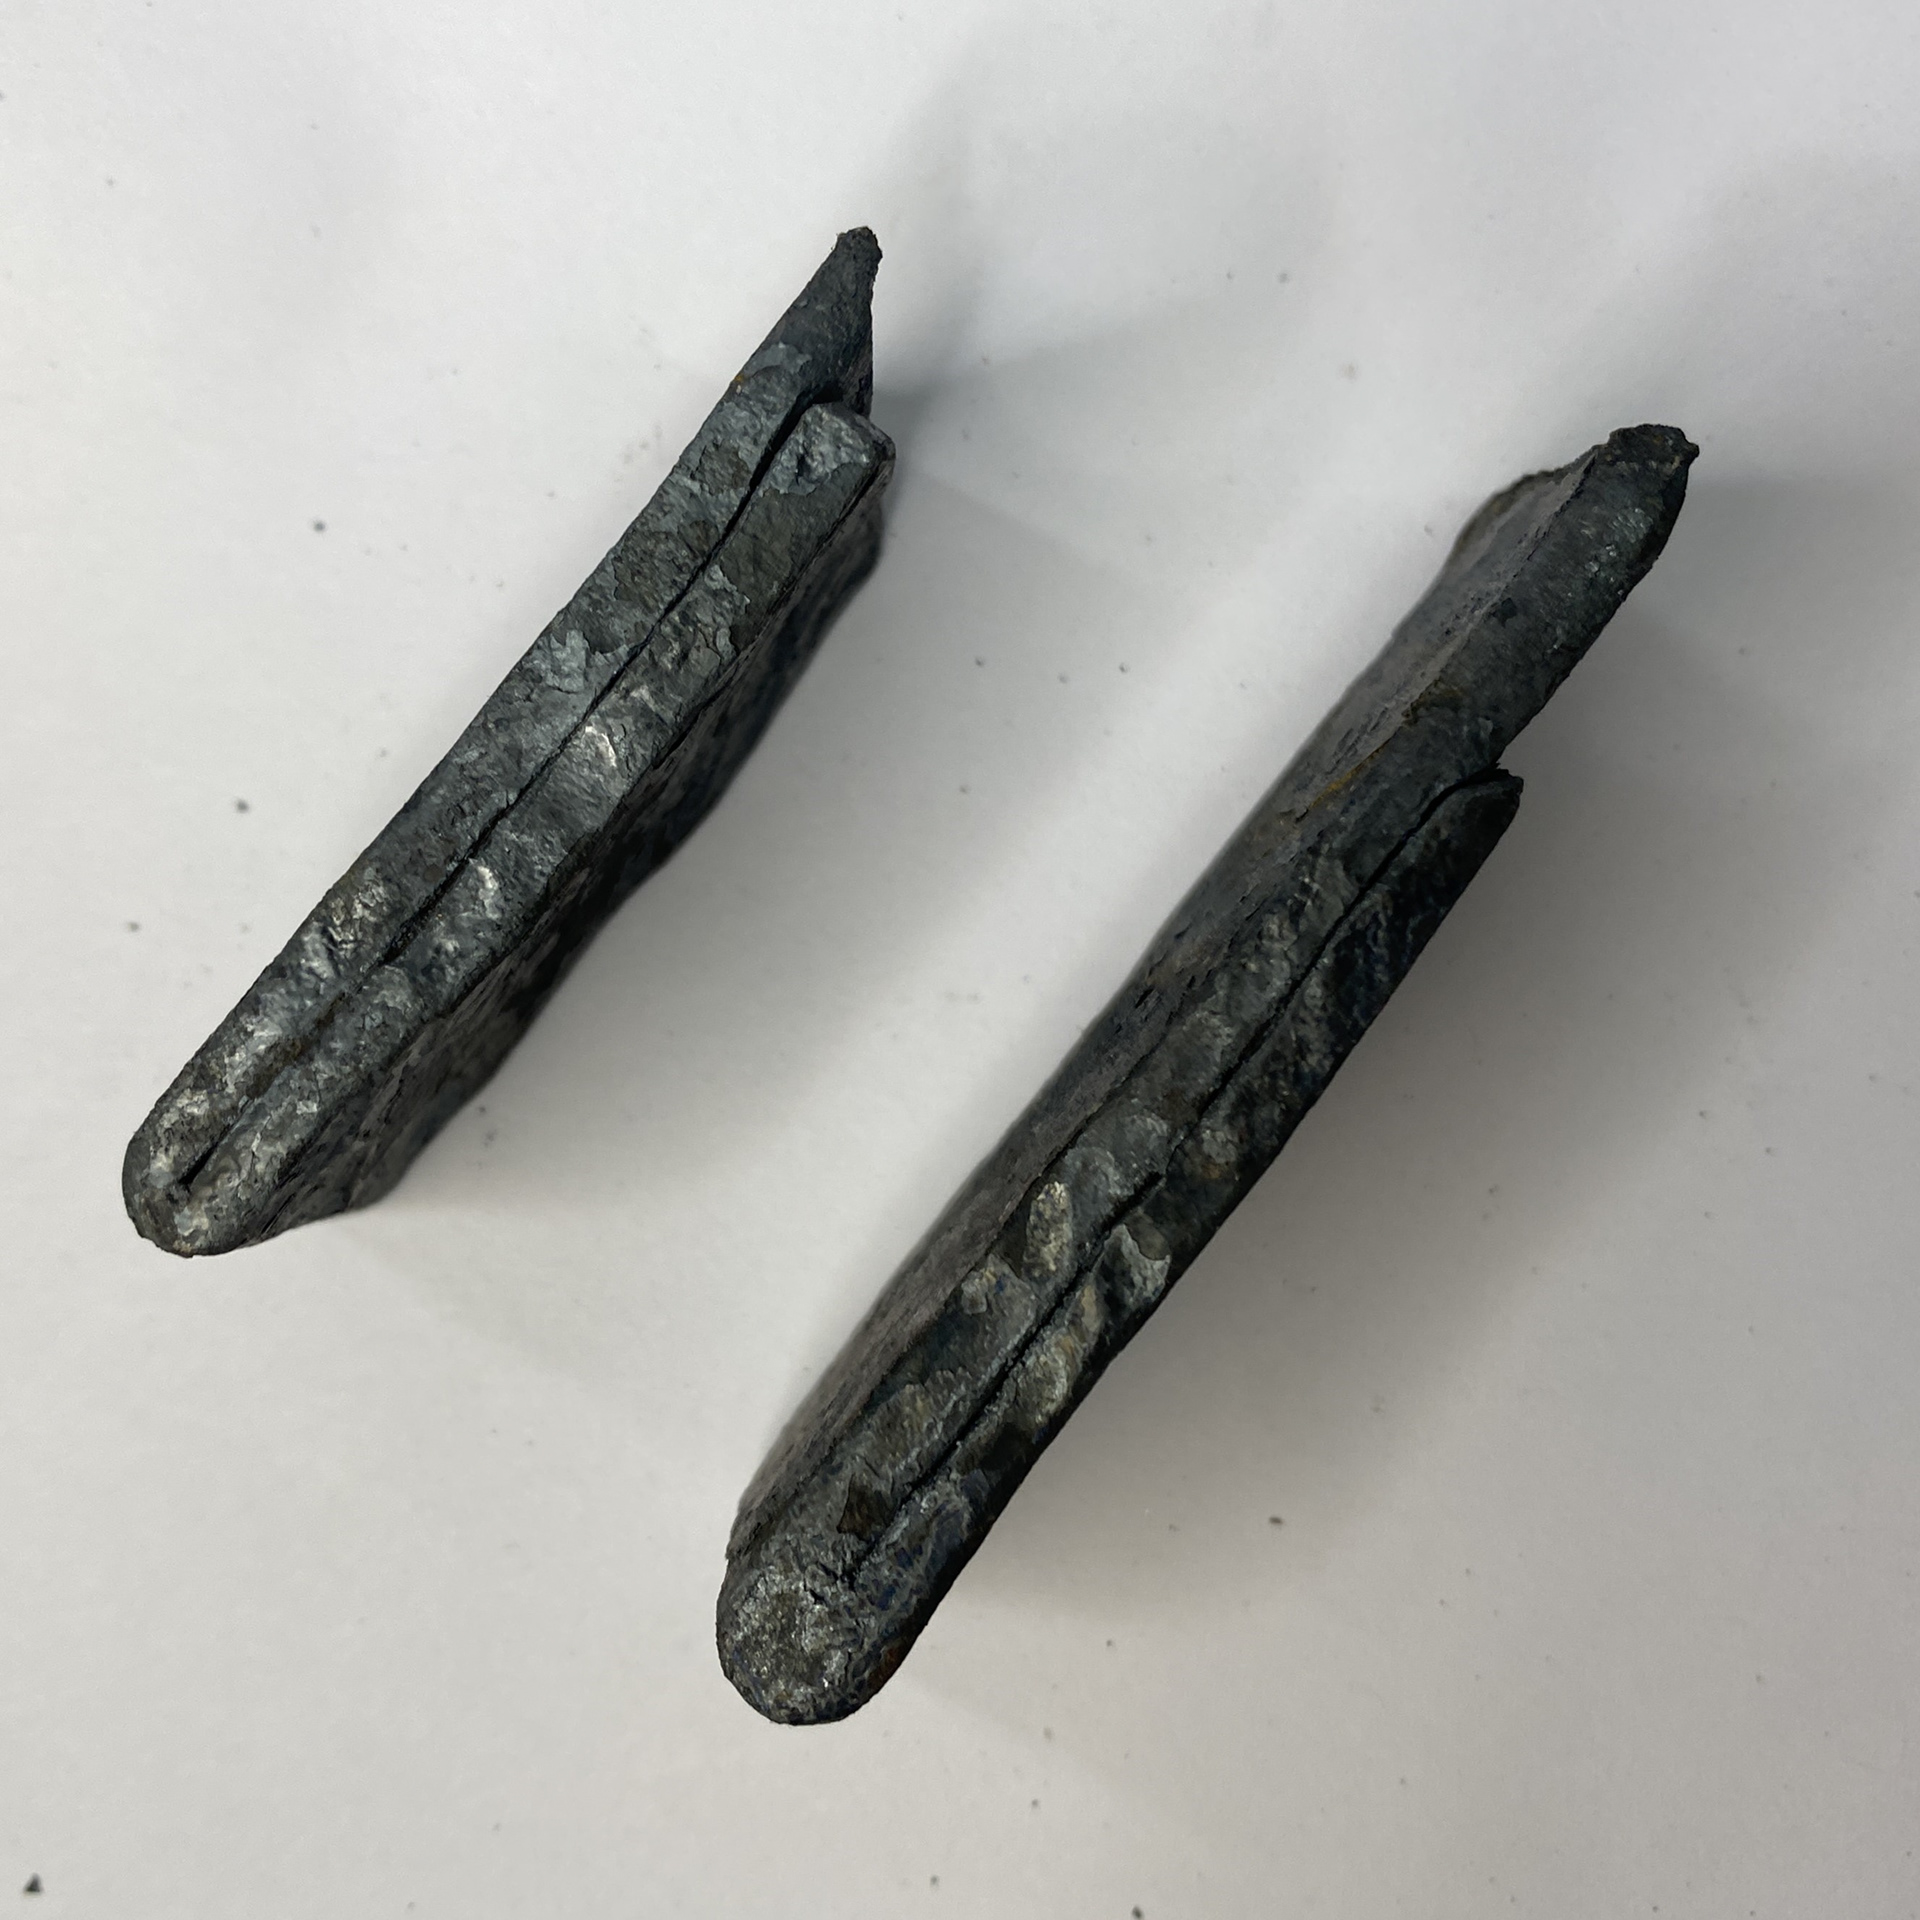
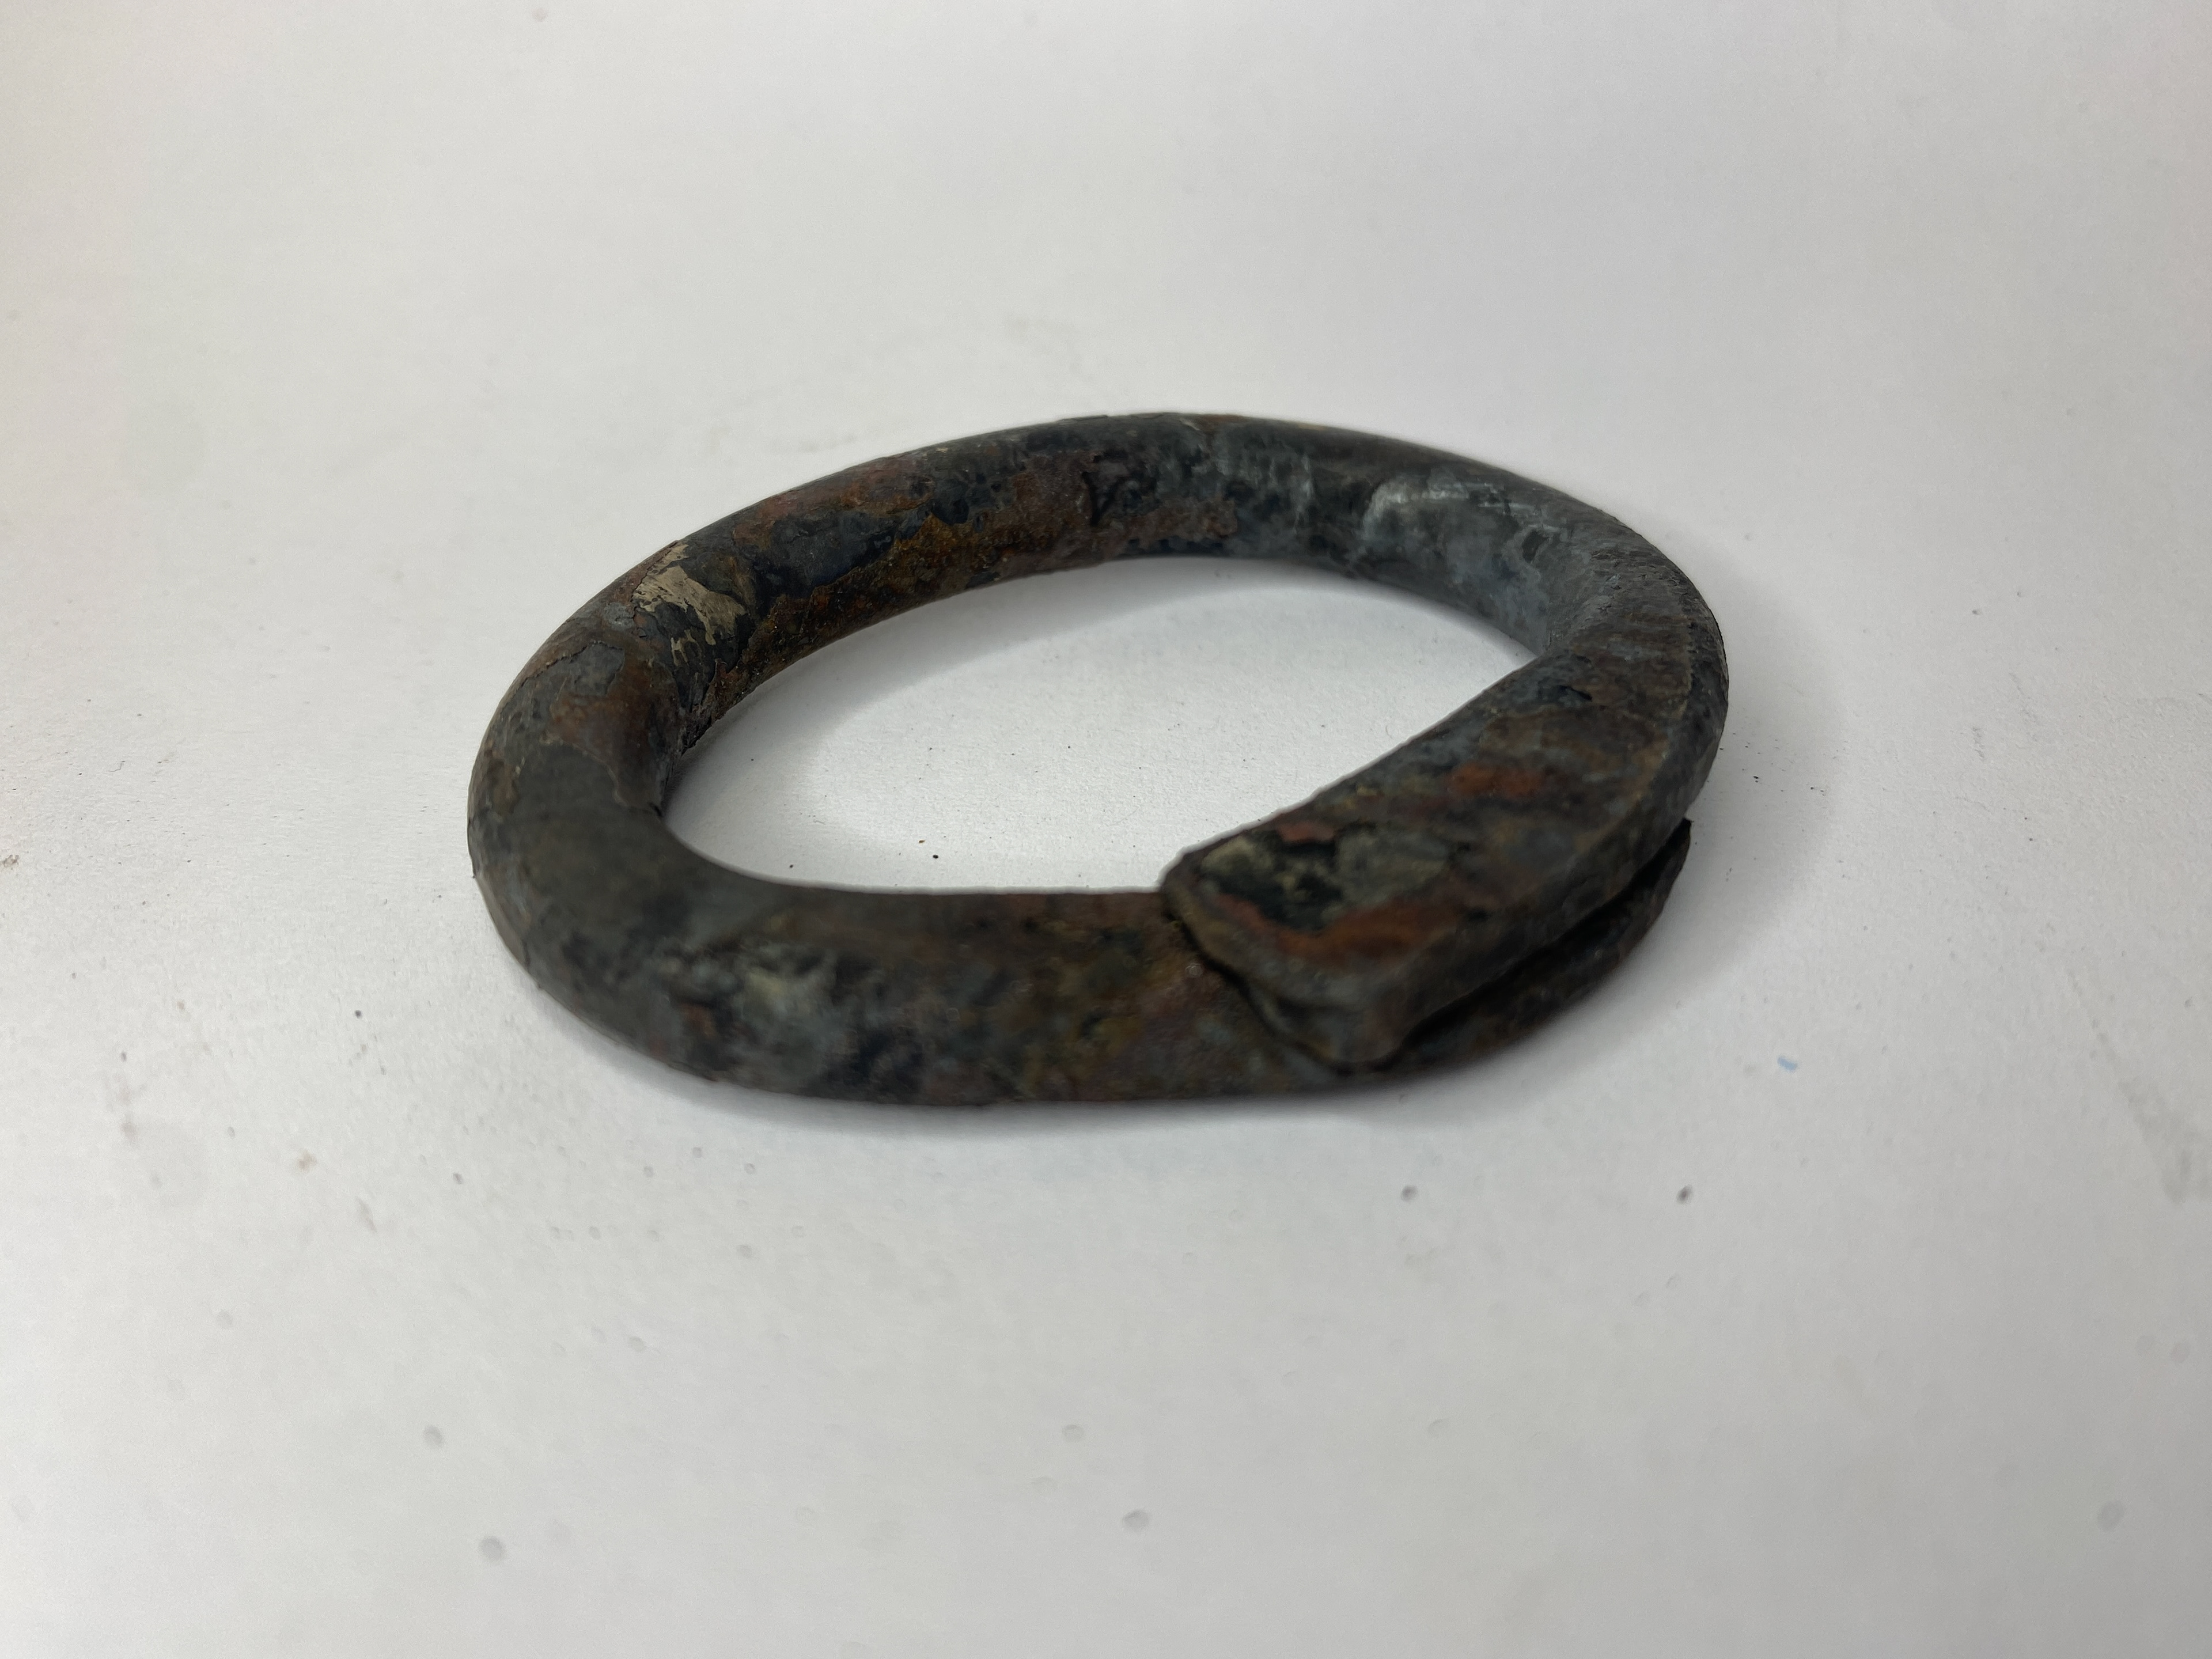
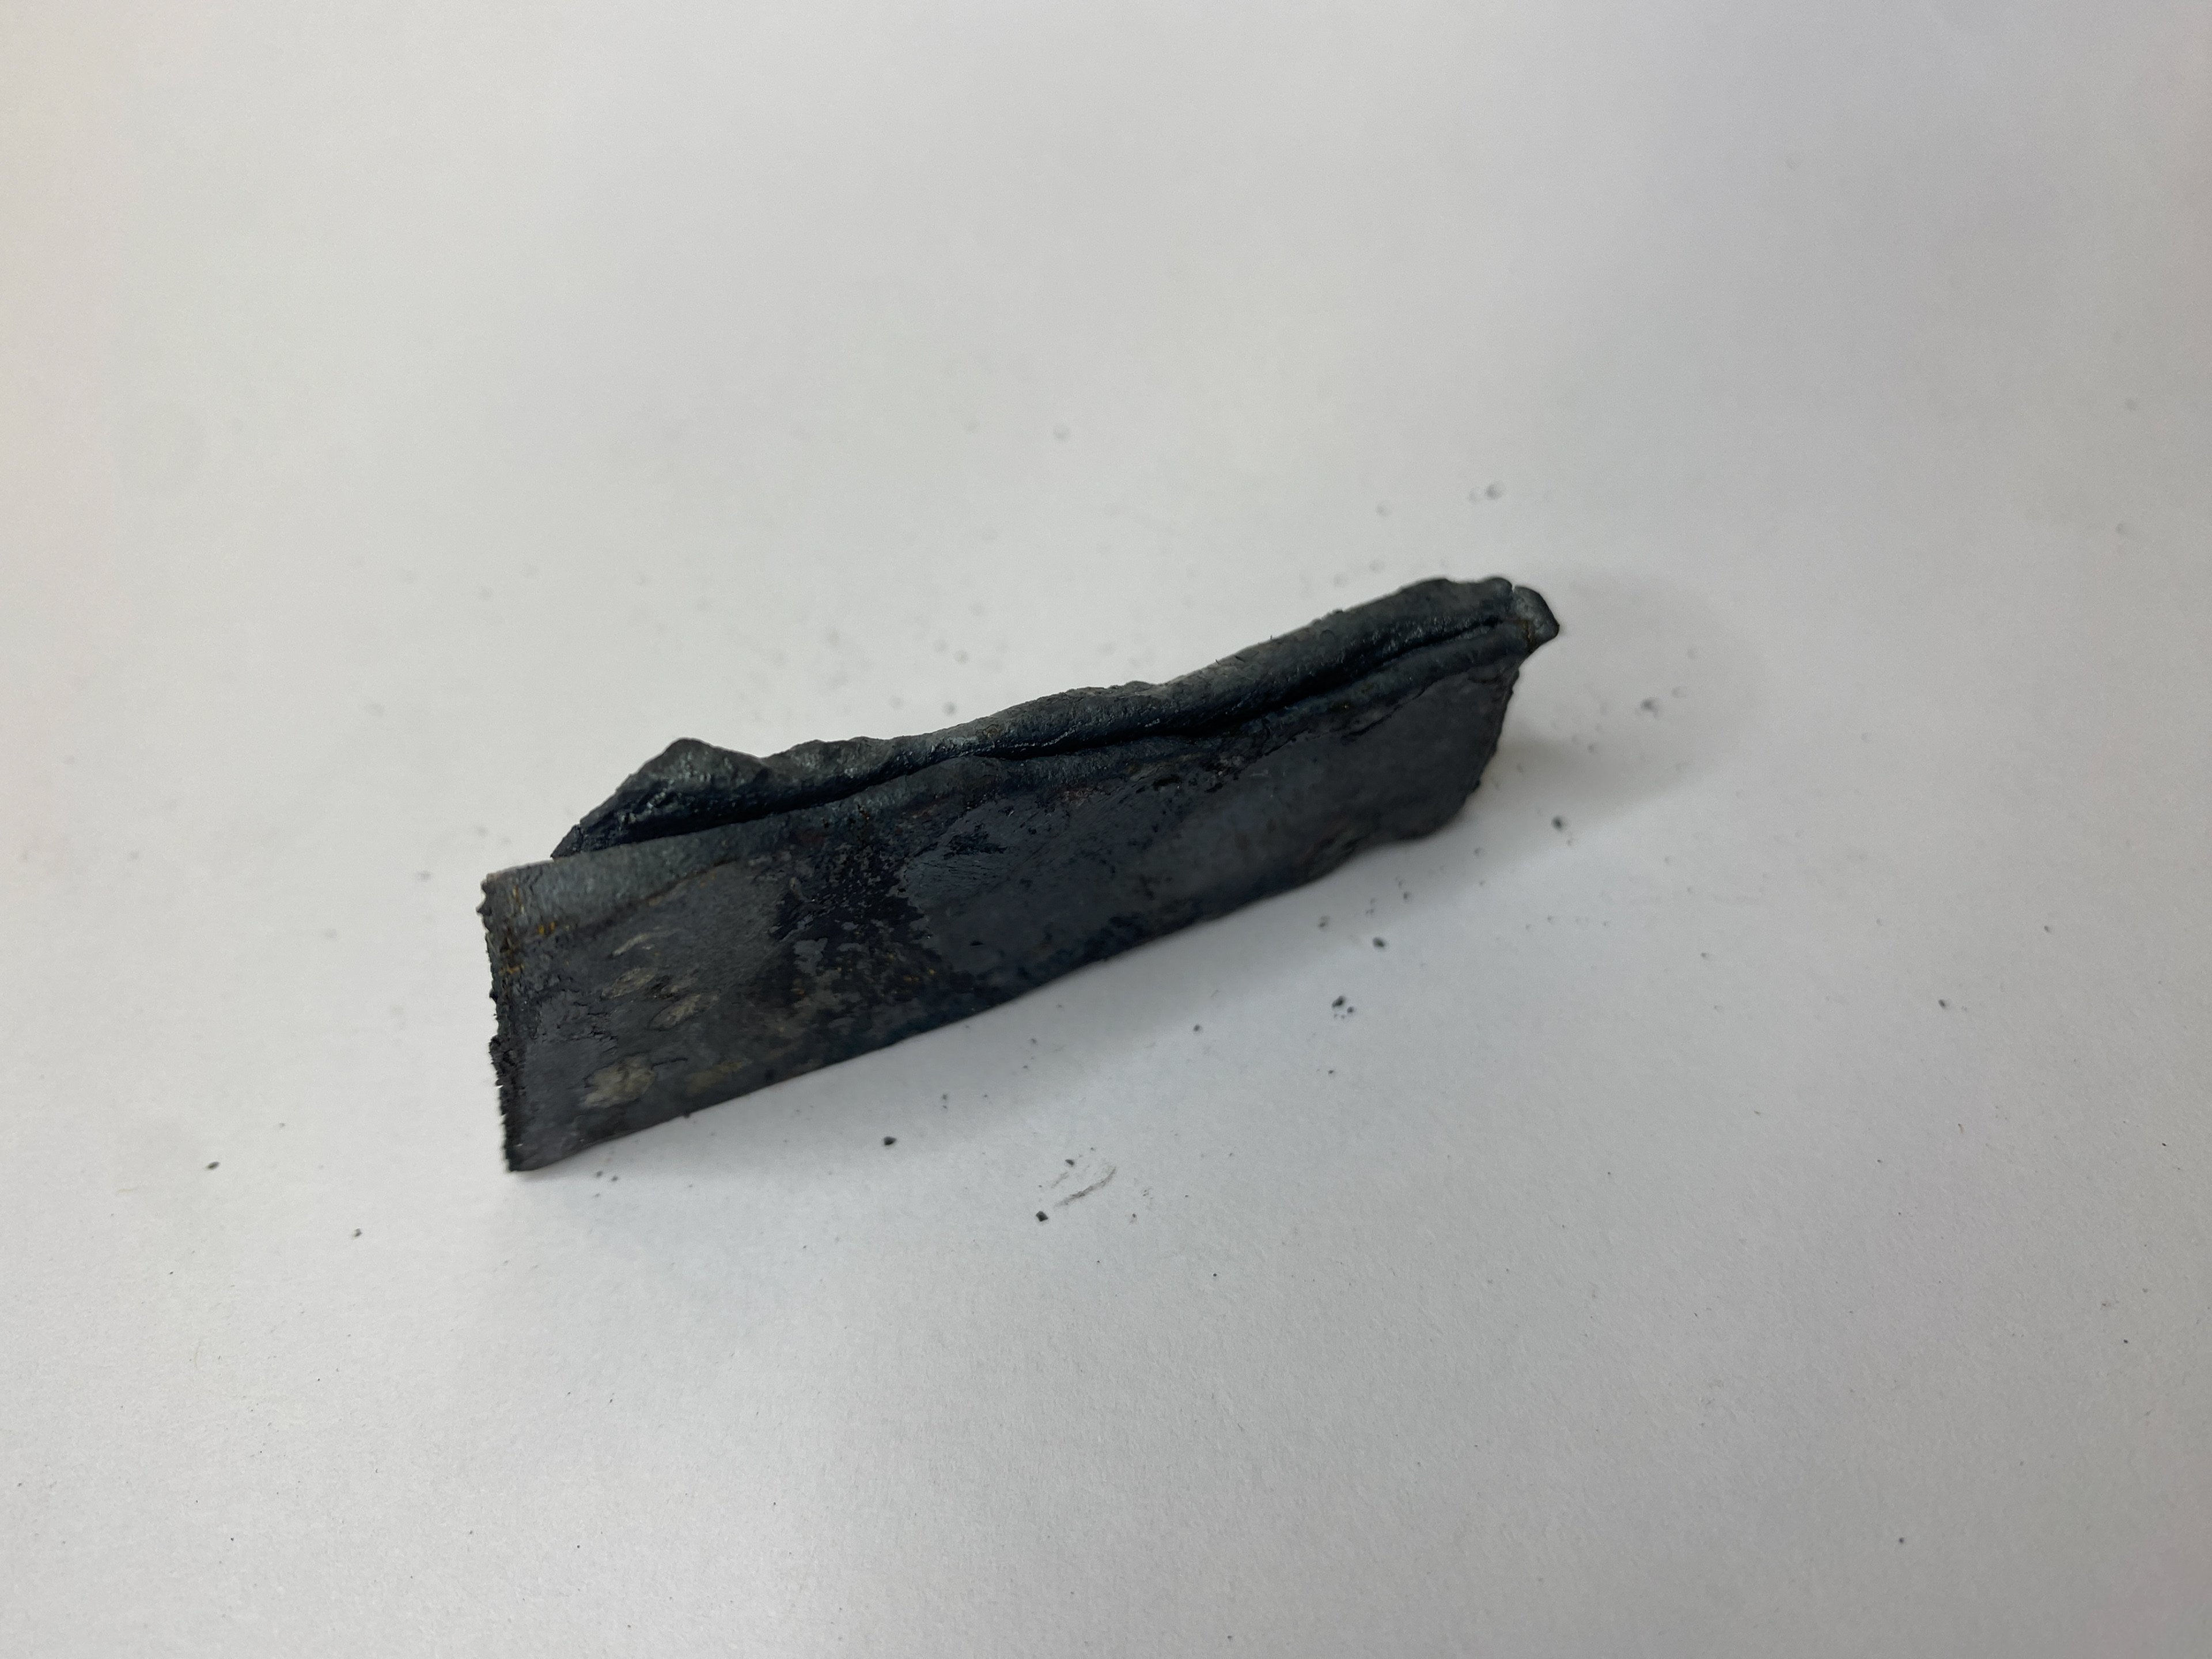
After further practices I achieved a successful forge weld which I tested by hammering down on the sides to try and open it up again. This means that I can take these skills into making traditional forge welded hand hammered chain.
Exploring stamping script into copper
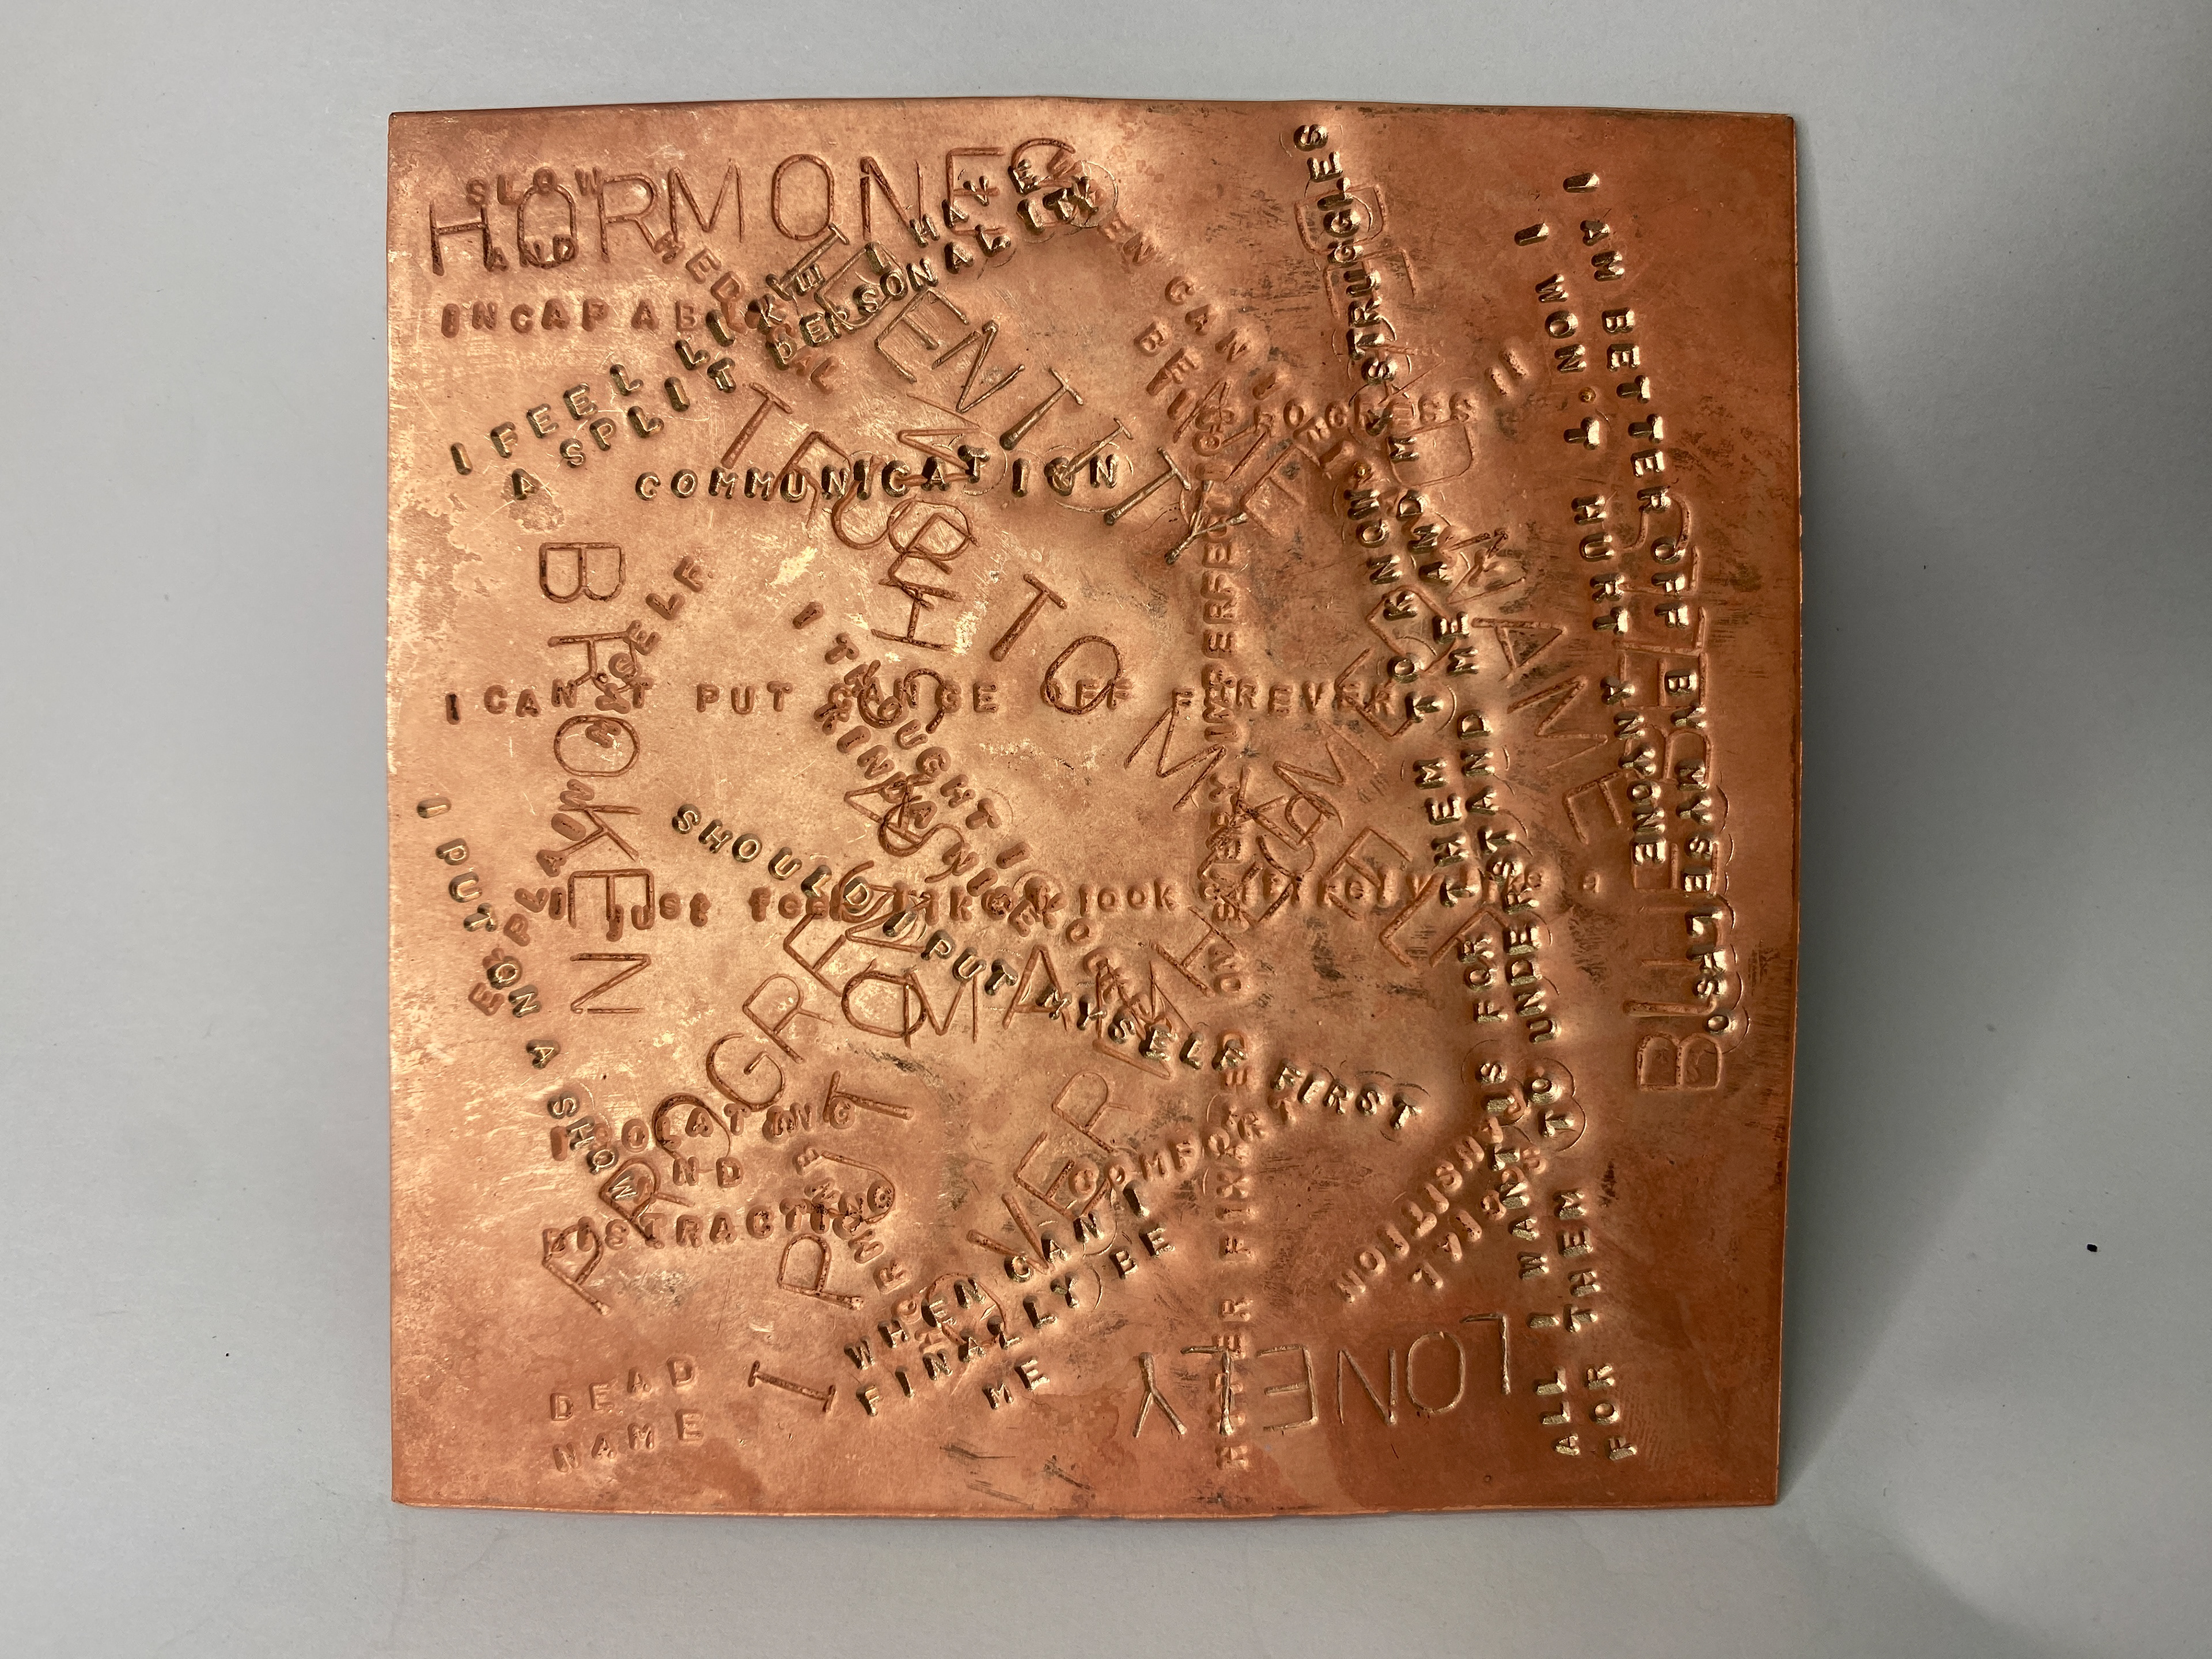
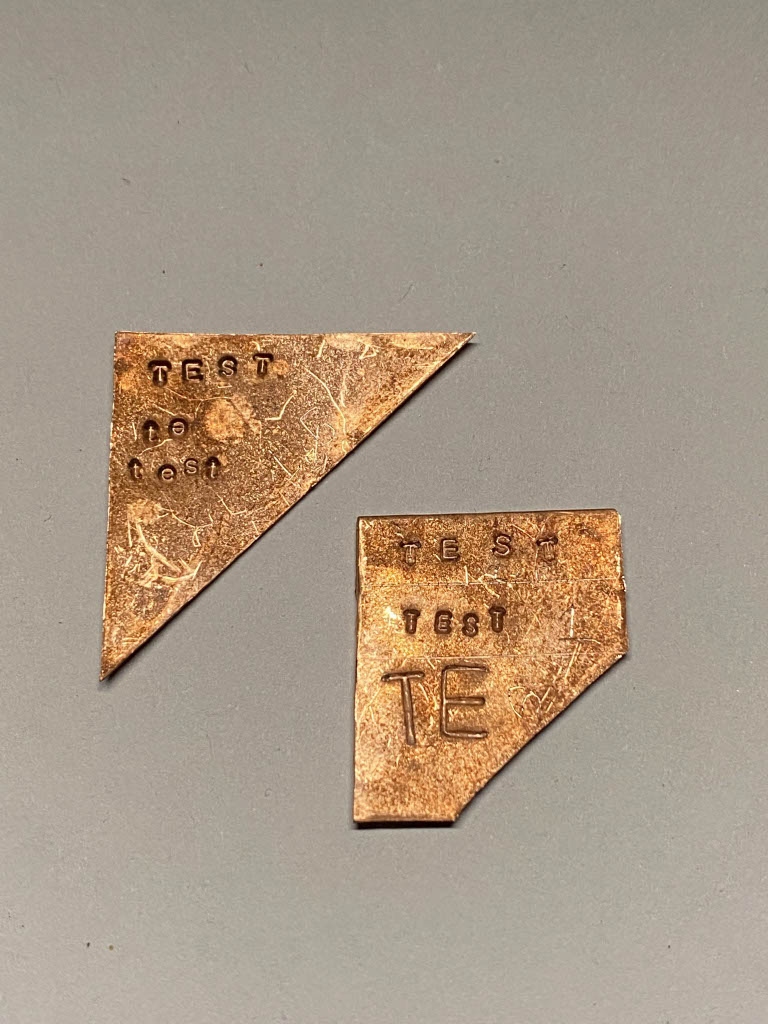
I investigated using stamps to repeatedly lay my diary phrases on top of each other varying the size of characters. I didn't have a set composition or view of the outcome; I just repeatedly wrote down the phrases as if I was dumping my thoughts manically onto a page varying the directions constantly. I like the way that layering the phrases distorts and makes the text difficult to read. I want to explore cutting the piece up and including it in the length of chain to add my obscured and censored thoughts.

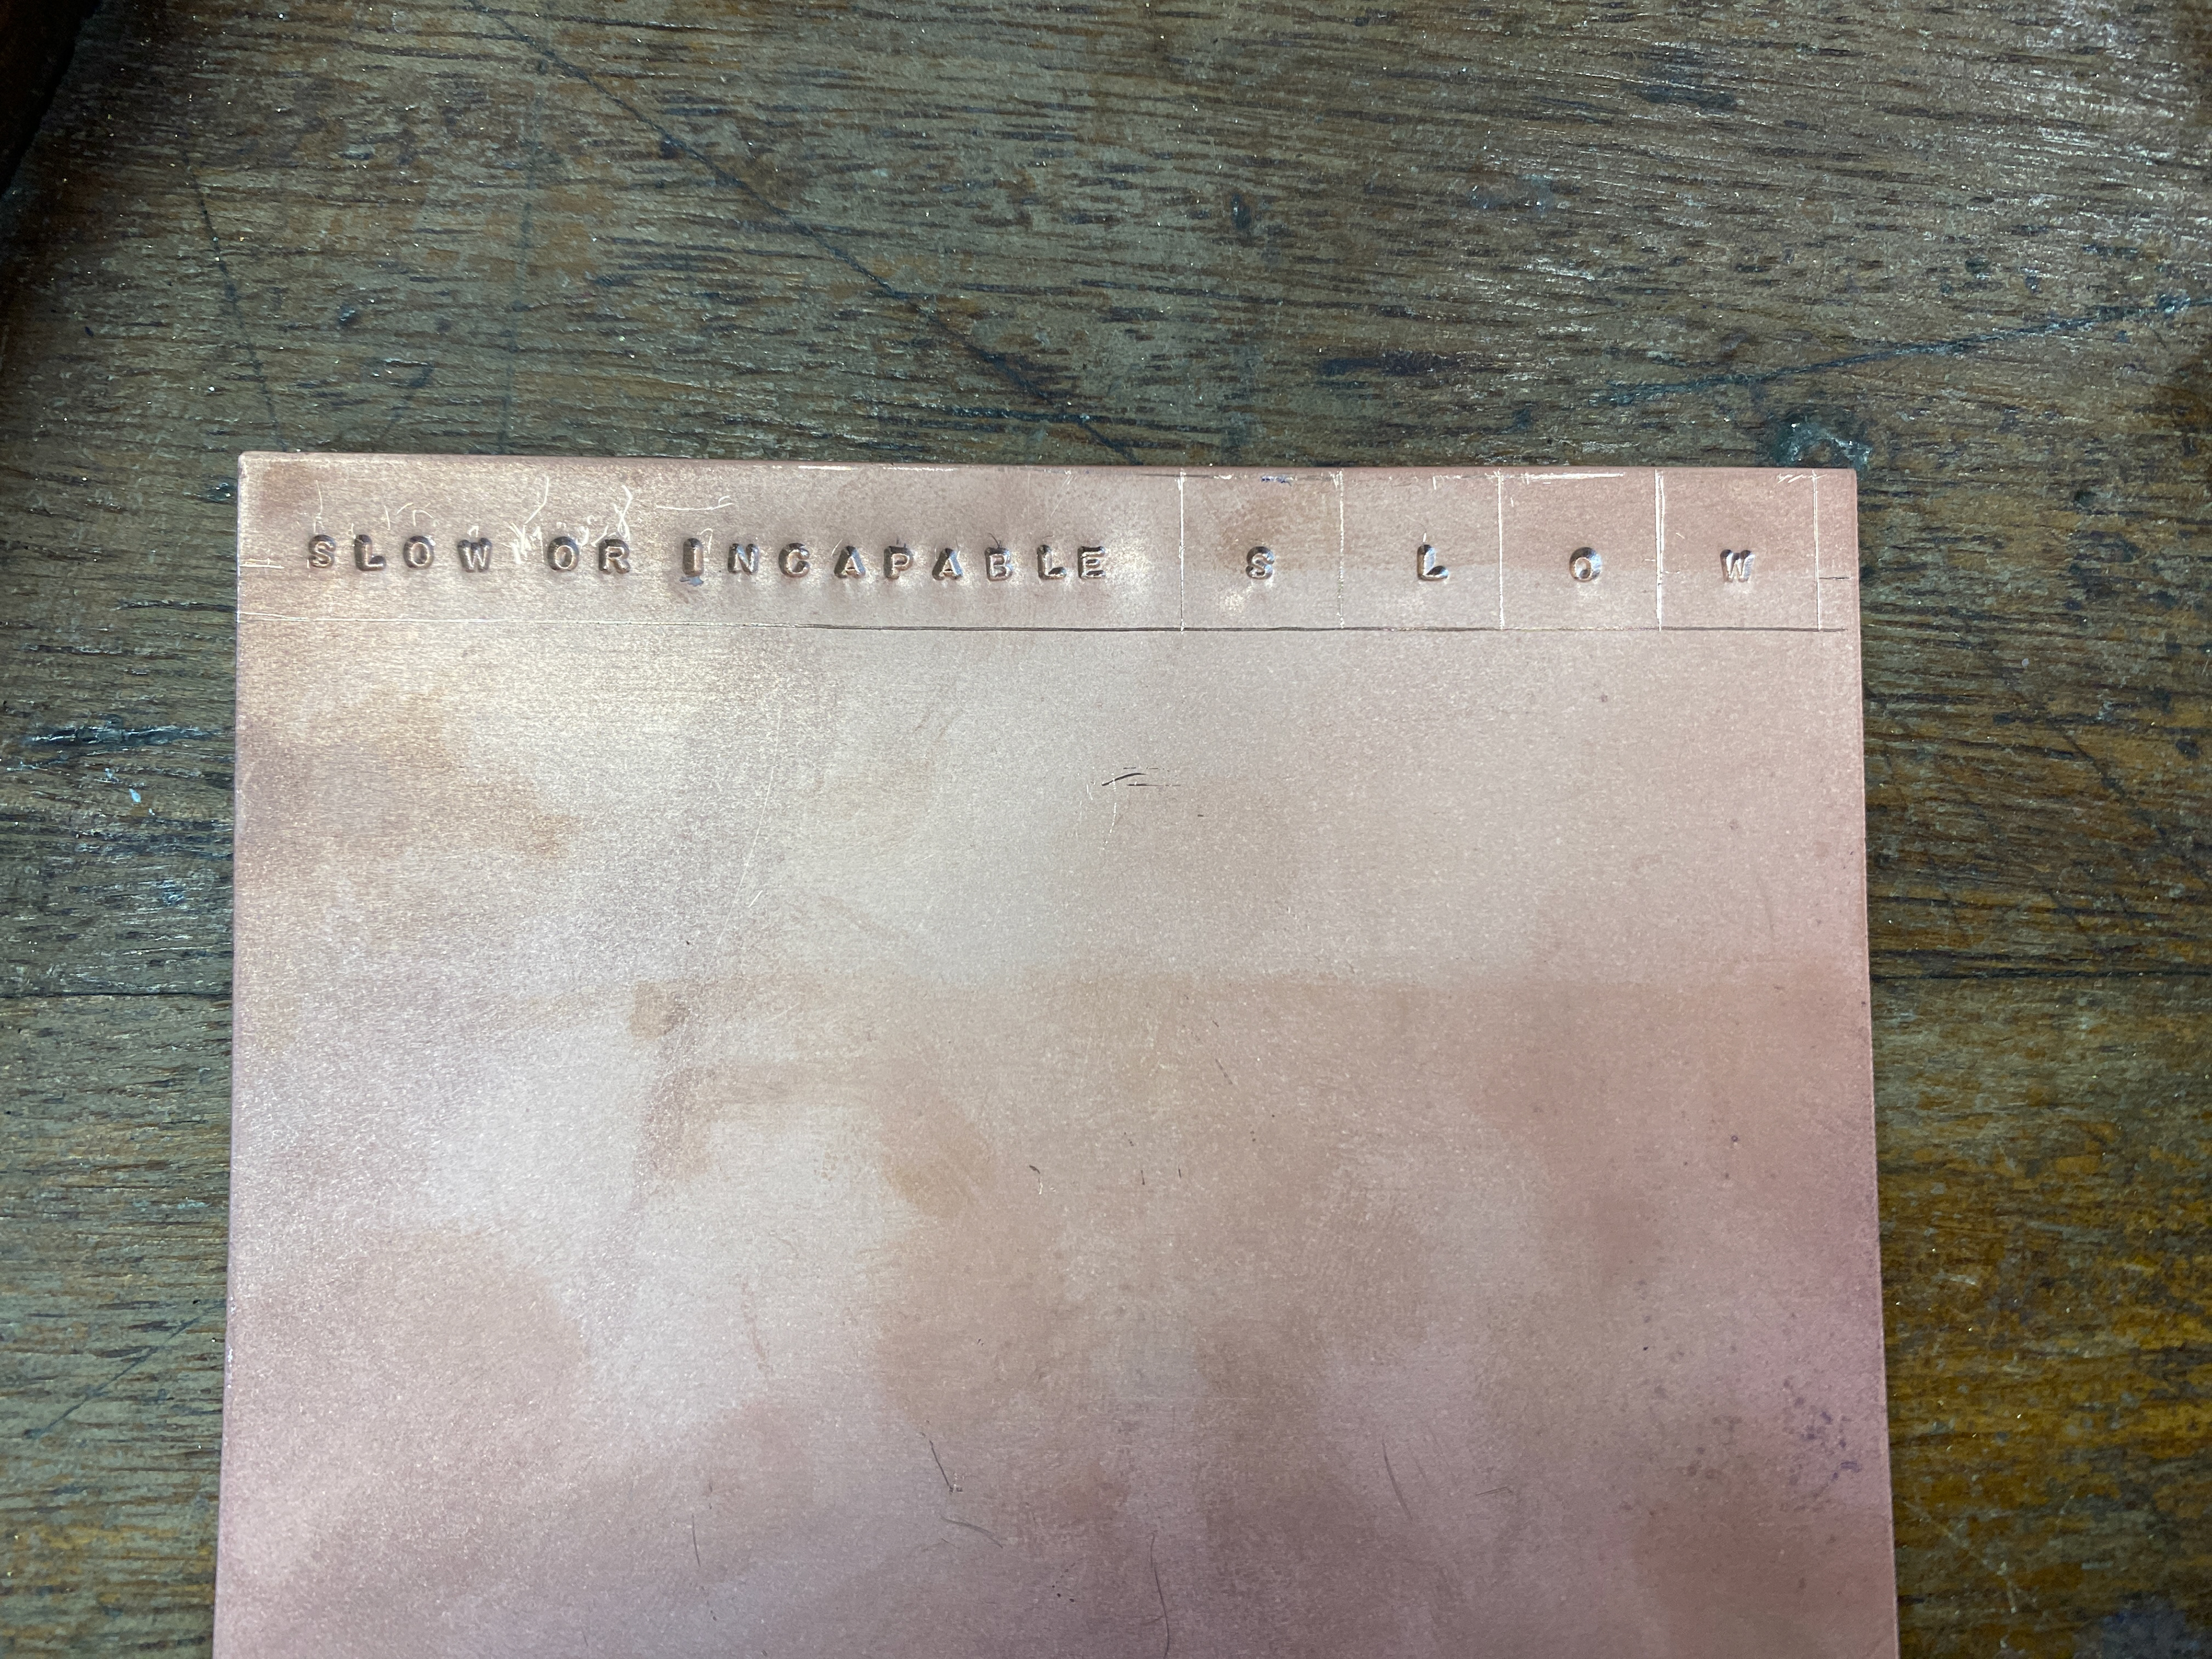

I researched how to make the letters align when stamping in a straight line and found using layers of masking tape to create a ridge to butt the stamps up against was the easiest. I also used the fly-press to stamp out circles for individual letter tests to replace chain links.


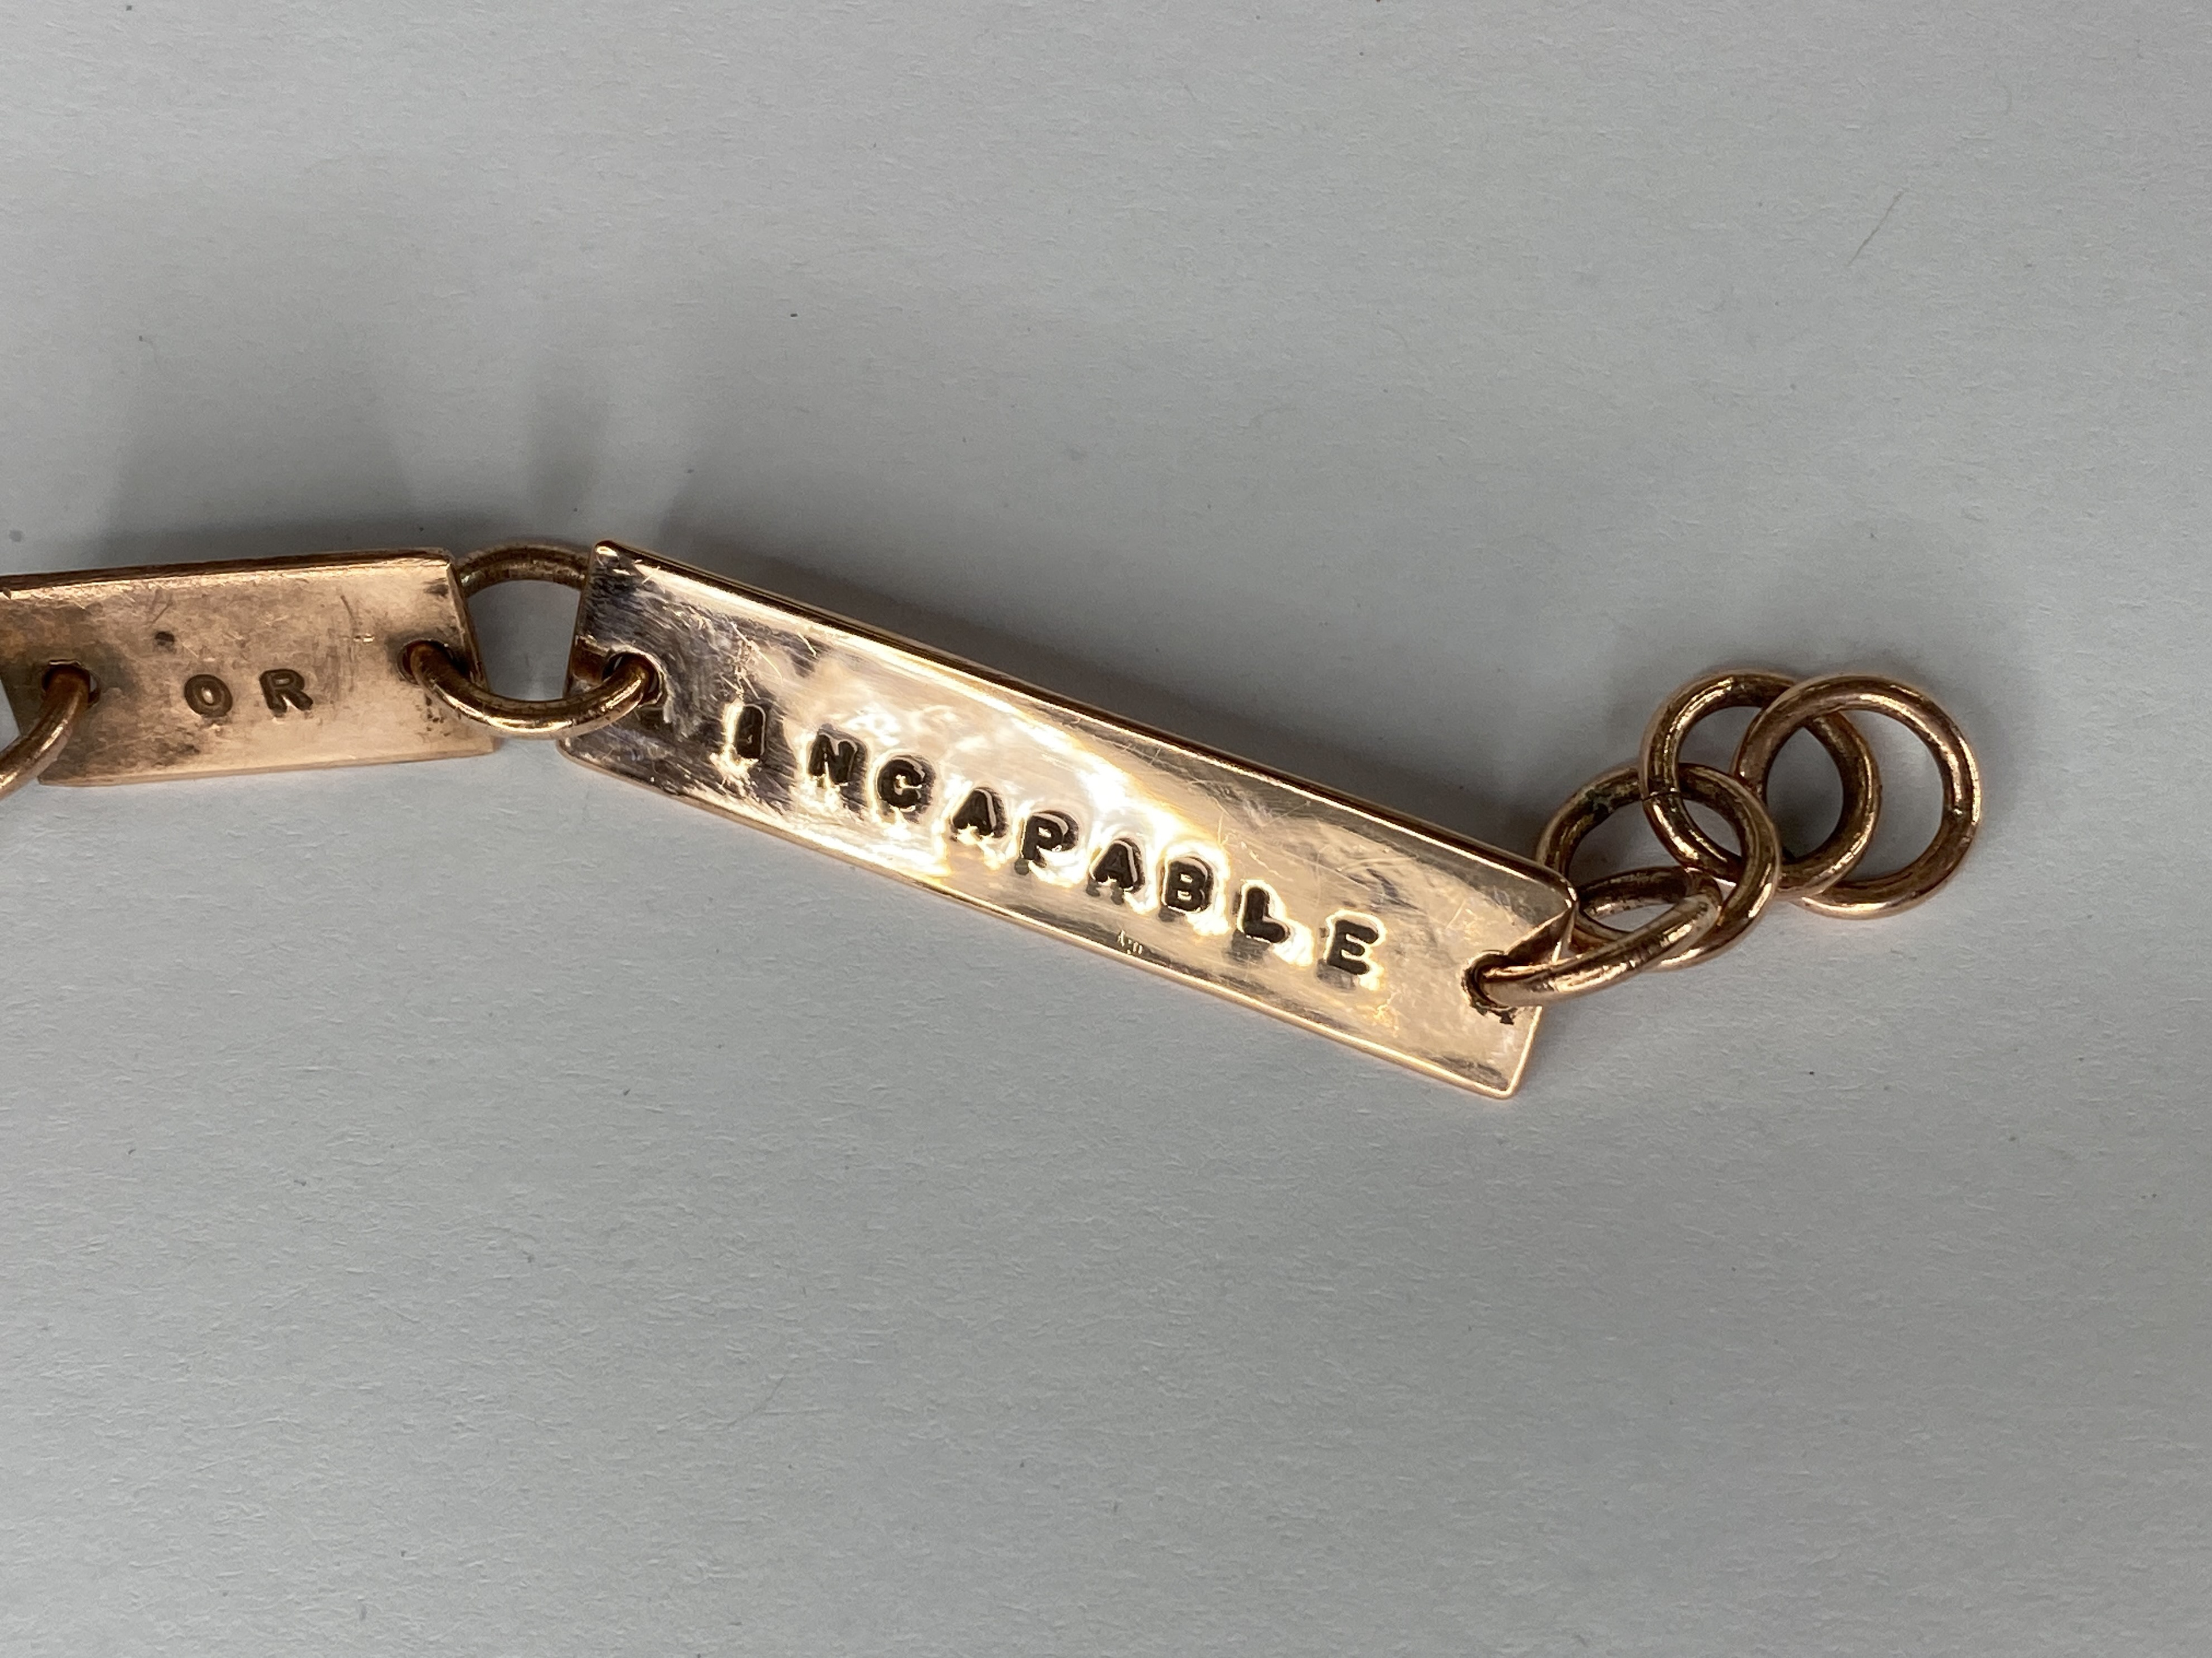
Introducing script into chain and experimenting with the placement and spacing. I found that I liked the single sheet with phrase on it and the single links experiment the most as the writing was most legible. This is something I want to push and explore how legible my writing is to the end viewer.
I was looking at bringing my thoughts and emotions into physical form by literally hammering them into sheet metal. These lengths of chain with script in between are intended to lay over the body and provide protection, both through the metal’s strength but also visually disrupting the view of the body beneath. Simultaneously it creates vulnerability by allowing others to see the emotions that lay deep within.


I took the previous repeated letter stamp test square and chopped it up making only some of the words and letters legible playing with the idea of censorship and what I allow others to view from my thoughts. I pared this with script that was stamped in a straight line to further reinforce the difference between clearly visible and concealed.
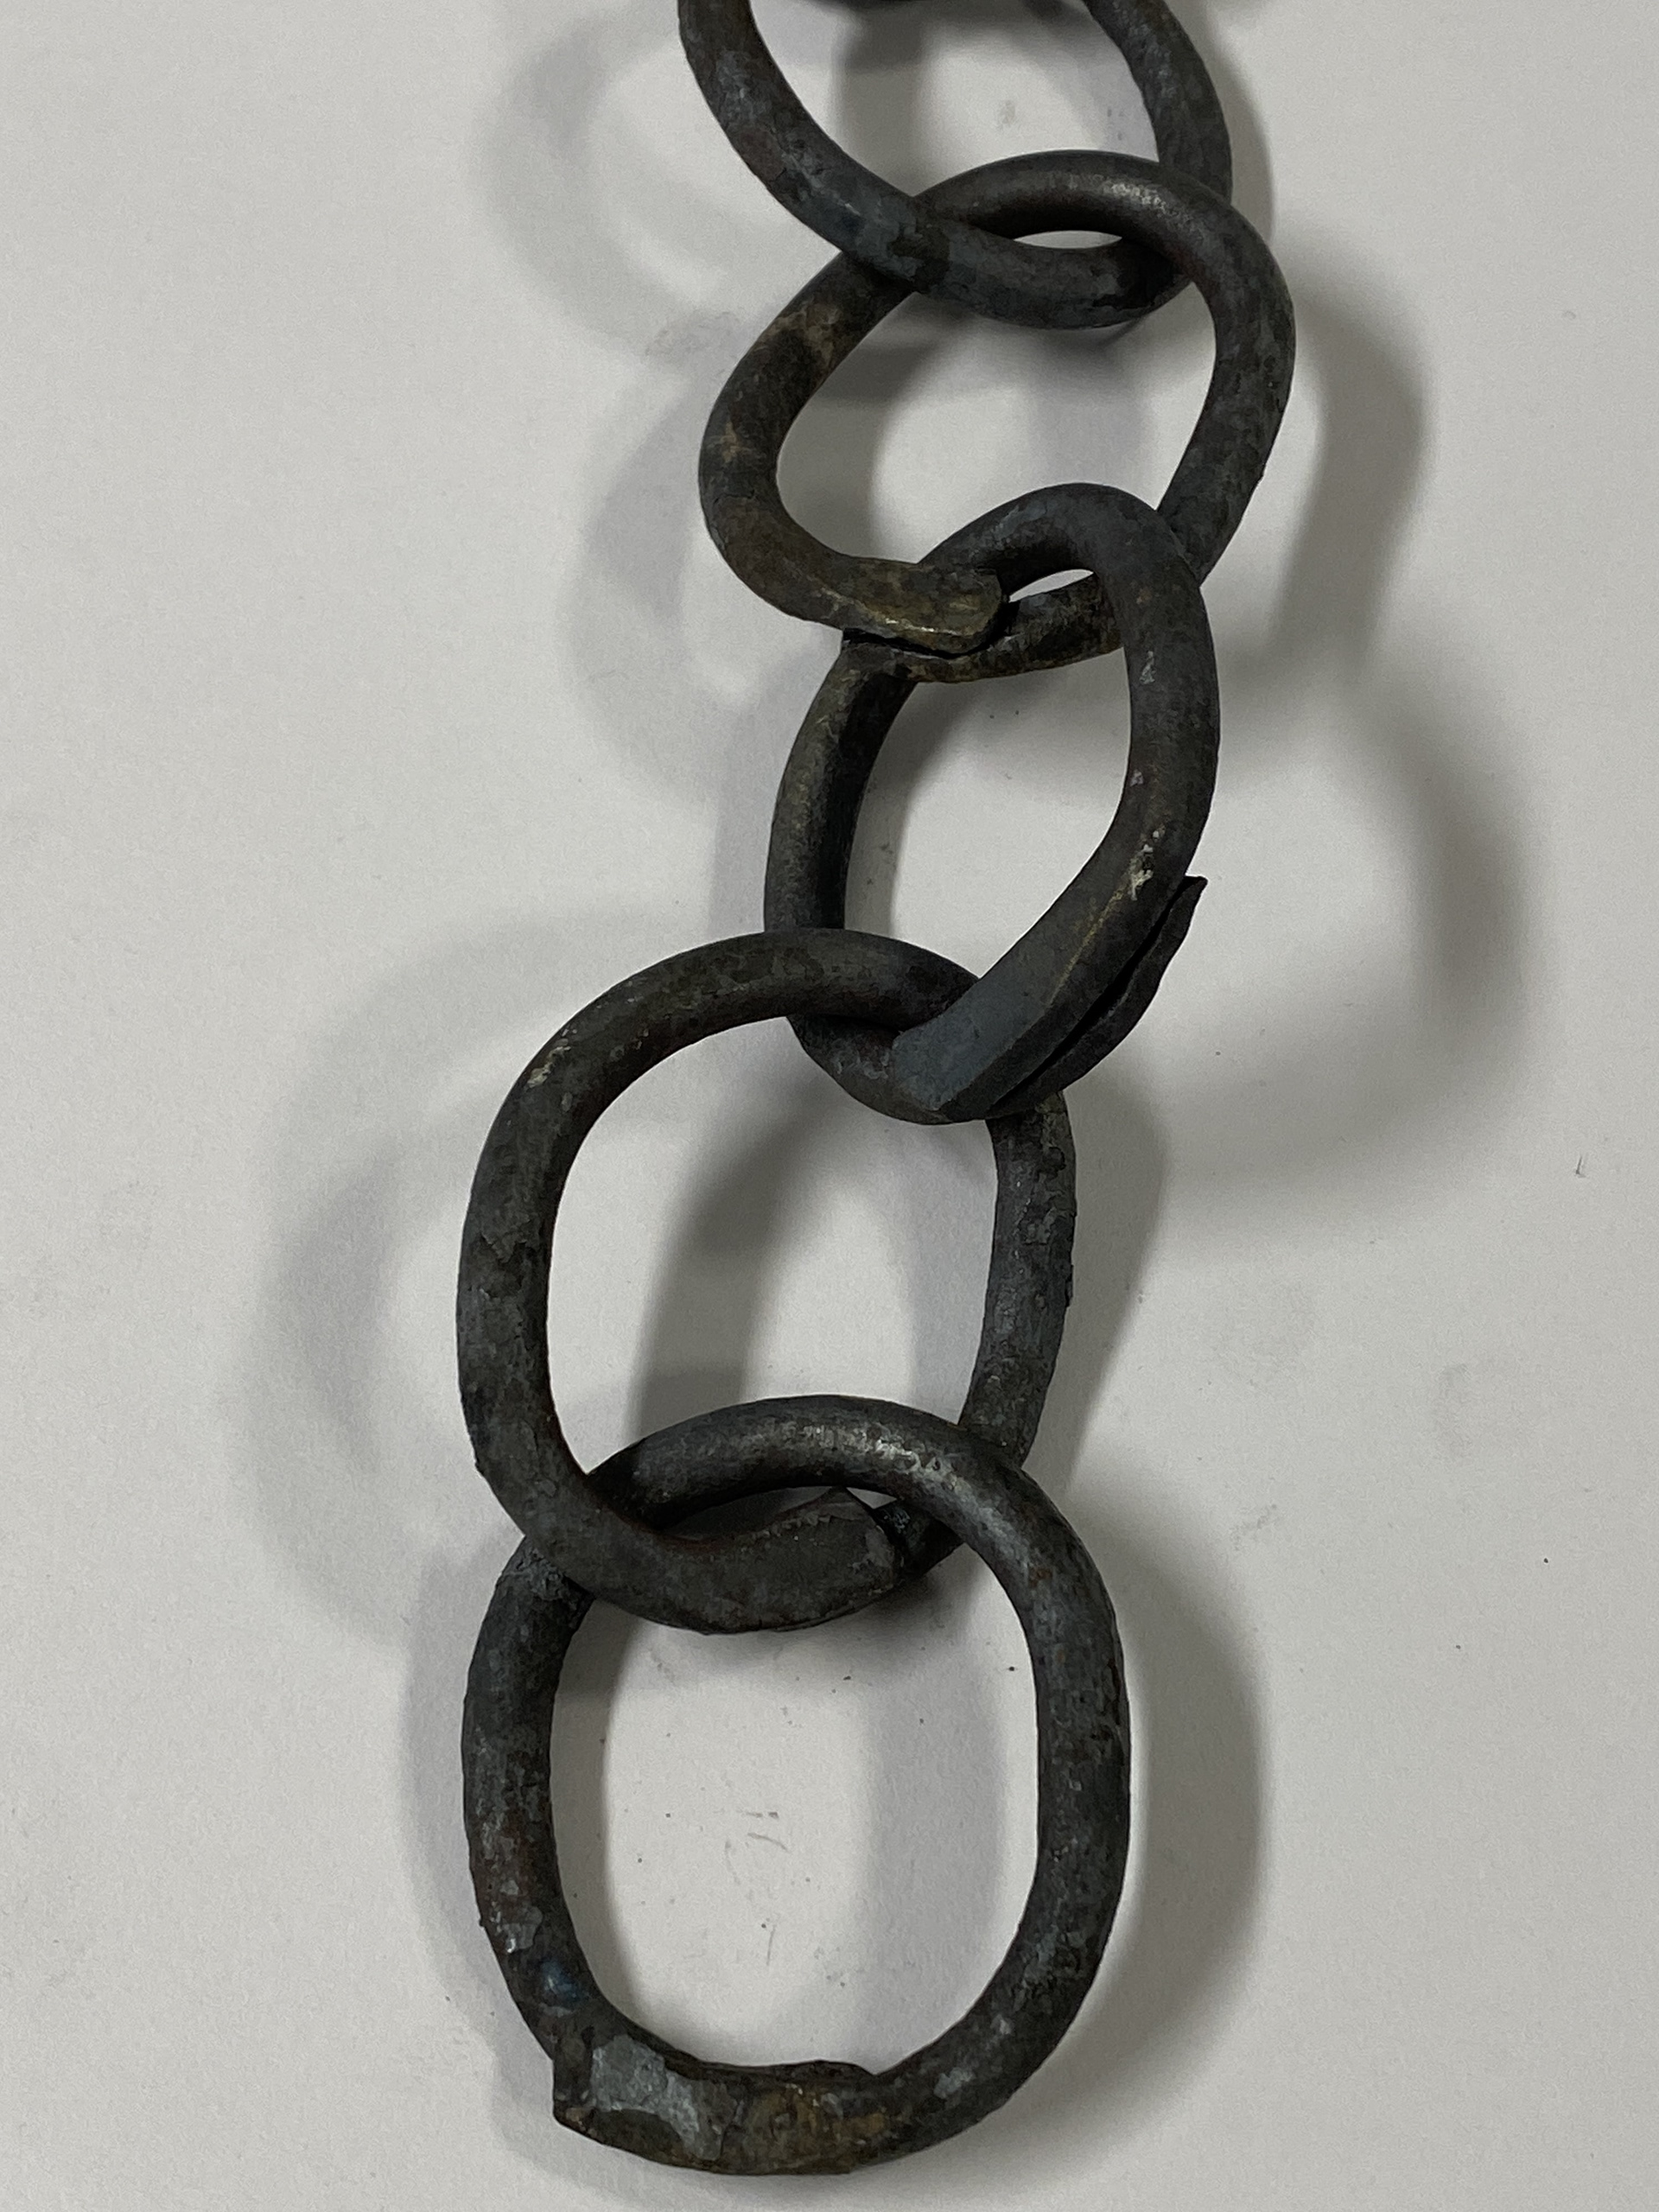
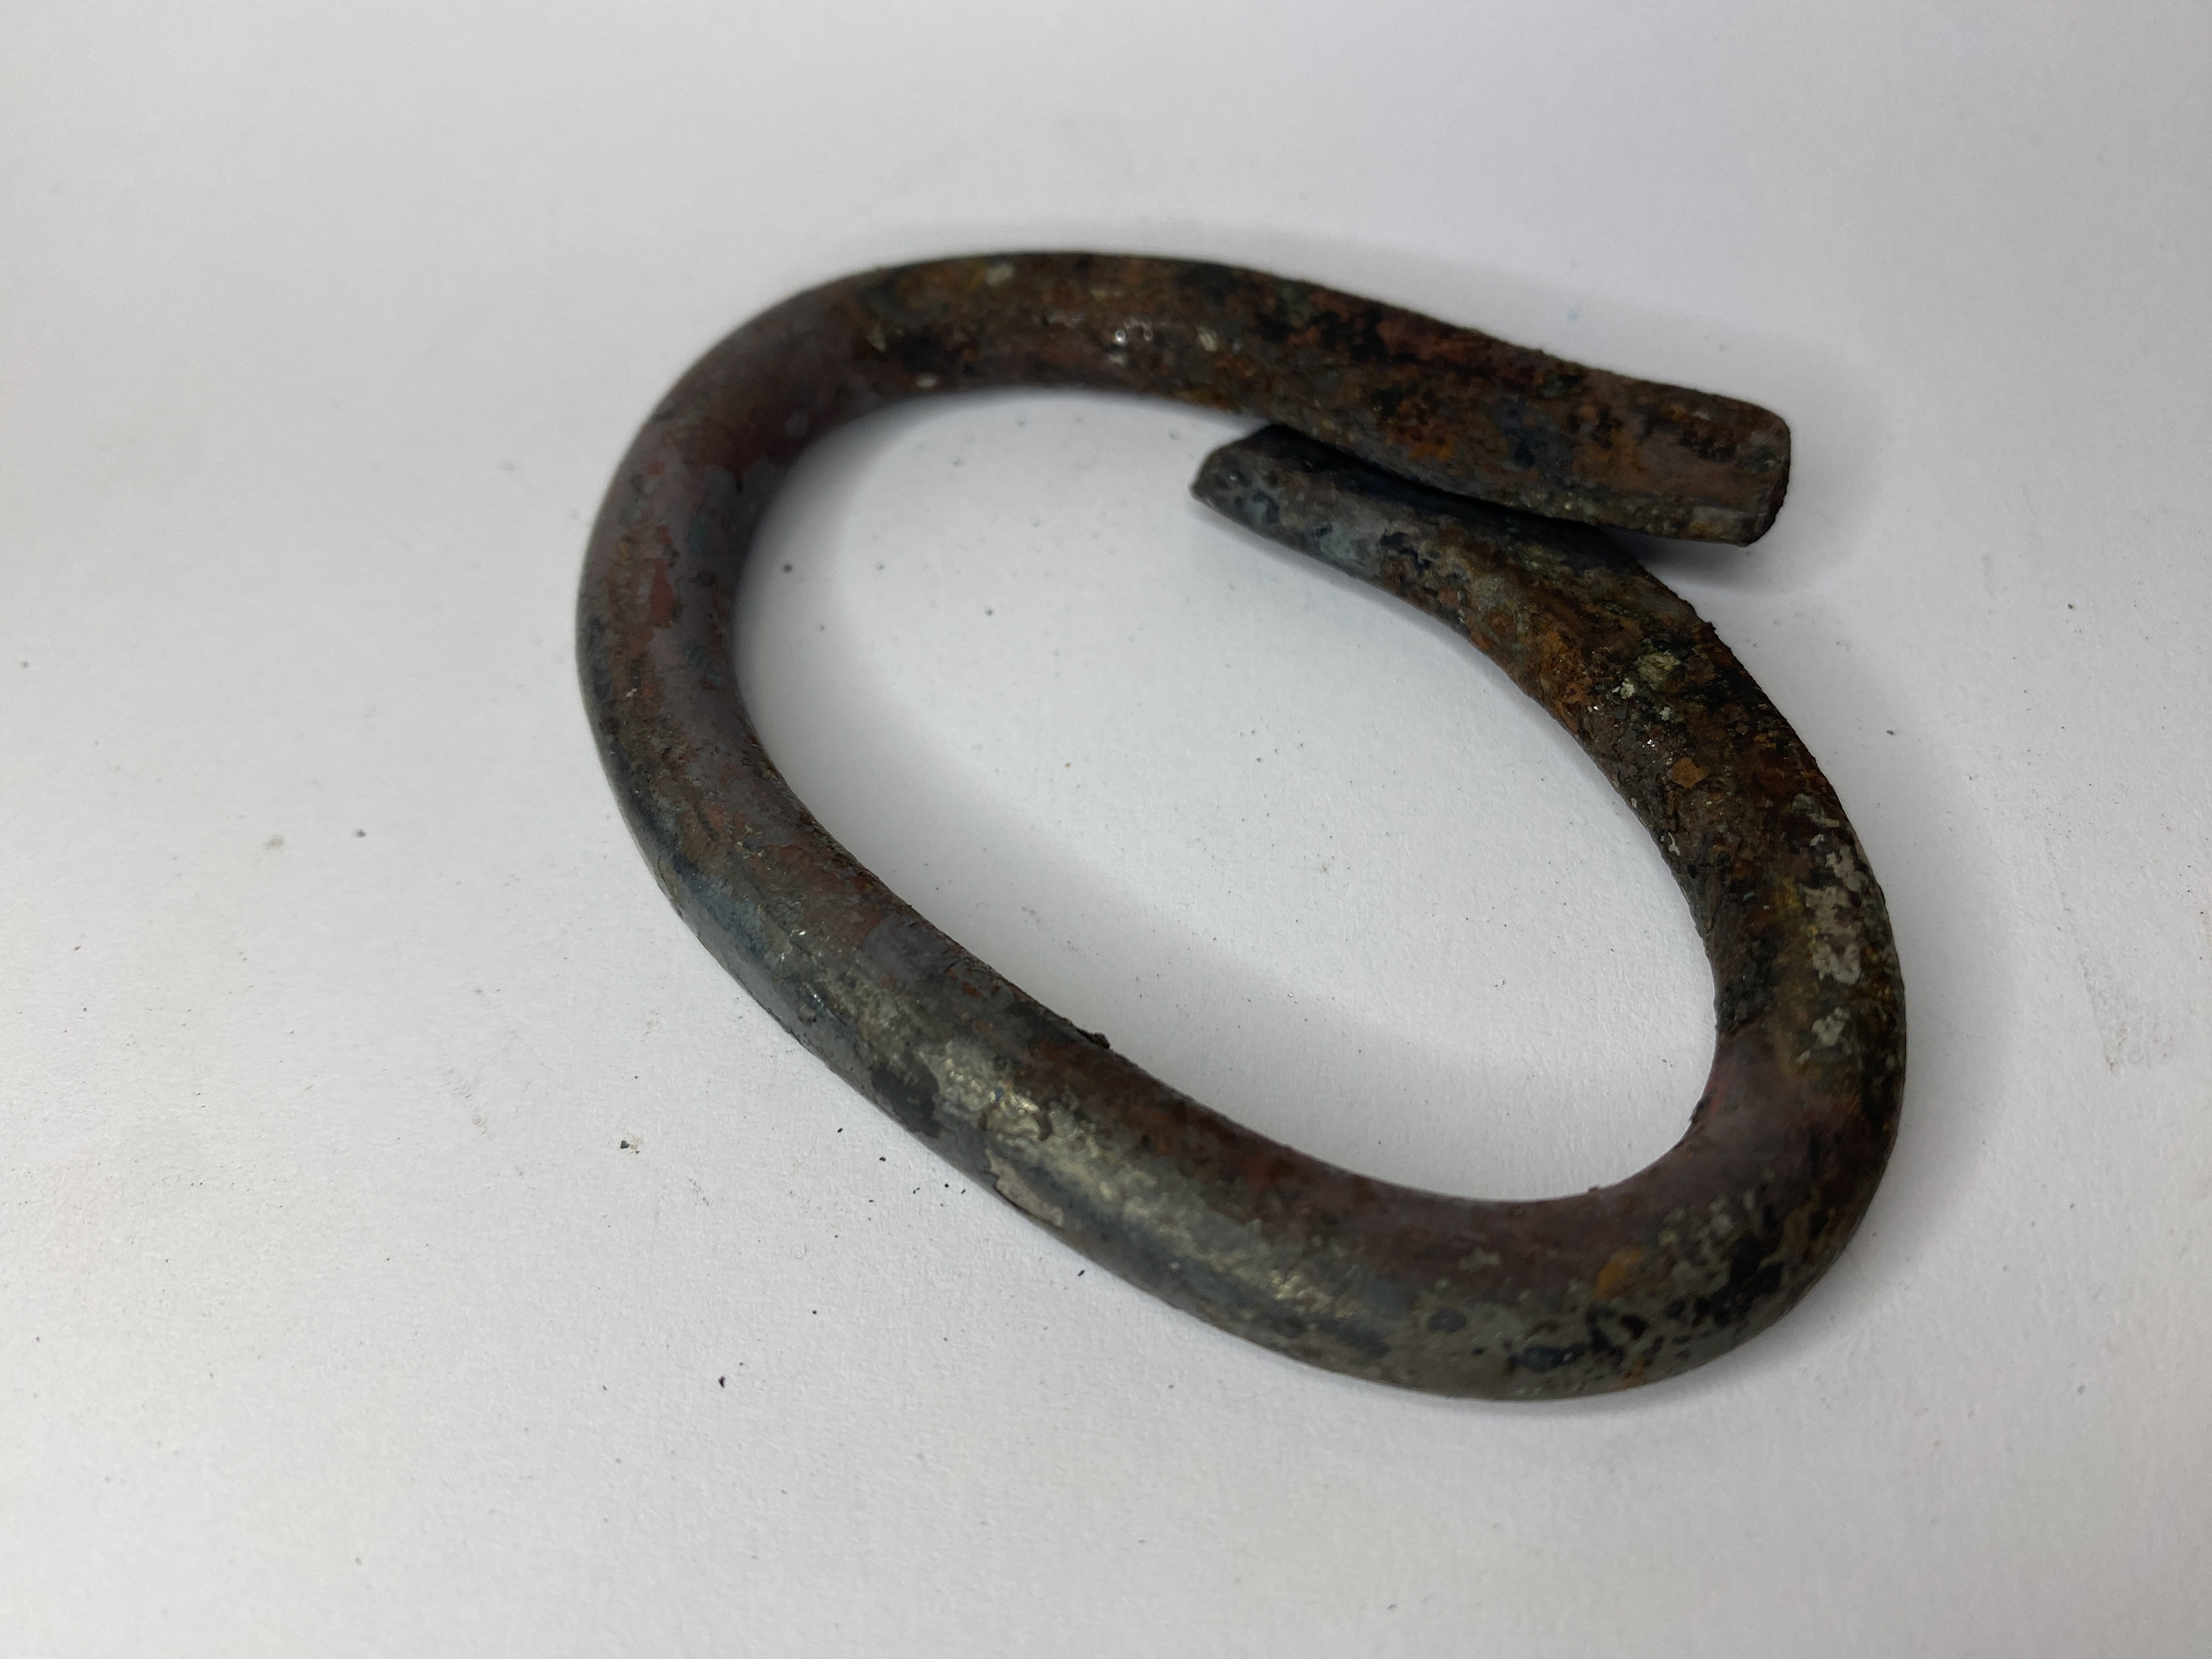
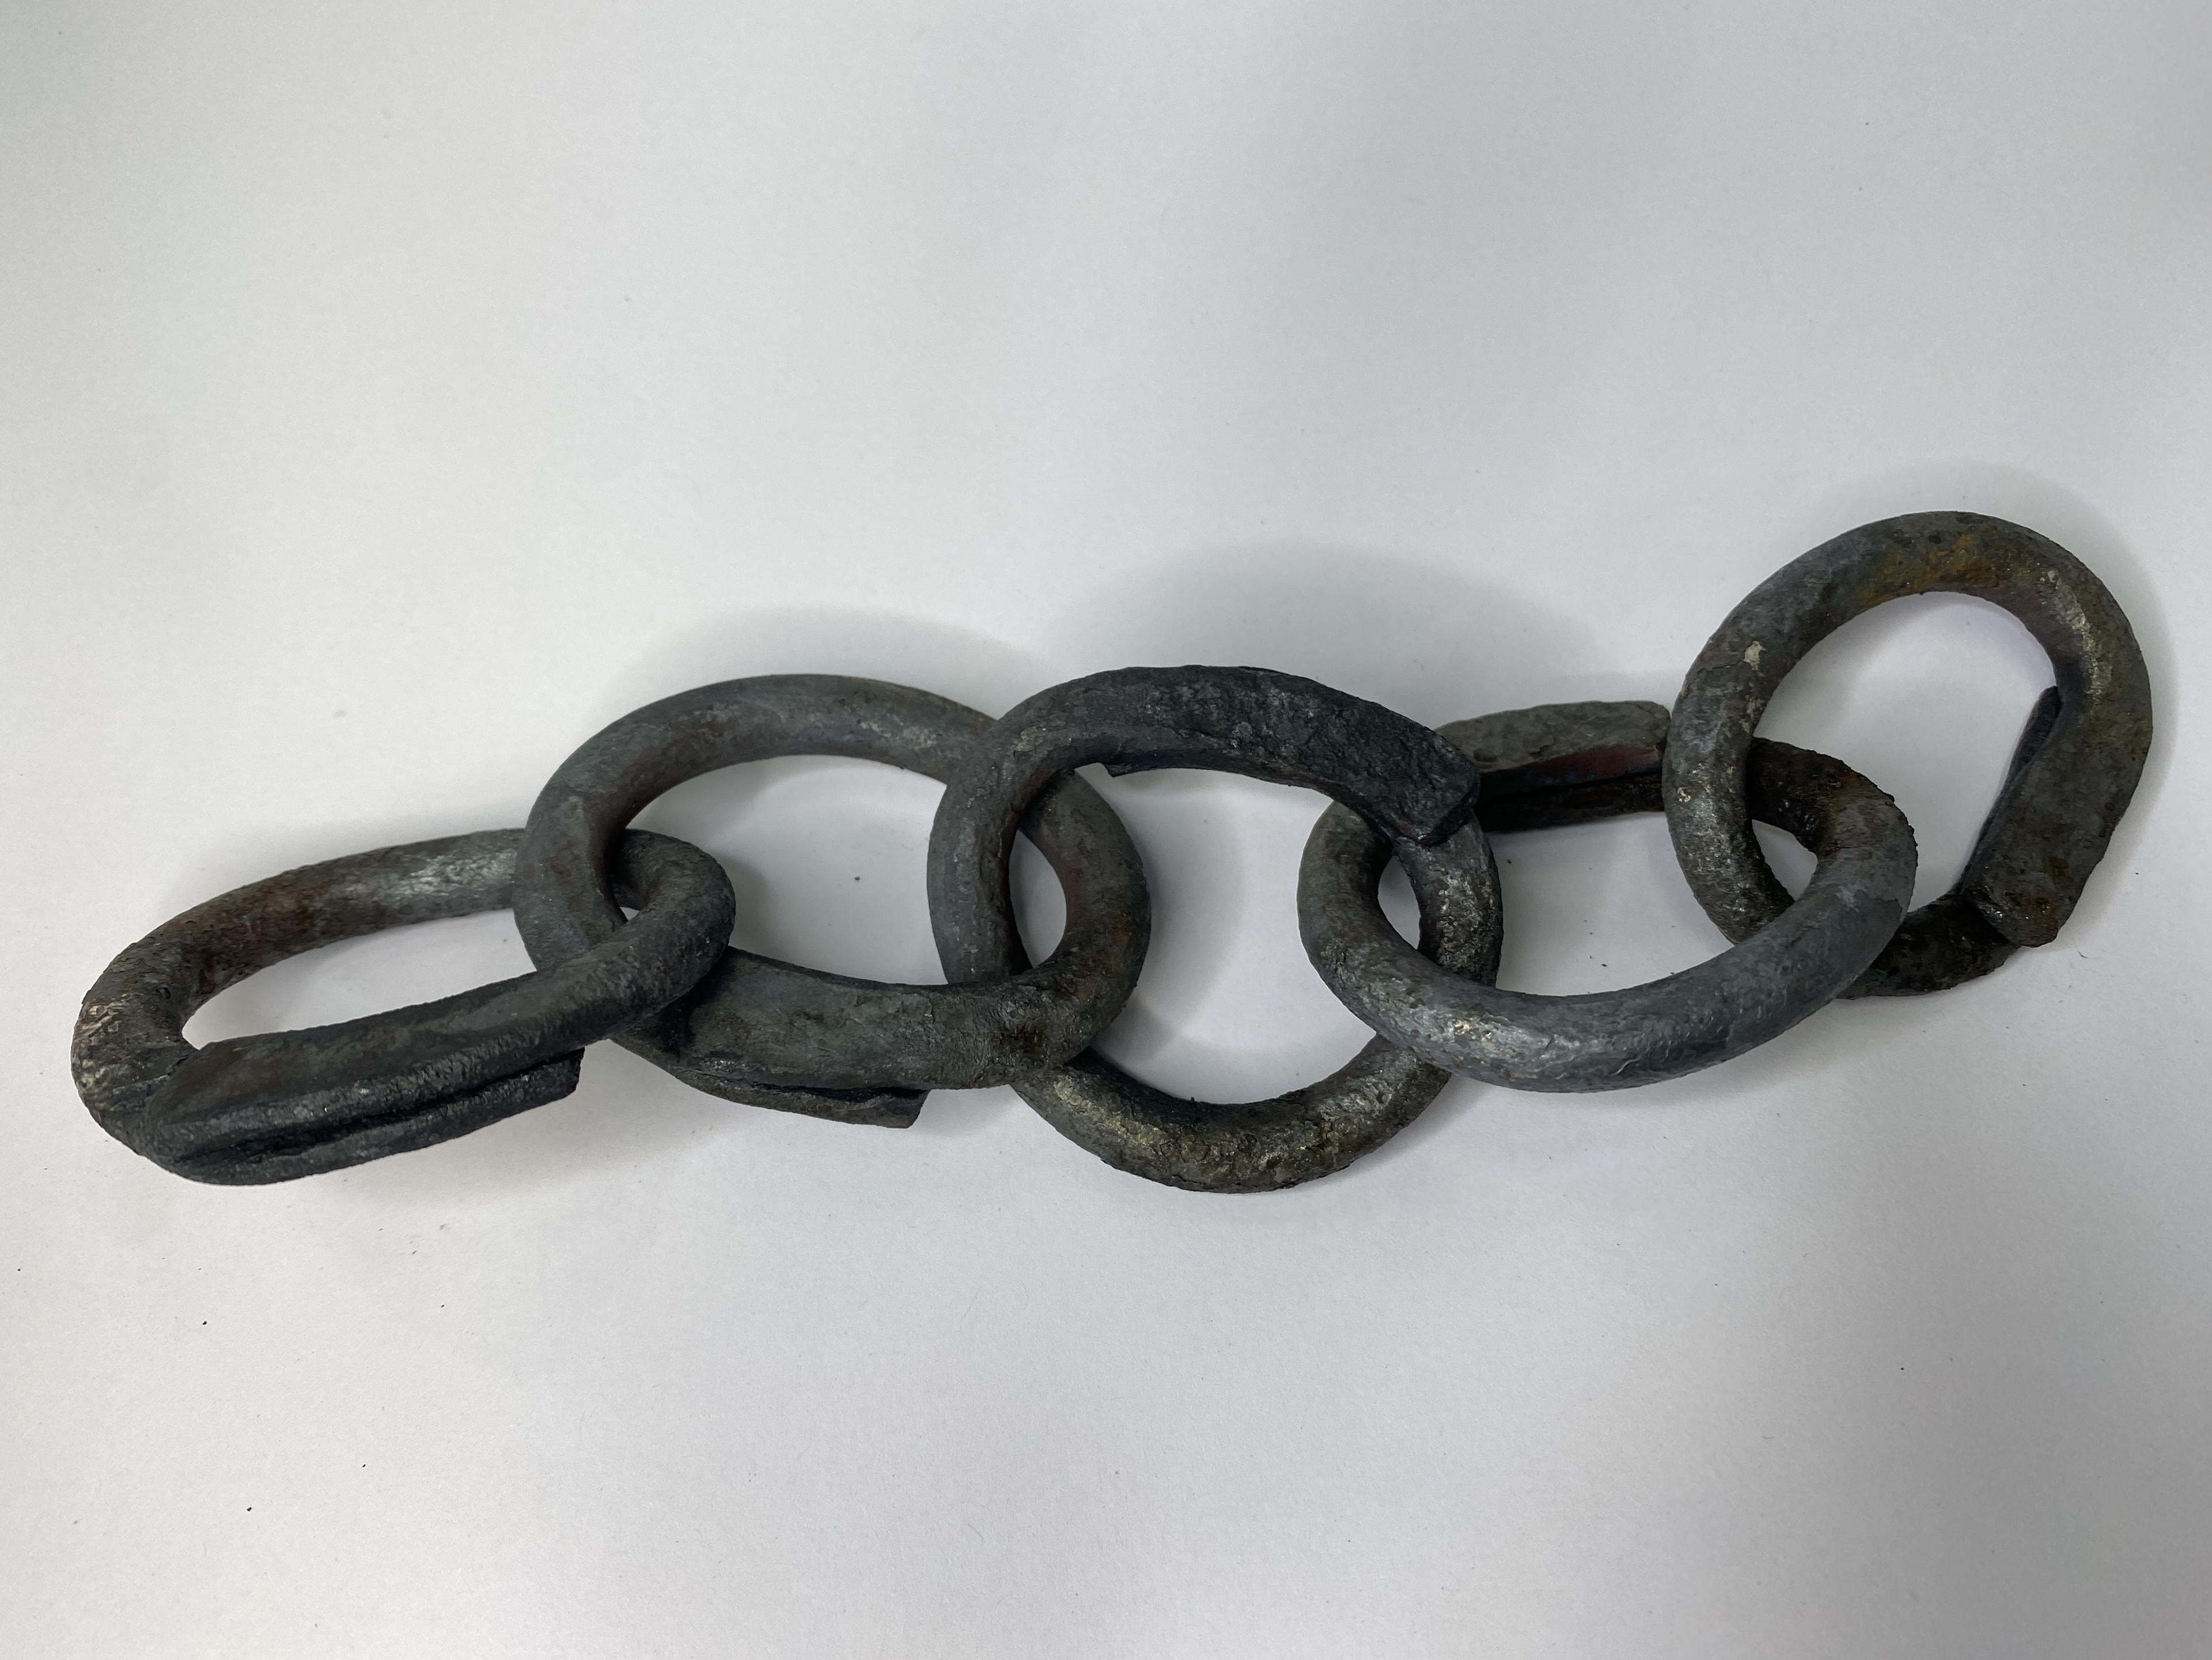
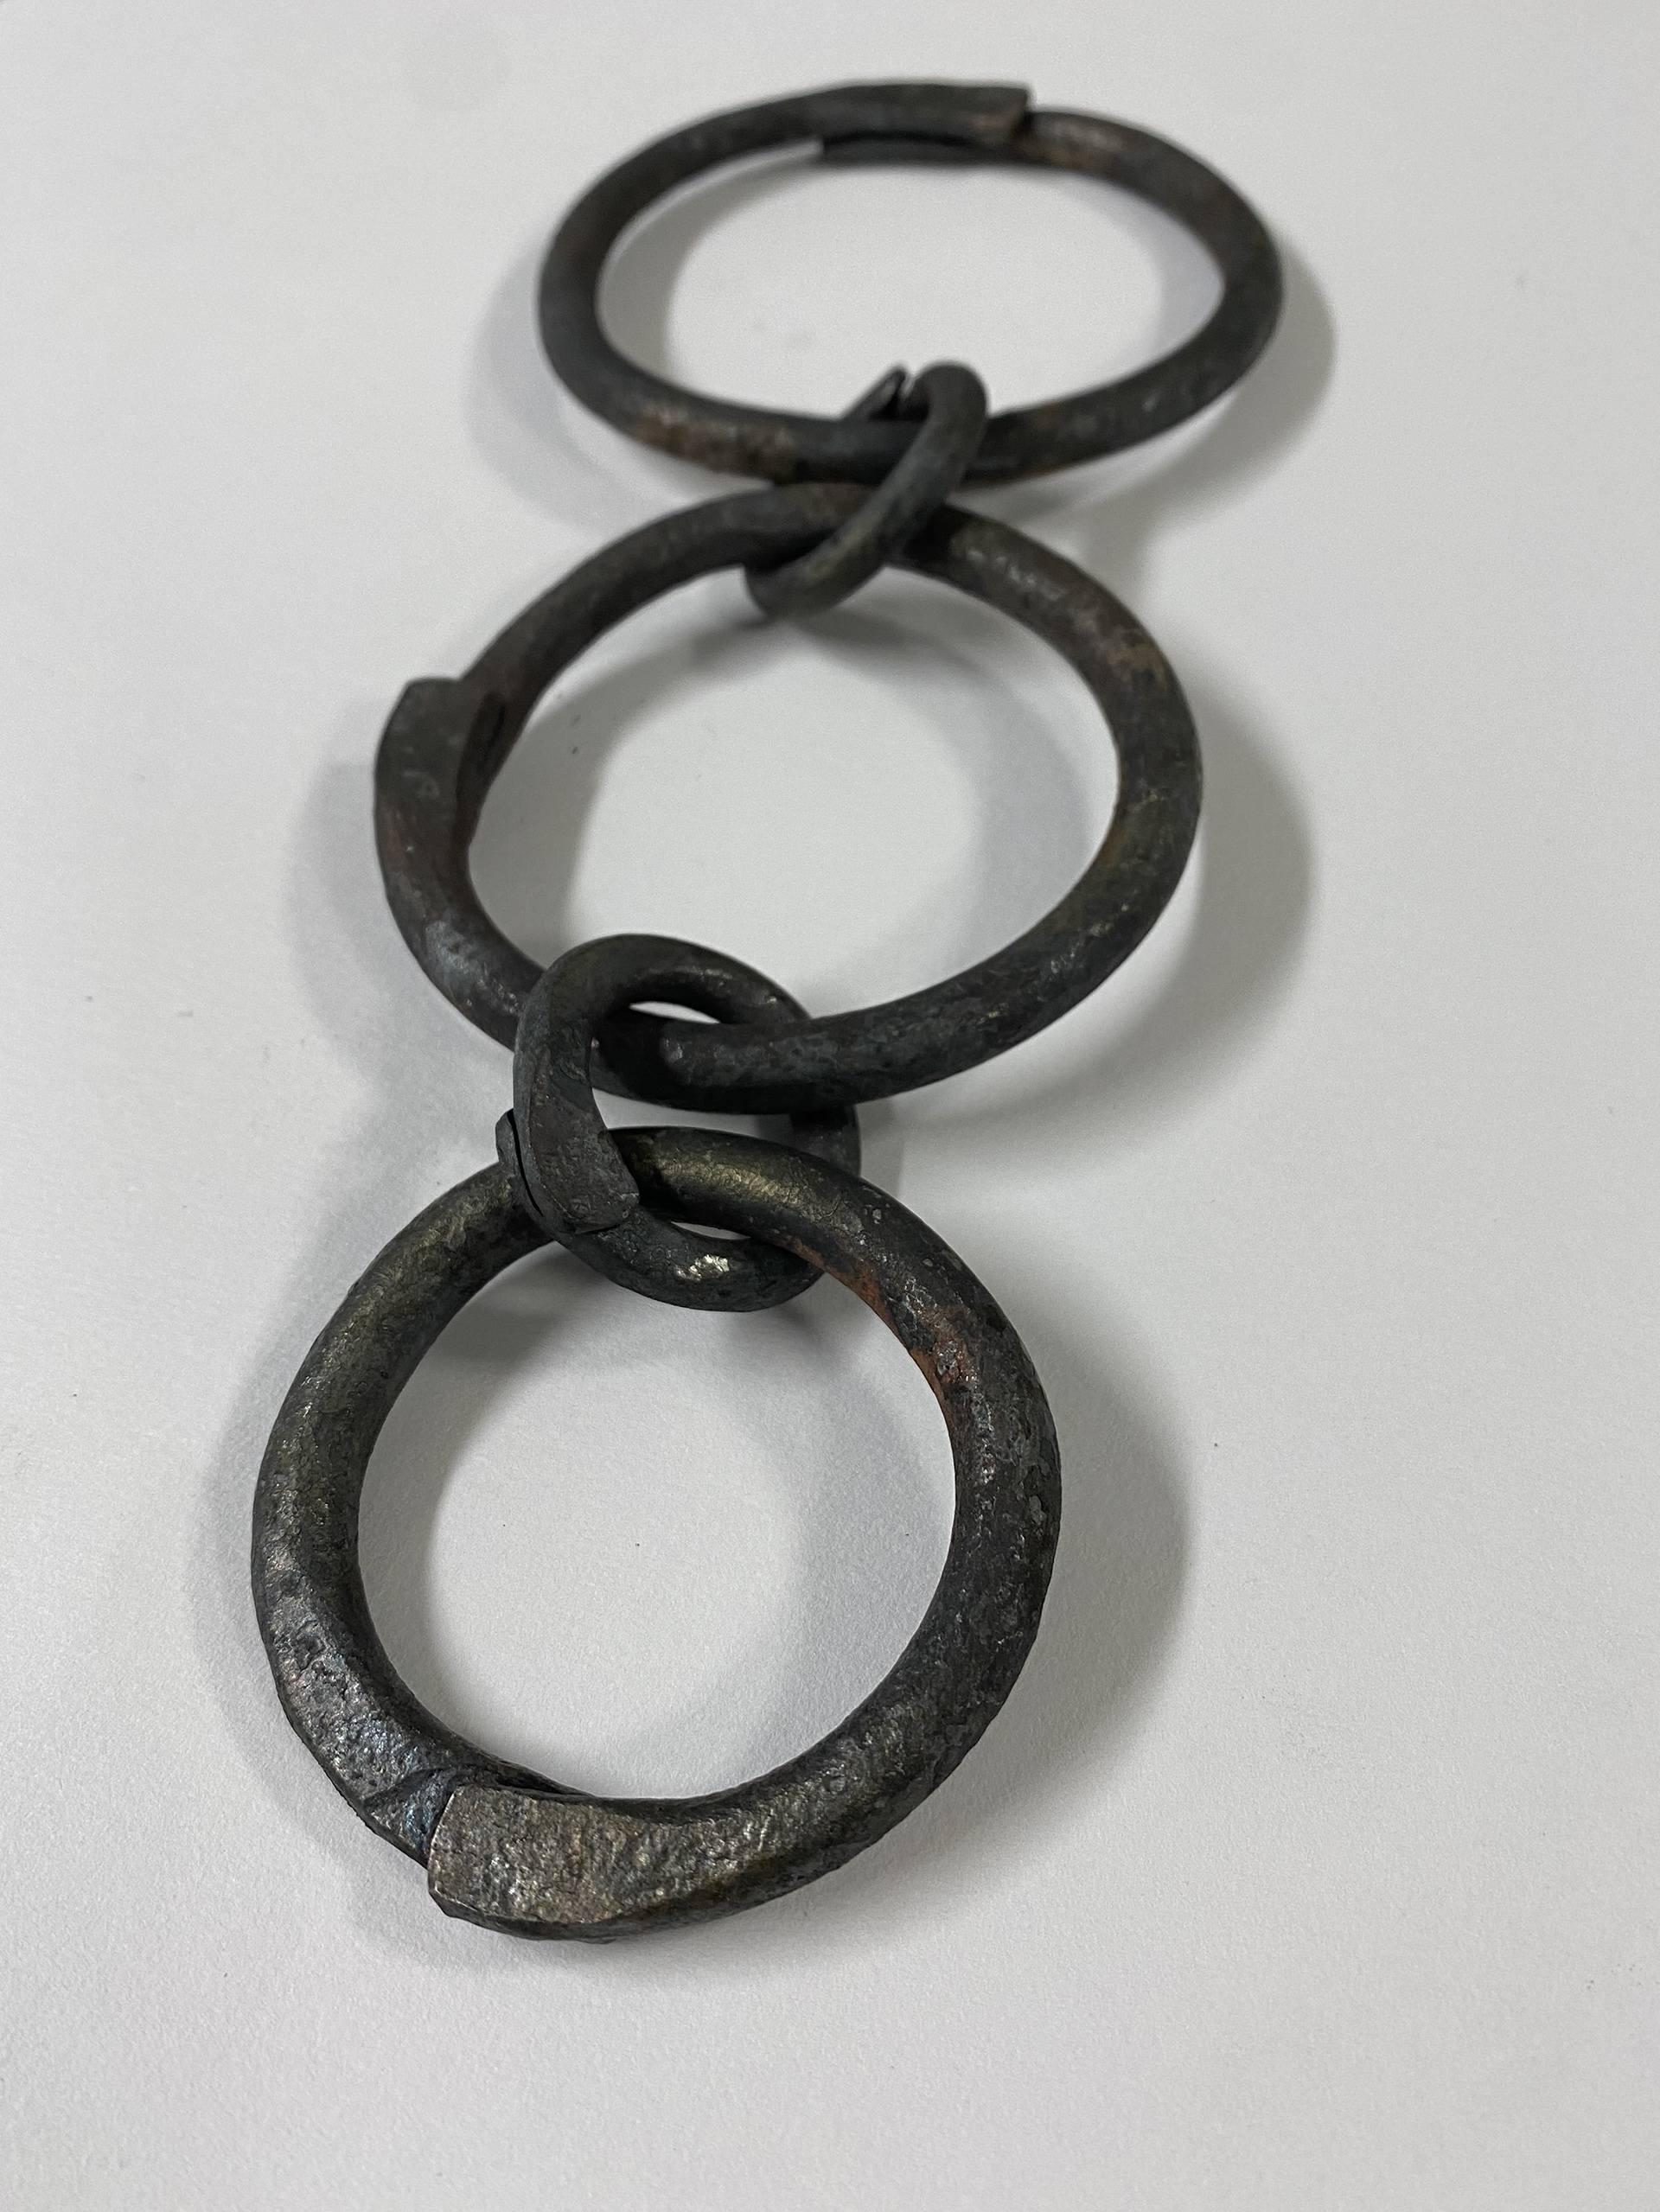
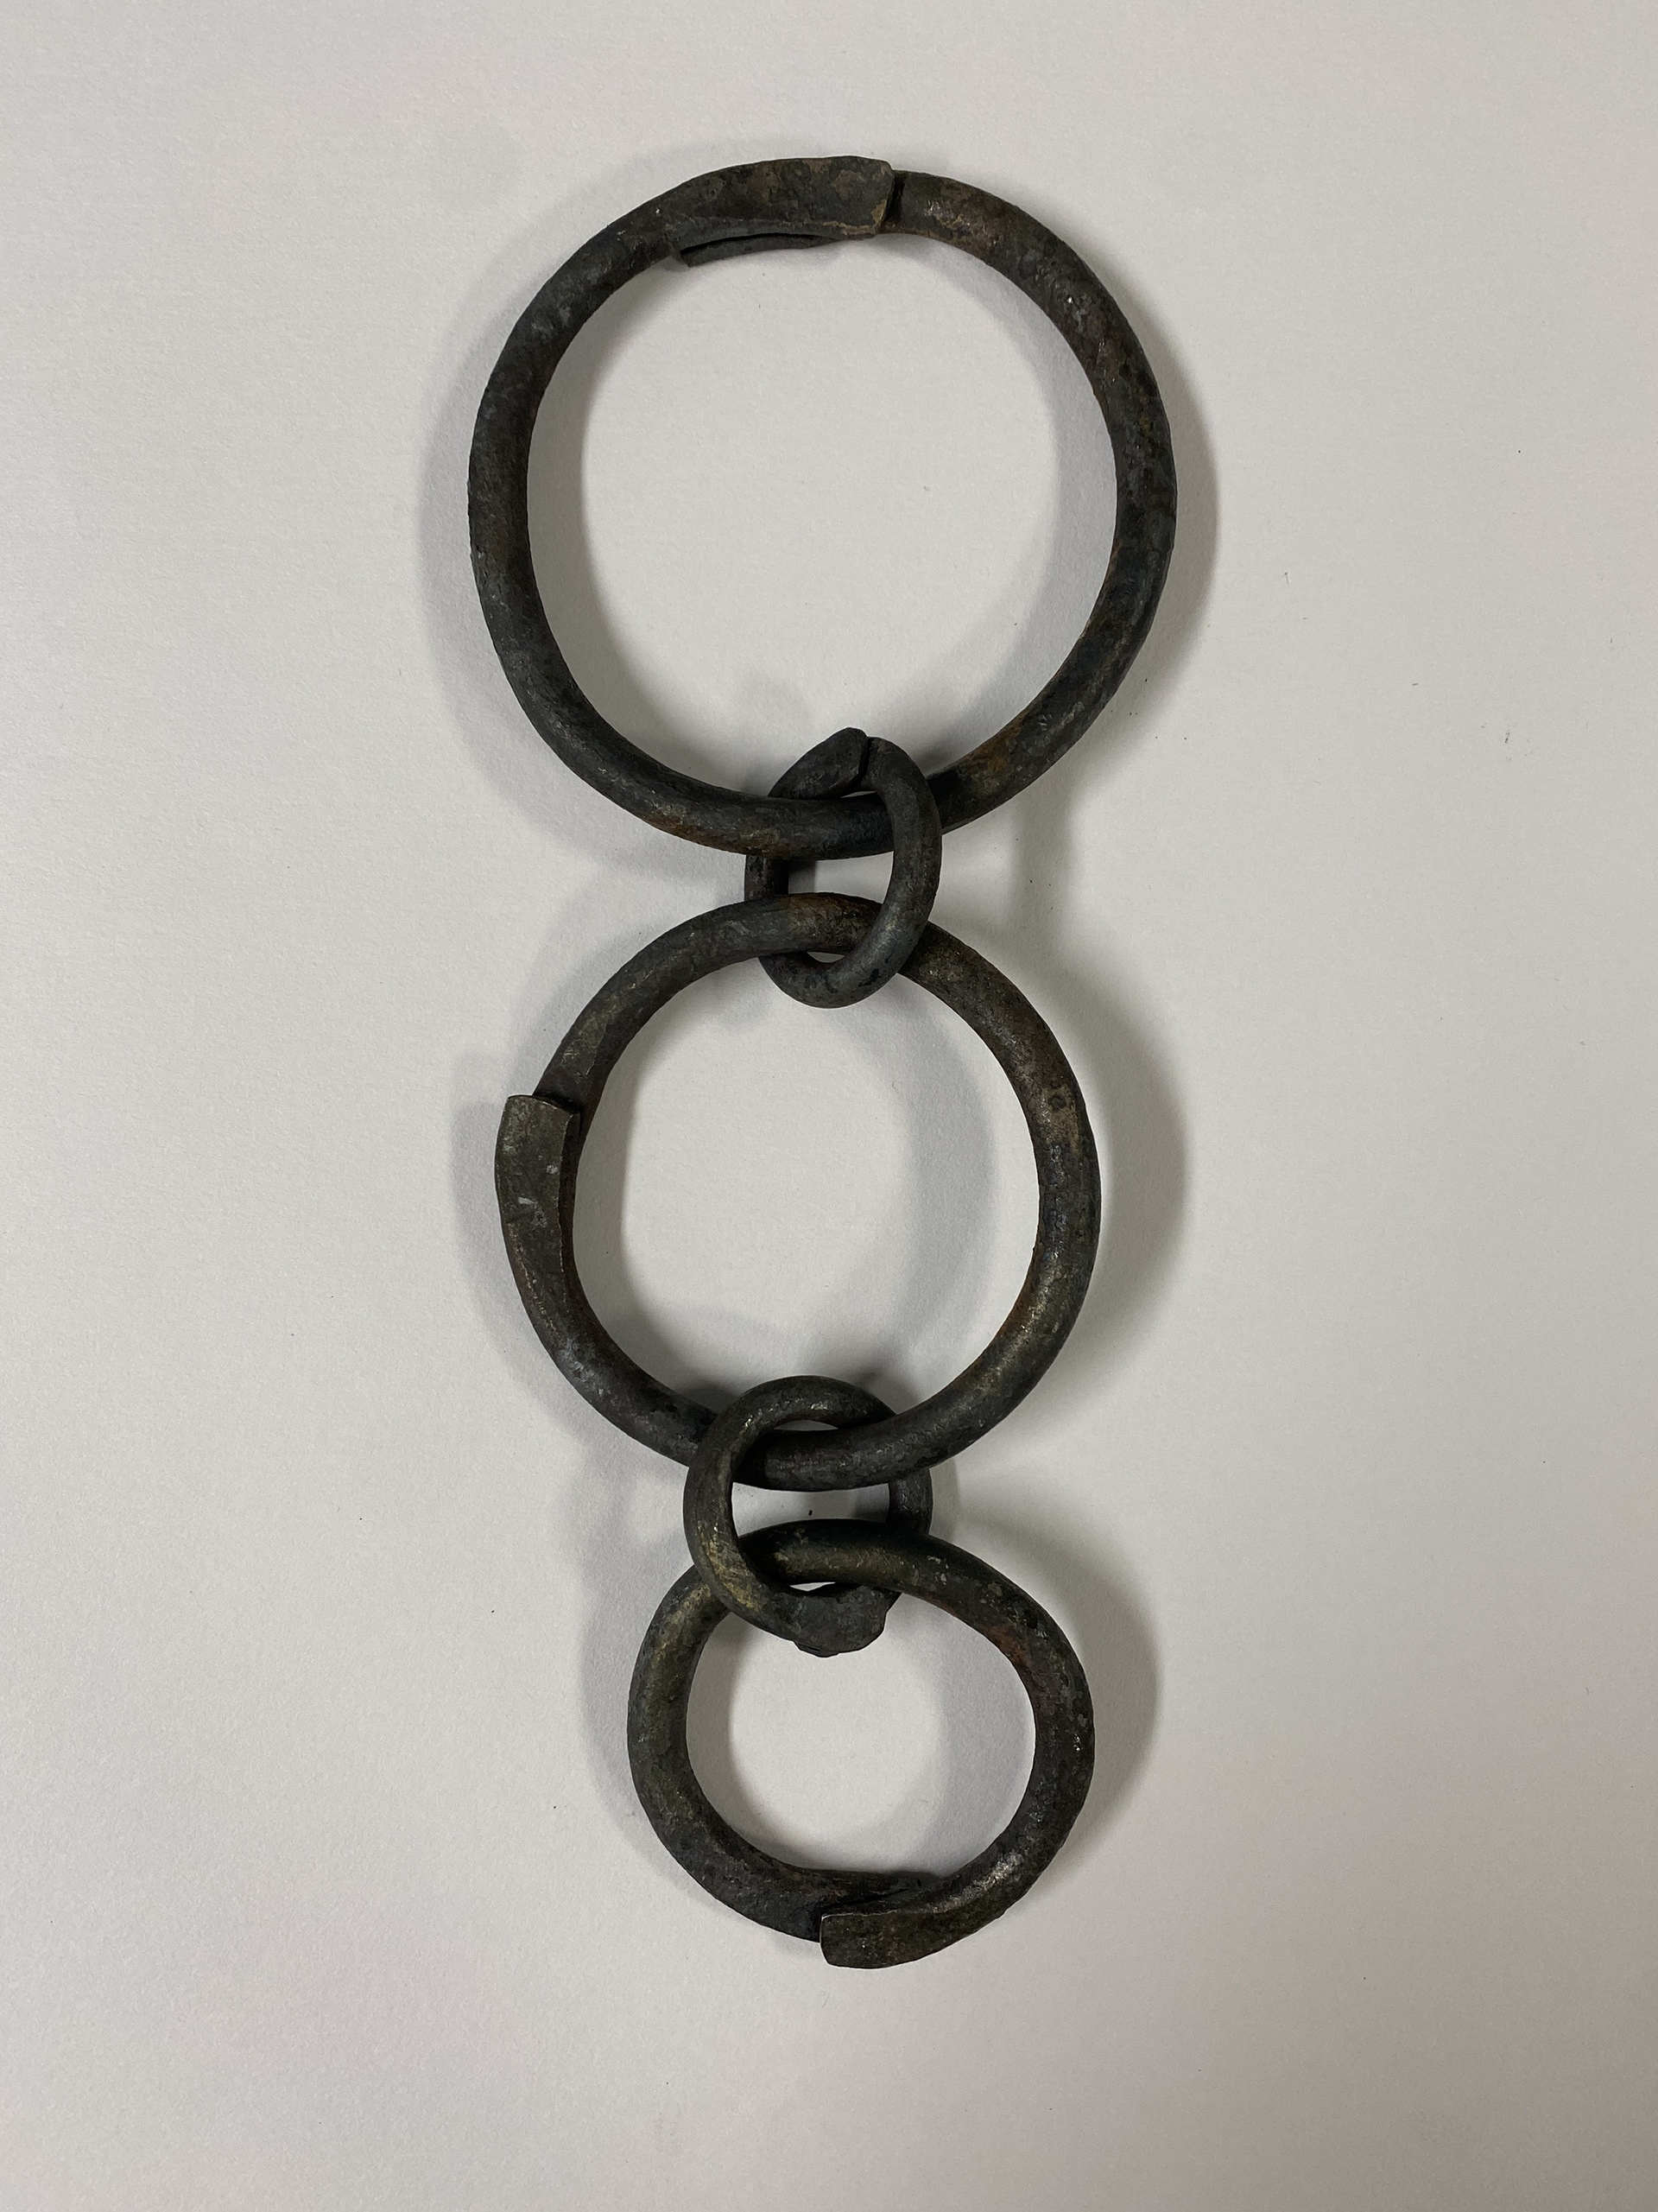
Further test of forging chain practicing forming a consistent shape and size. However, none of the welds fused therefore, I am focusing on creating an aestetic overlap joint and form.
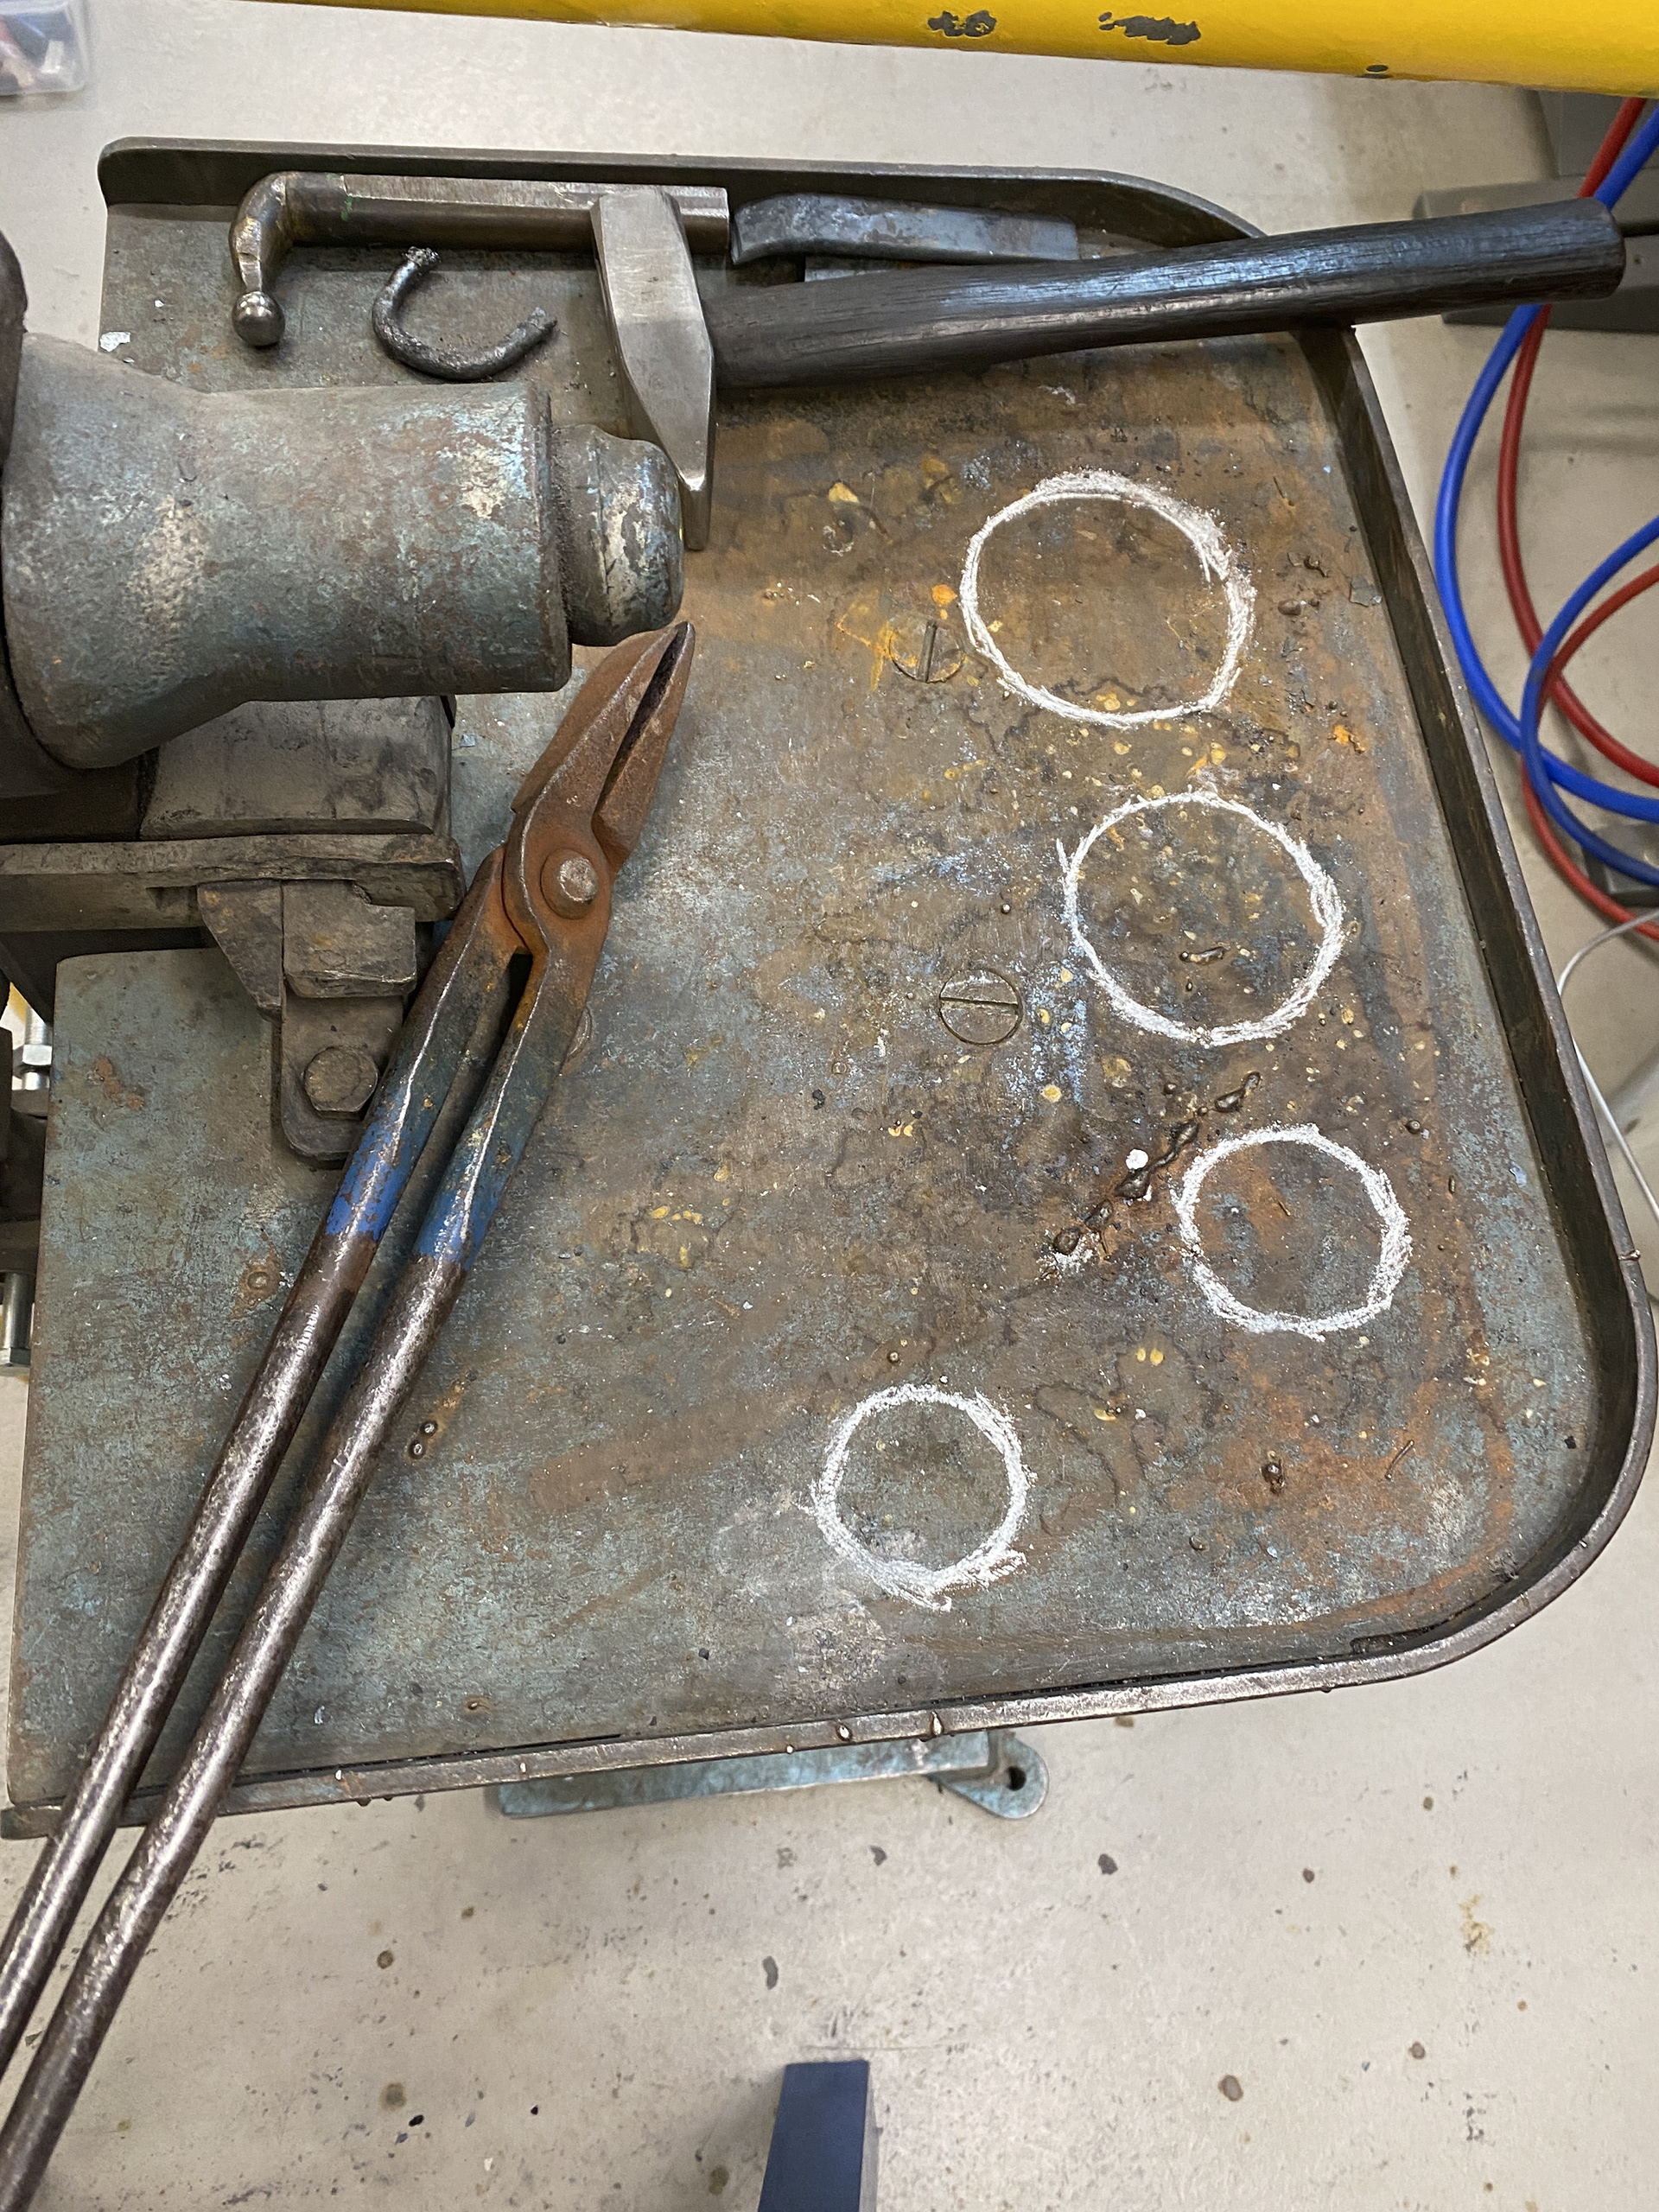

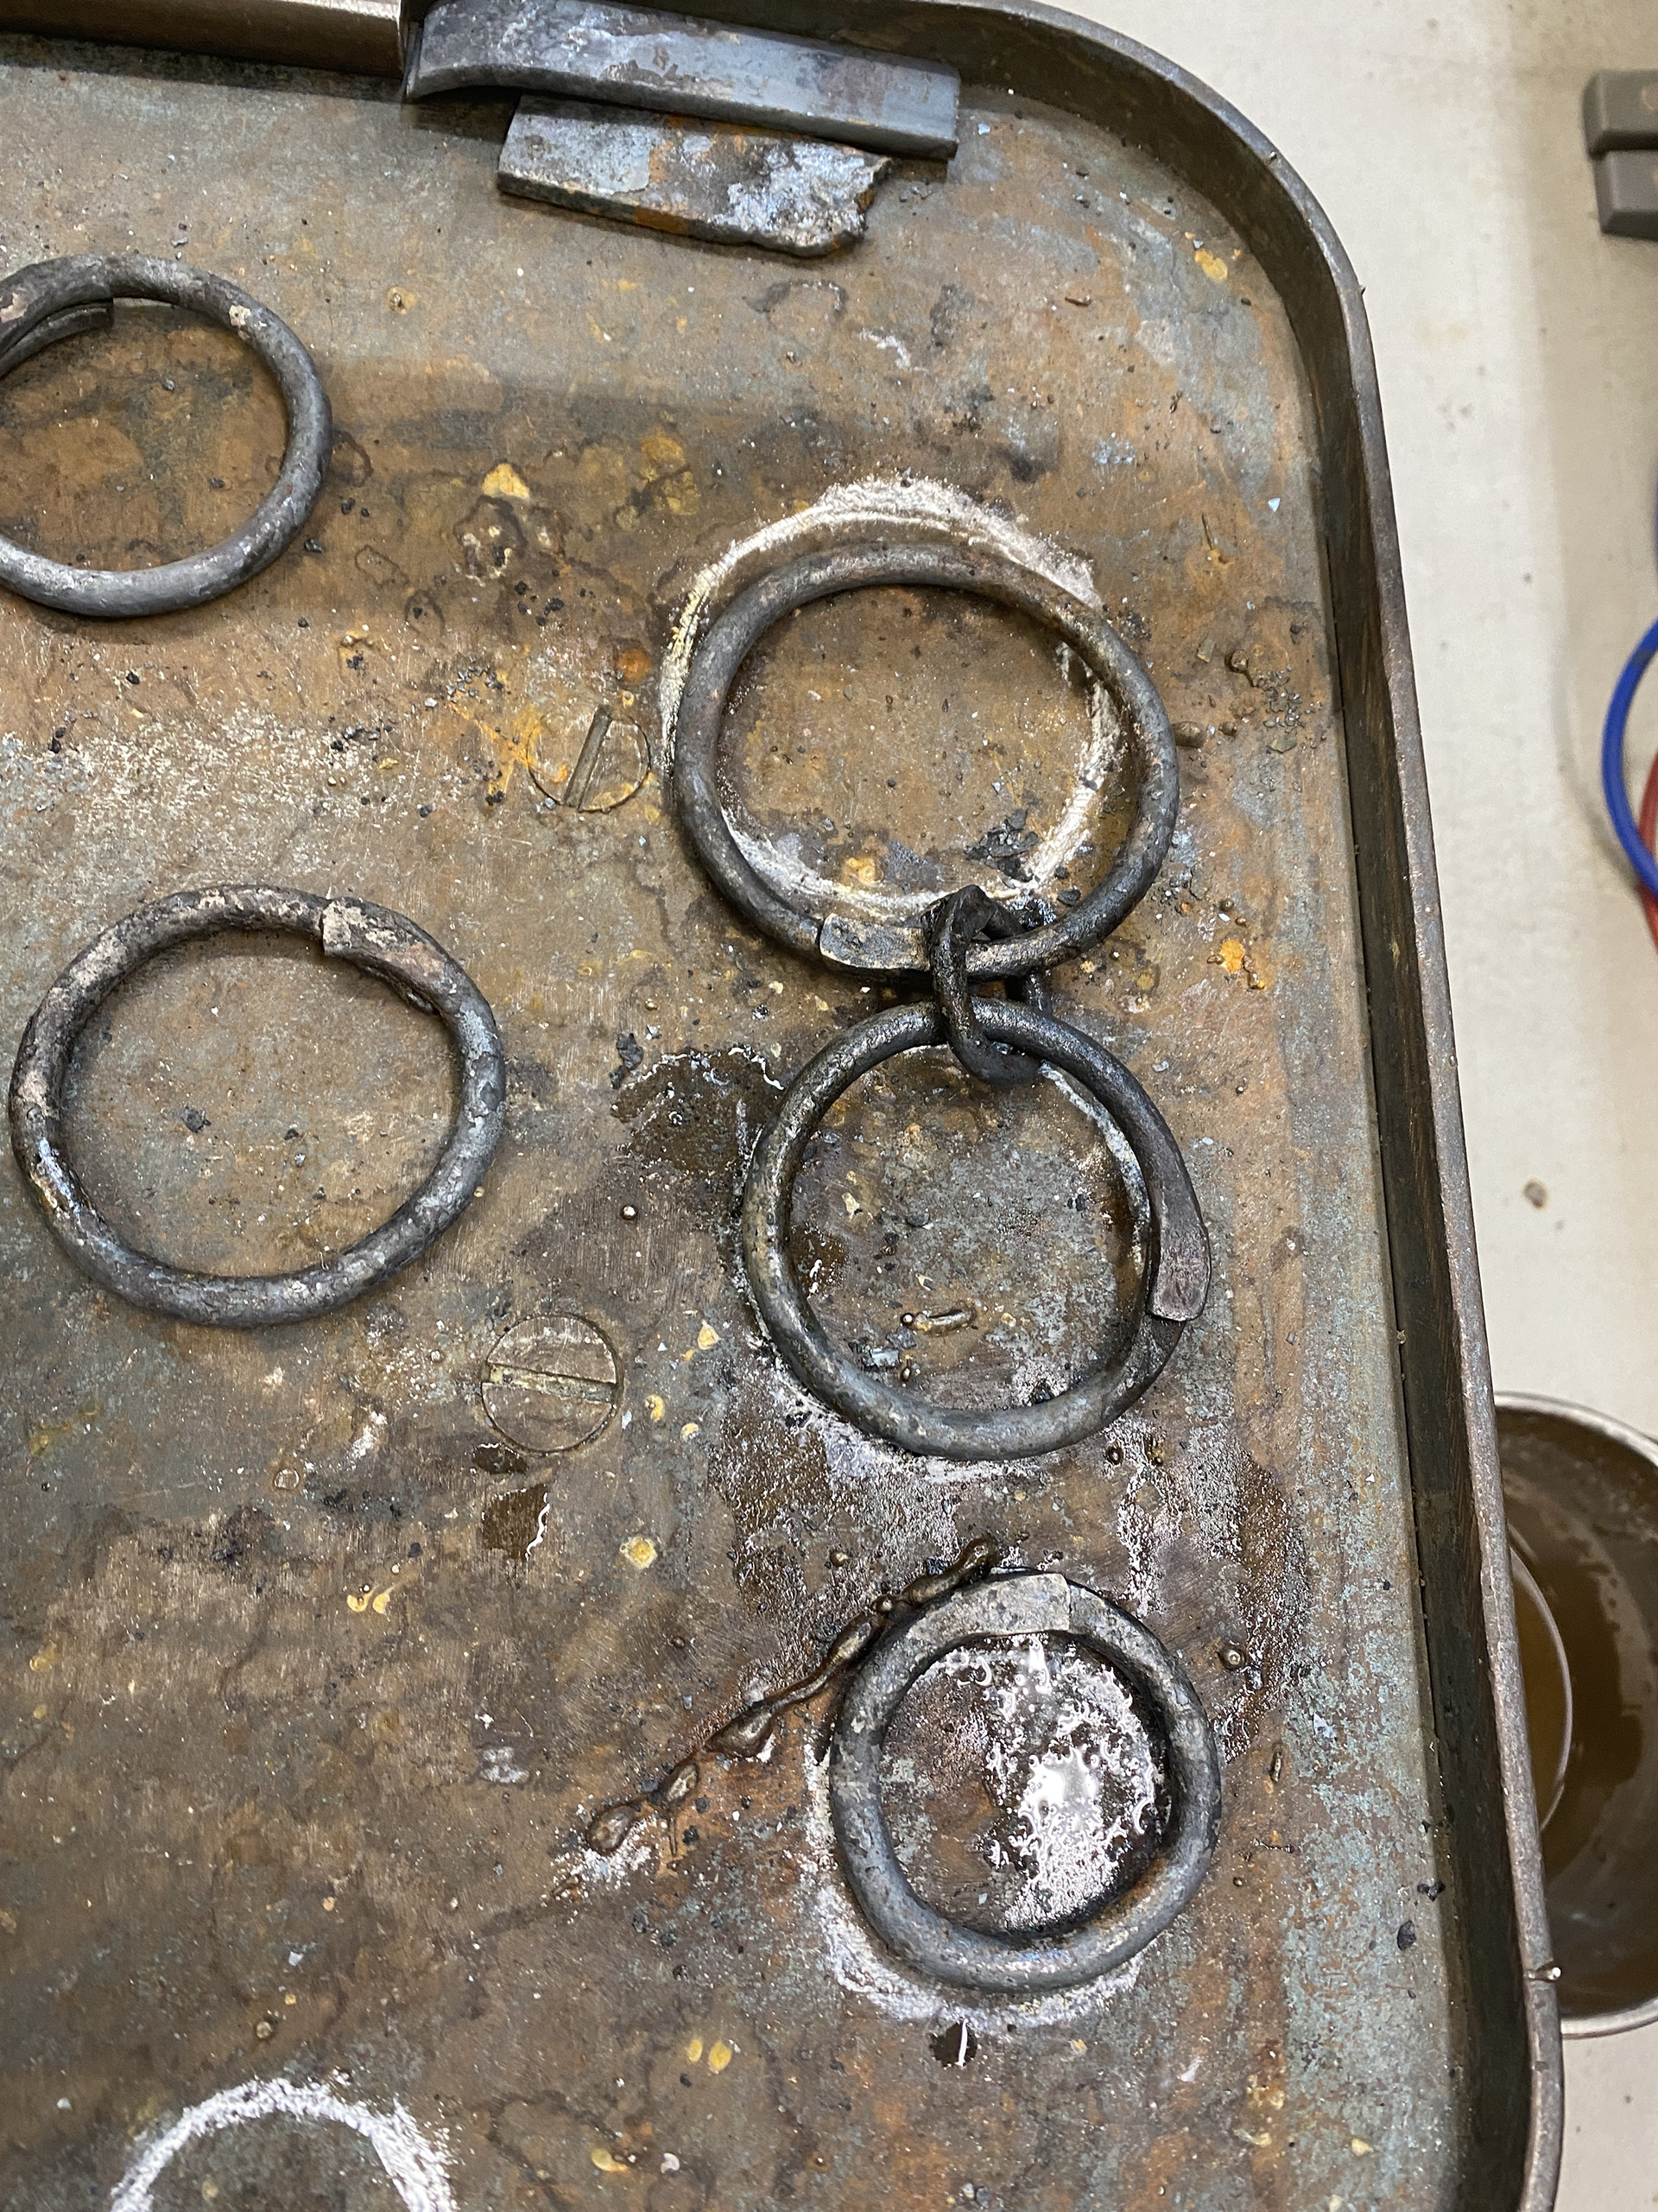
I changed some areas of my forging set up to increase the accuracy of the circular links. I drew outlines of the links in chalk so that I could reference the size and adjust the piece whilst still hot, speeding up my workflow. I also added a round mandrel to form the circles around and a smaller horned stake in the leg vice to refine and adjust the overlapping sections of the links.
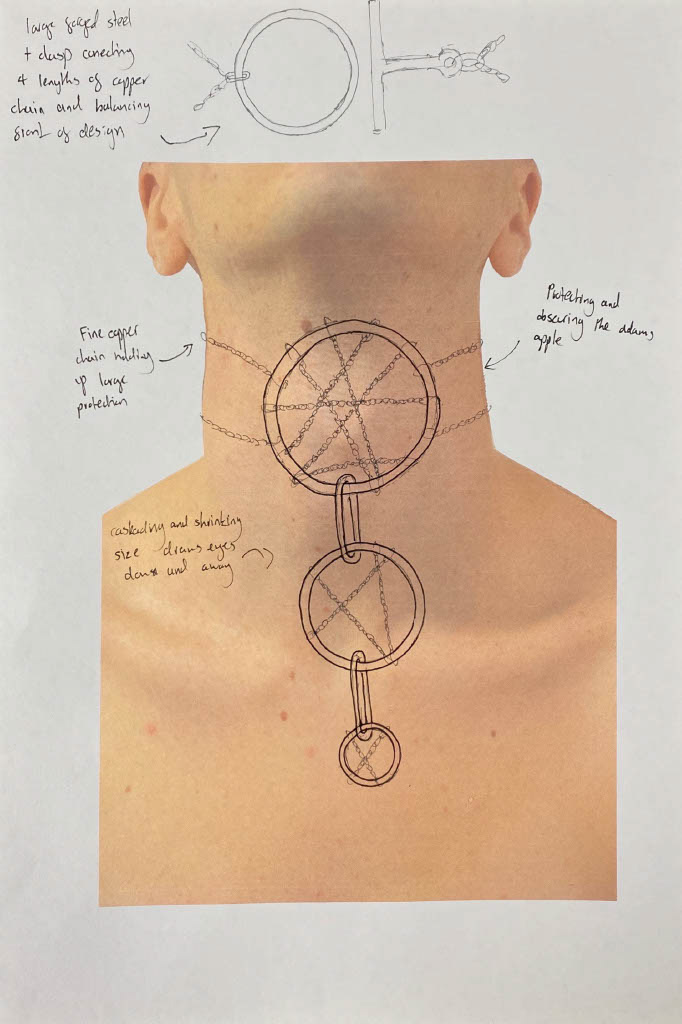
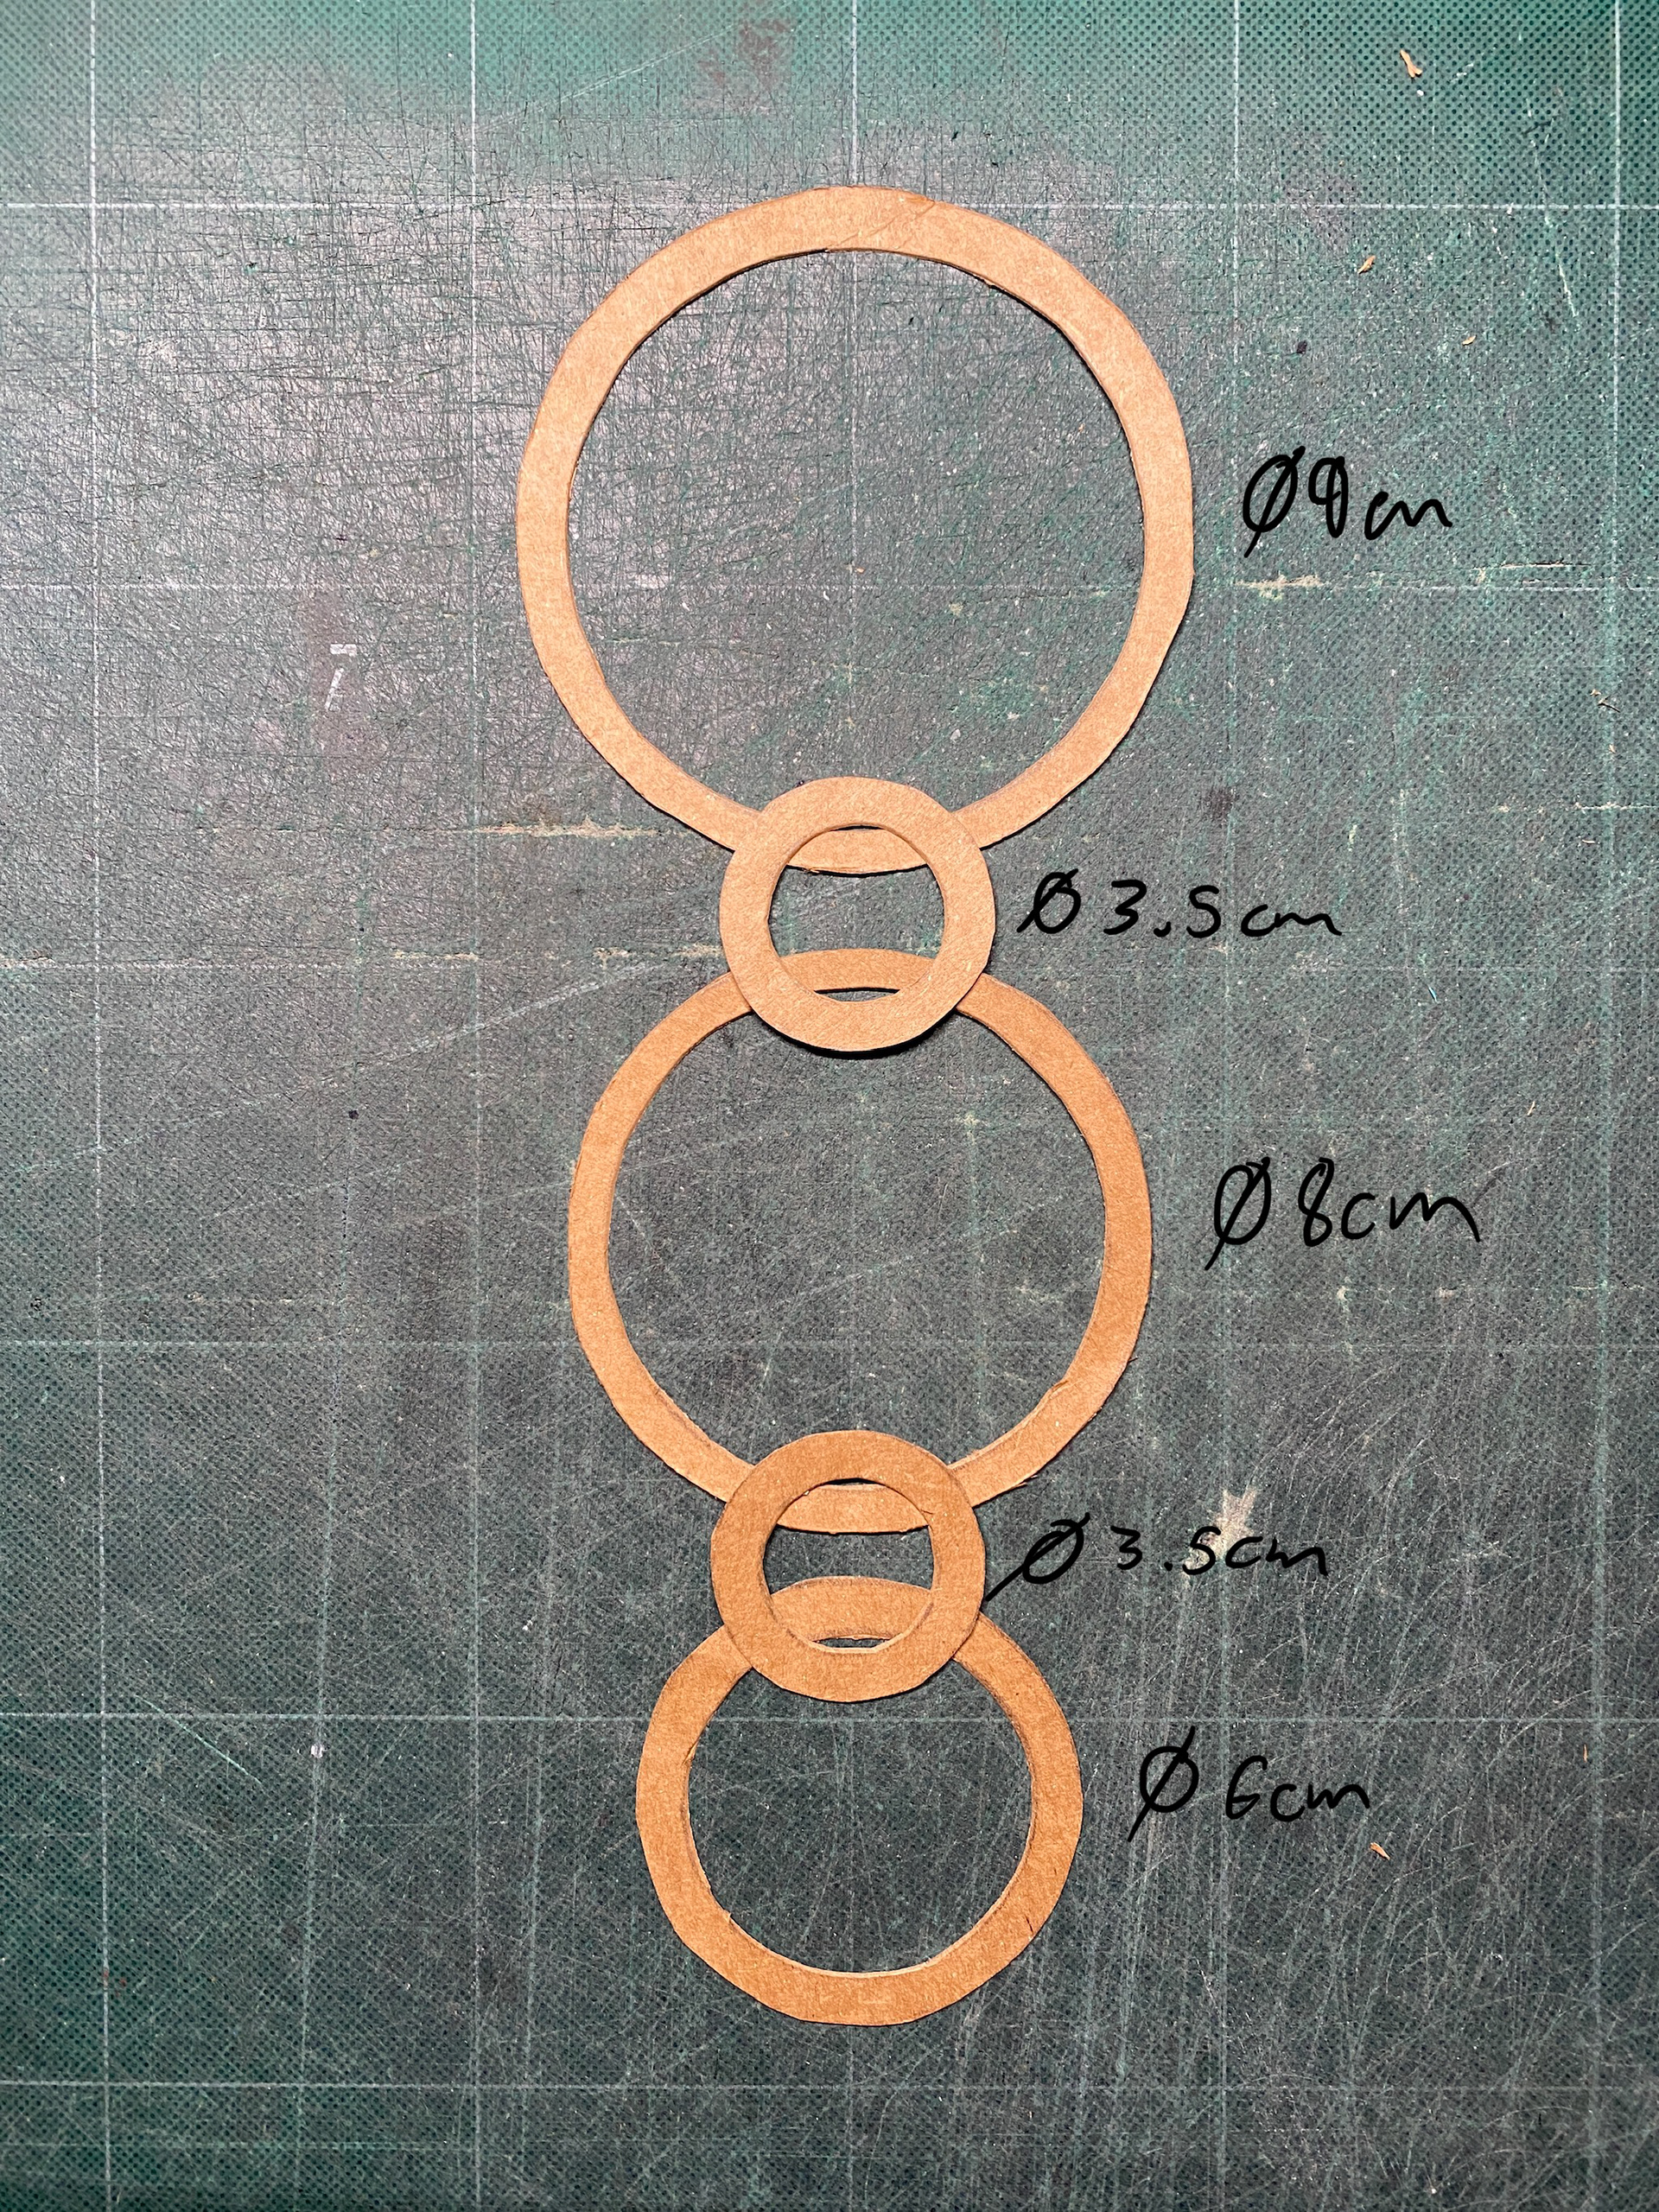
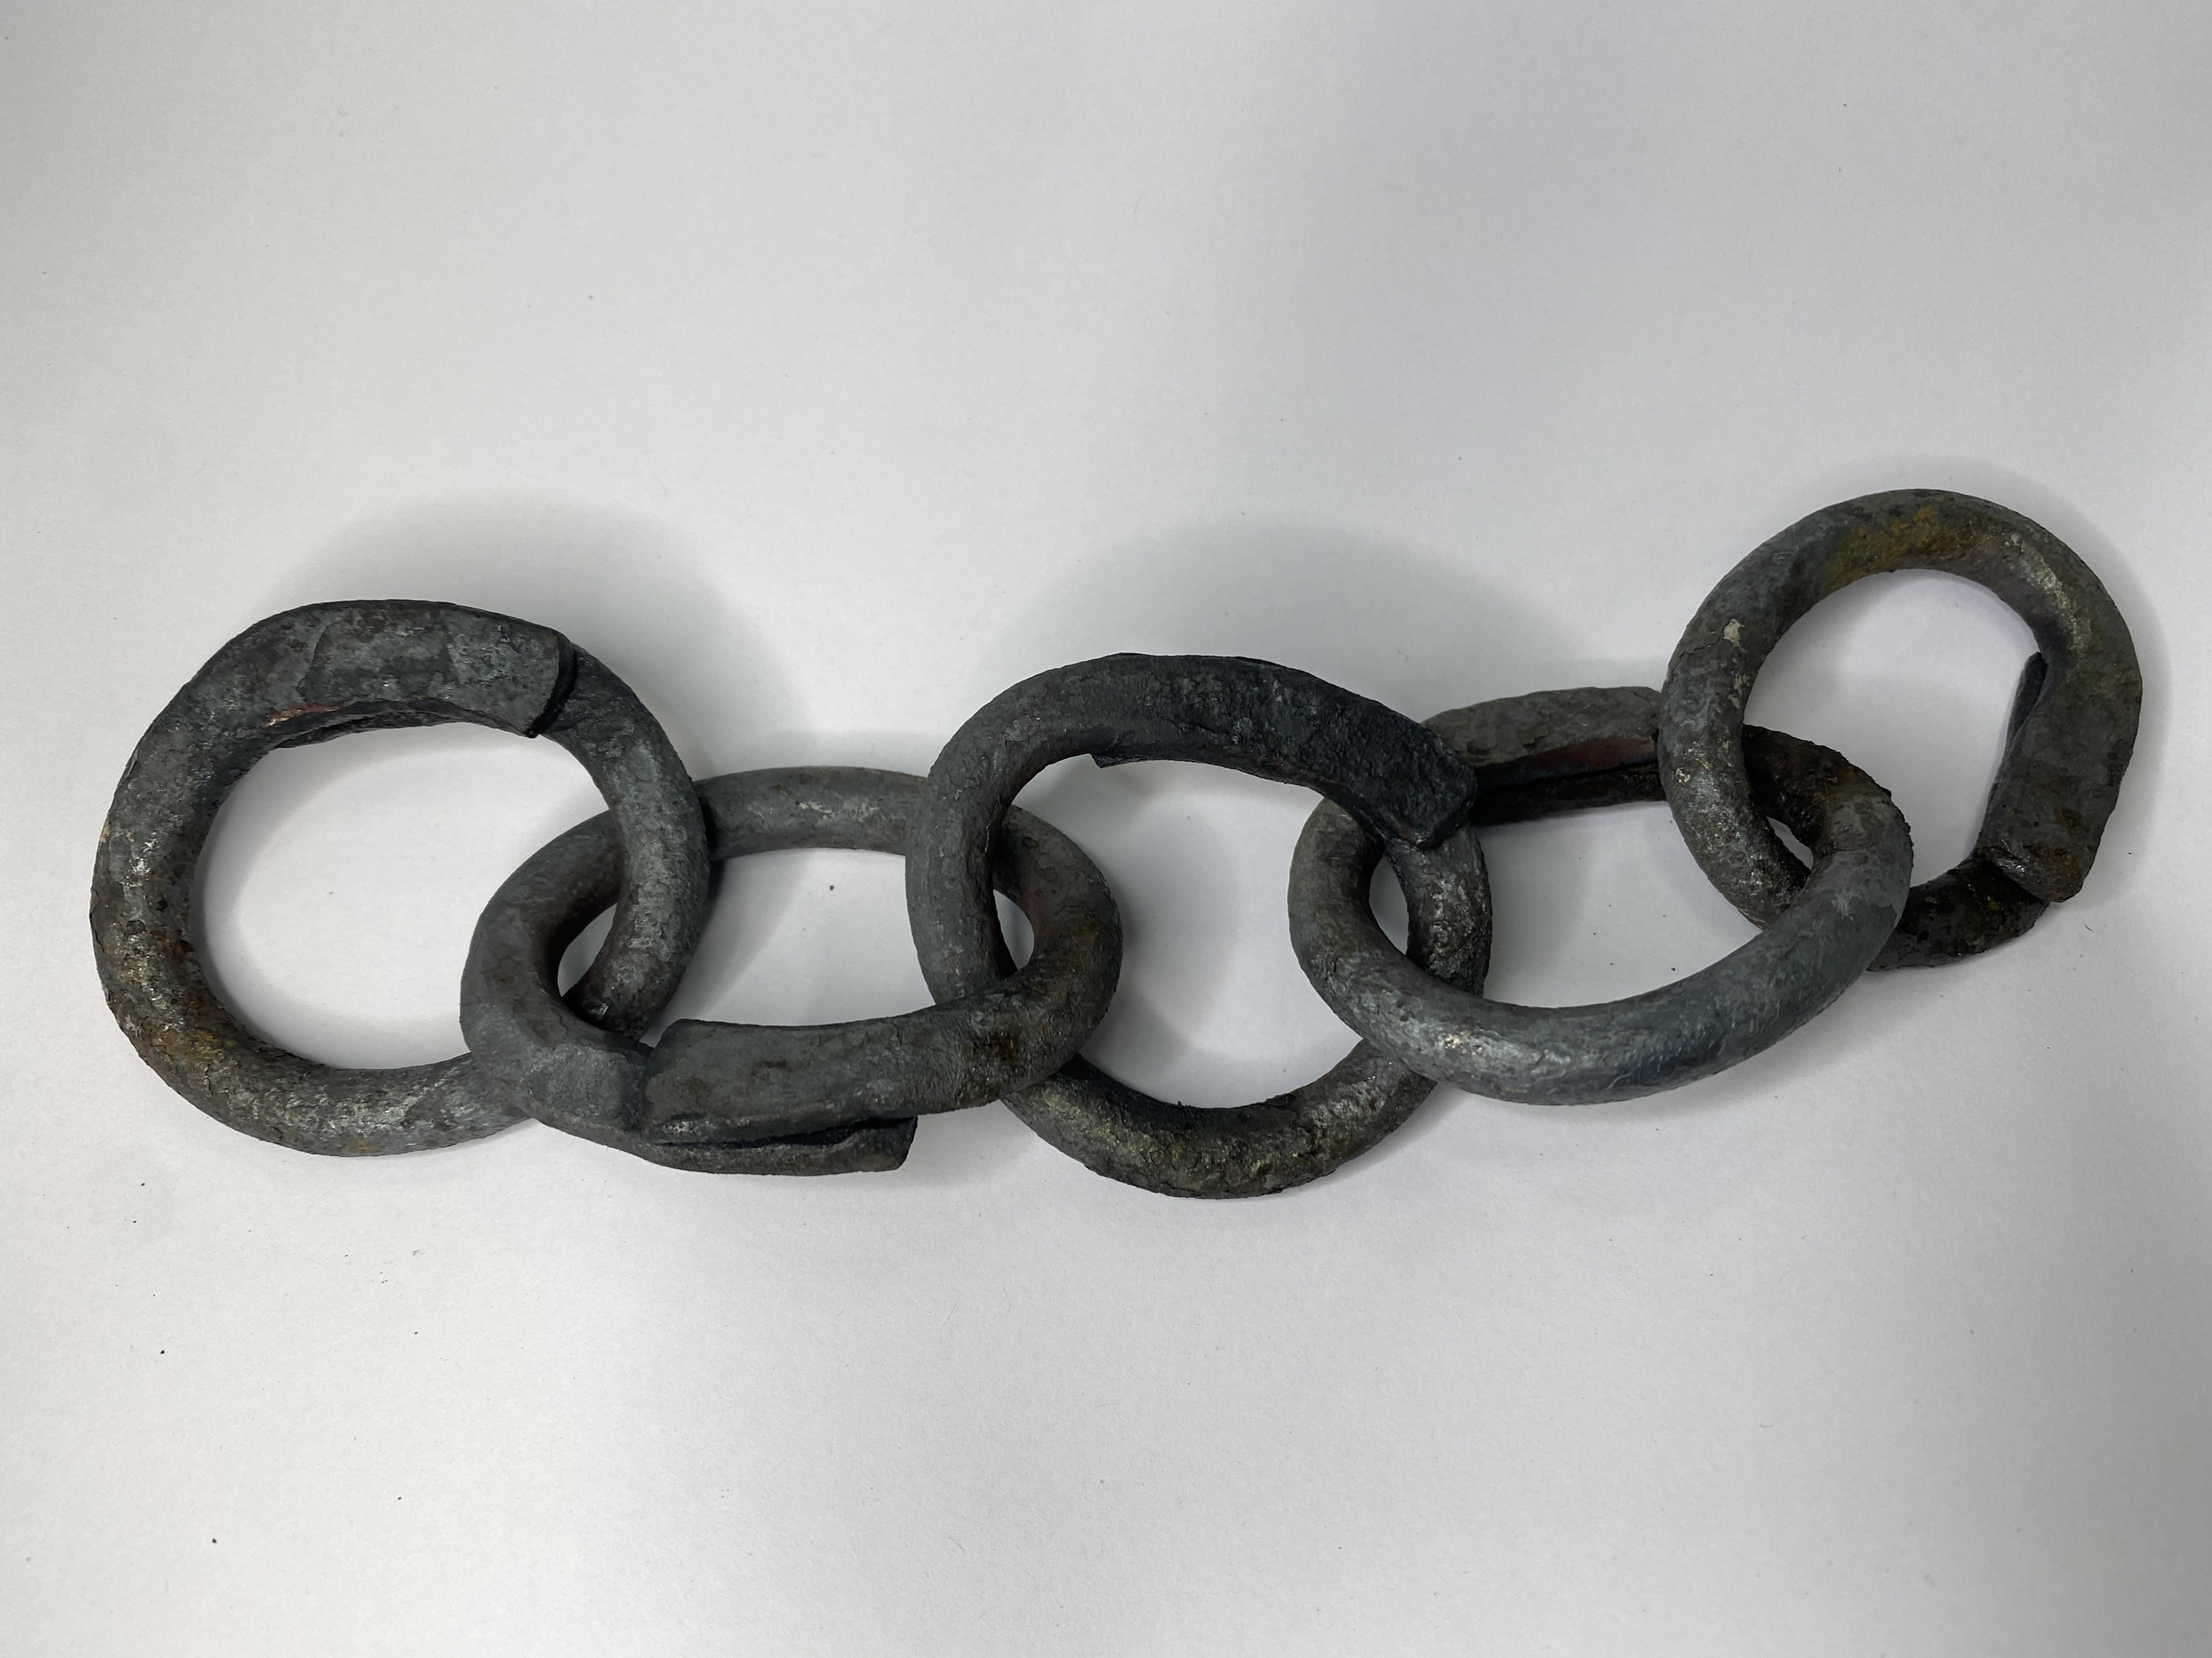
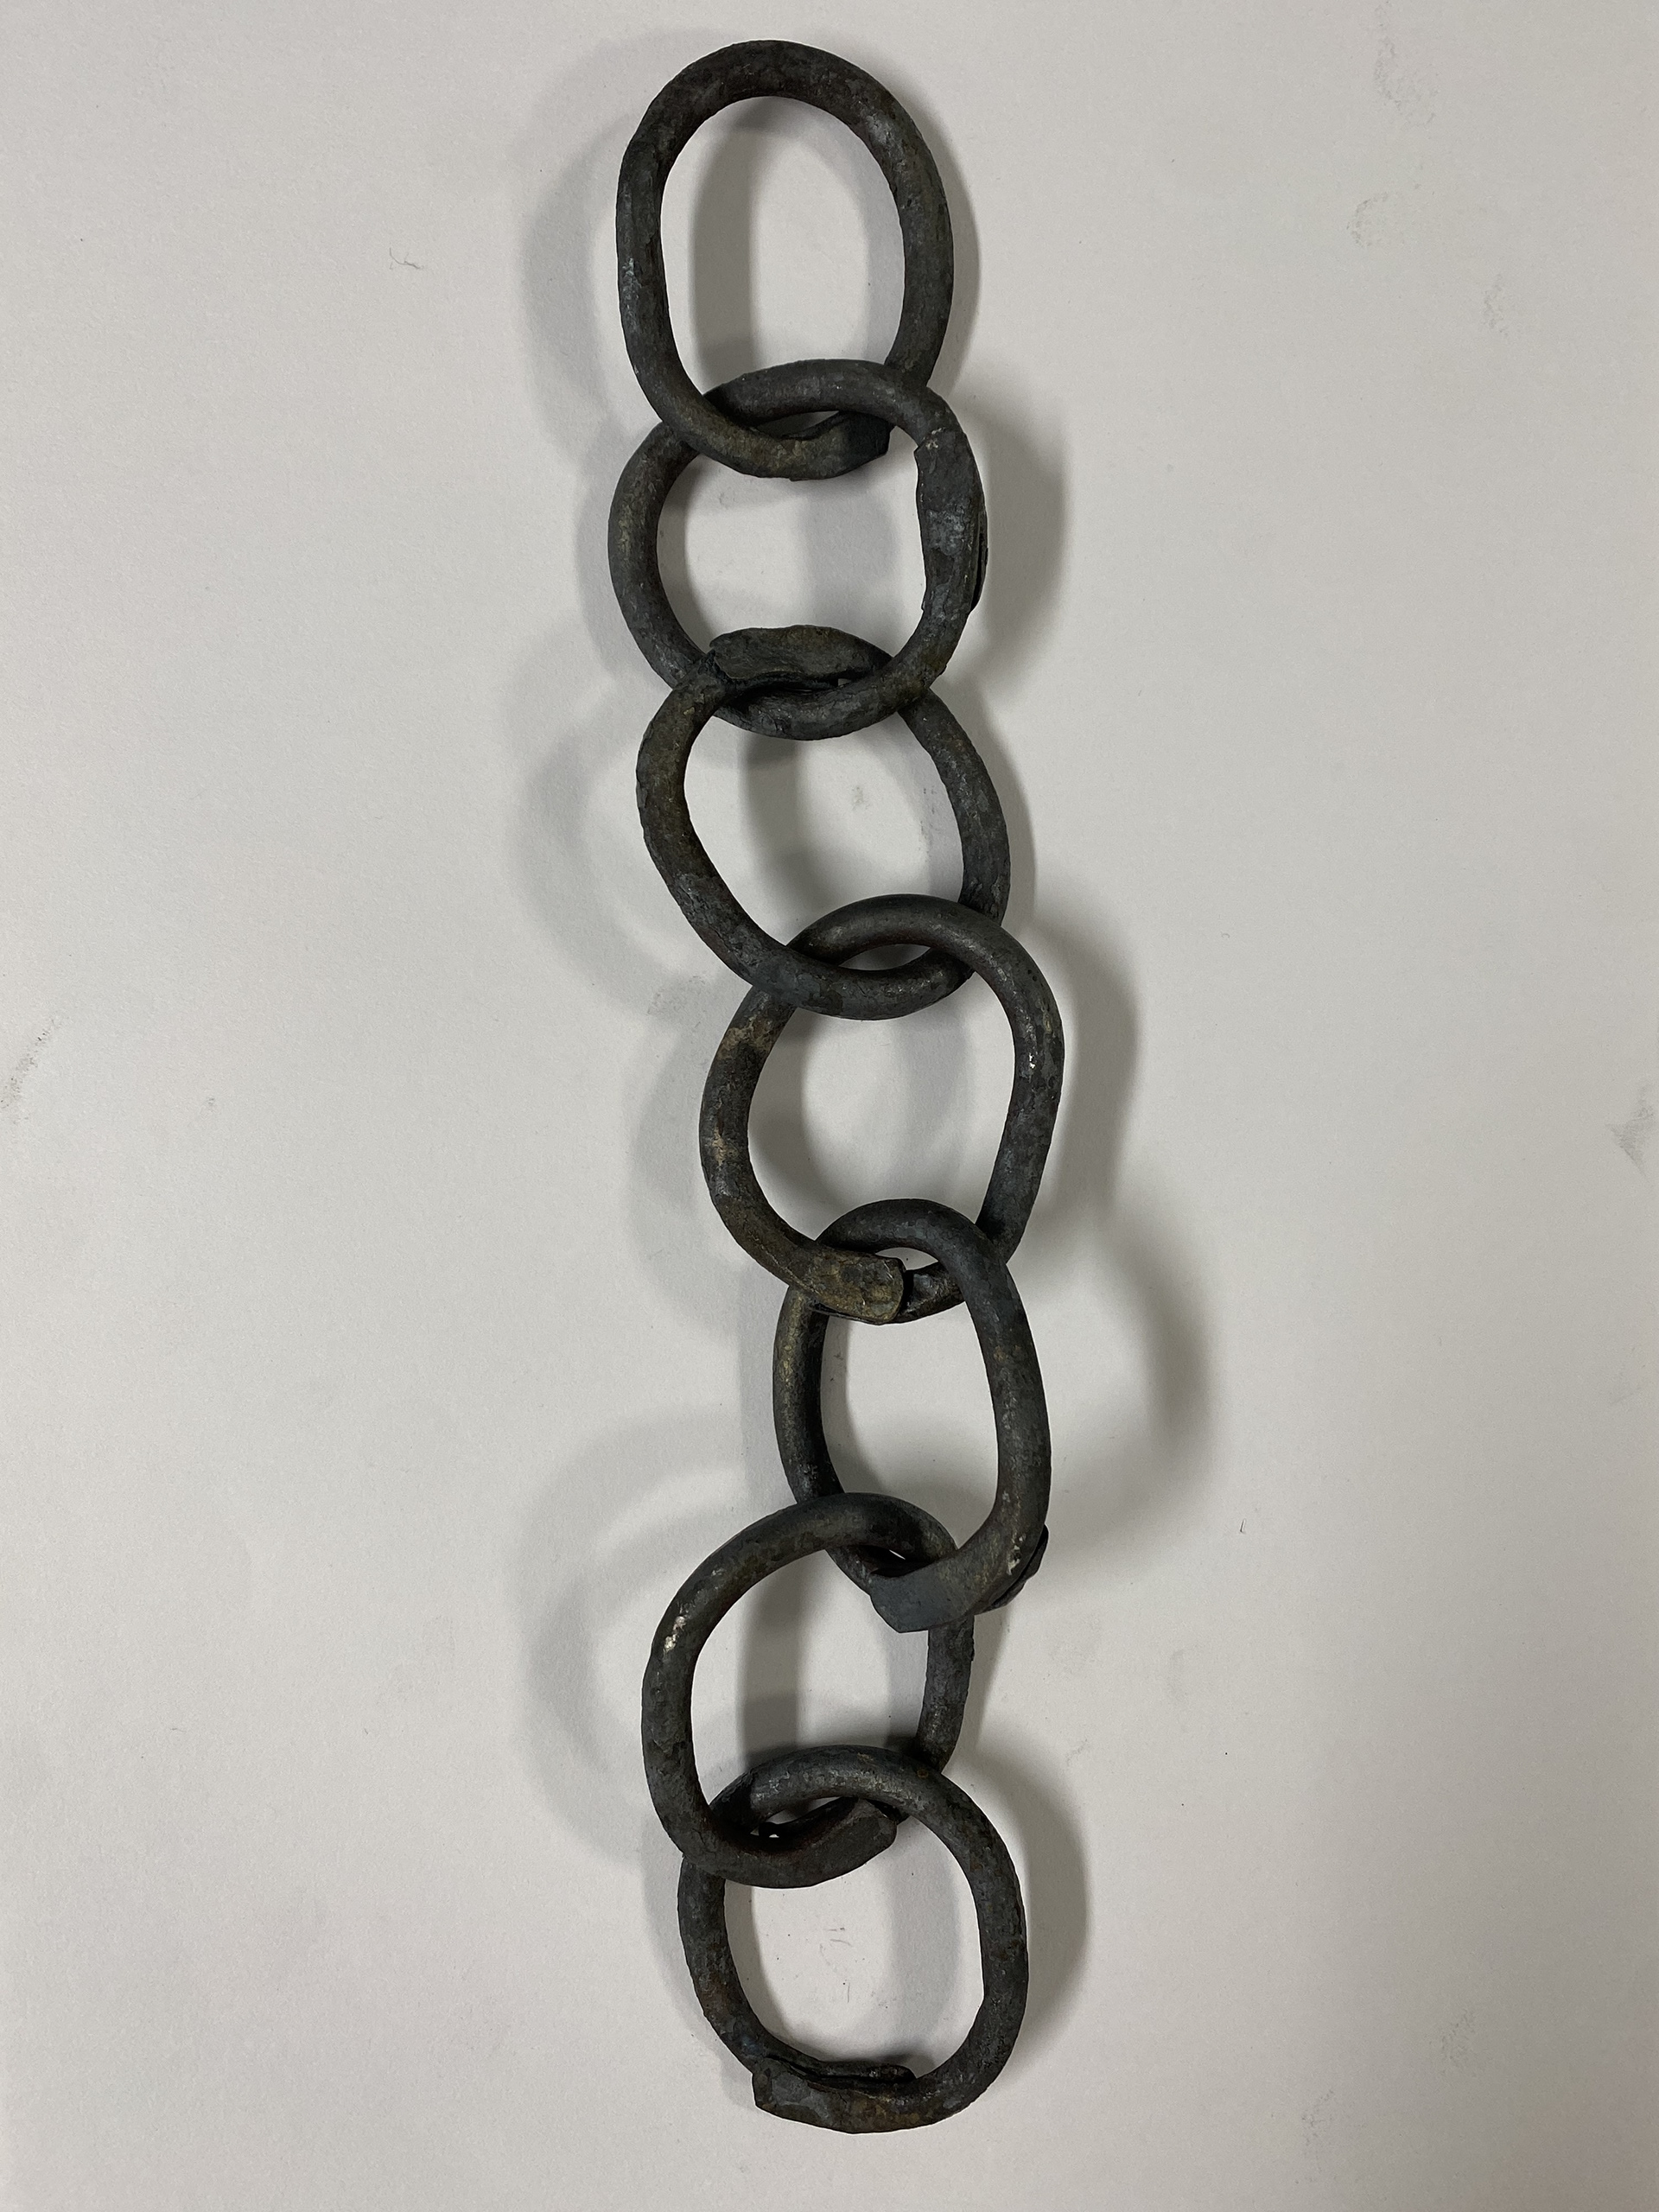
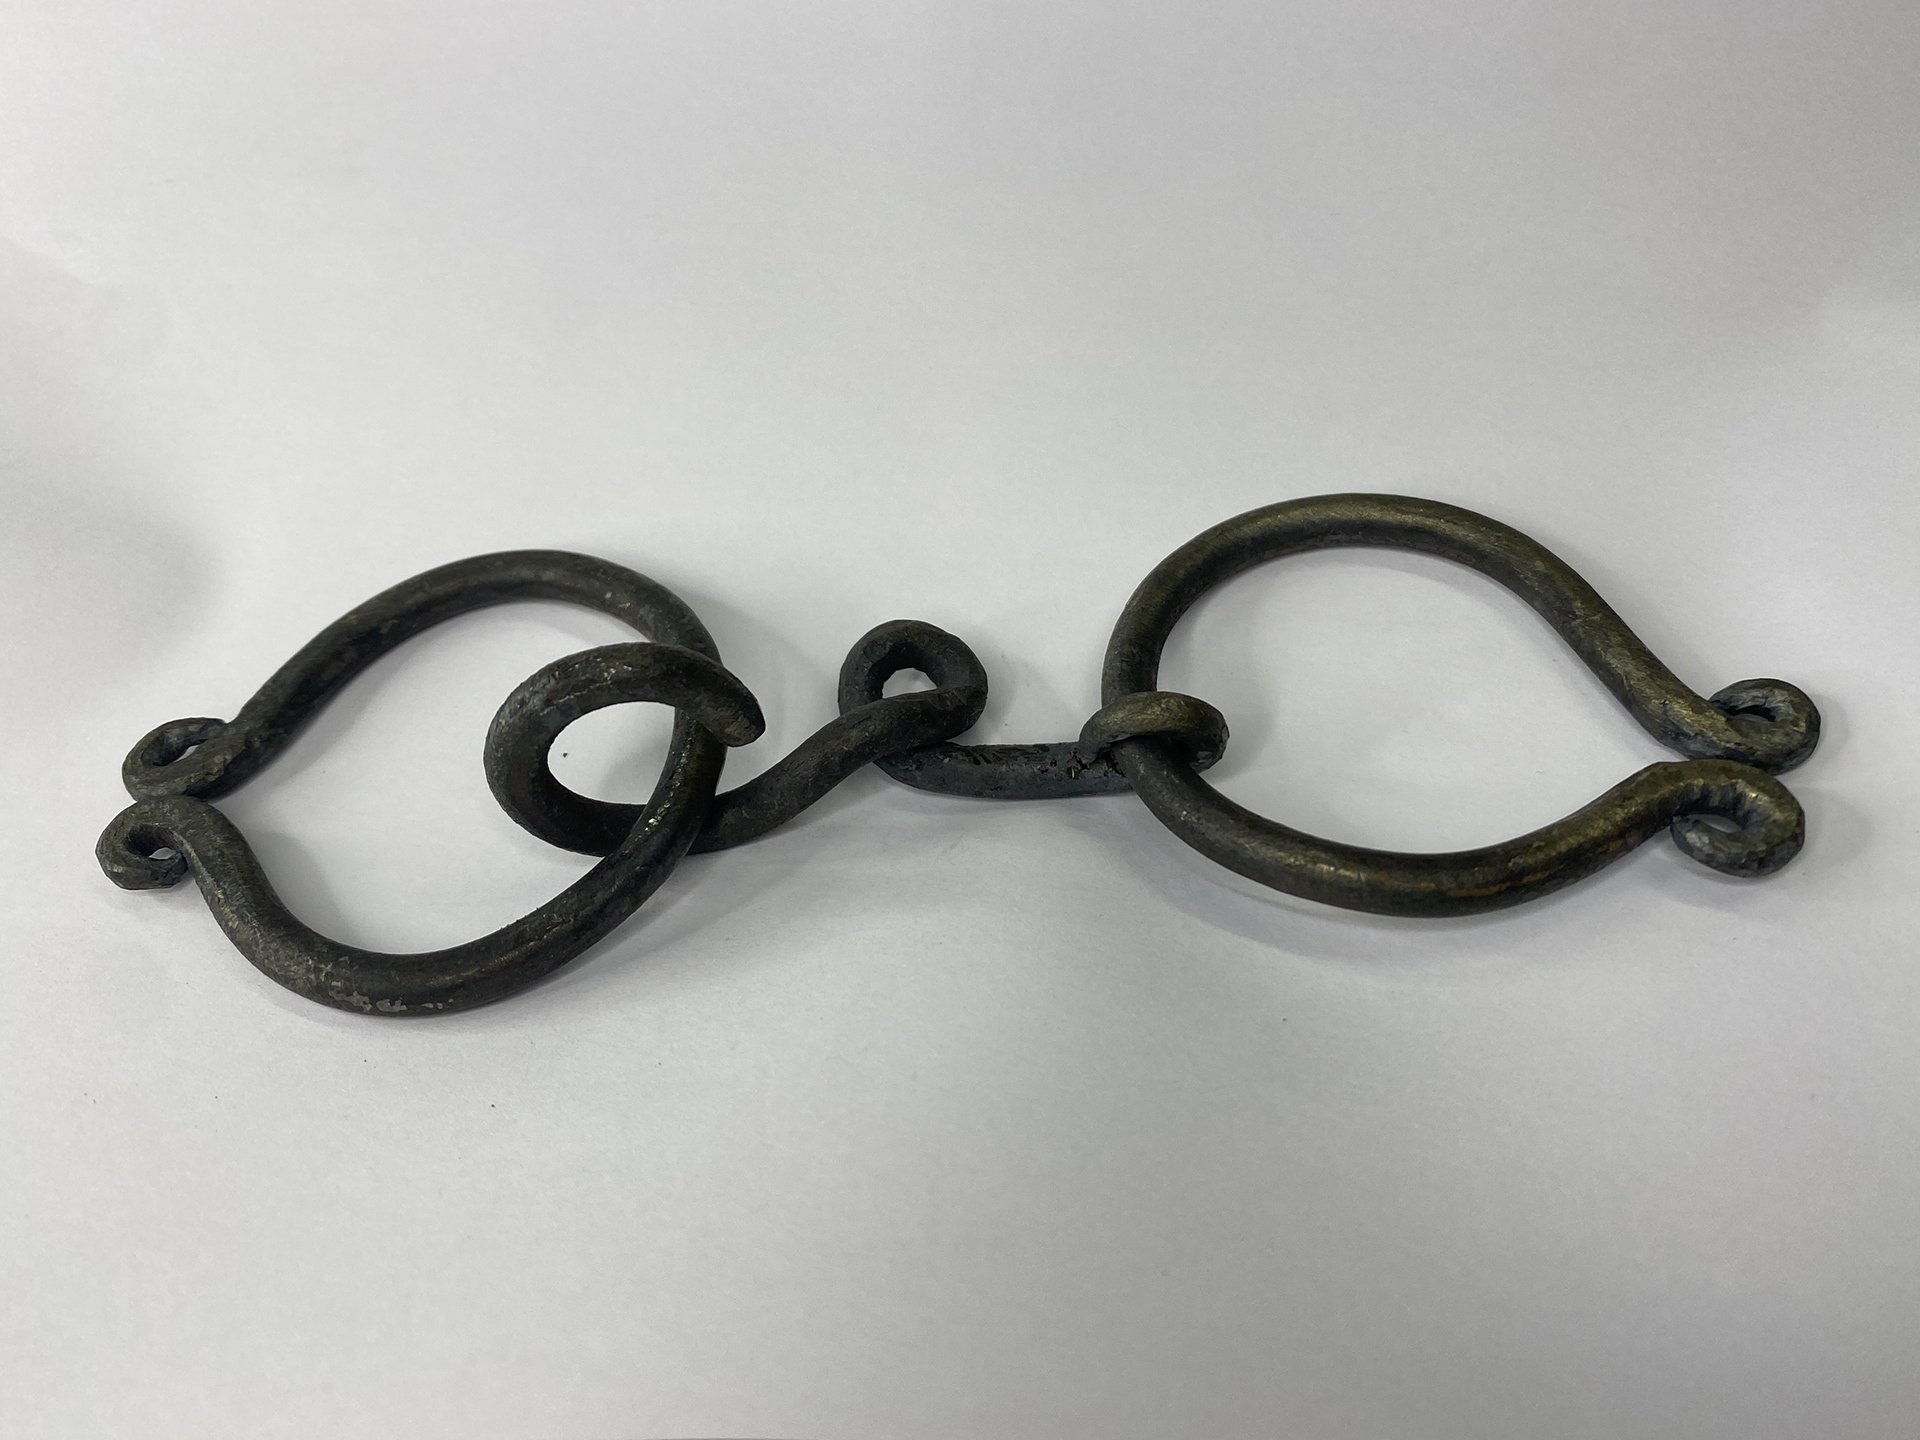
From my chosen design and planning I created the large forged steel links from 10mm round bar.
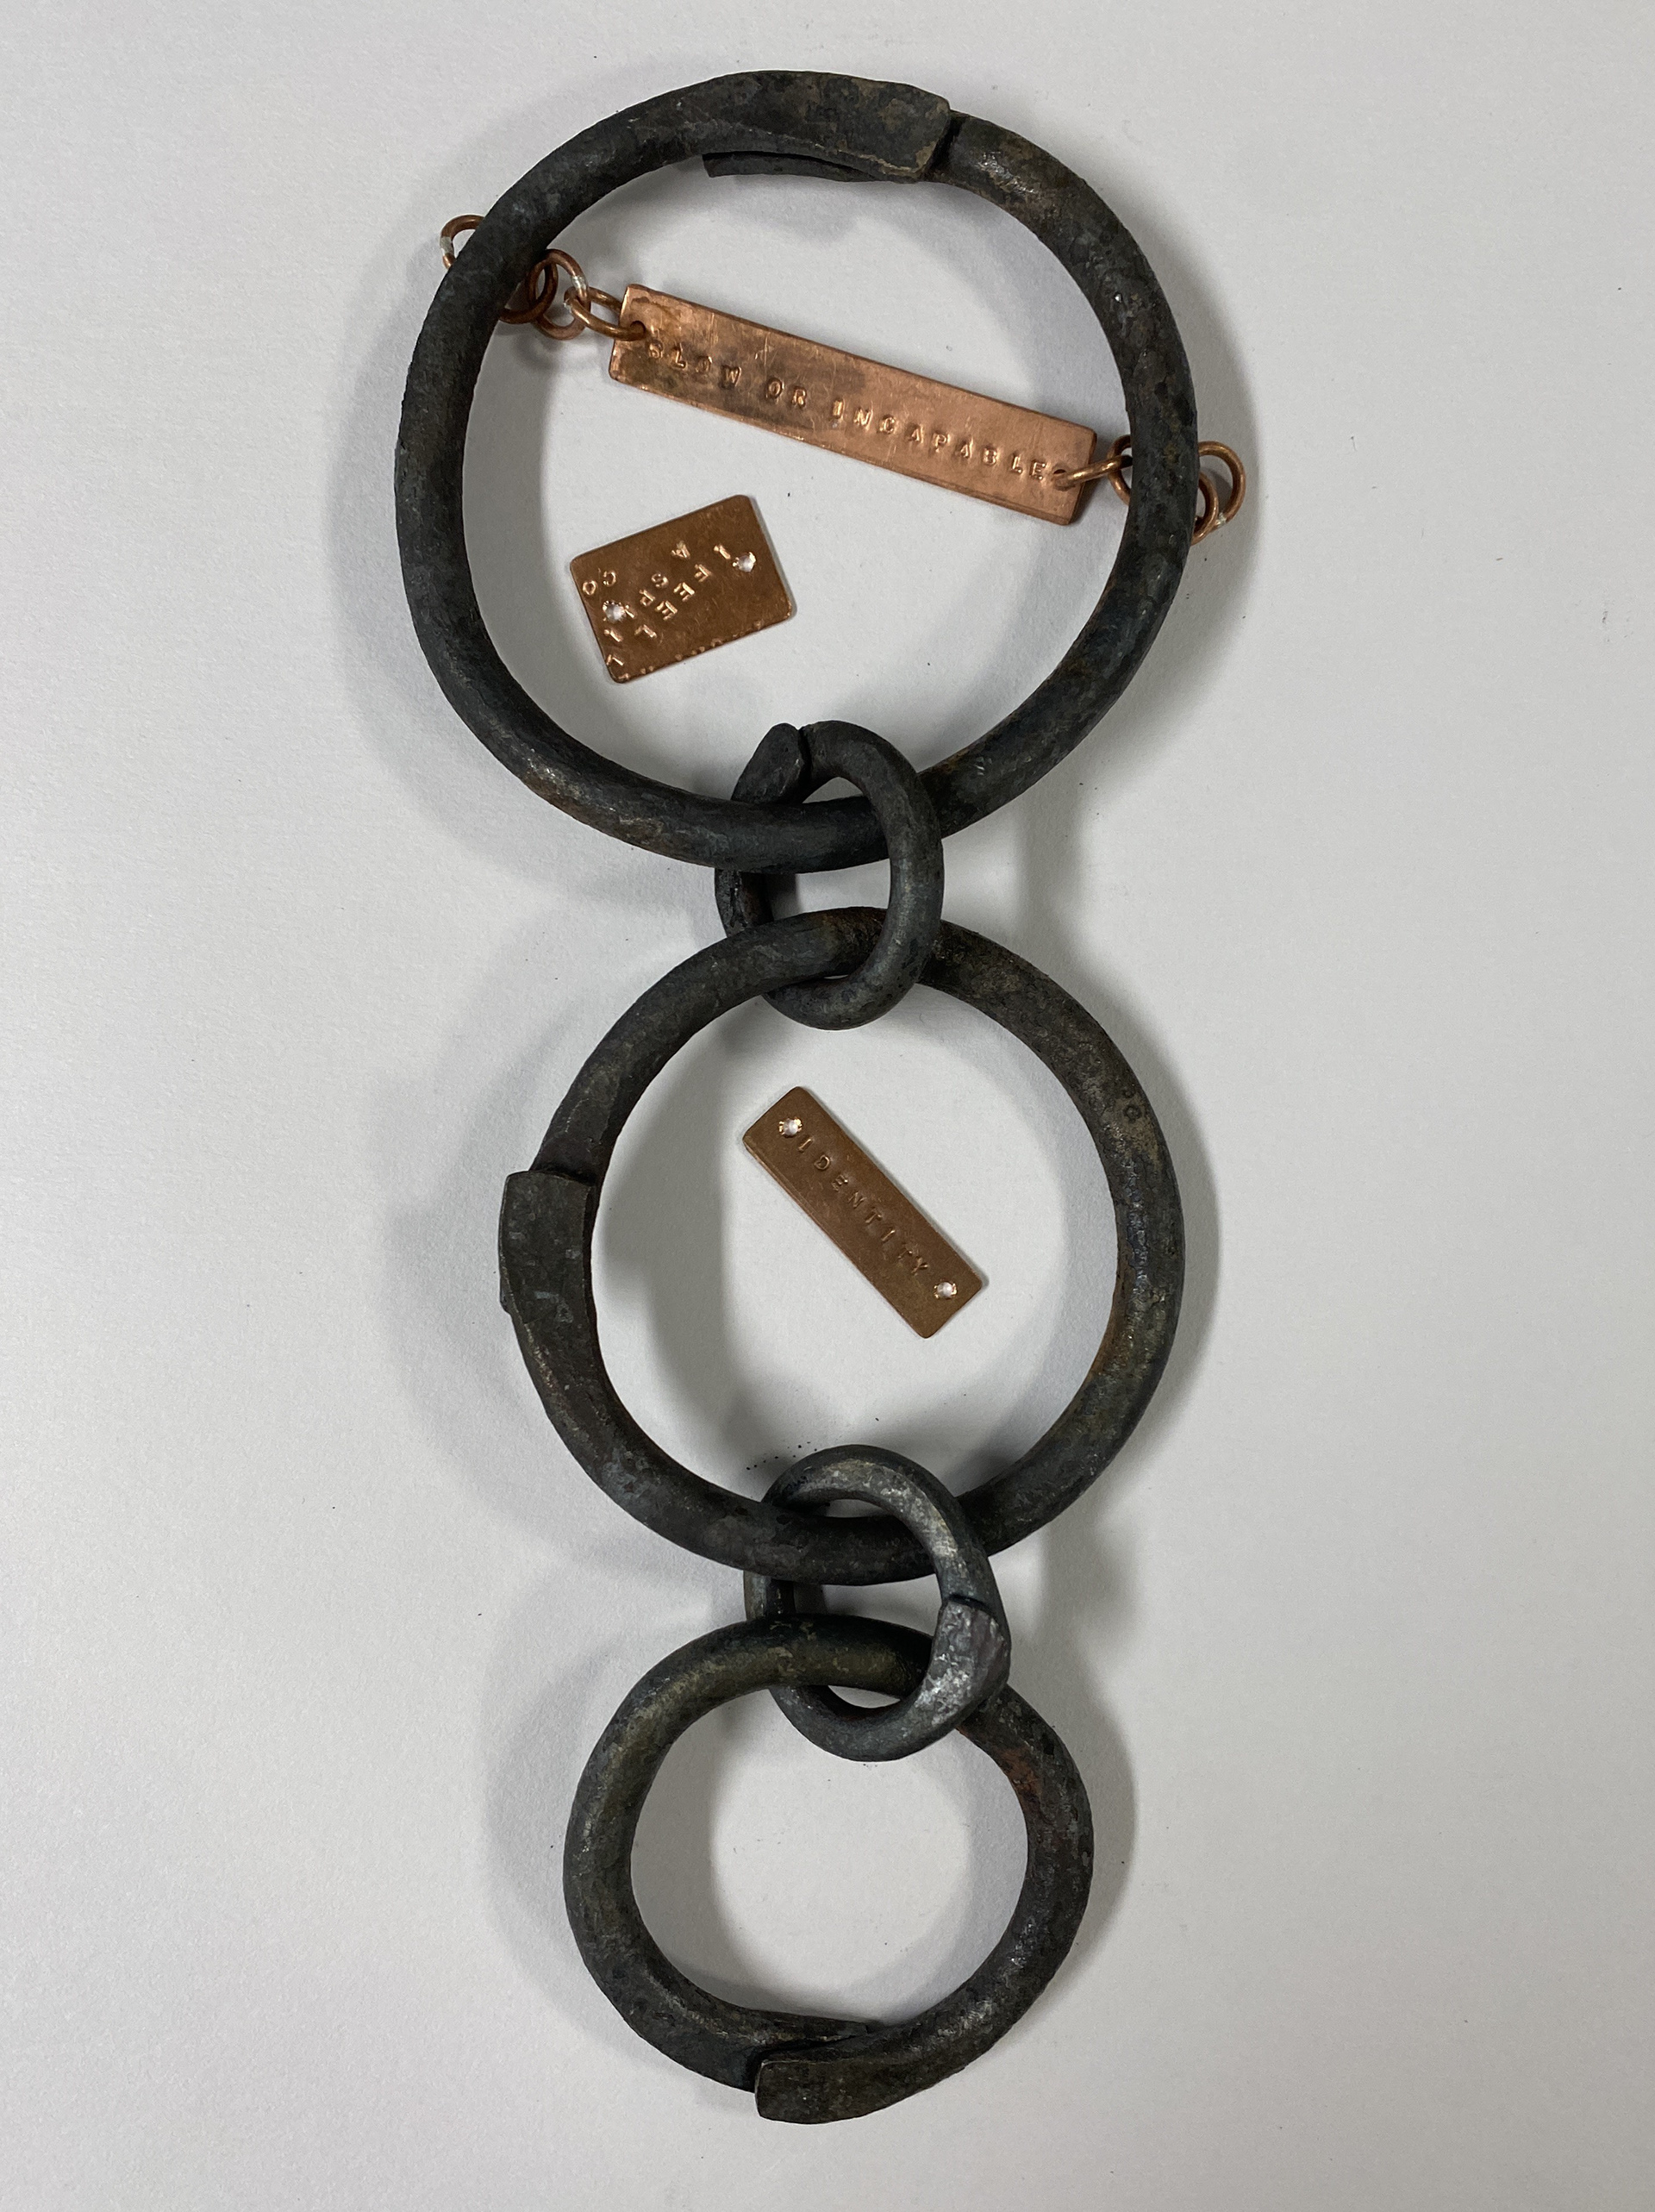

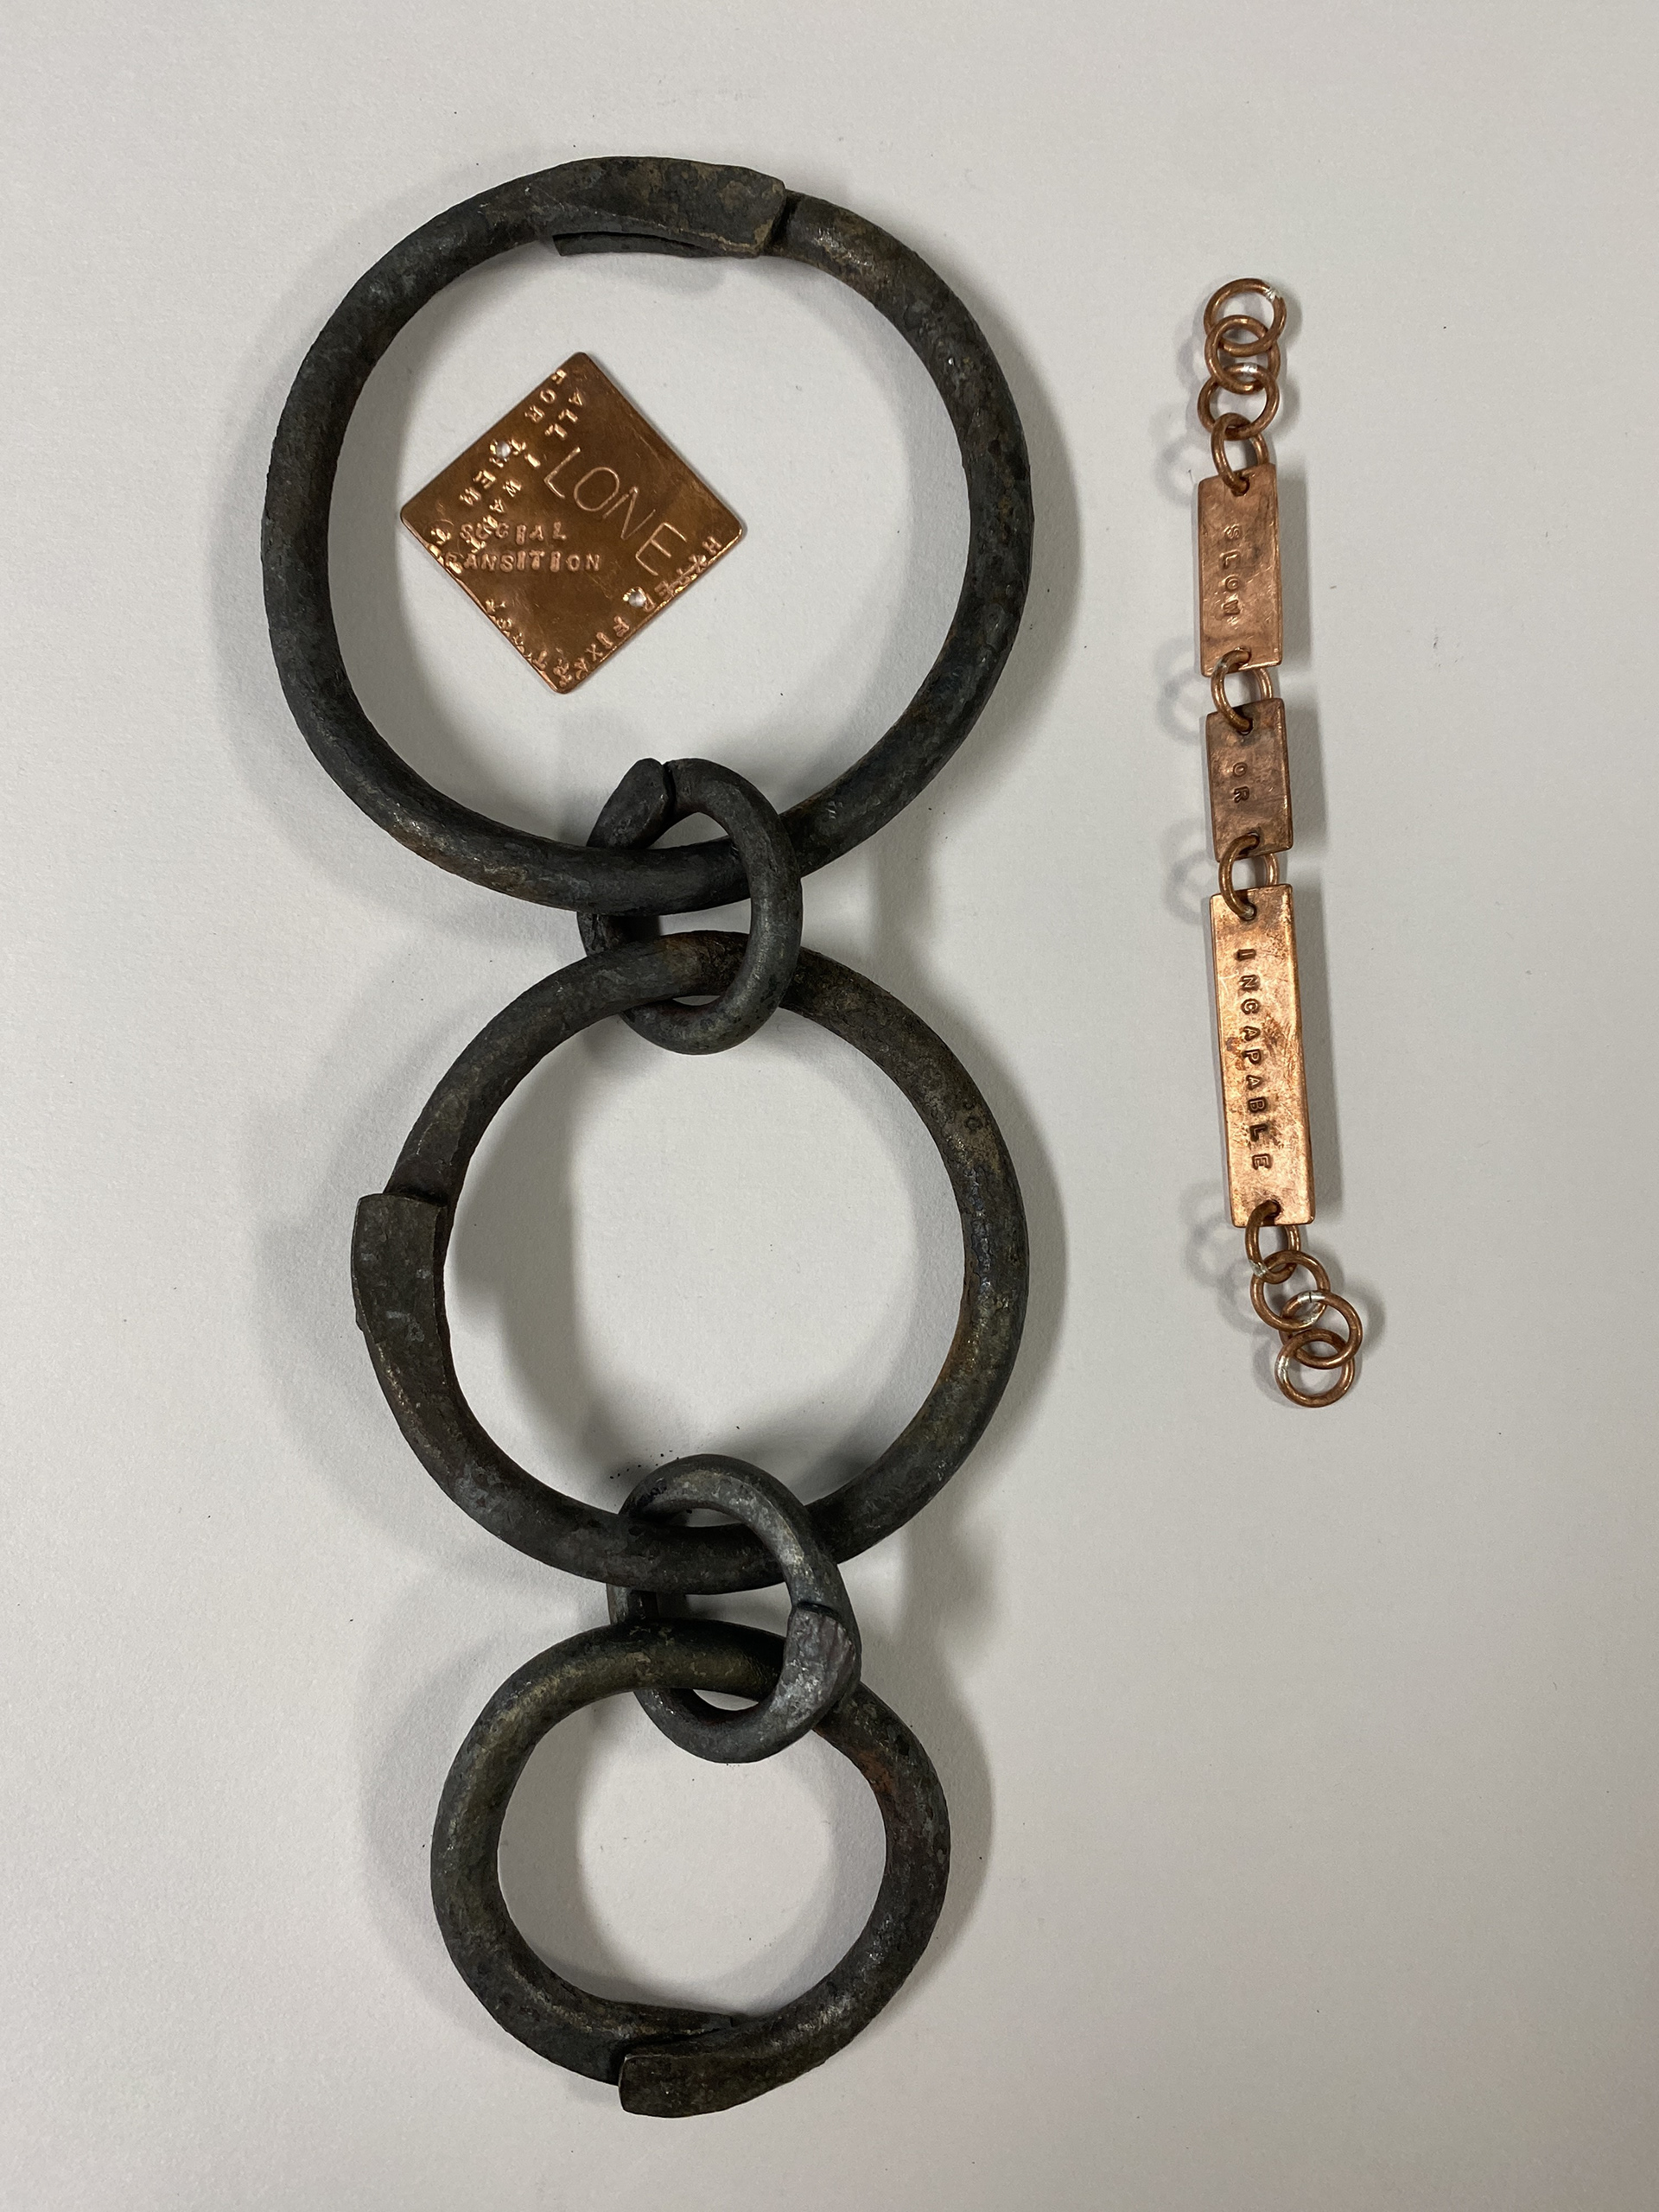
I wanted to include the script from my diary into the design so explored adding it into the smaller copper chain inside the steel links. However, I felt that this was too dominant and filled too much space inside the links not leaving much room for the simple copper chain. Moreover, only a couple words fit into the steel links and didn’t allow for the same narrative as my previous tests.
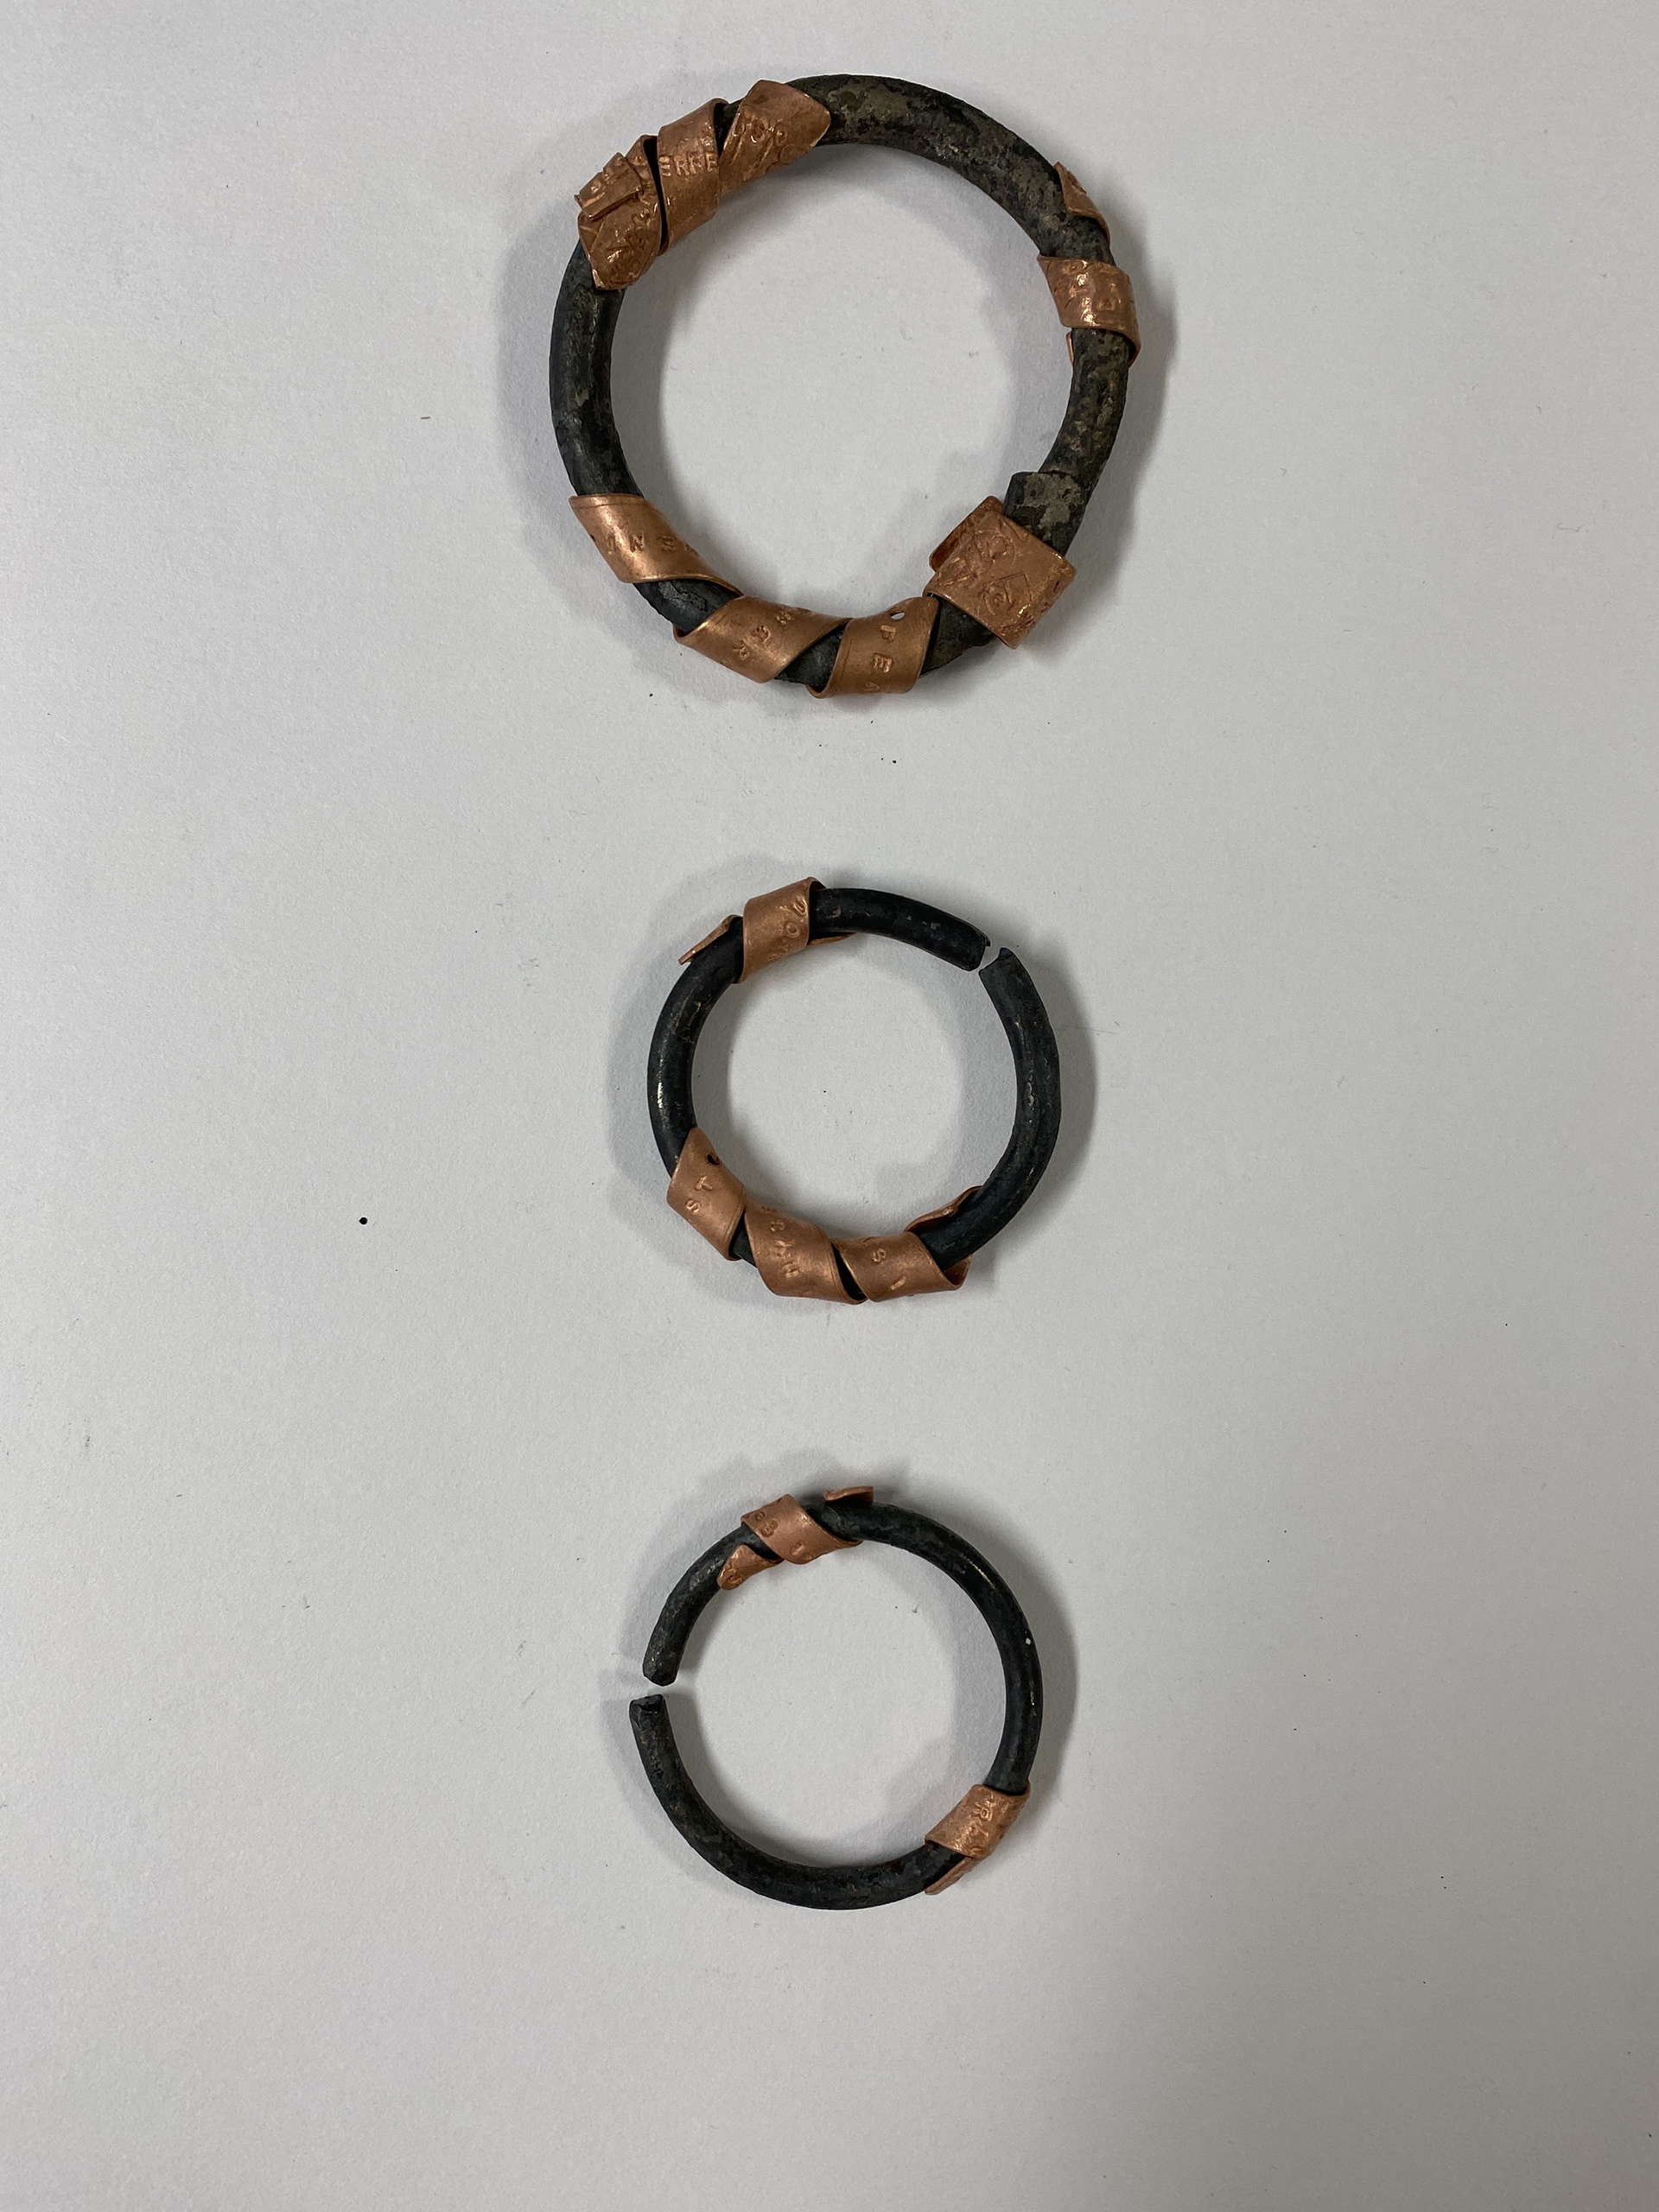
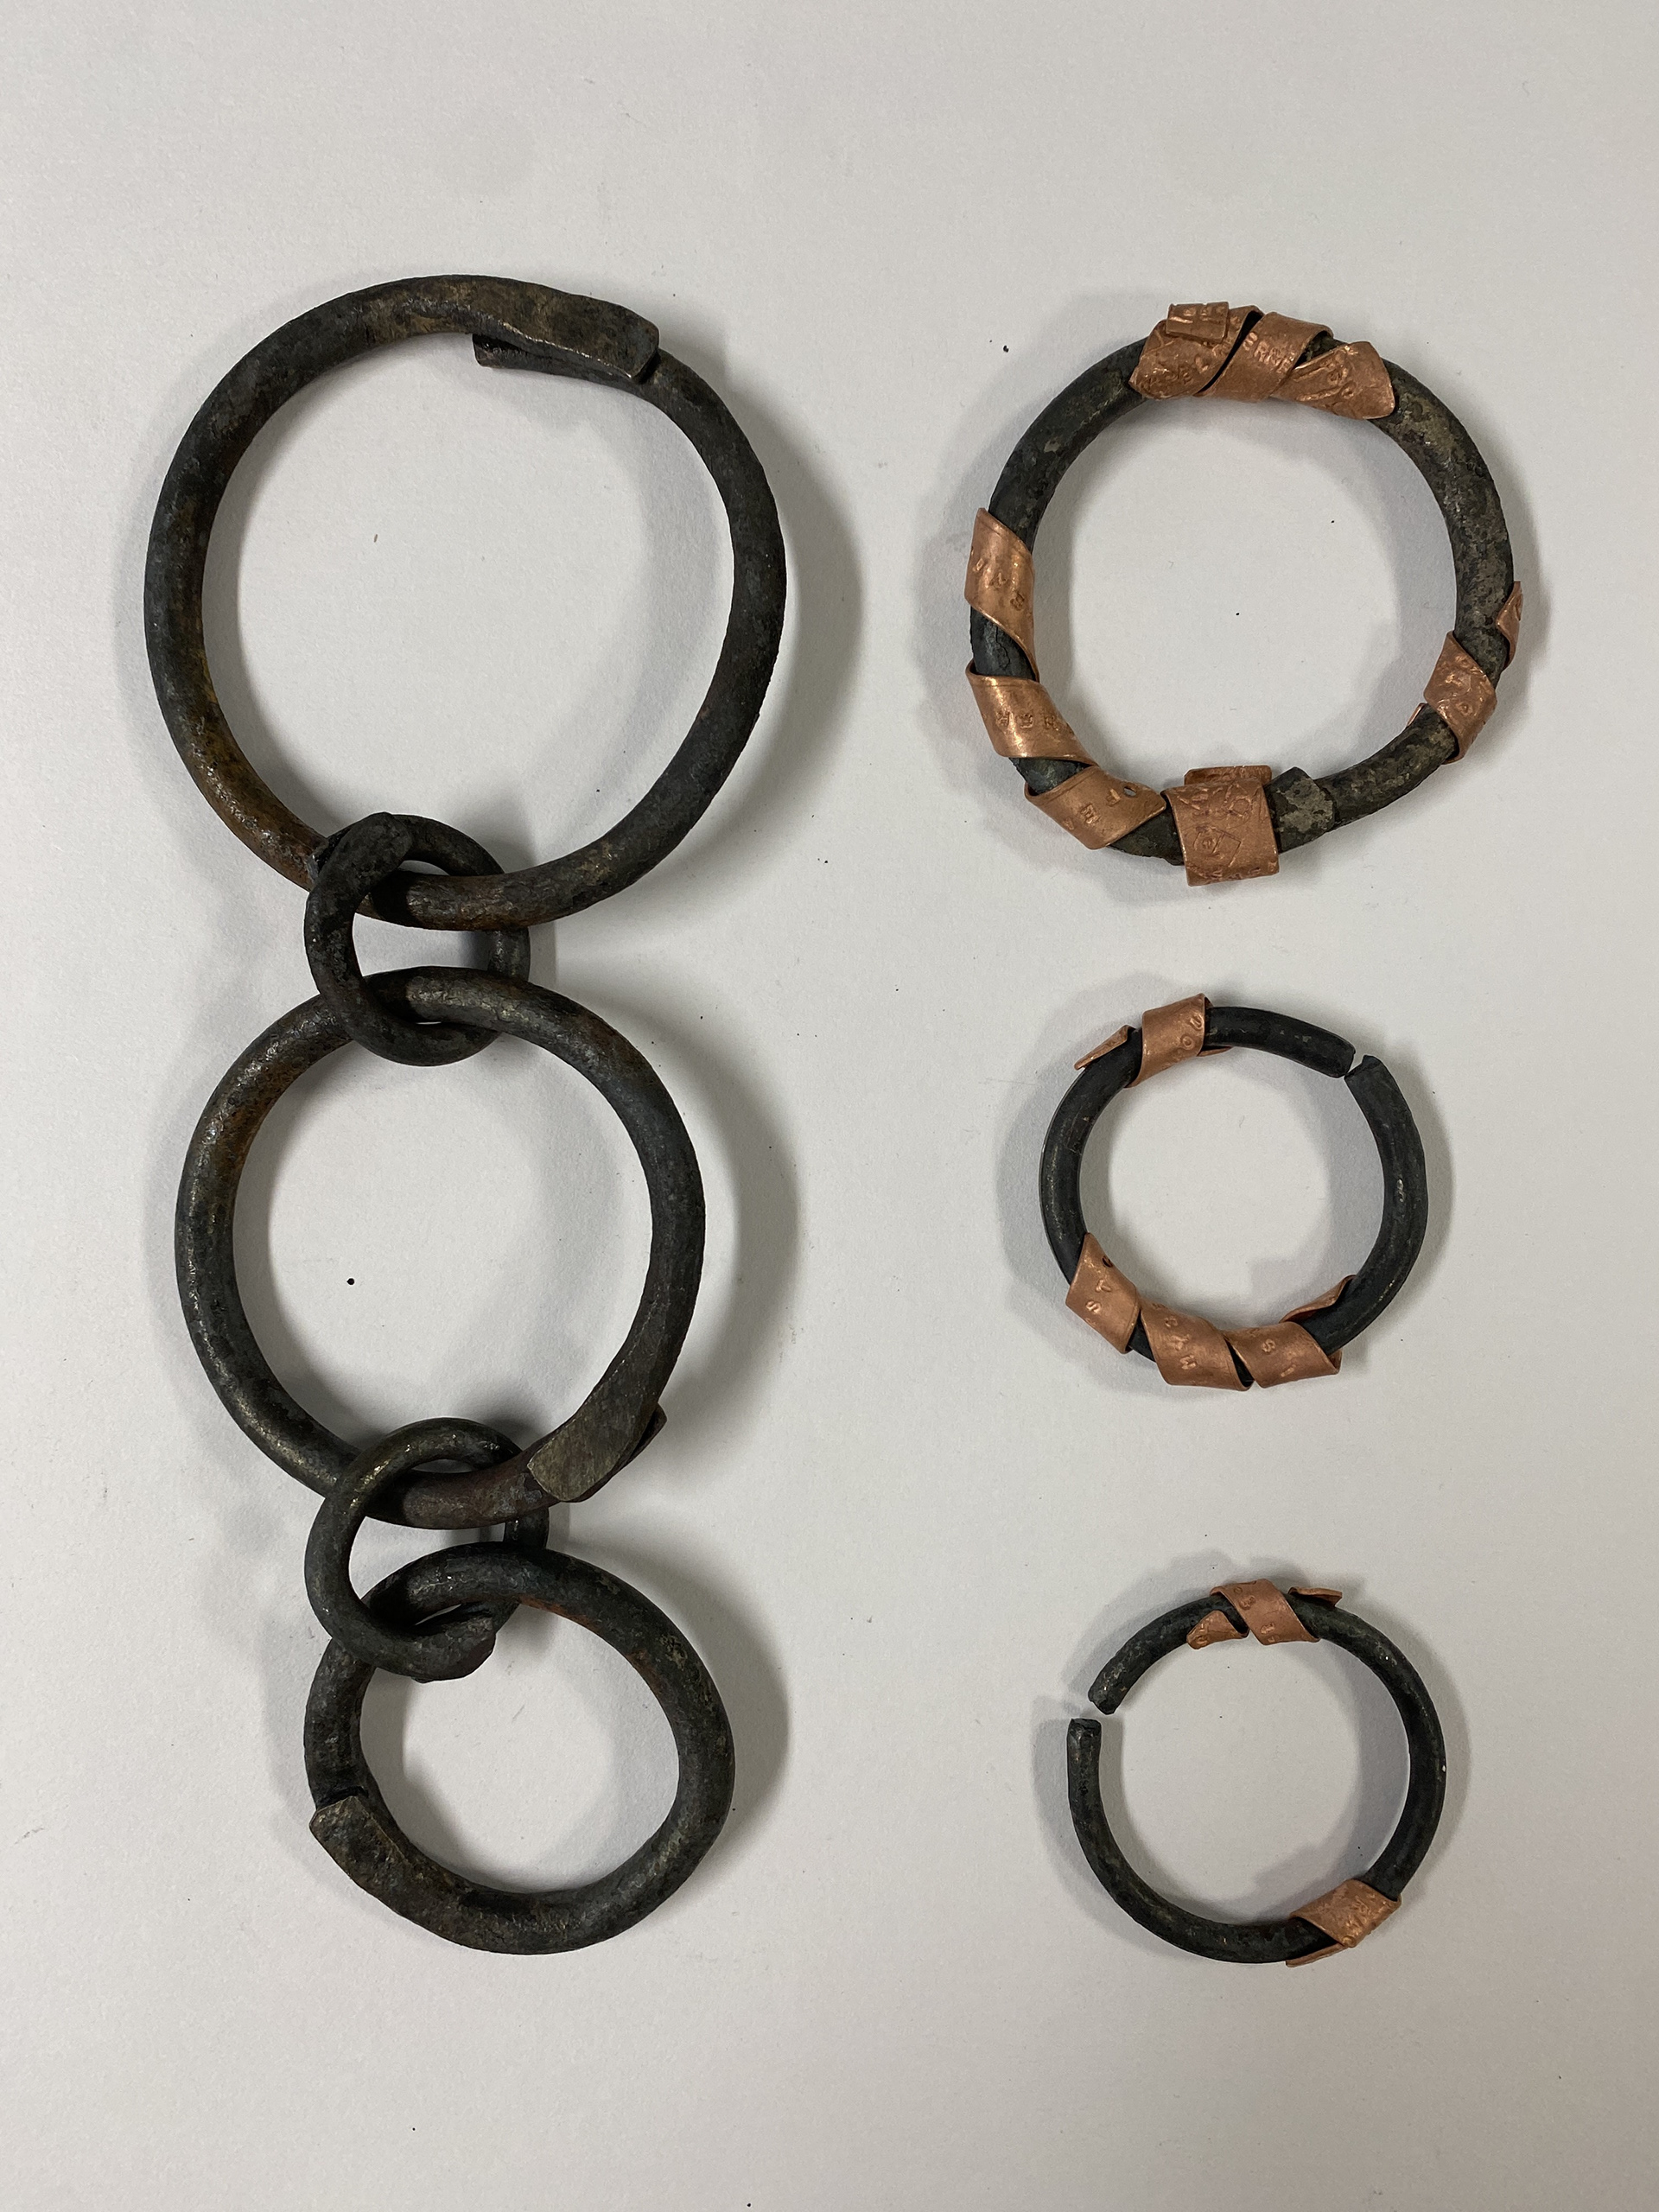
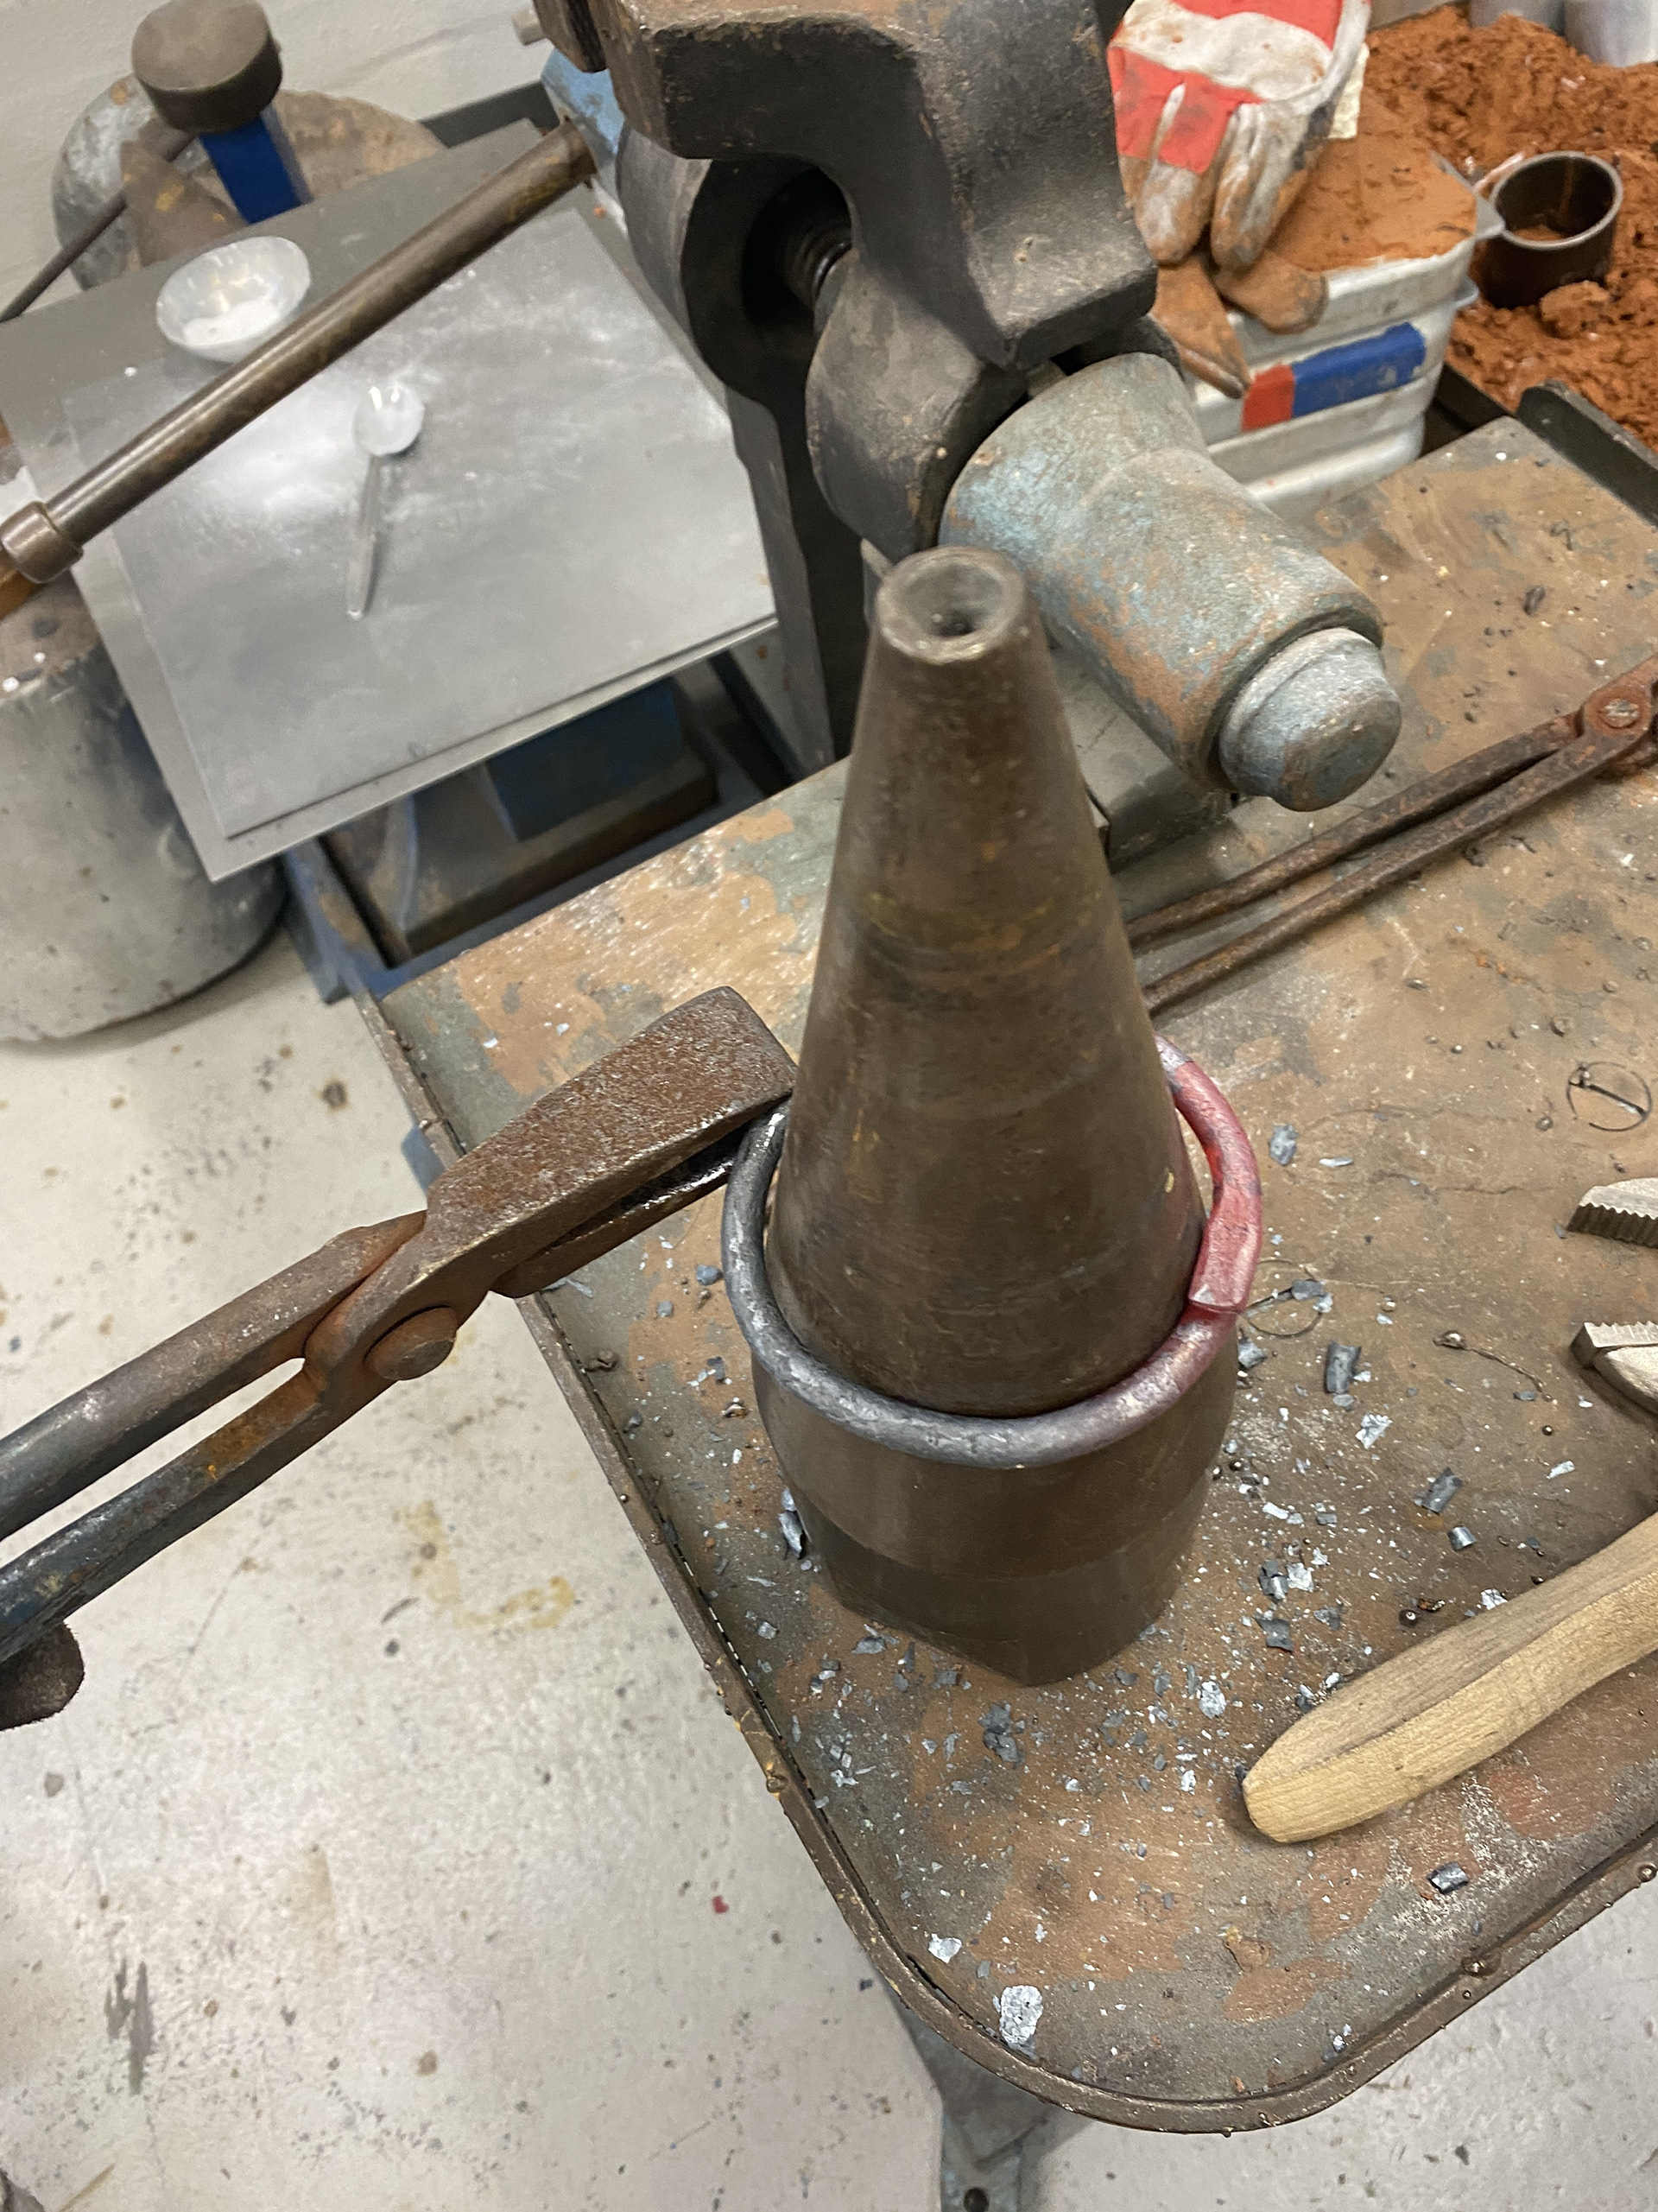
Instead of placing the script in the front I experimented with wrapping the back ring which is part of the closing T-bar clasp. I feel that the act of wrapping and rolling the script around the heavy steel links creates a juxtaposition of additional physical protection with vulnerability of the script being shown off to others. The vulnerability appears to engulf the hard steel link whilst simultaneously embellish it. I think that exploring how the text could then flow or expand off the closing mechanism down the back of the neck could create a metaphorical weight of being dragged back by my thoughts.
I then experimented with different thicknesses of steel rod for the clasp (10,6,5mm) and found that I preferred the 5mm as it gave a delicacy that contrasts with the front links (10mm) but still allowed me to wrap the copper script over it.
Quick polishing test using the Dremel to clean up work piece. I like the aesthetic of the mirror finish that will contrast against the rough forge scale on the steel chain. I found that this process took longer than expected and therefore I would need to set aside more time at the end to polish all the copper. Also, I think I needed to spend more time using the tripoli to ensure all the deeper scratches are removed before moving onto the rouge compound.
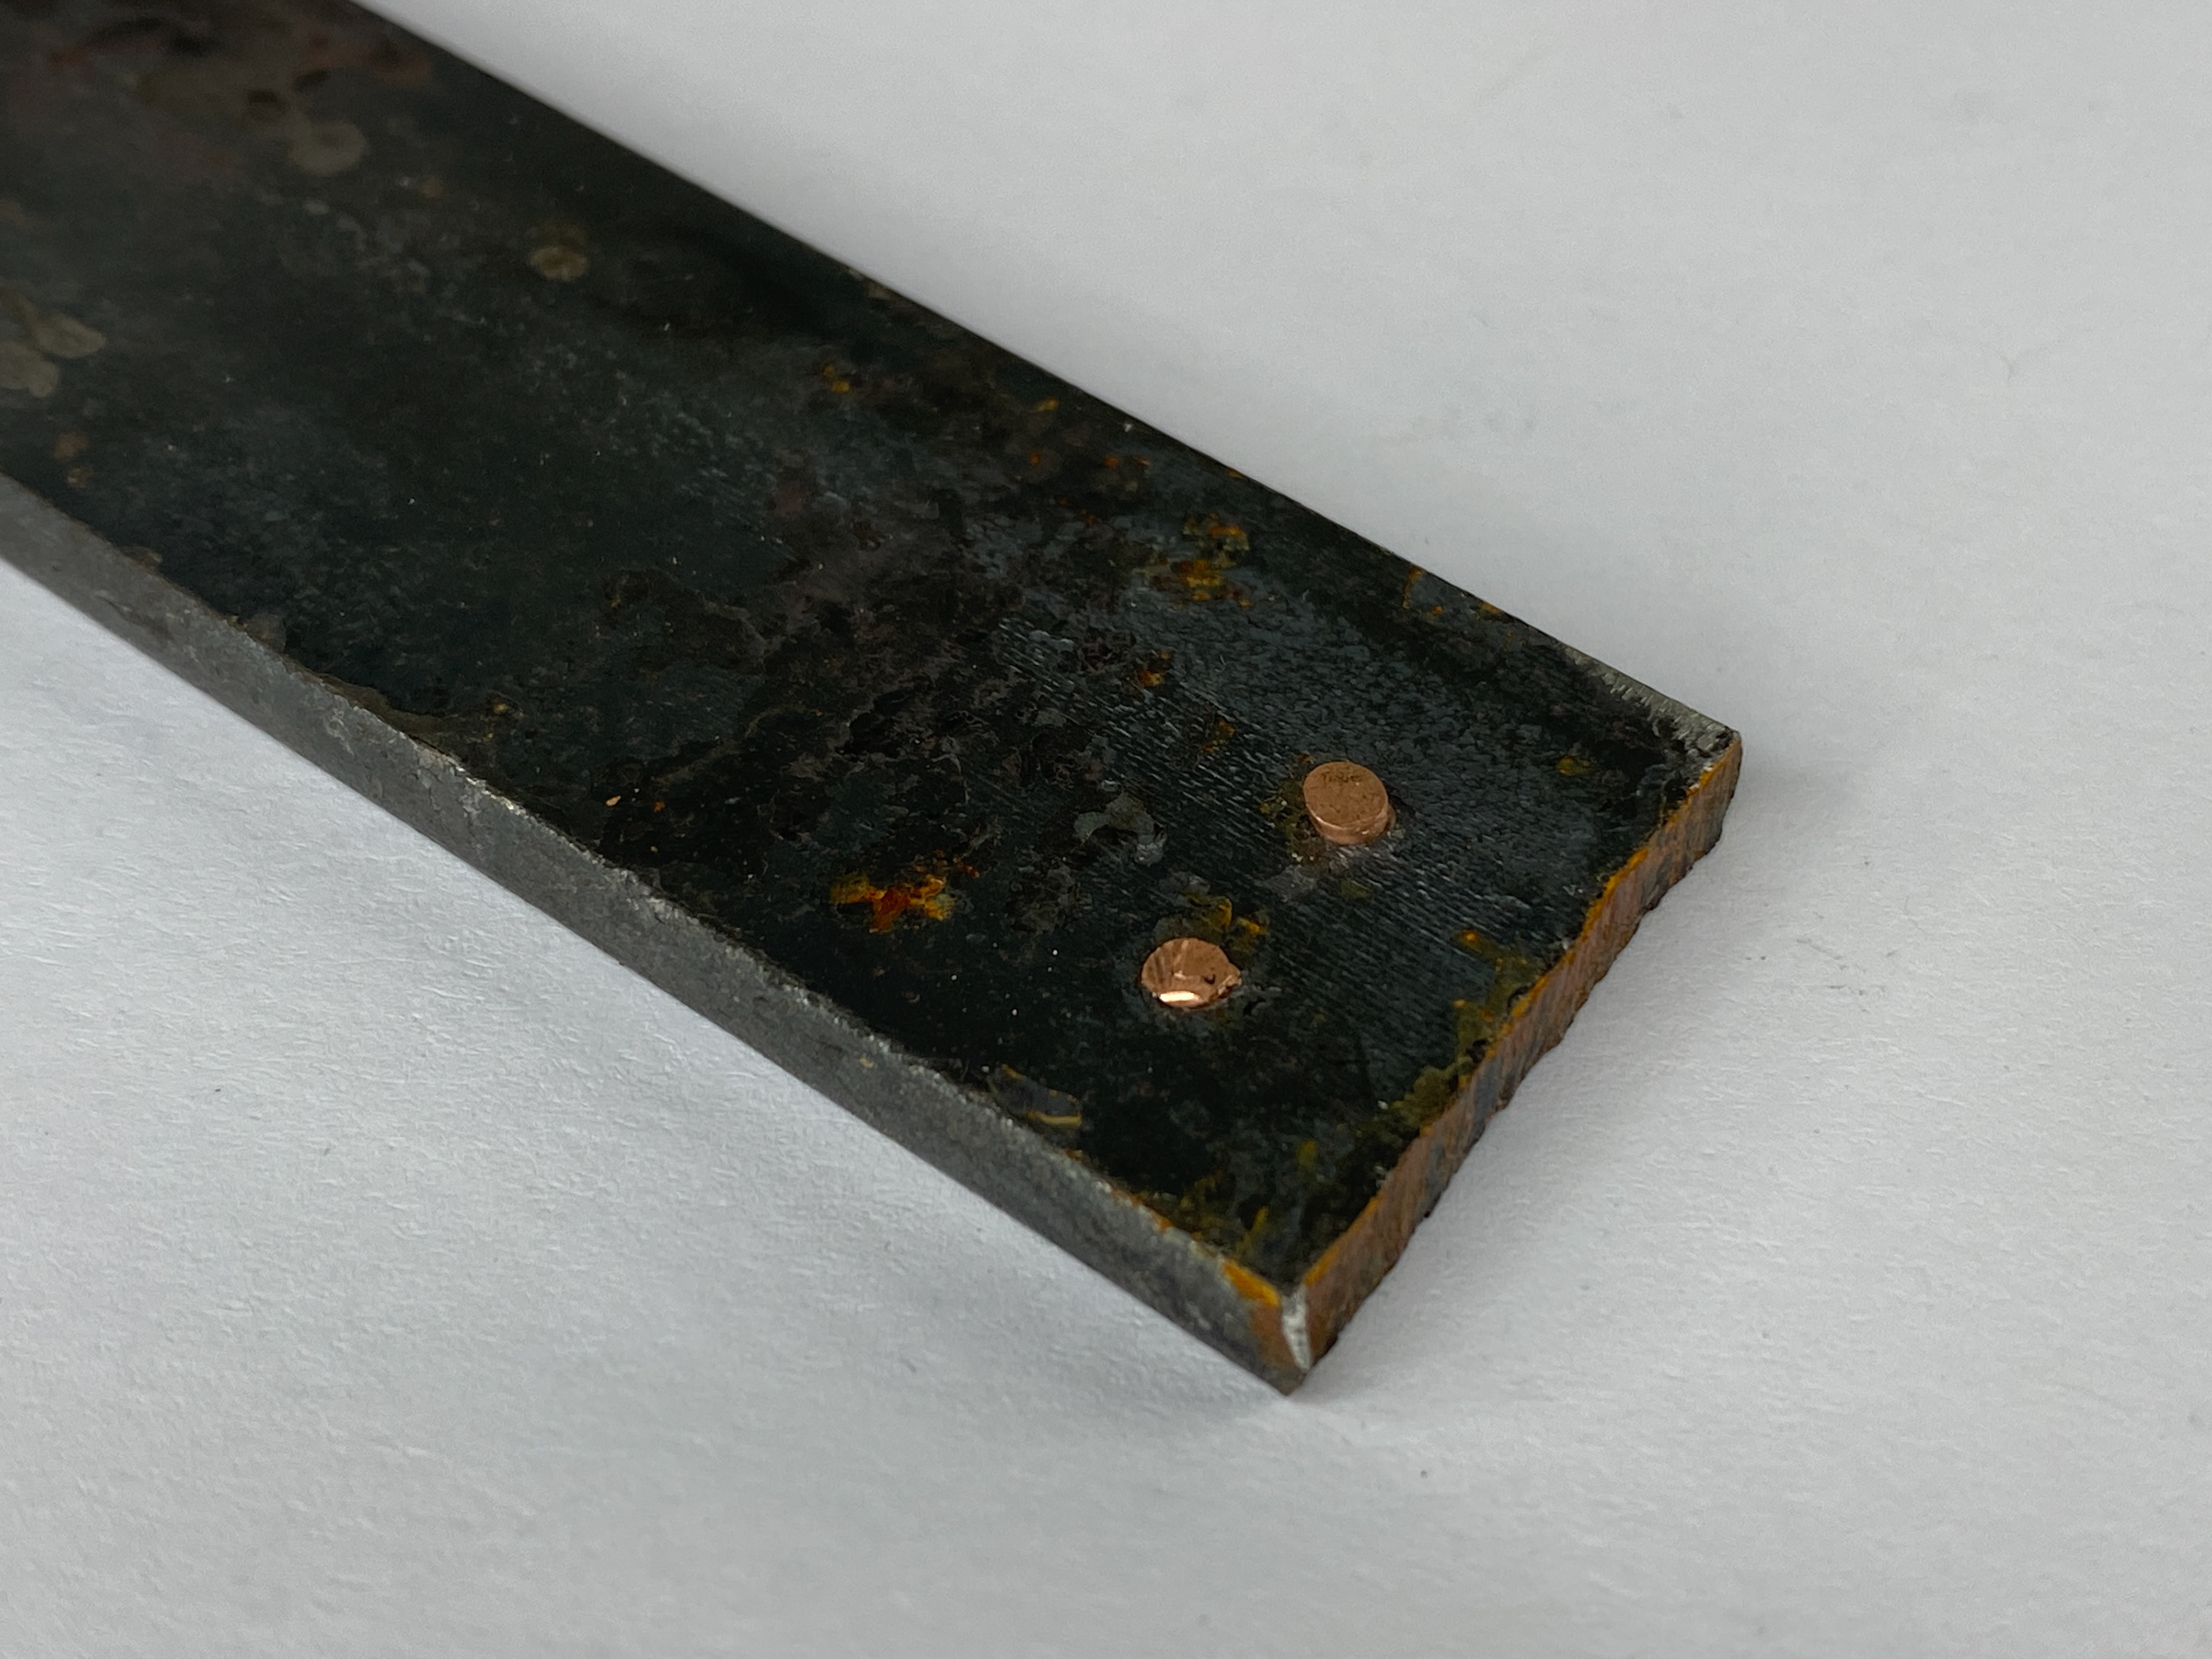

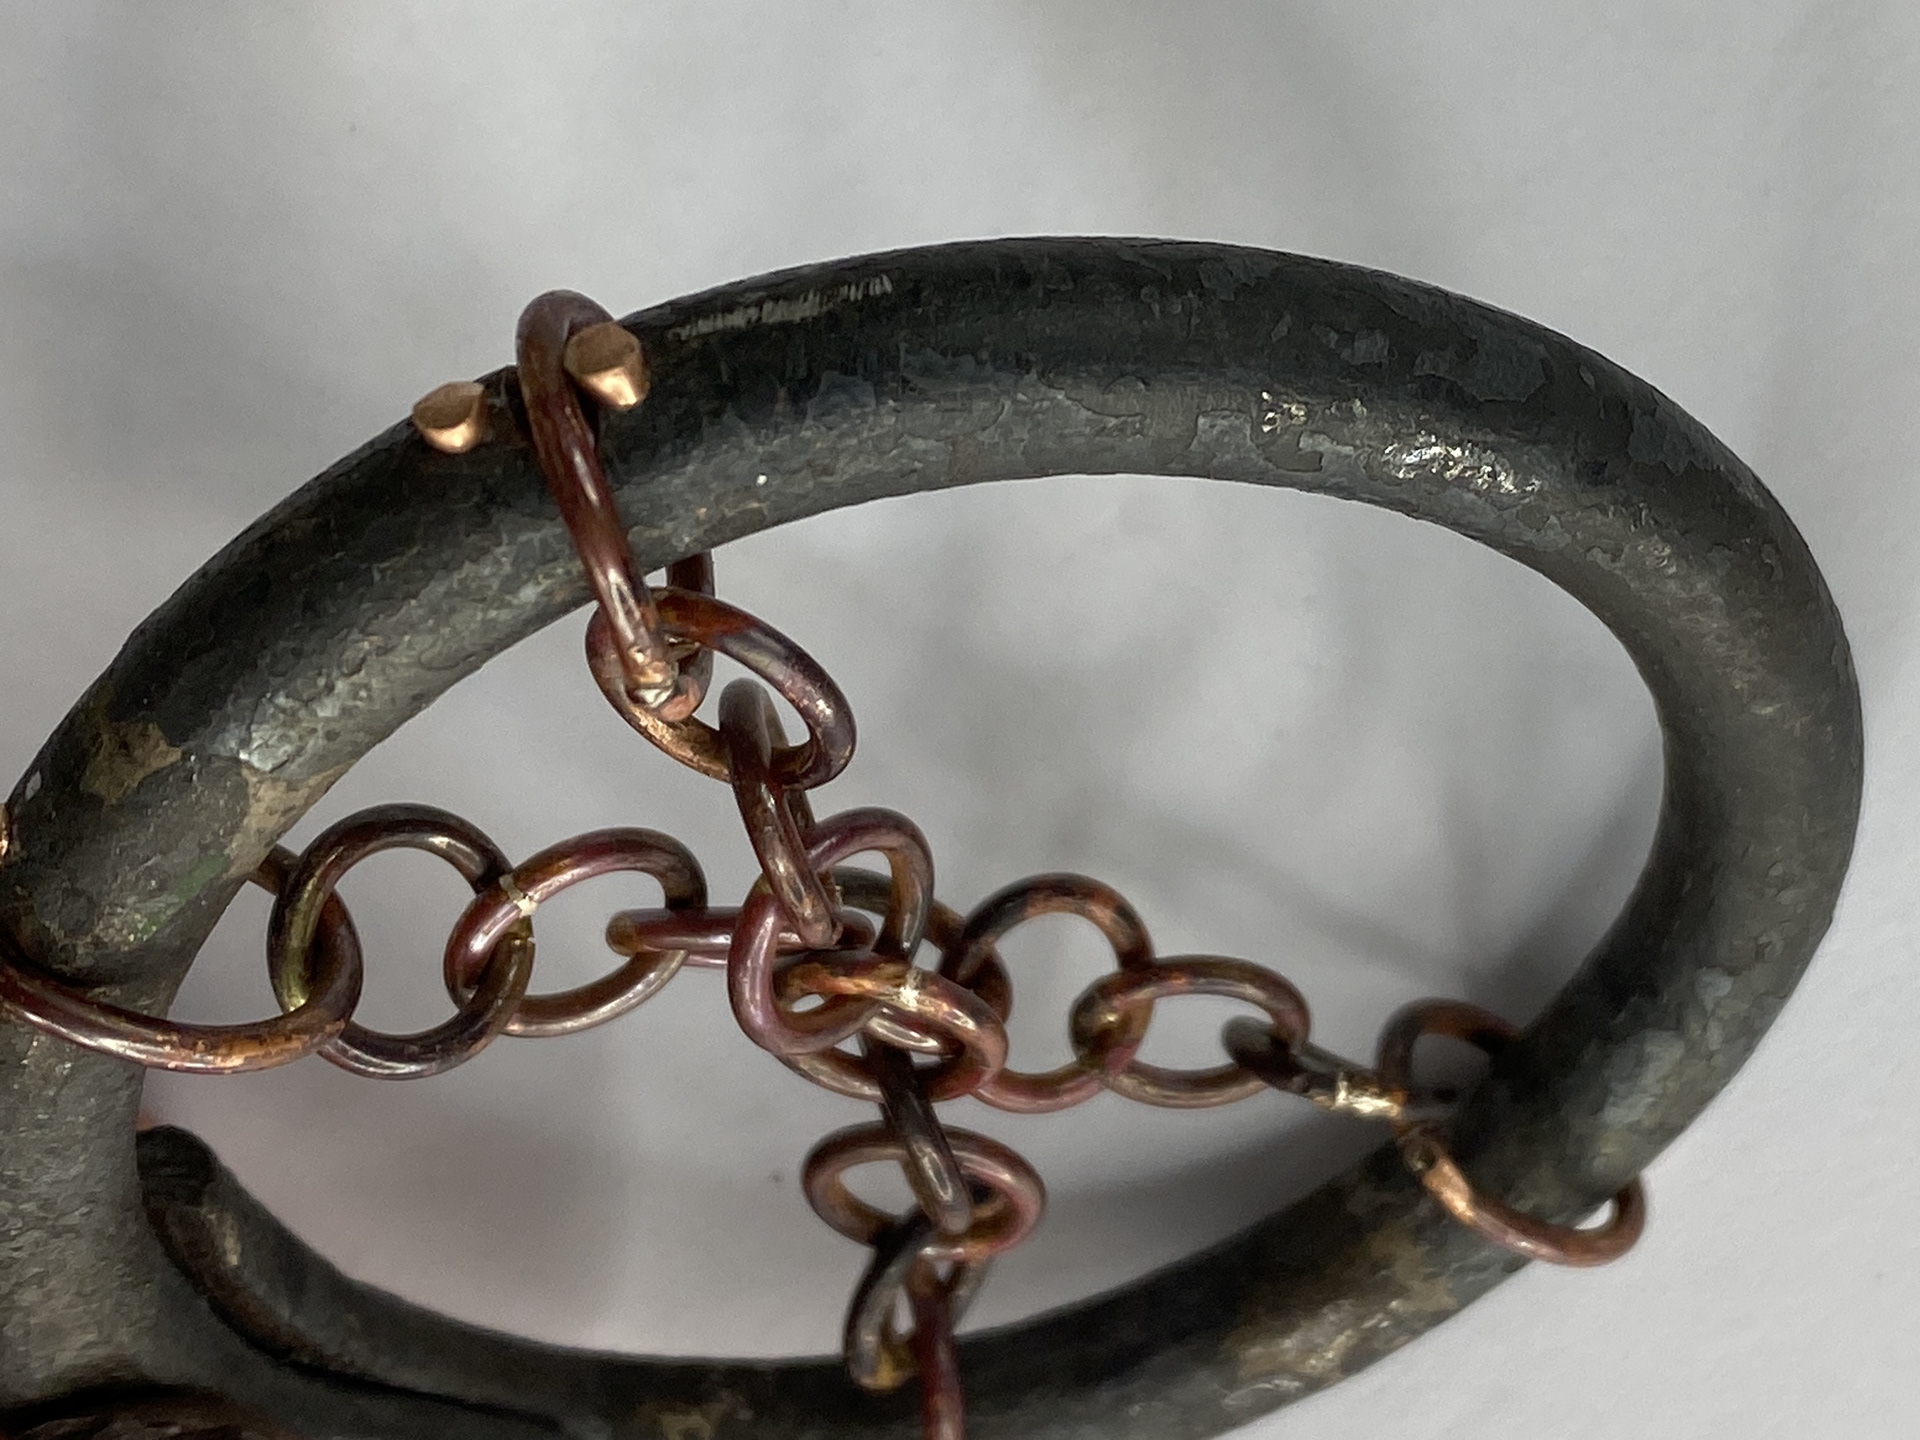
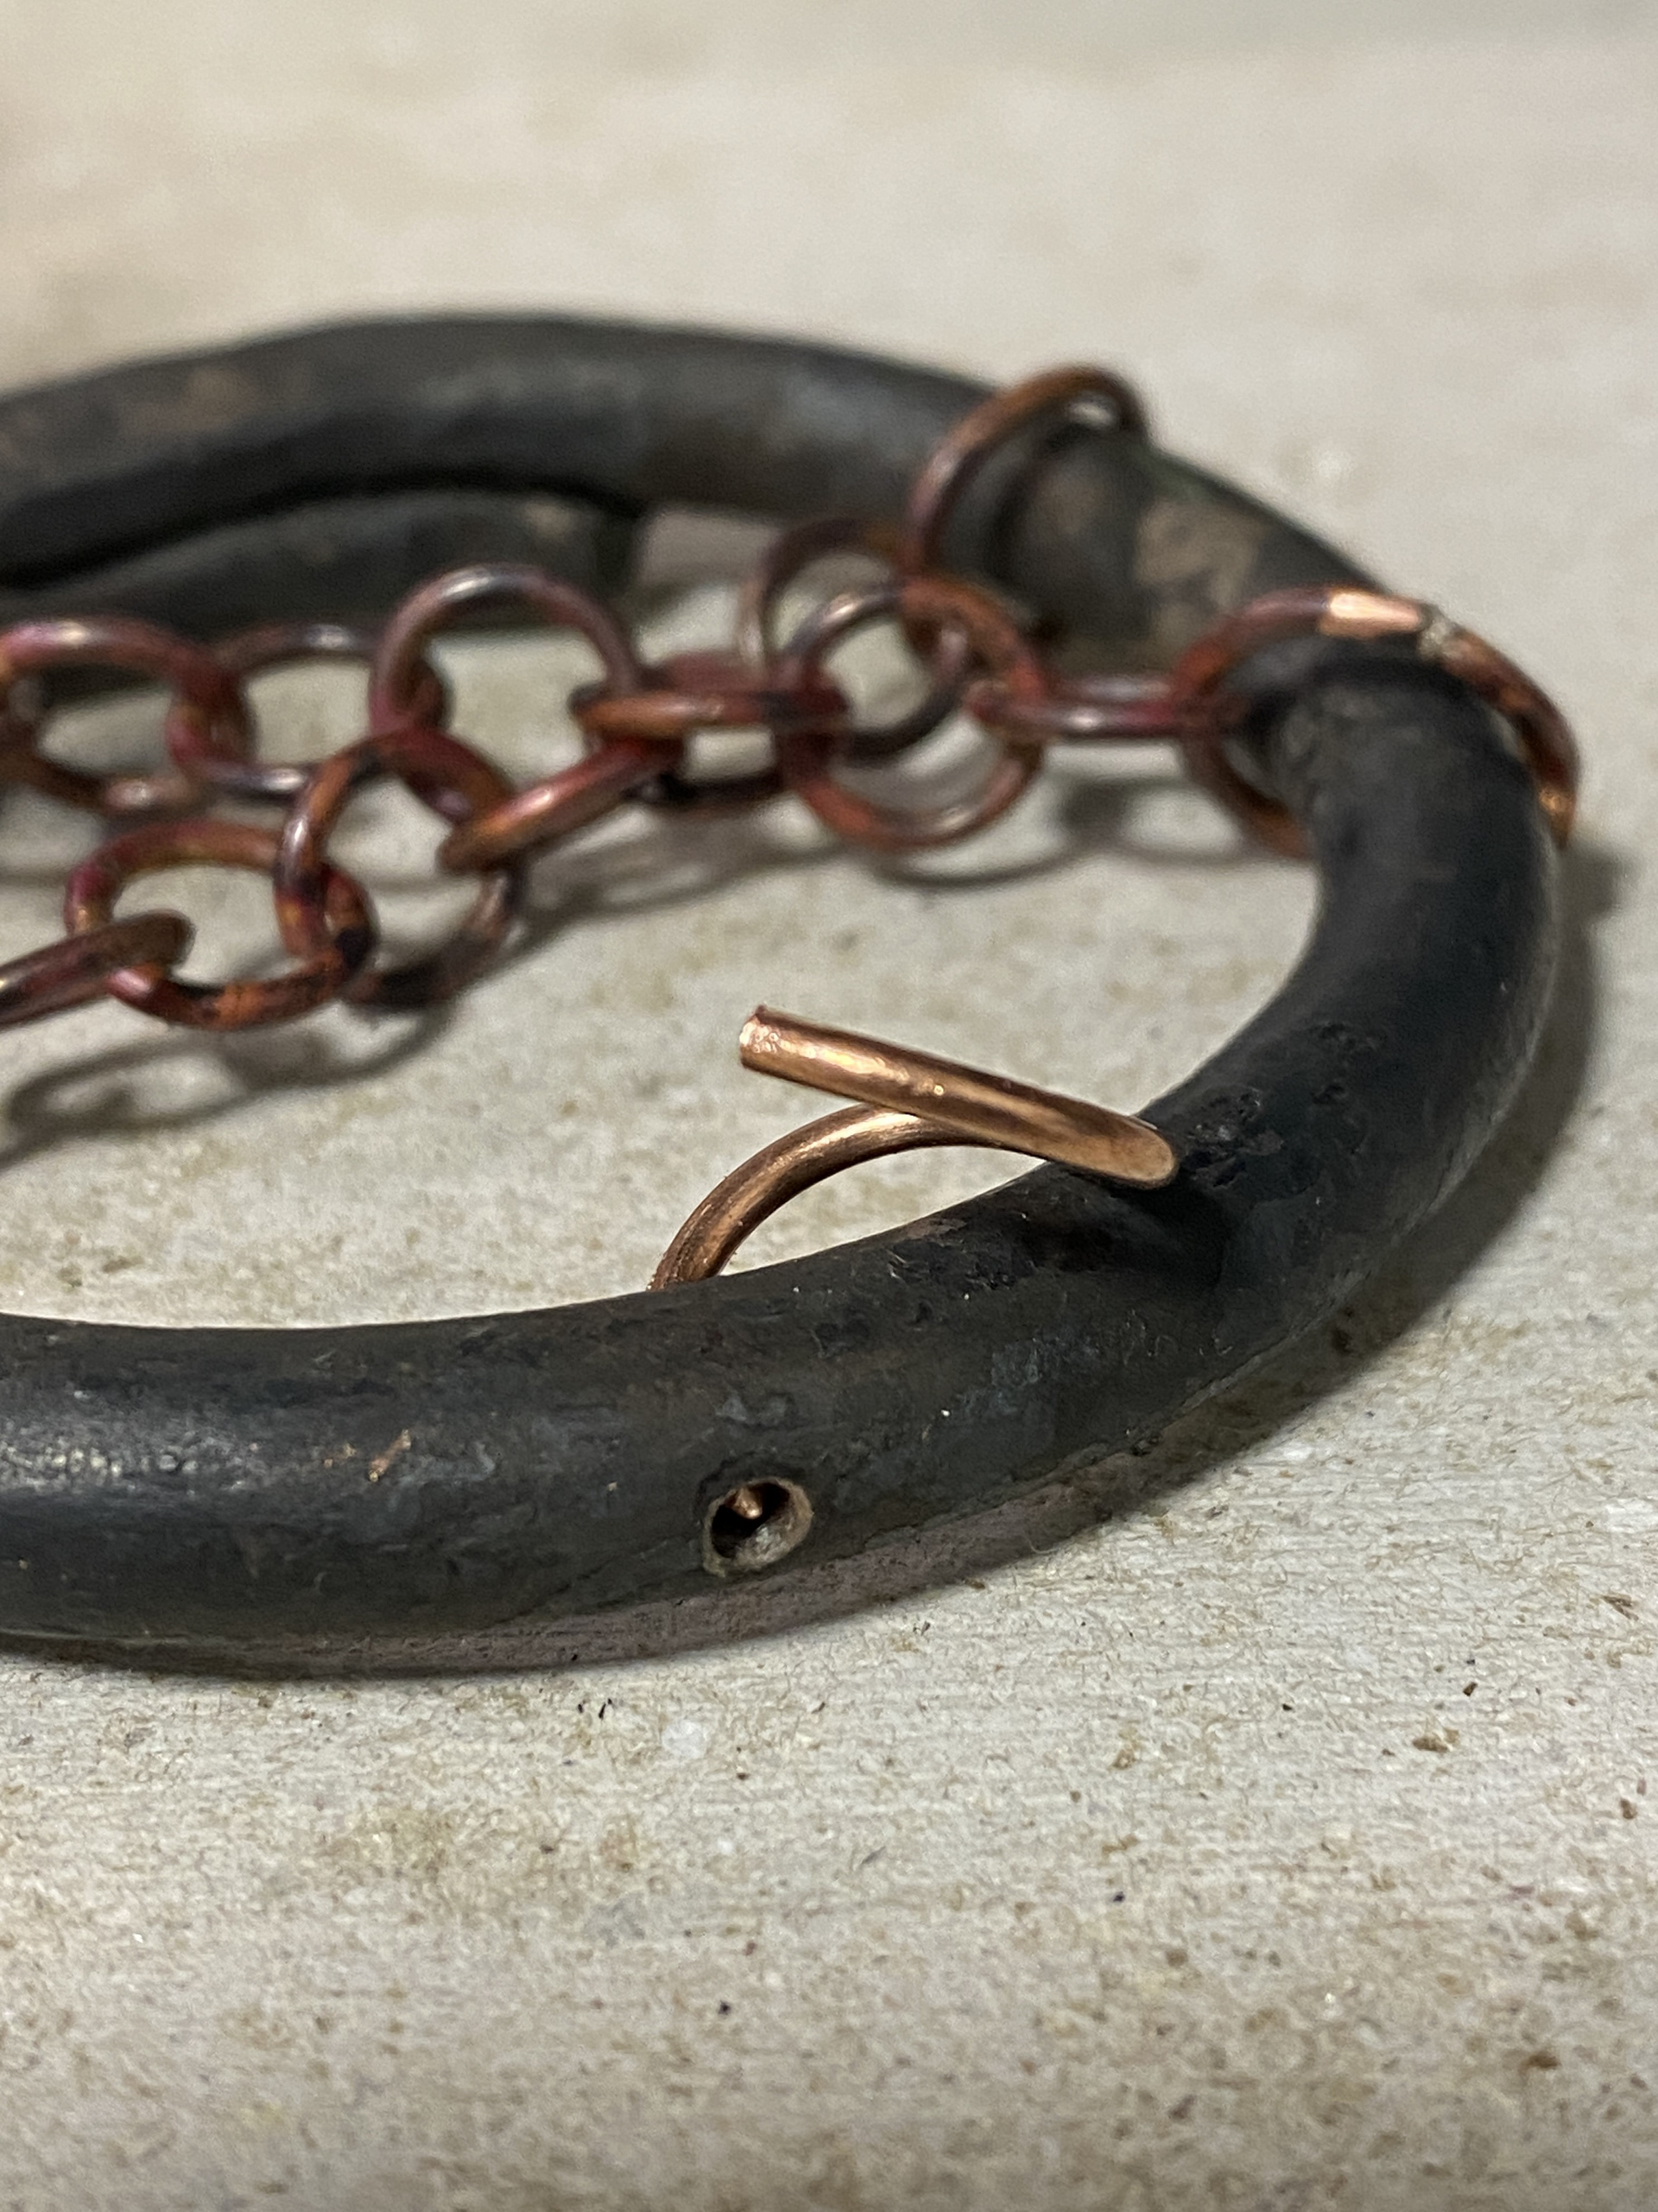
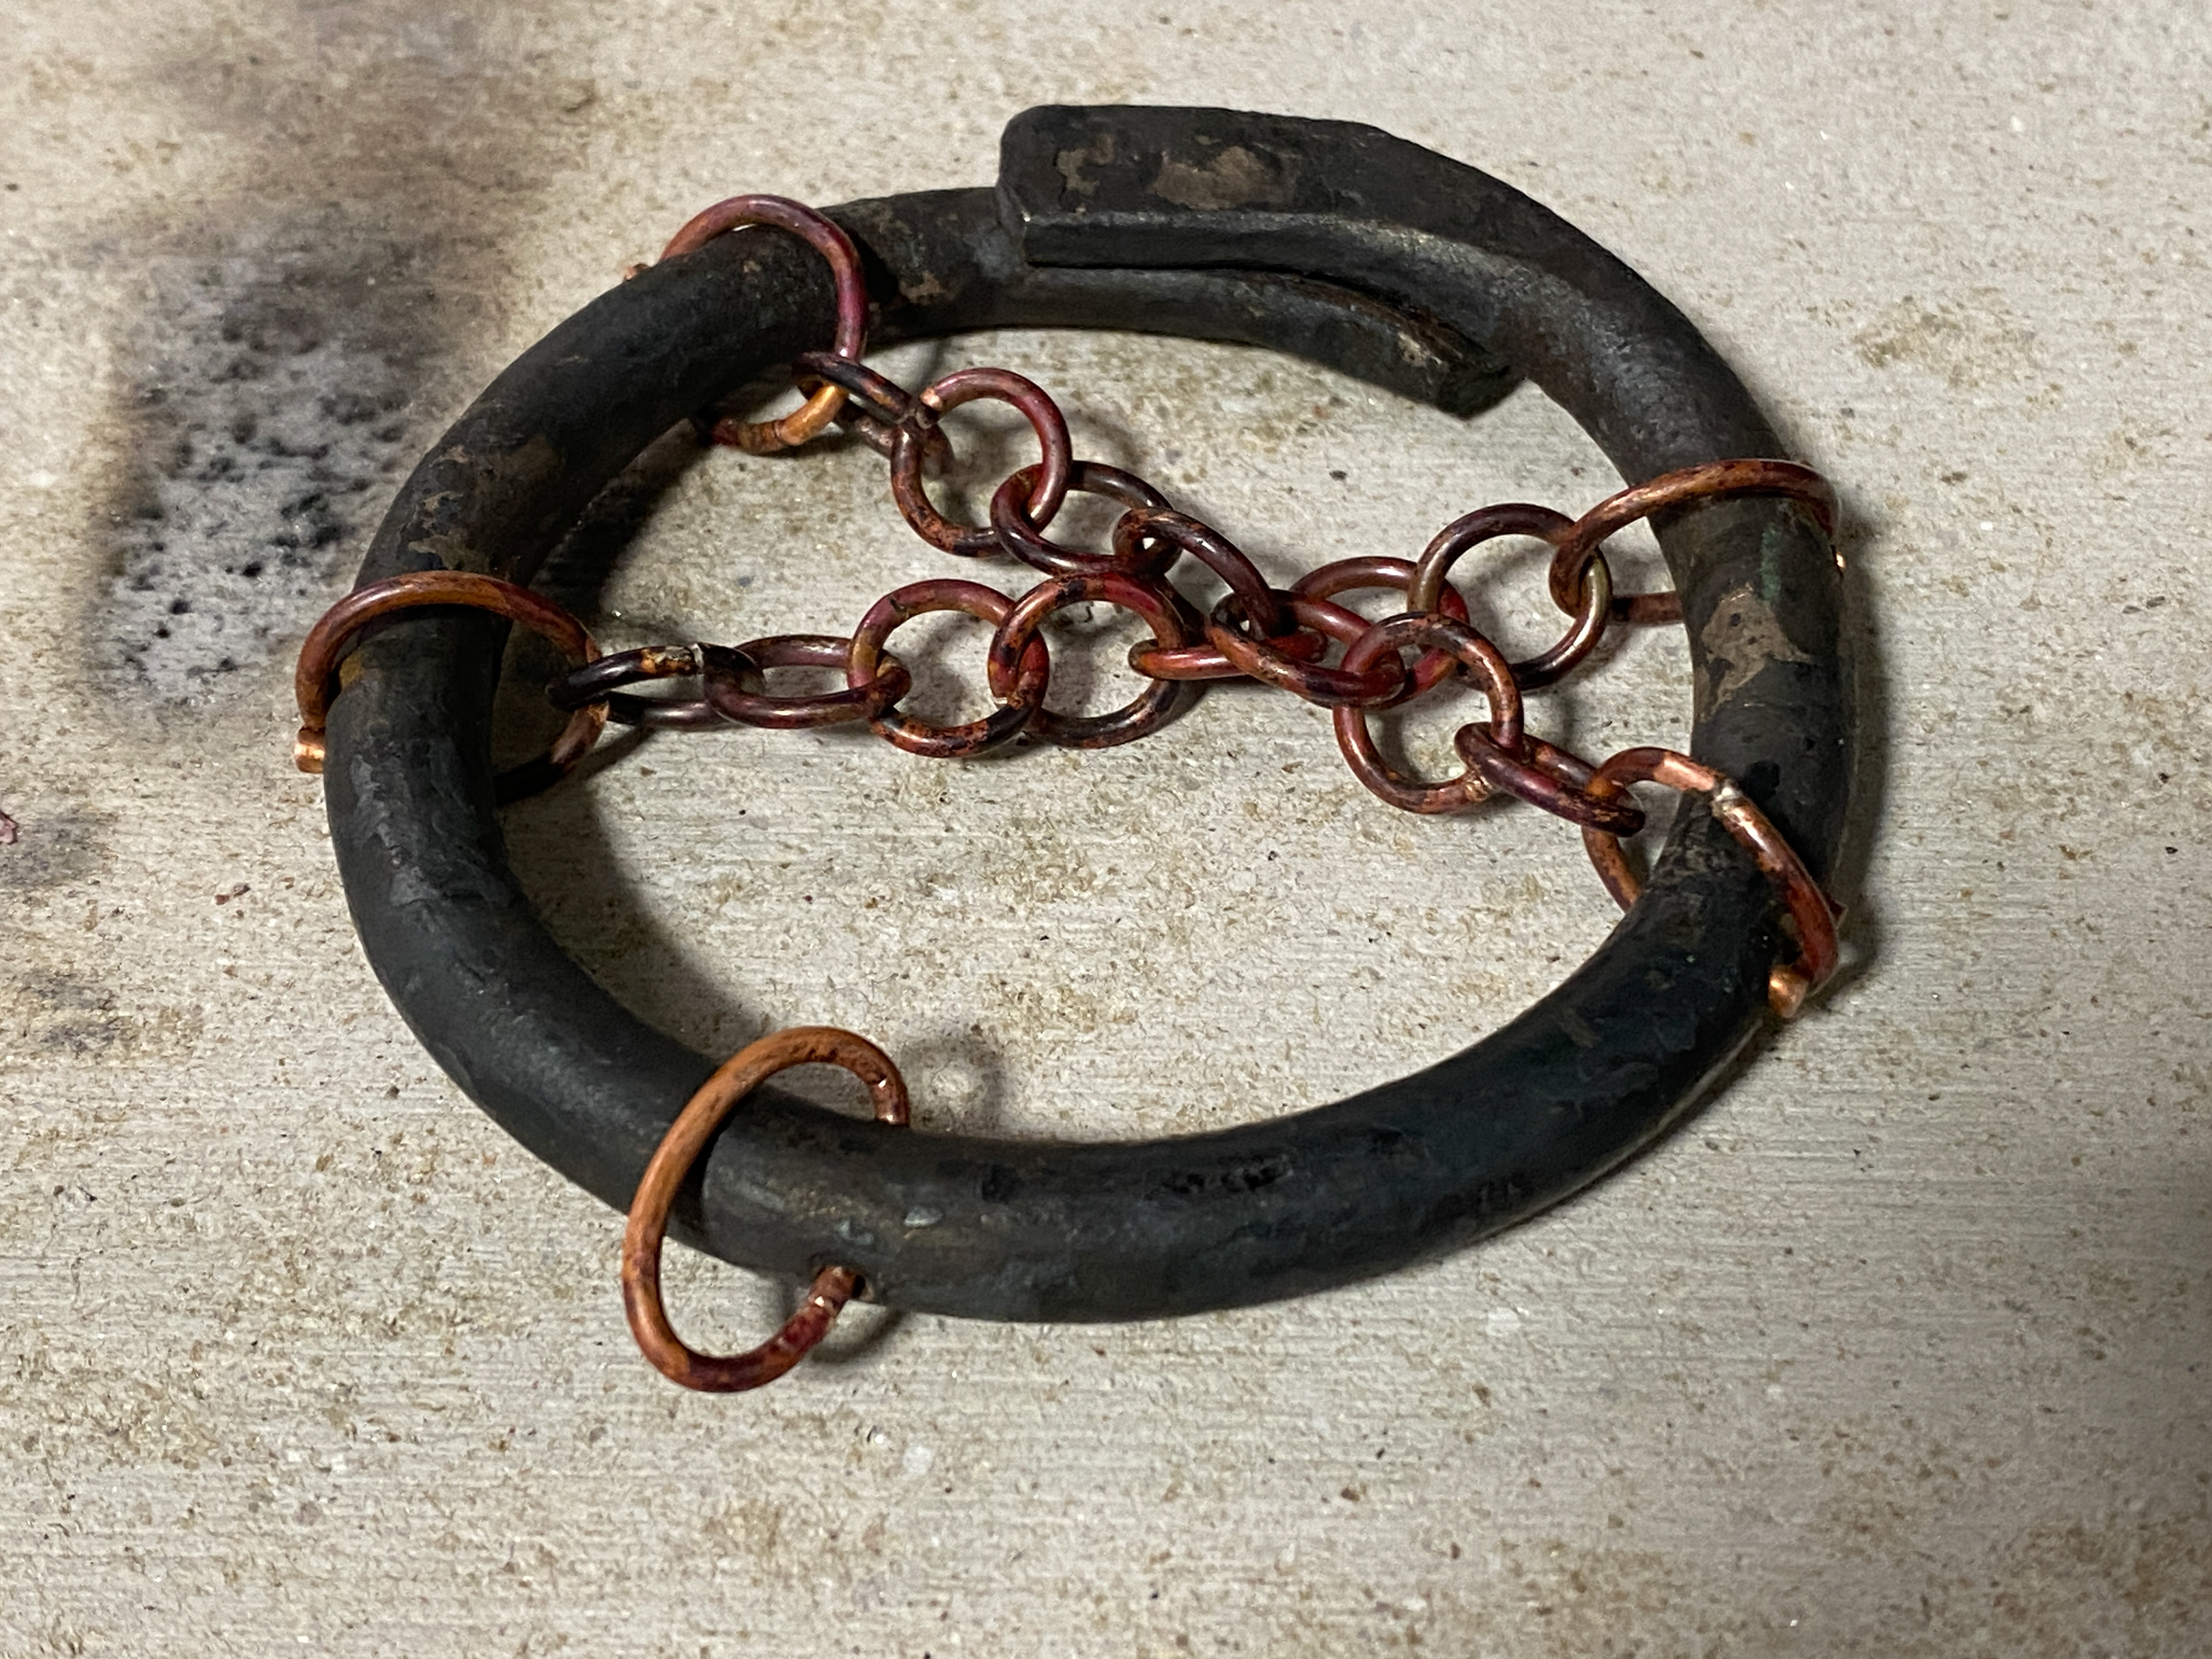
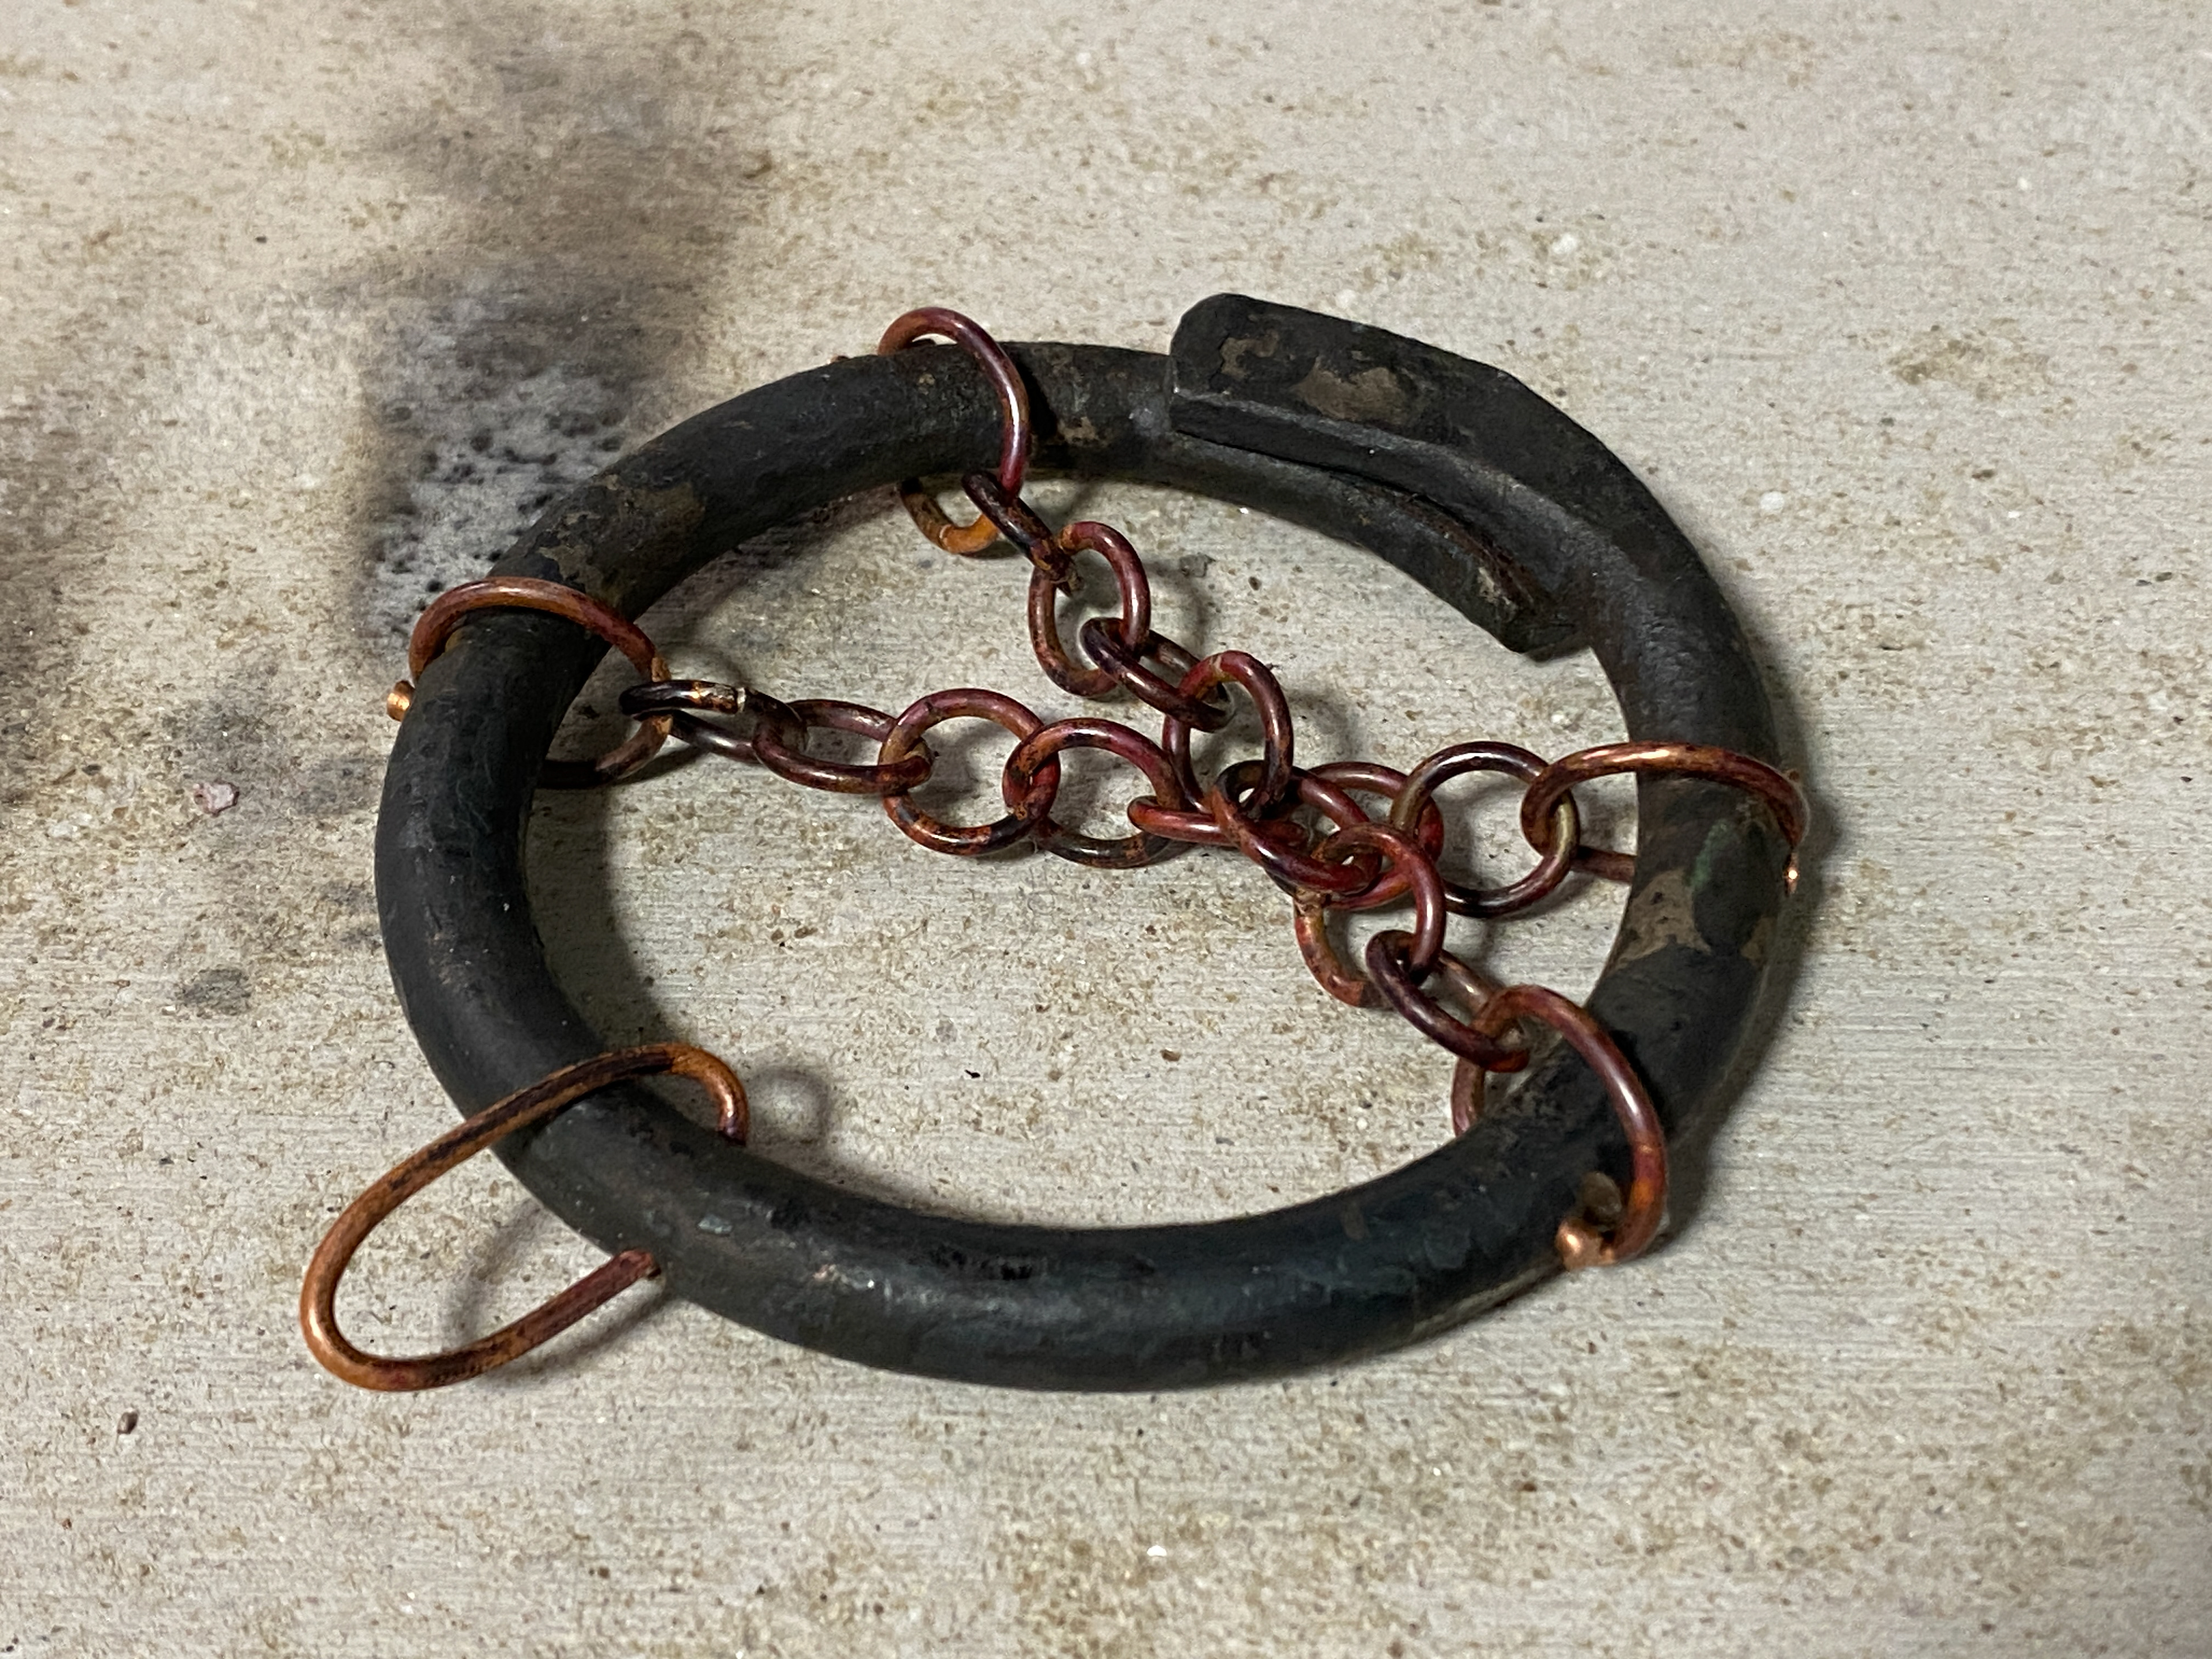
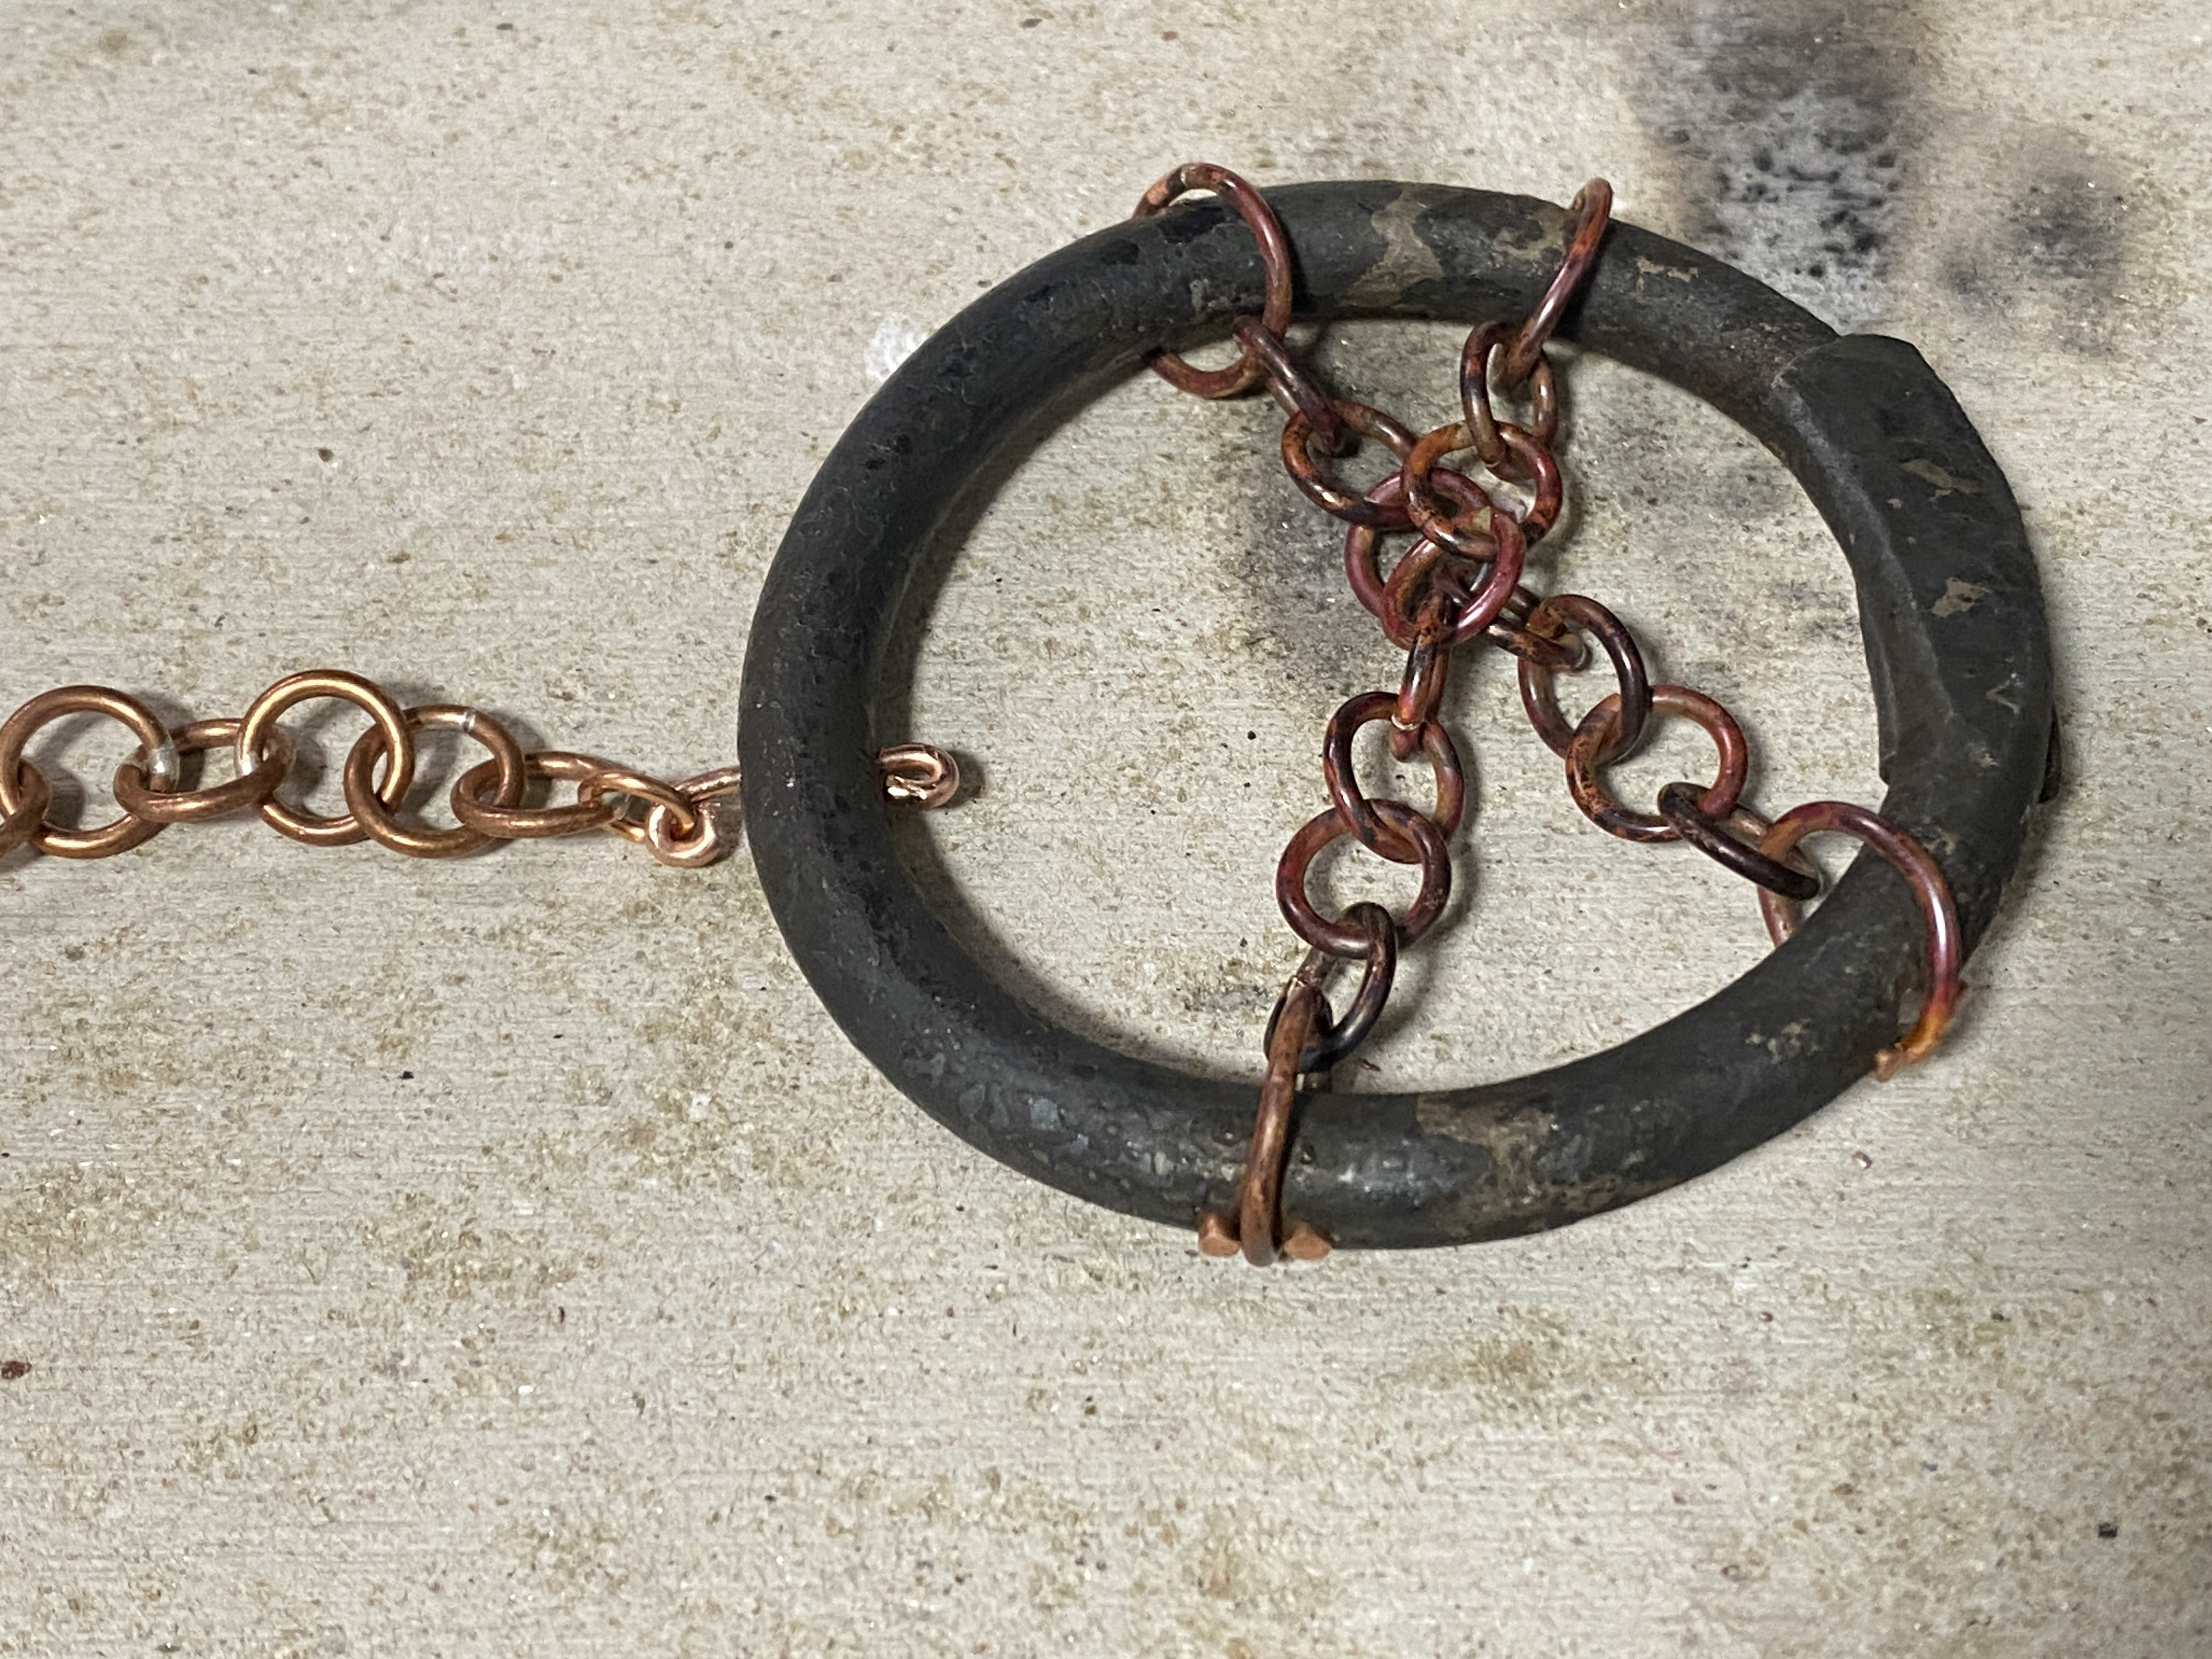
Experimenting with attaching the internal copper chain to the steel links. I filed into the edge of the steel link using a round needle file carving a groove that the larger jump ring could lay in. I initially wanted the copper chain to stay in place using this method alone but found the chain could slip out and fall disrupting the composition. Therefore, I added copper pins either side of the jump ring by drilling and hammering copper wire into the steel. This fixed the issue but upon reflection I decided that the size of my copper chain was too large and clunky not creating the contrast of delicacy verses weight of the steel chain.
I experimented with different size jump rings to fix the connecting chain from the front to back. As I was having difficulty with the links slipping inside the steel ring, I drilled holes into the steel to ensure this connection was structurally sound. I wanted to create consistency in my design and found that the size of circular link necessary was too big and bulky which drew attention away from the fine copper chain. I also found that stretching the link and resoldering it onto the steel forced the chain out too far from the neck. Therefore, I tested creating a loop design which holds the copper chain next to the steel. In my final piece I tested further and found that soldering on a T-bar shape was the sleekest design whilst giving enough structural support.

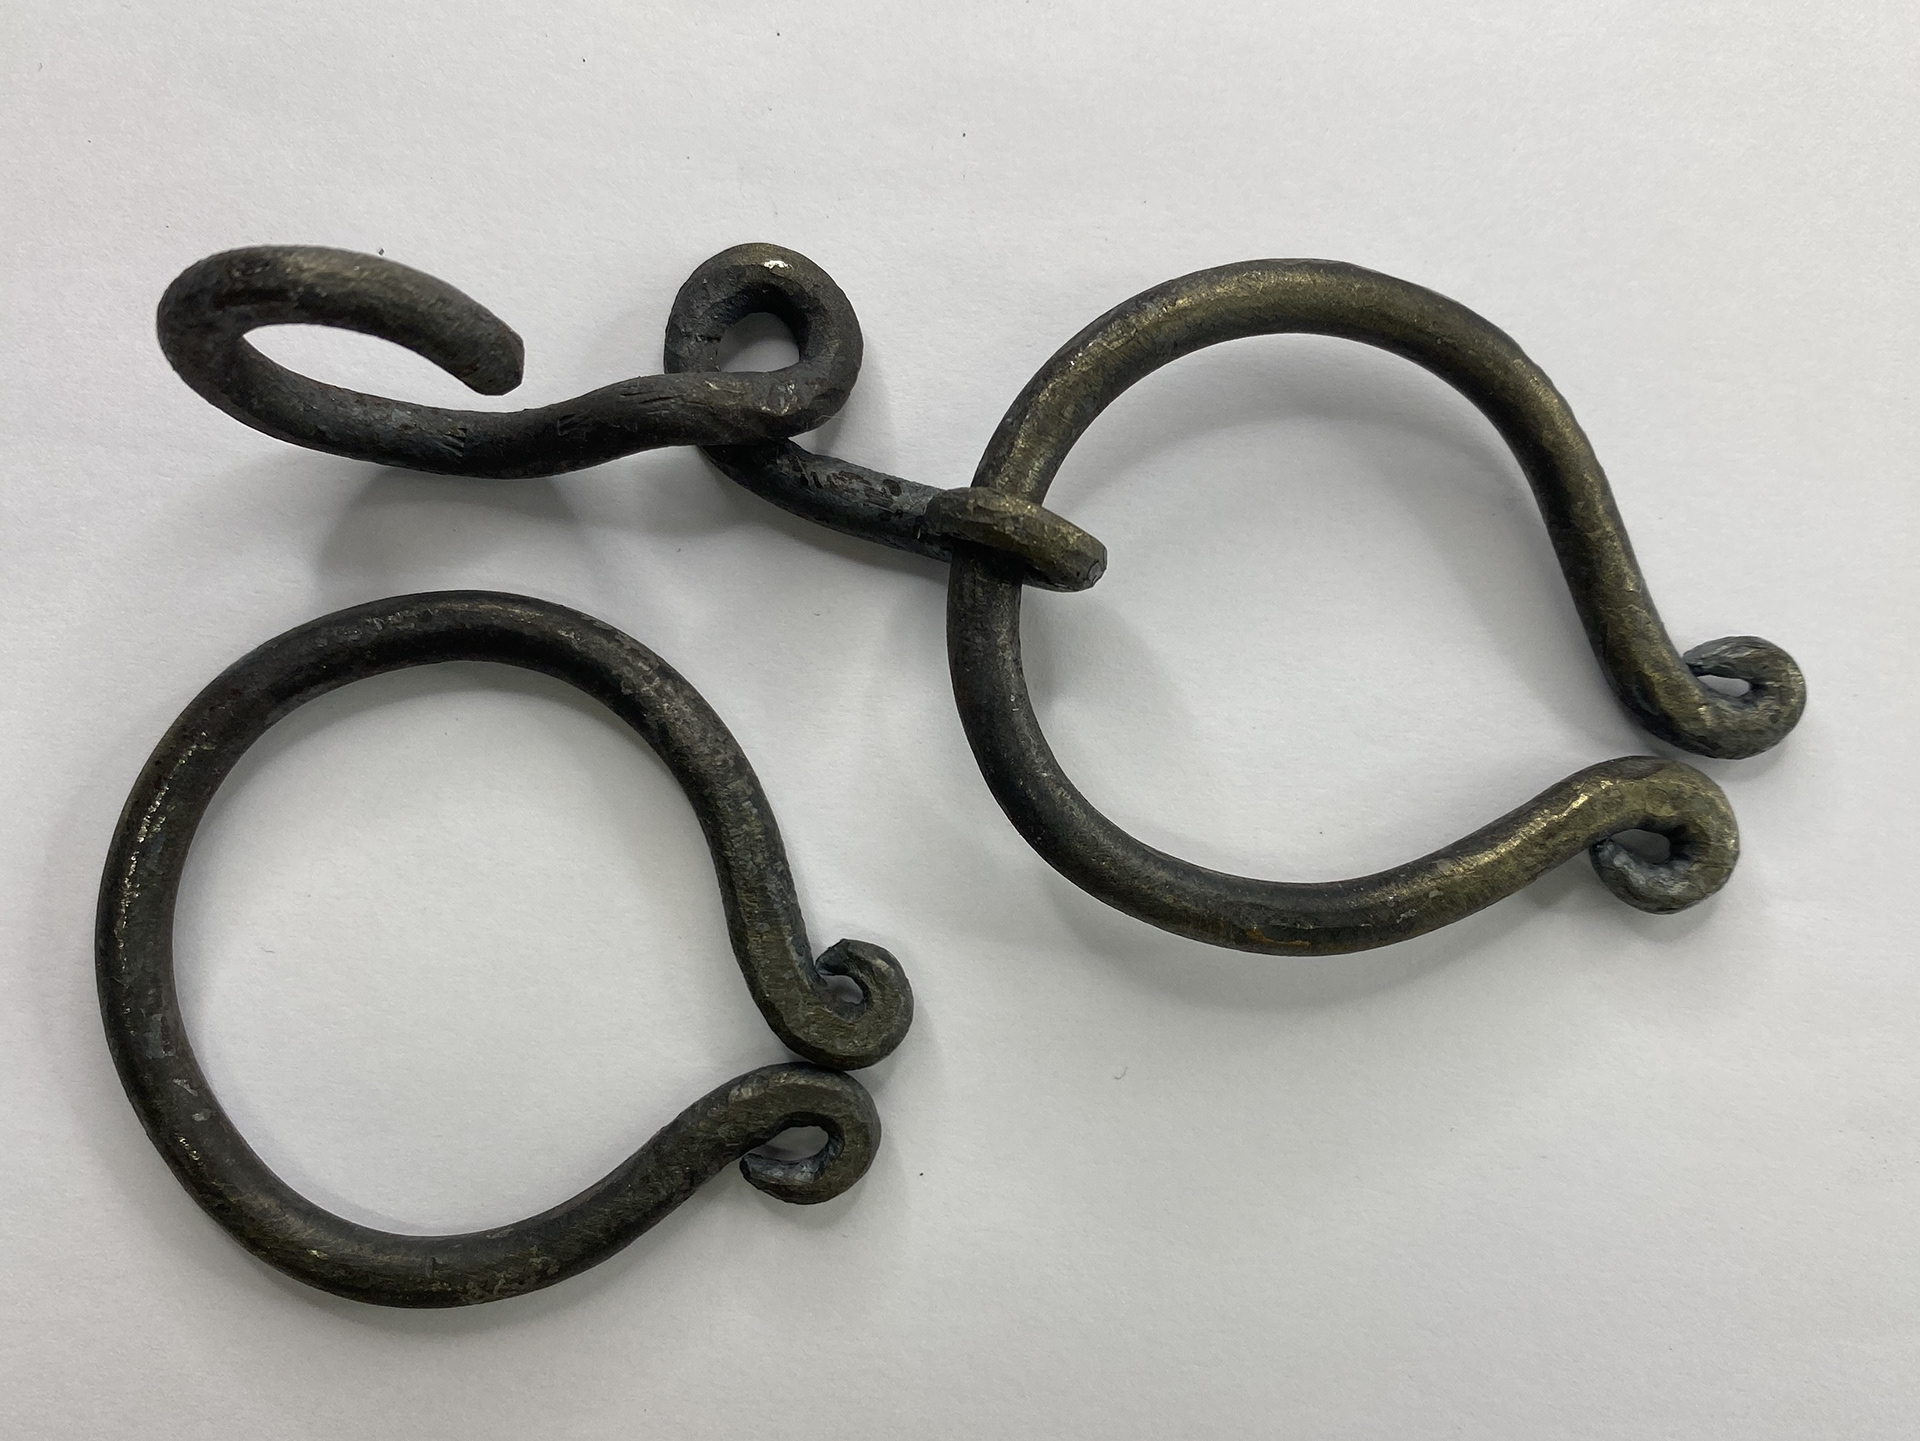
I forged the back clasps using a scale aluminium mock as a reference. I forged it from 5mm steel which I found challenging as it heated and cooled quicker than the 10mm bar, meaning that I needed to work quicker and more focused on specific sections. I drew down the ends of the bar to a point to help curl and create closed loops to attach the copper chain to. Working on a smaller scale also meant that my normal hammer blows adjusted the shape too much and deformed the piece. Therefore, I focused on lighter hammering and used the tongs alongside pliers to create the tighter curved sections. I found this type of work much more enjoyable than forming the chain links.
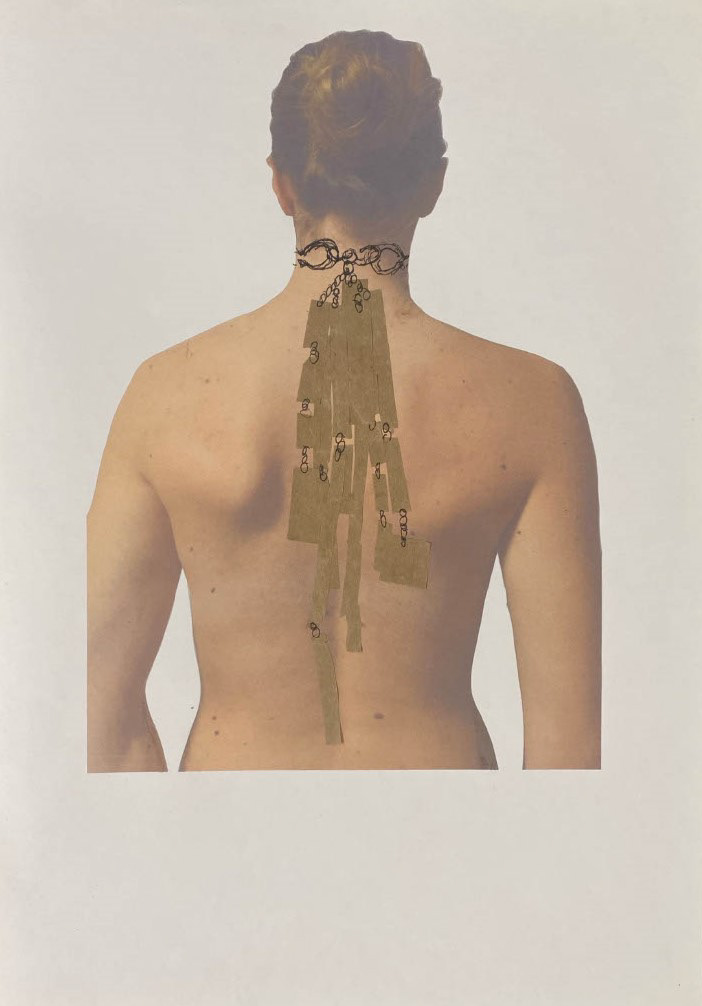
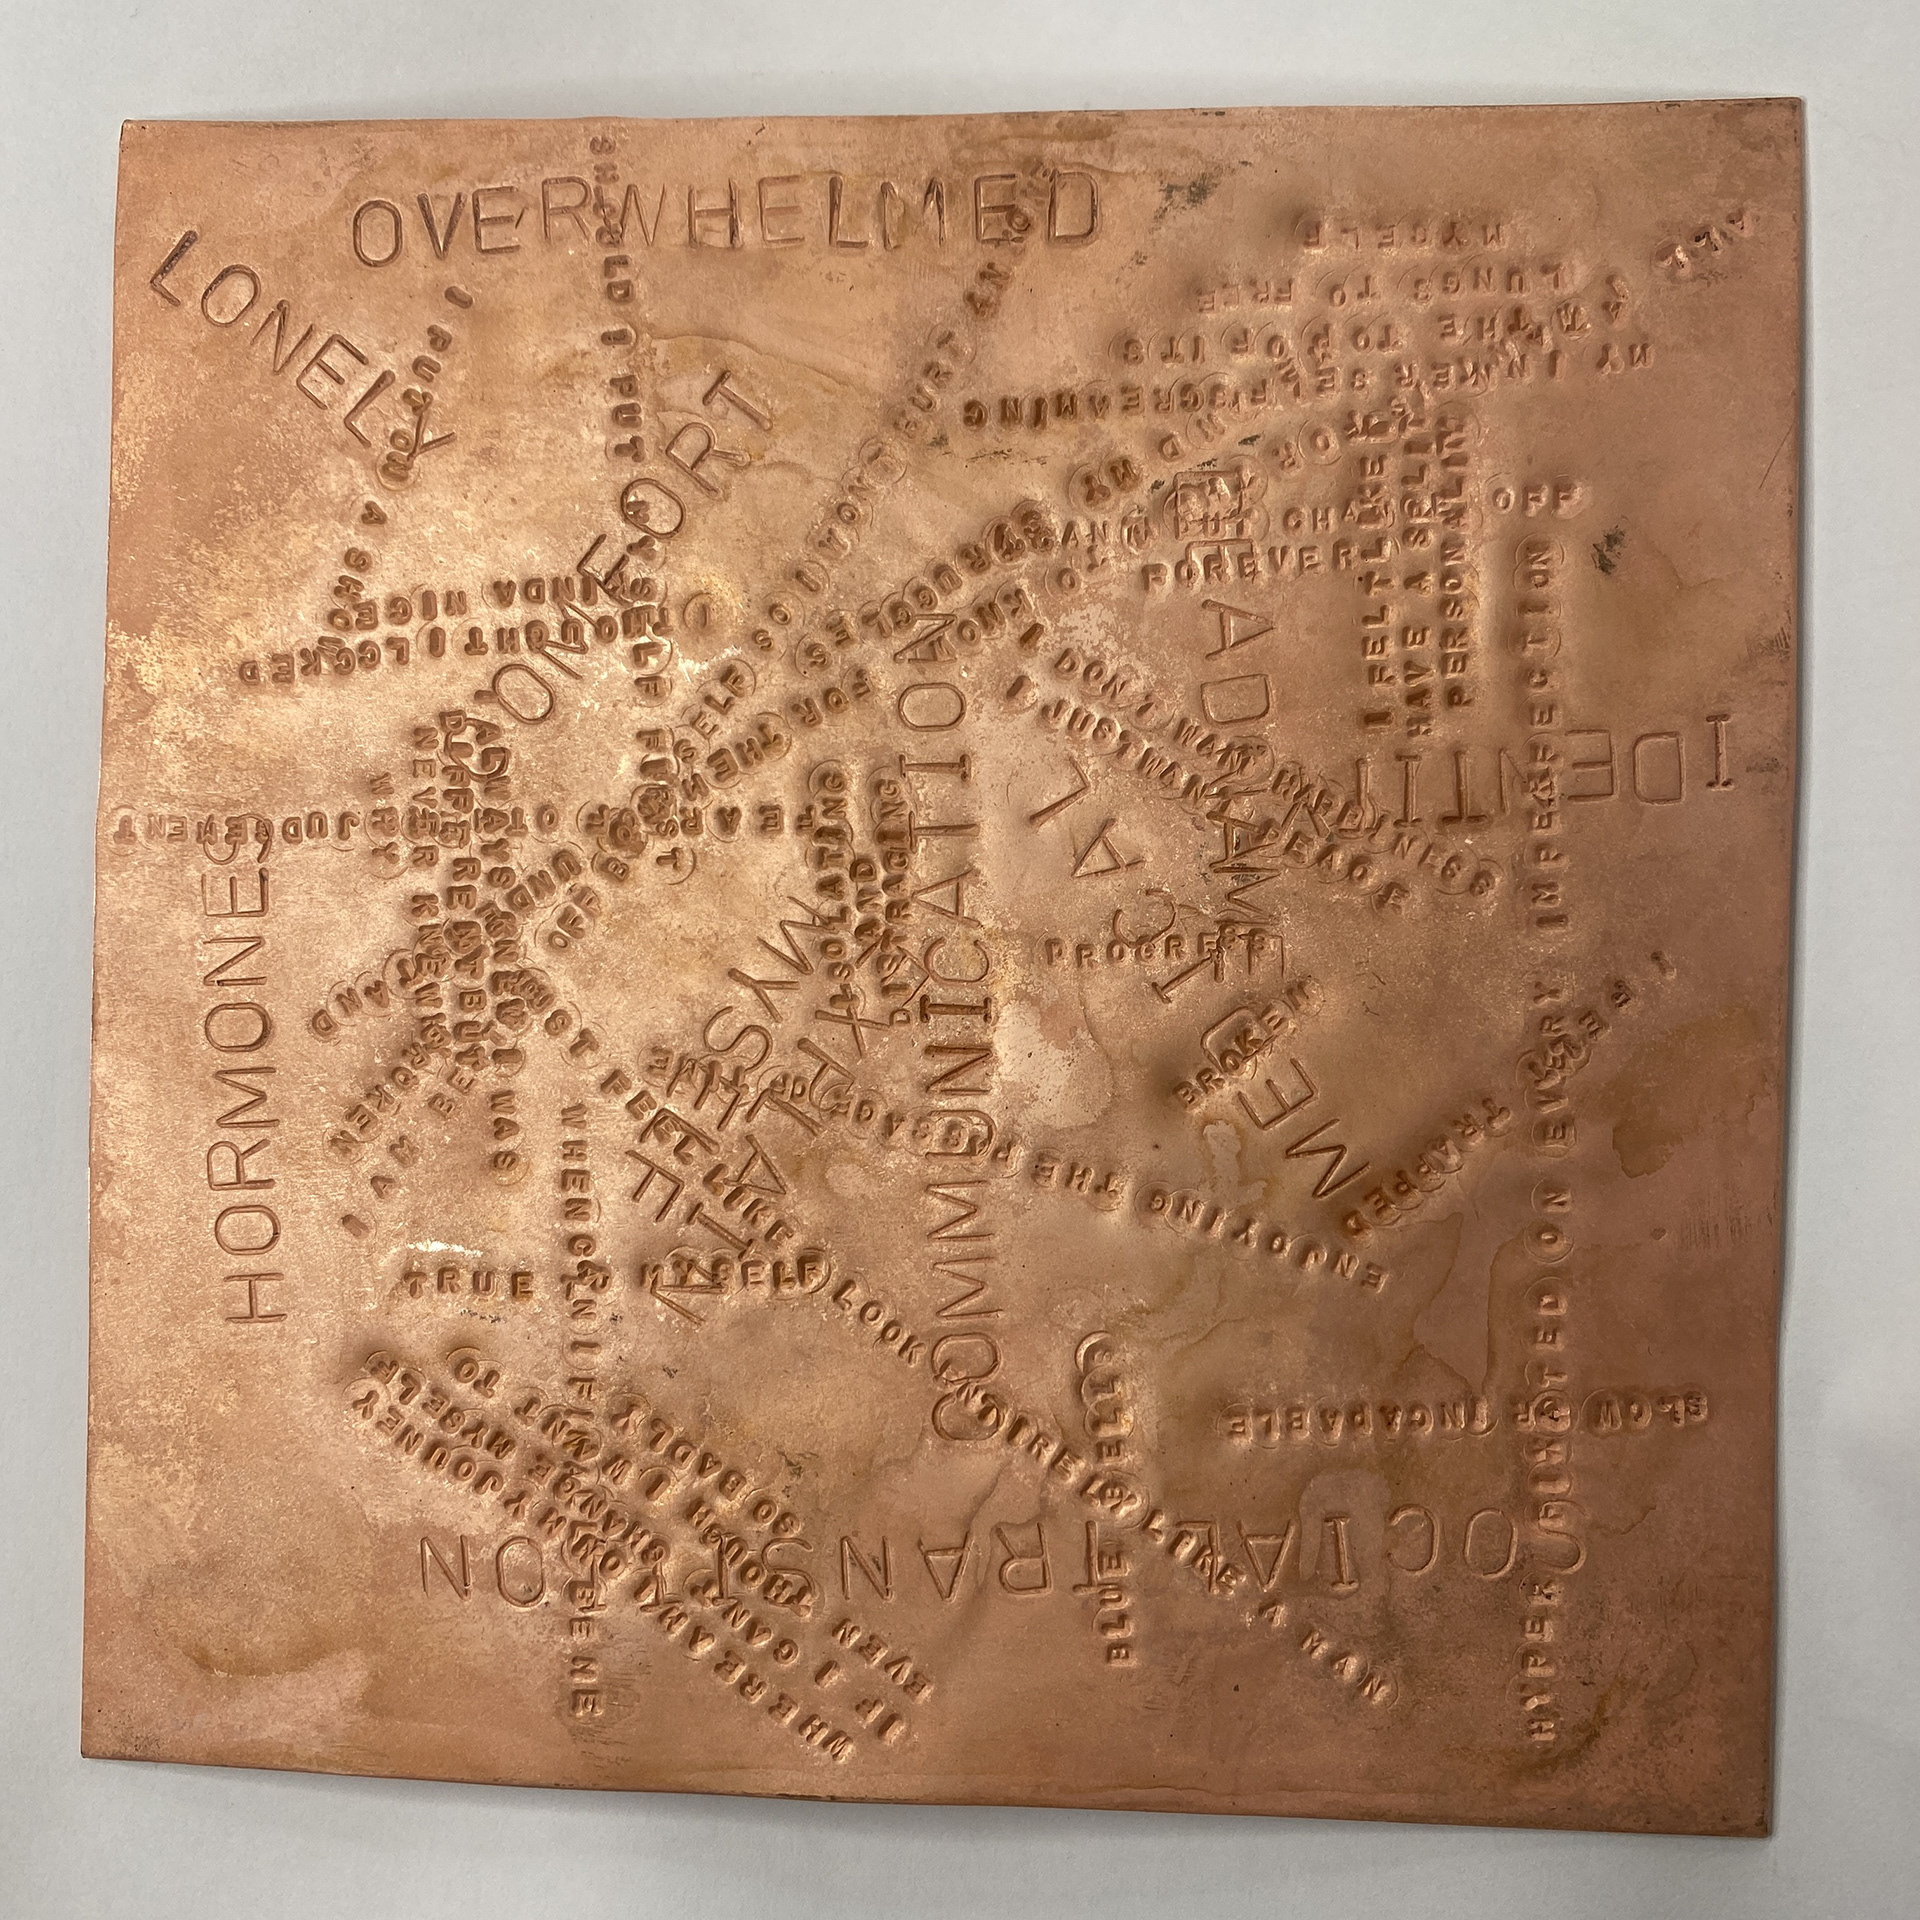
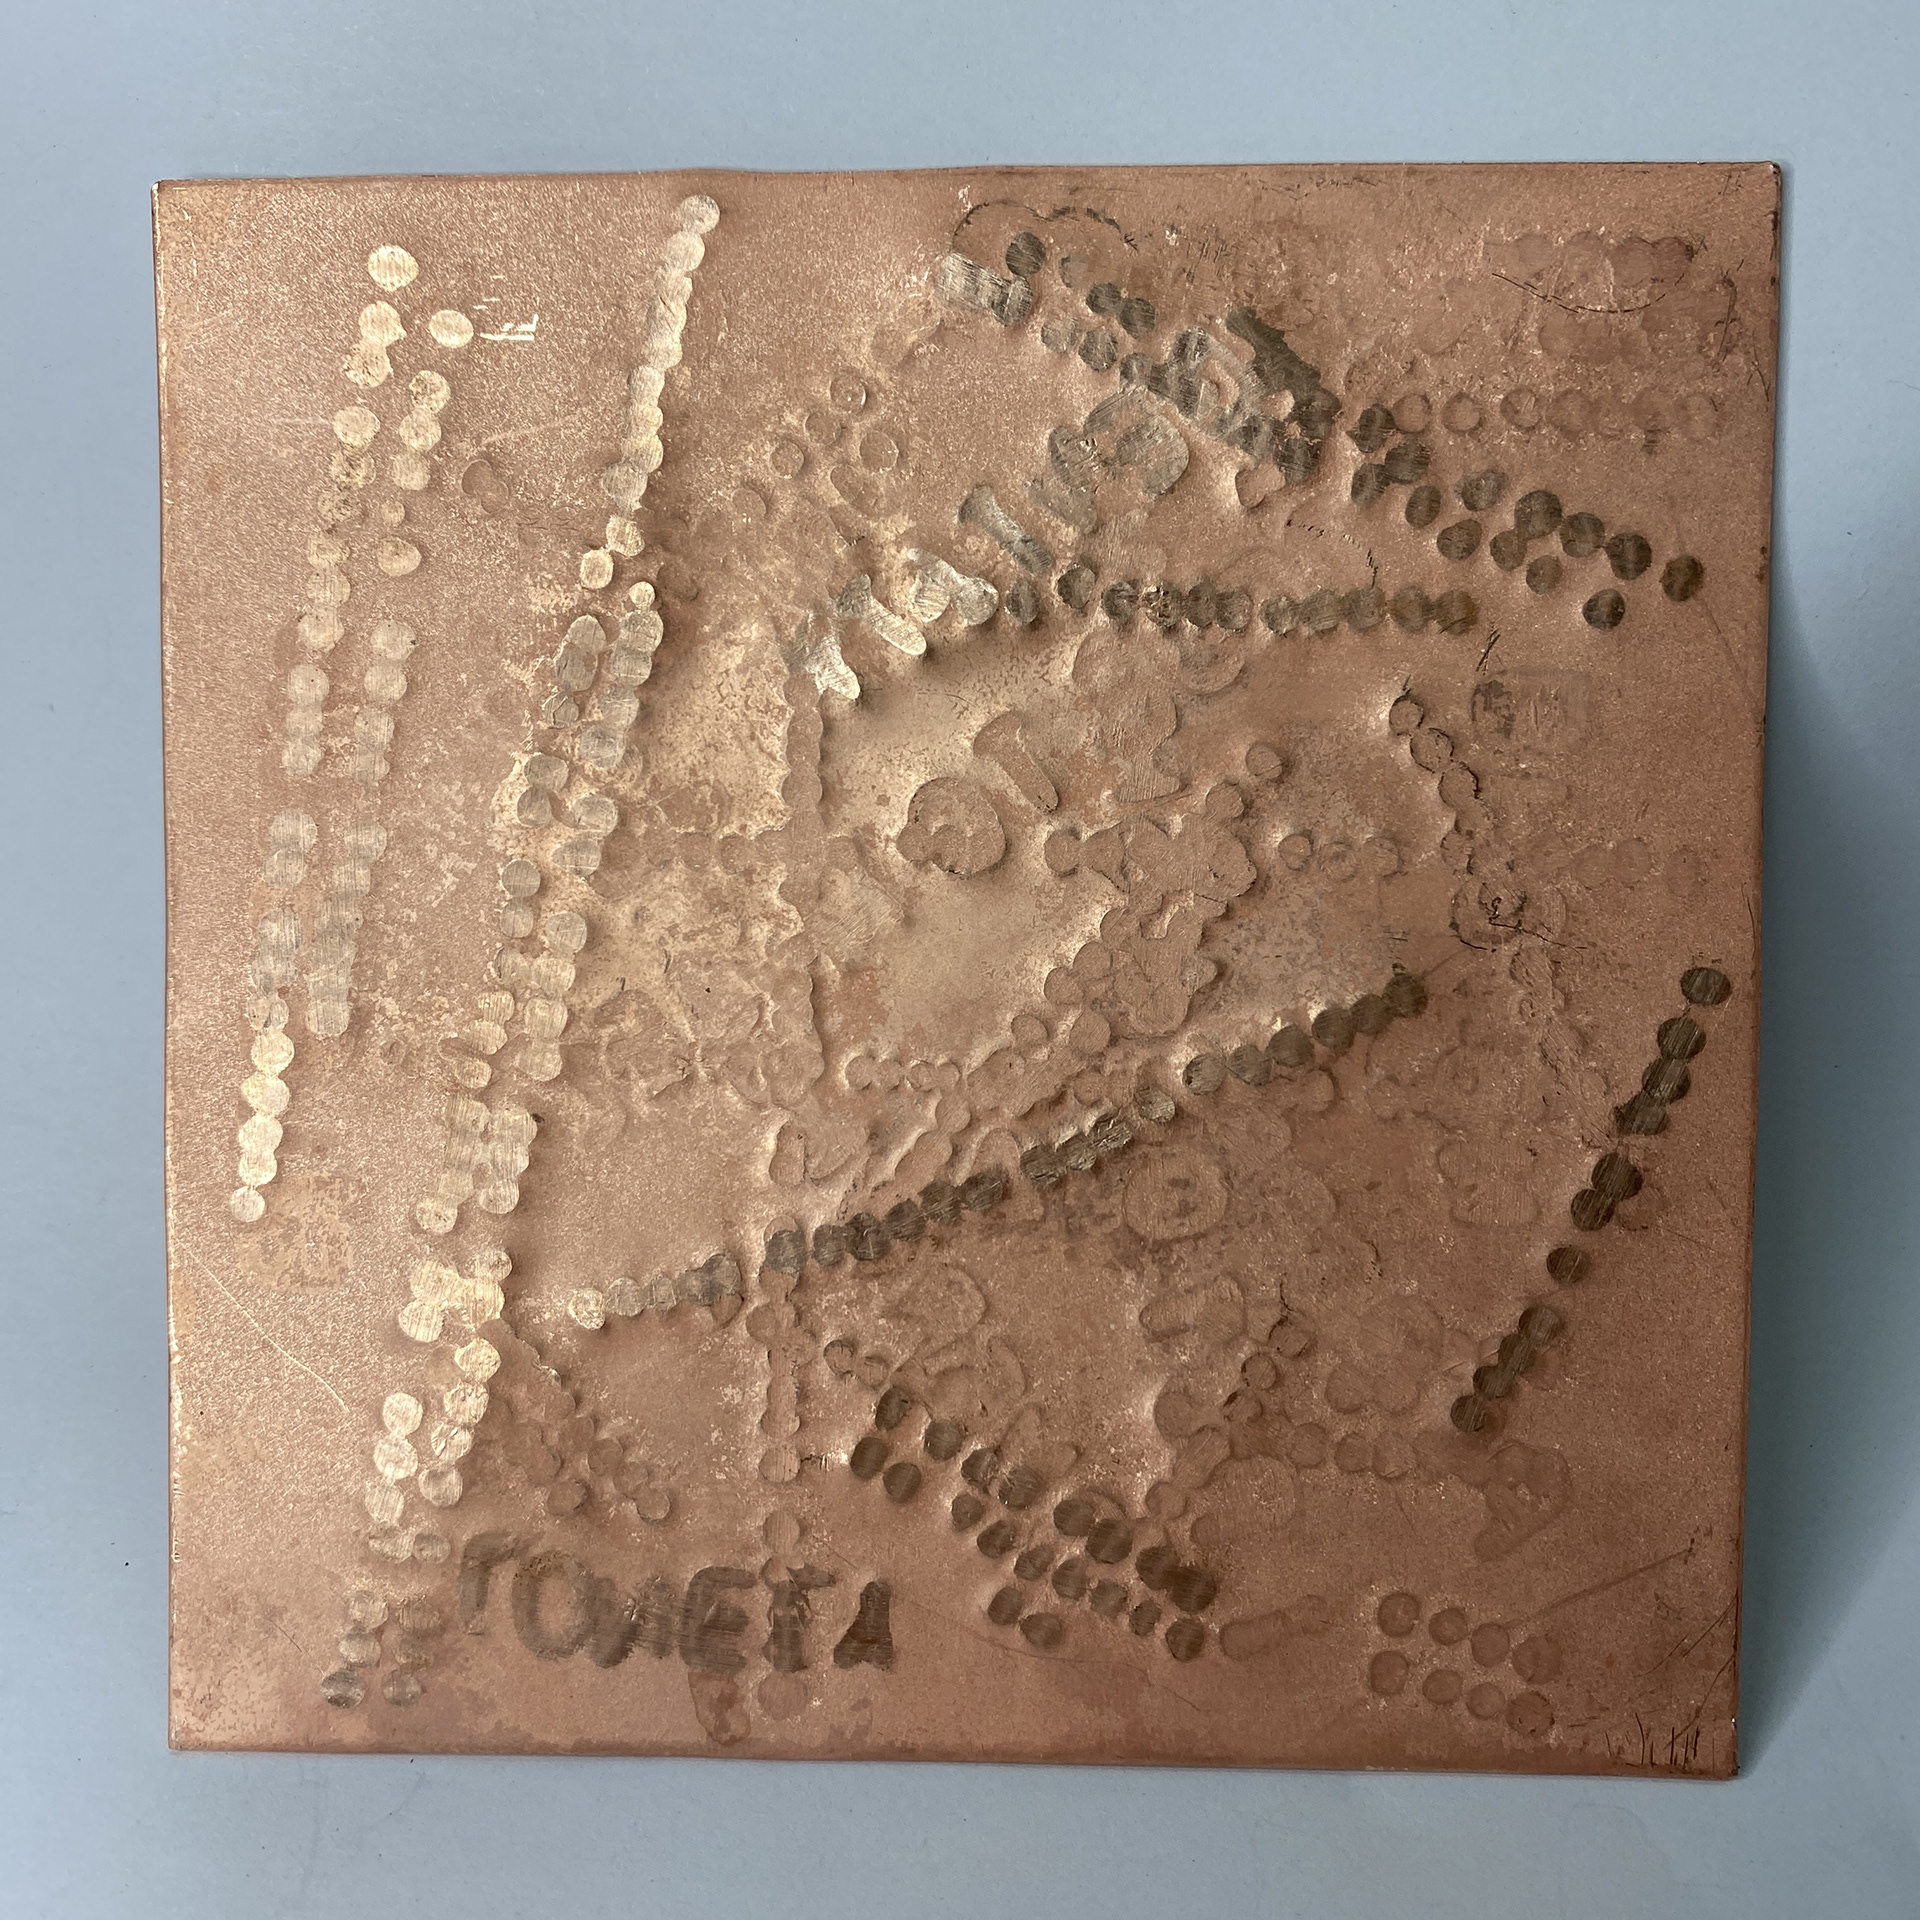
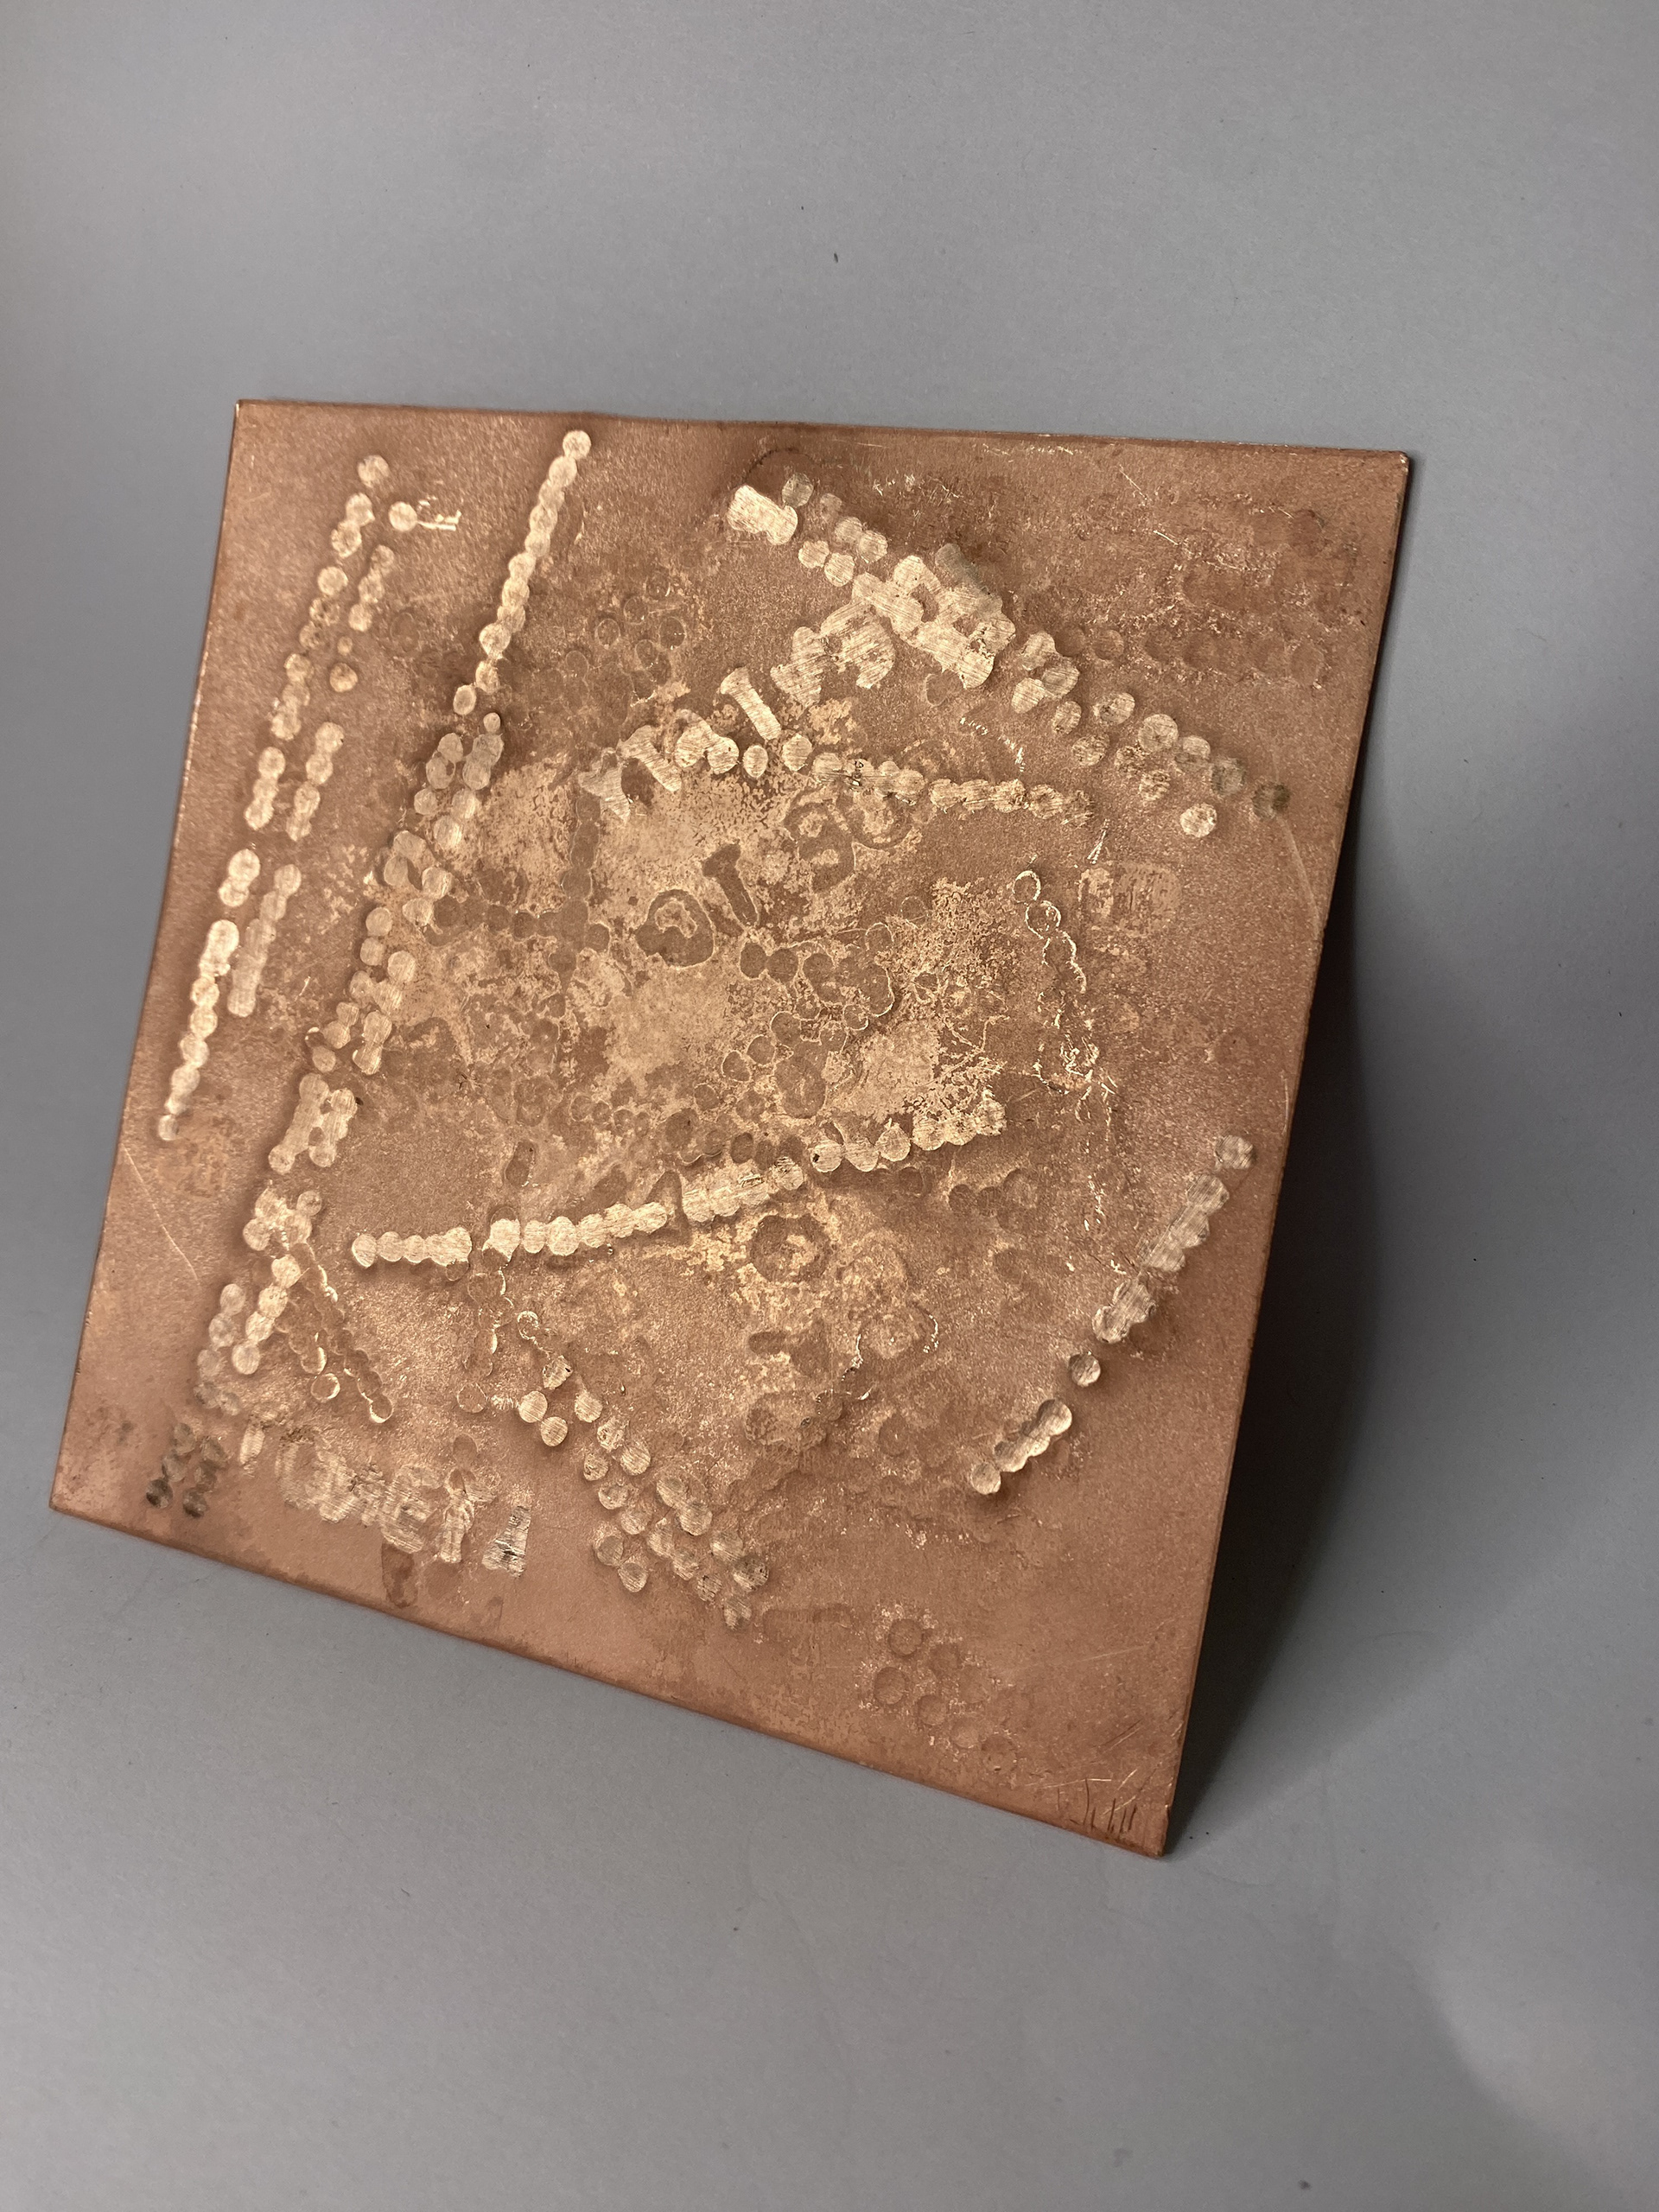
To construct the back piece, I took my diary phrases and stamped them into a 15 x 15cm sheet of 0.9mm copper. I used the larger stamps to print the key underlying themes throughout my diary and placed these down first so that the phrases would cover up and distorted them. I wrote the script in all directions and varied the spacing to create areas of high interference as well as negative space. I then cut these up into different sizes of rectangles keeping some words and phrases visible whilst others were disrupted and censored.
Deliverables
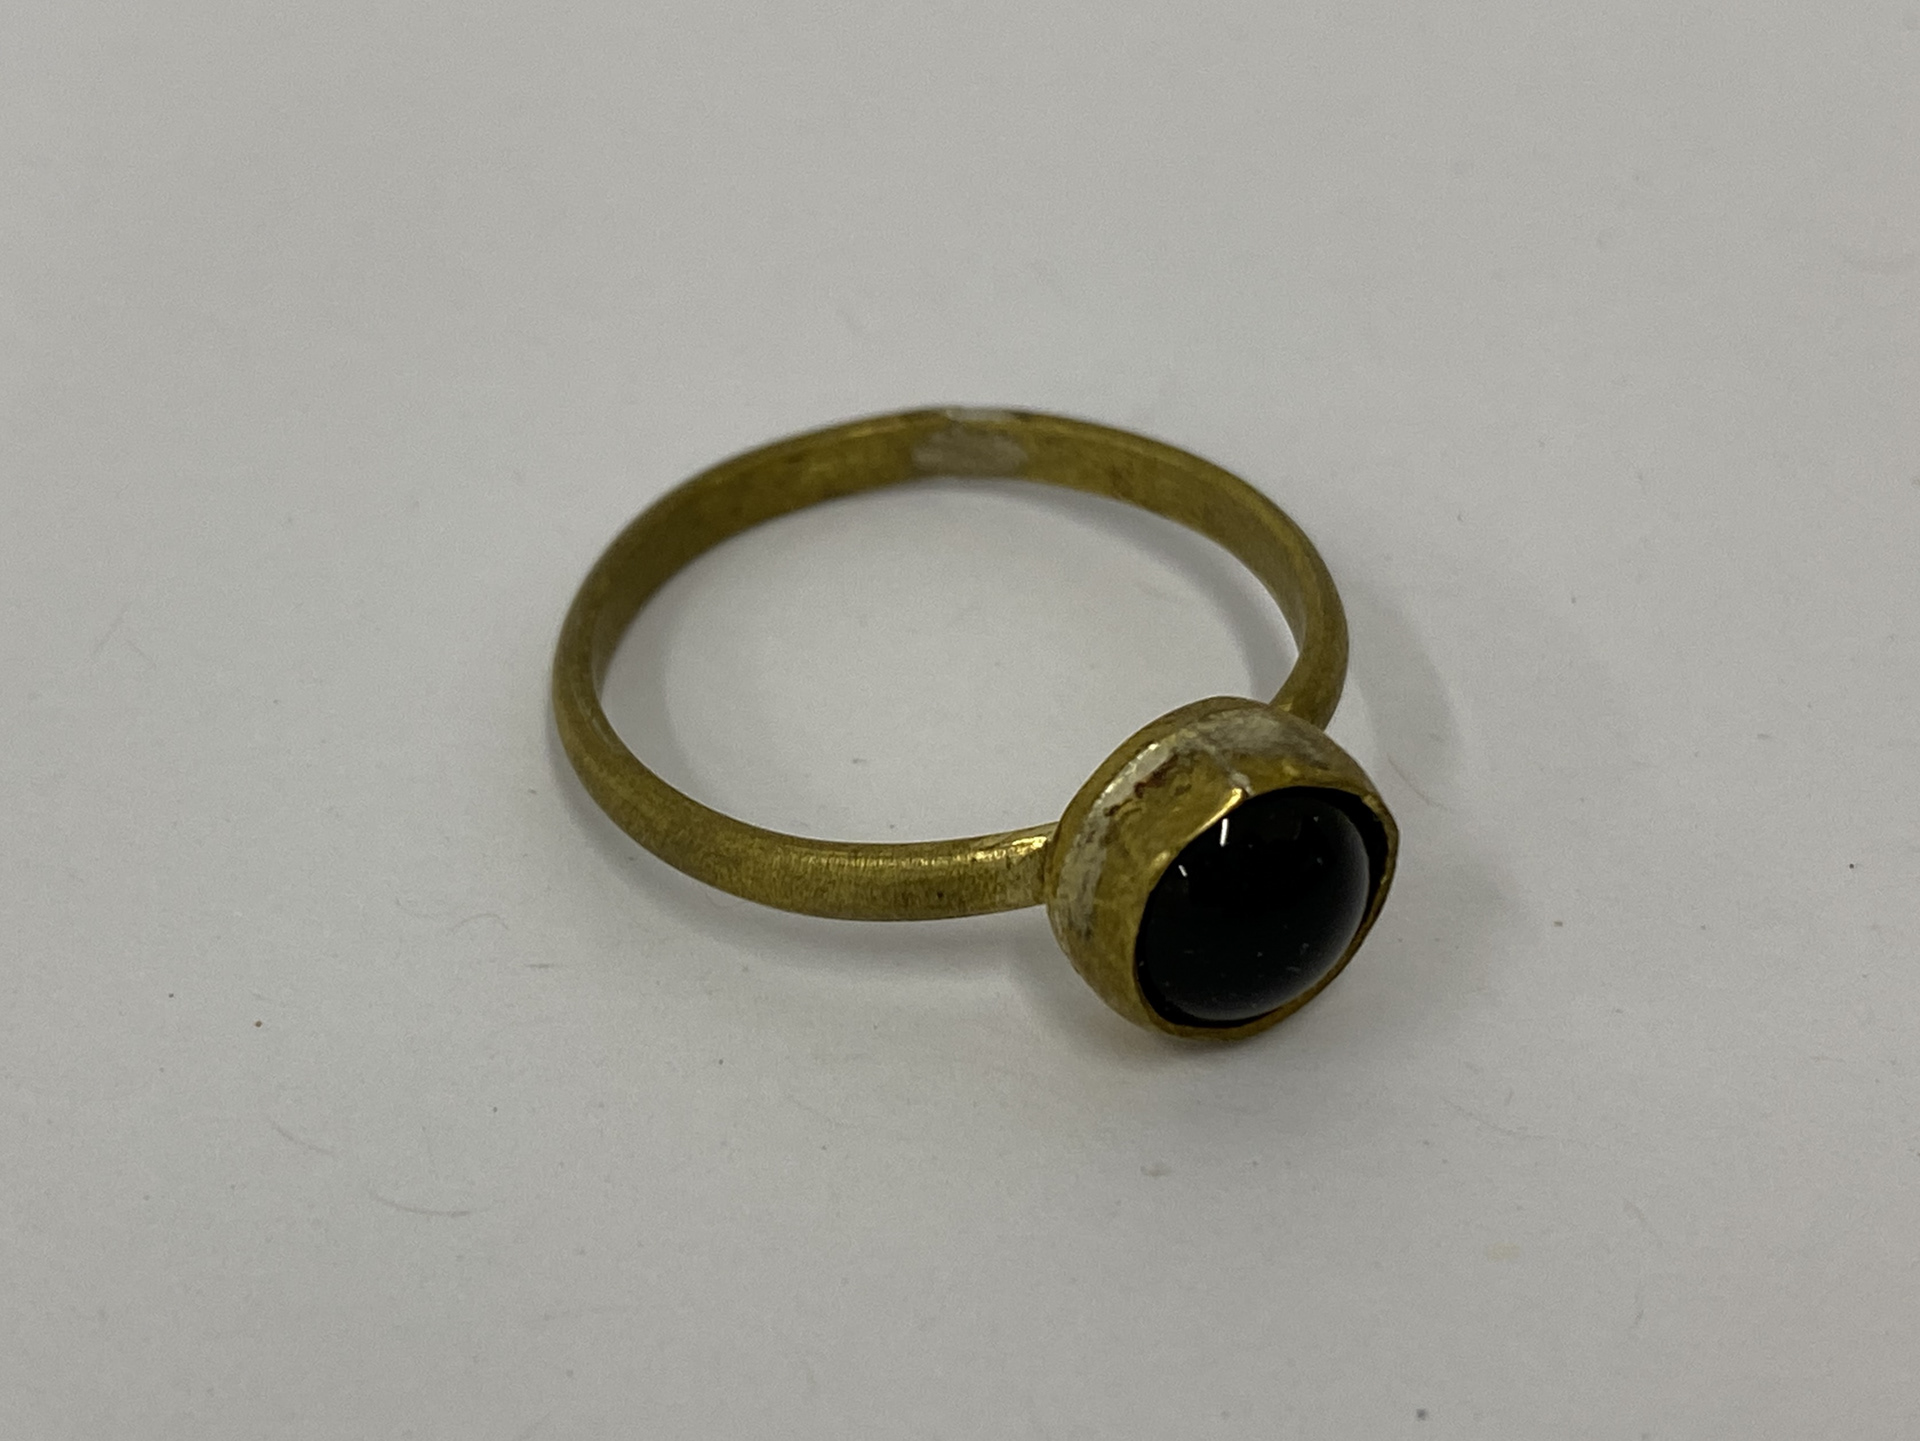
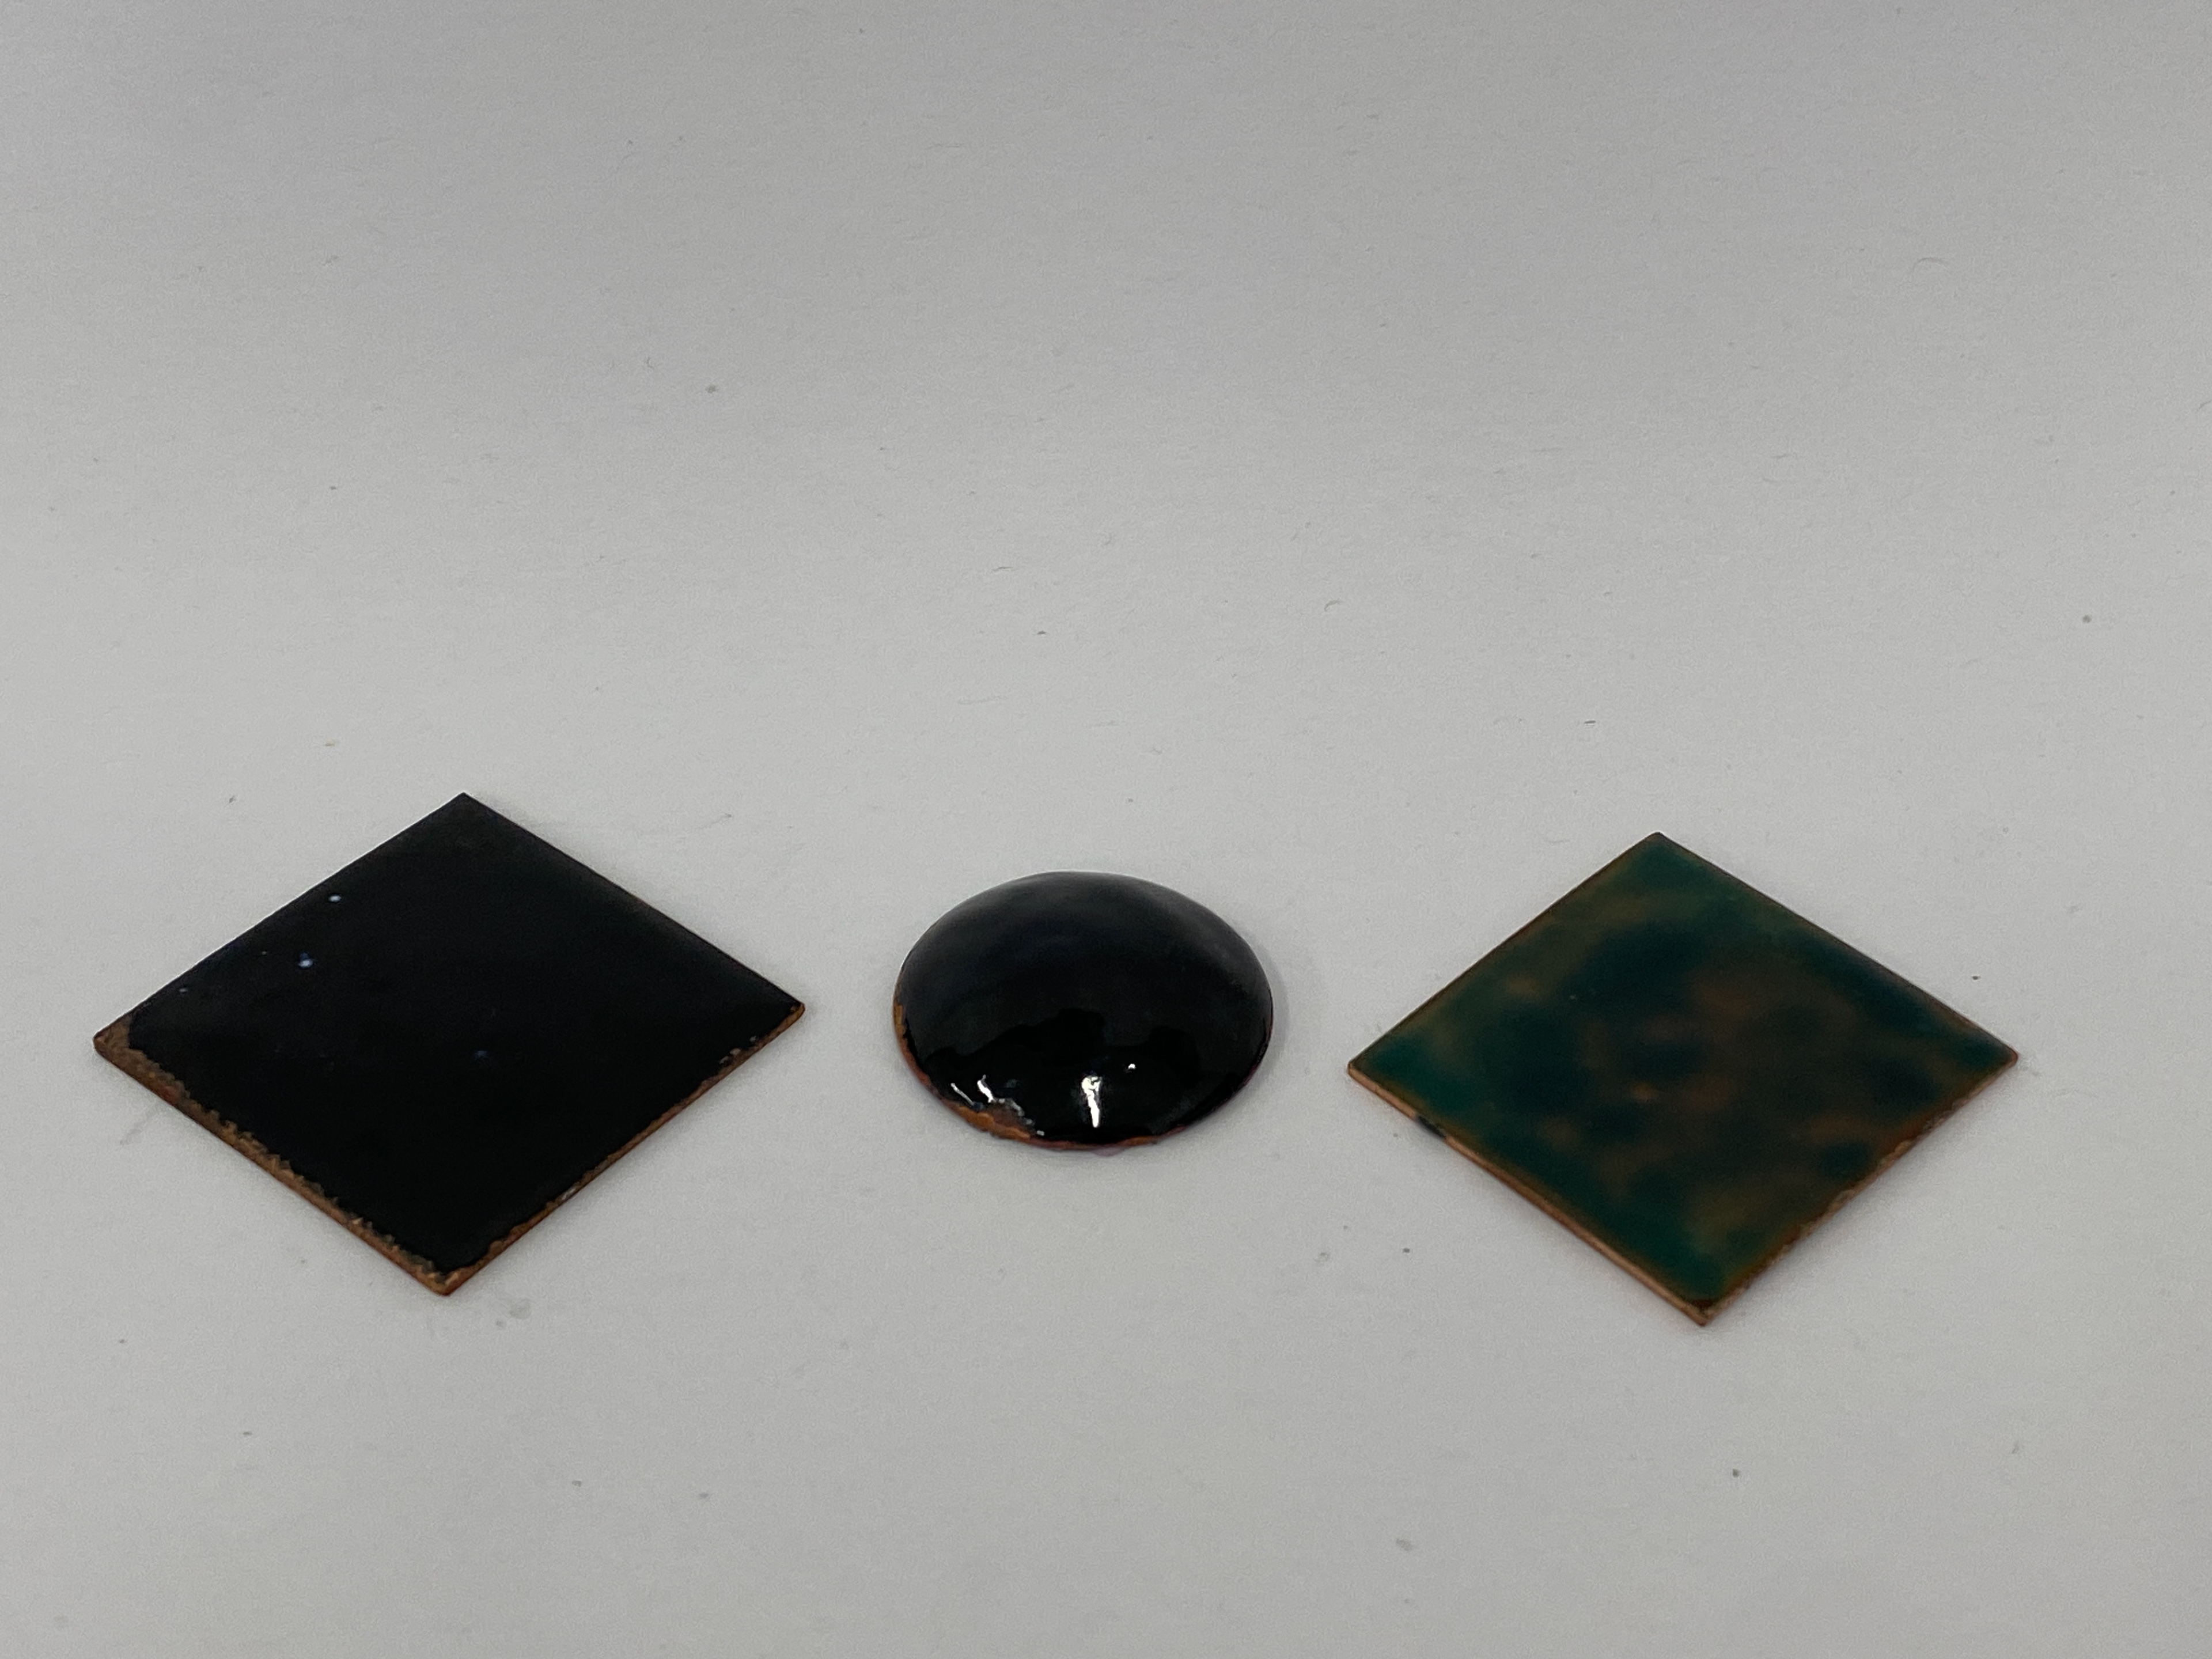
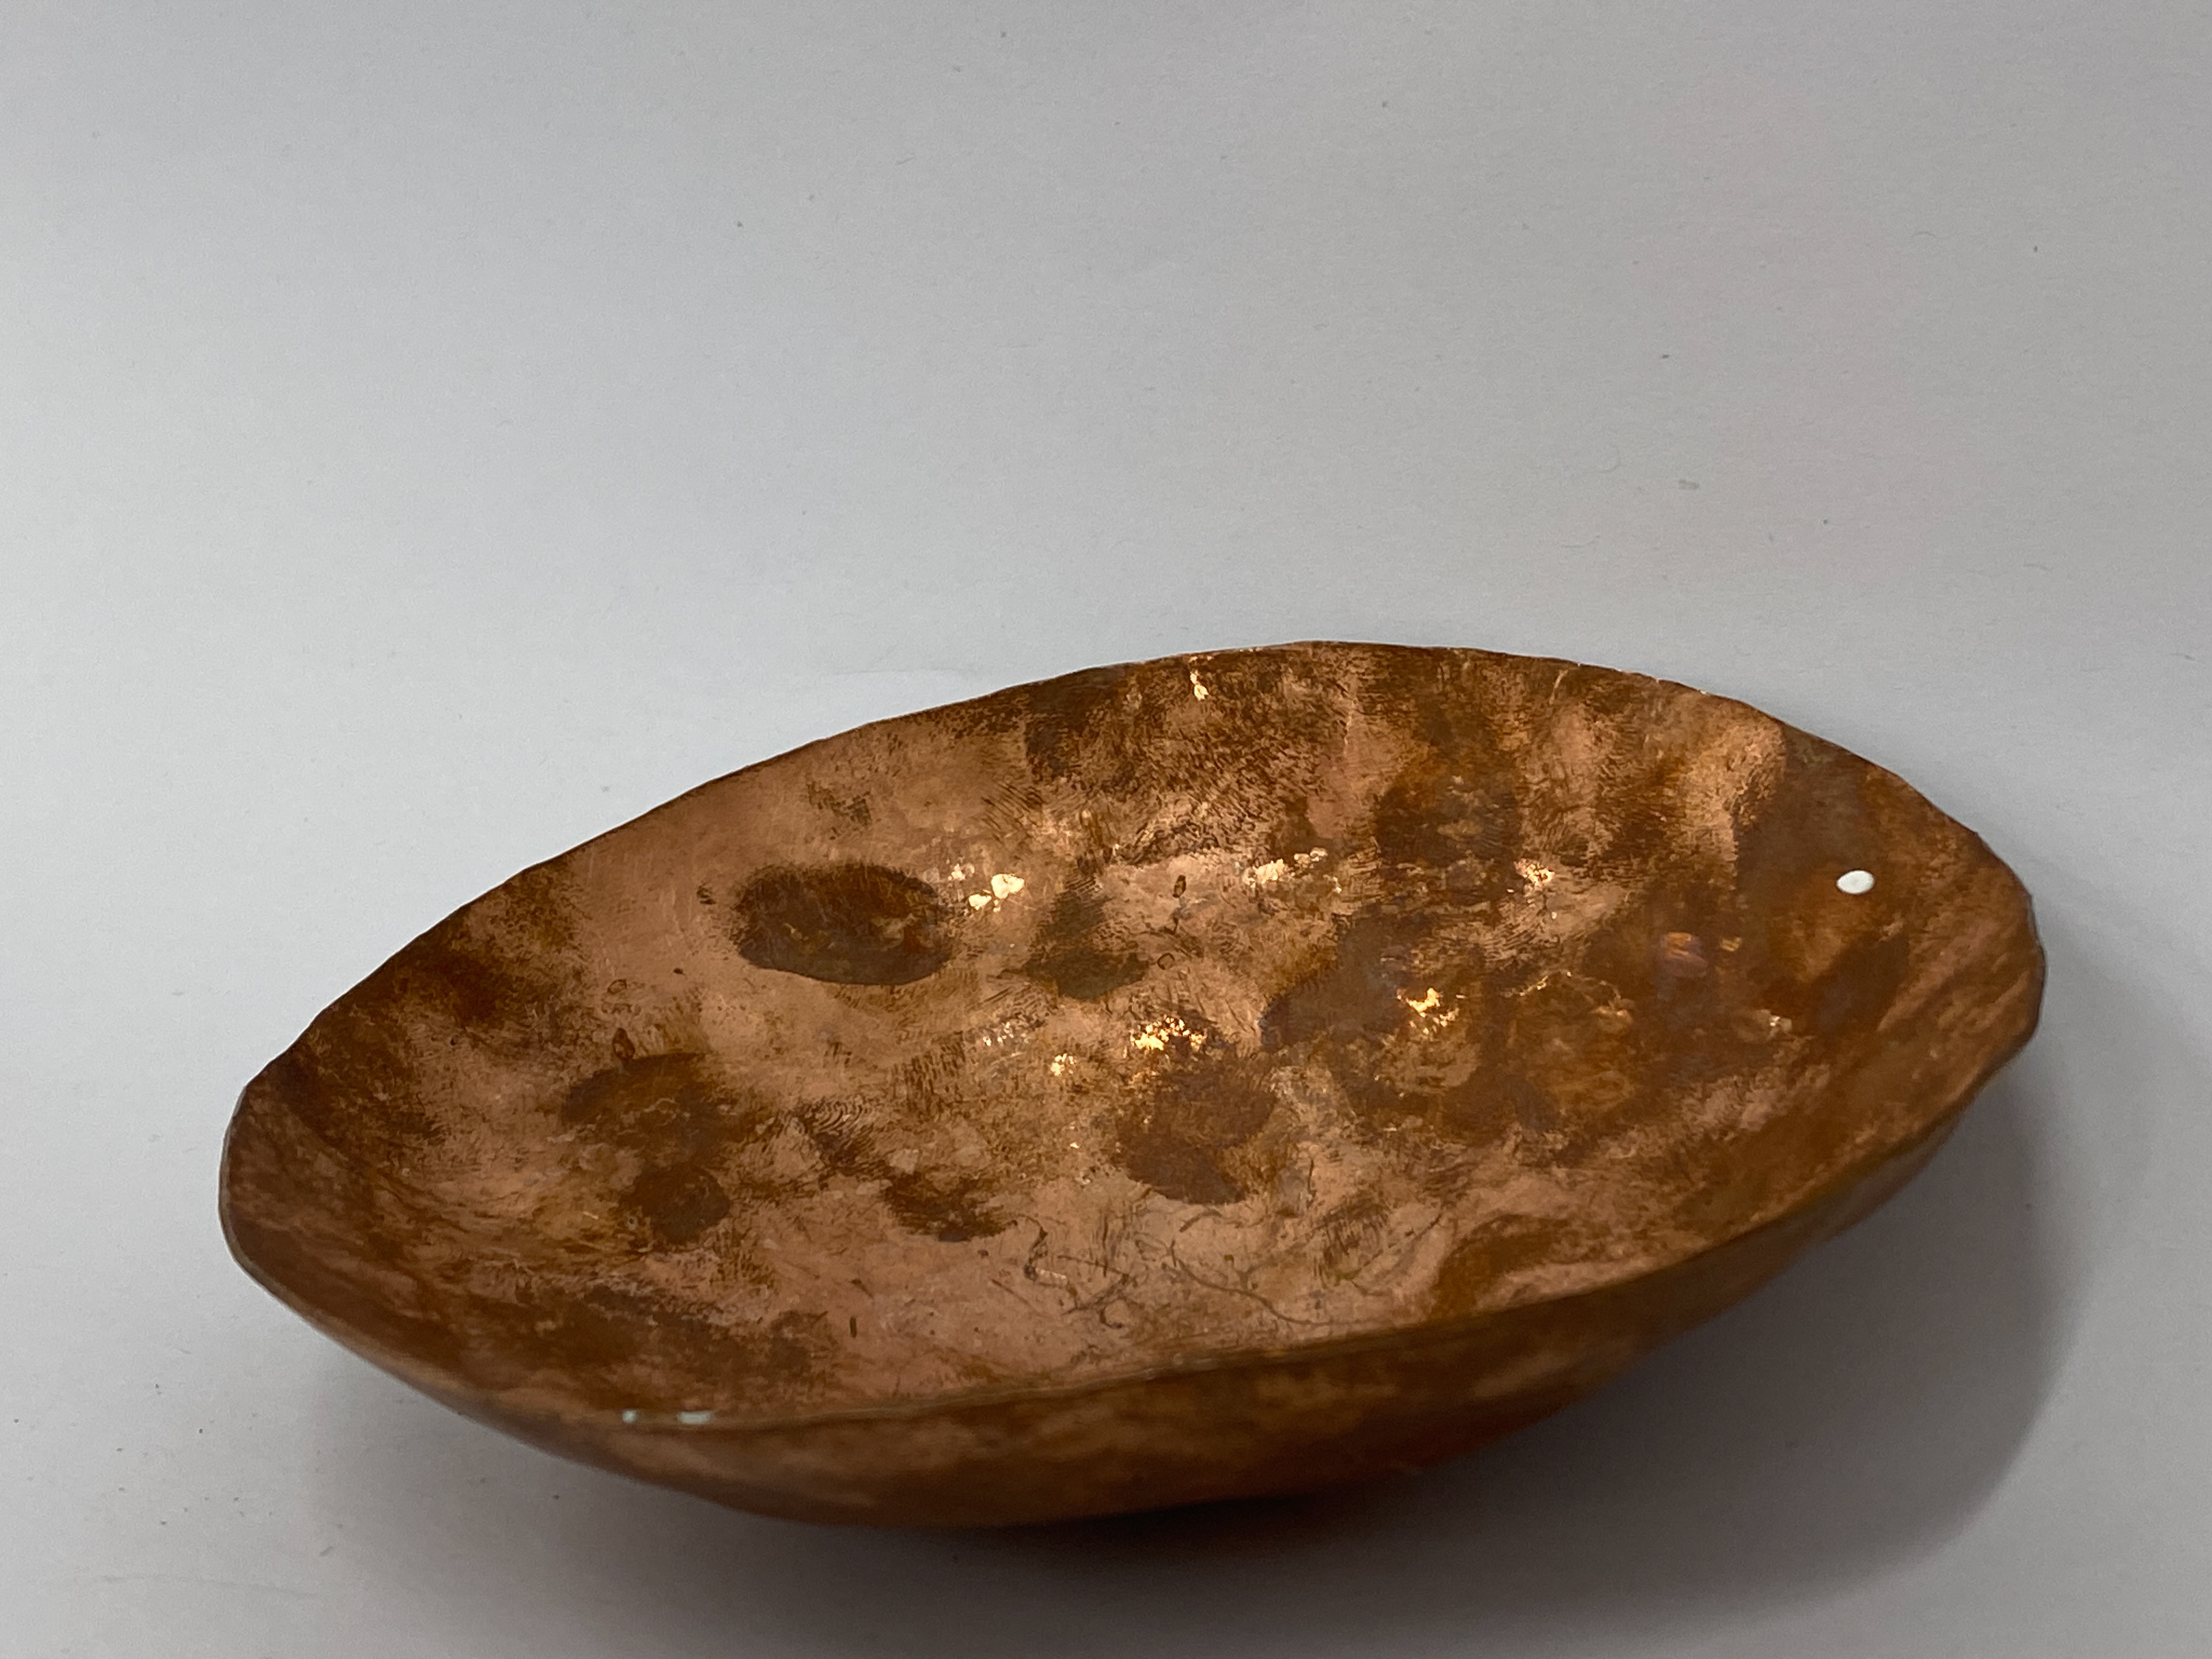
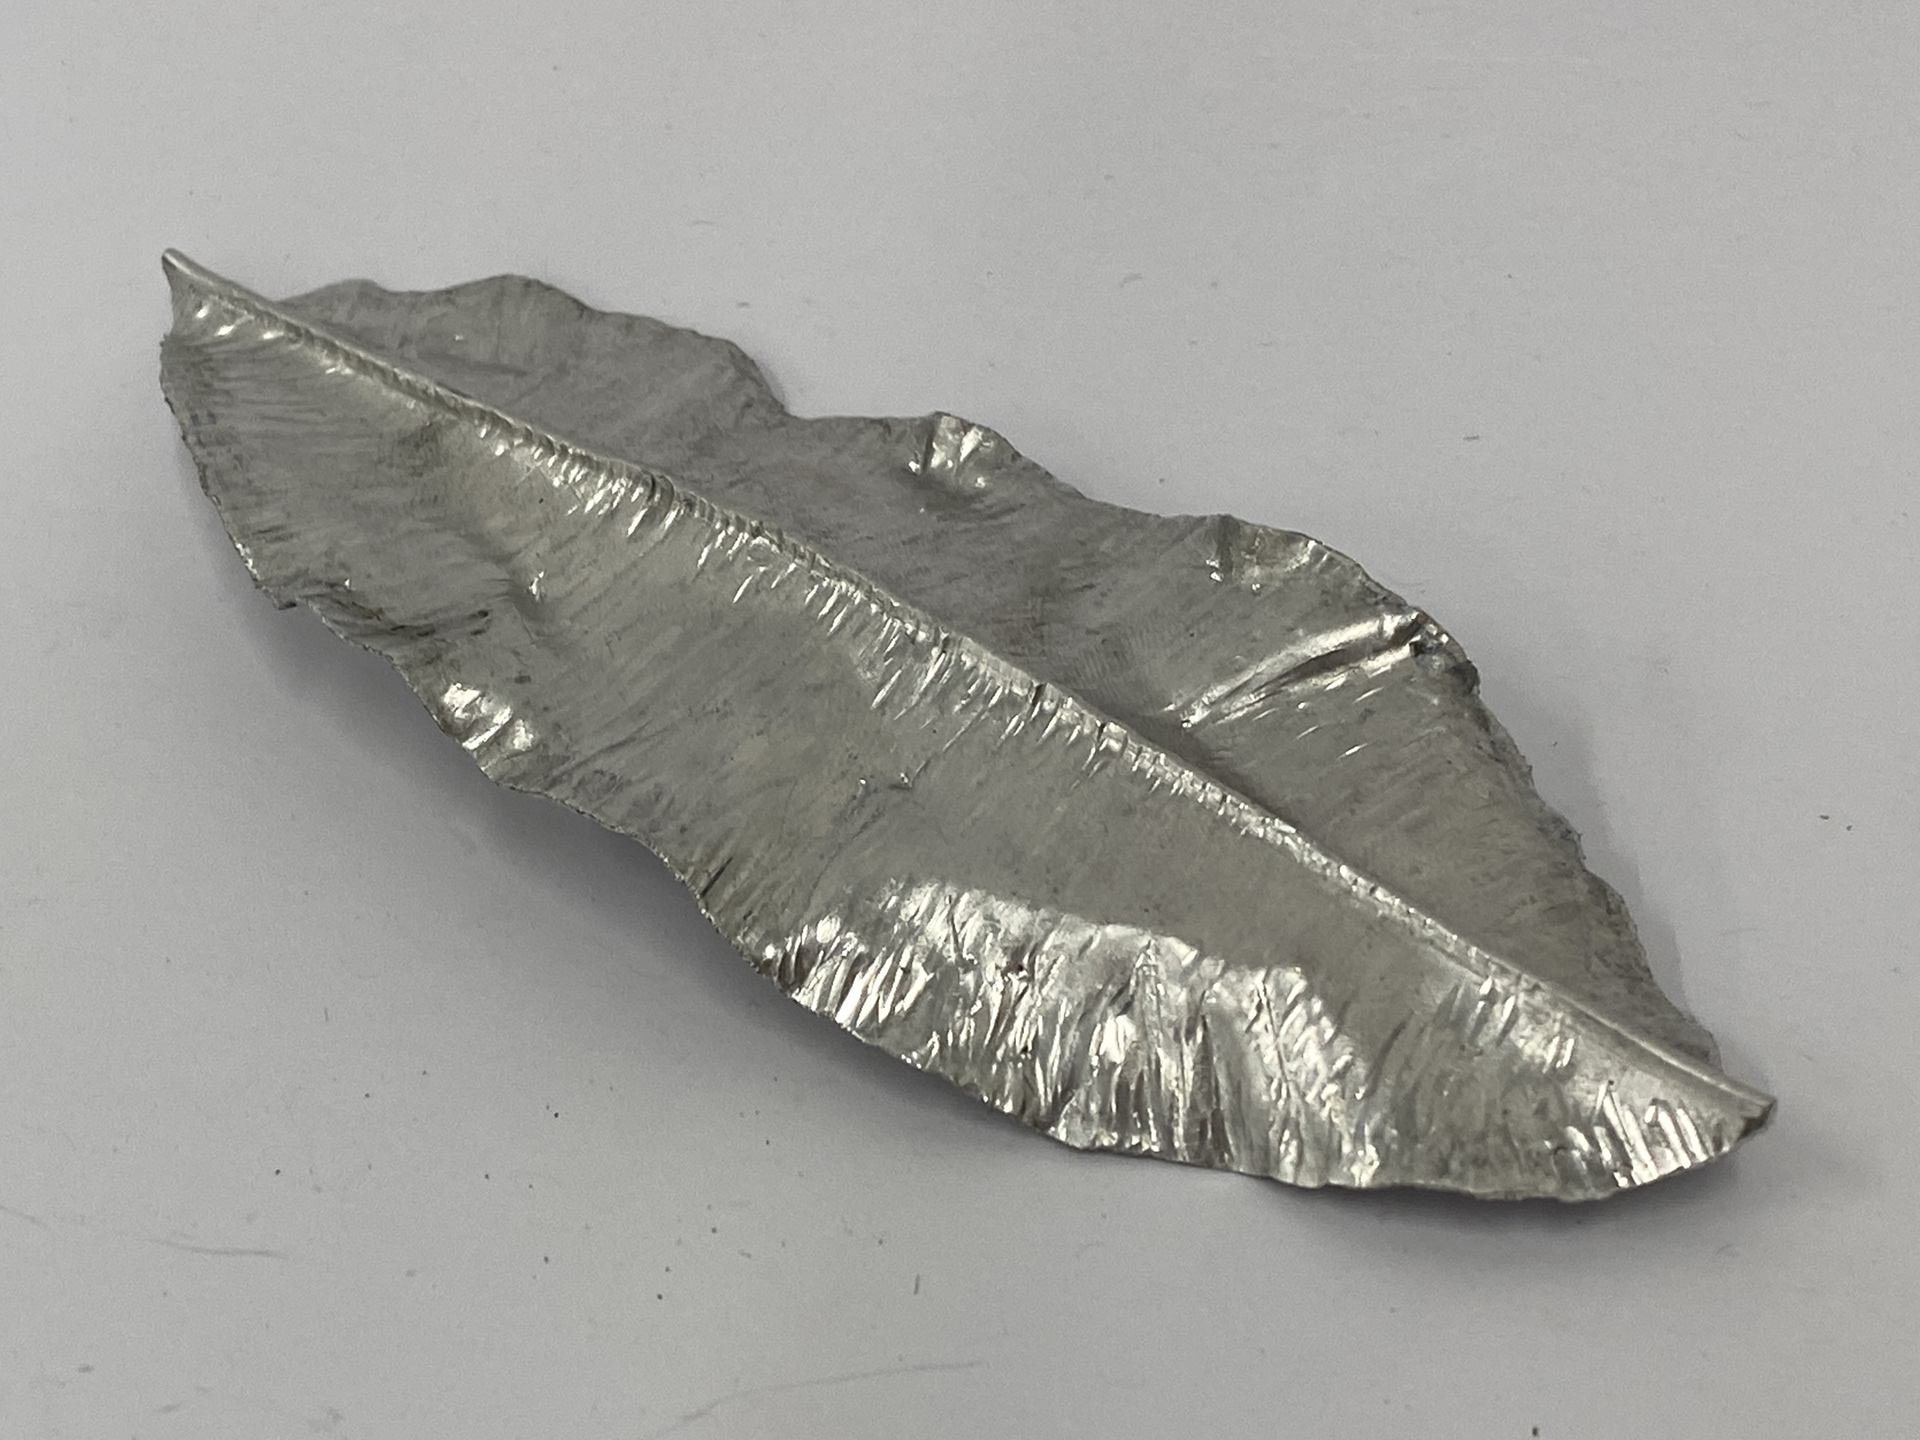
Throughout the unit we had technical workshops learning different skills: stone setting, enamelling, raising and fold forming. I focused on learning the techniques and order of process over refinement of outcome. I enjoyed the fold forming and raising process and would like to develop these skills further in my practice.