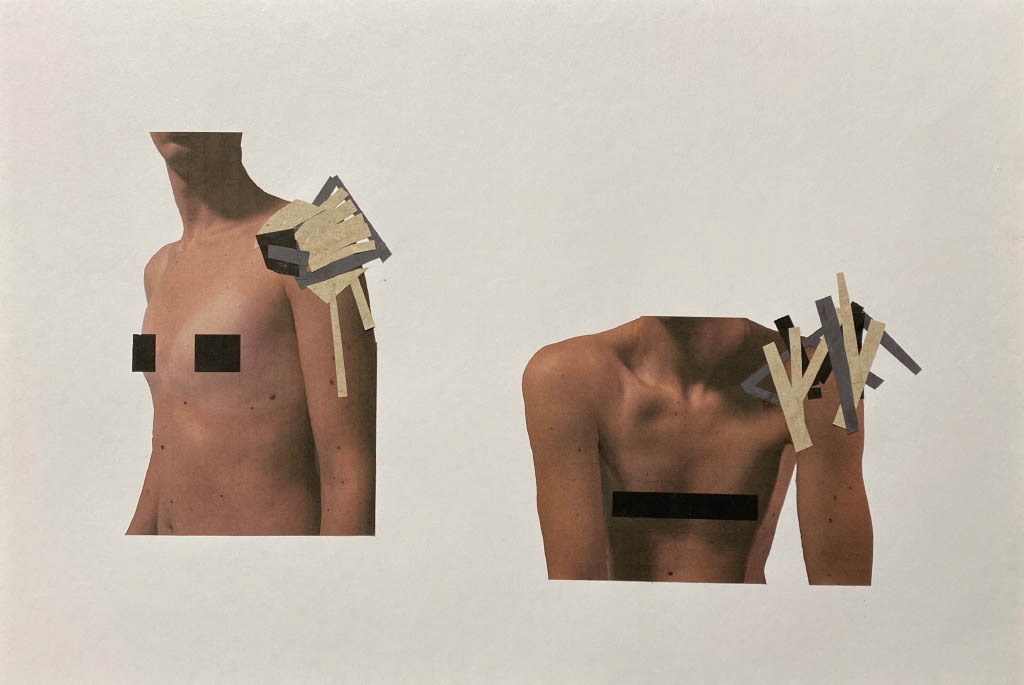
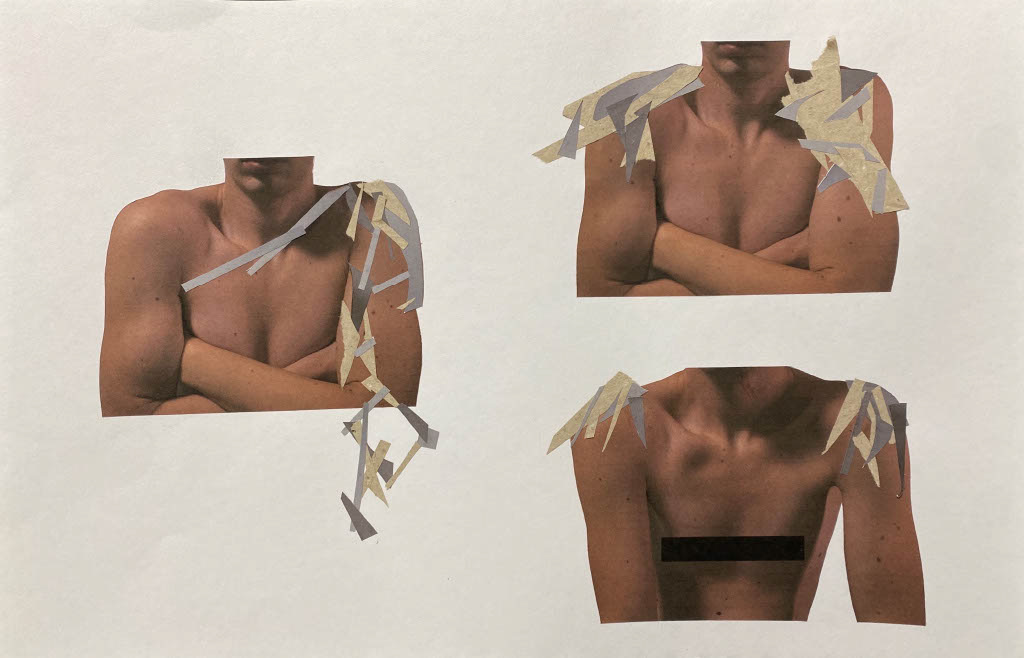
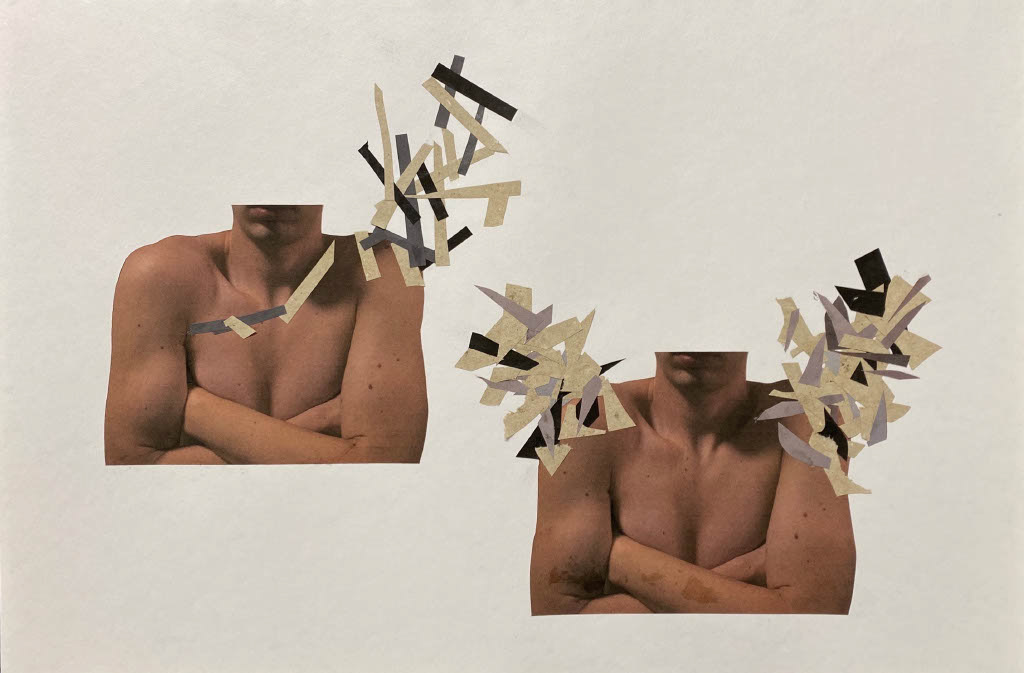
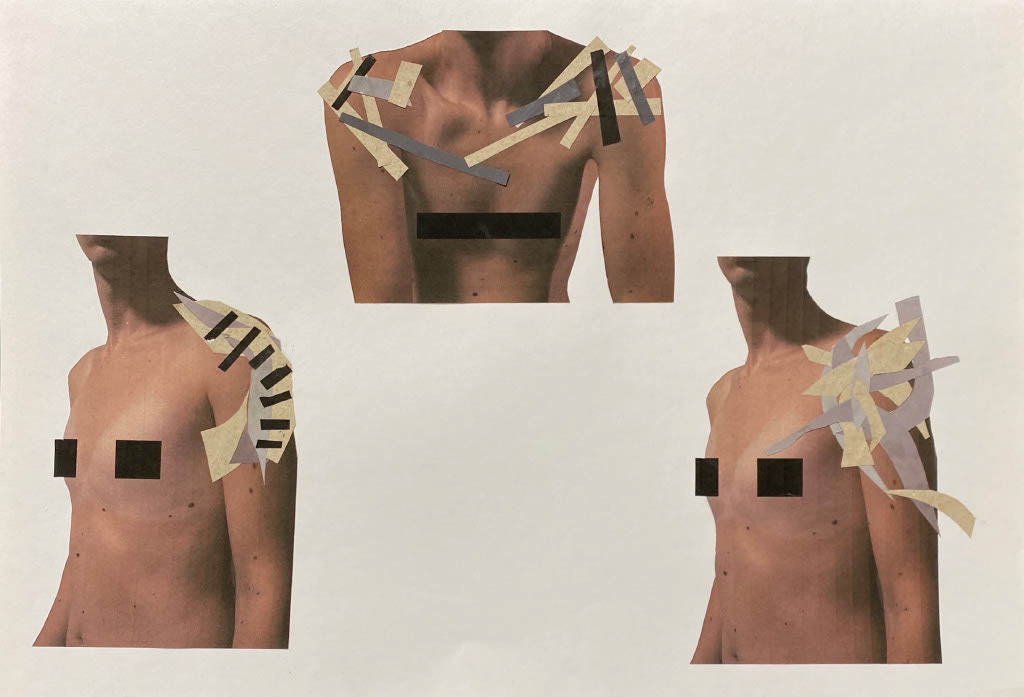
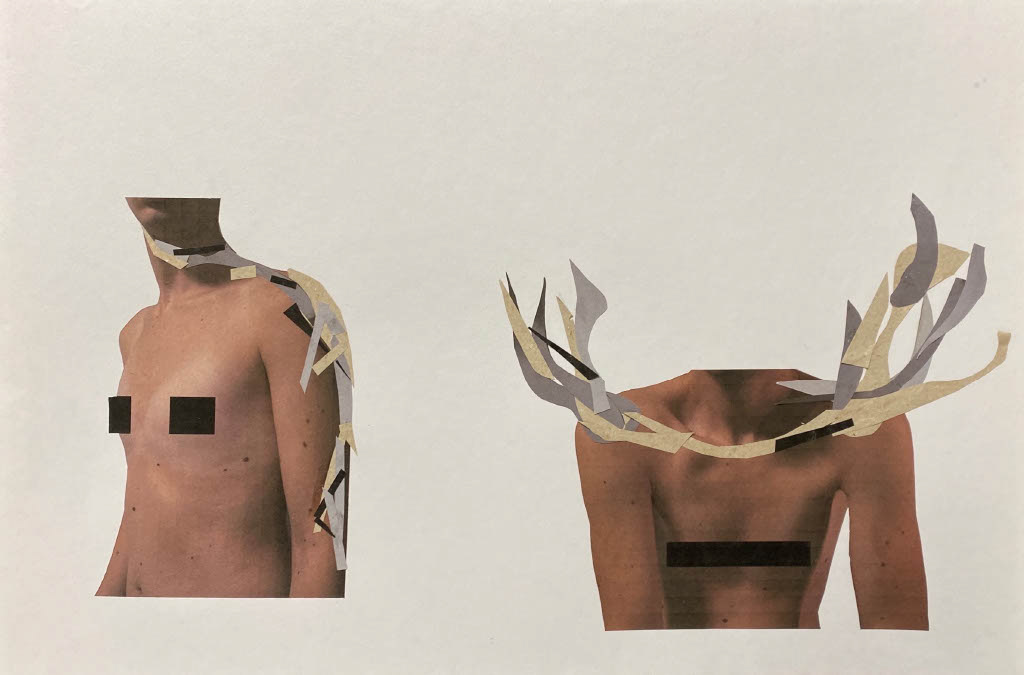
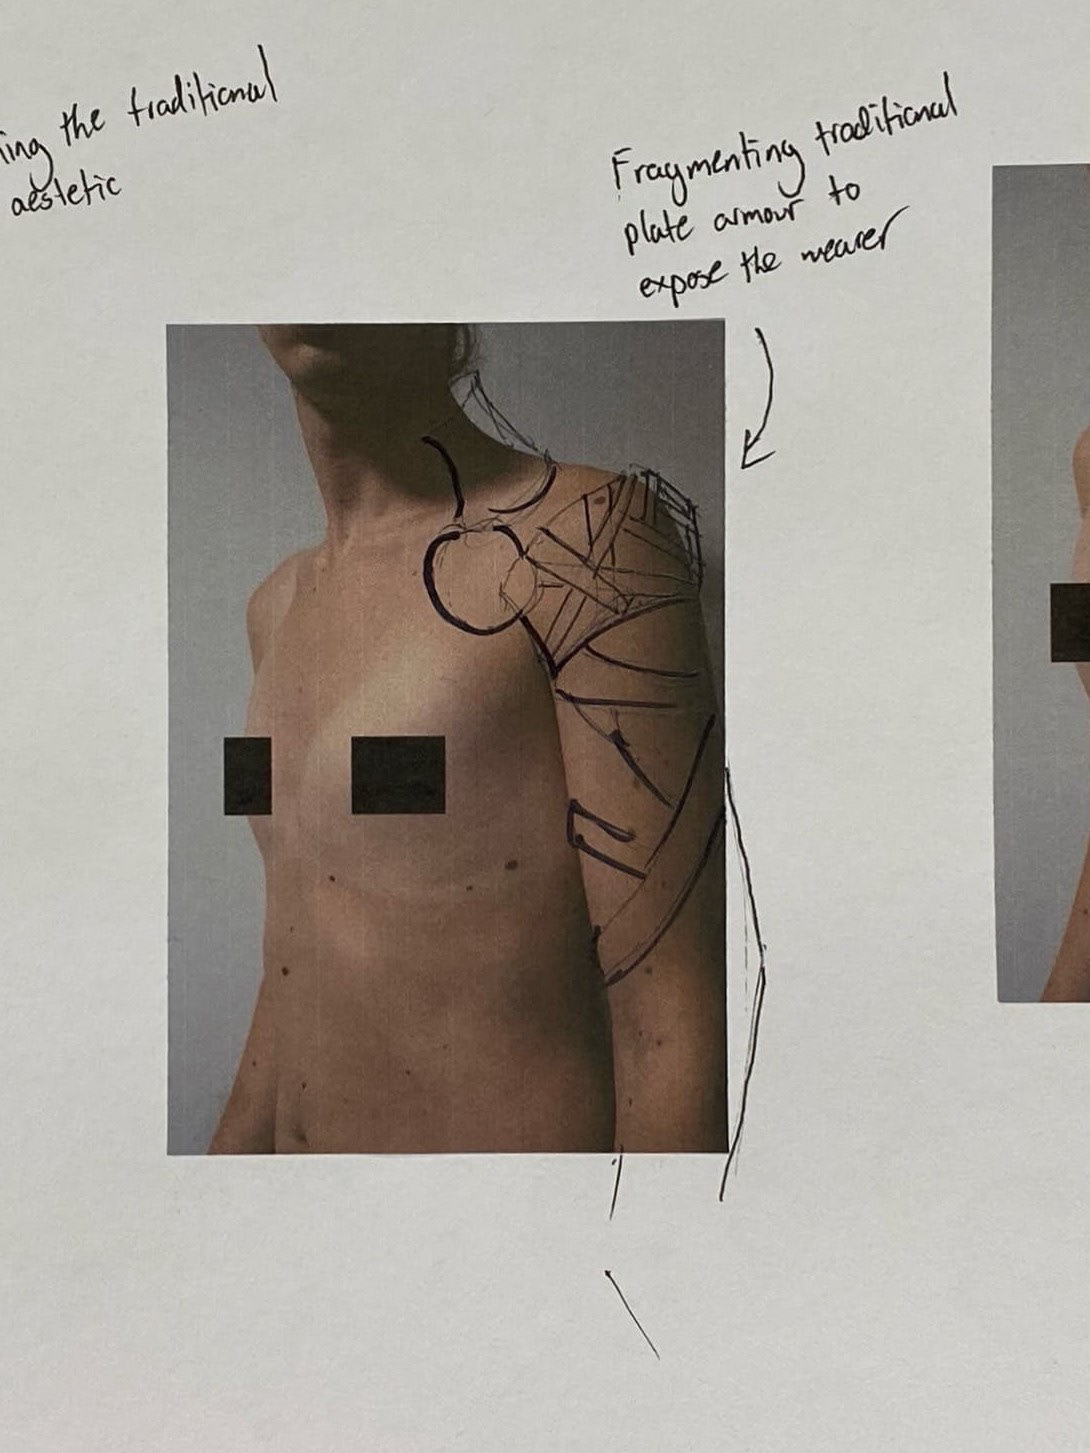
Reflecting on my design intentions and initial collages from Understanding Context 1, I want to take a few key areas forwards. The first is the choice of the shoulder as a location. This is one of the ways I want to explore our relationship with the body and challenge our own vulnerabilities. In my collages I looked at the impacts of covering and exposing the shoulder. I feel that the most effective designs looked at emphasising the size and breadth of the shoulder, drawing attention through form and detail.
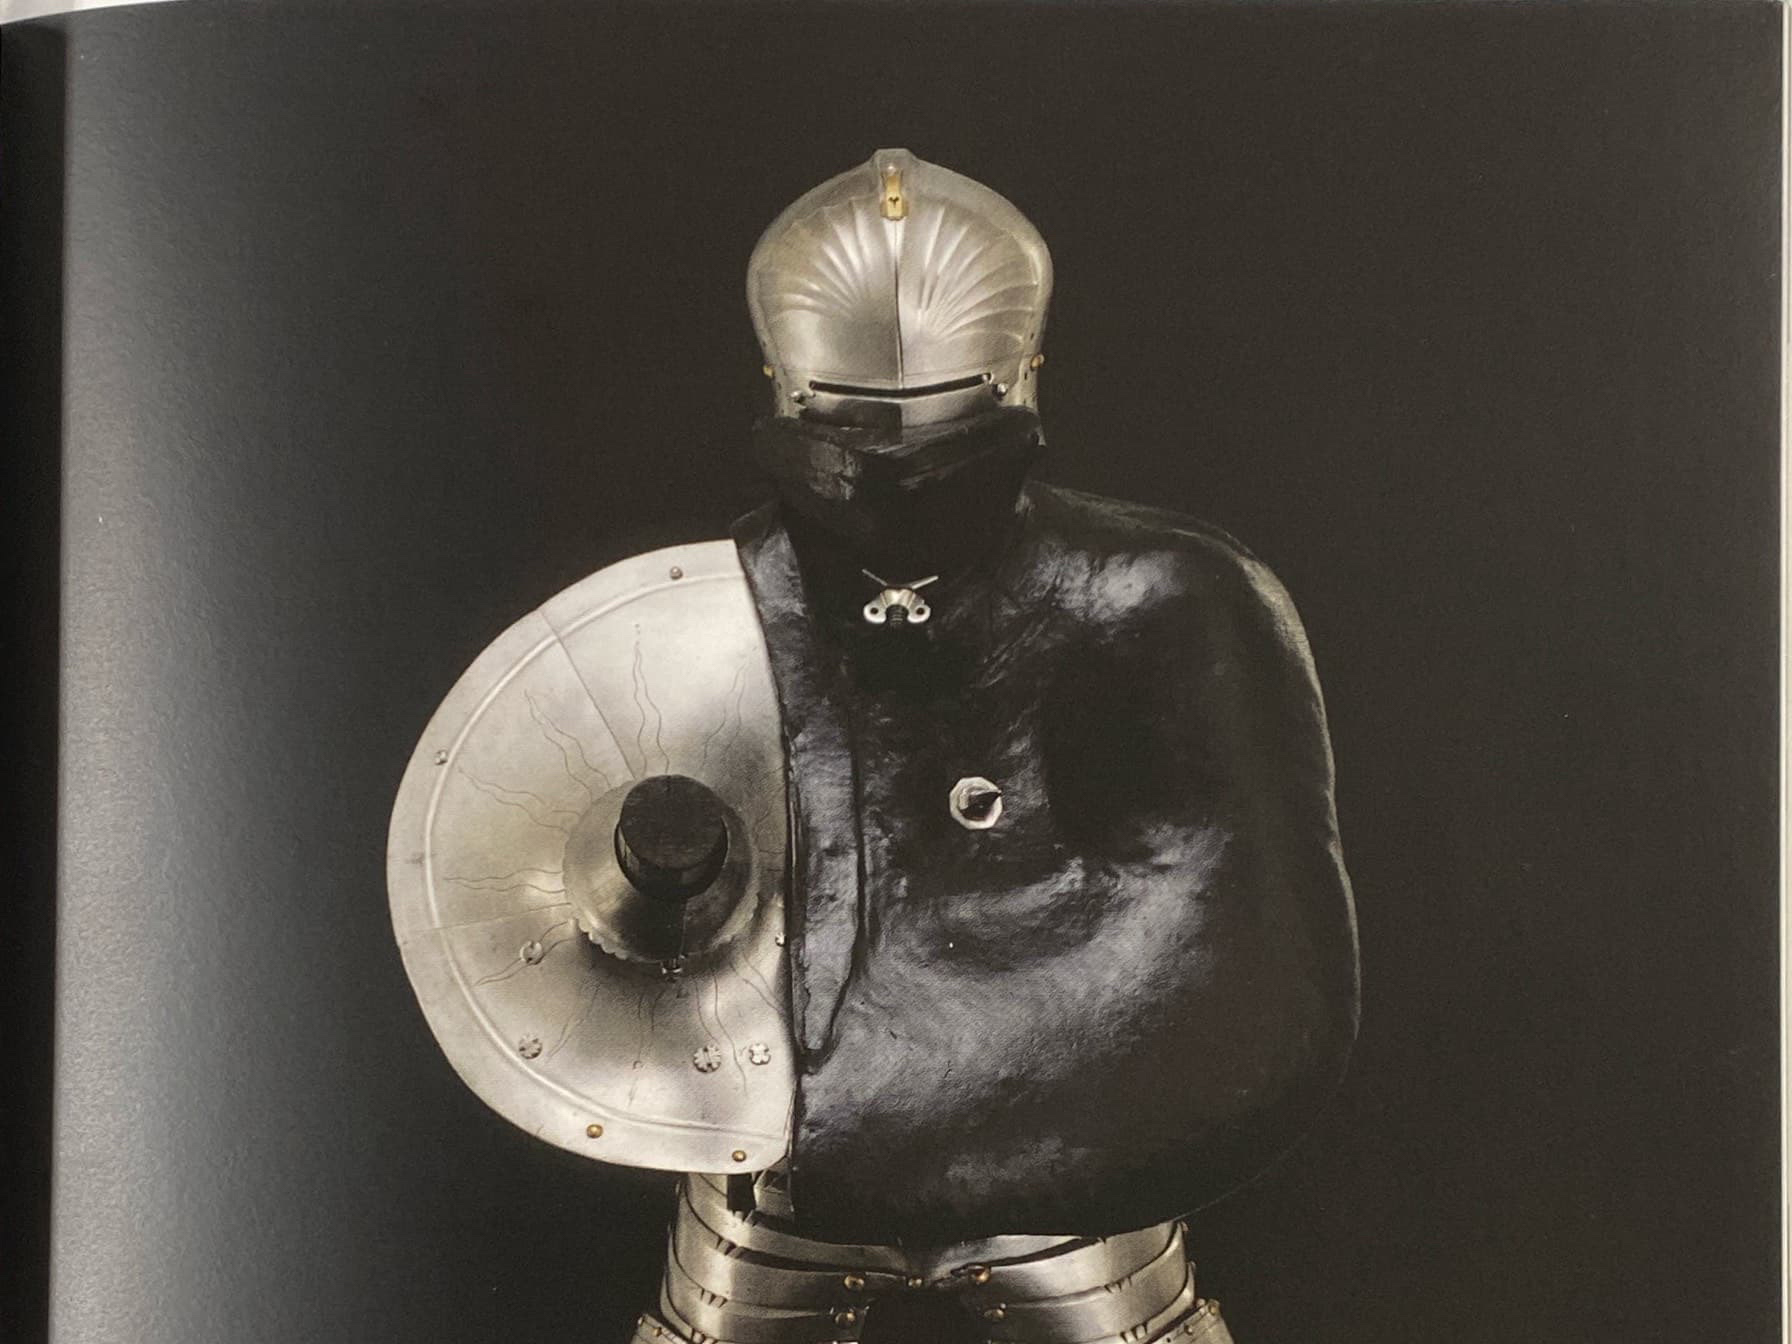
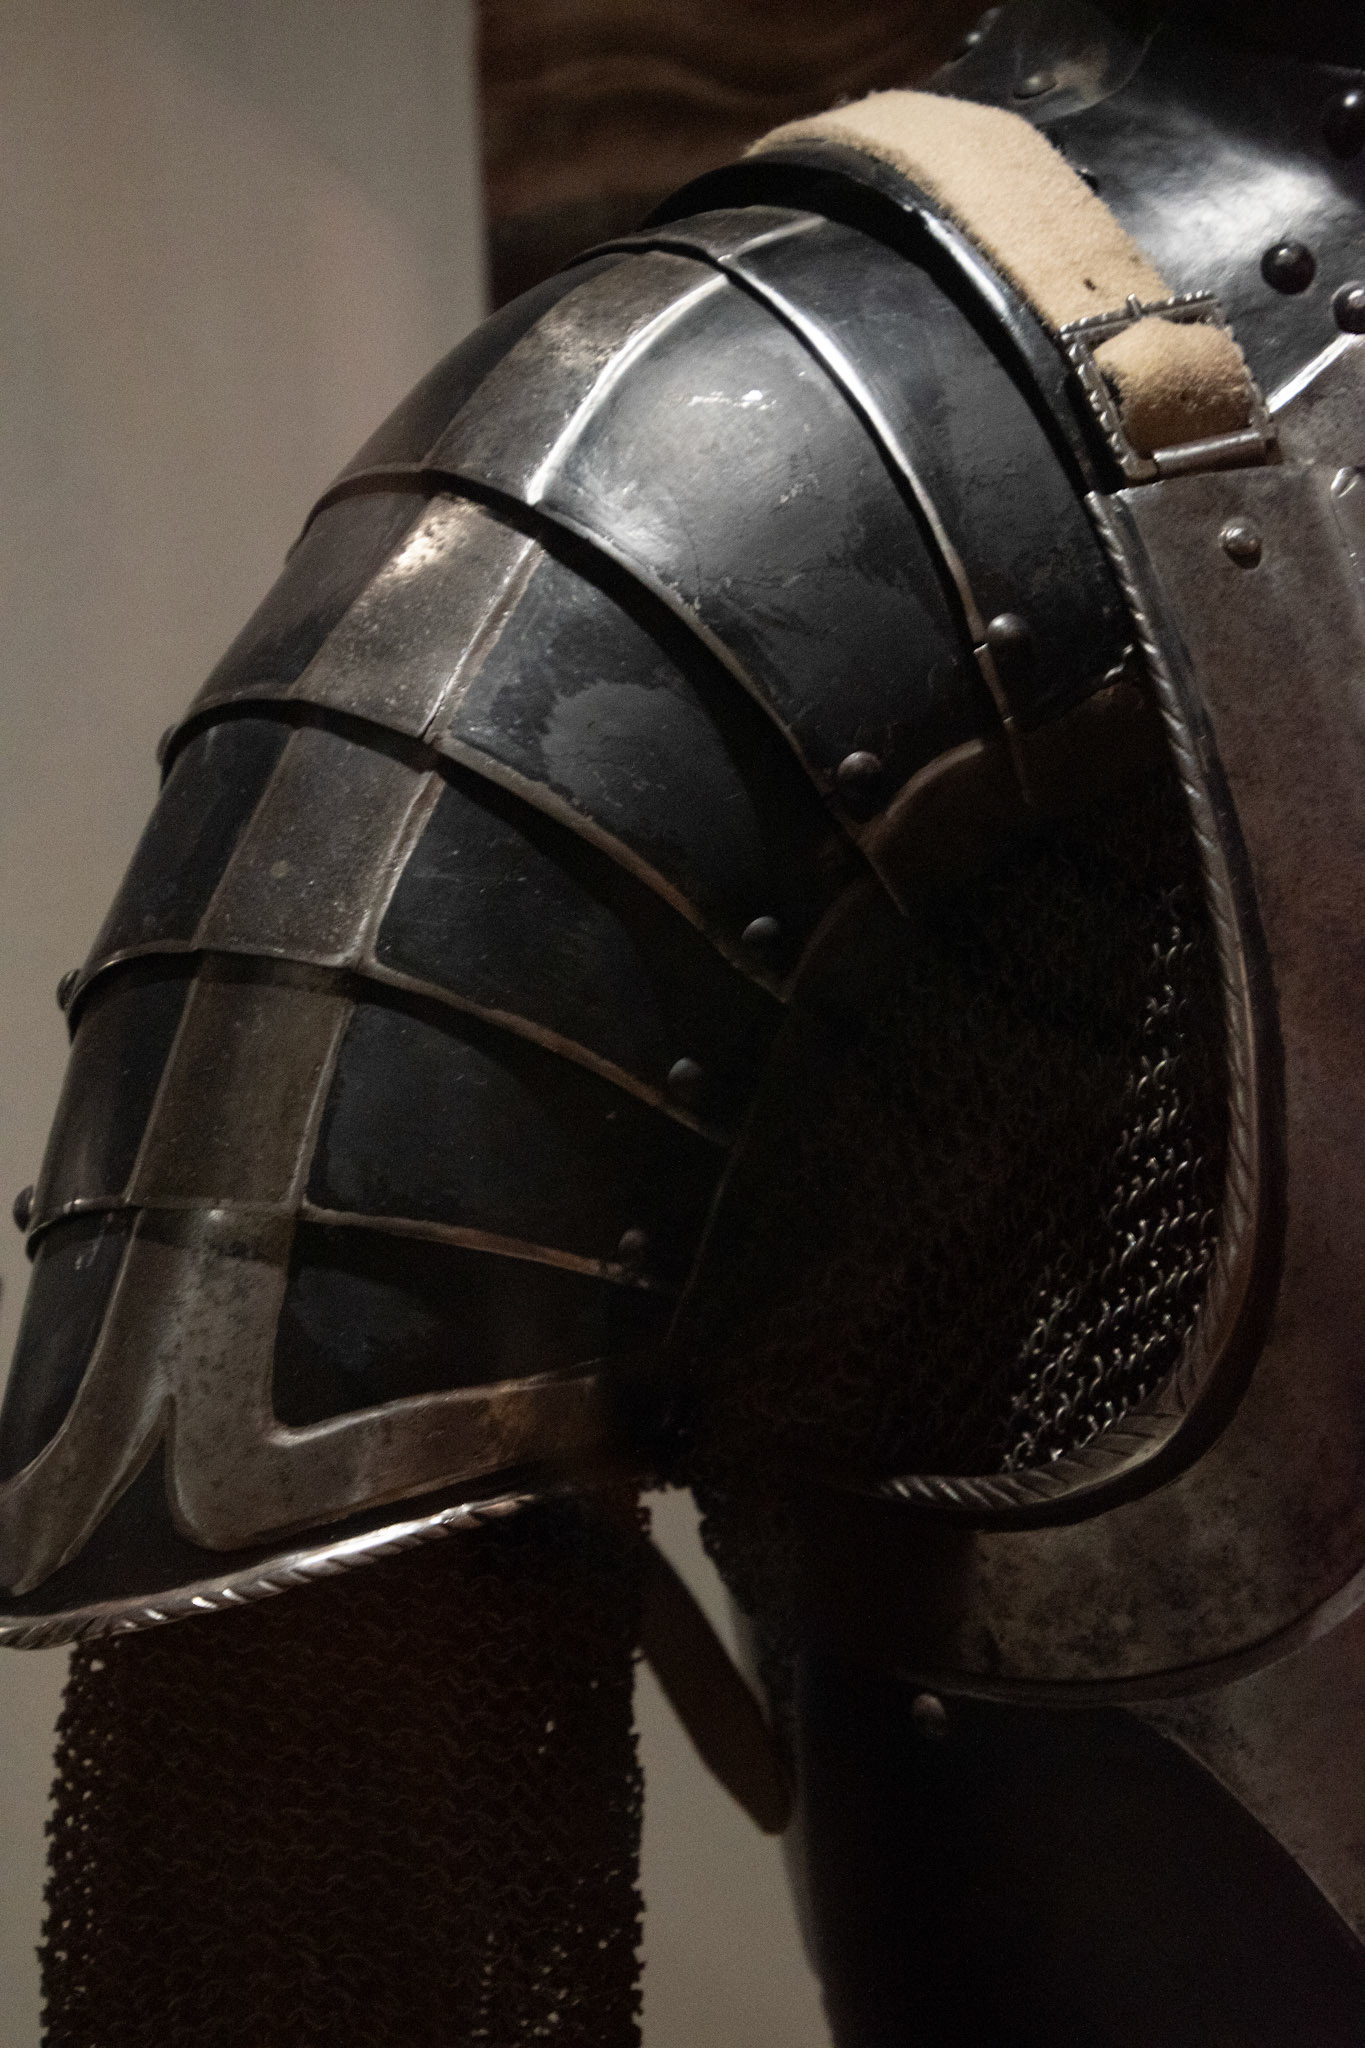
The second key theme is the use of jewellery and wearables as a modern-day item of armour. Armour’s primary function was to protect from attacks from weaponry, and its secondary was as a statement of wealth and status through craftsmanship and adornment. I want to take the forms and imagery of traditional armour (from my trip to the Royal Armouries Museum Leeds) and turn the idea of protection from physical to emotion. But create juxtaposition where the adornments expose and show vulnerabilities to the viewer.
Finaly the addition of text into the work. This is my version of adornment onto the armour, where using my own diary phrases I can embed emotion directly into the work.
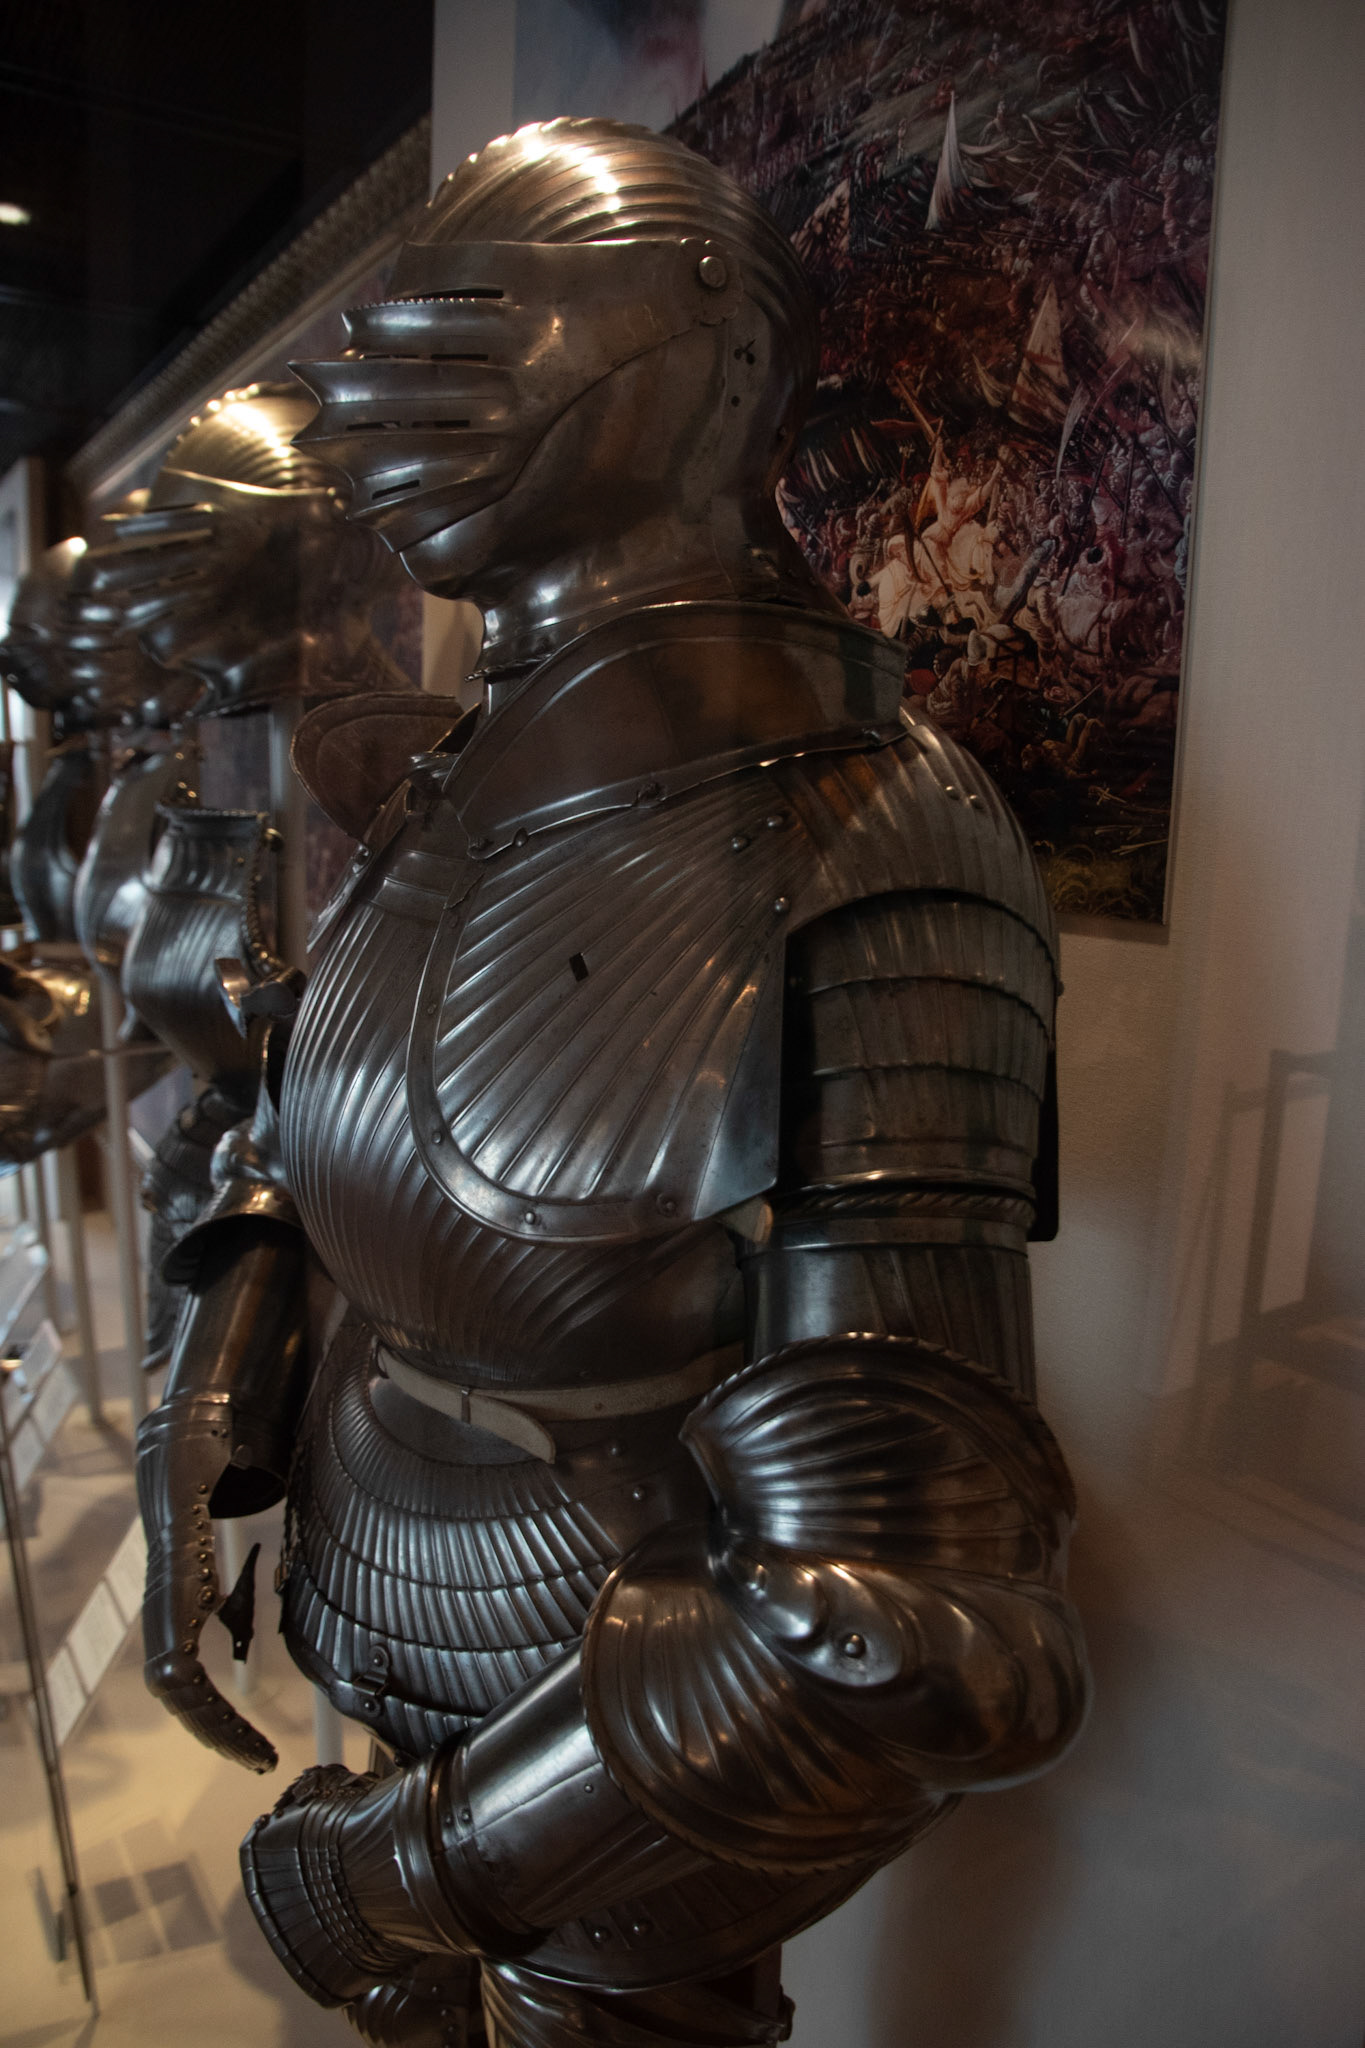
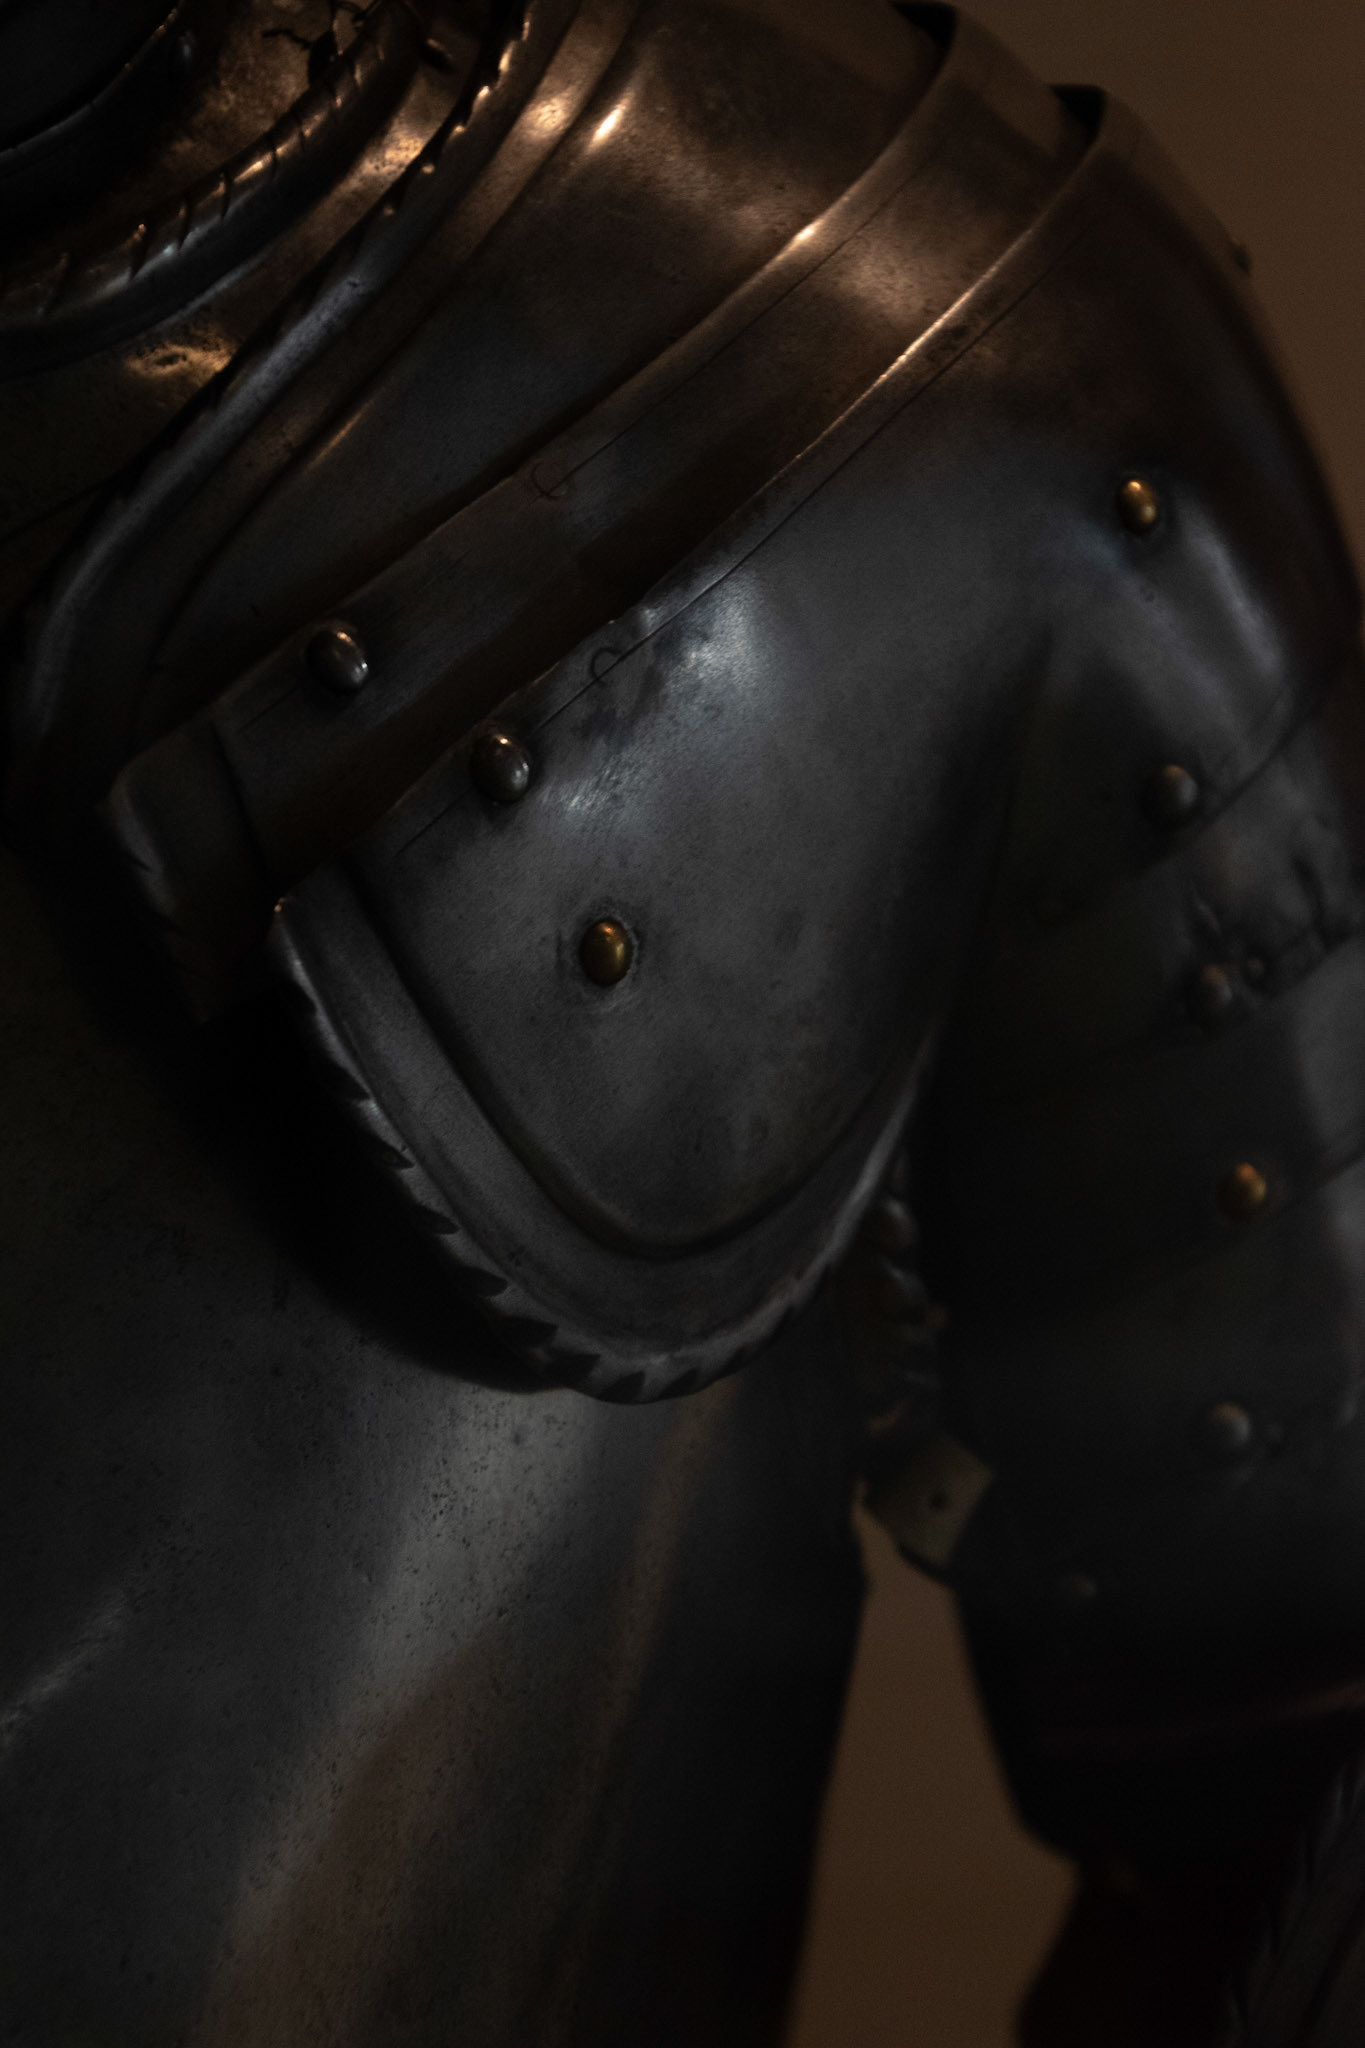
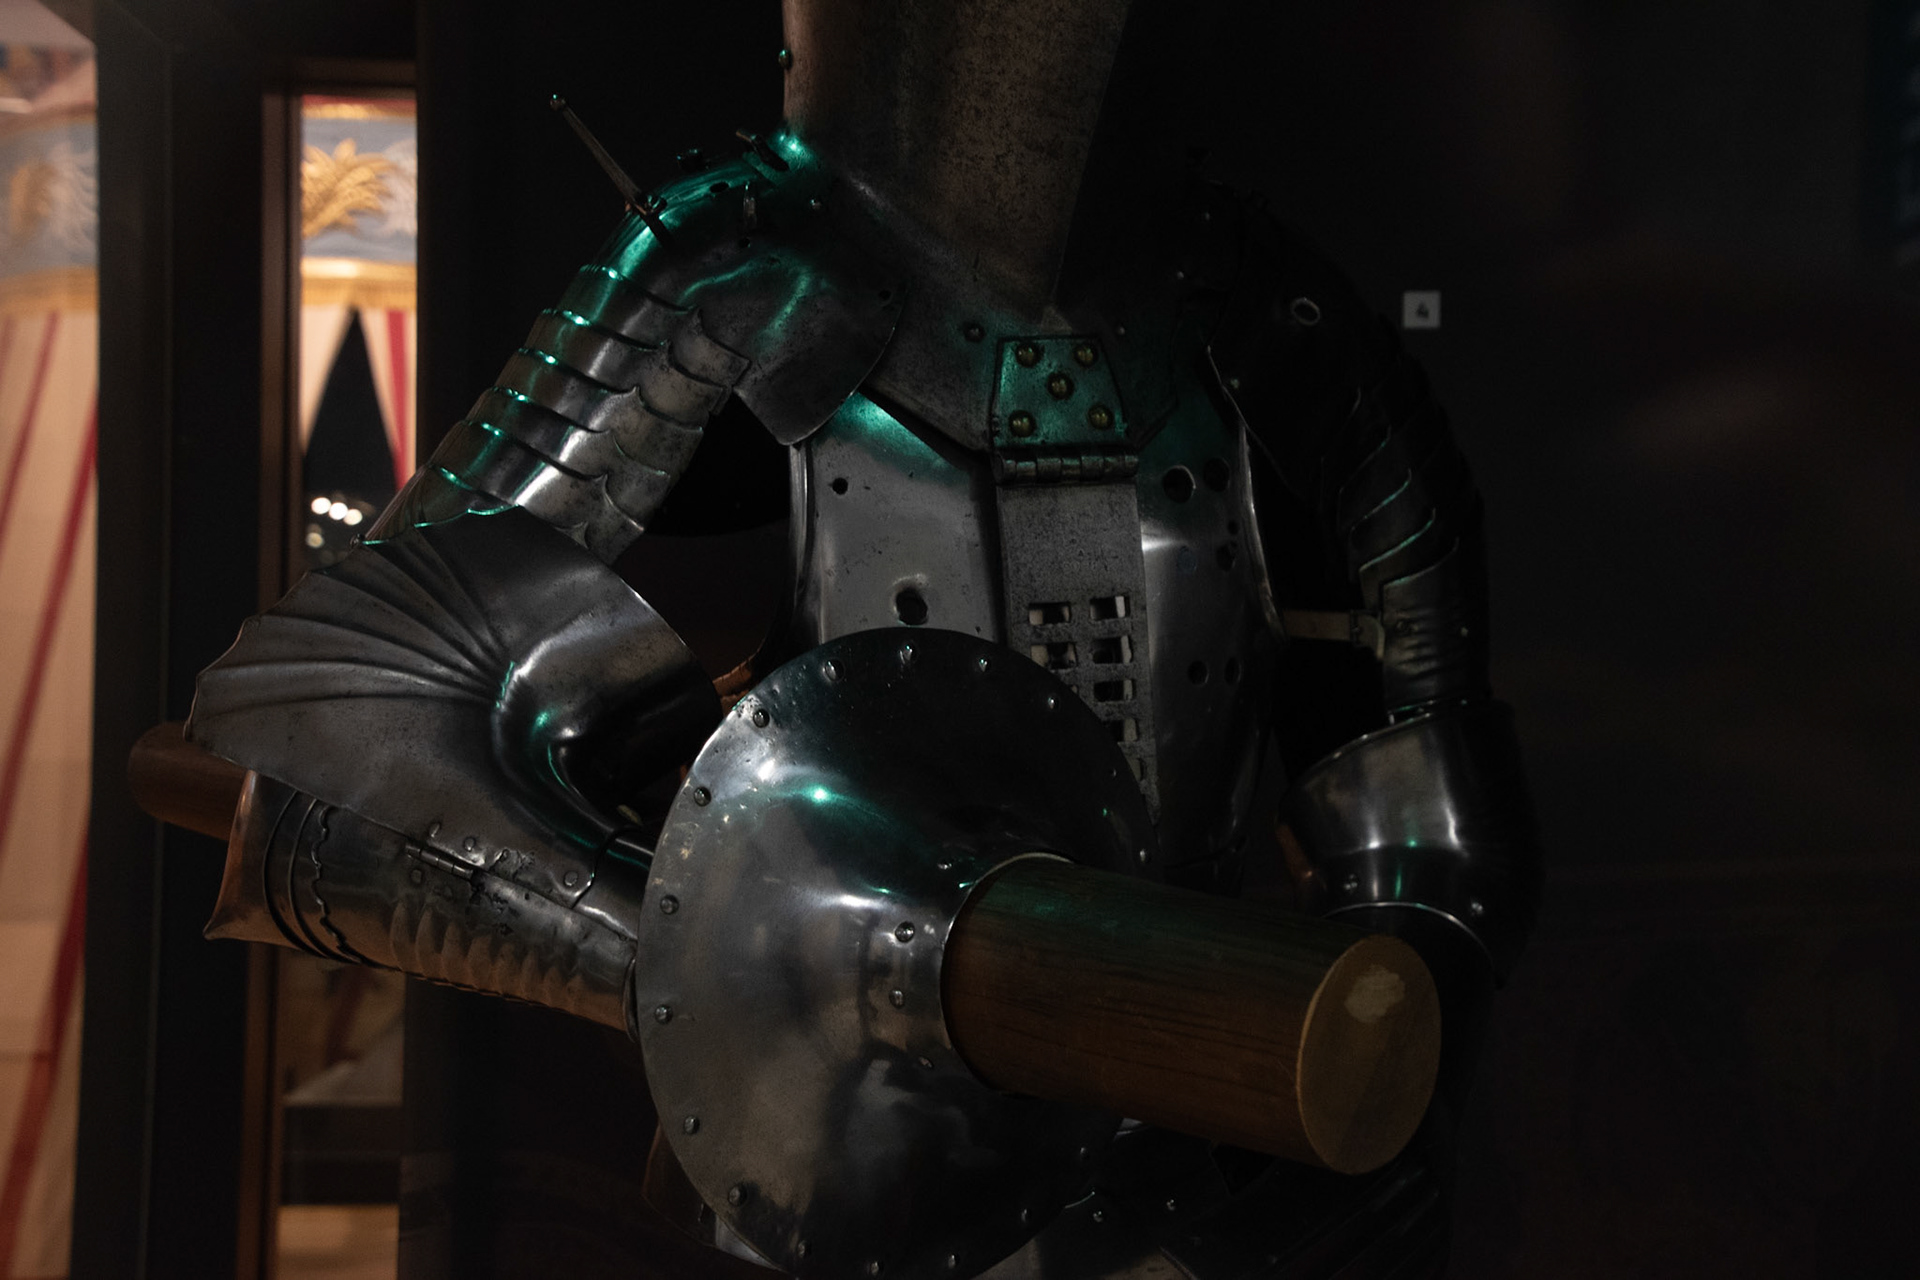
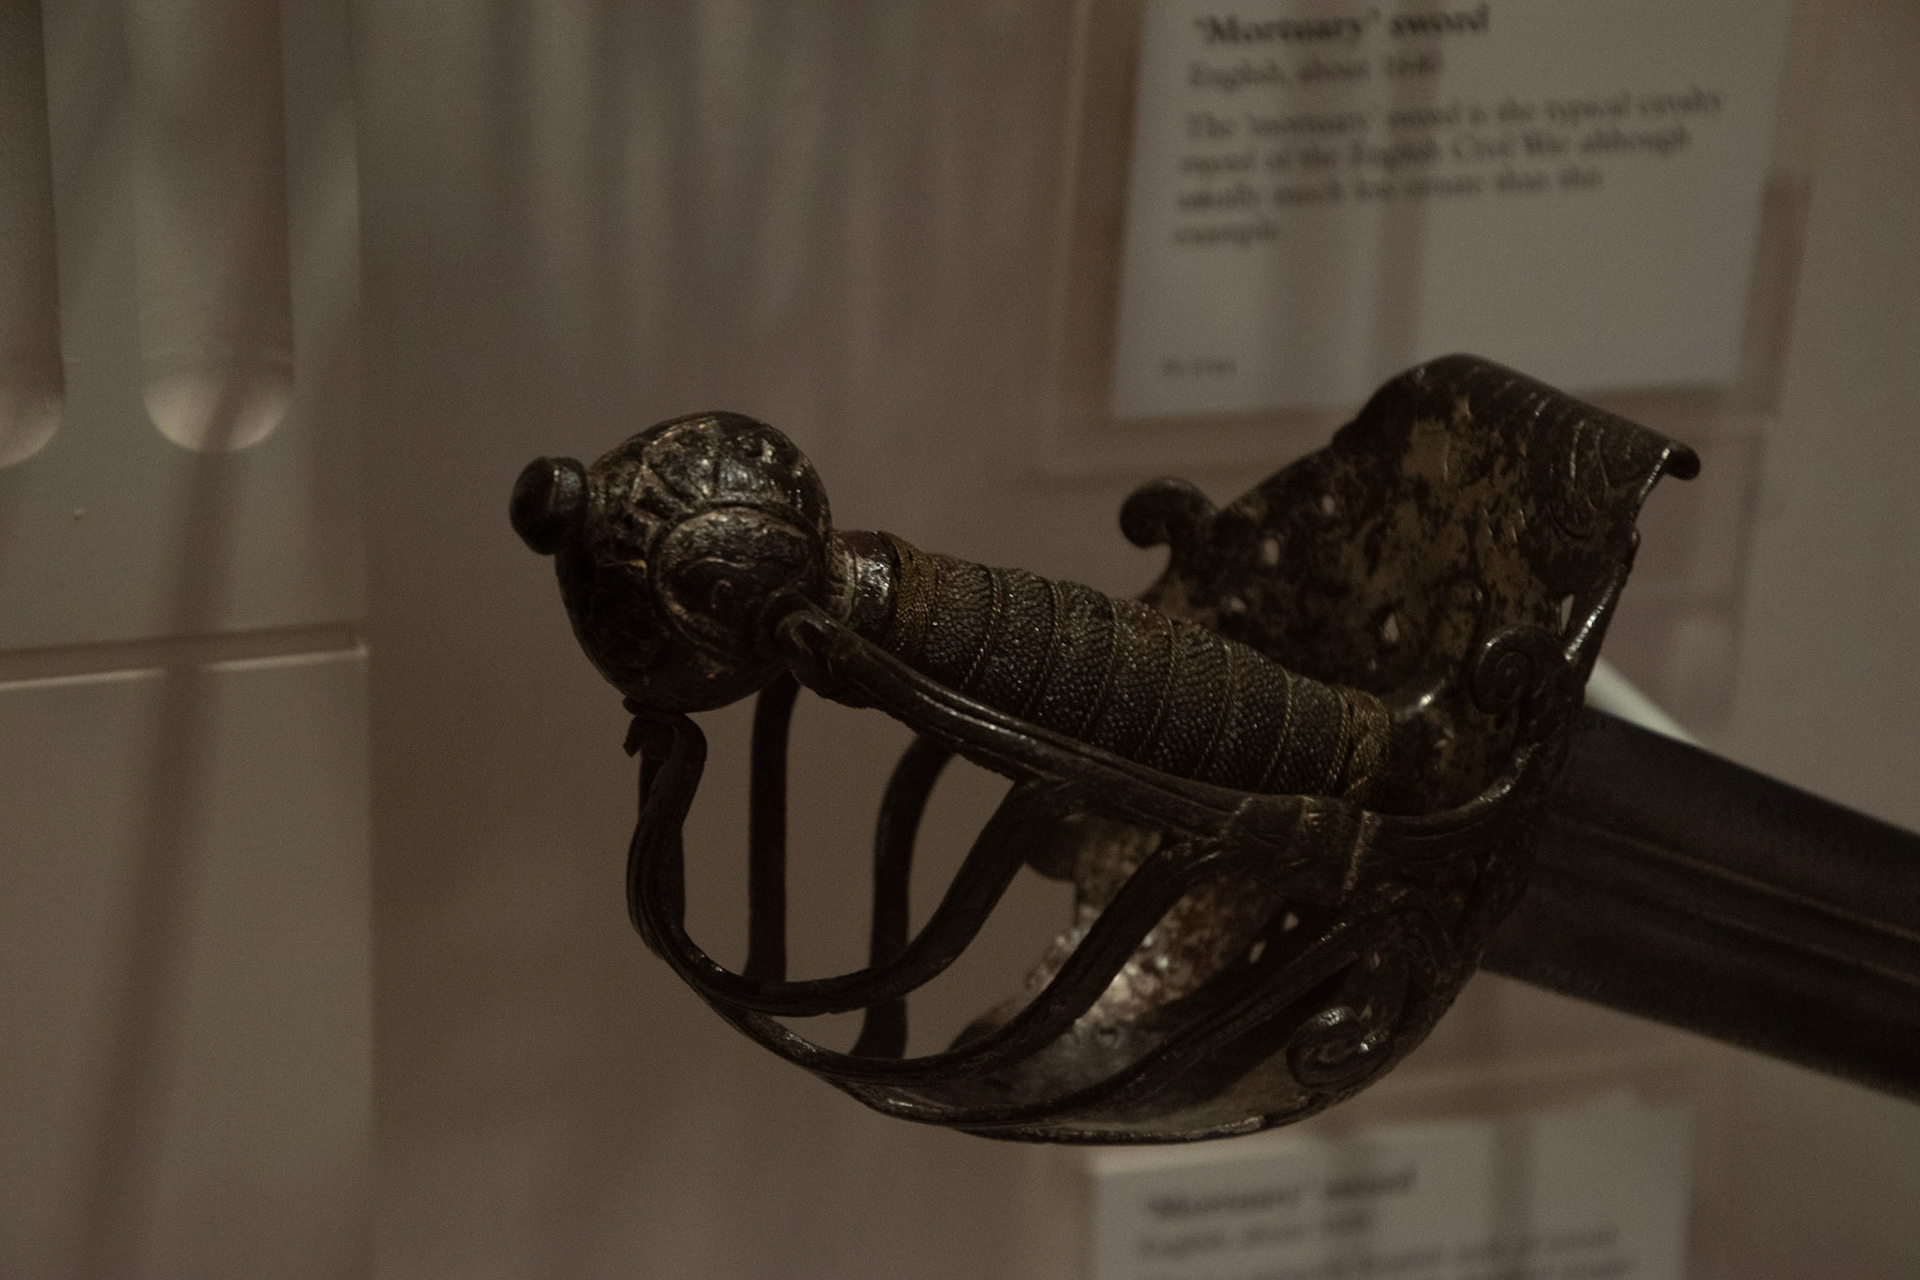
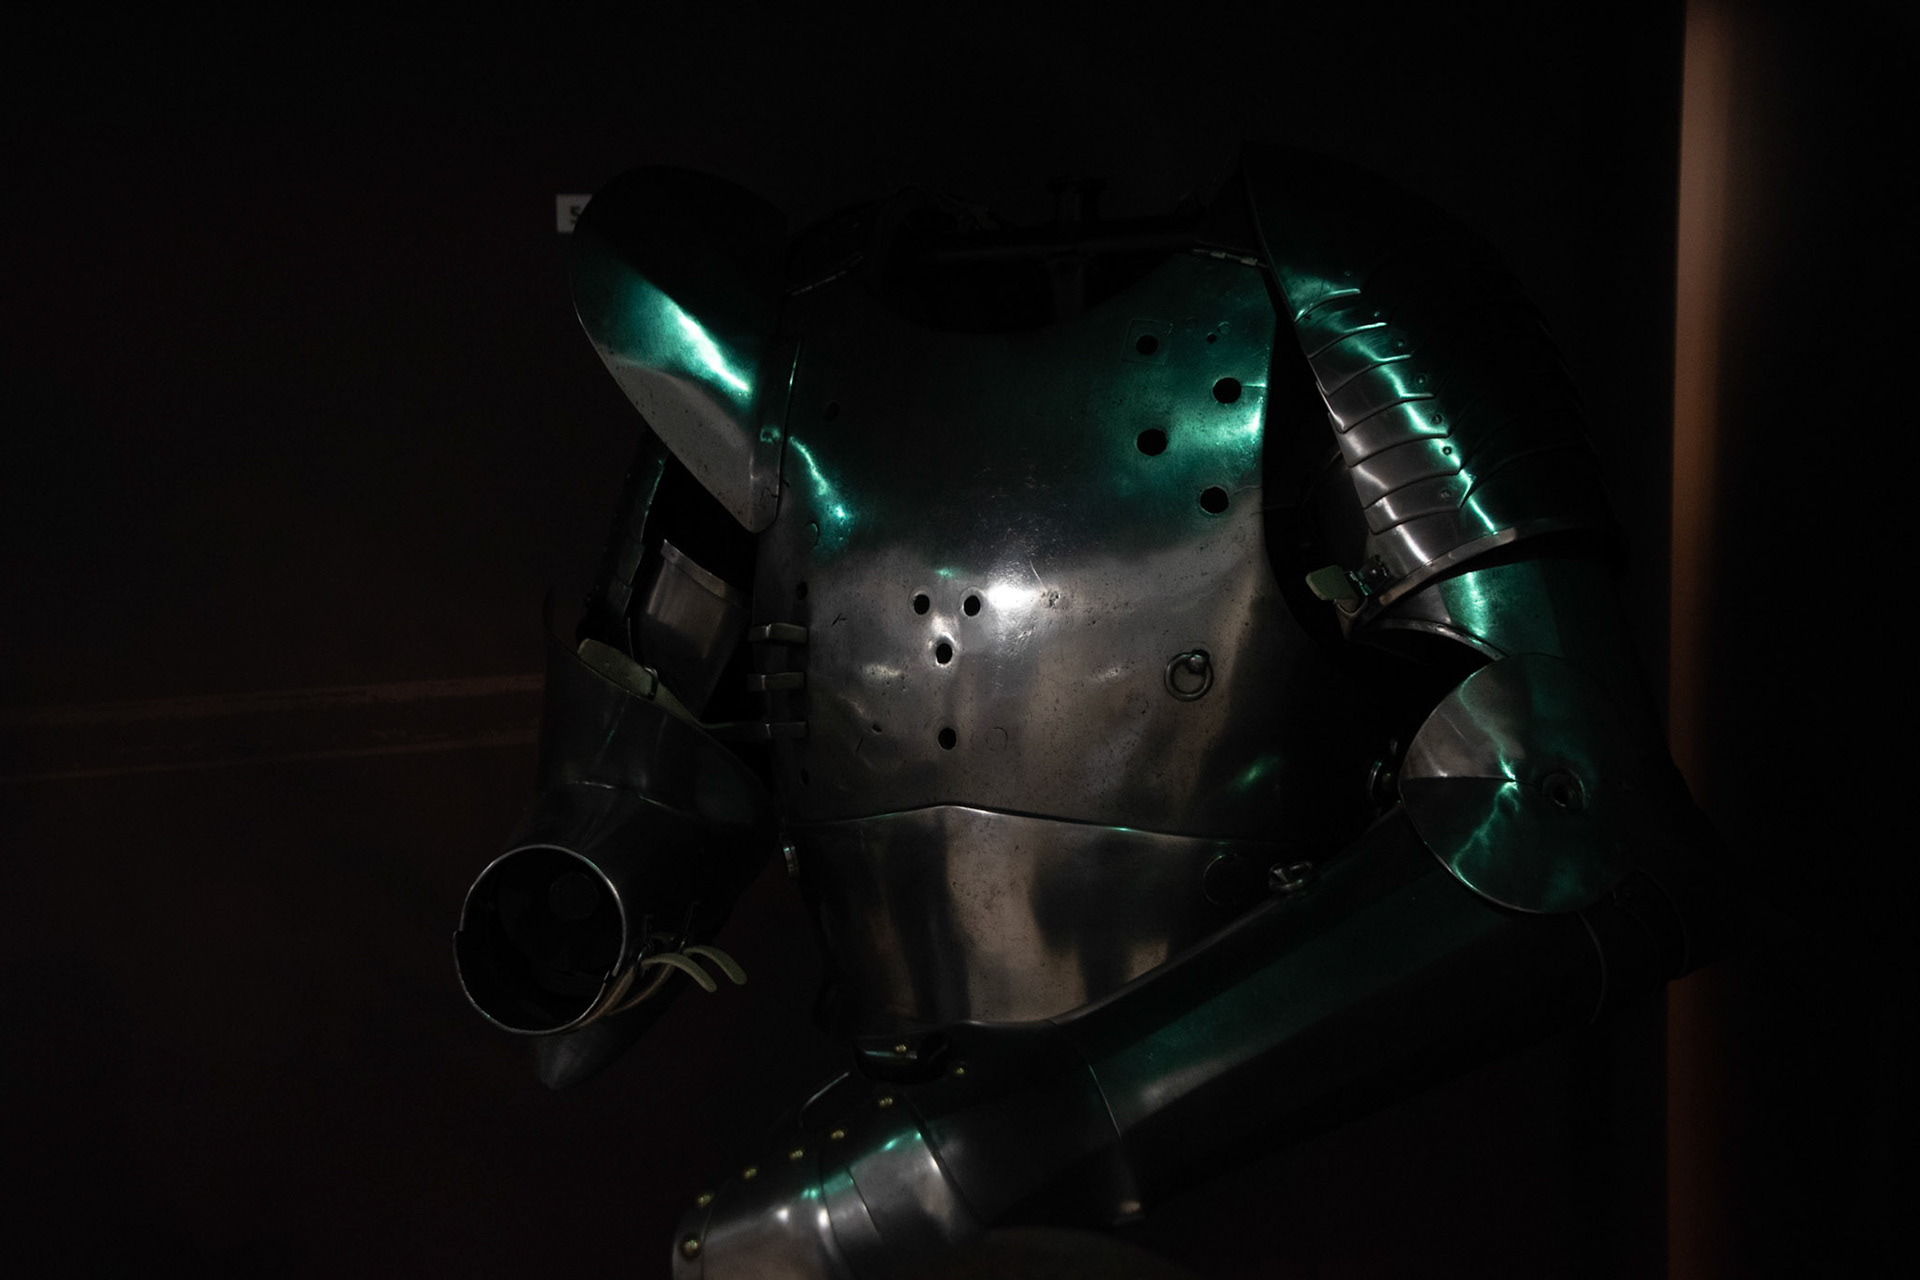
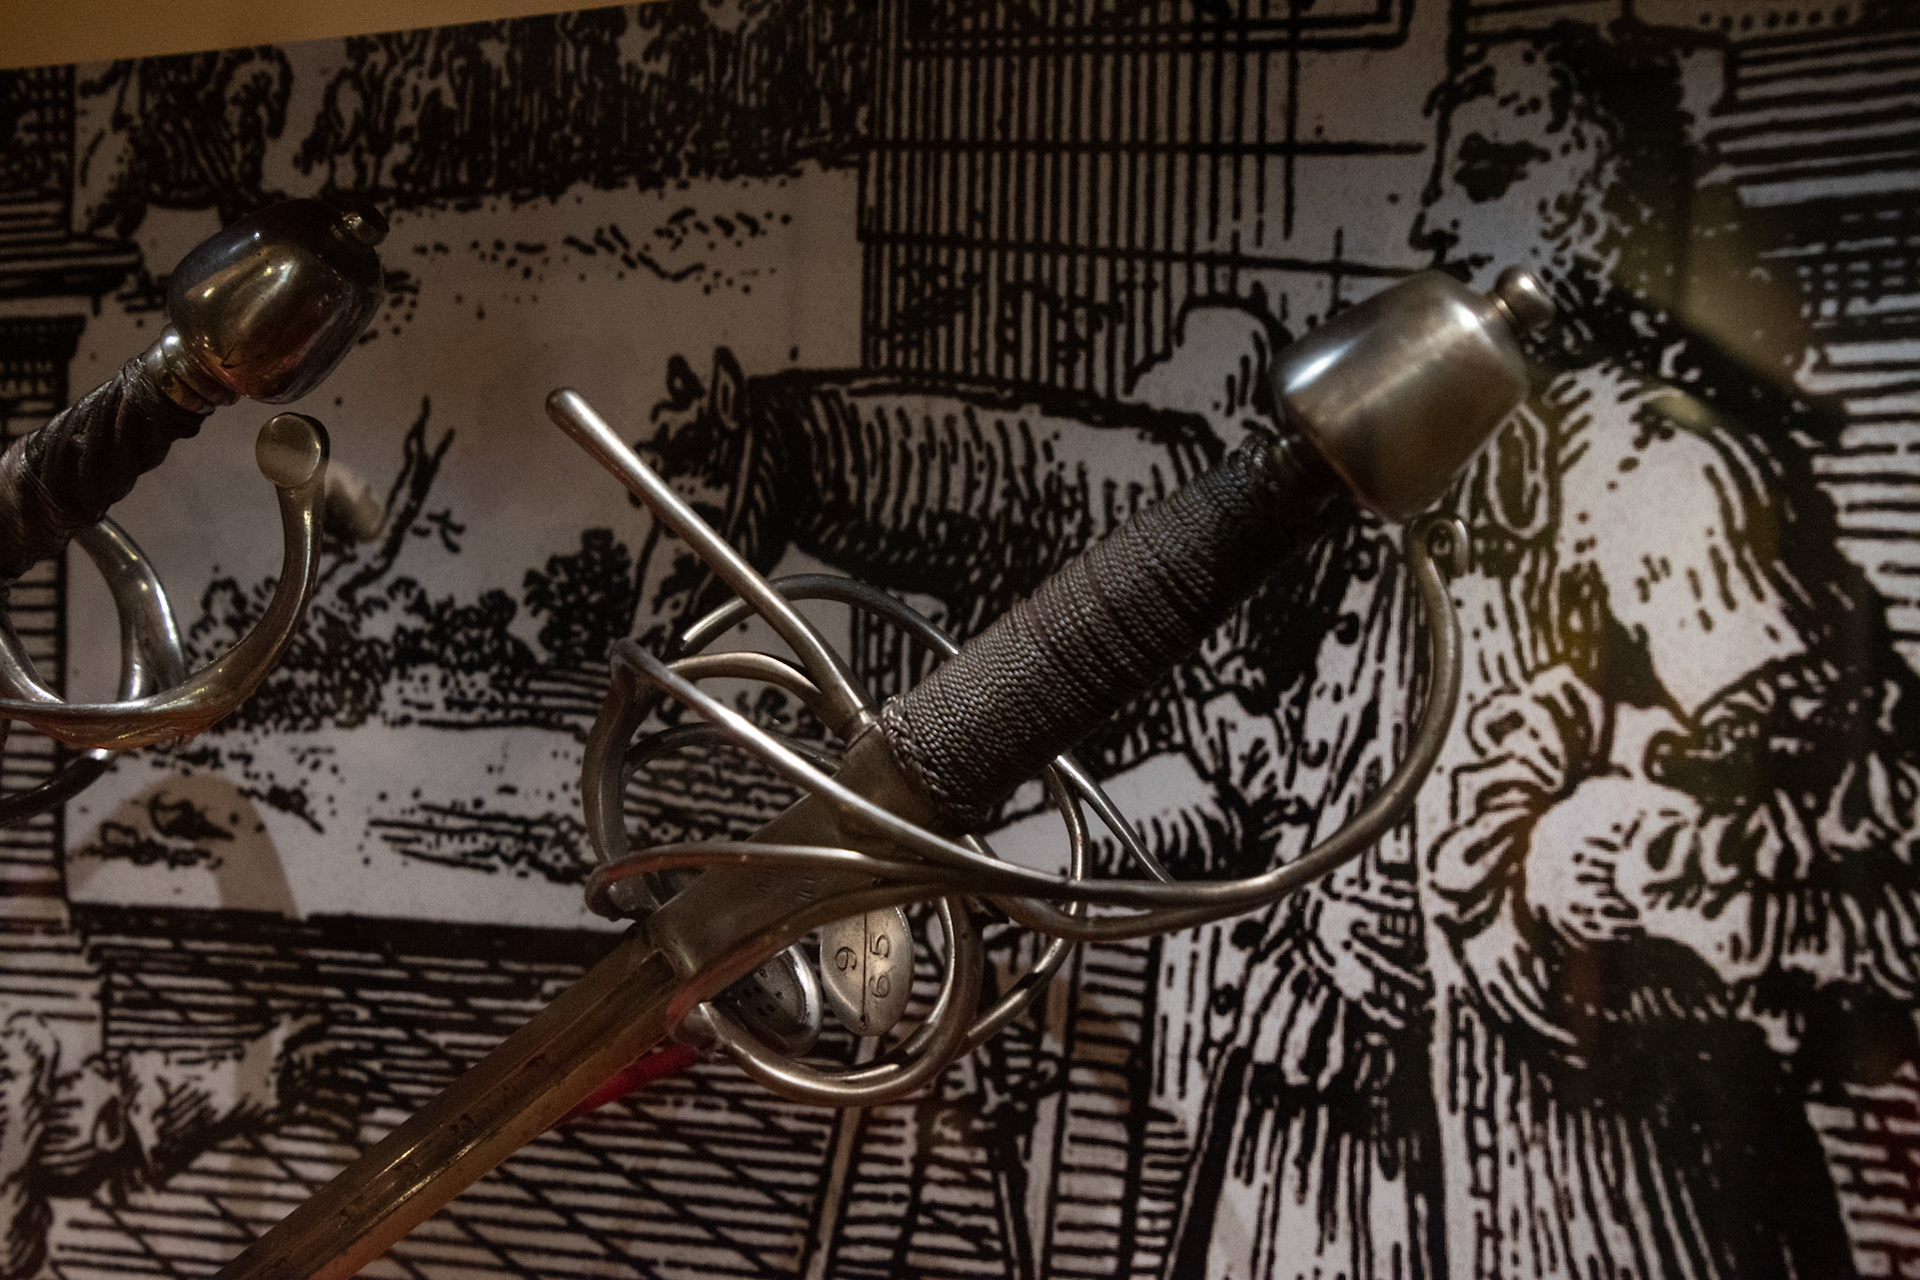
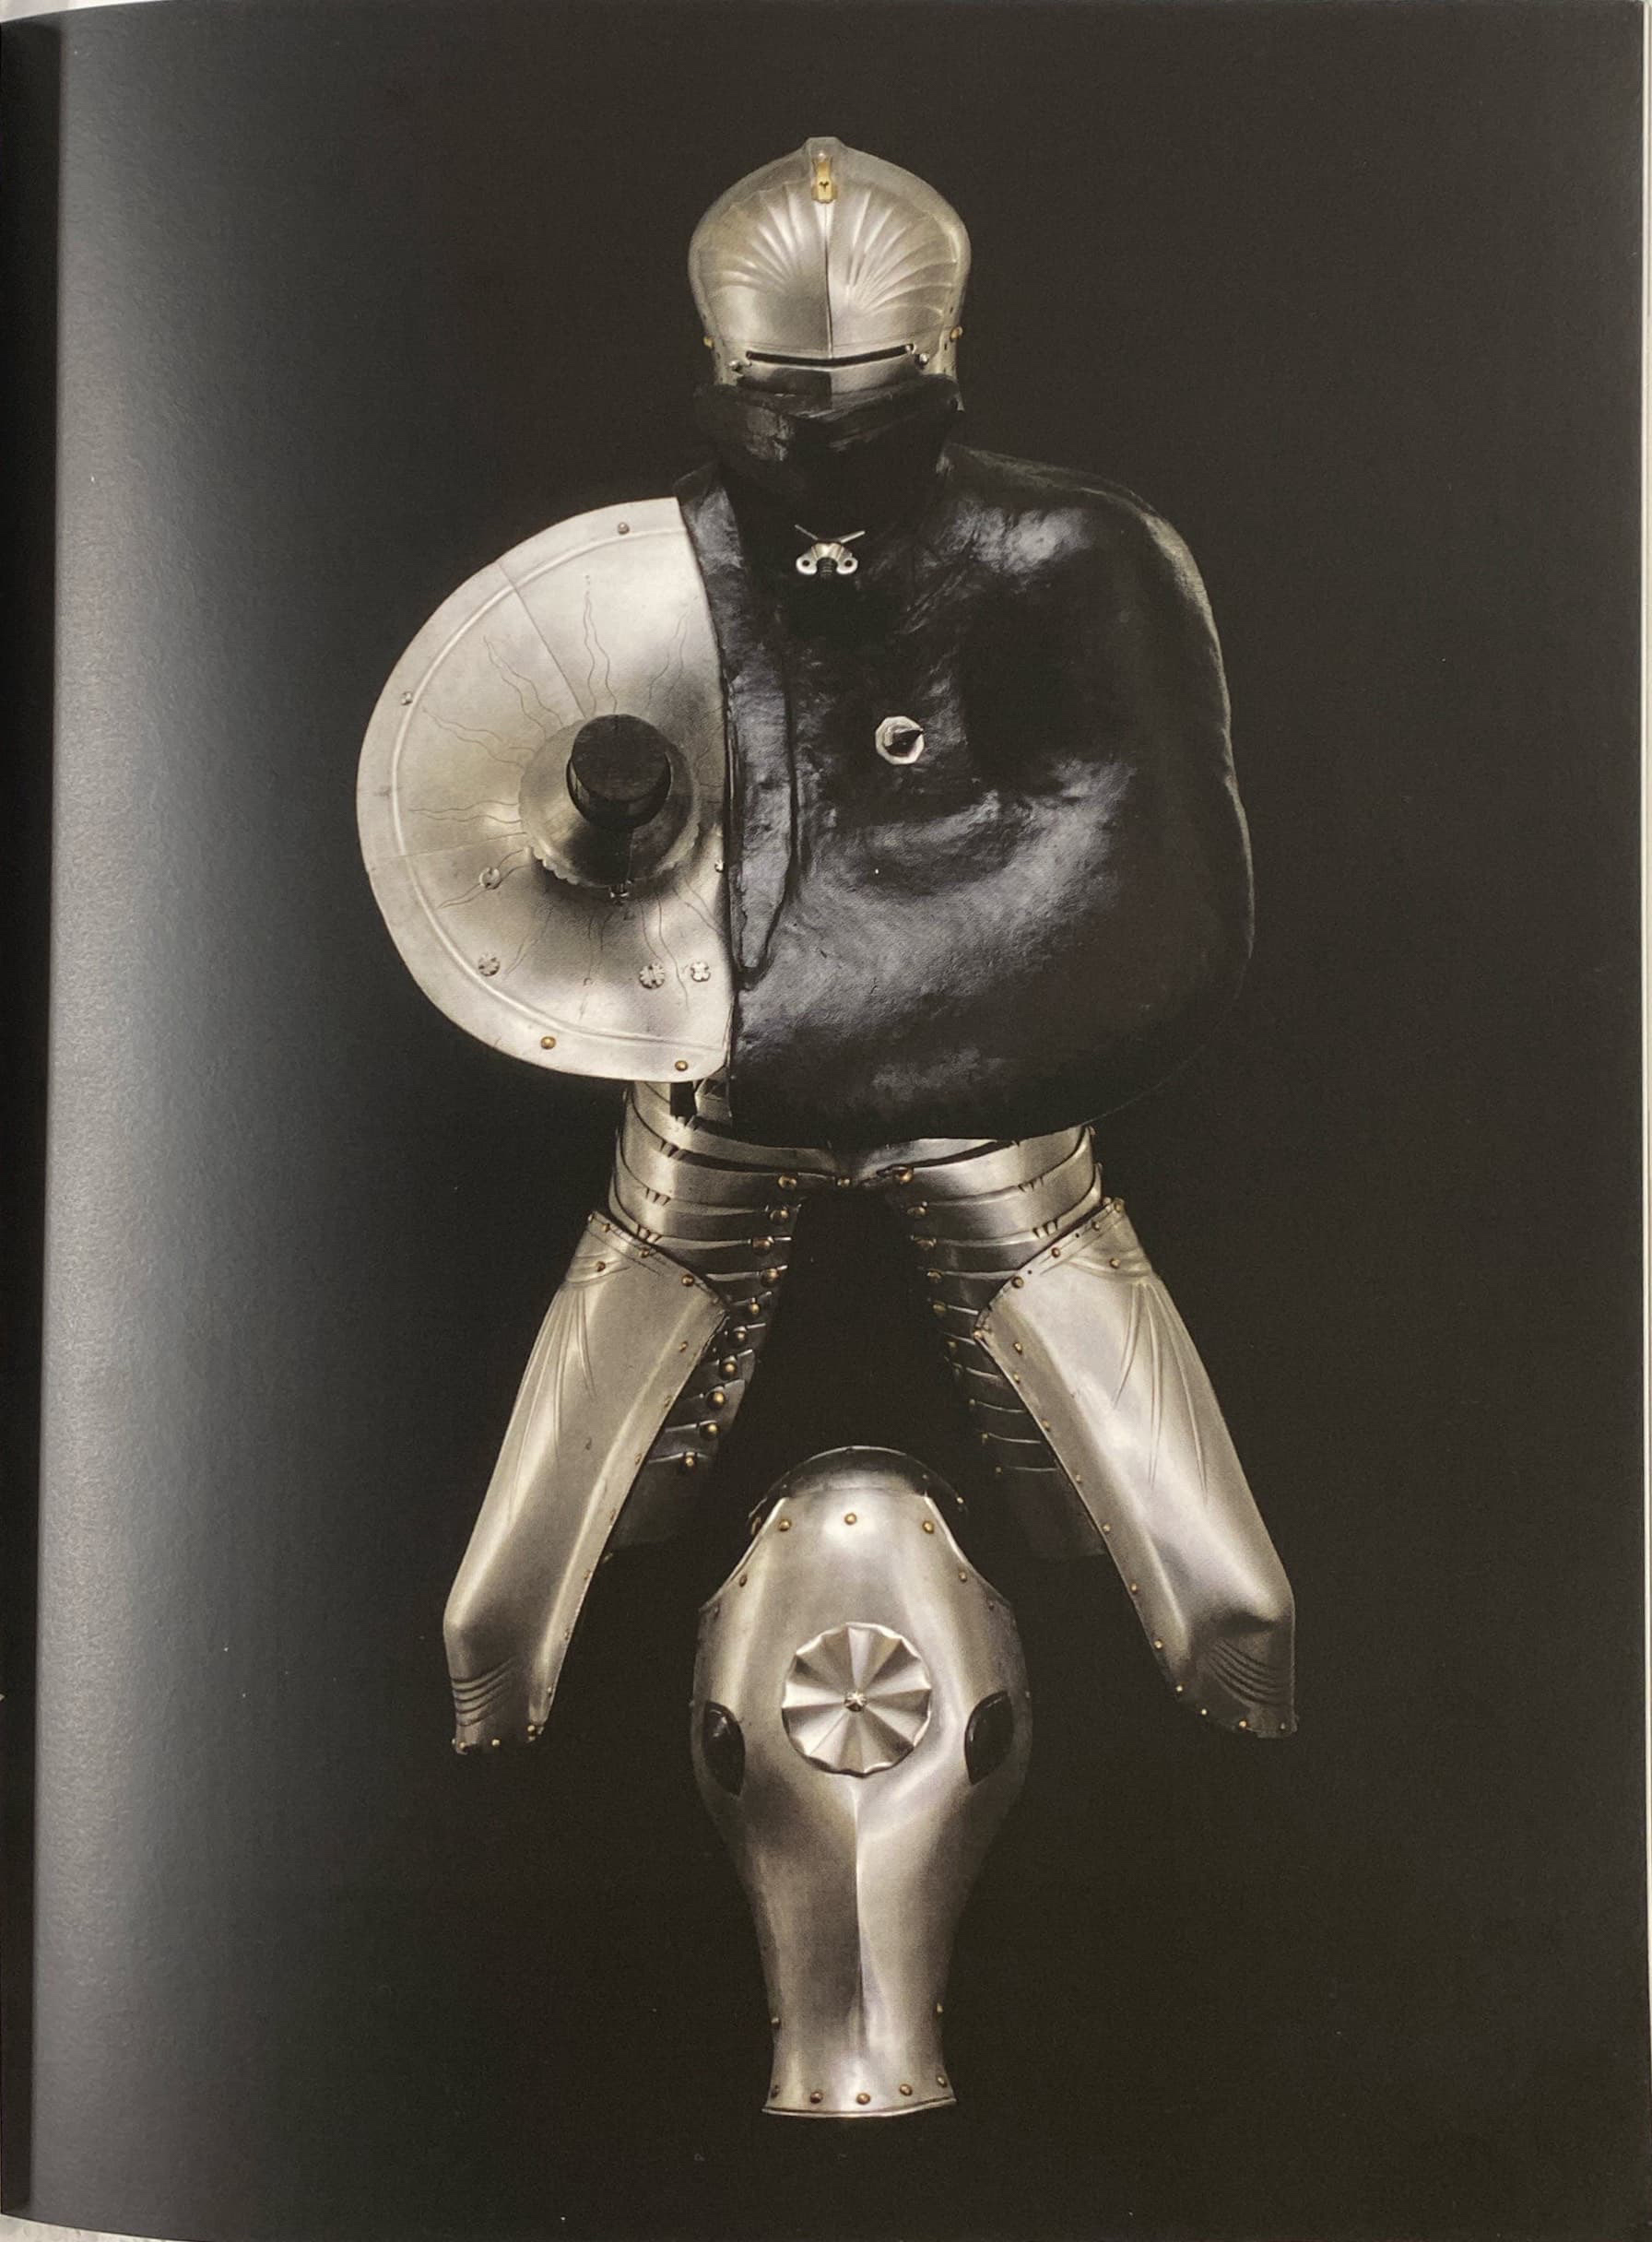
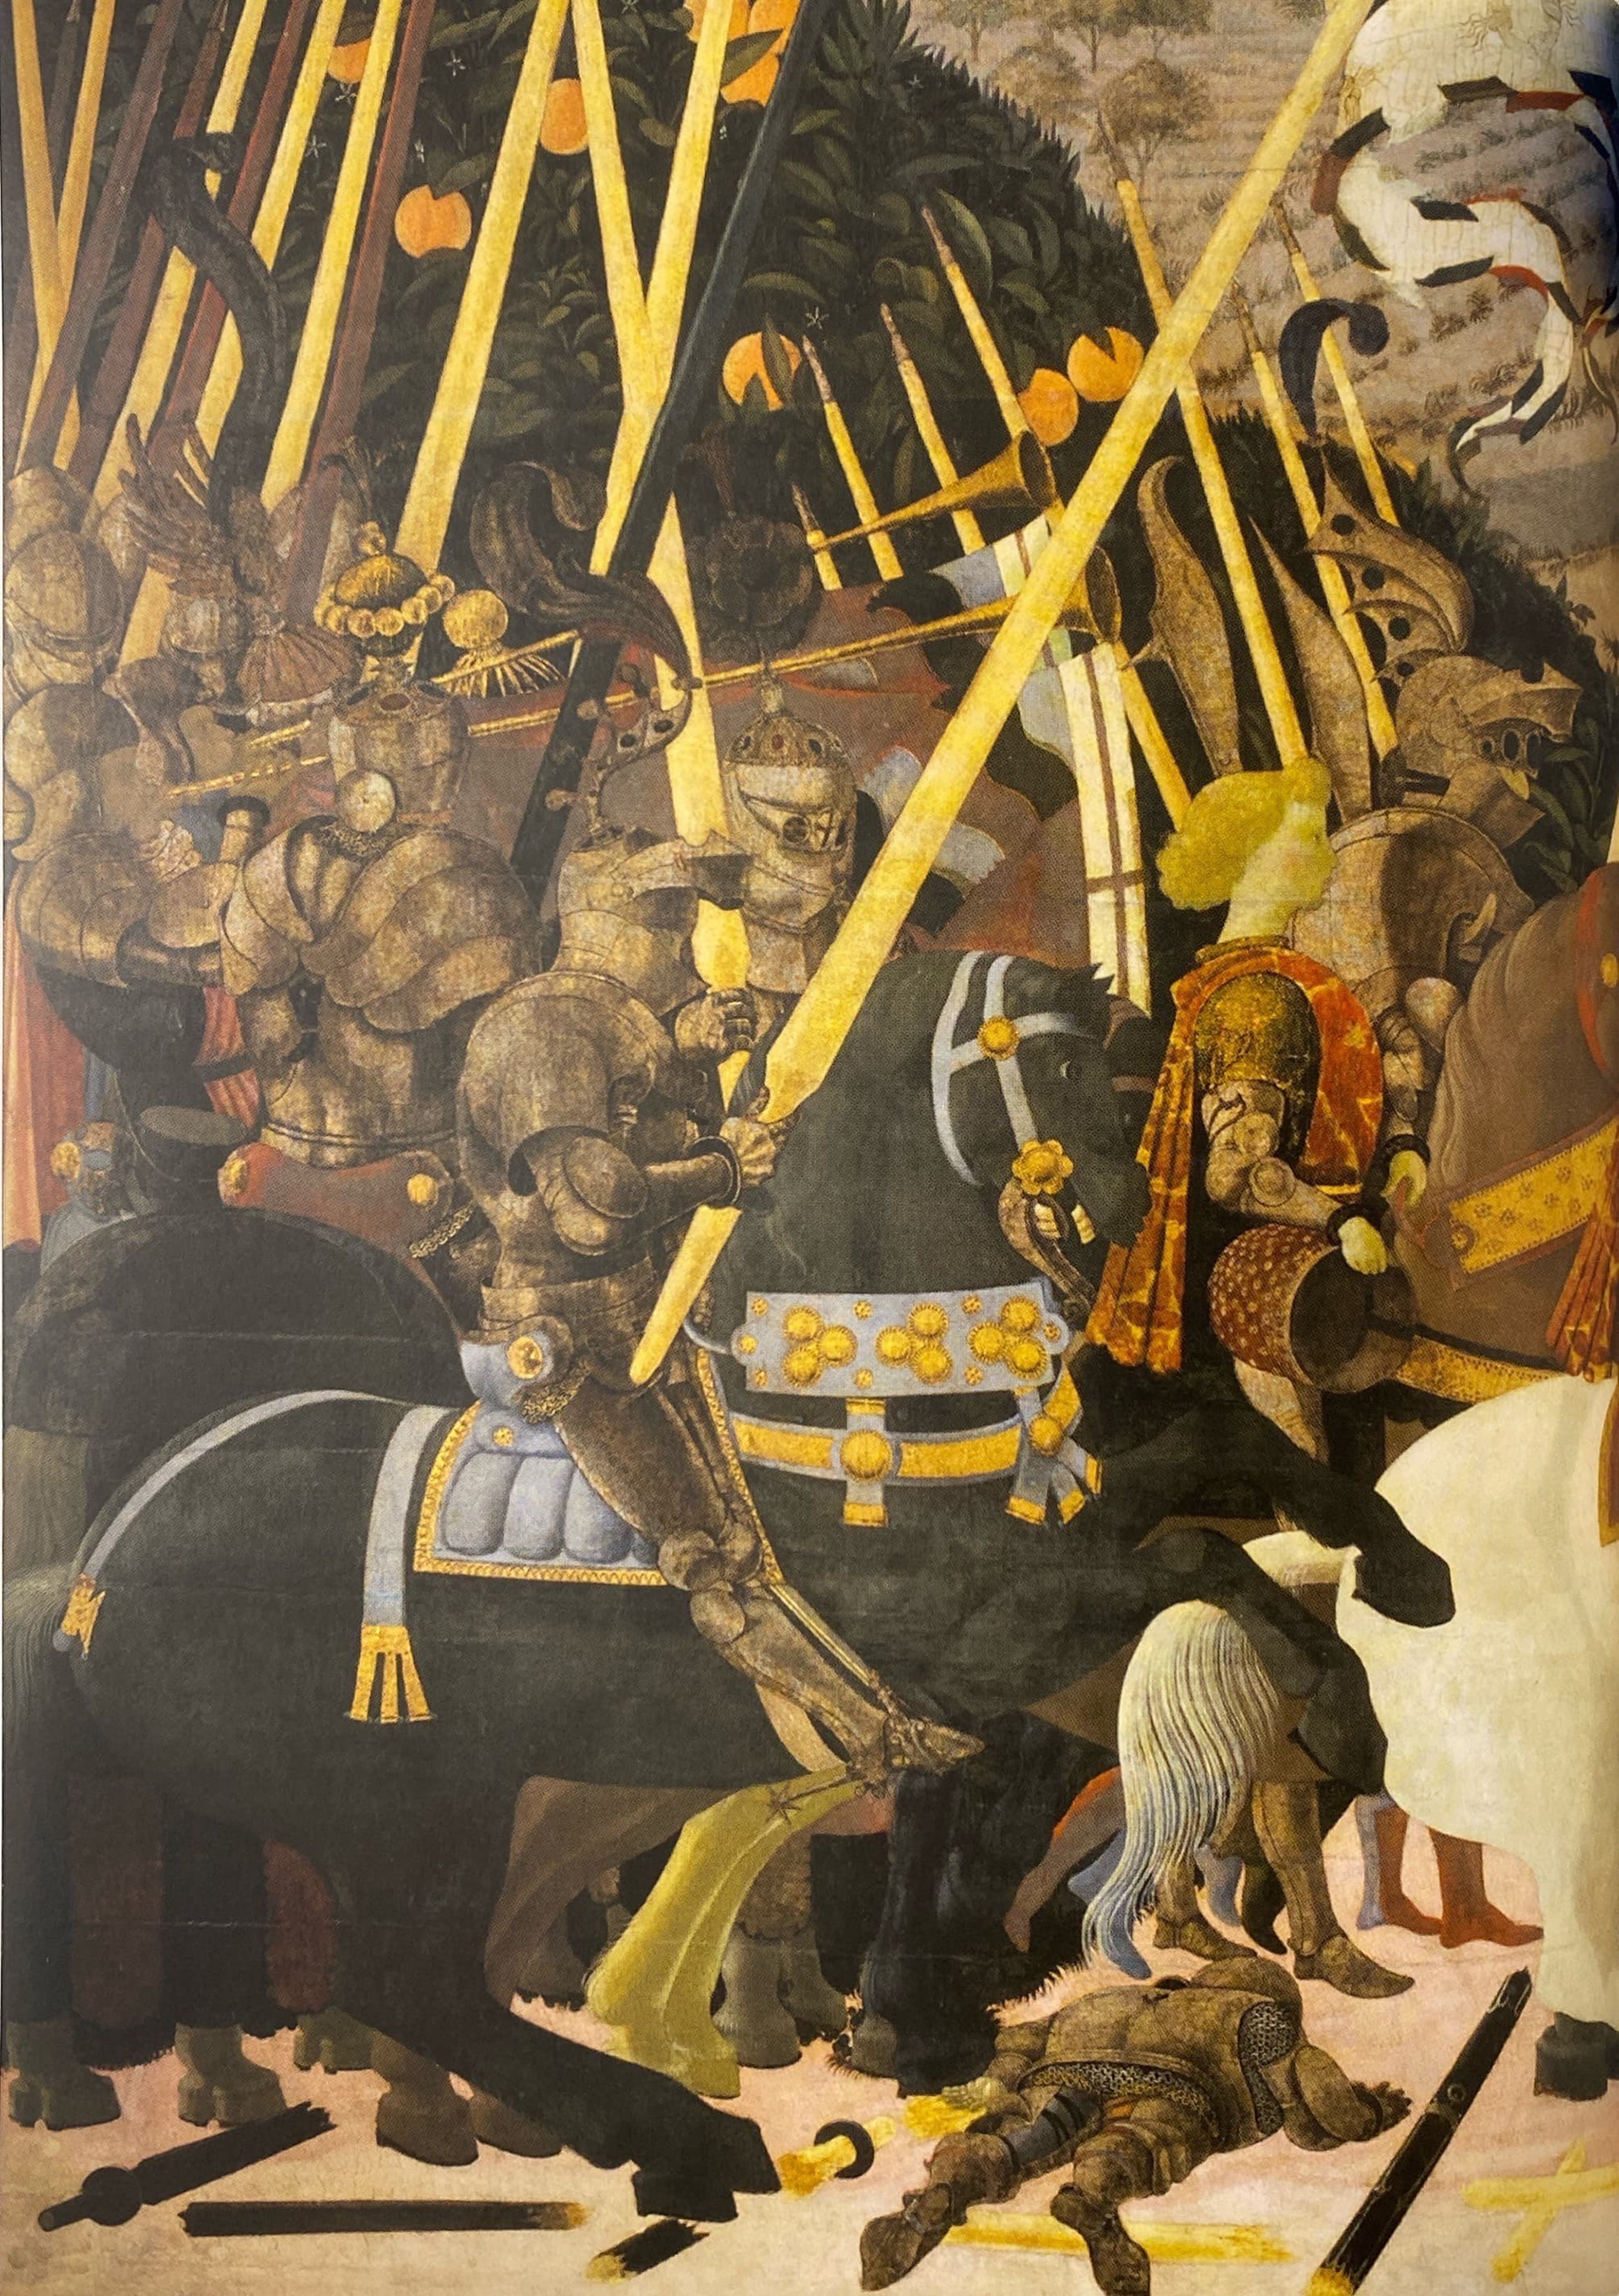
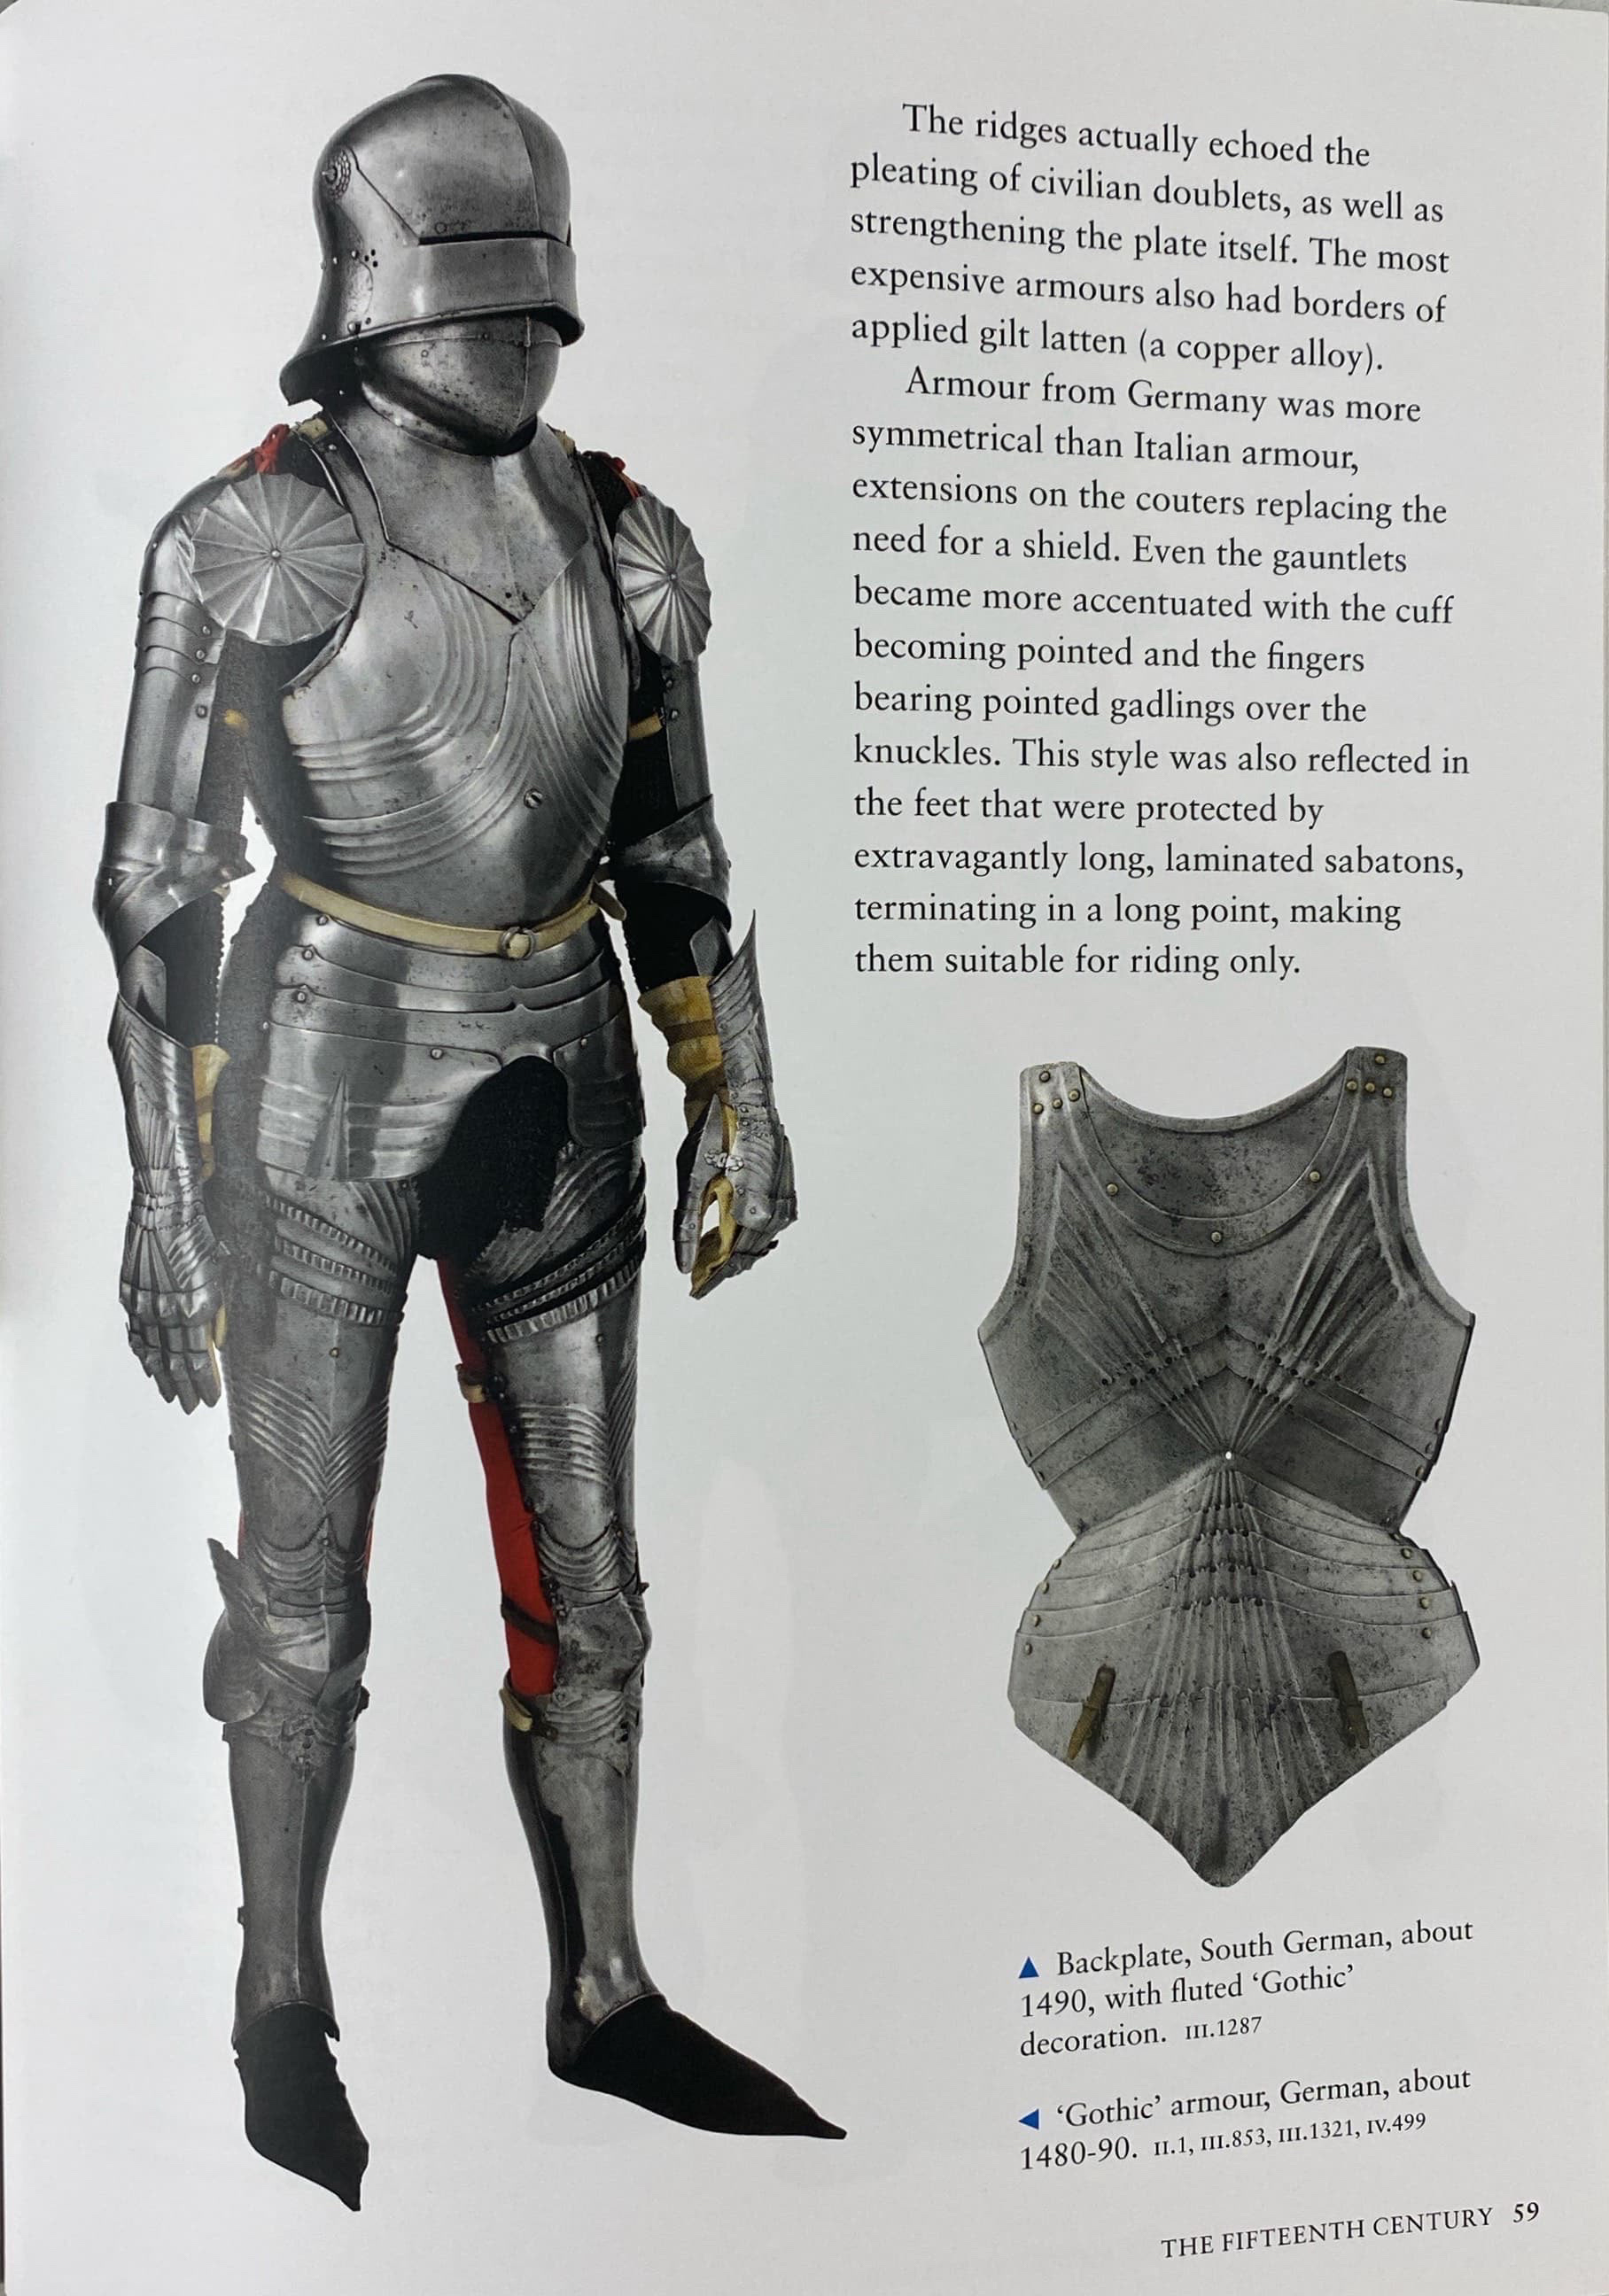
Key inspirations from the Royal Armouries Museum Leeds
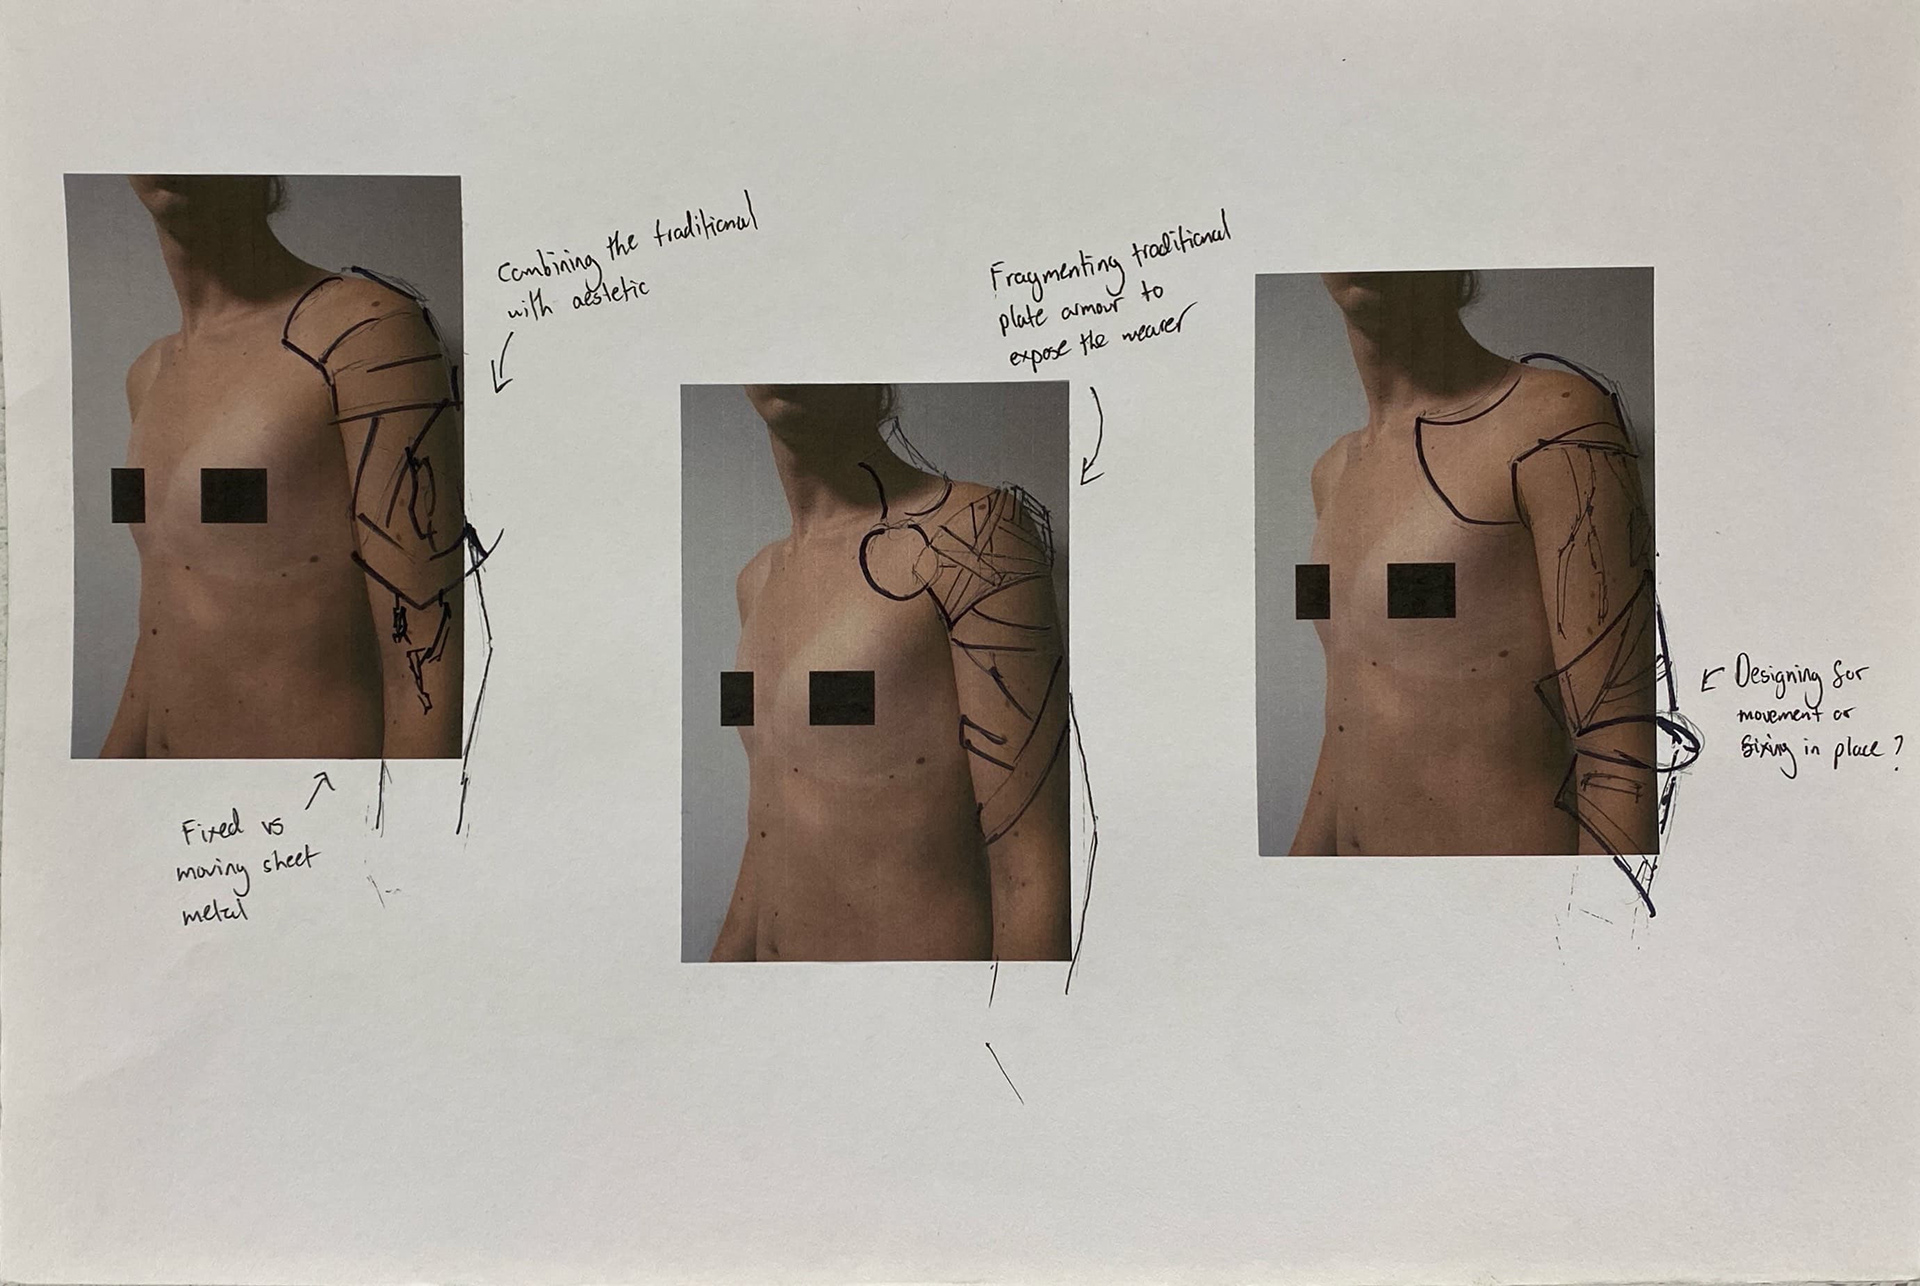
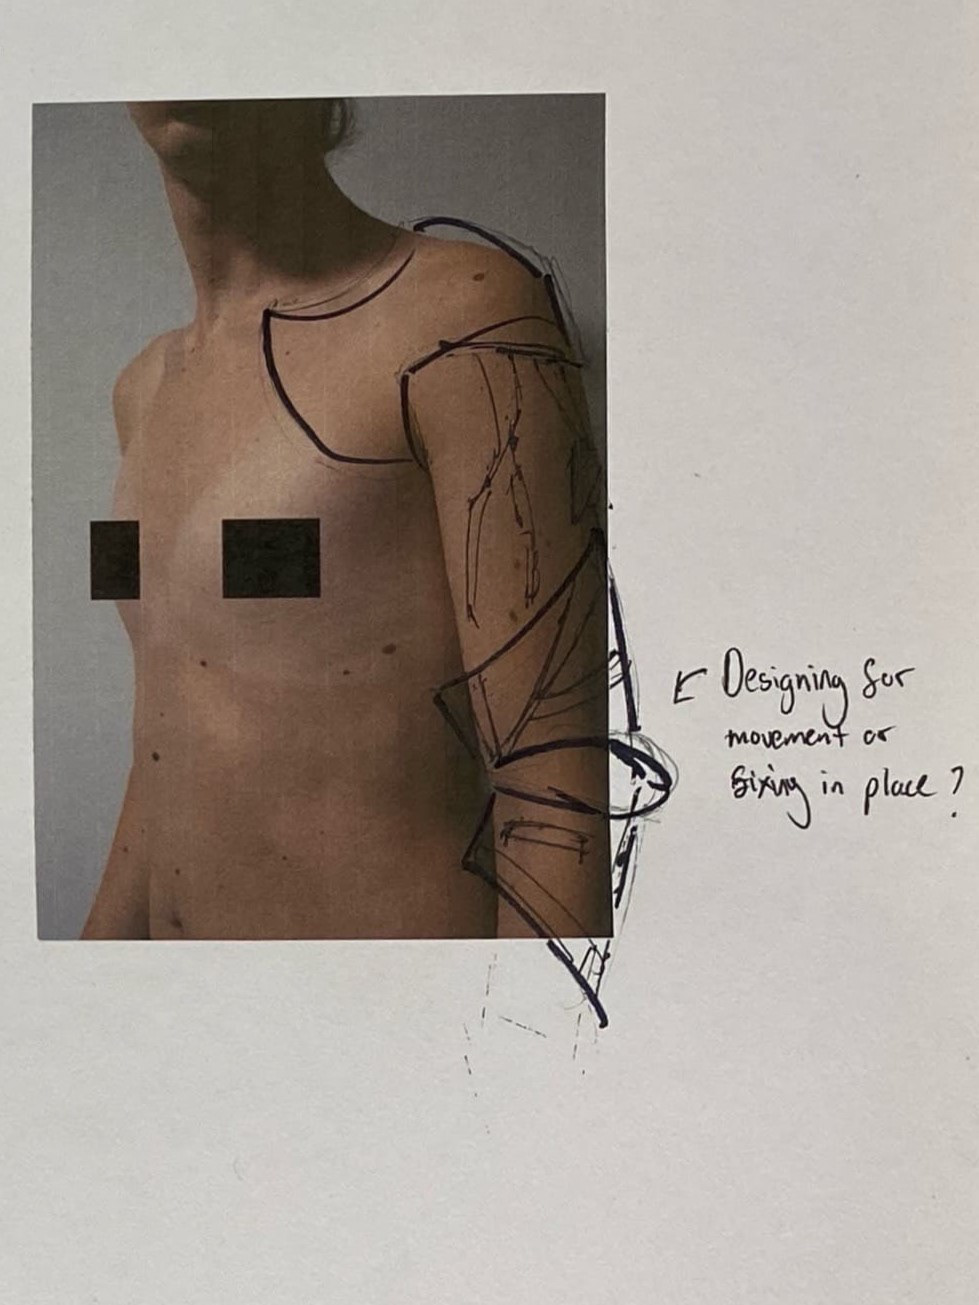
Taking the initial collages and concepts forward, I generated a rough series of designs looking at combining the forms of traditional armour and my material testing. My focus was exploring how the forms lay onto the body and how I could cover or expose the body through using negative space. One of the key decisions I made during and reflecting on the designs, is that I don’t want to explore moving components. I feel that this would be too hard, and time consuming to design and produce to the standard required for a piece to be presented in Collect with my current skill set. Additionally, I think that working with the idea of encapsulating the wearer inside could bring connotation that the individual is physically trapped inside their own emotions.
Developing initial designs through paper modelling
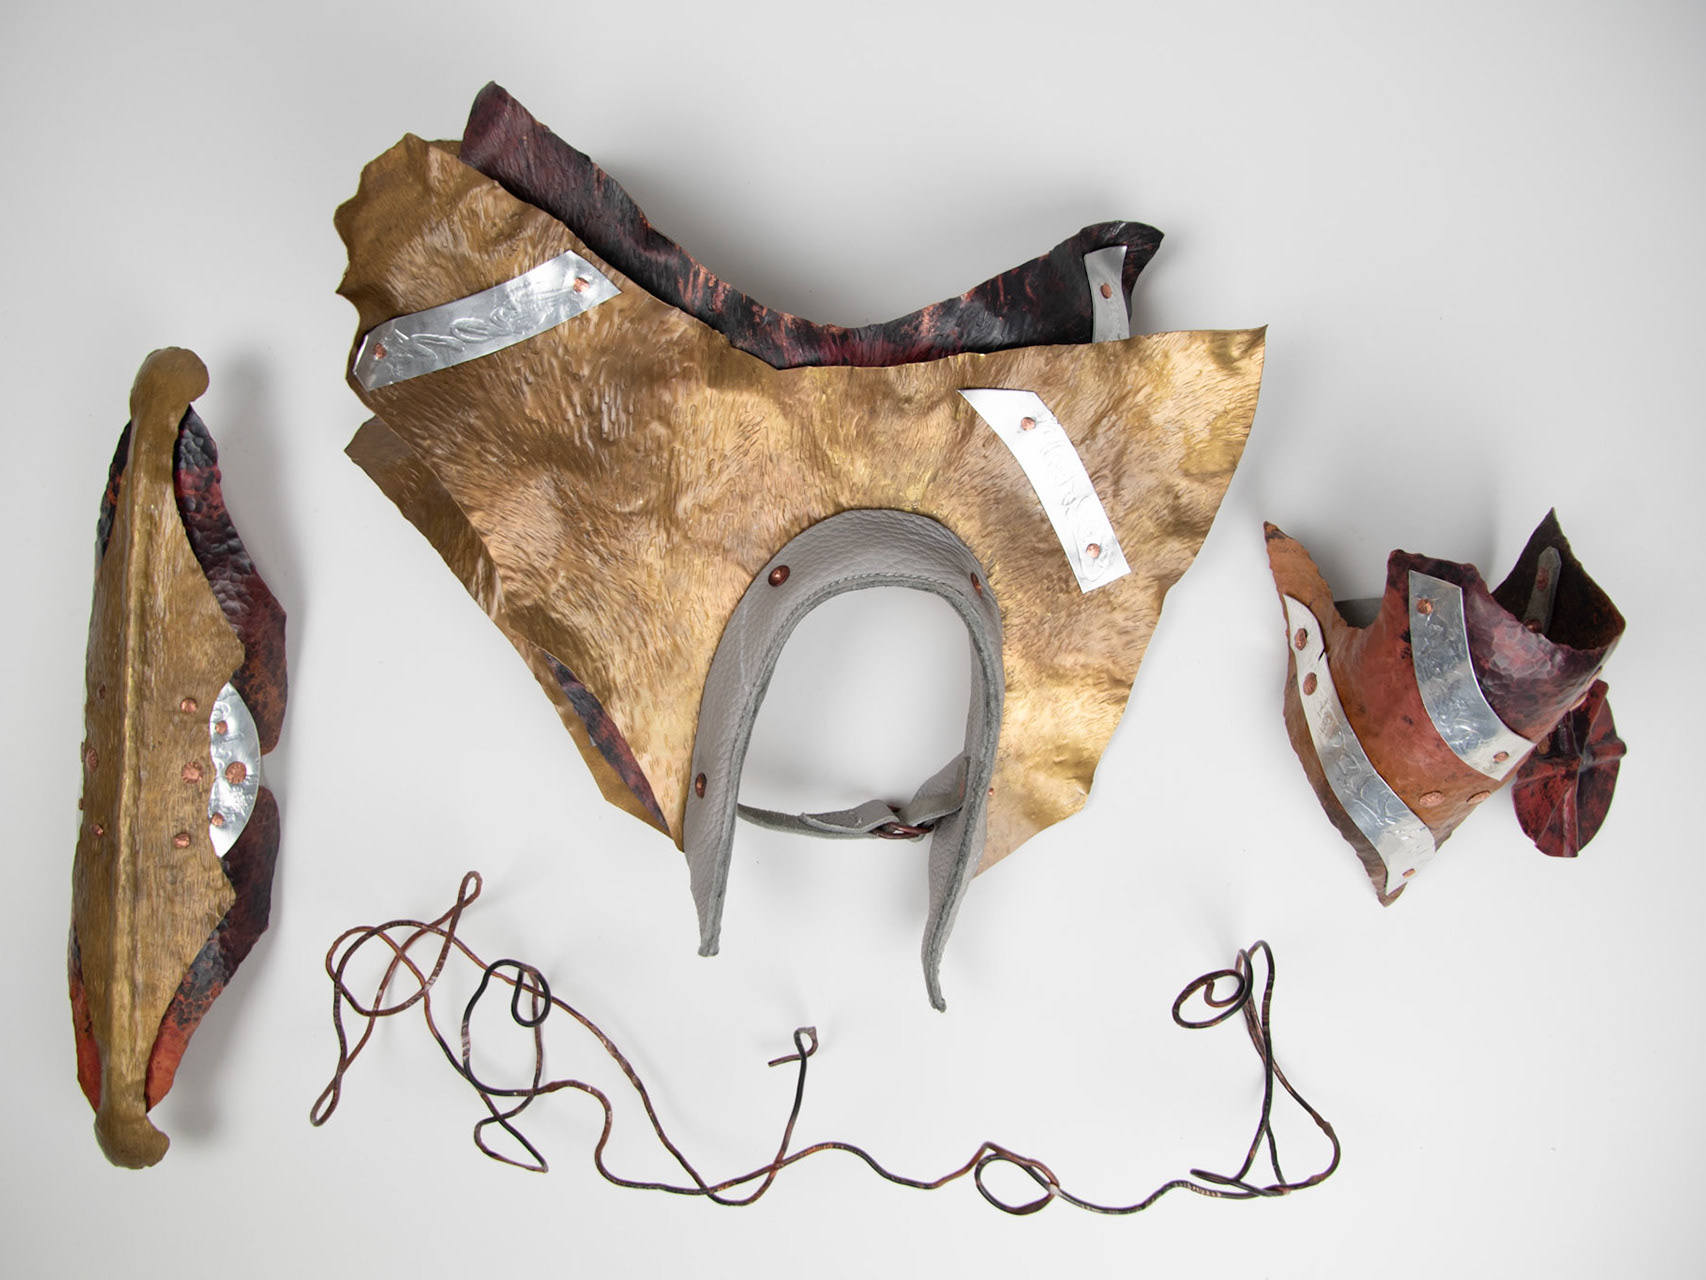
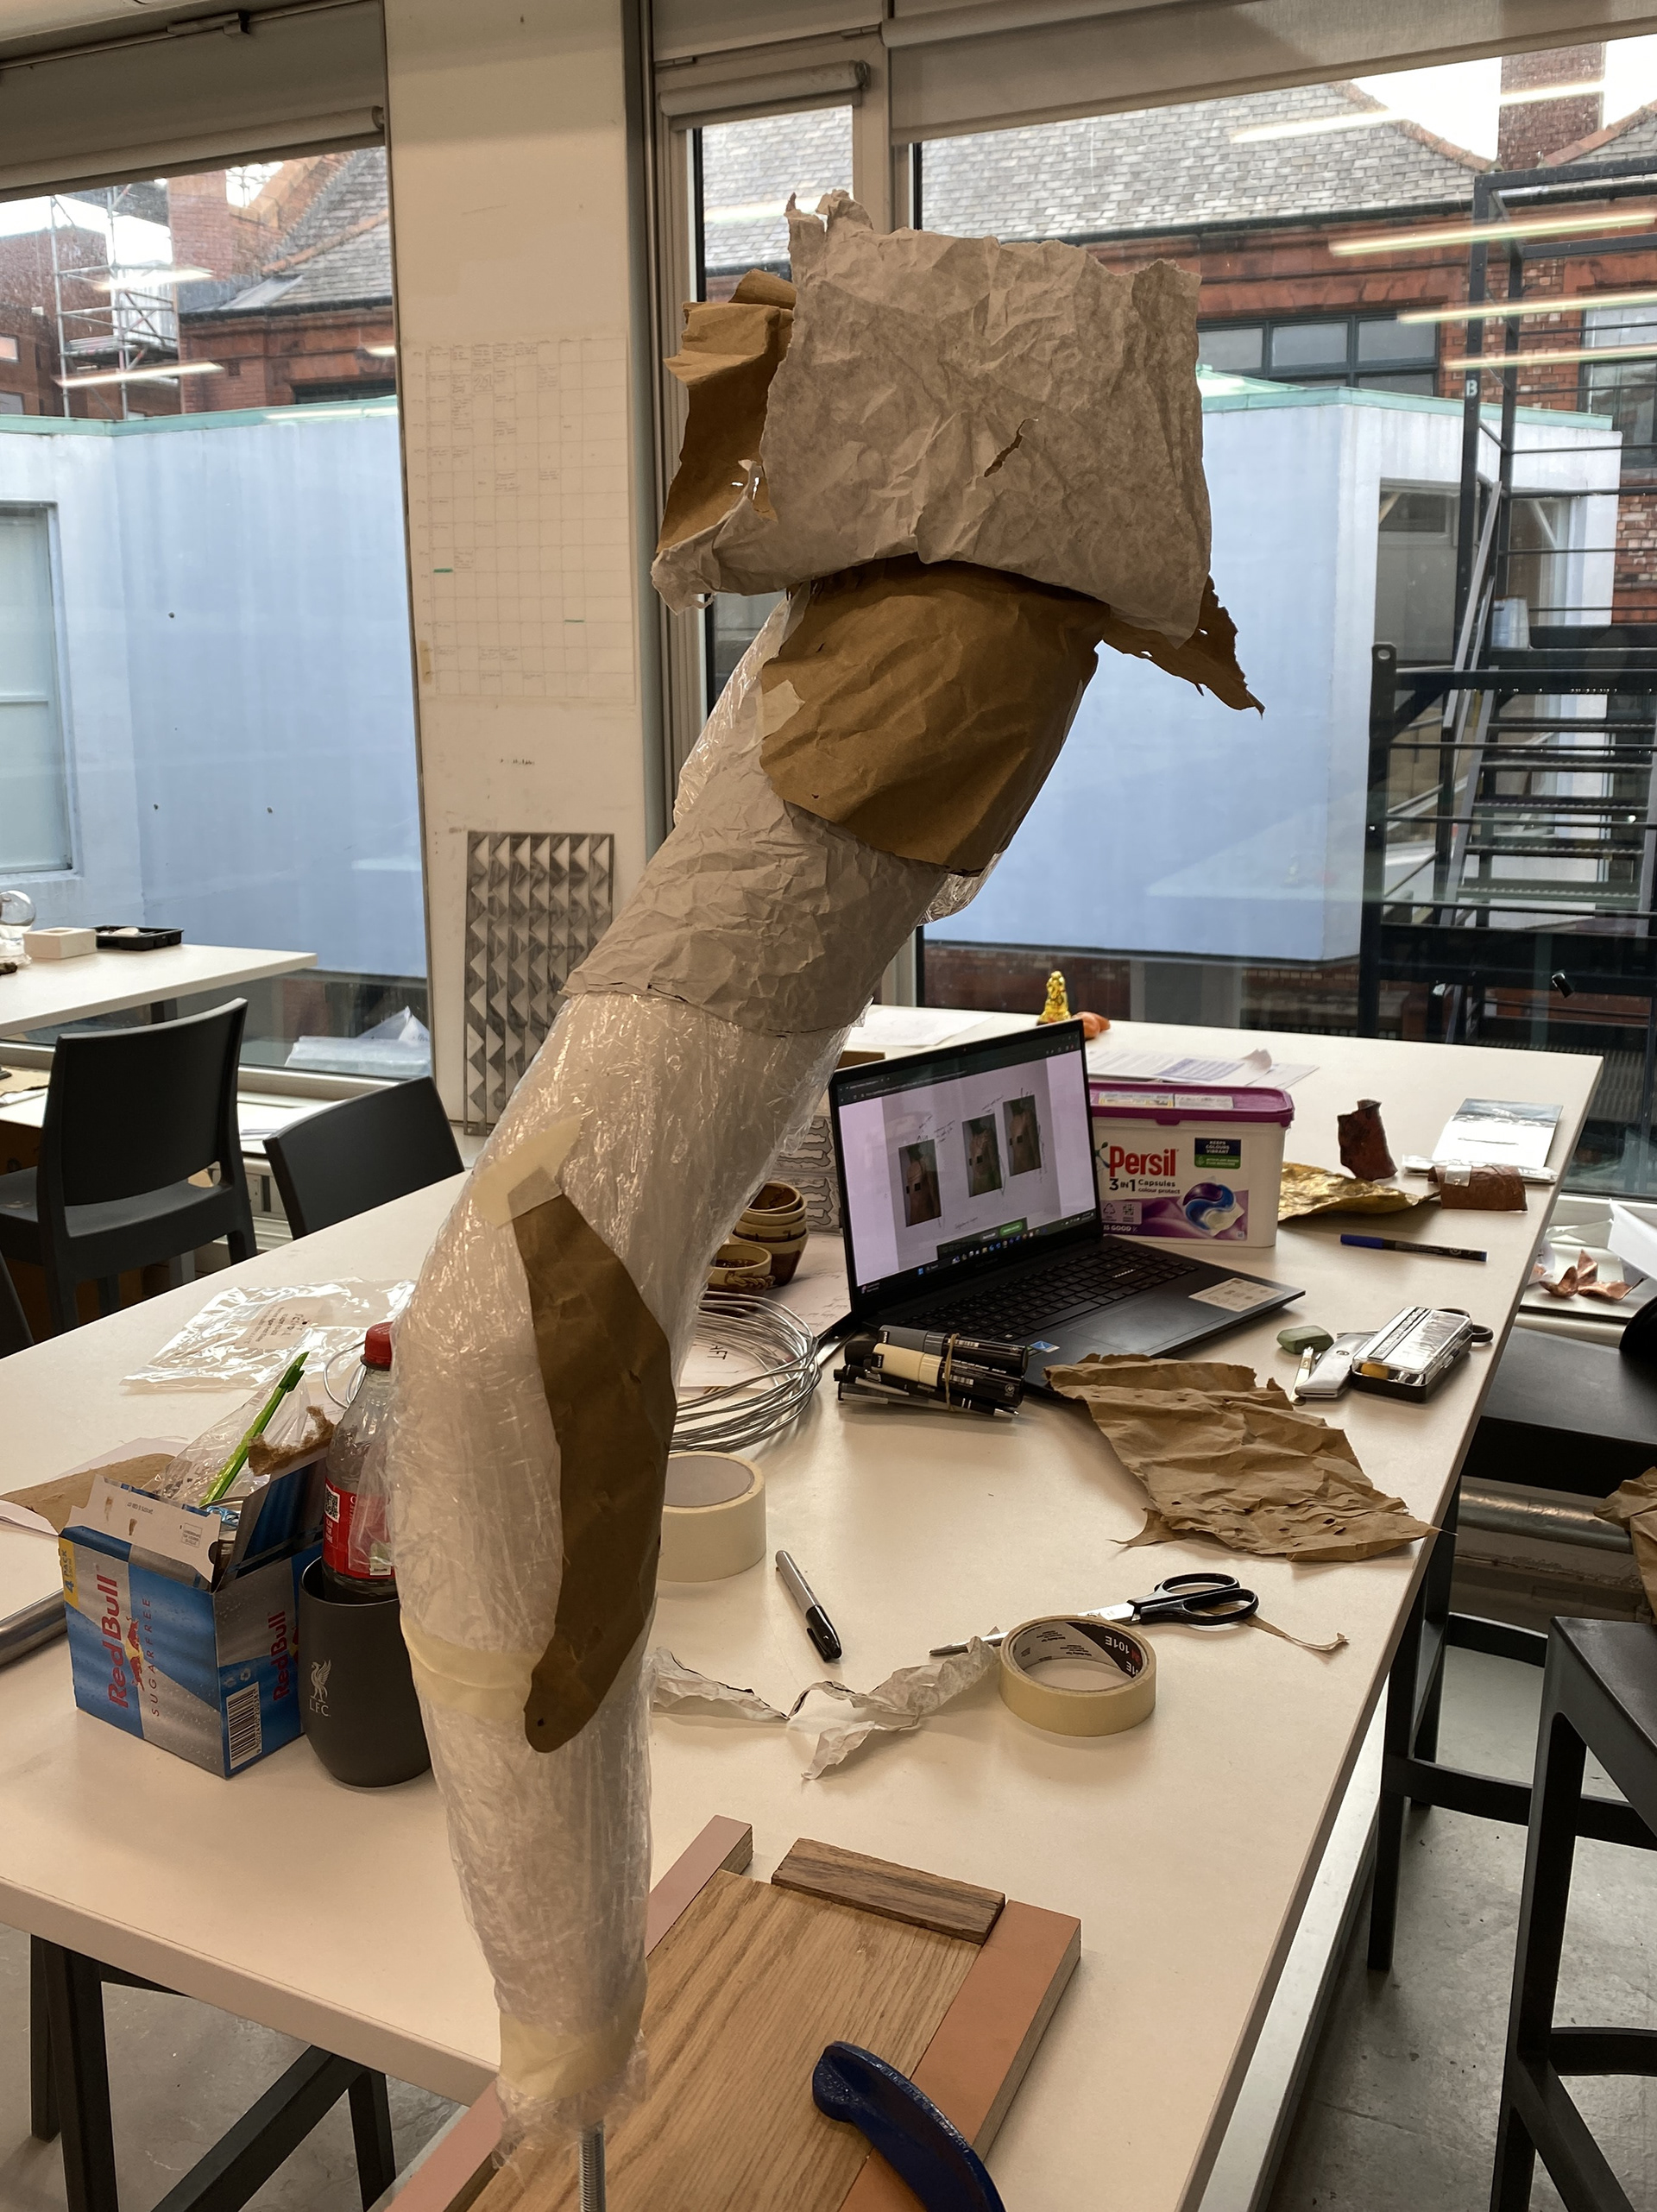
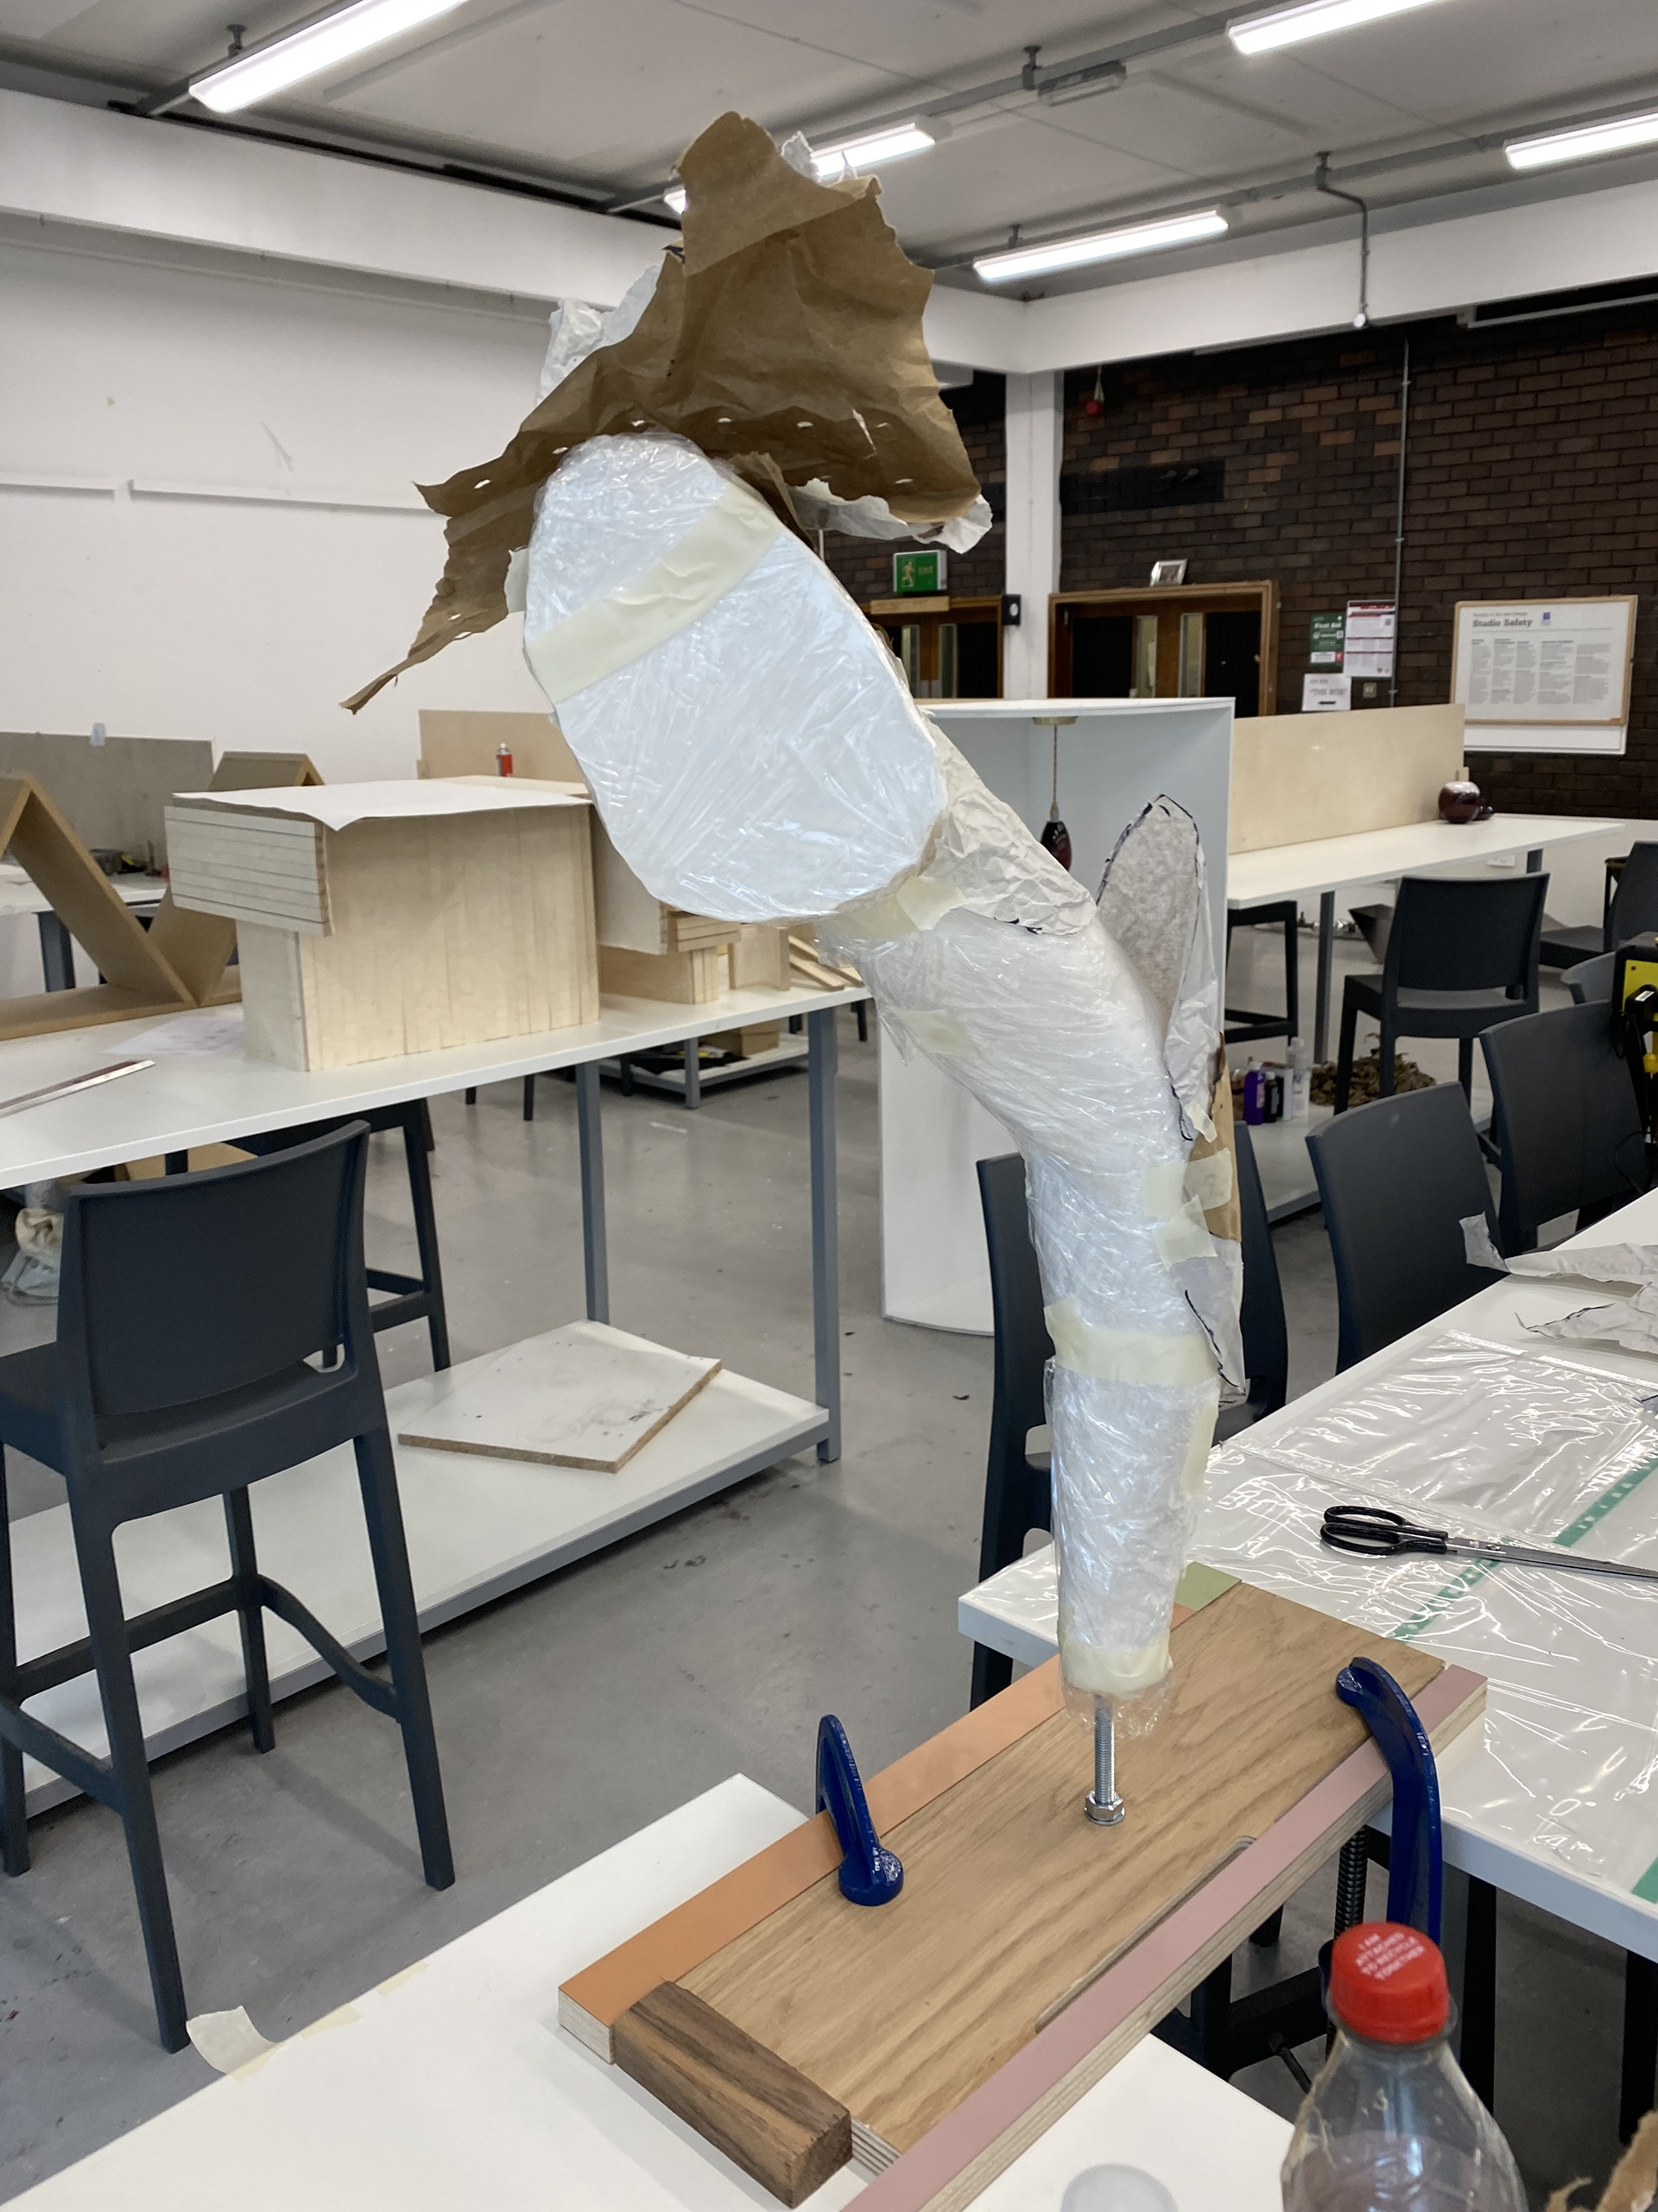
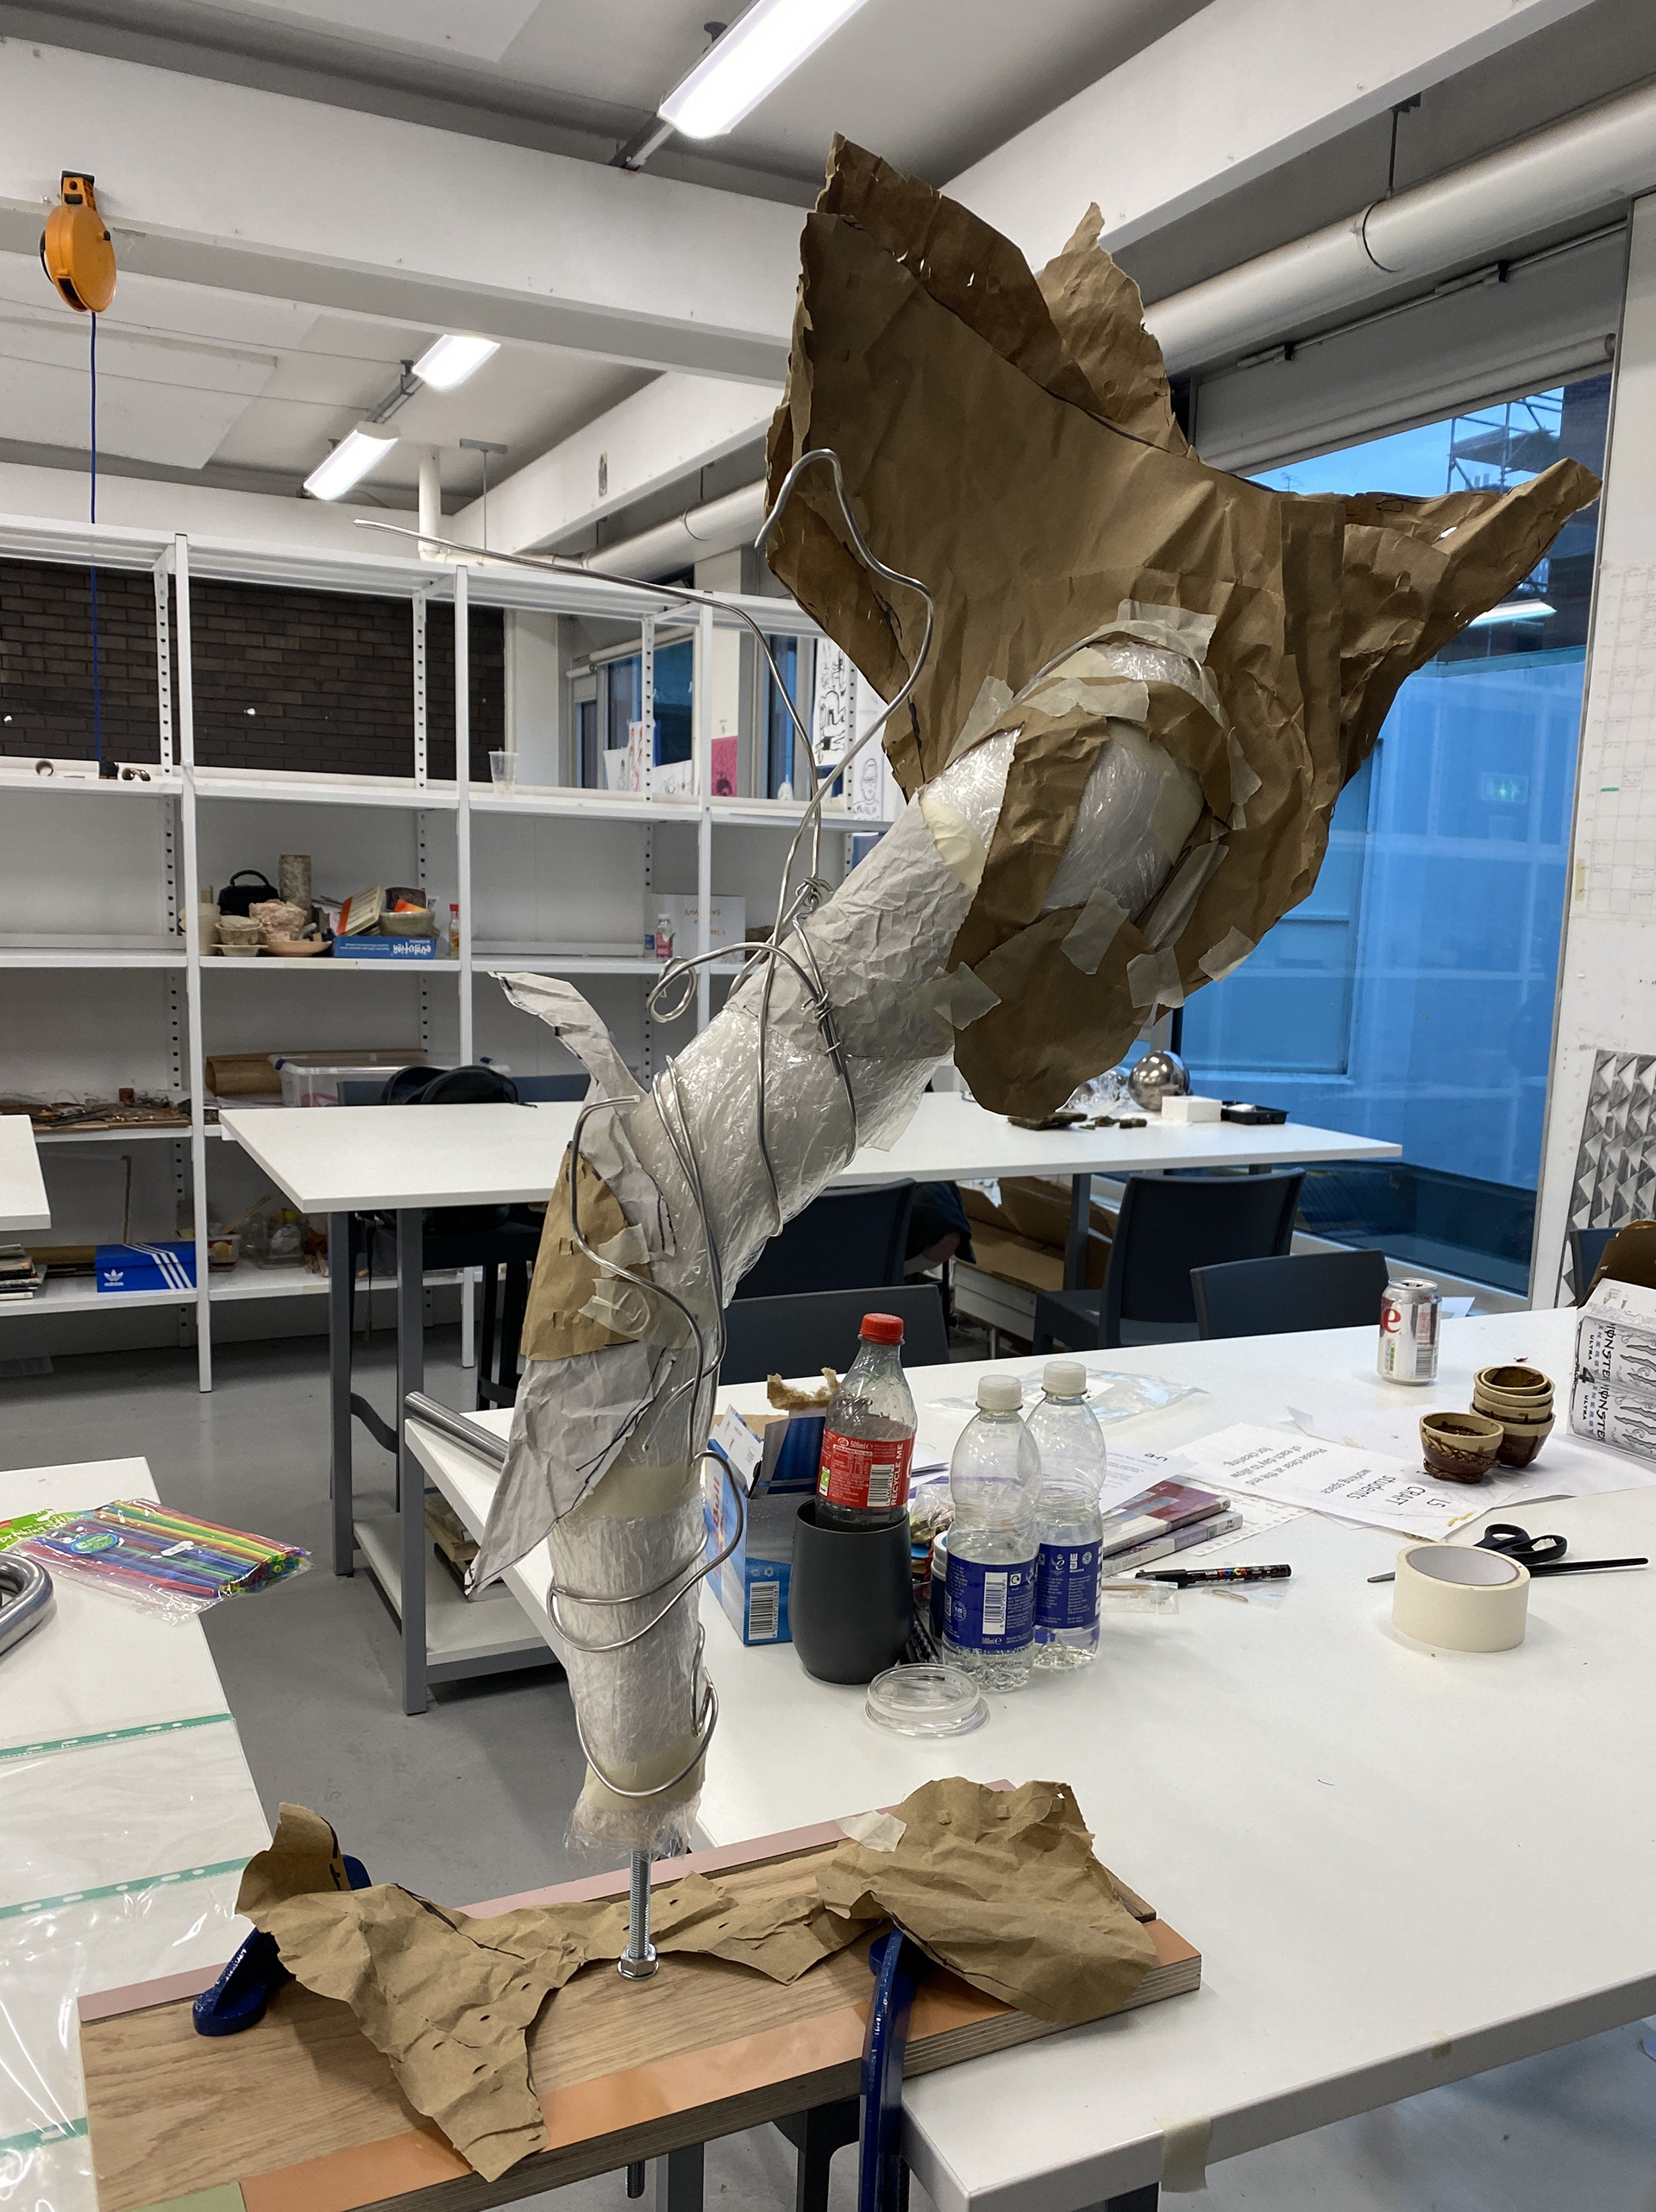
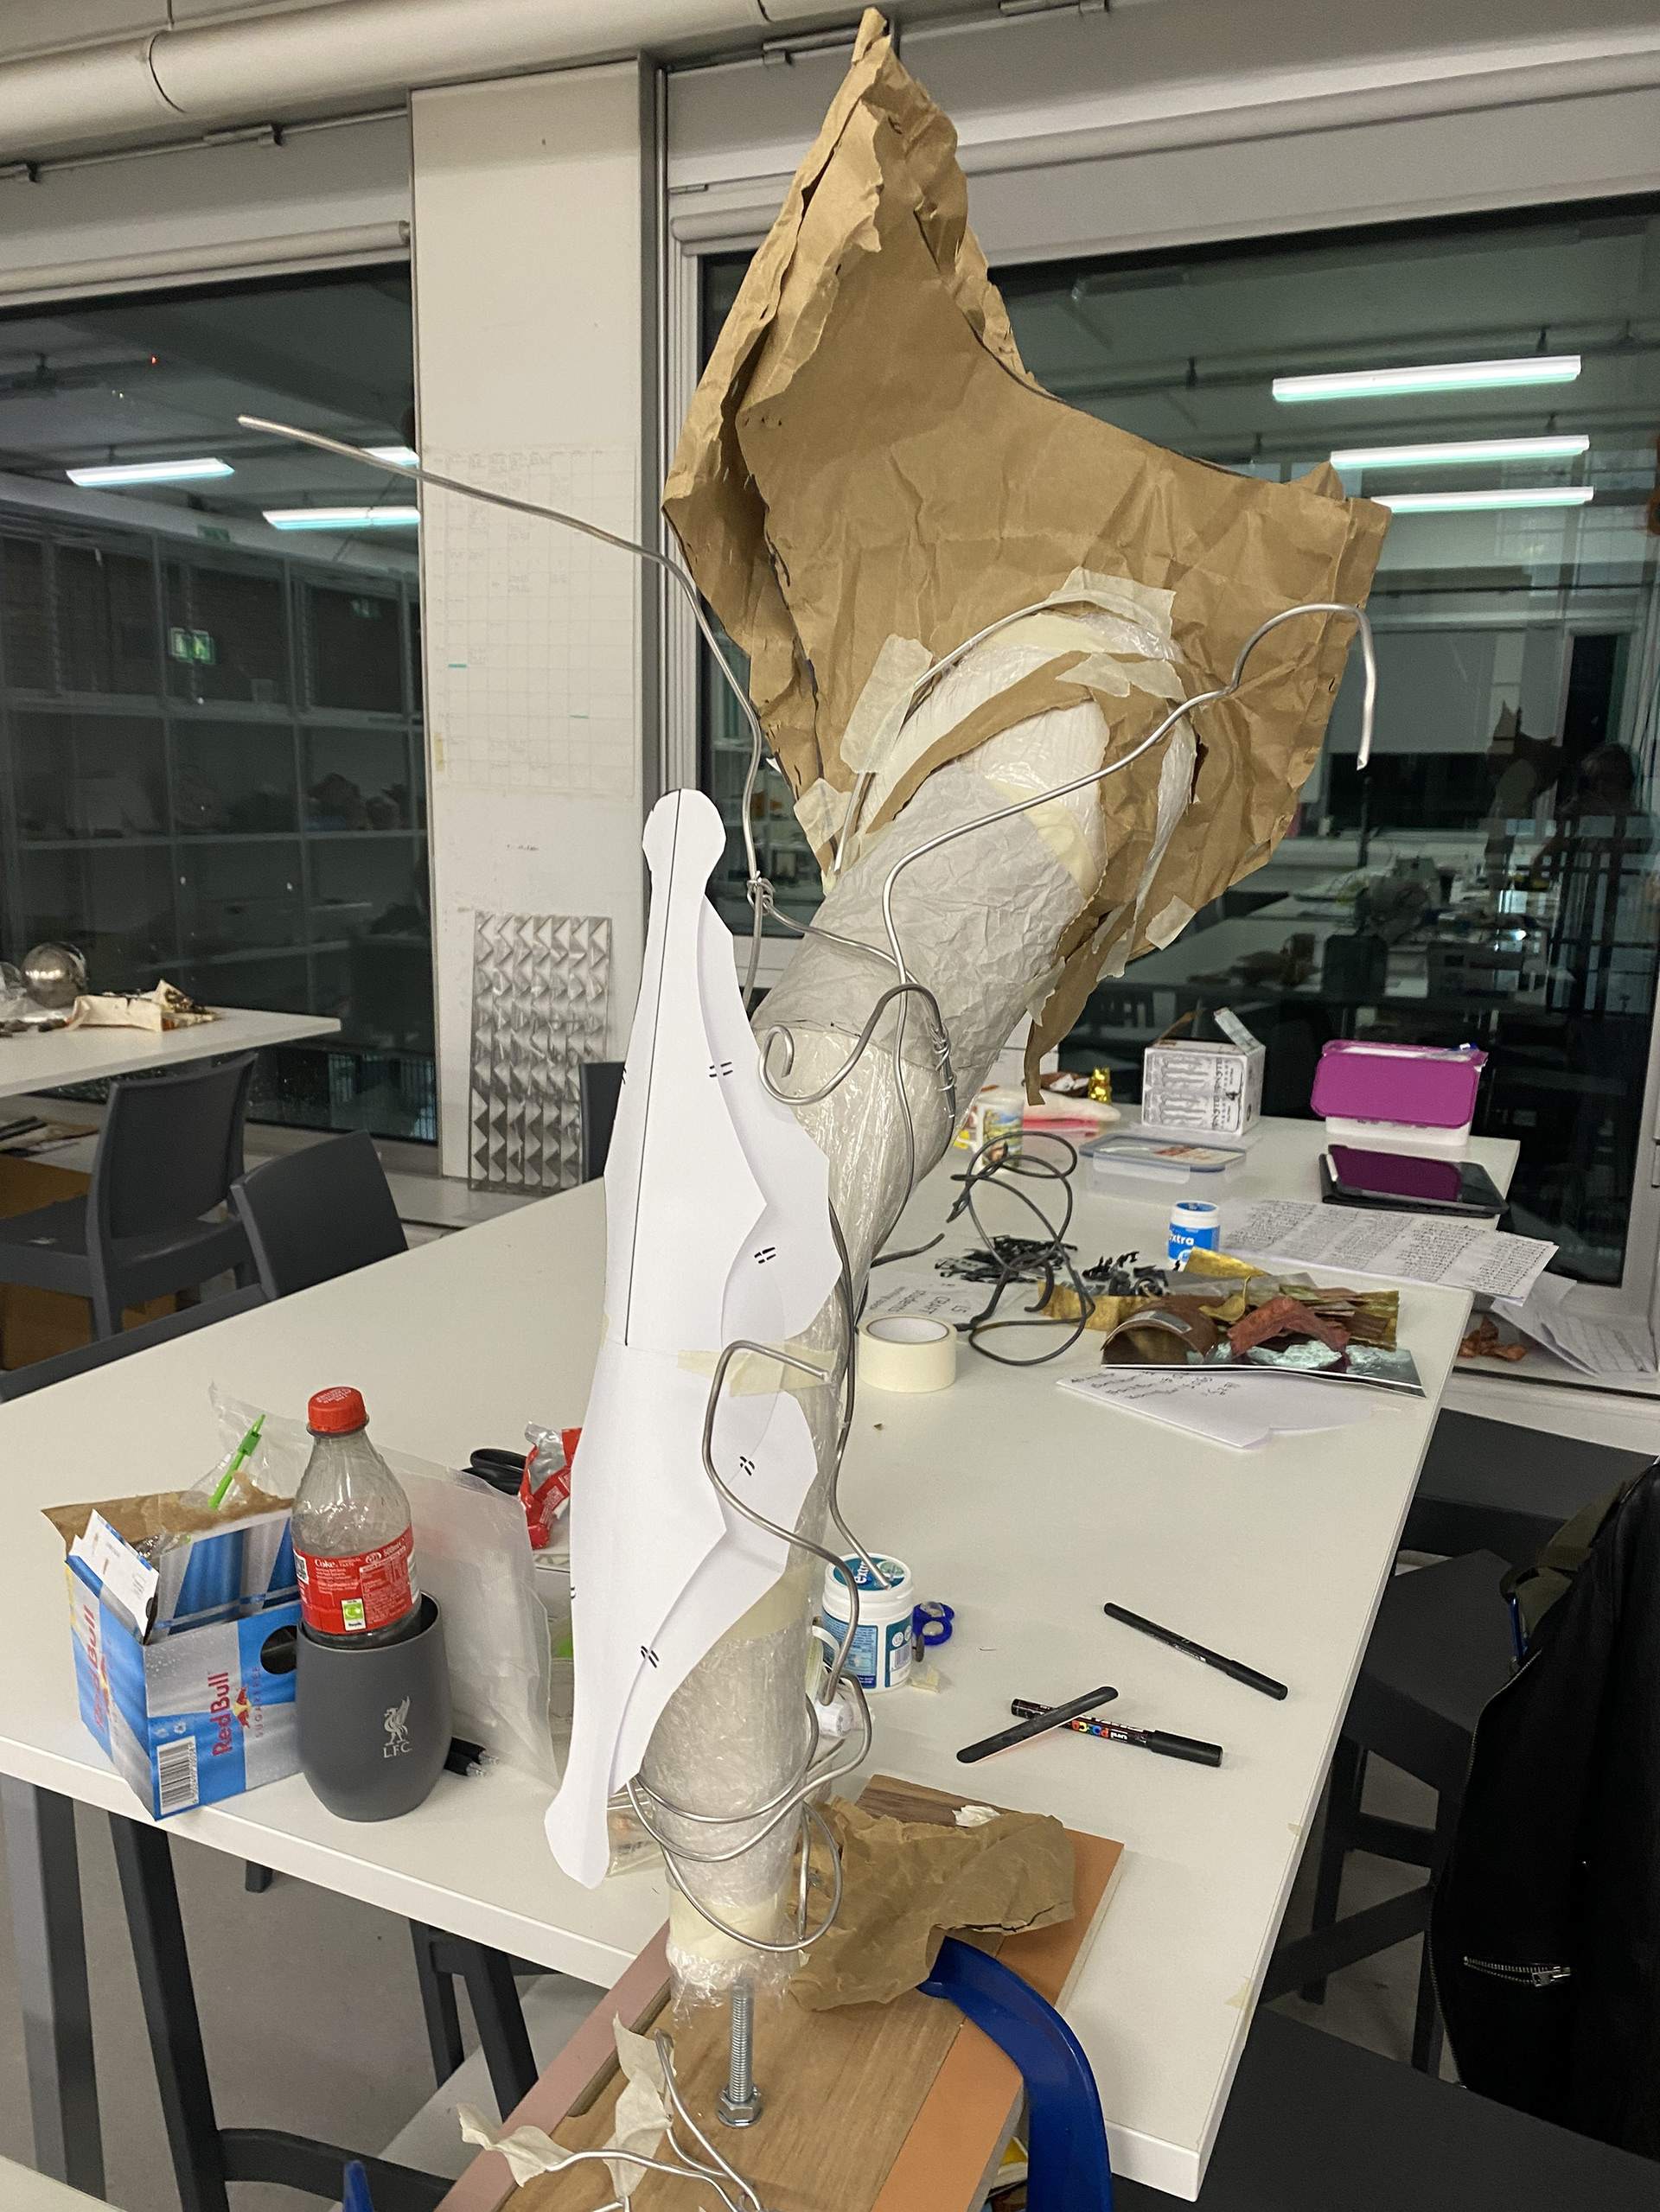
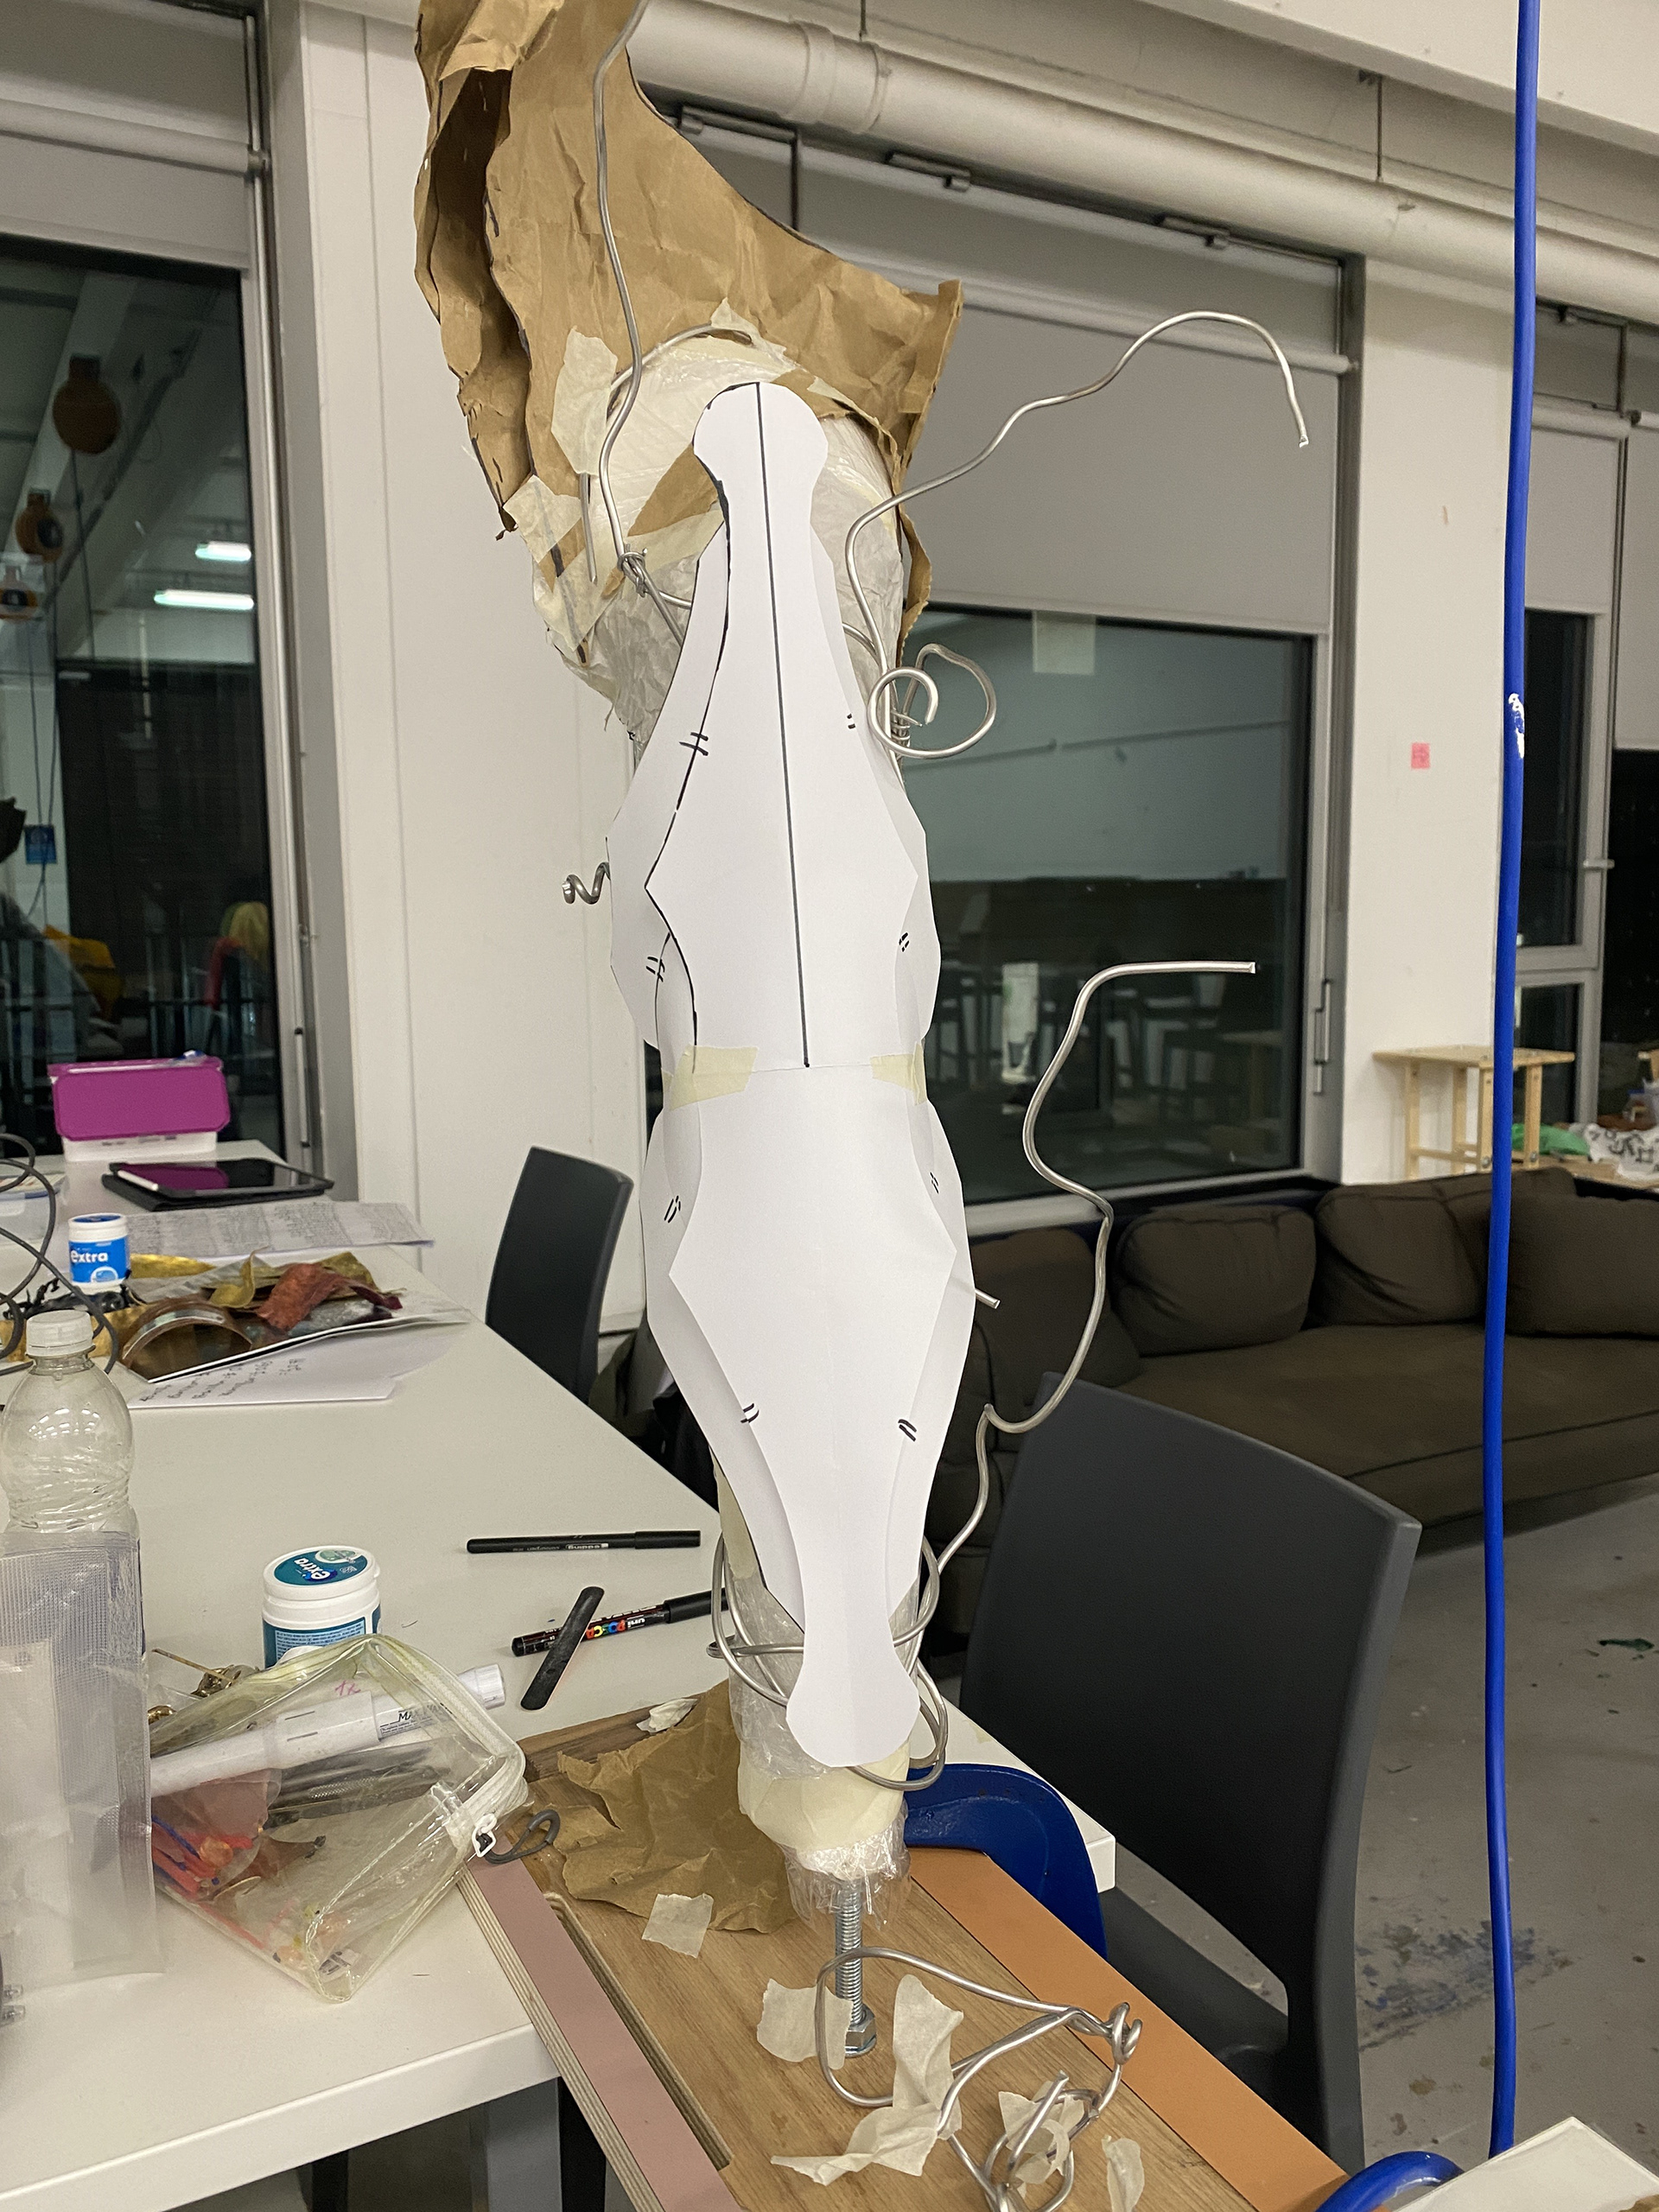
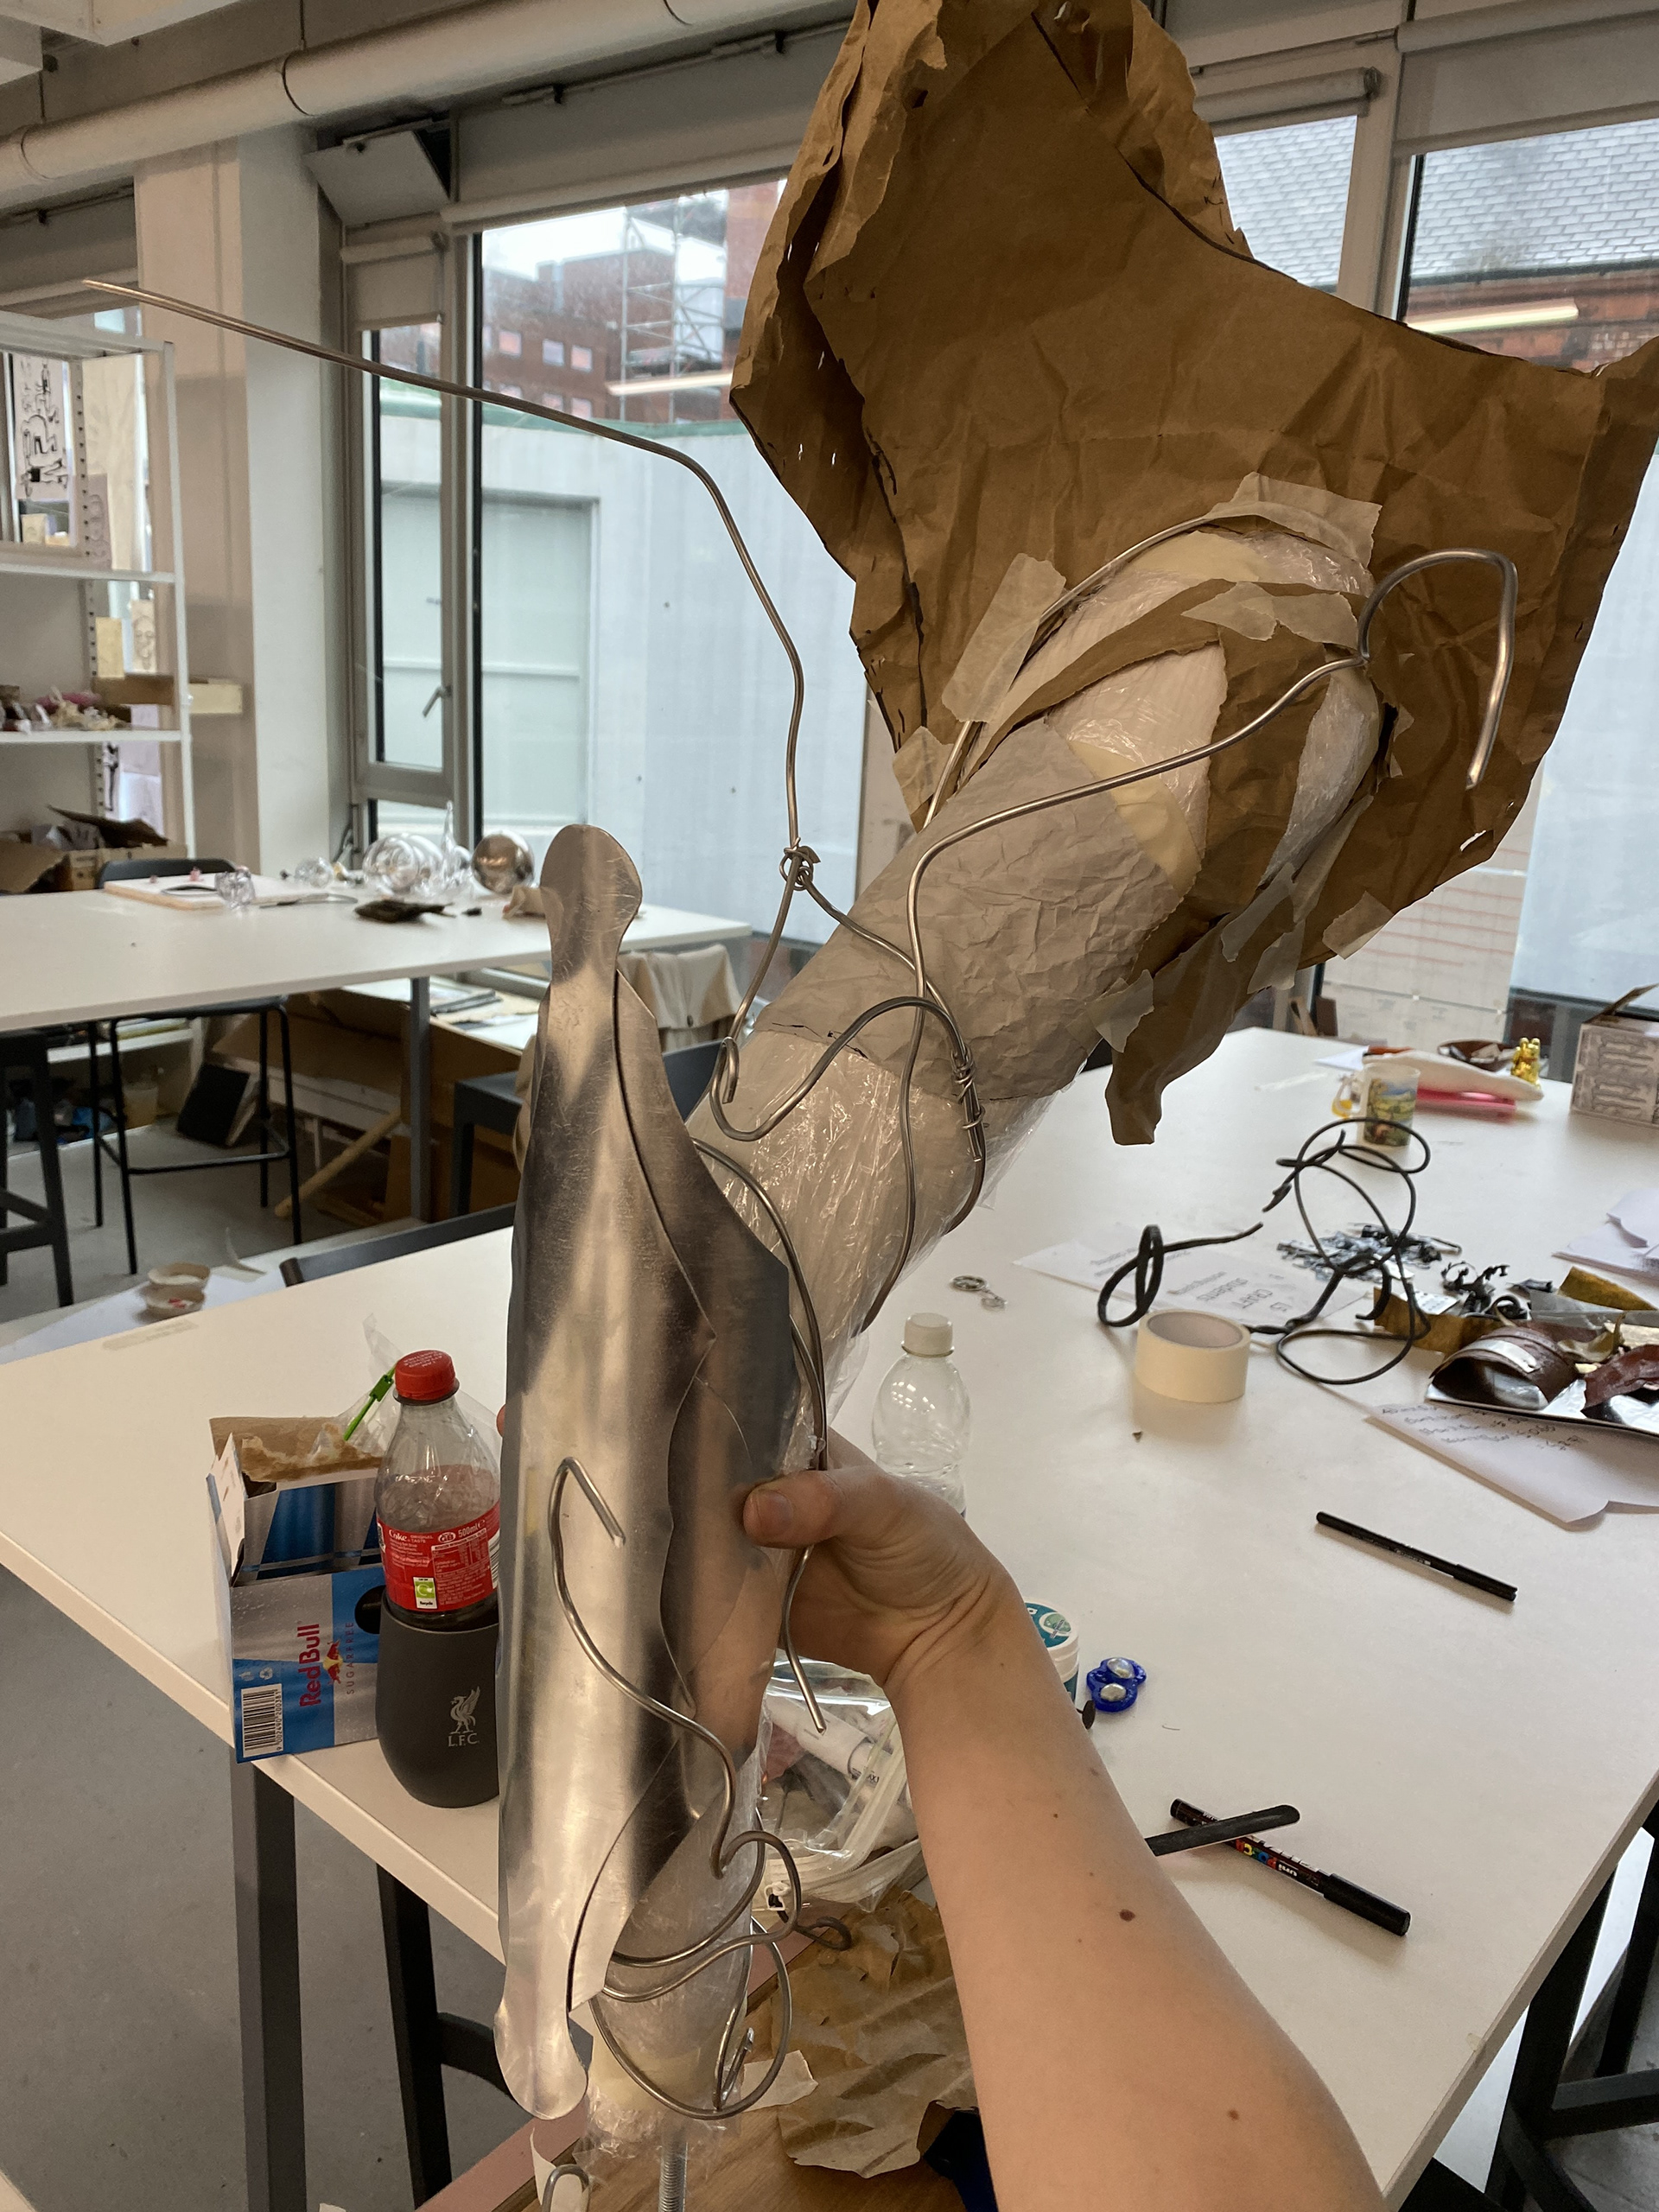
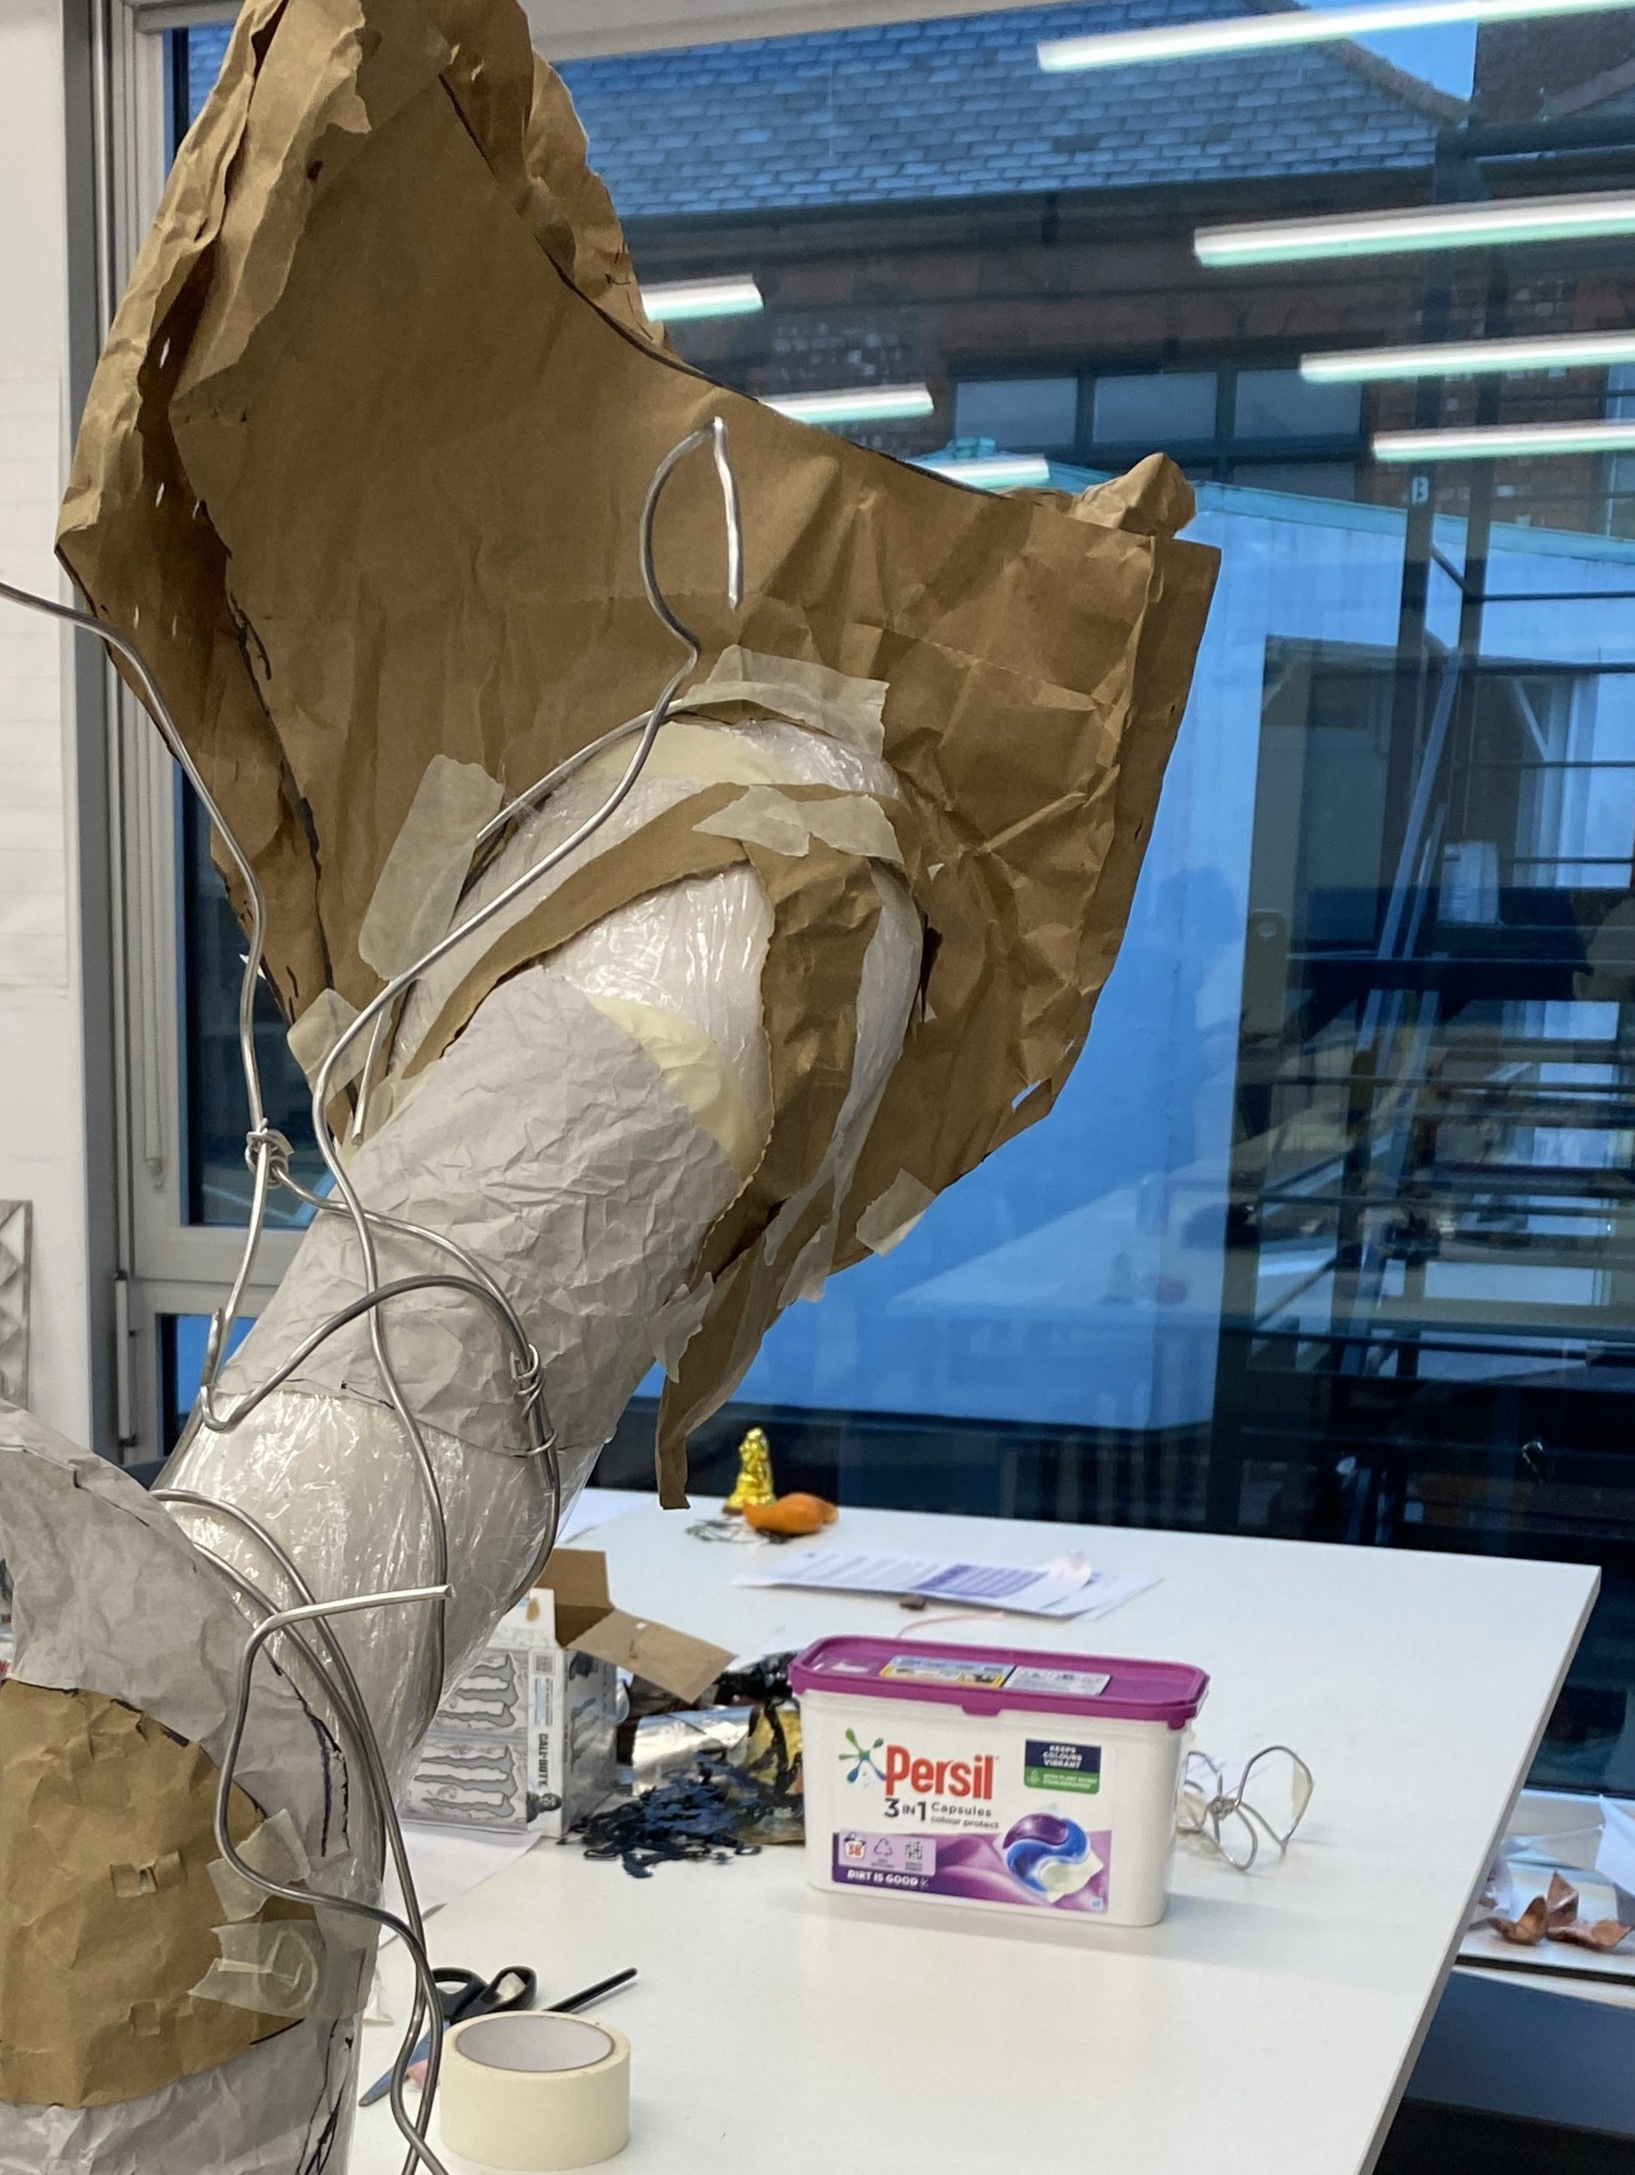
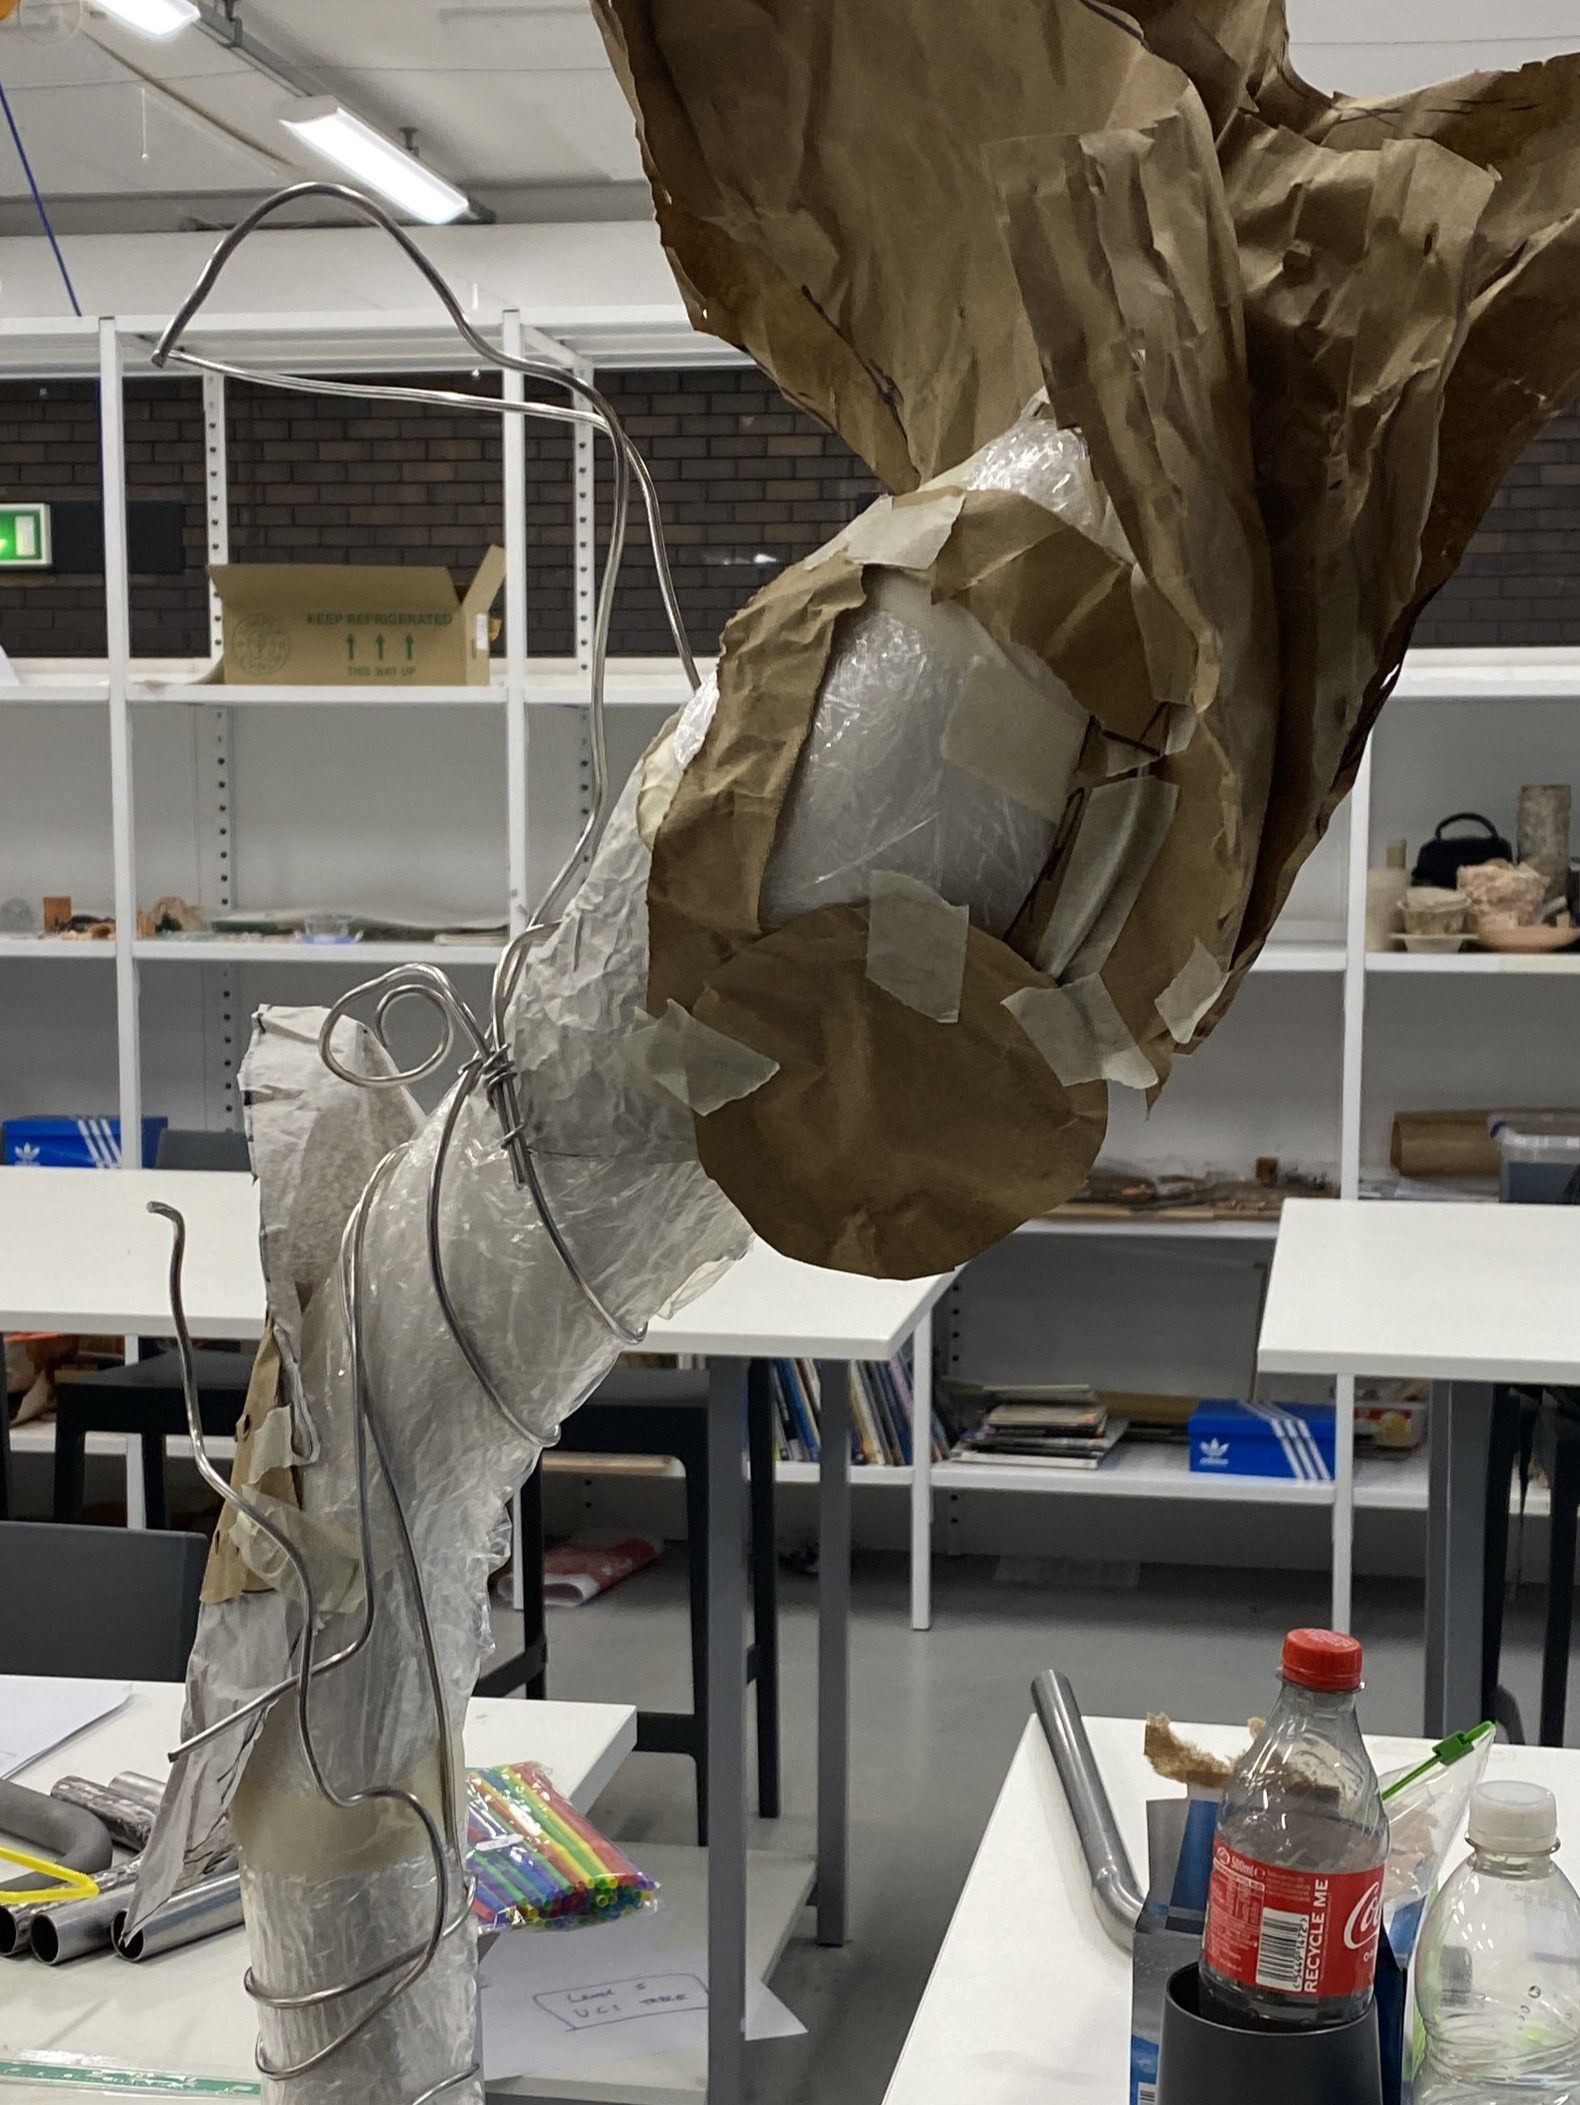
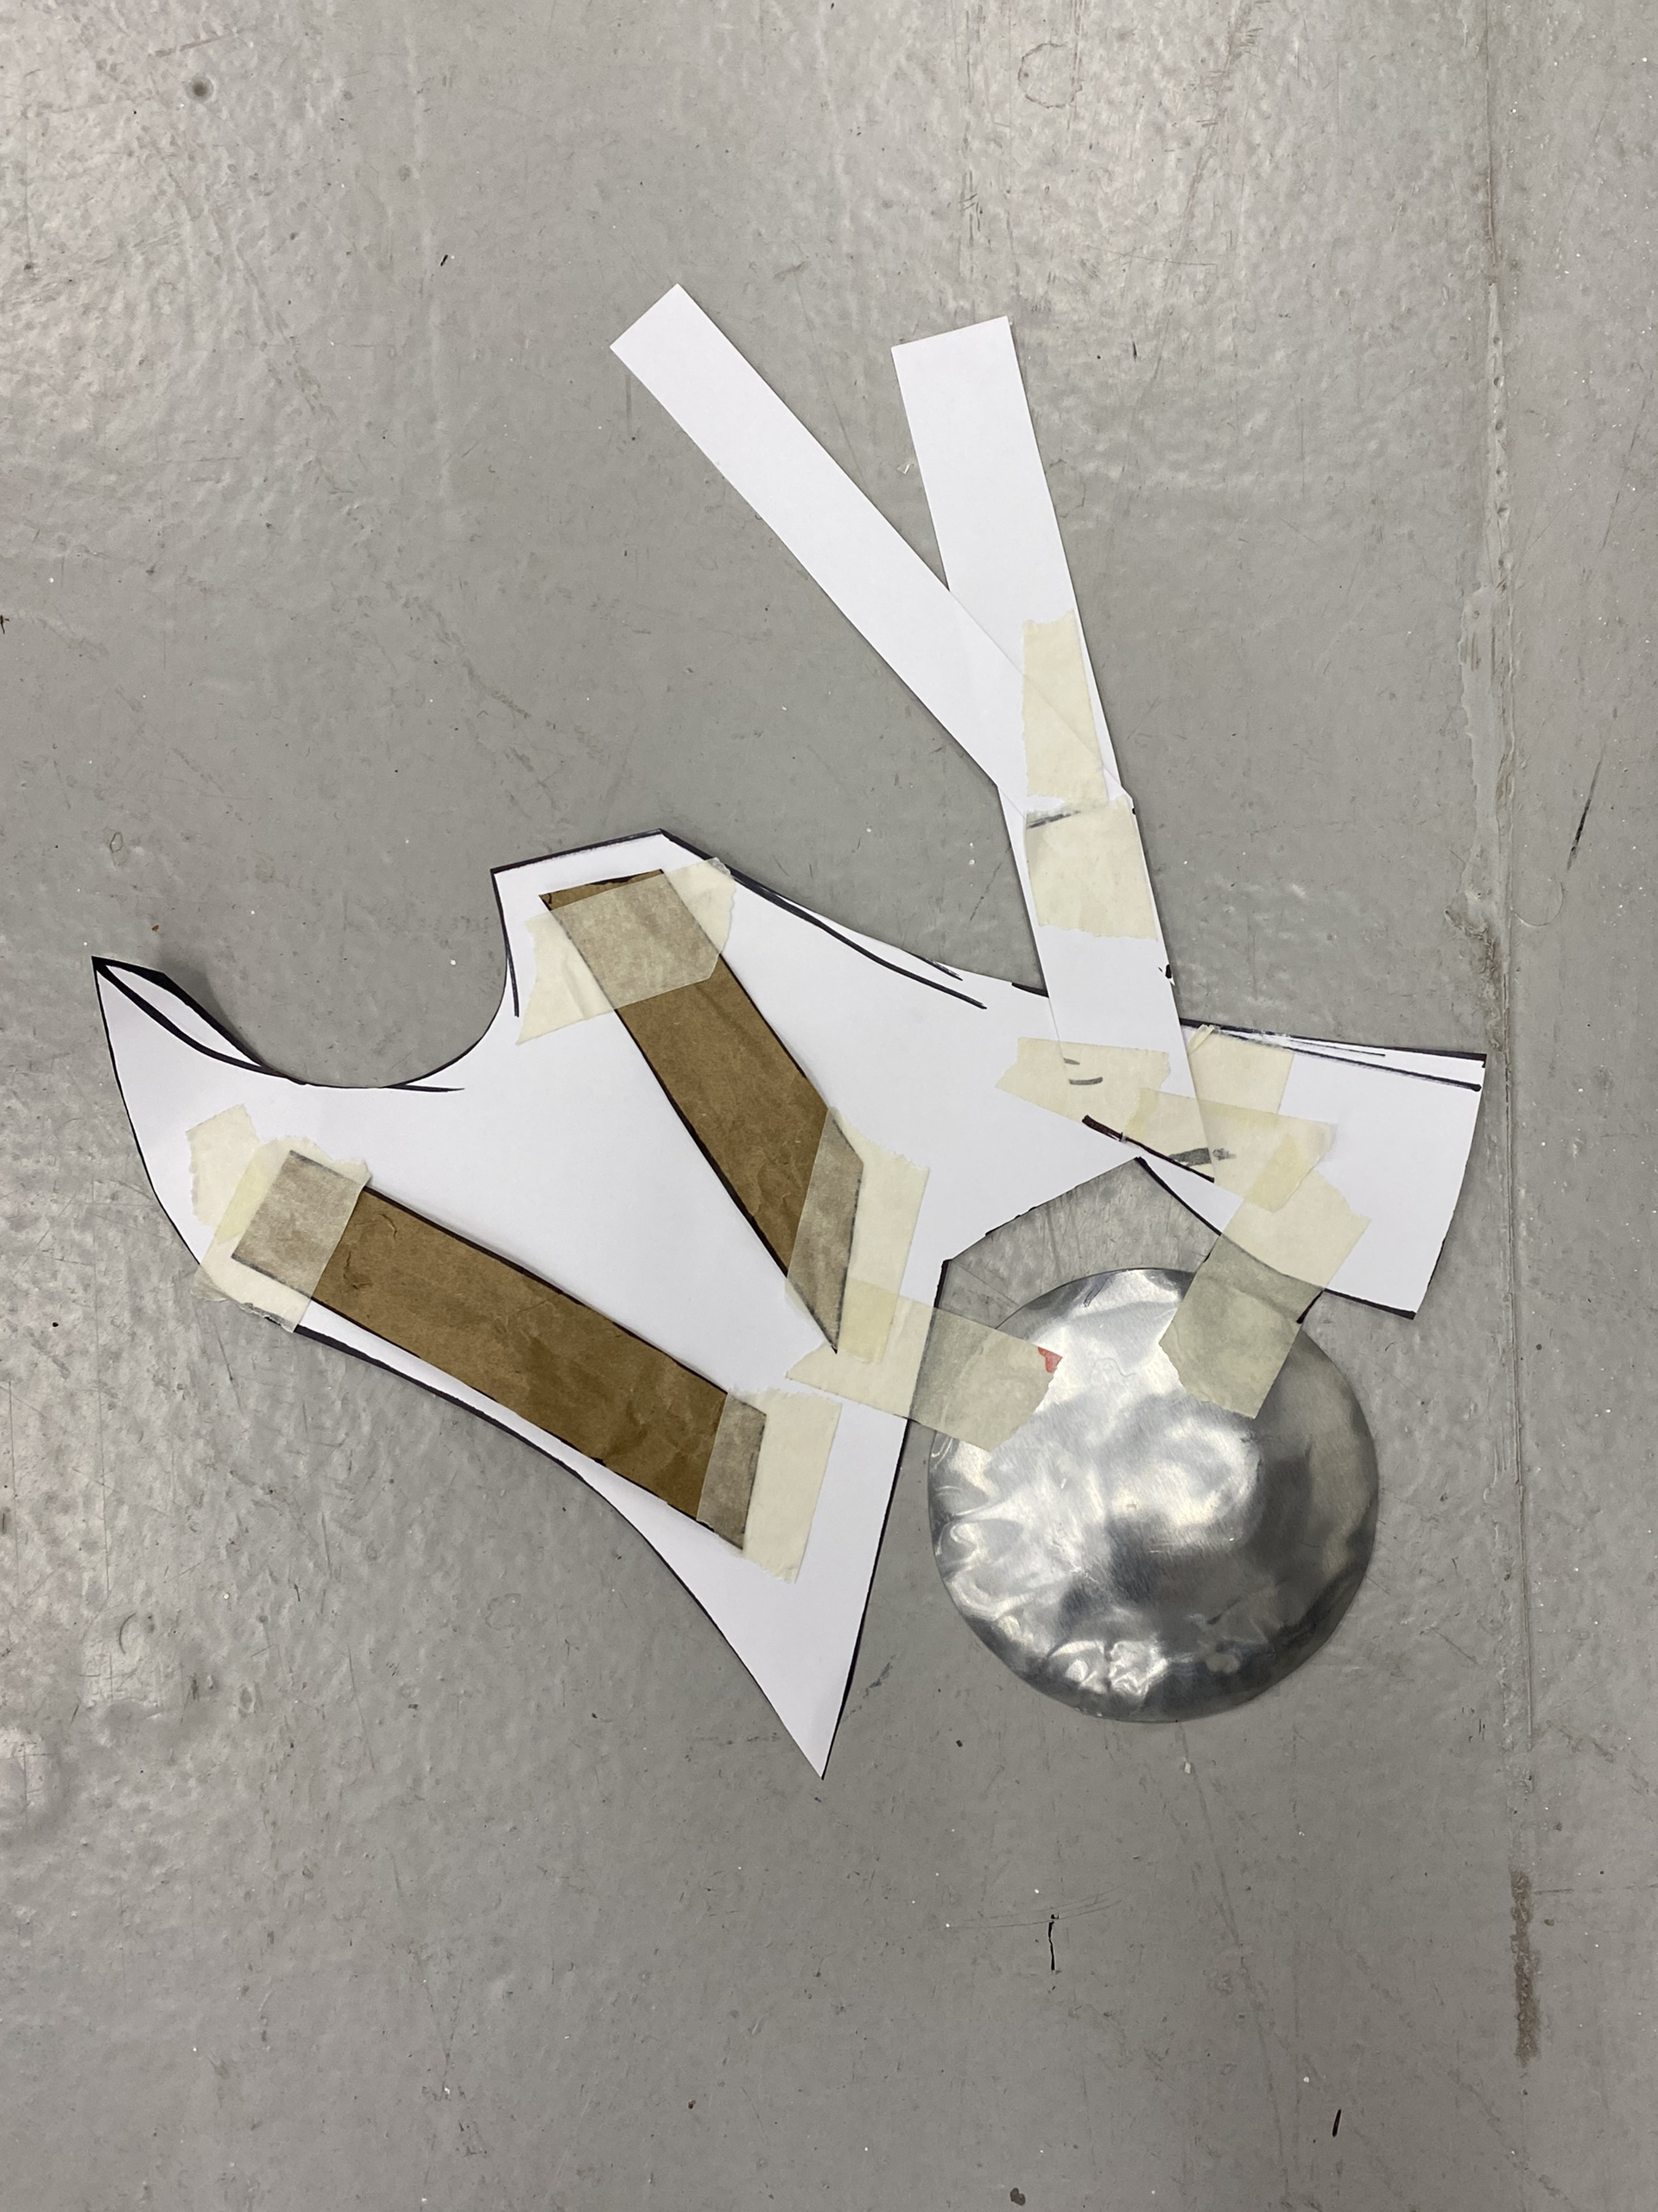
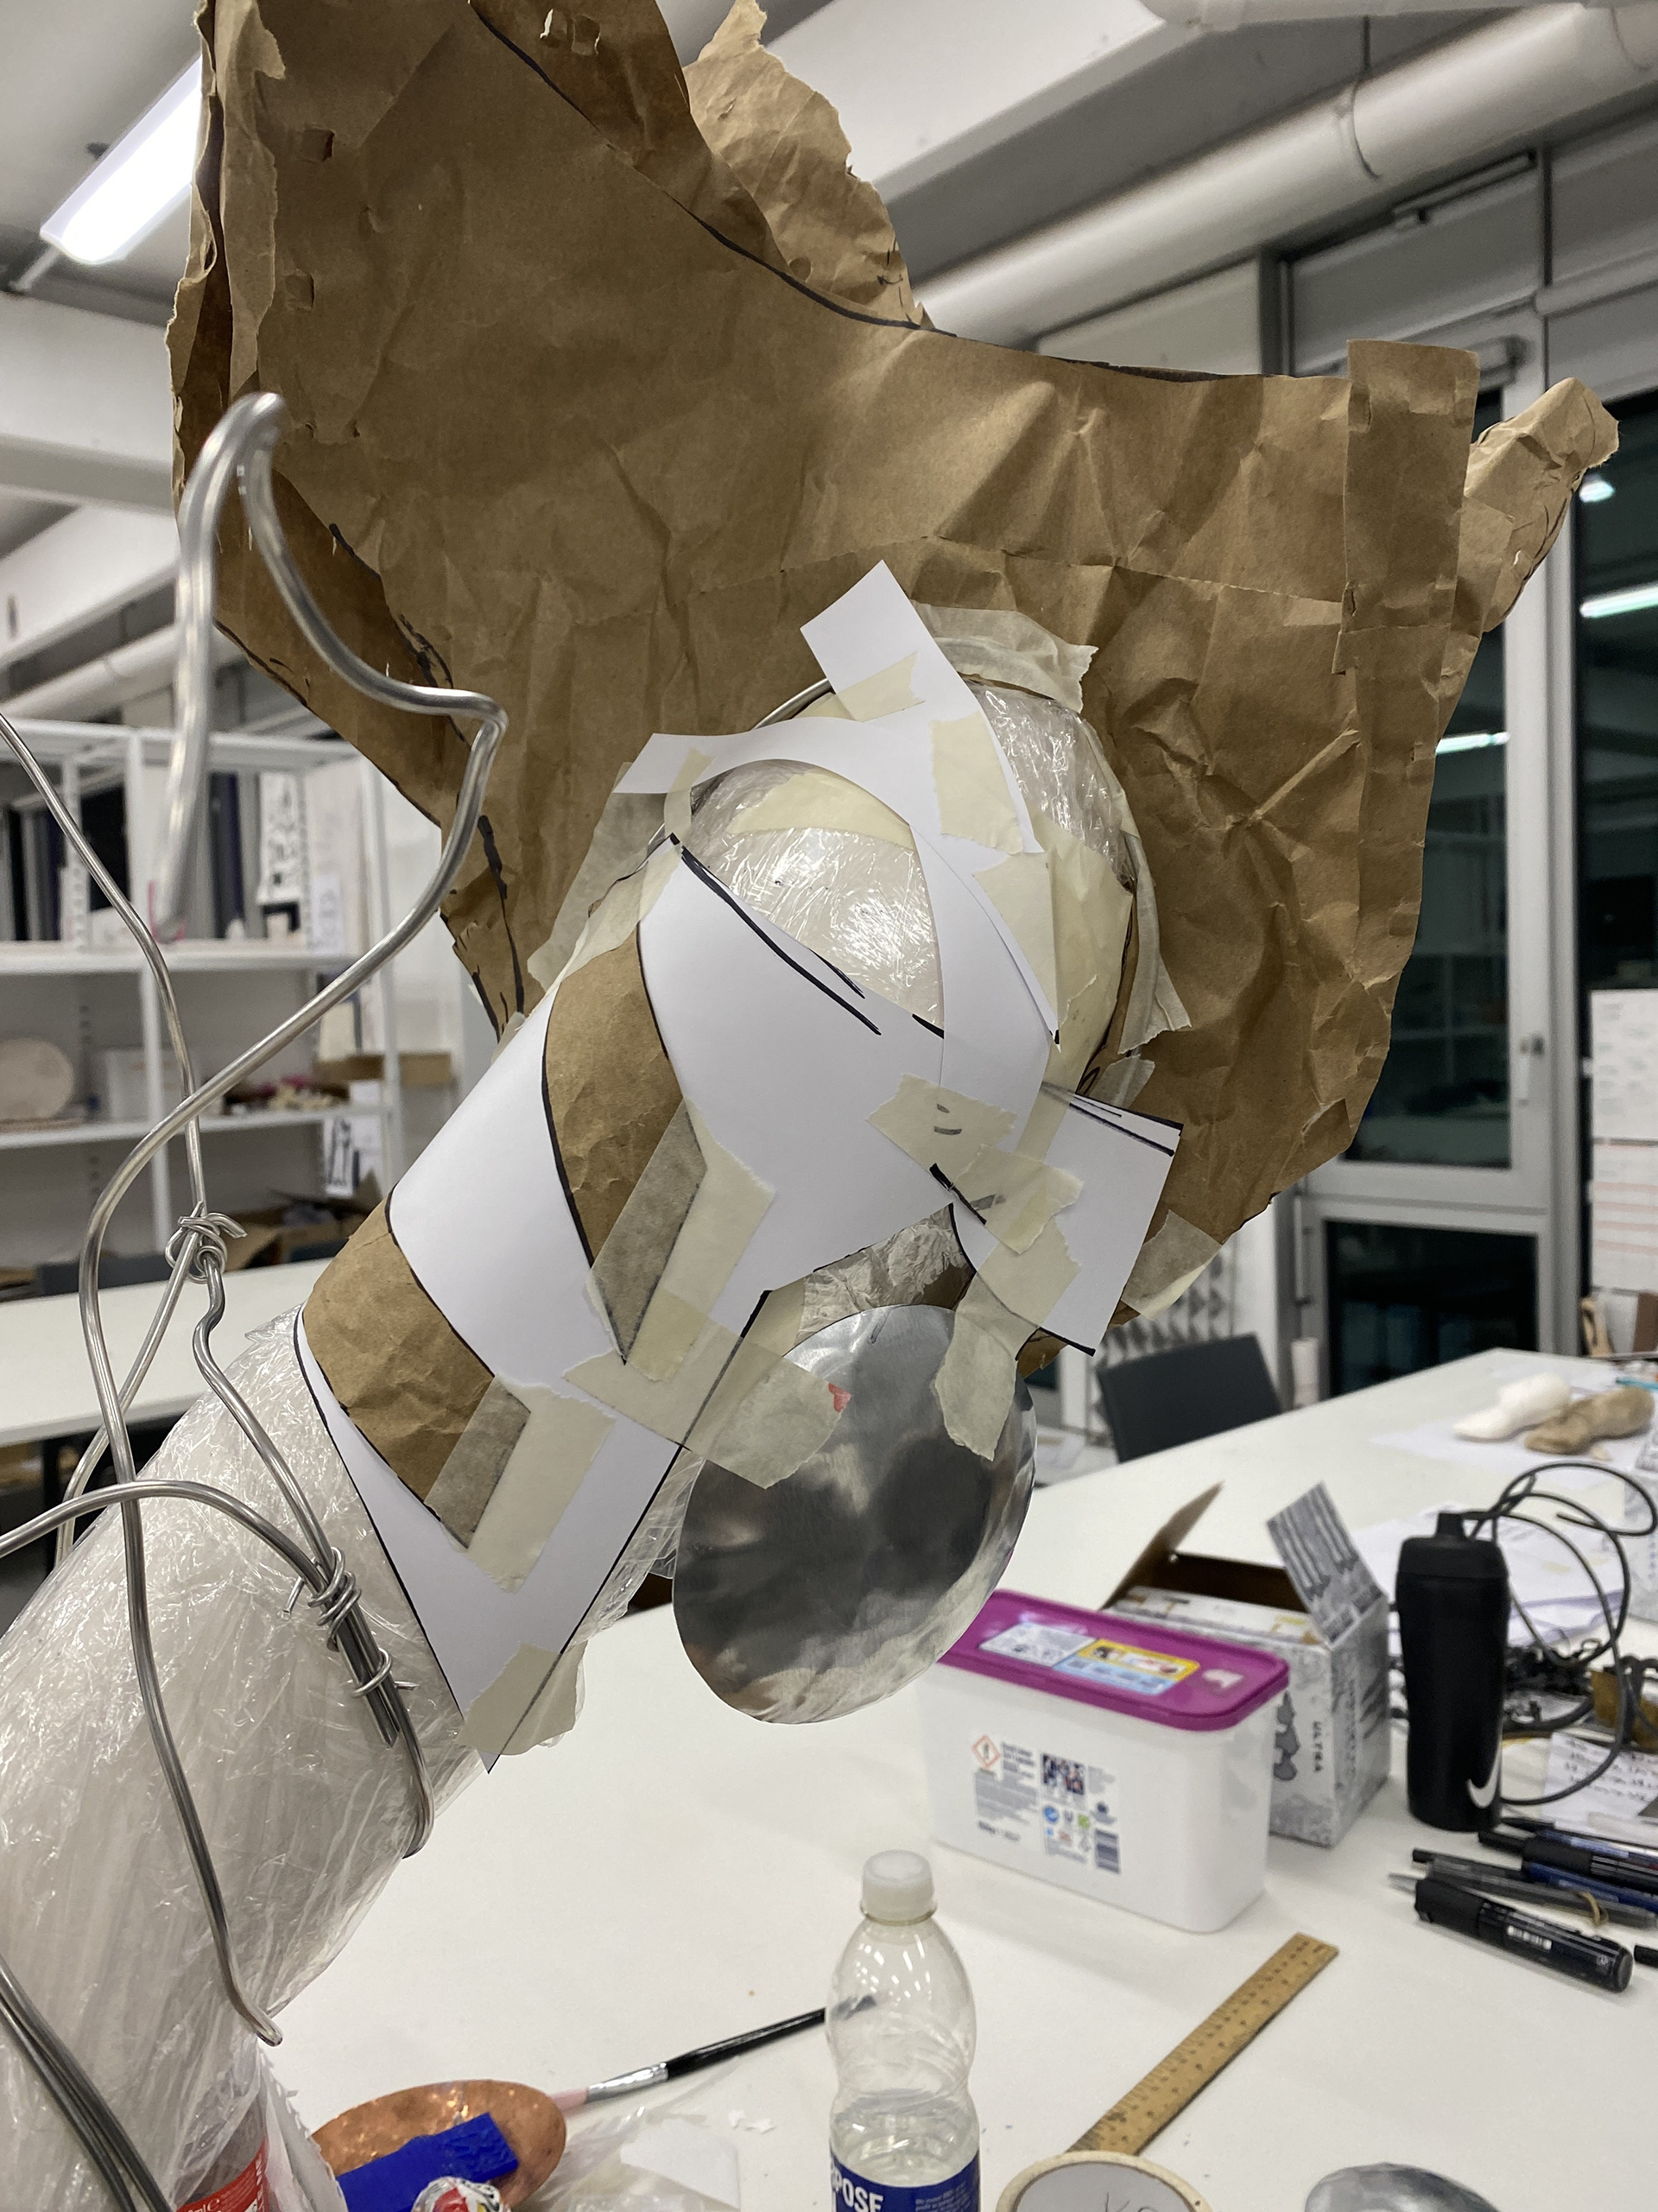
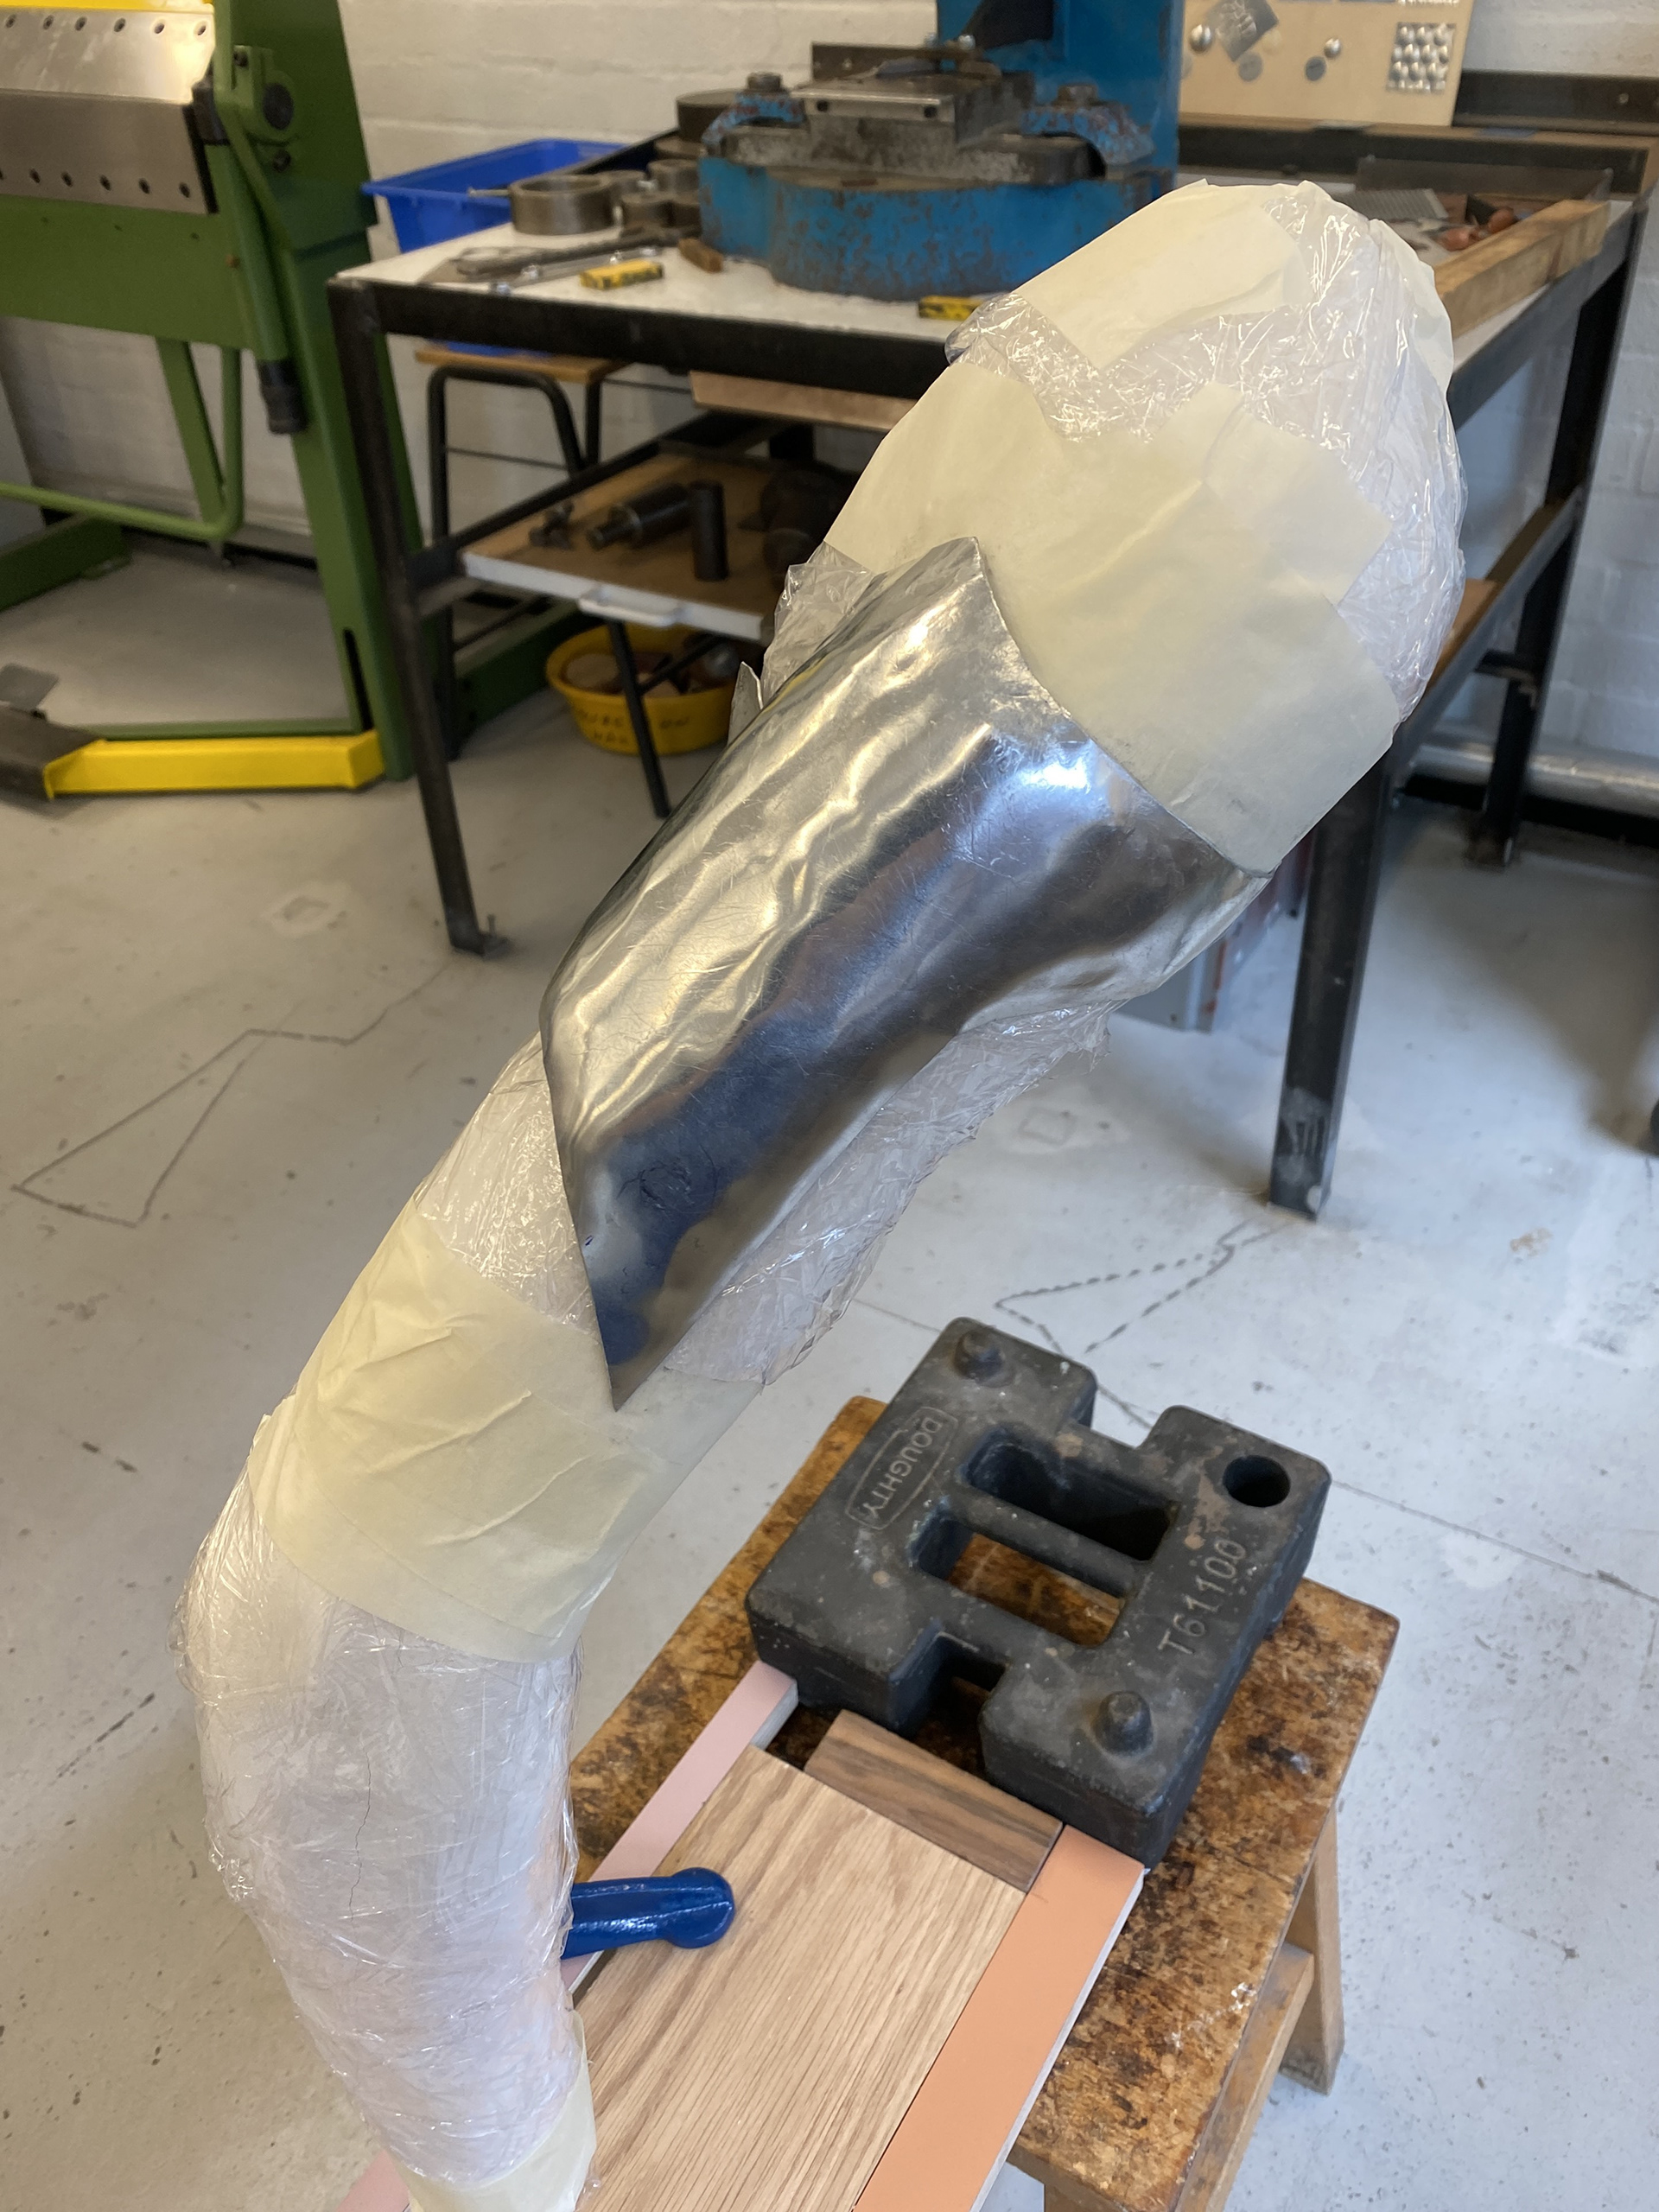
To progress and refine the form of my initial designs I started to work collaging in 3D, looking at how the different eliments sit on the body. To do this I created a cast of my shoulder and arm and temporarily mounted it verticaly so that I could build directly onto the form of myself. Initiaily I was going to test each design directly referencing from my drawings but through my material testing and reivewing my design ideas, I discovered that there were key elements to combine from all the designs. Therefore, my aproach changed to layering and merging different forms from all designs whilst keeping in mind the variety of textutes and materials from my workshop testing.
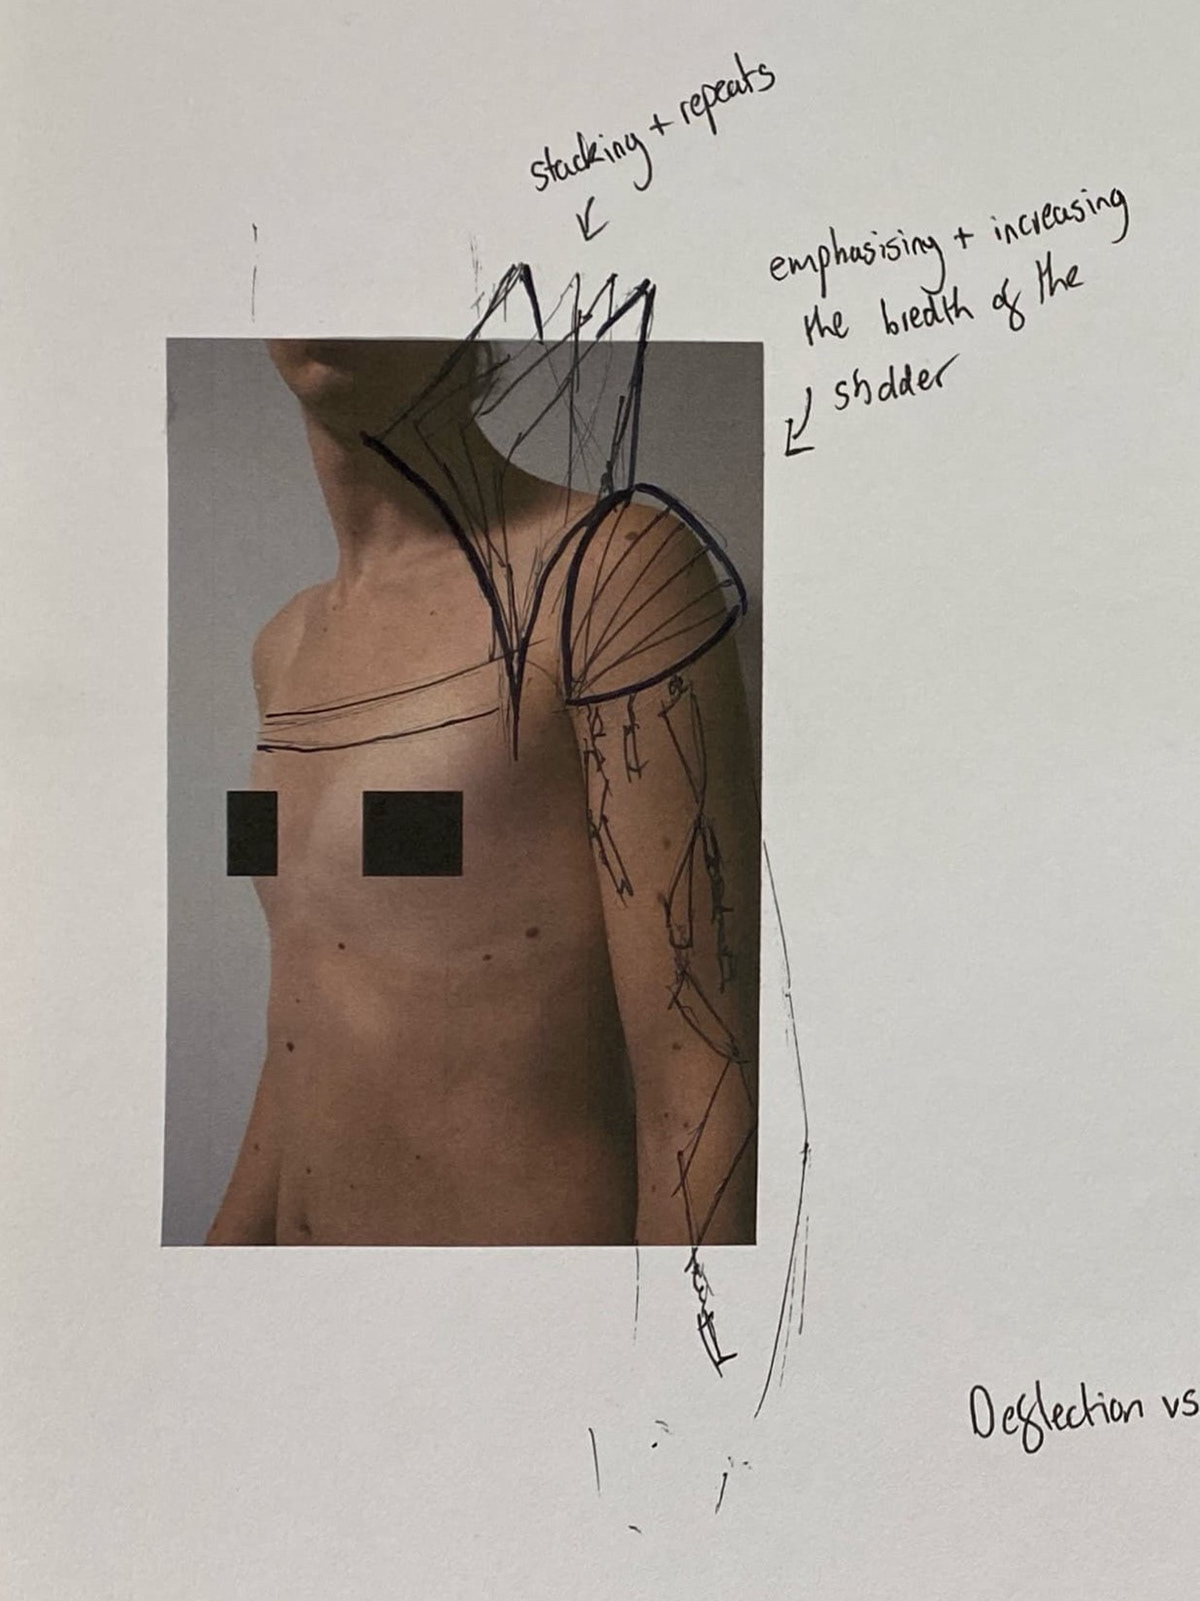
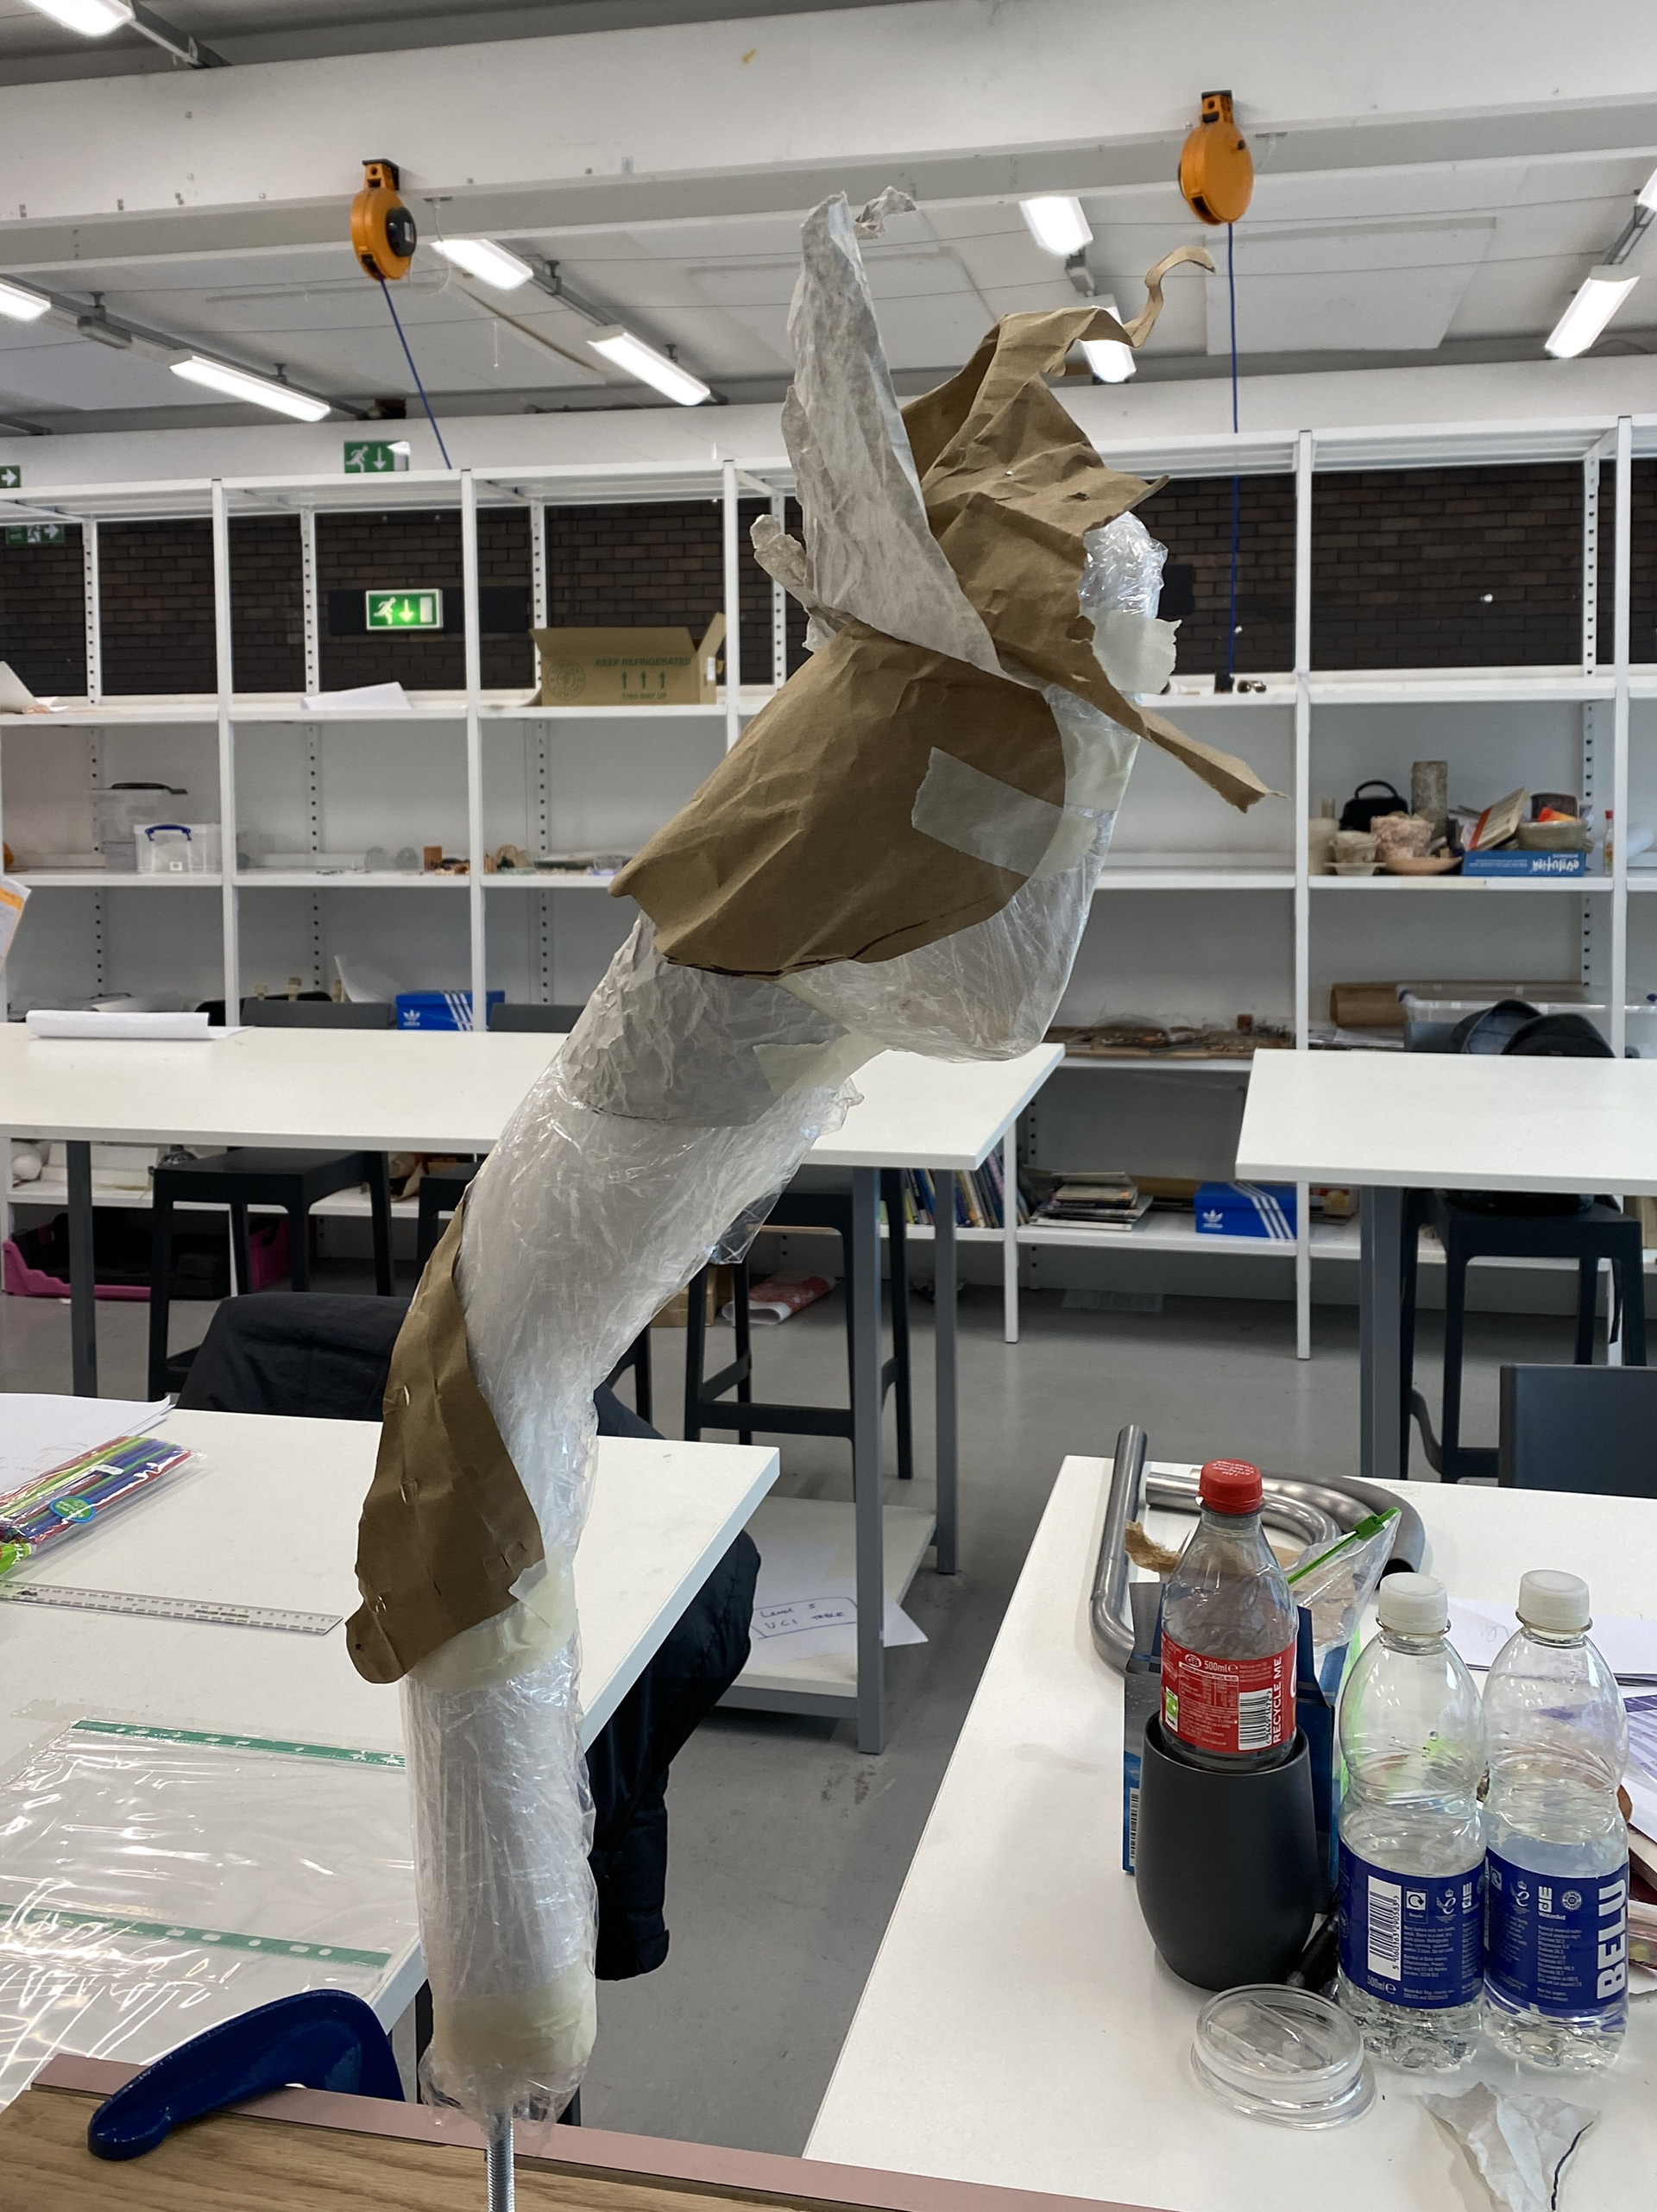
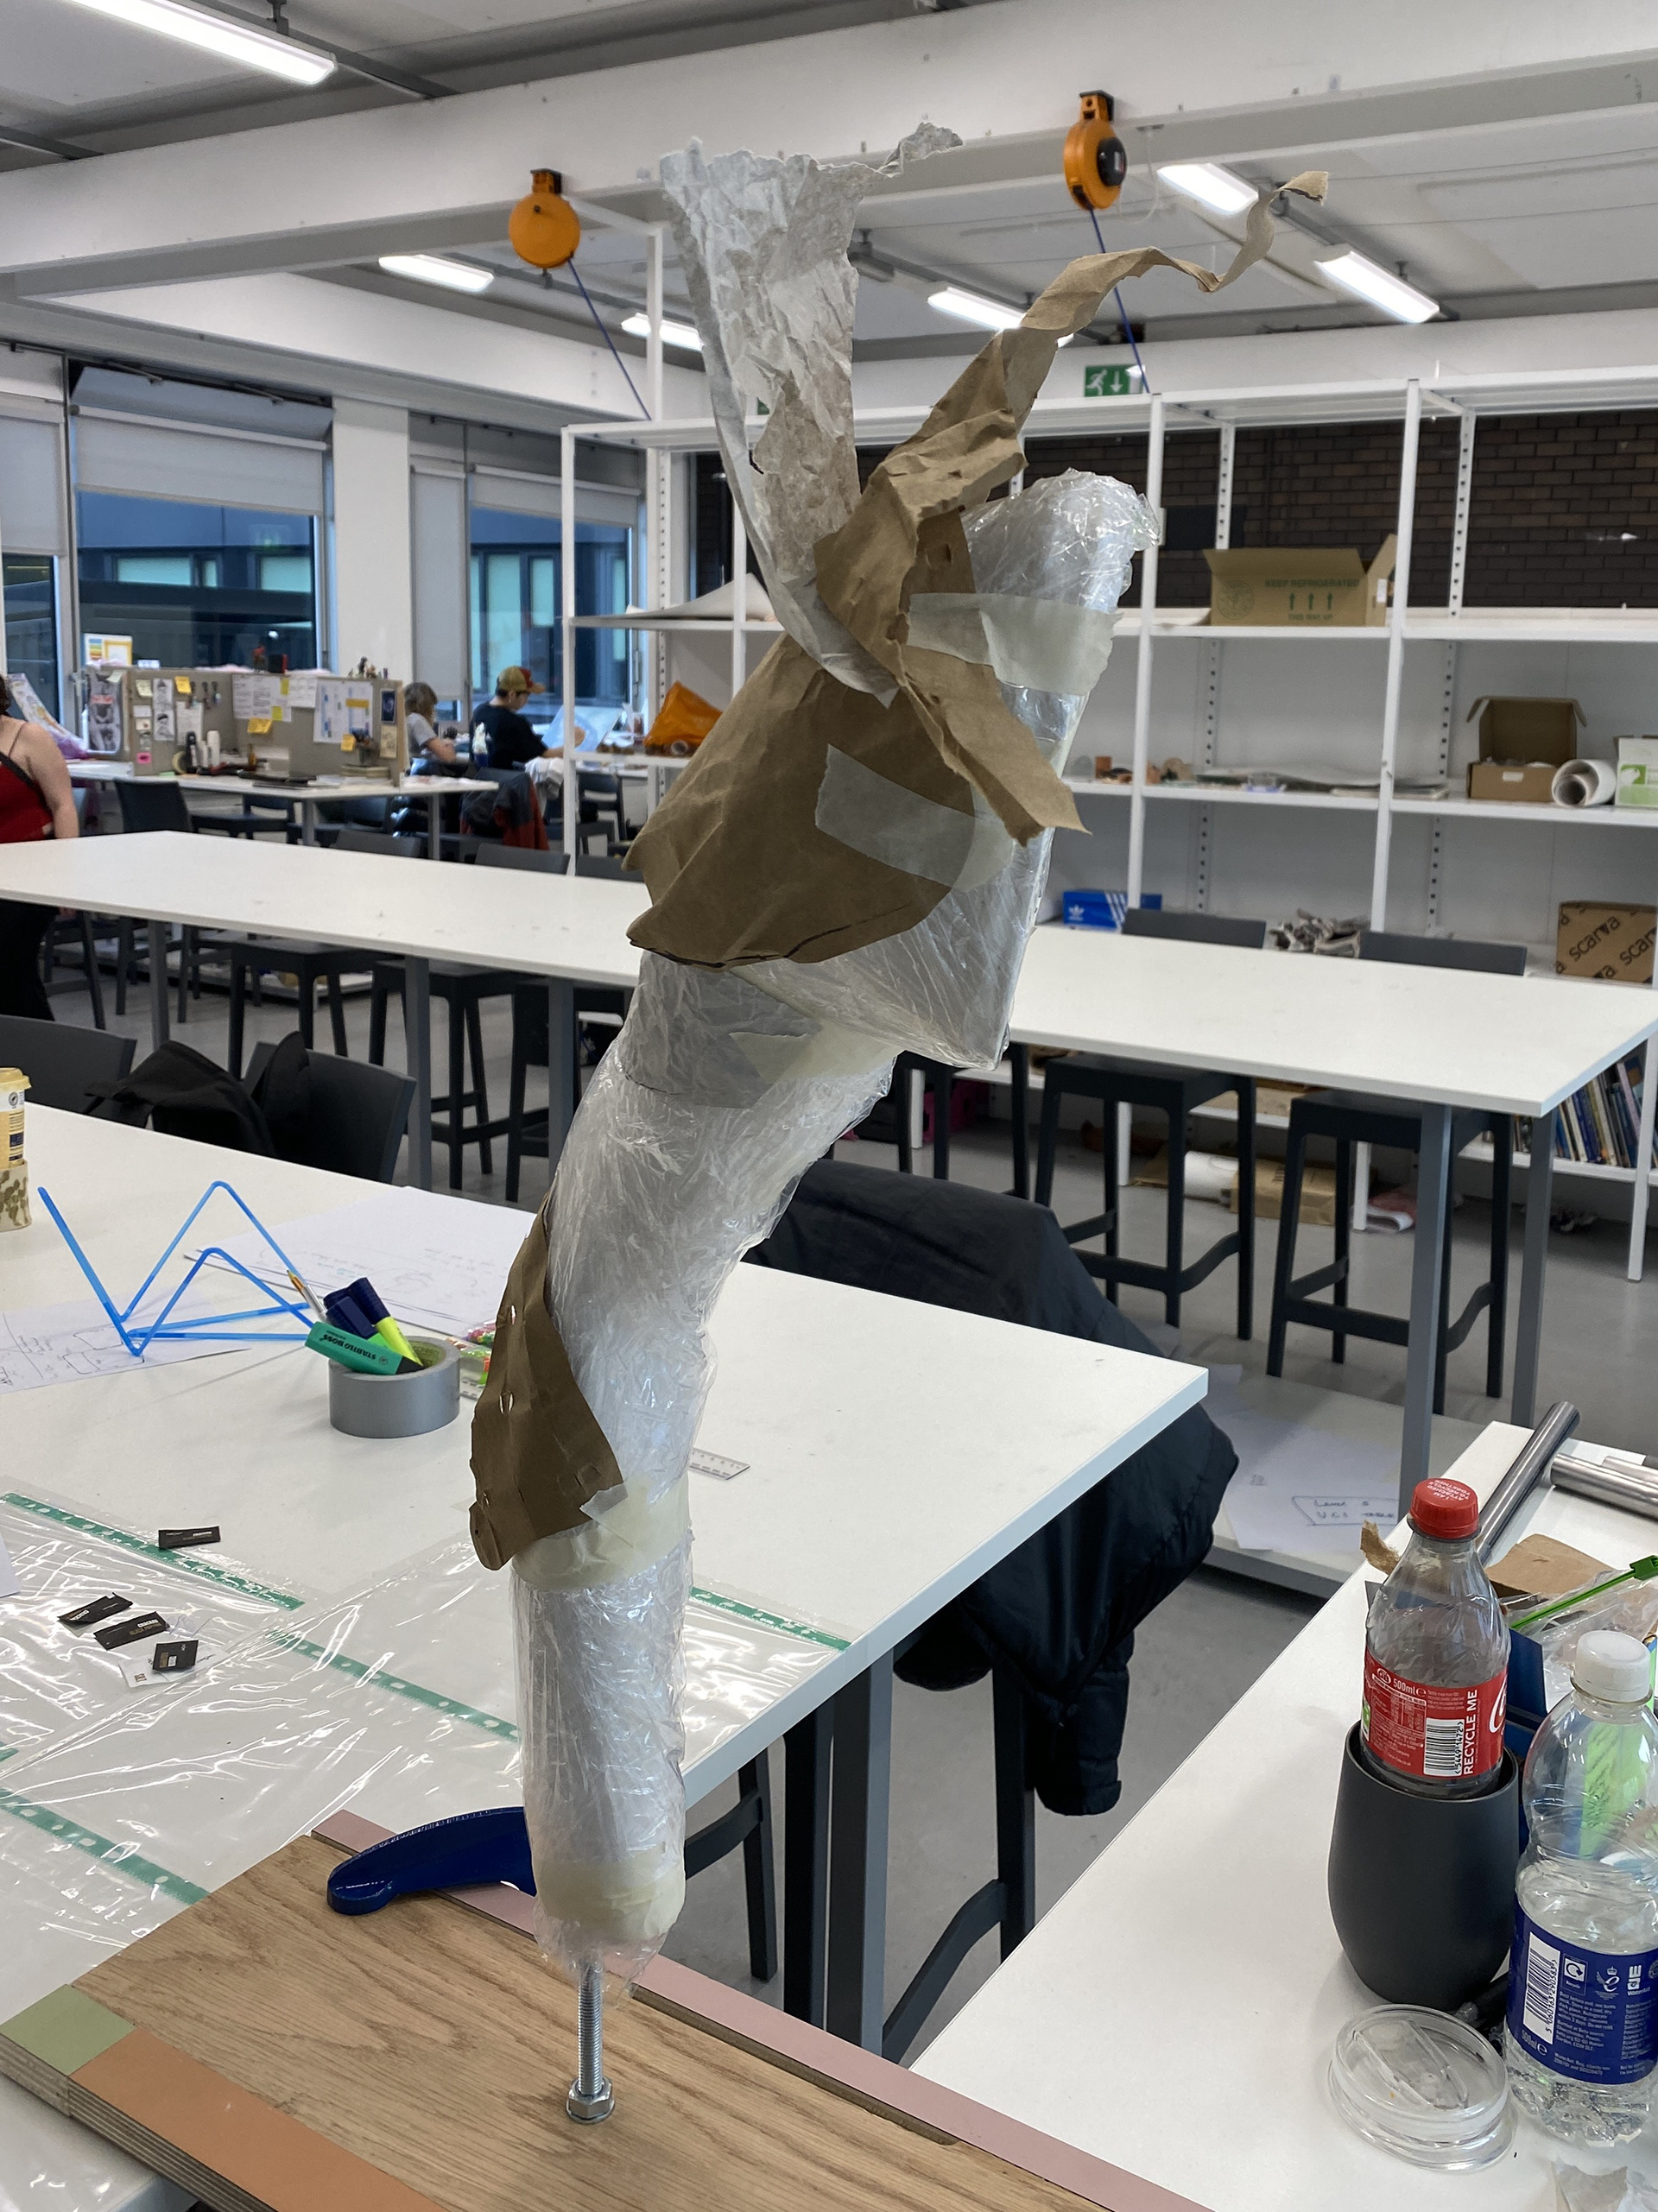
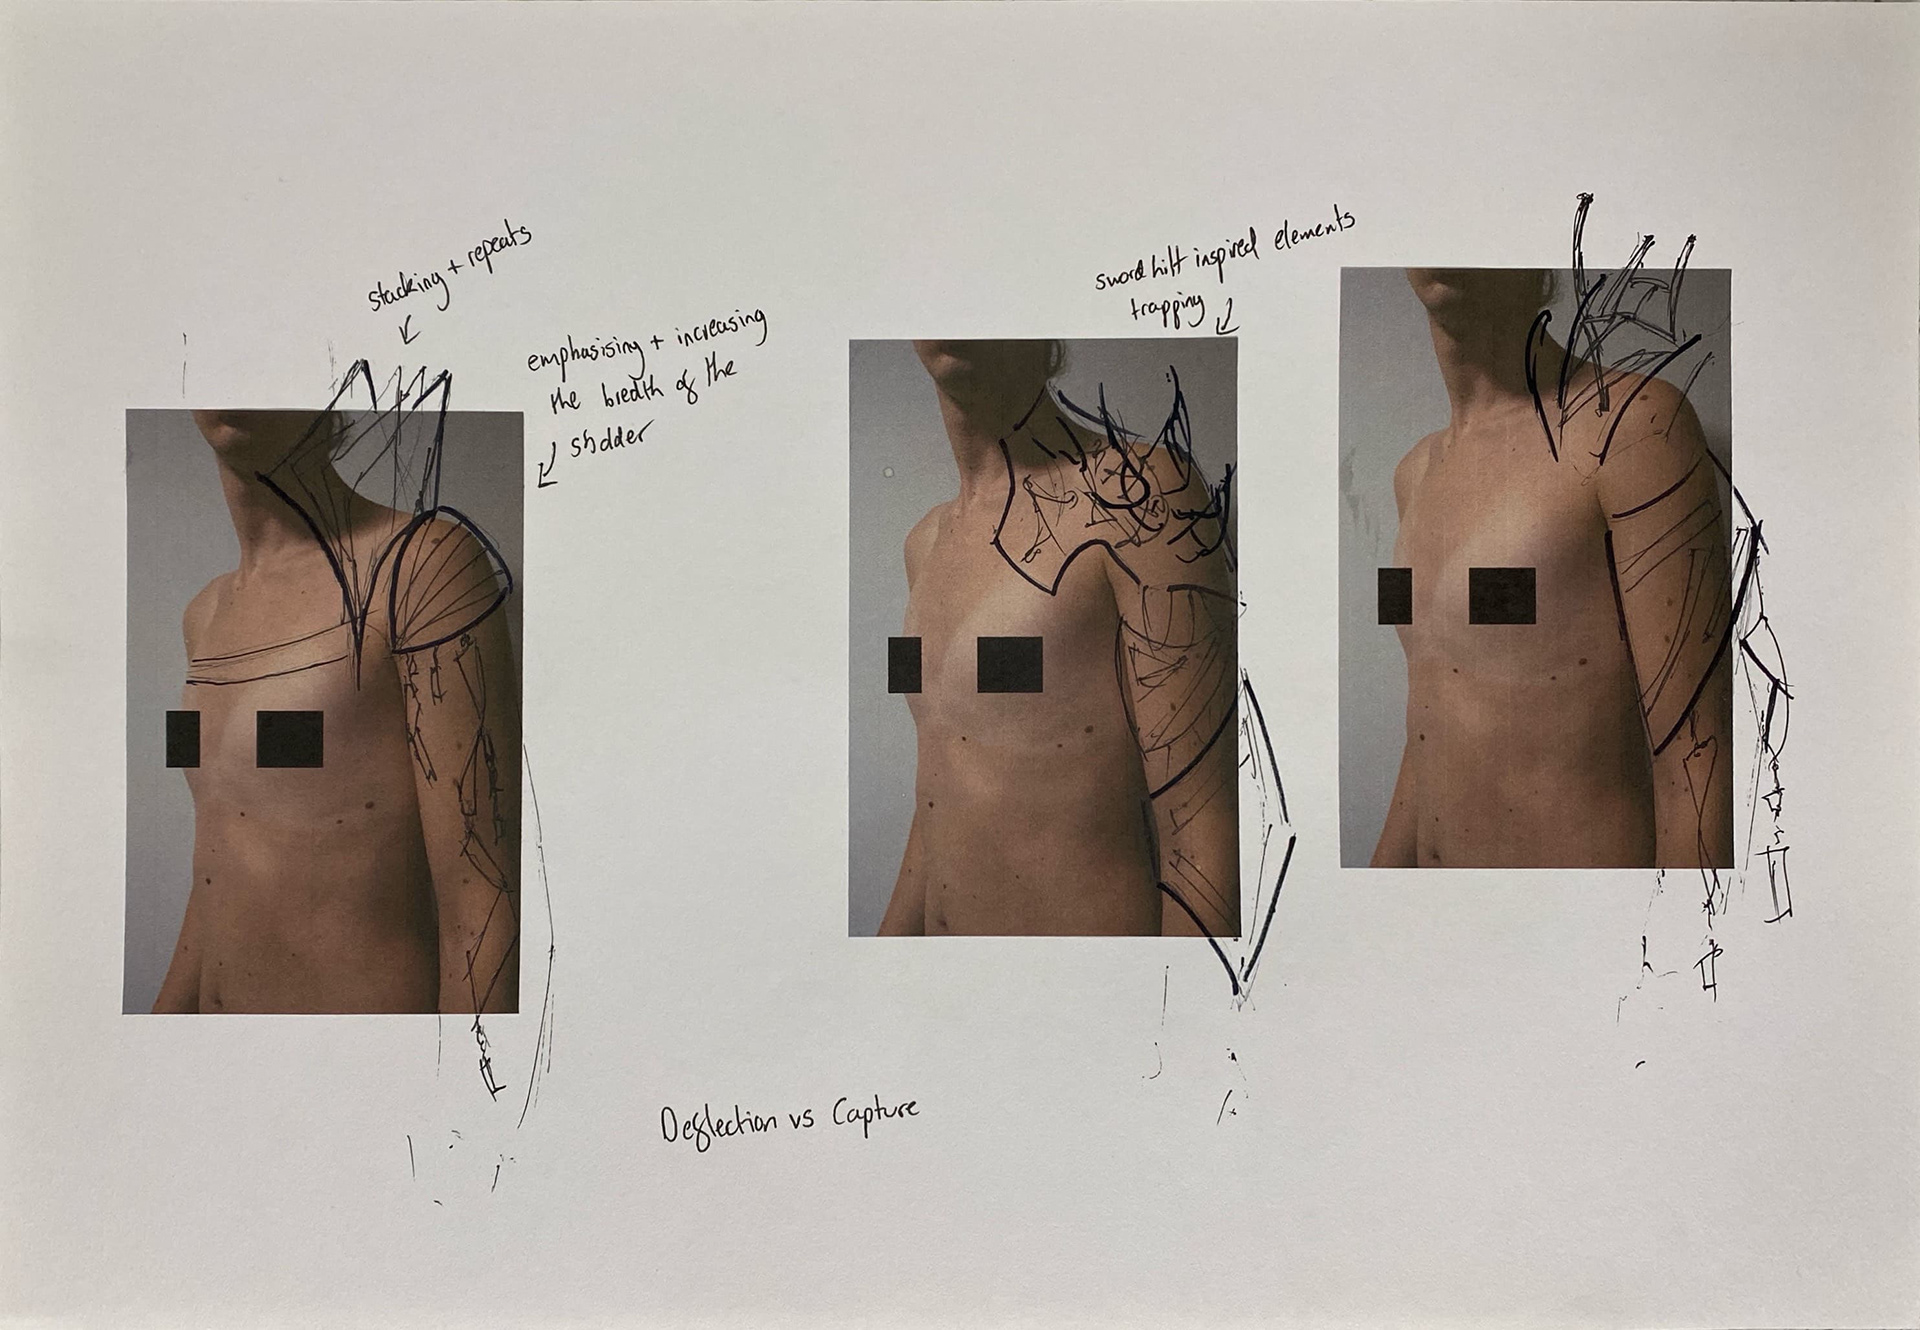
To start the modelling I looked at the design above and liked the interplay between the fan elements that blocked the view of the wearer's neck and face, along with how it creates height and emphasises the breadth of the shoulder. I also looked at stacking simple shapes down the arm inspired by the piece that covers the outer shoulder in the drawing.
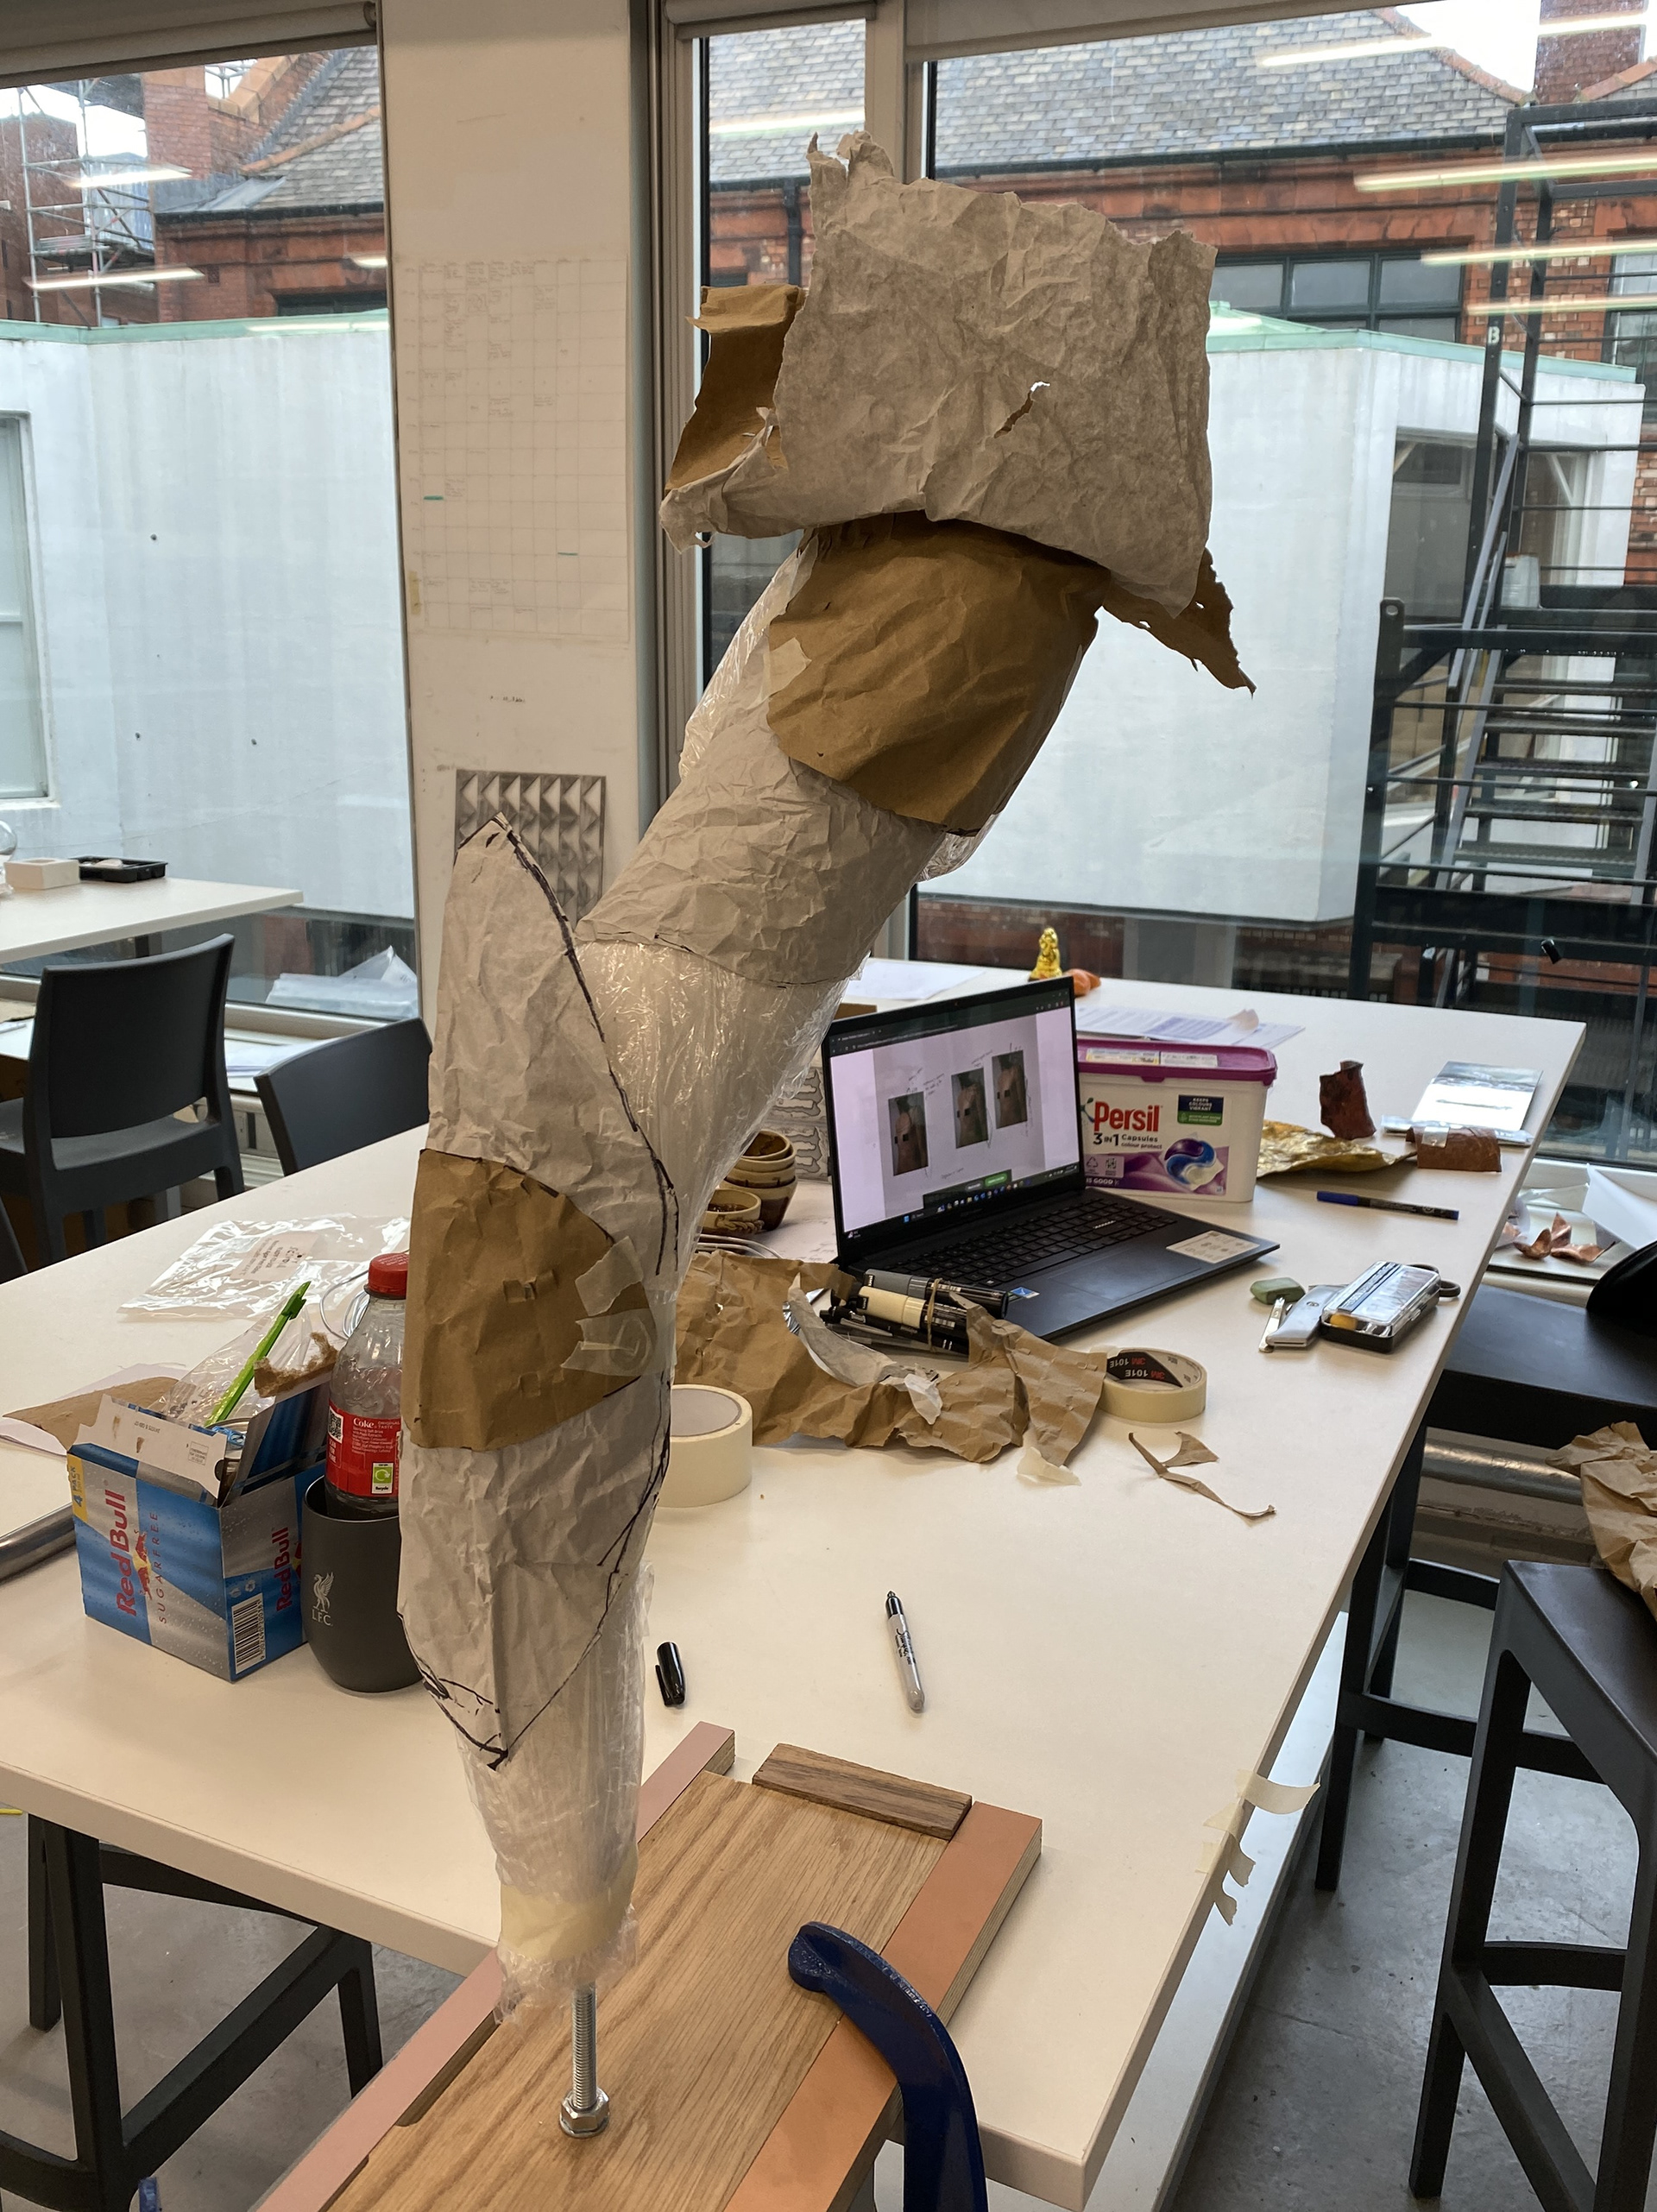

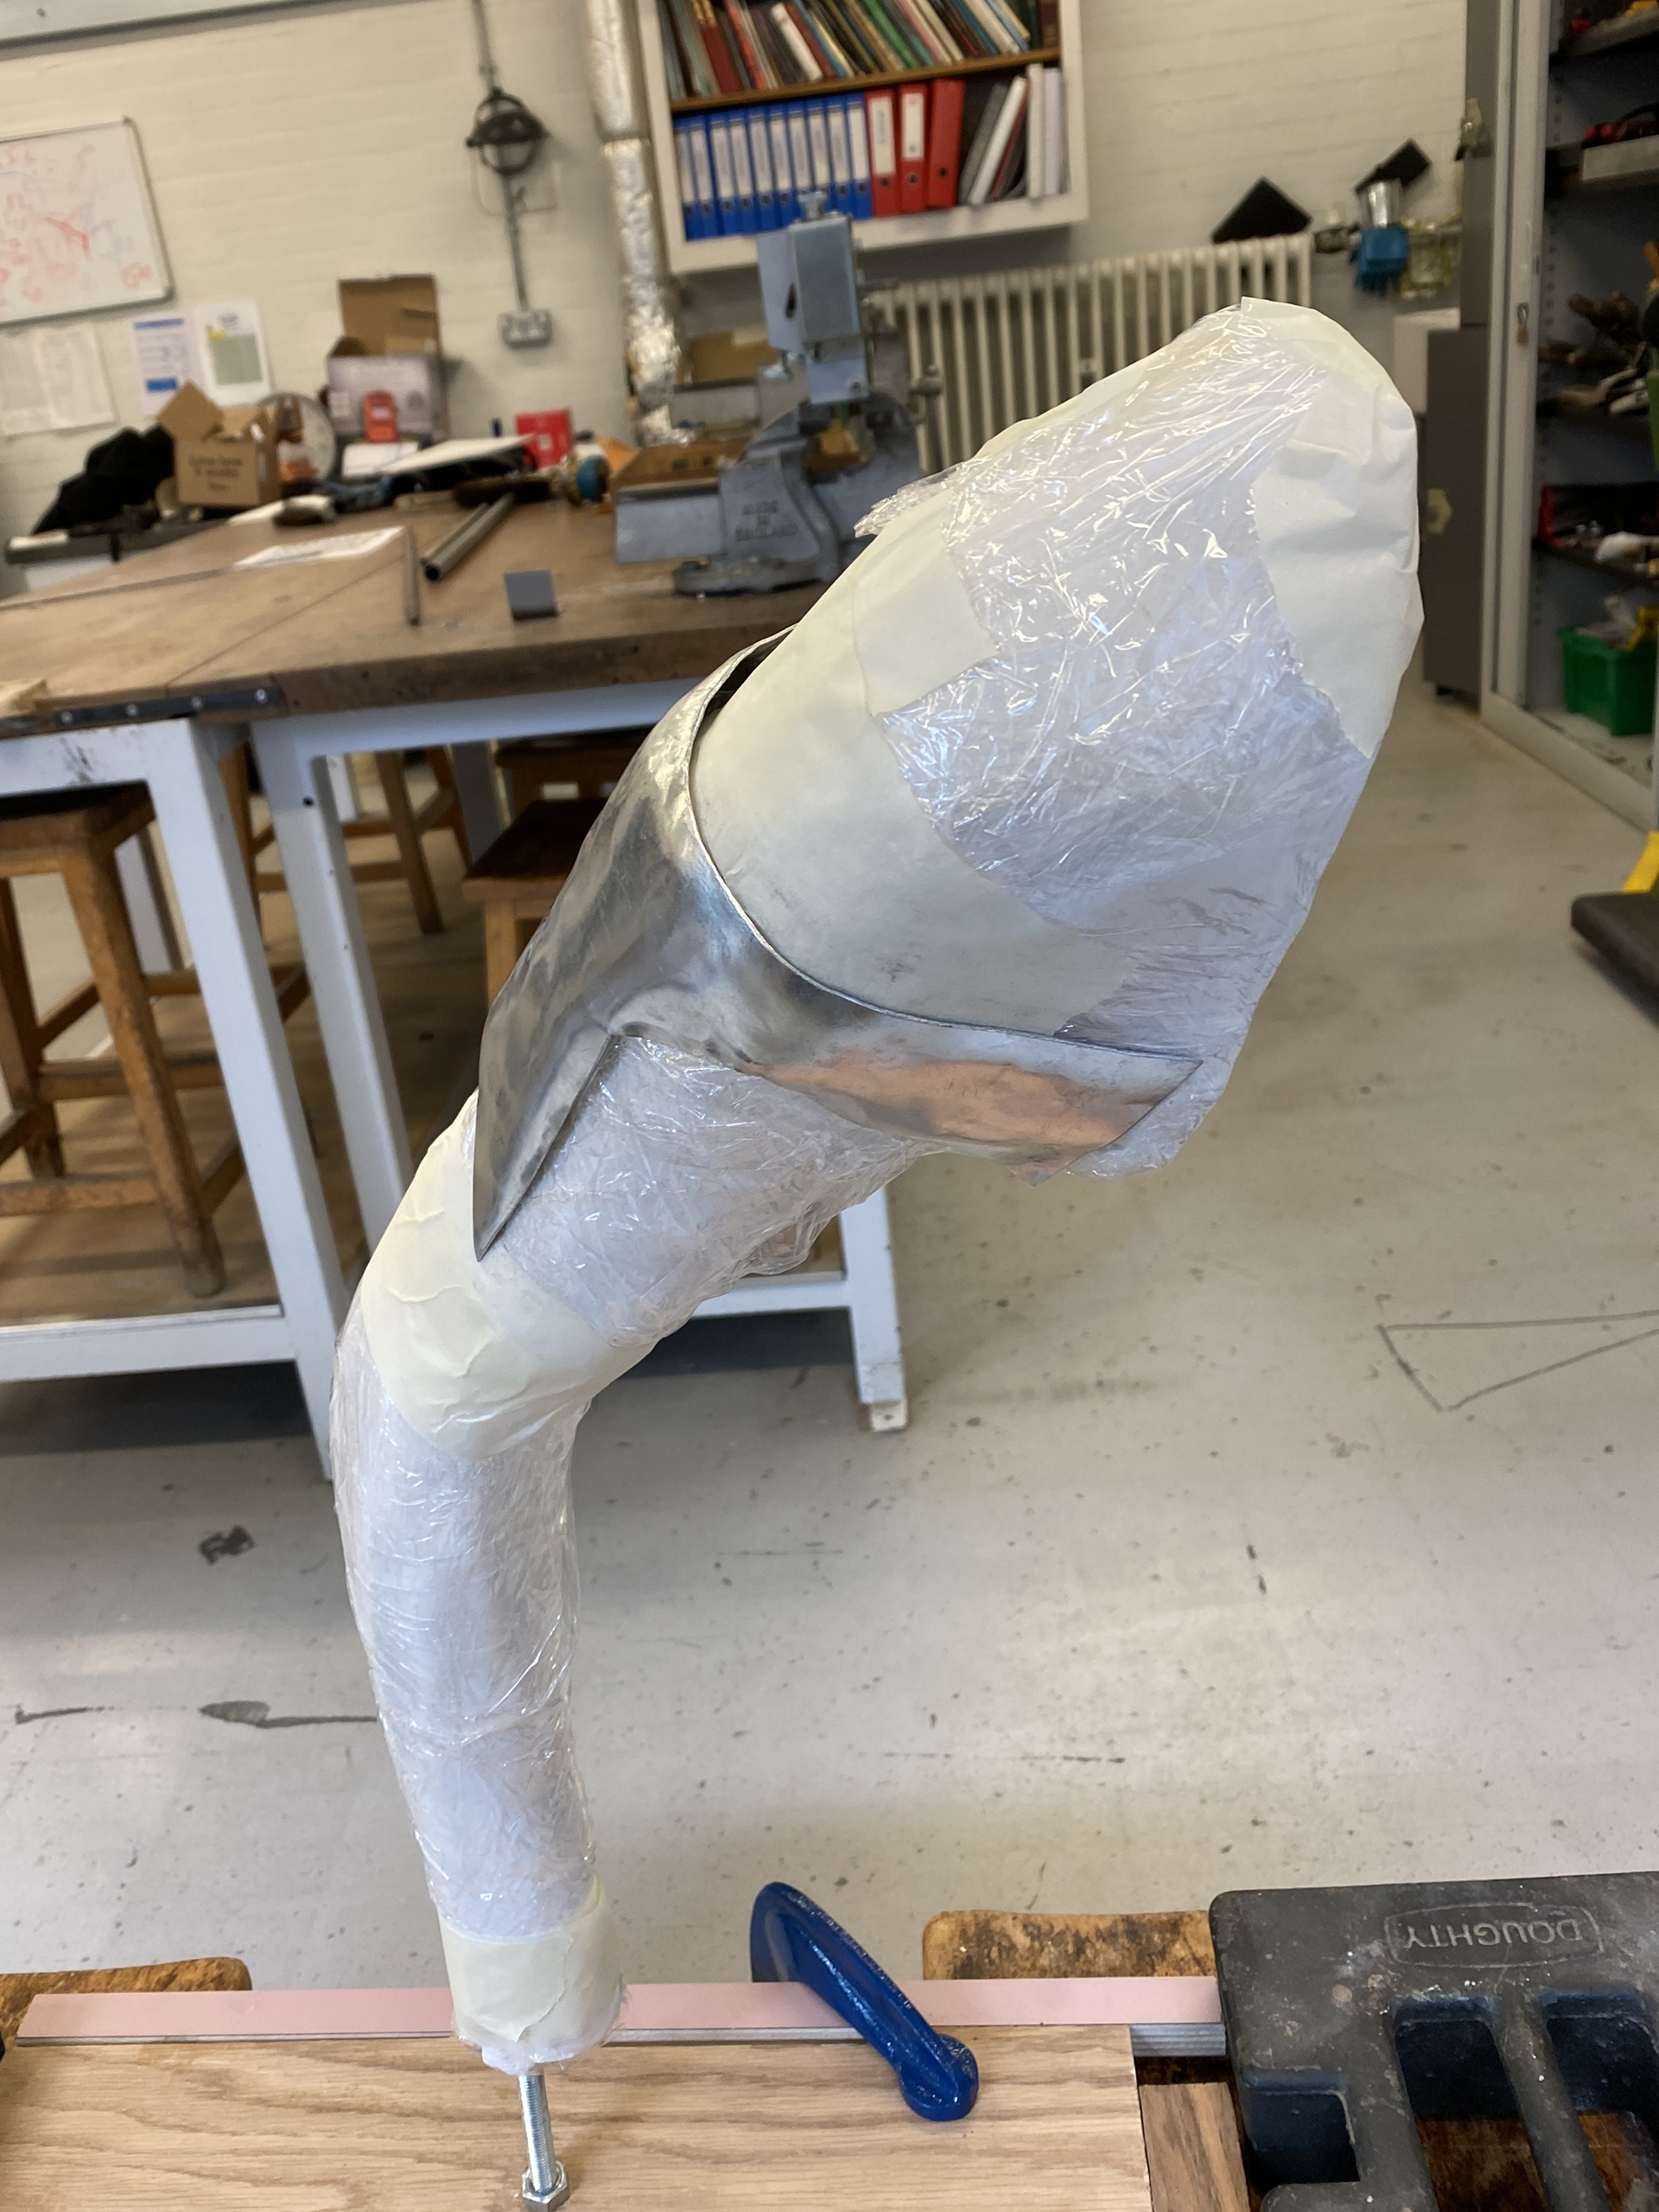
I didn’t like the elbow section so looked back at the drawing above and brought in a larger stacked piece of armour to balance the top of the shoulder.

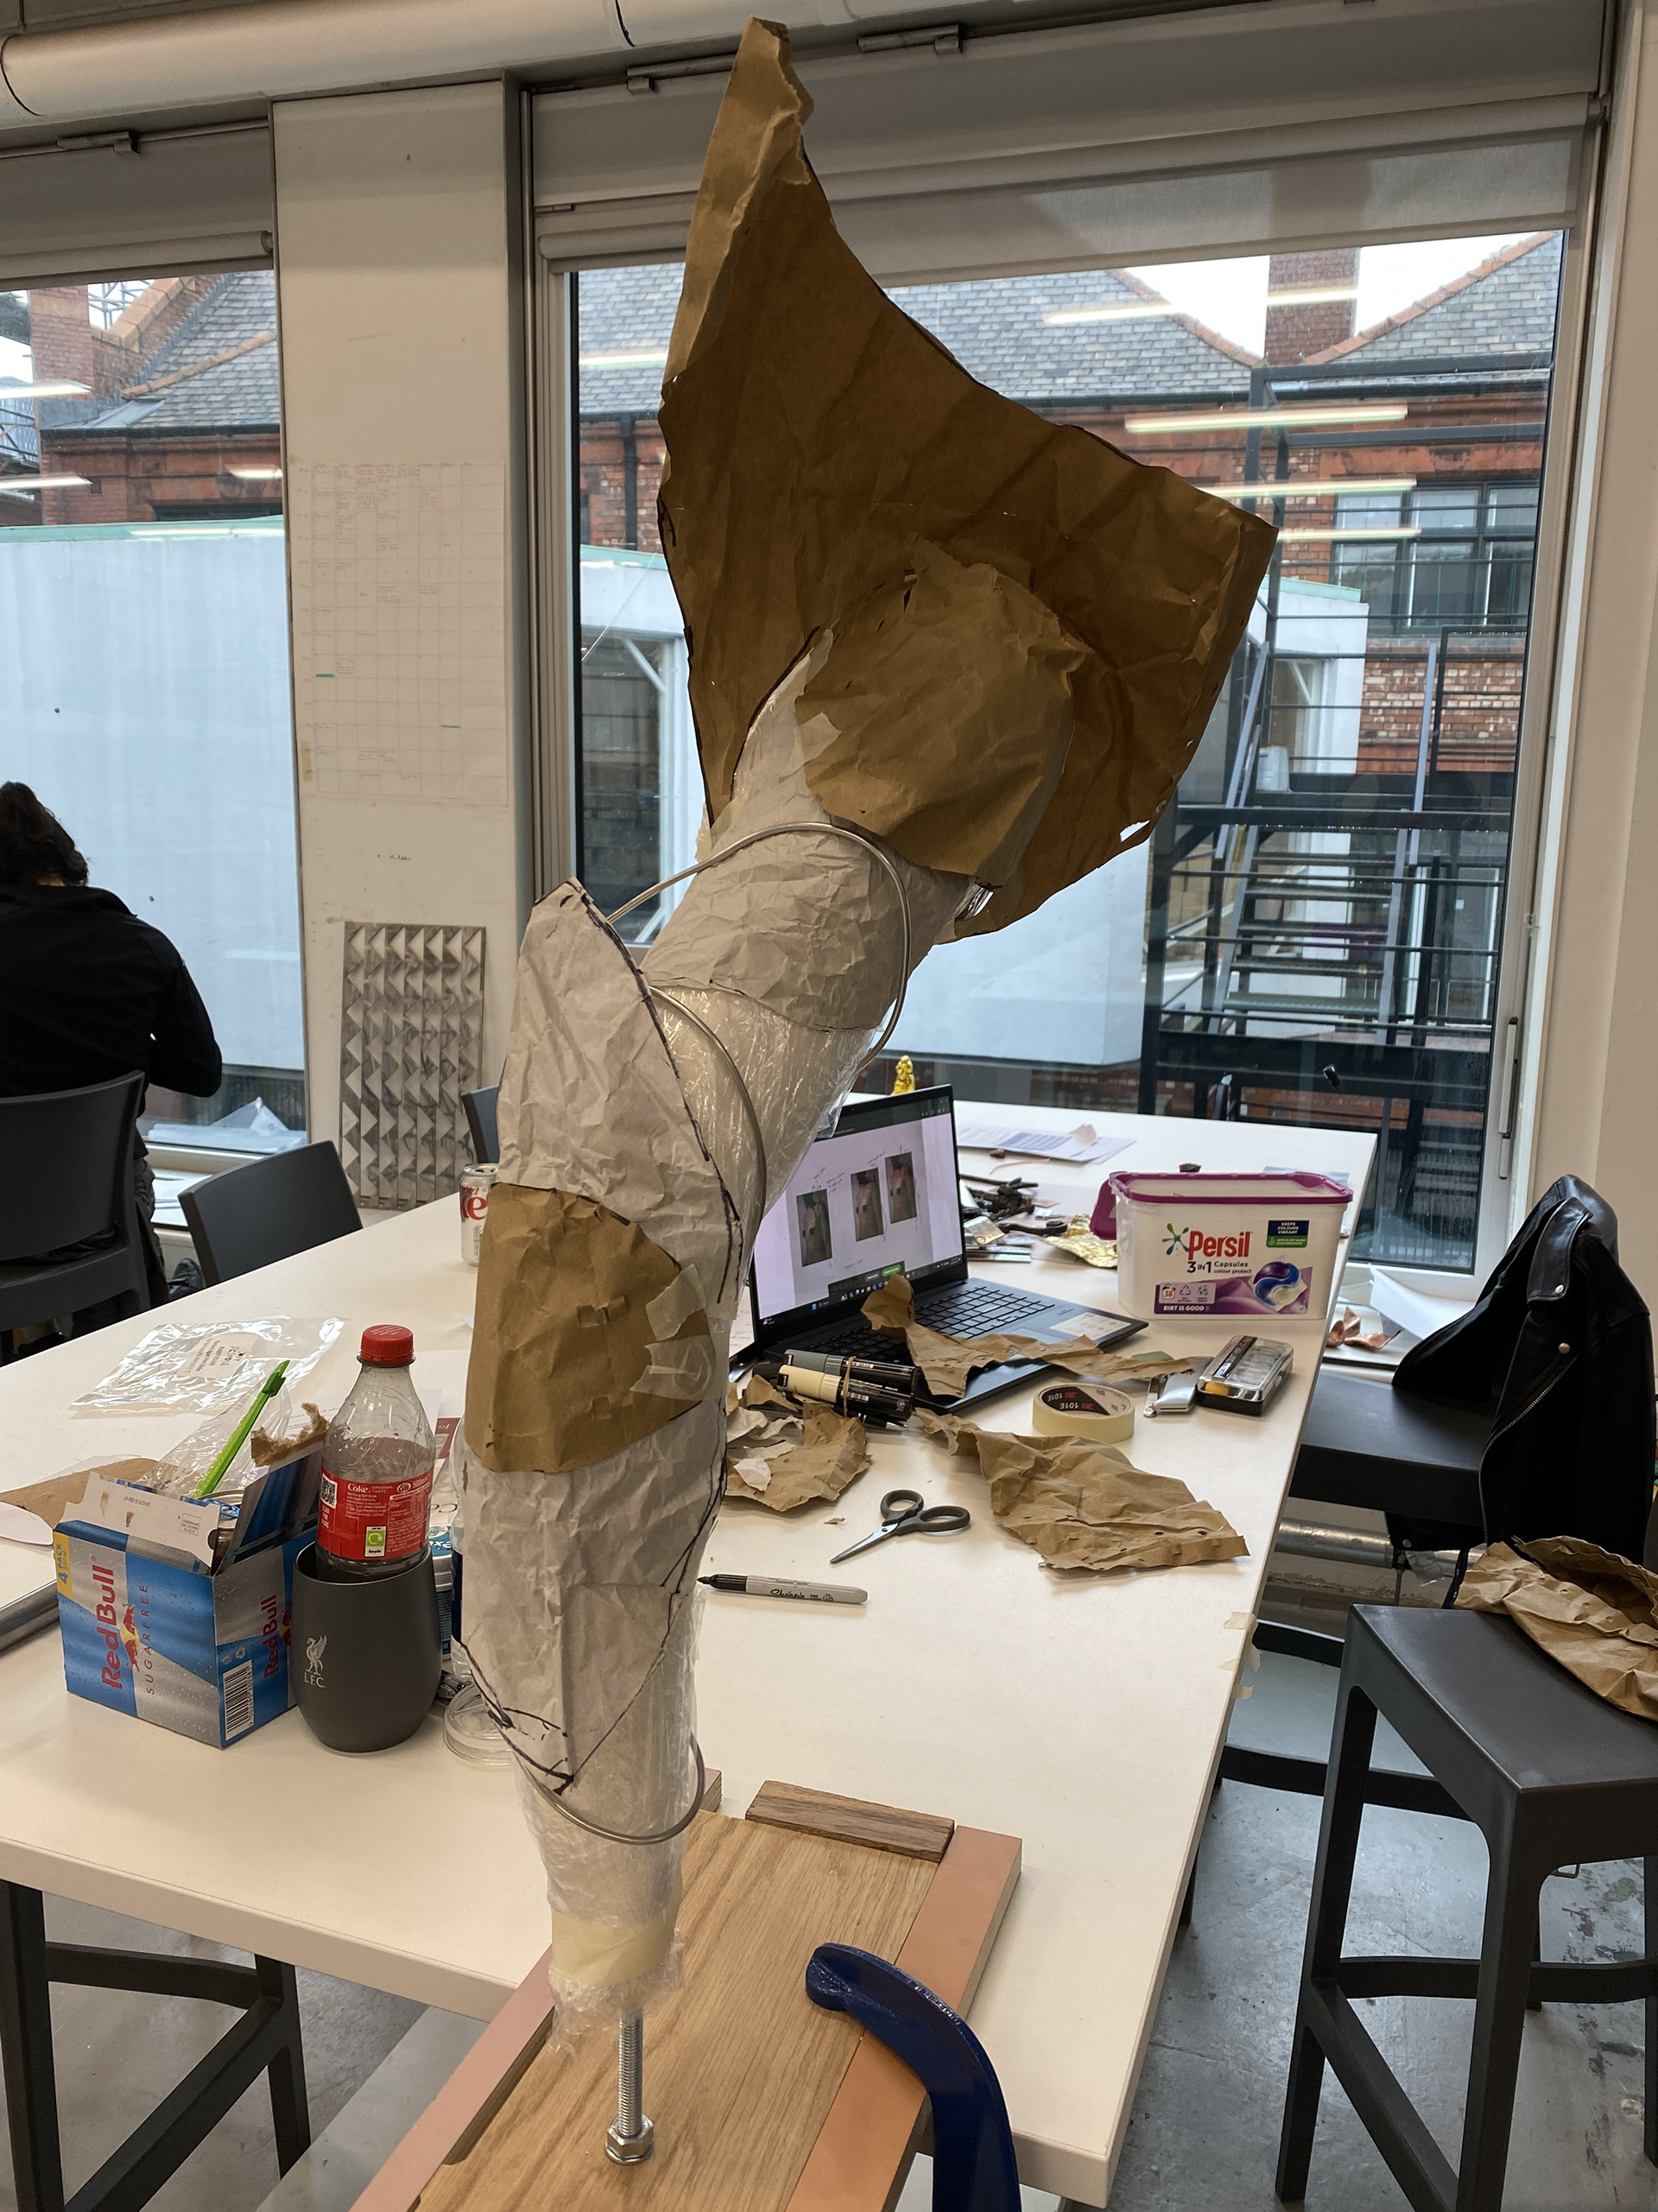

The upper shoulder felt too square and small, therefore I refered back to the original drawing and looked at creating a more asymetrical section, with more curvature to contrast with the elbow section.
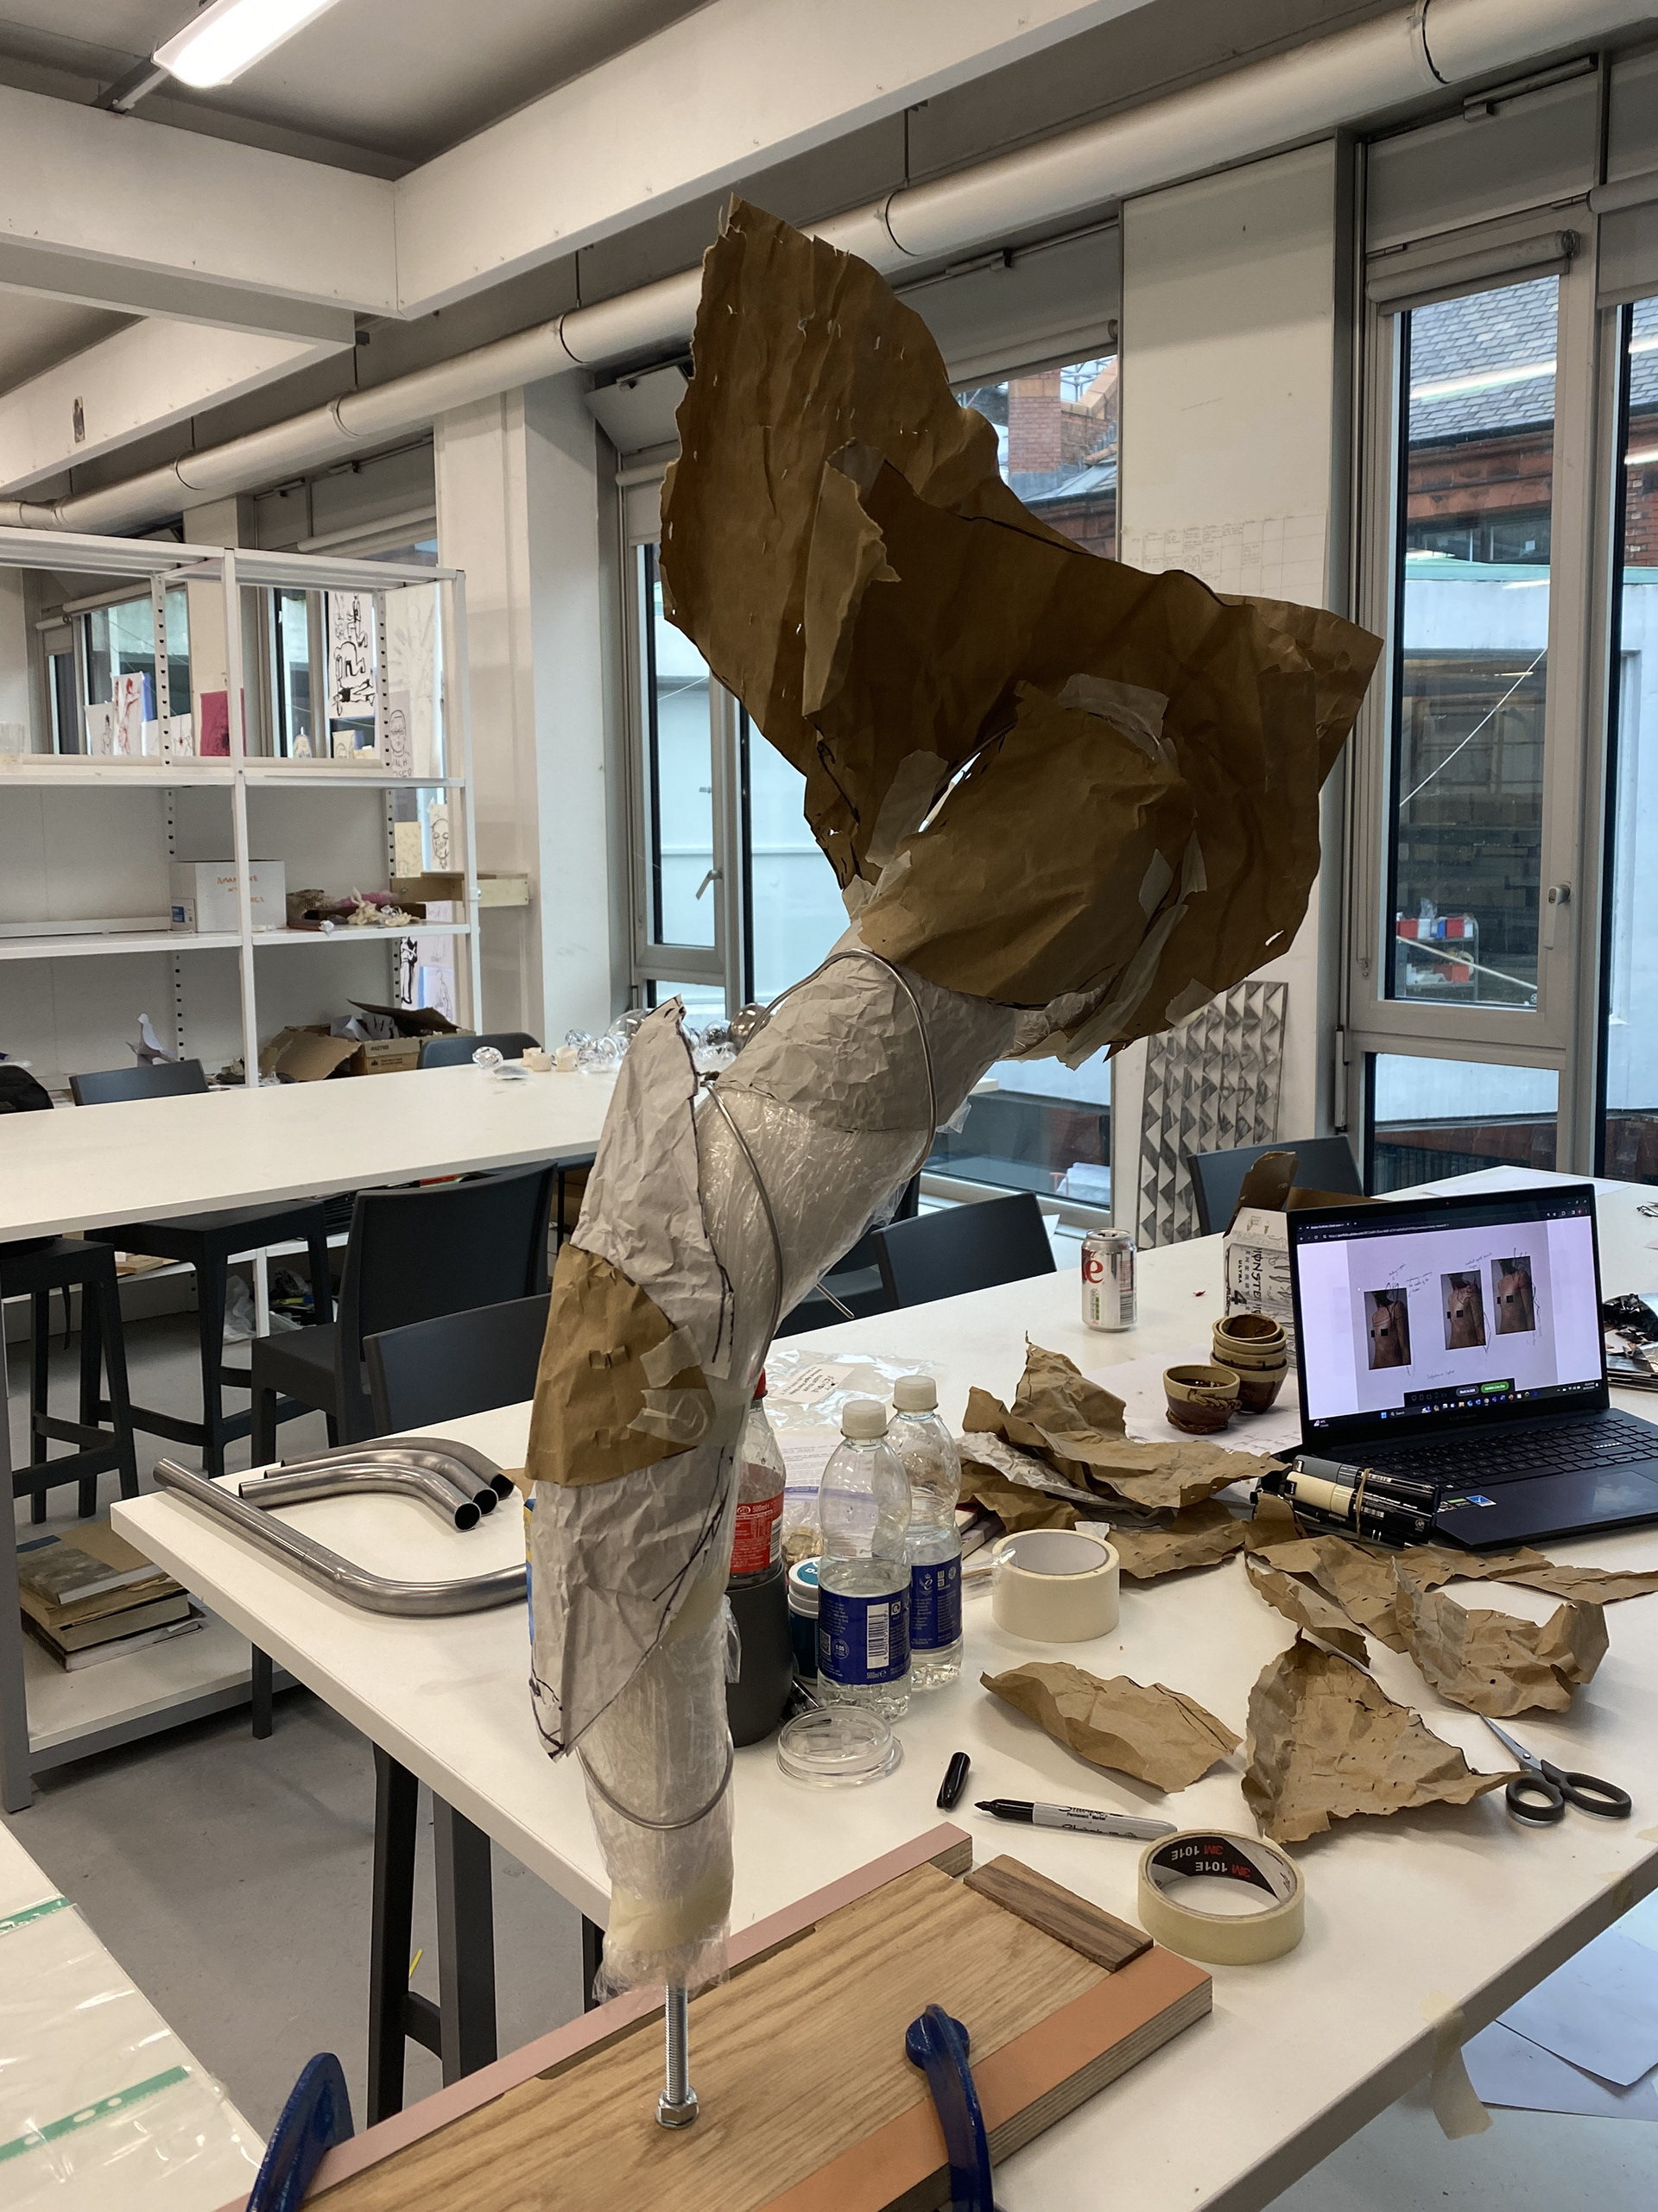
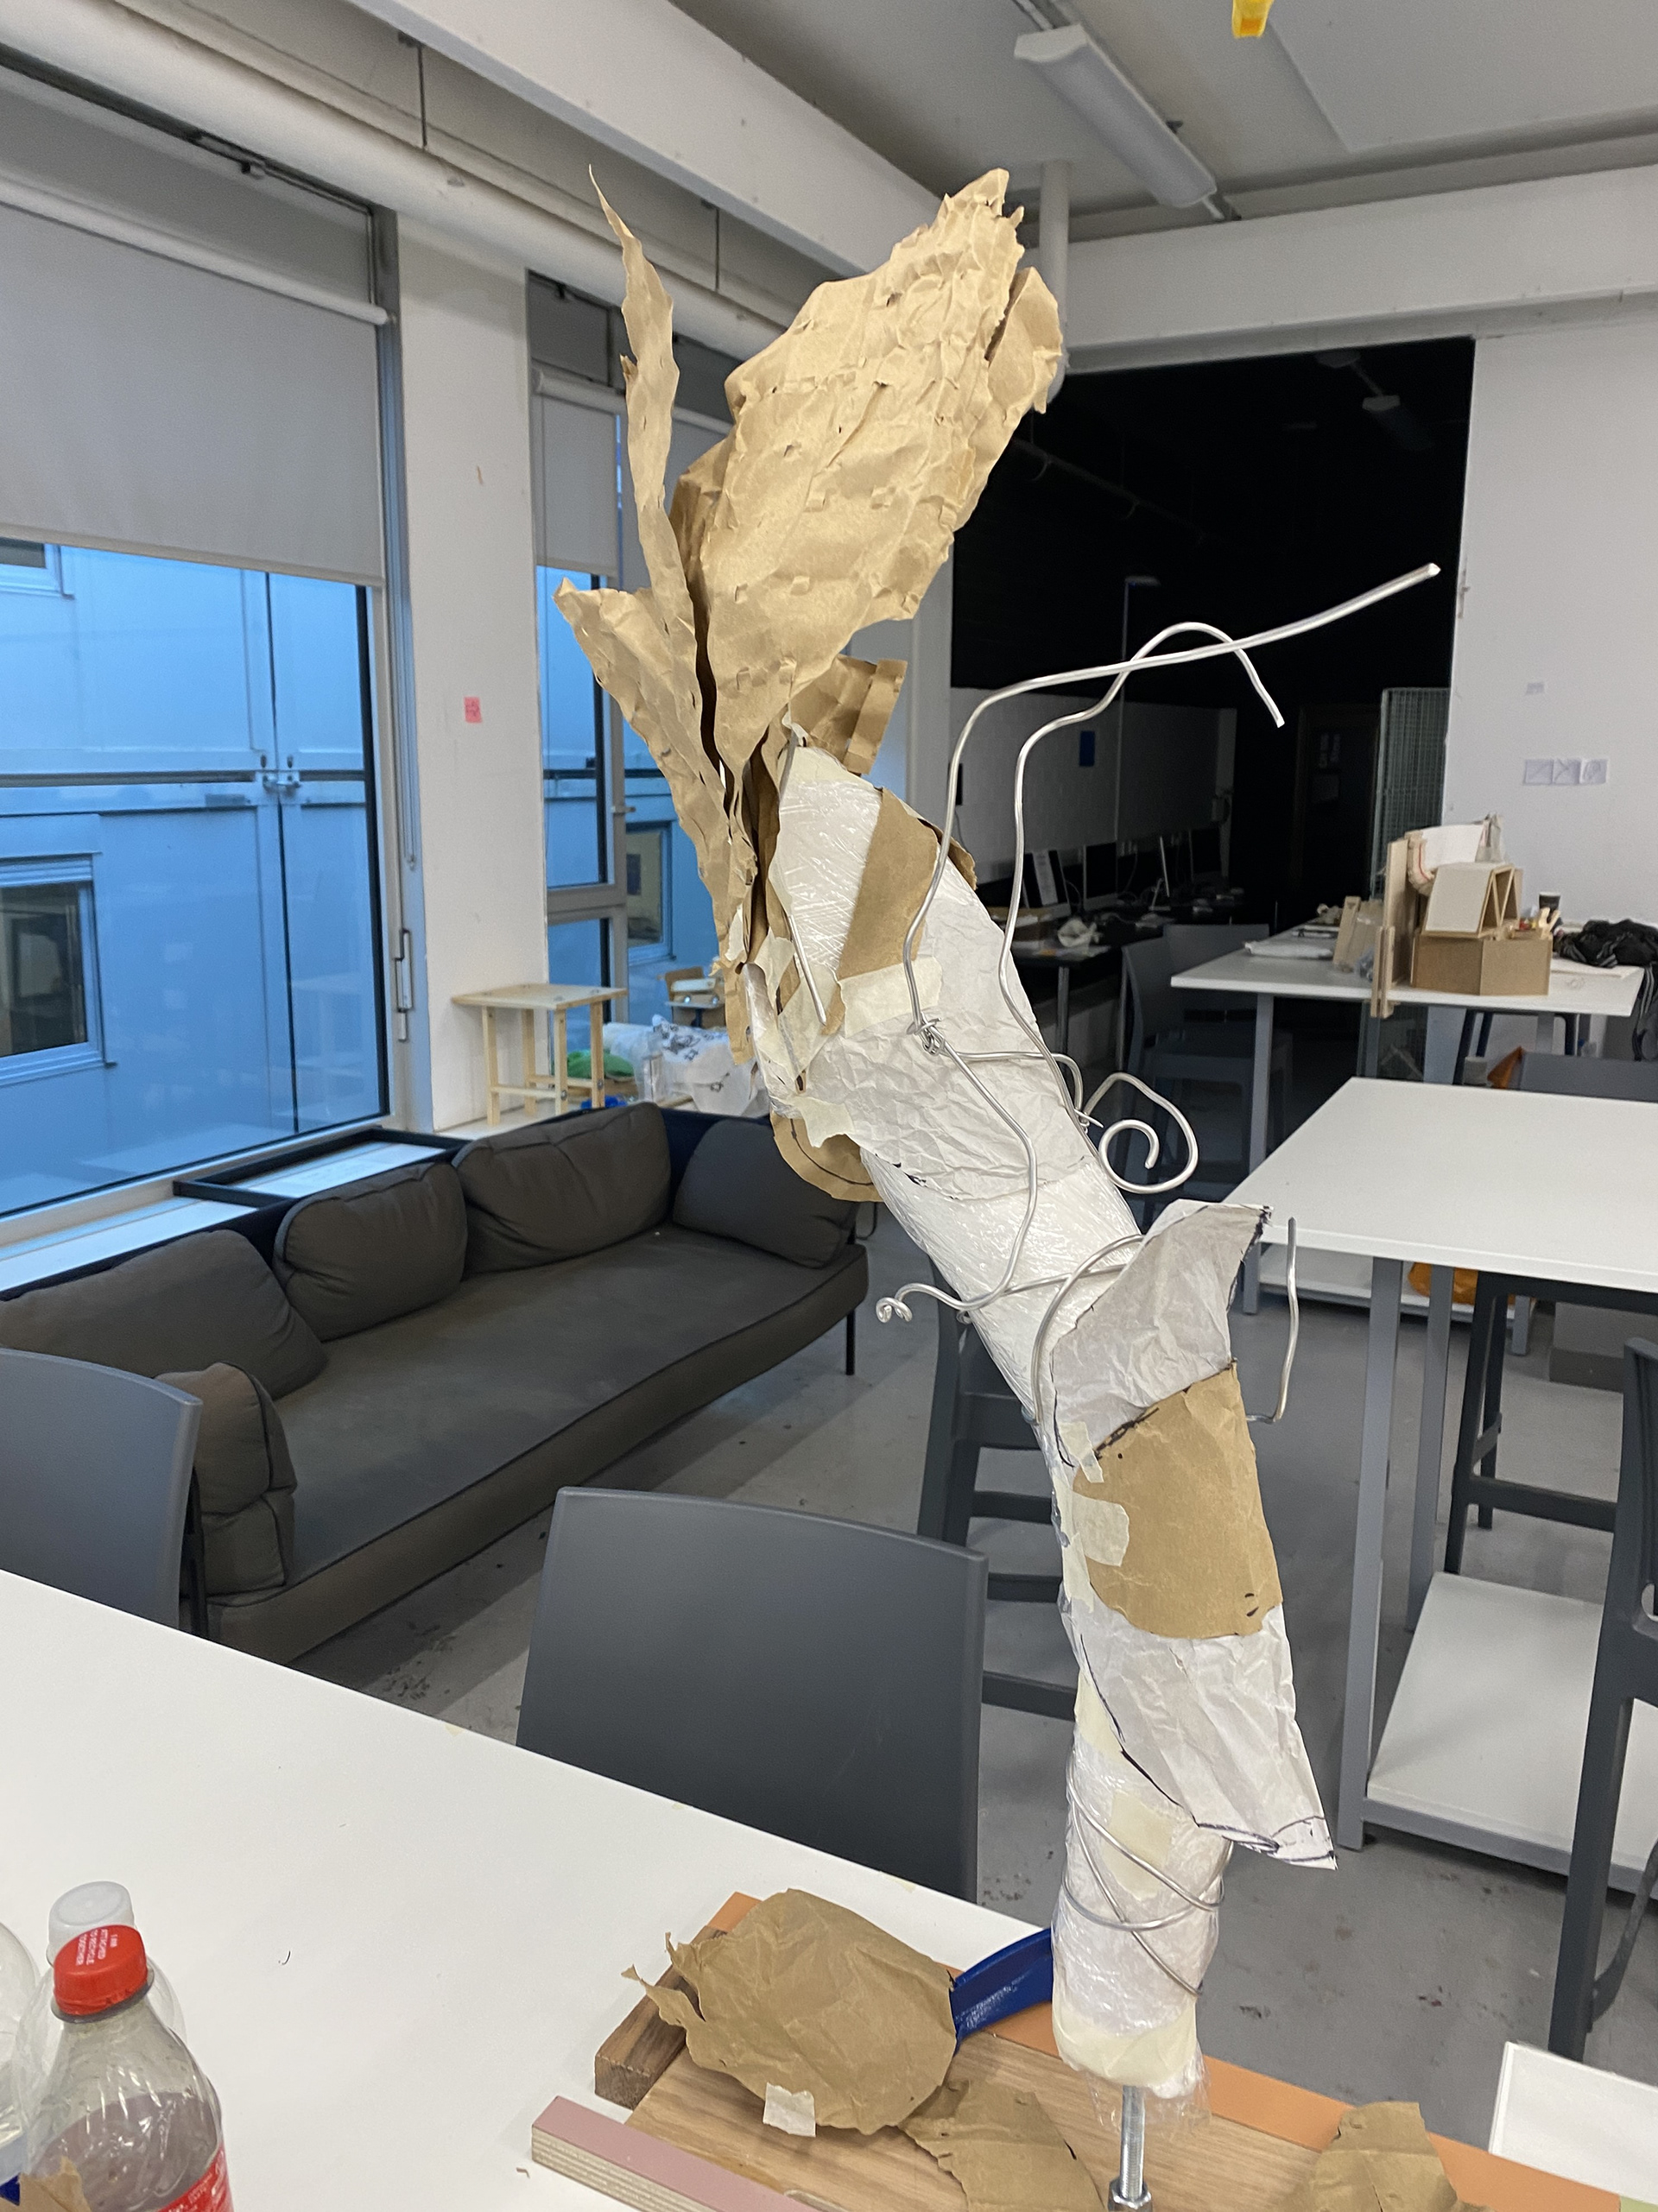
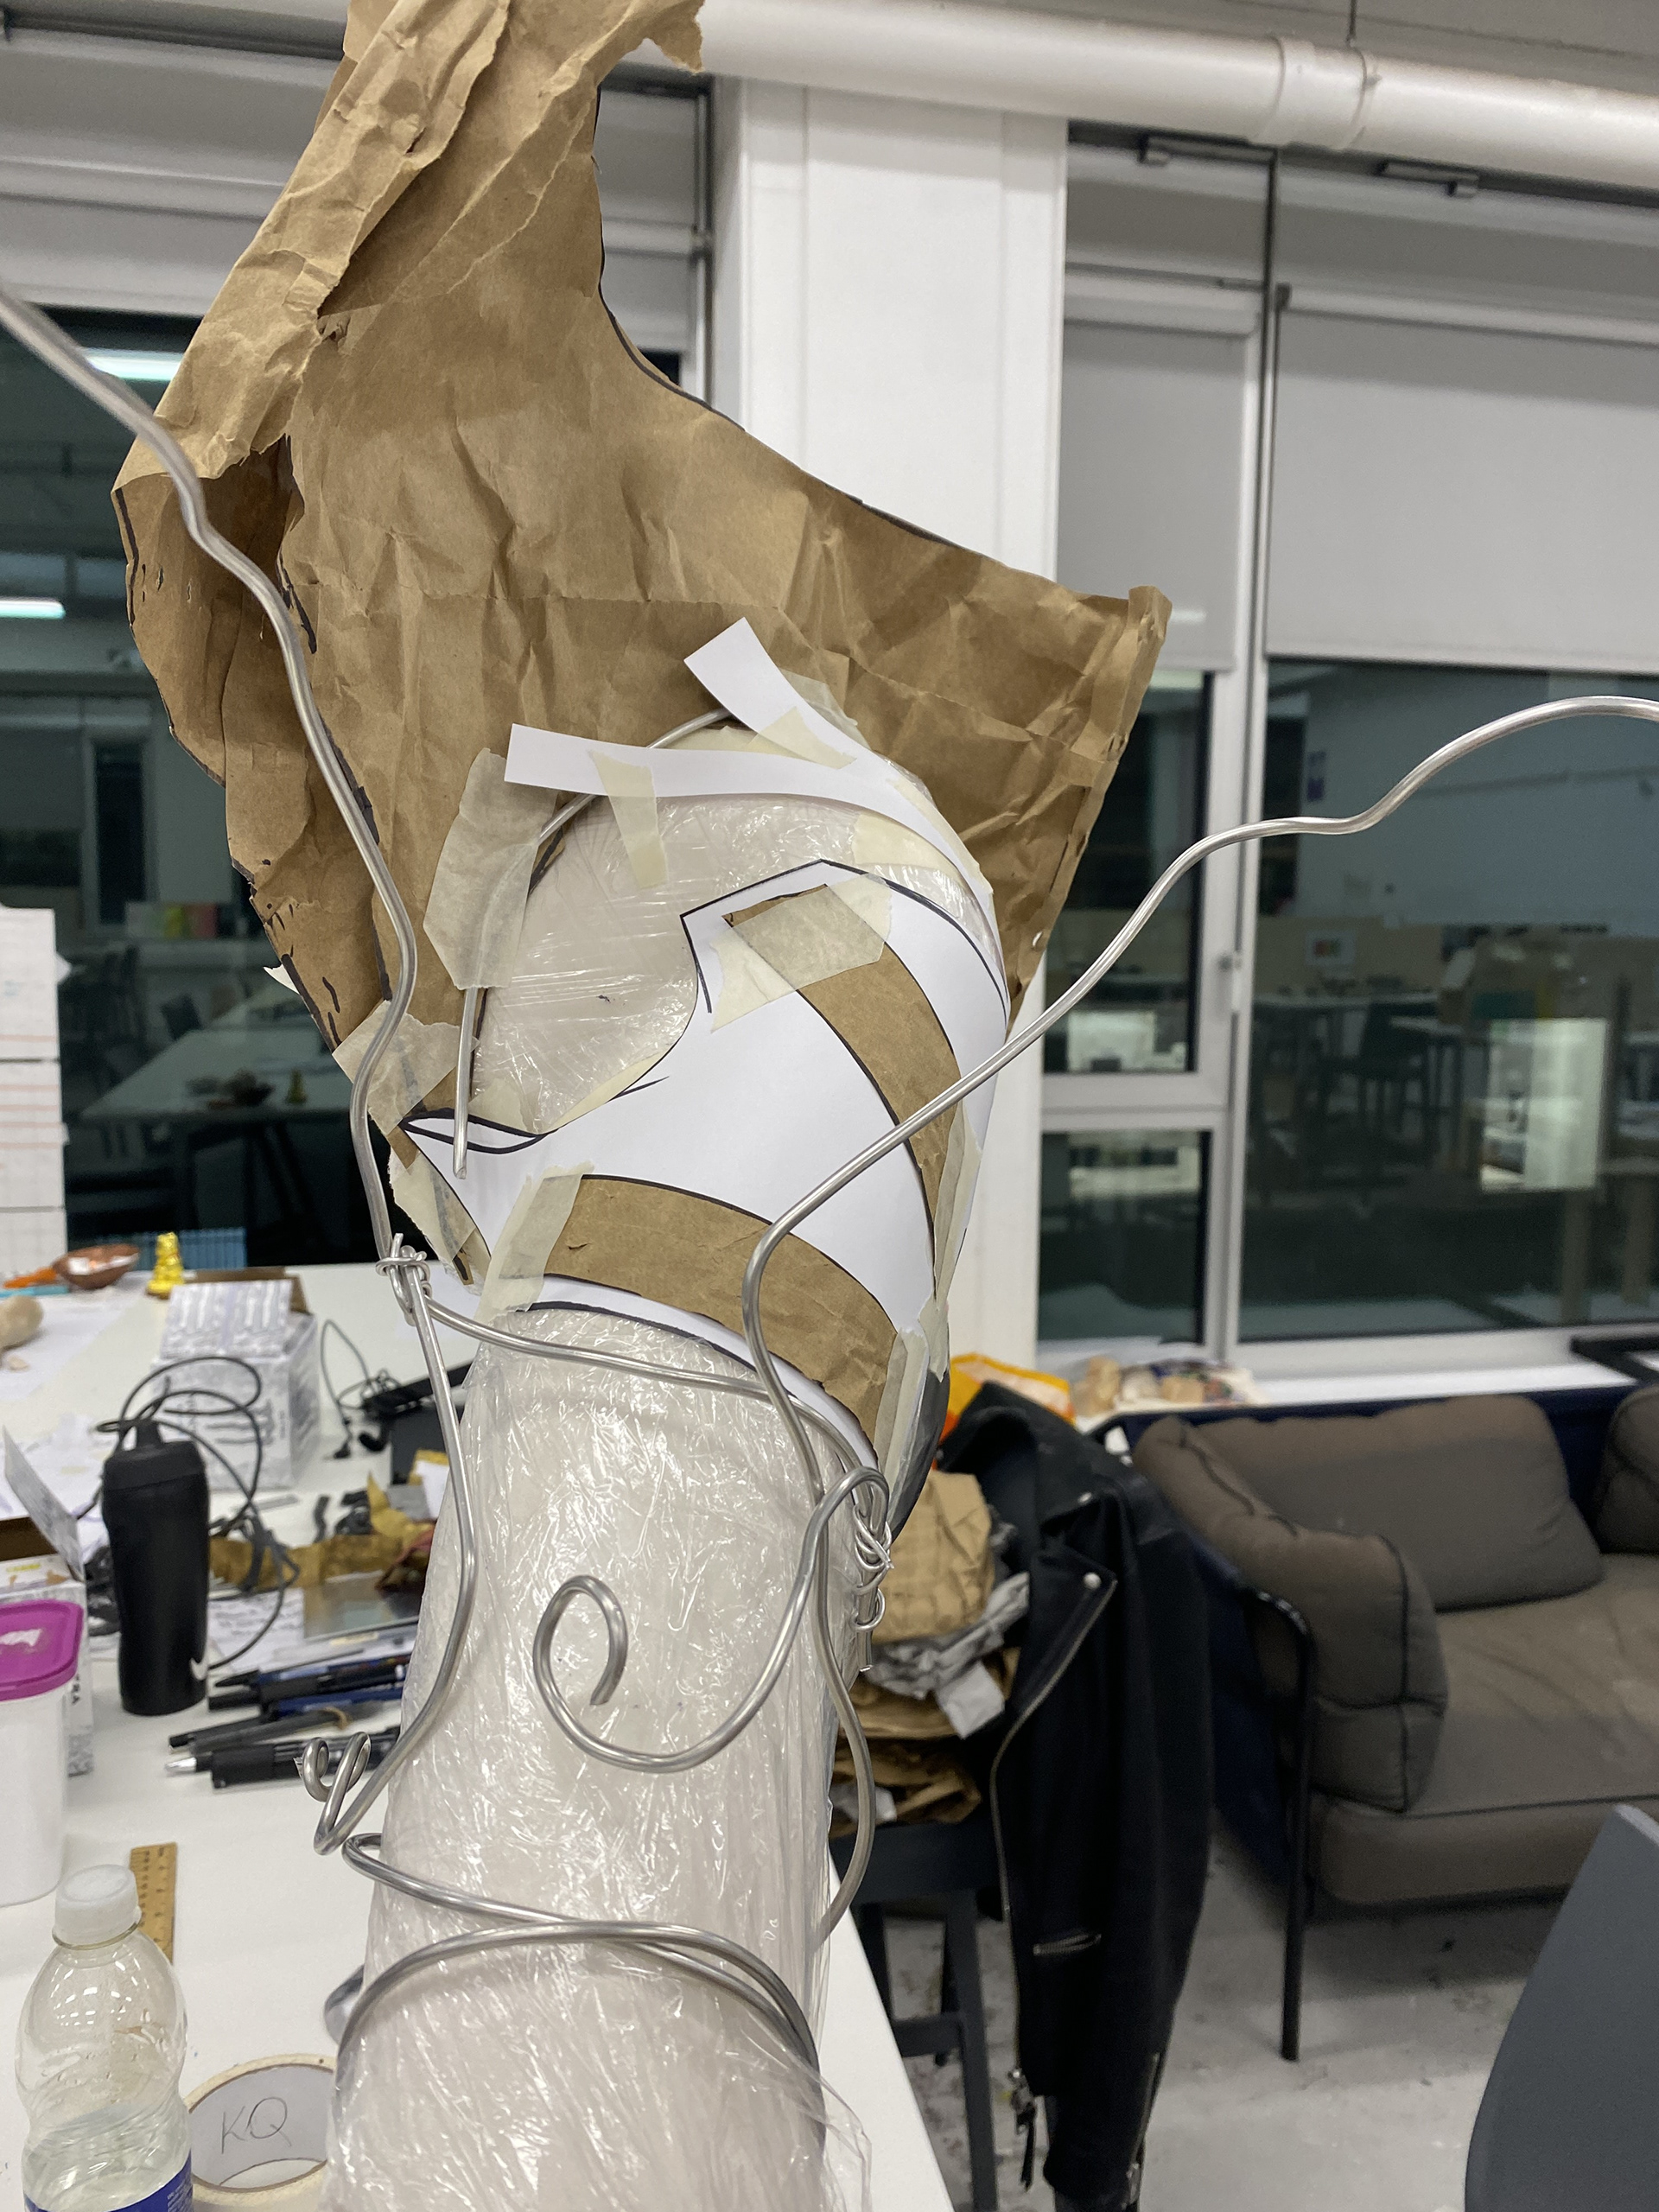
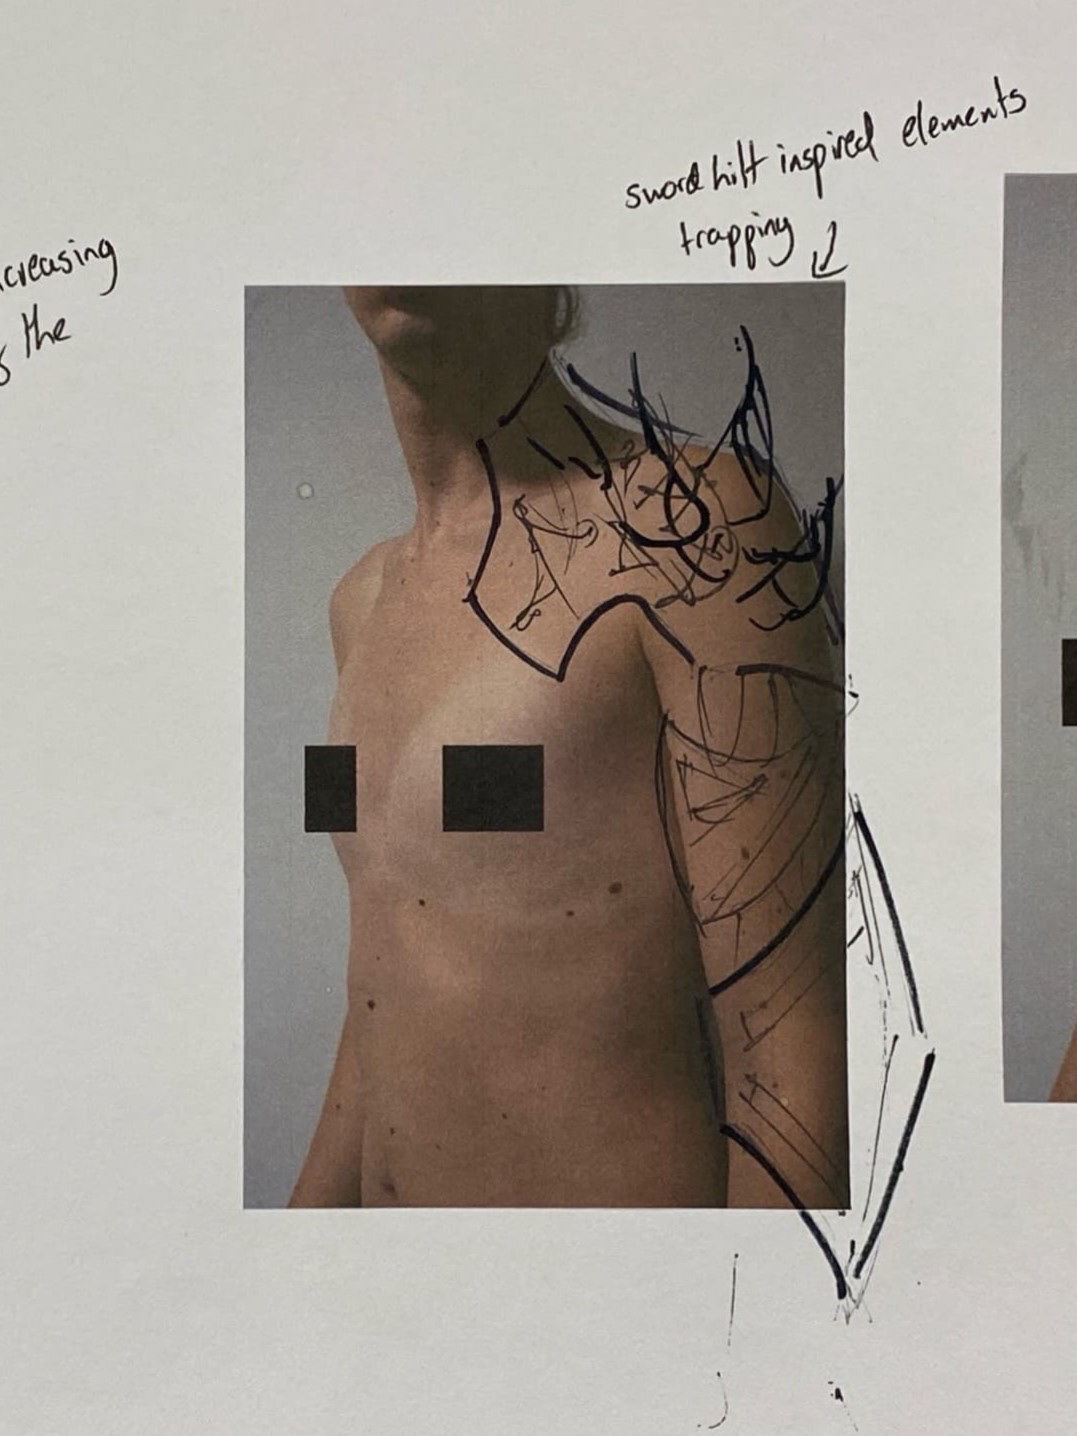
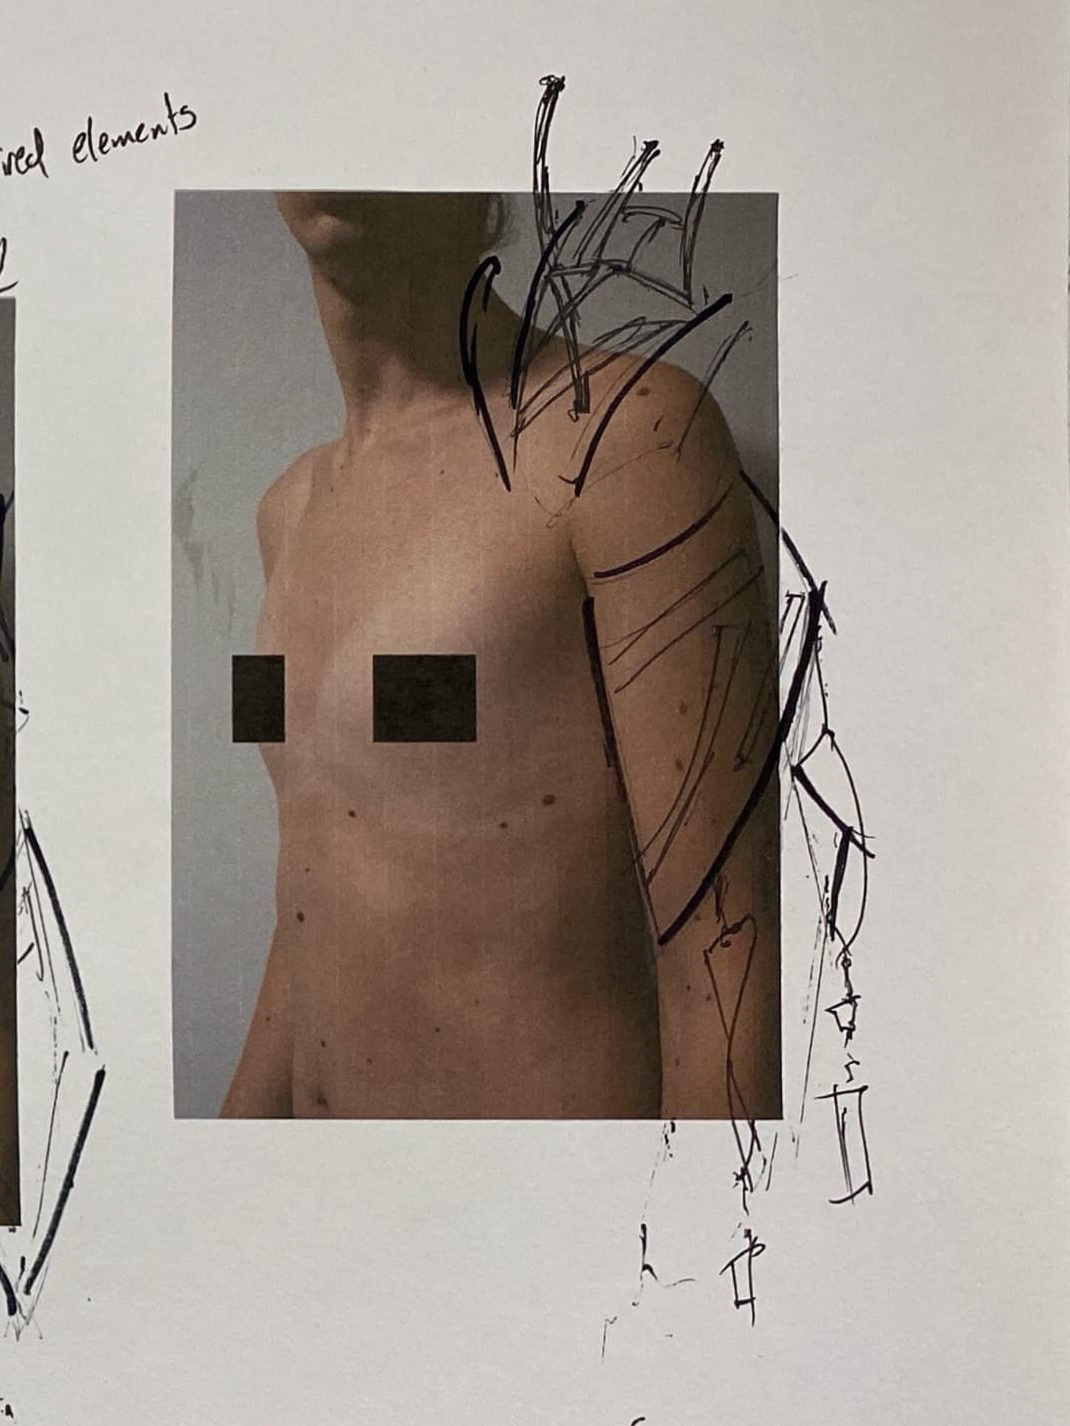
I was struggling with the design of the mid shoulder area and went through a series of tests. The first was looking at covering it with larger and multiple pieces of plate that spanned down from the upper fanned shoulder piece. I also looked at the design on the right, investigating how to incorporate the hilt of swords as spikes onto this shoulder area. However, I felt that this didn't convey the idea of encapsulation and looked to use this feature by wrapping rod around the arm, trapping it inside the armour.

I added more layers to the top of the shoulder which created a dynamic design with additional area to incorporate a variety of texture and embossed words onto.
I also wasn’t happy with the changes I had explored with the lower shoulder section and looked at the drawing above to break up all the large sheets. I felt that there was visually too much mass on the shoulder as well as this being impractical due to the weight when made in metal. I broke the section up, looking at using one large sheet and some smaller elements. I added the circle (Besagews) from the drawing which brings in a traditional armour element into my contemporary design. Also, I wanted to incorporate more sections with text and did this by using two rectangular pieces to bring together the whole shoulder design.
Currently this is a very rough design and to take it into metal I need to refine each element separately to create accurate templates that I can turn into a final metal outcome. Furthermore, I need to work out how each element connects and is attached to the body, as currently the shapes are stuck onto the cast with tape. Finaly, I need to look at how each element will be textured and what material I make the final outcome from.
Developing elbow piece

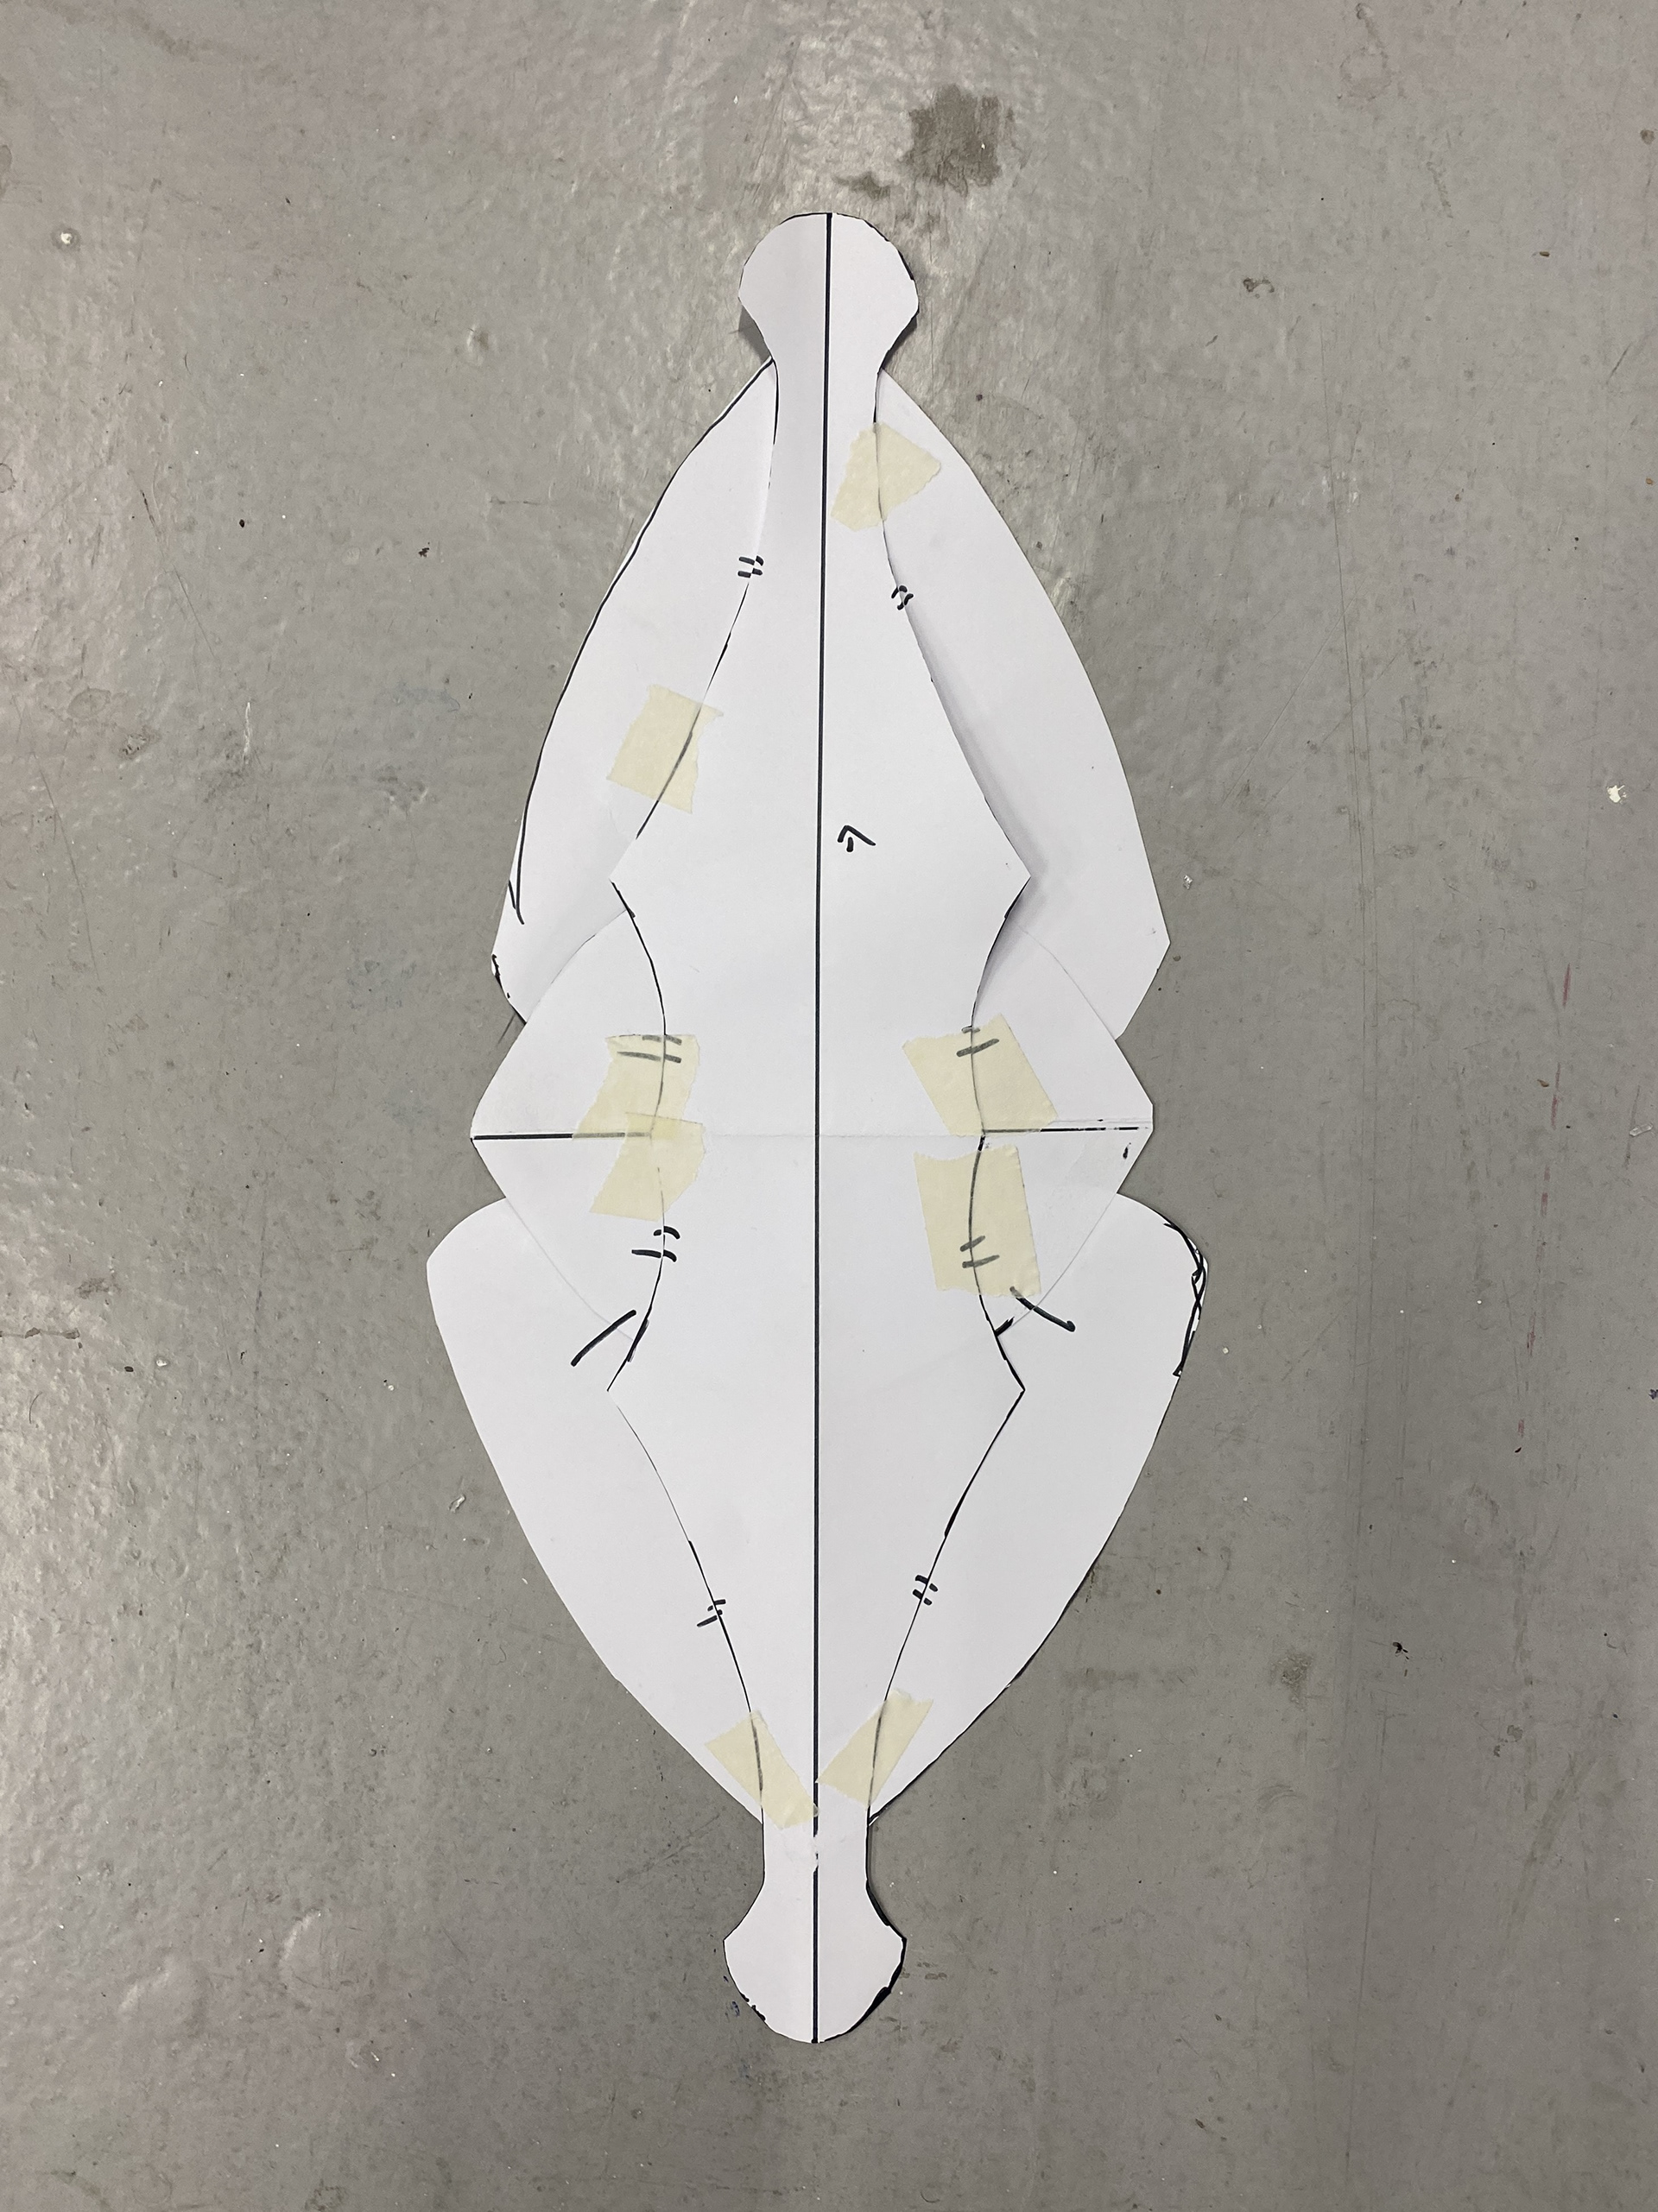
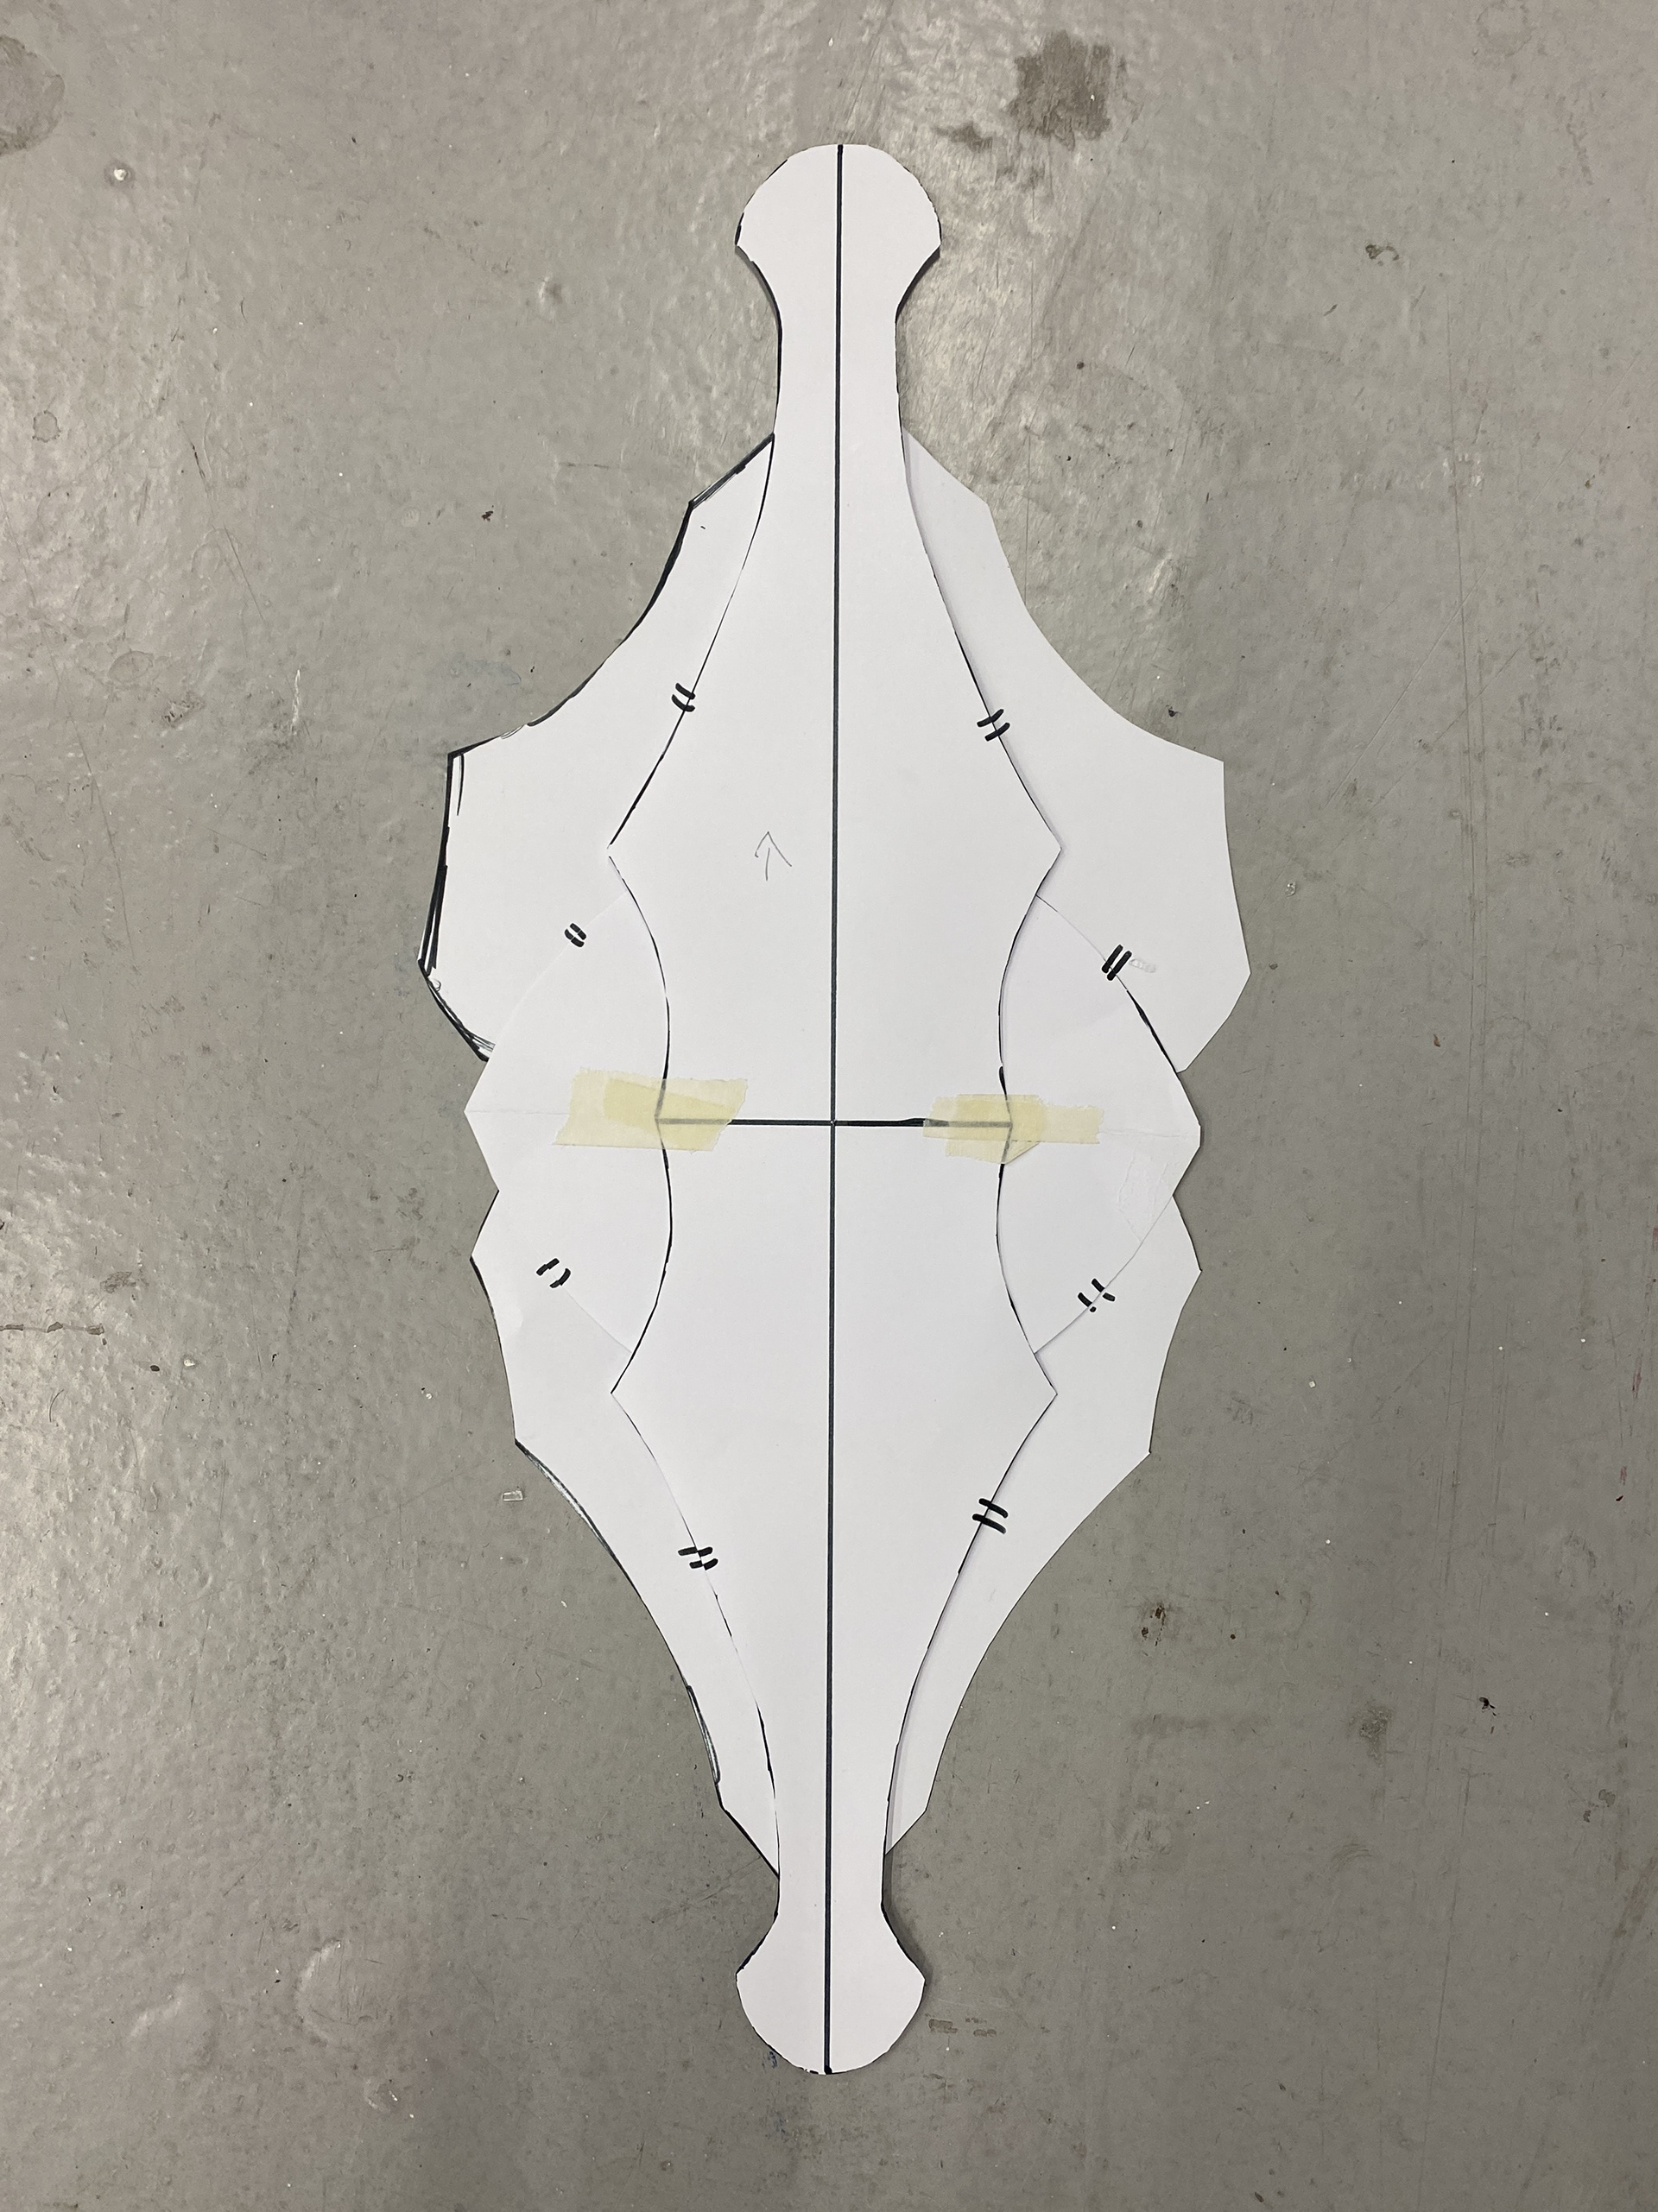
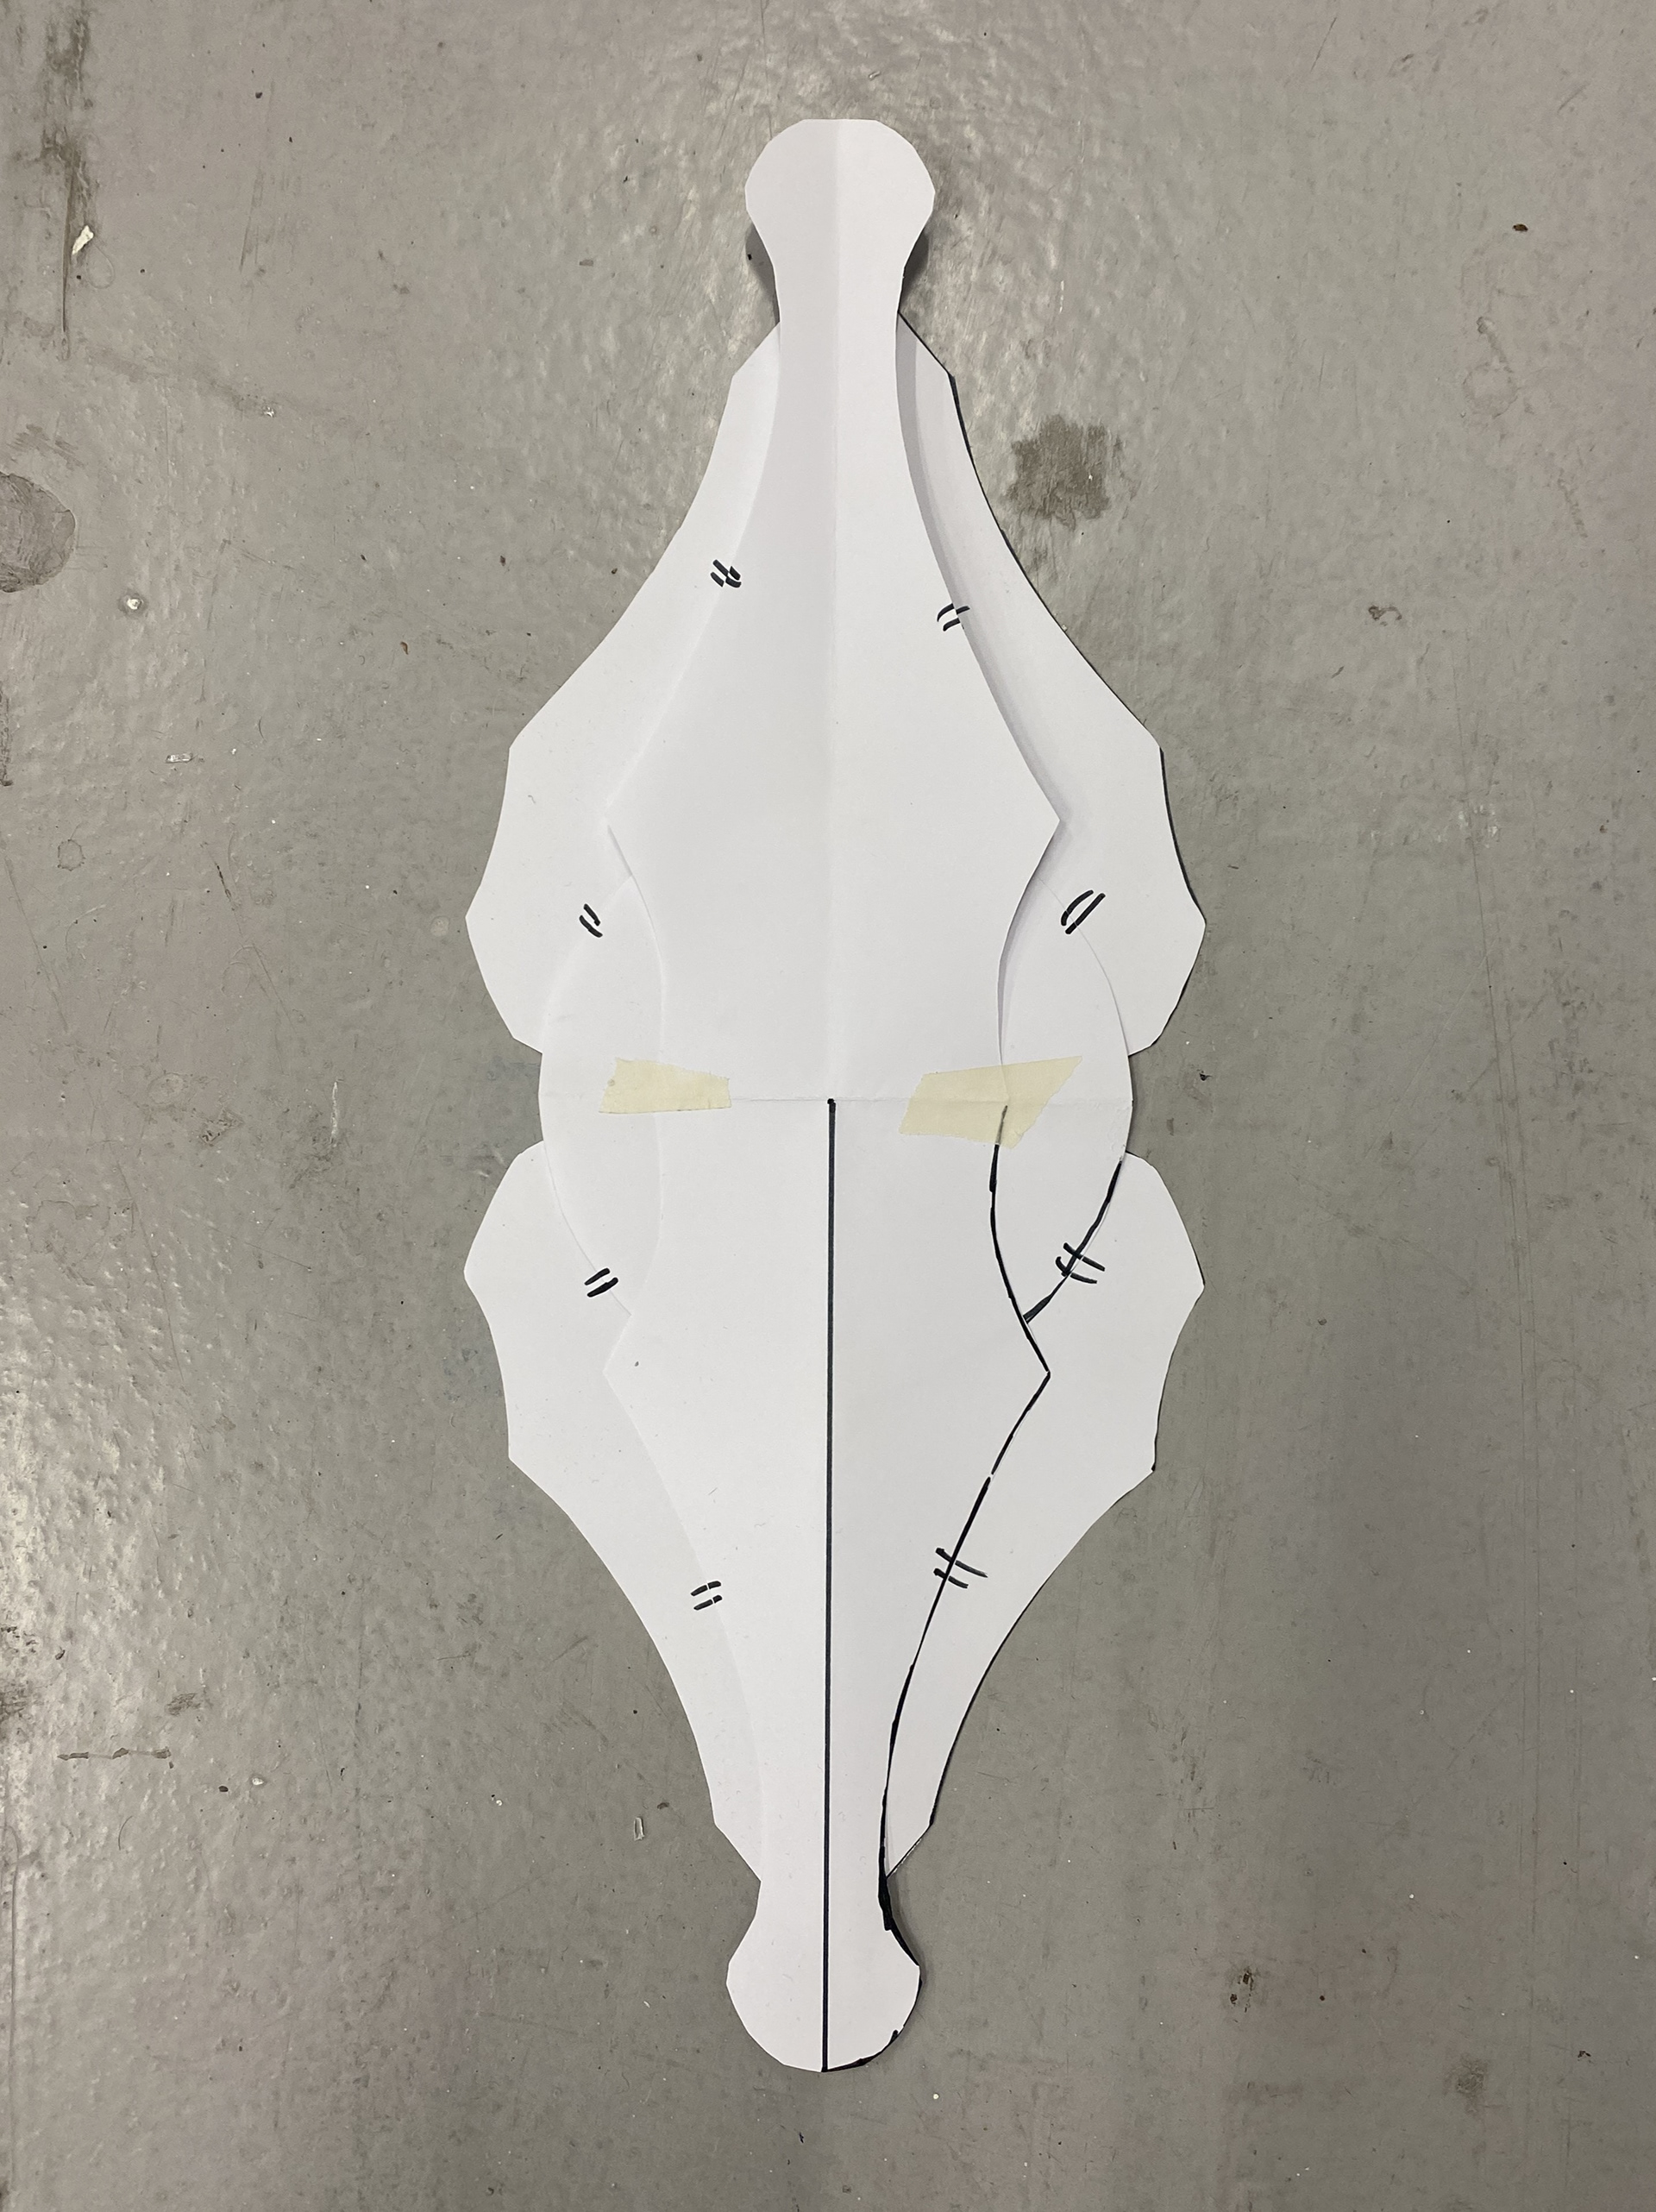
My initial 3D collage of the elbow section was extremely loose and simply gave a vague idea of my design. I then went through a series of iterations looking at how the different sections overlayed on top of each other as well as the overall form. At first, I decided to create one line of symmetry vertically. I referenced the shapes and lines created in Medieval European armour. In my last design I created 4 lines of symmetry both vertical and horizontal through the centre. I took inspiration from the circle of the Besagews and felt that with my first three designs, having the top and bottom back pieces being close but not duplicates of each, other looked unintentional.

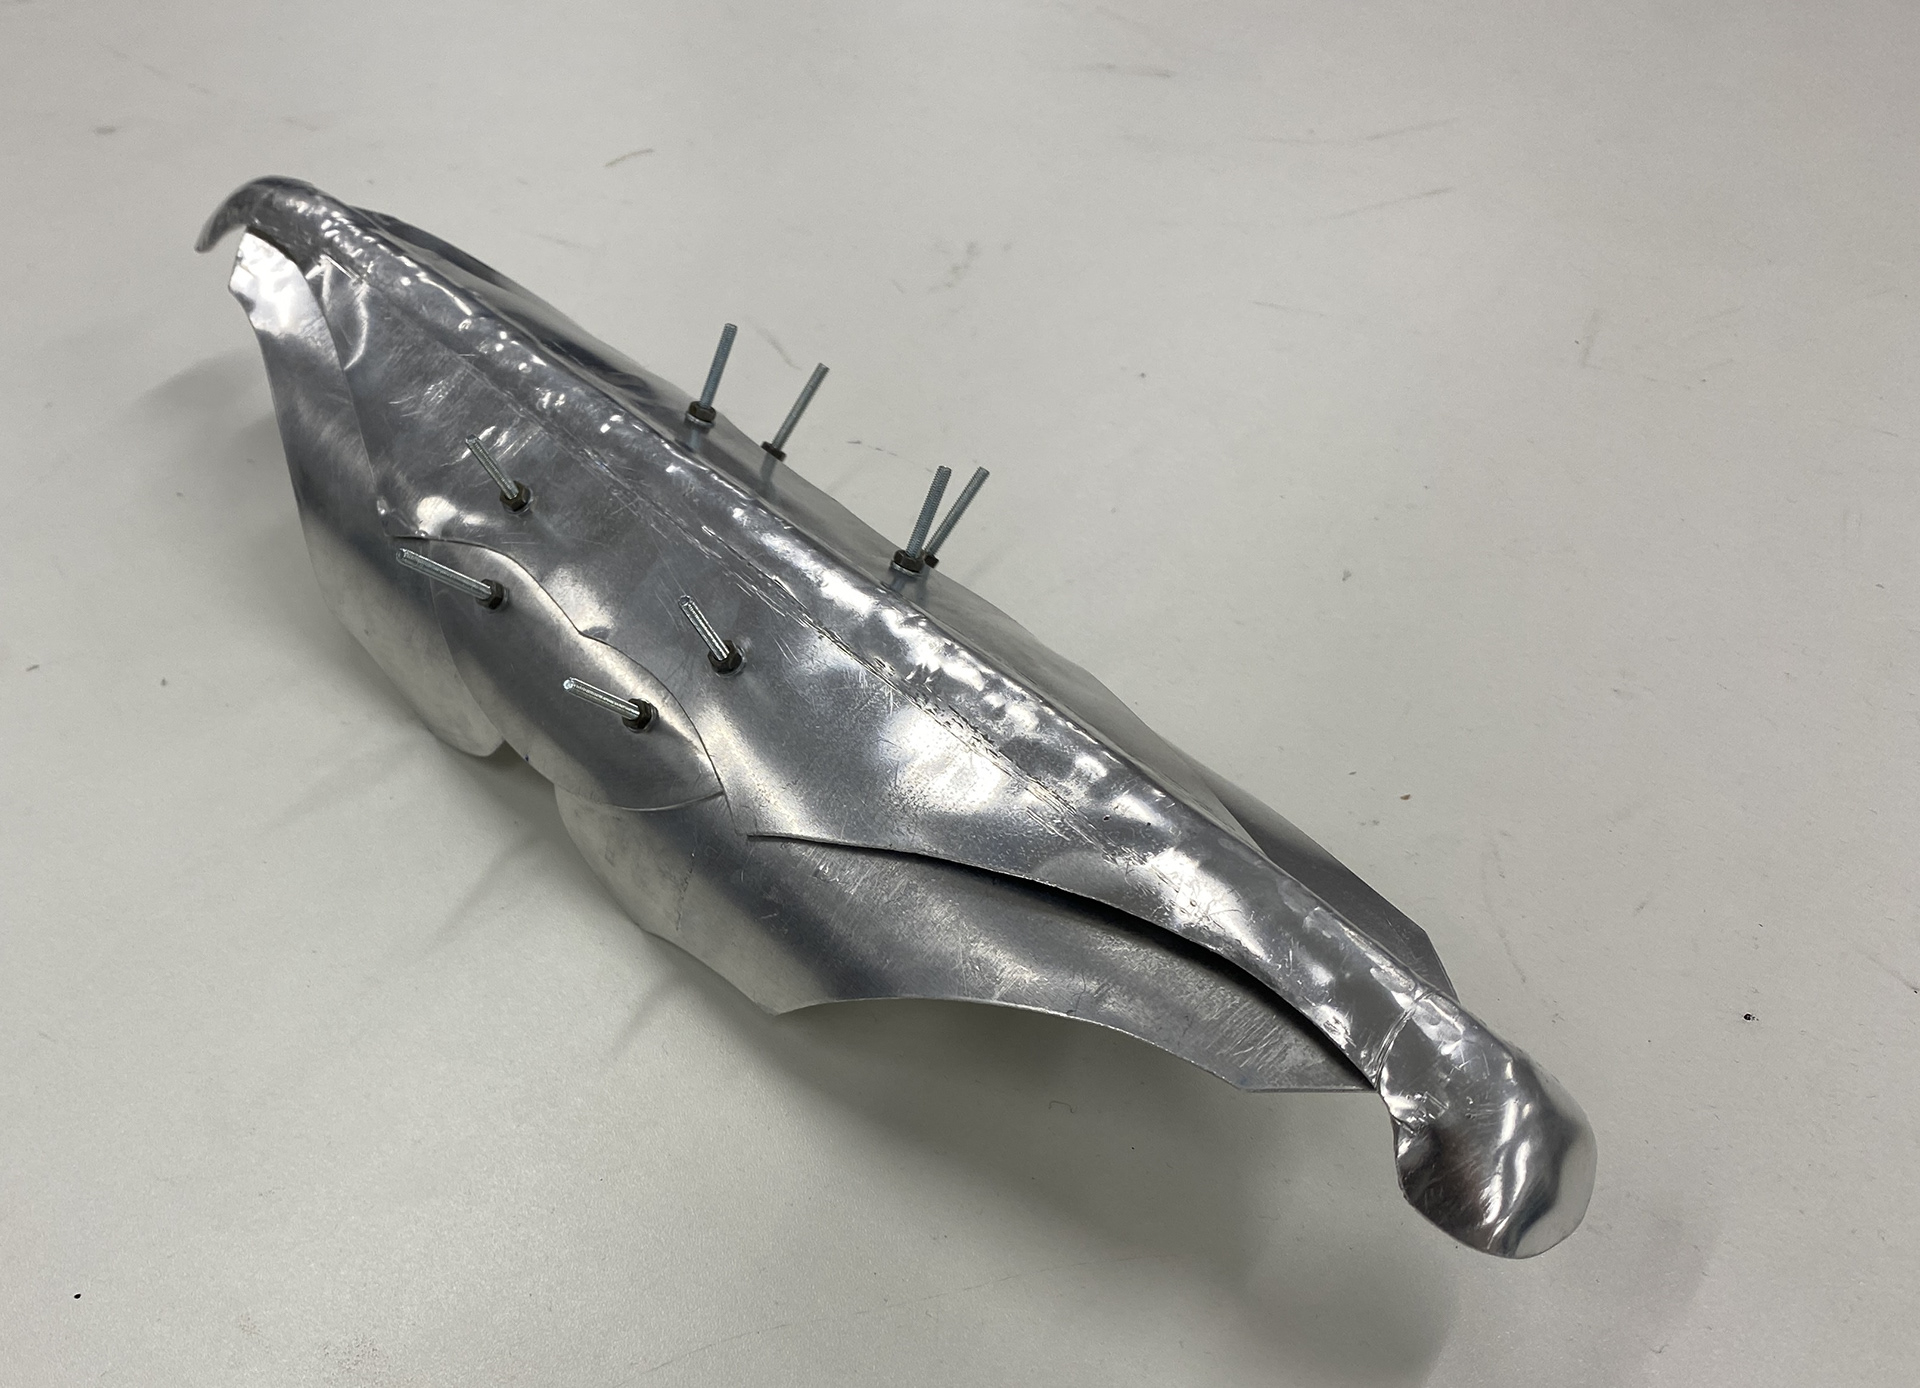
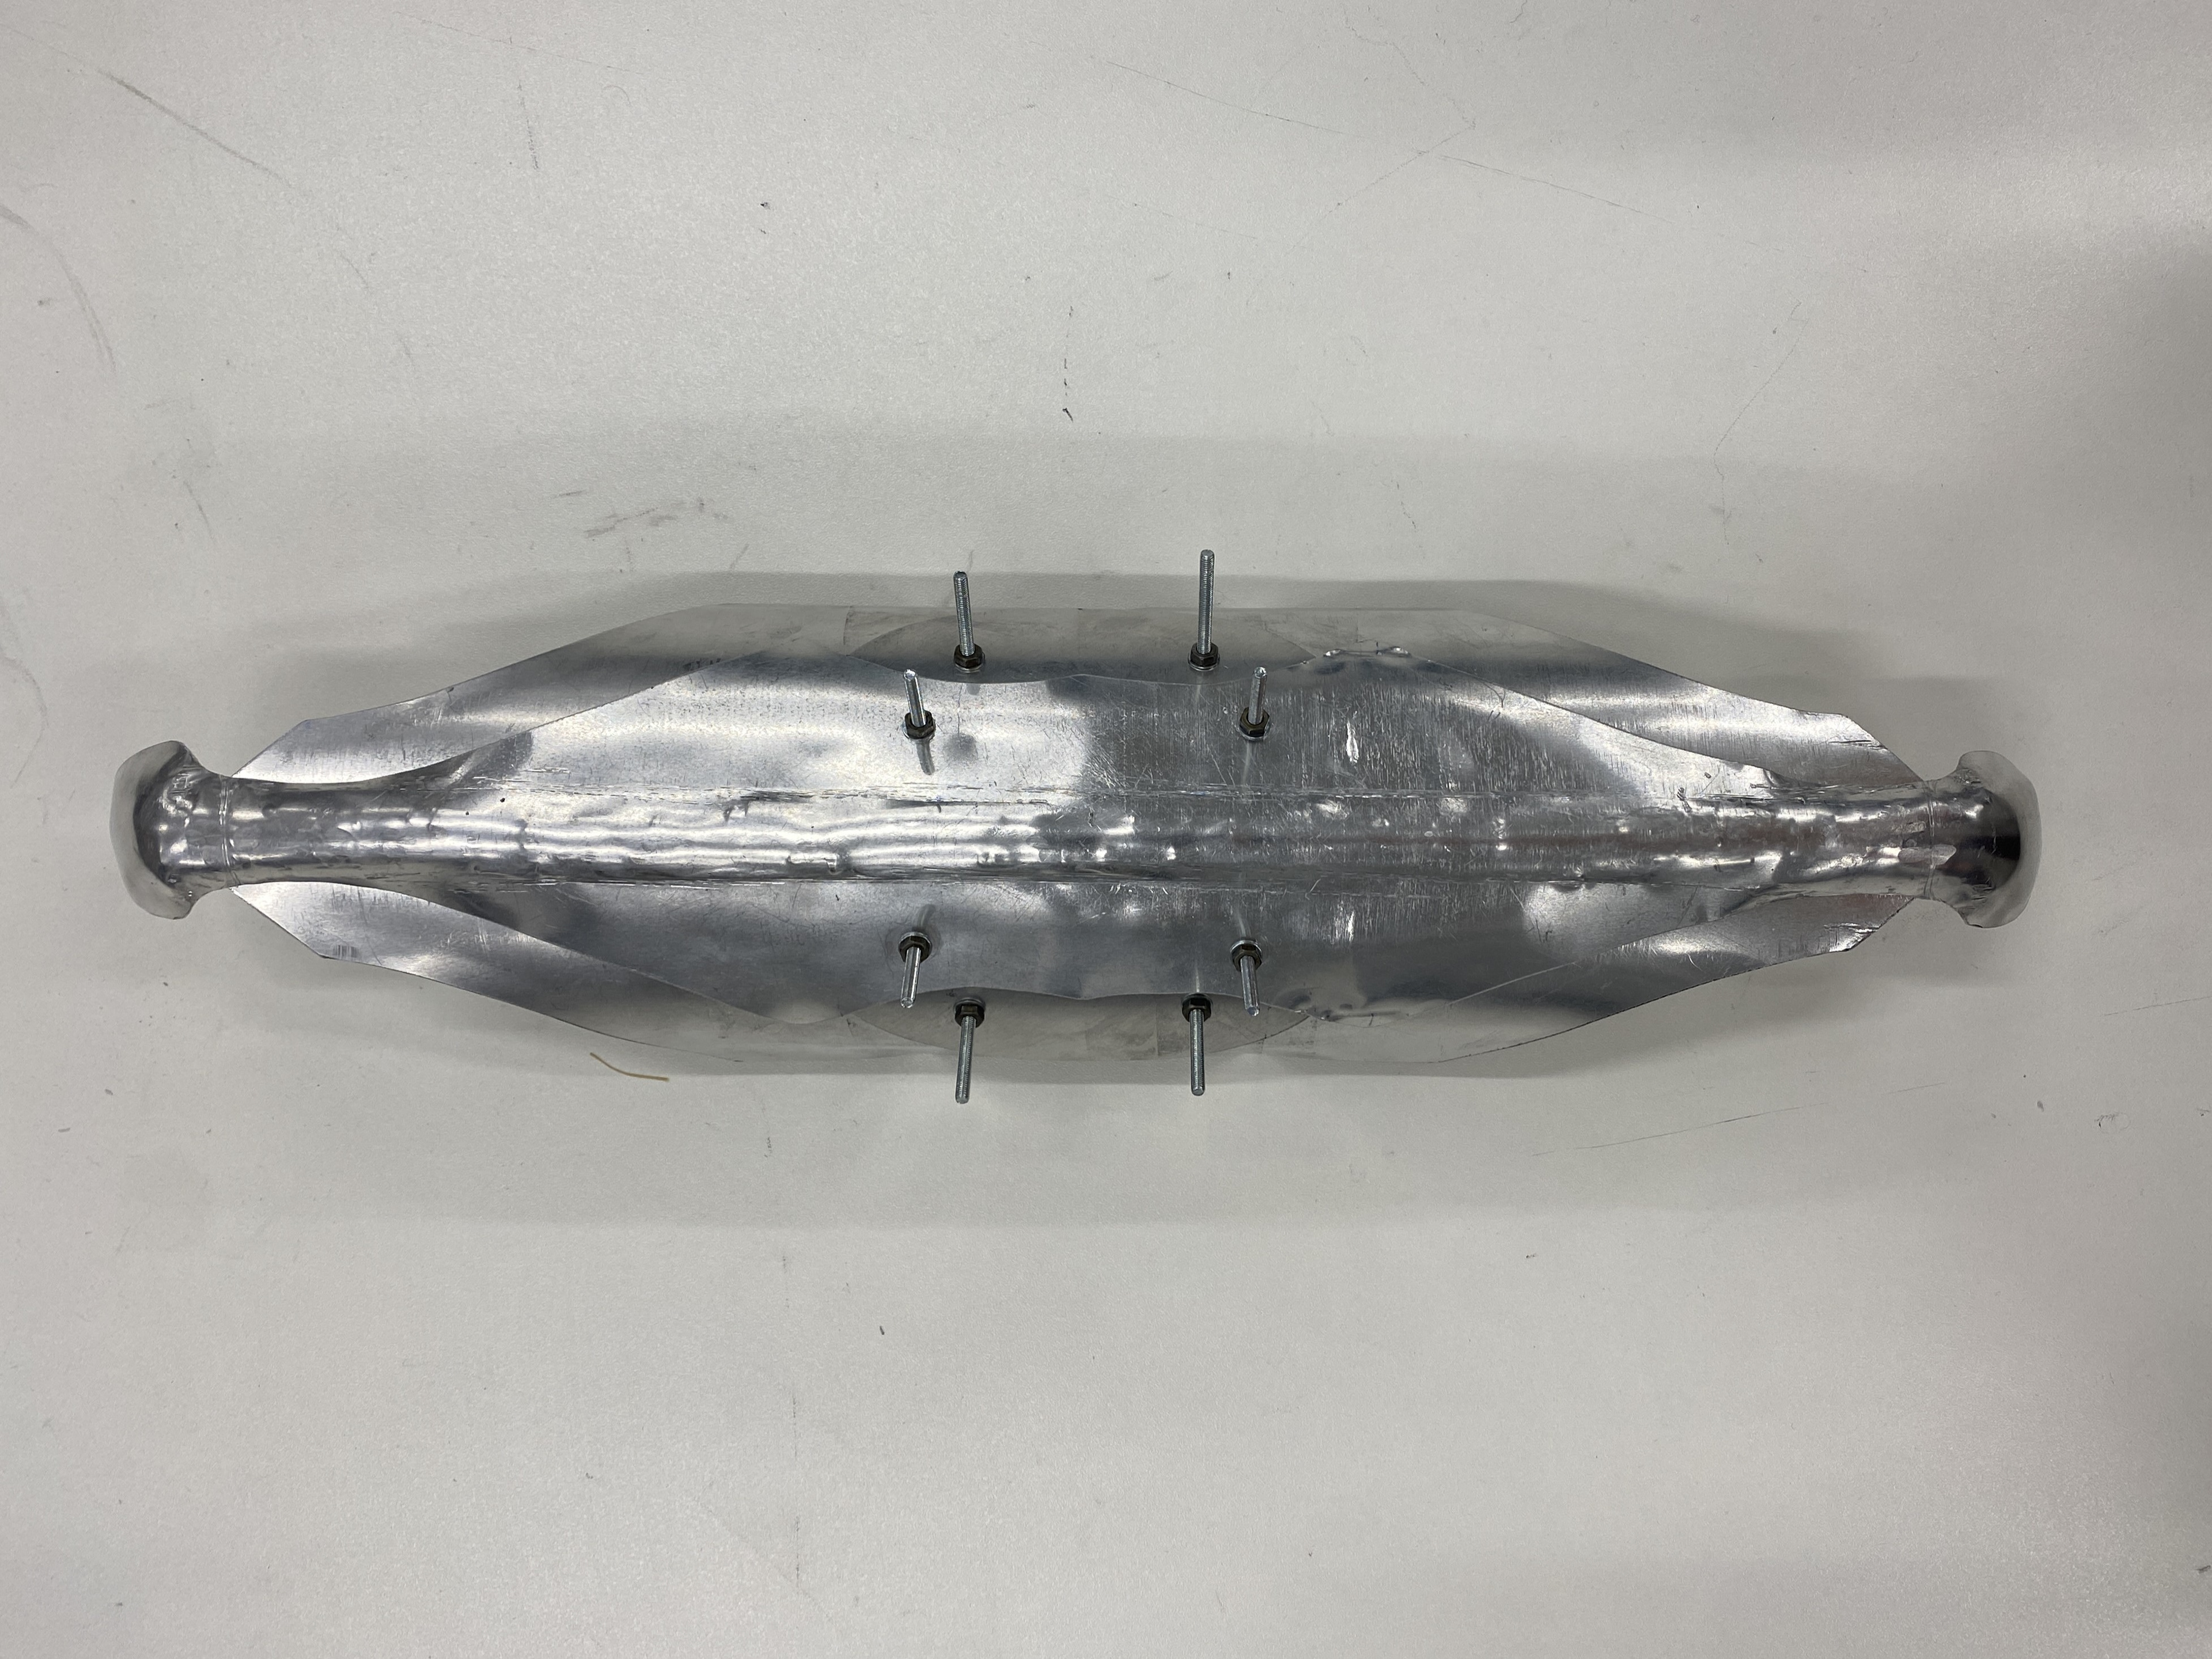
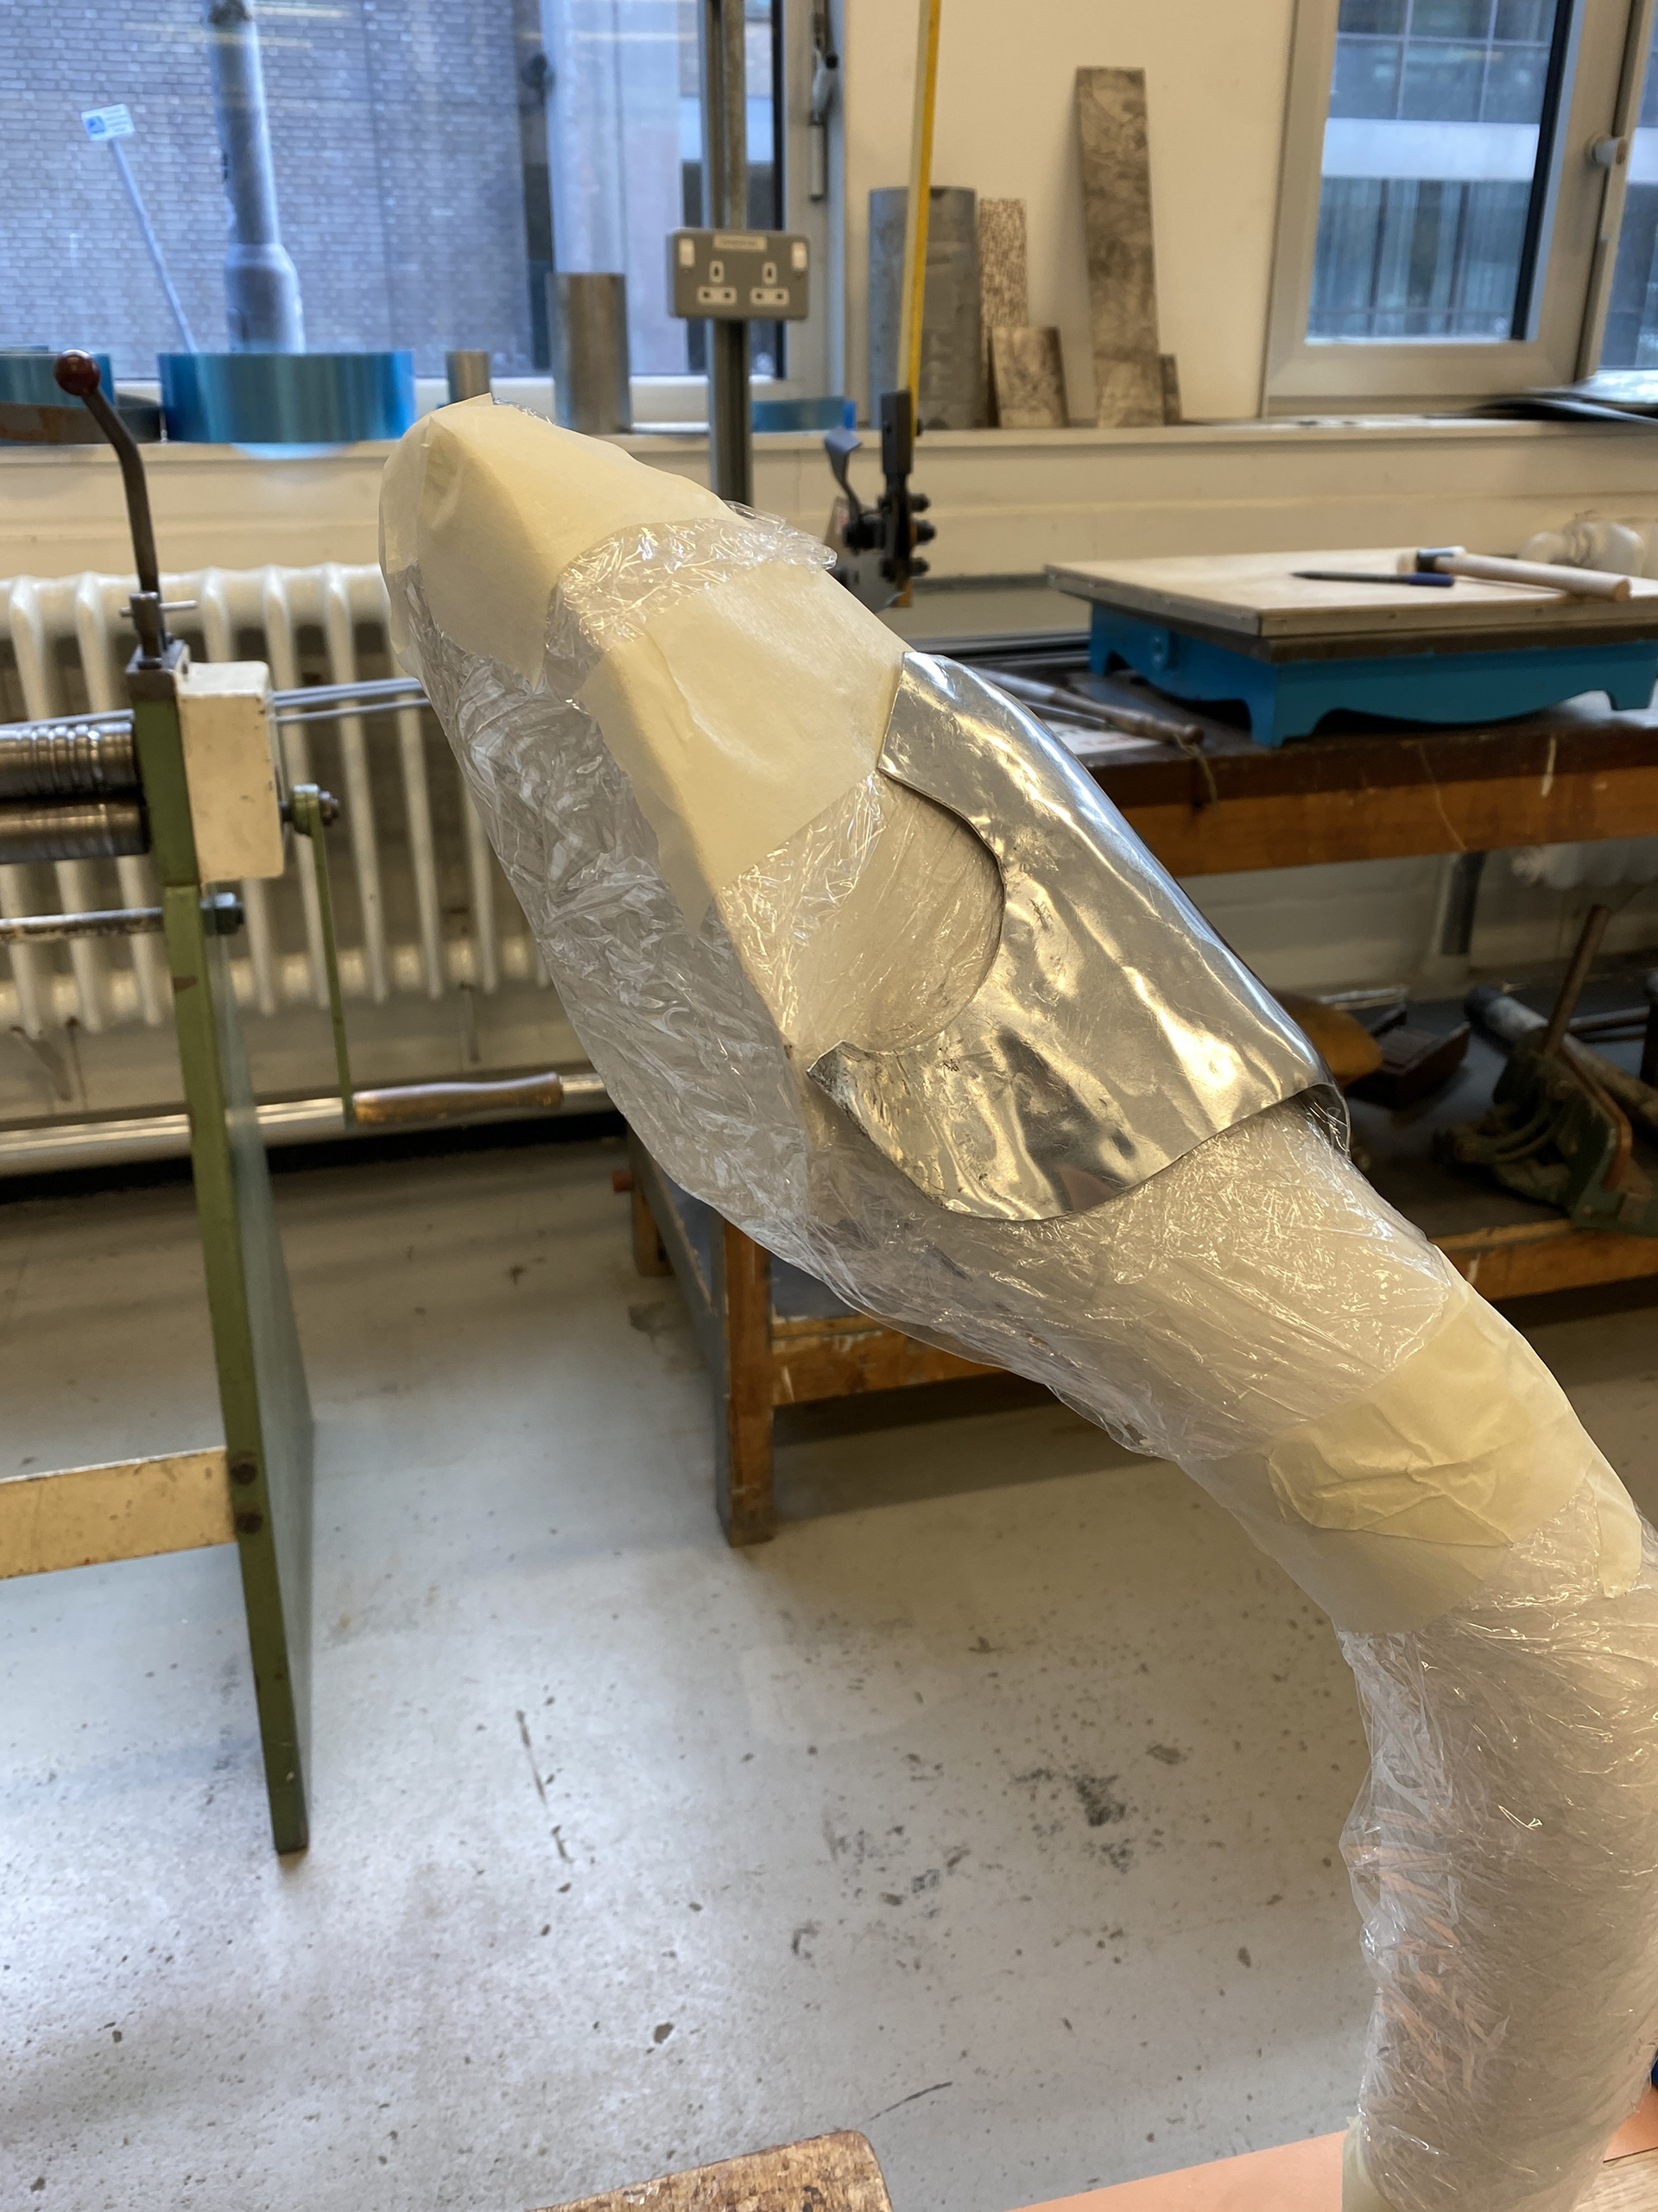
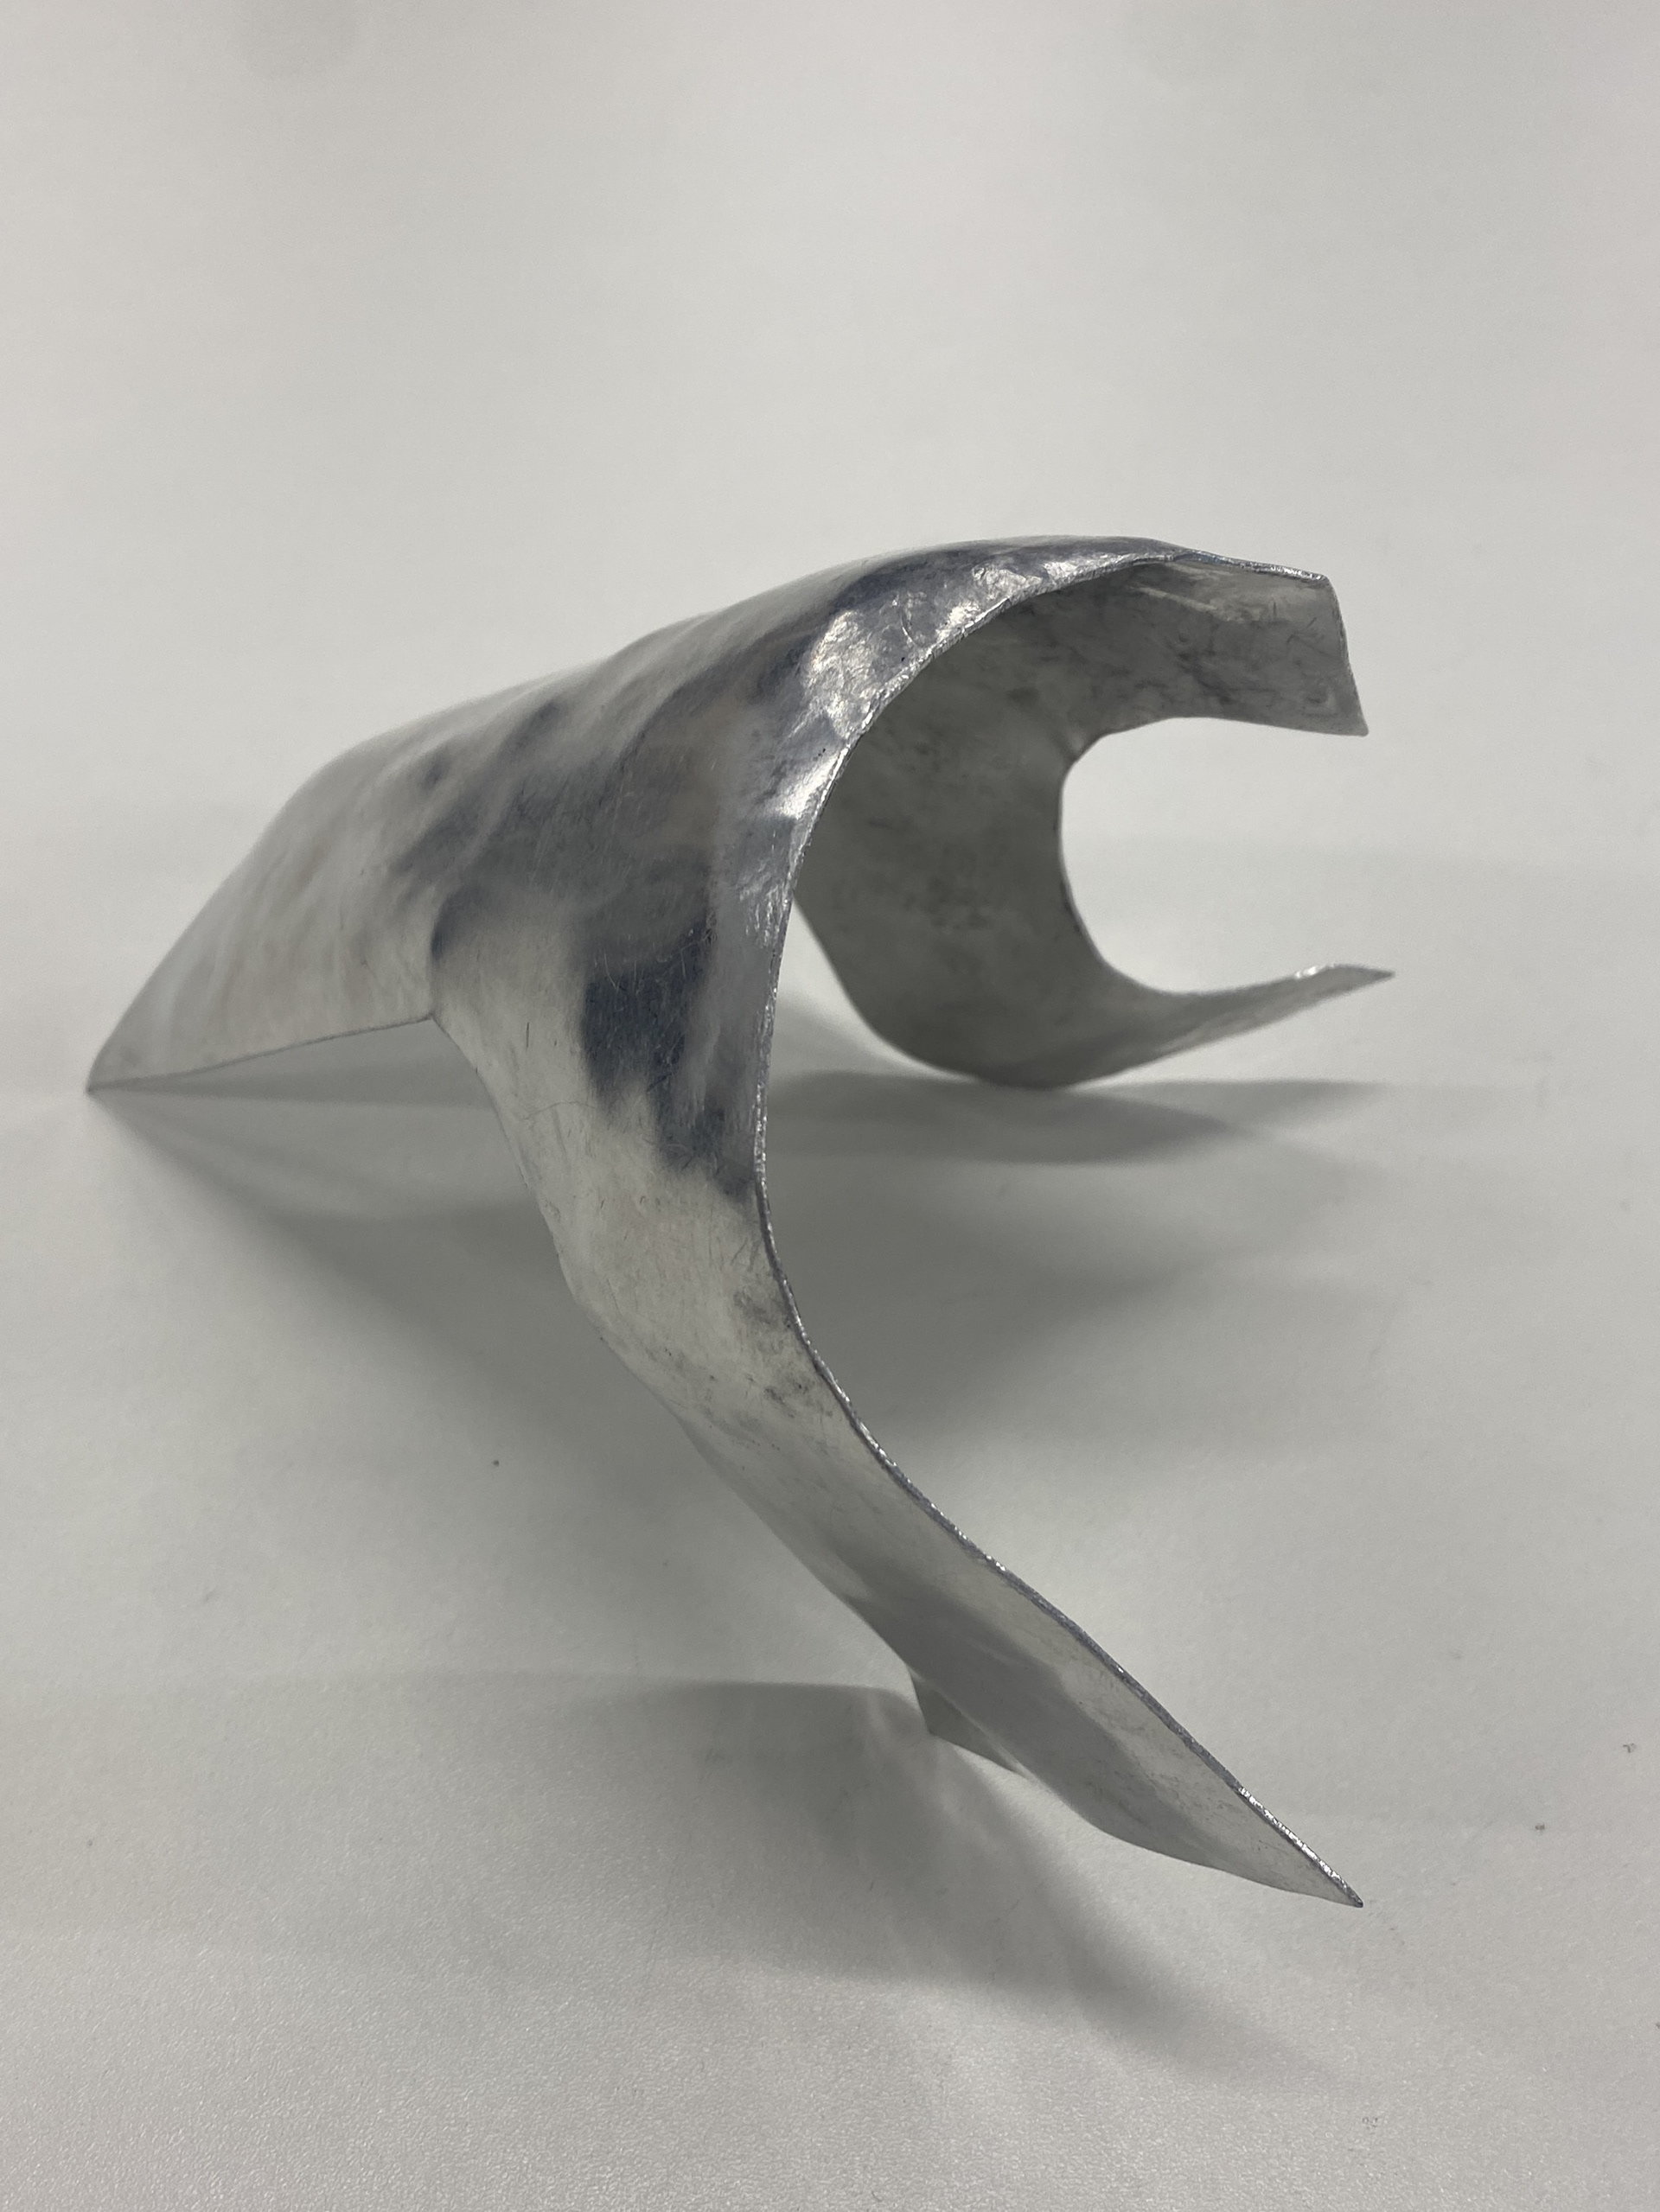
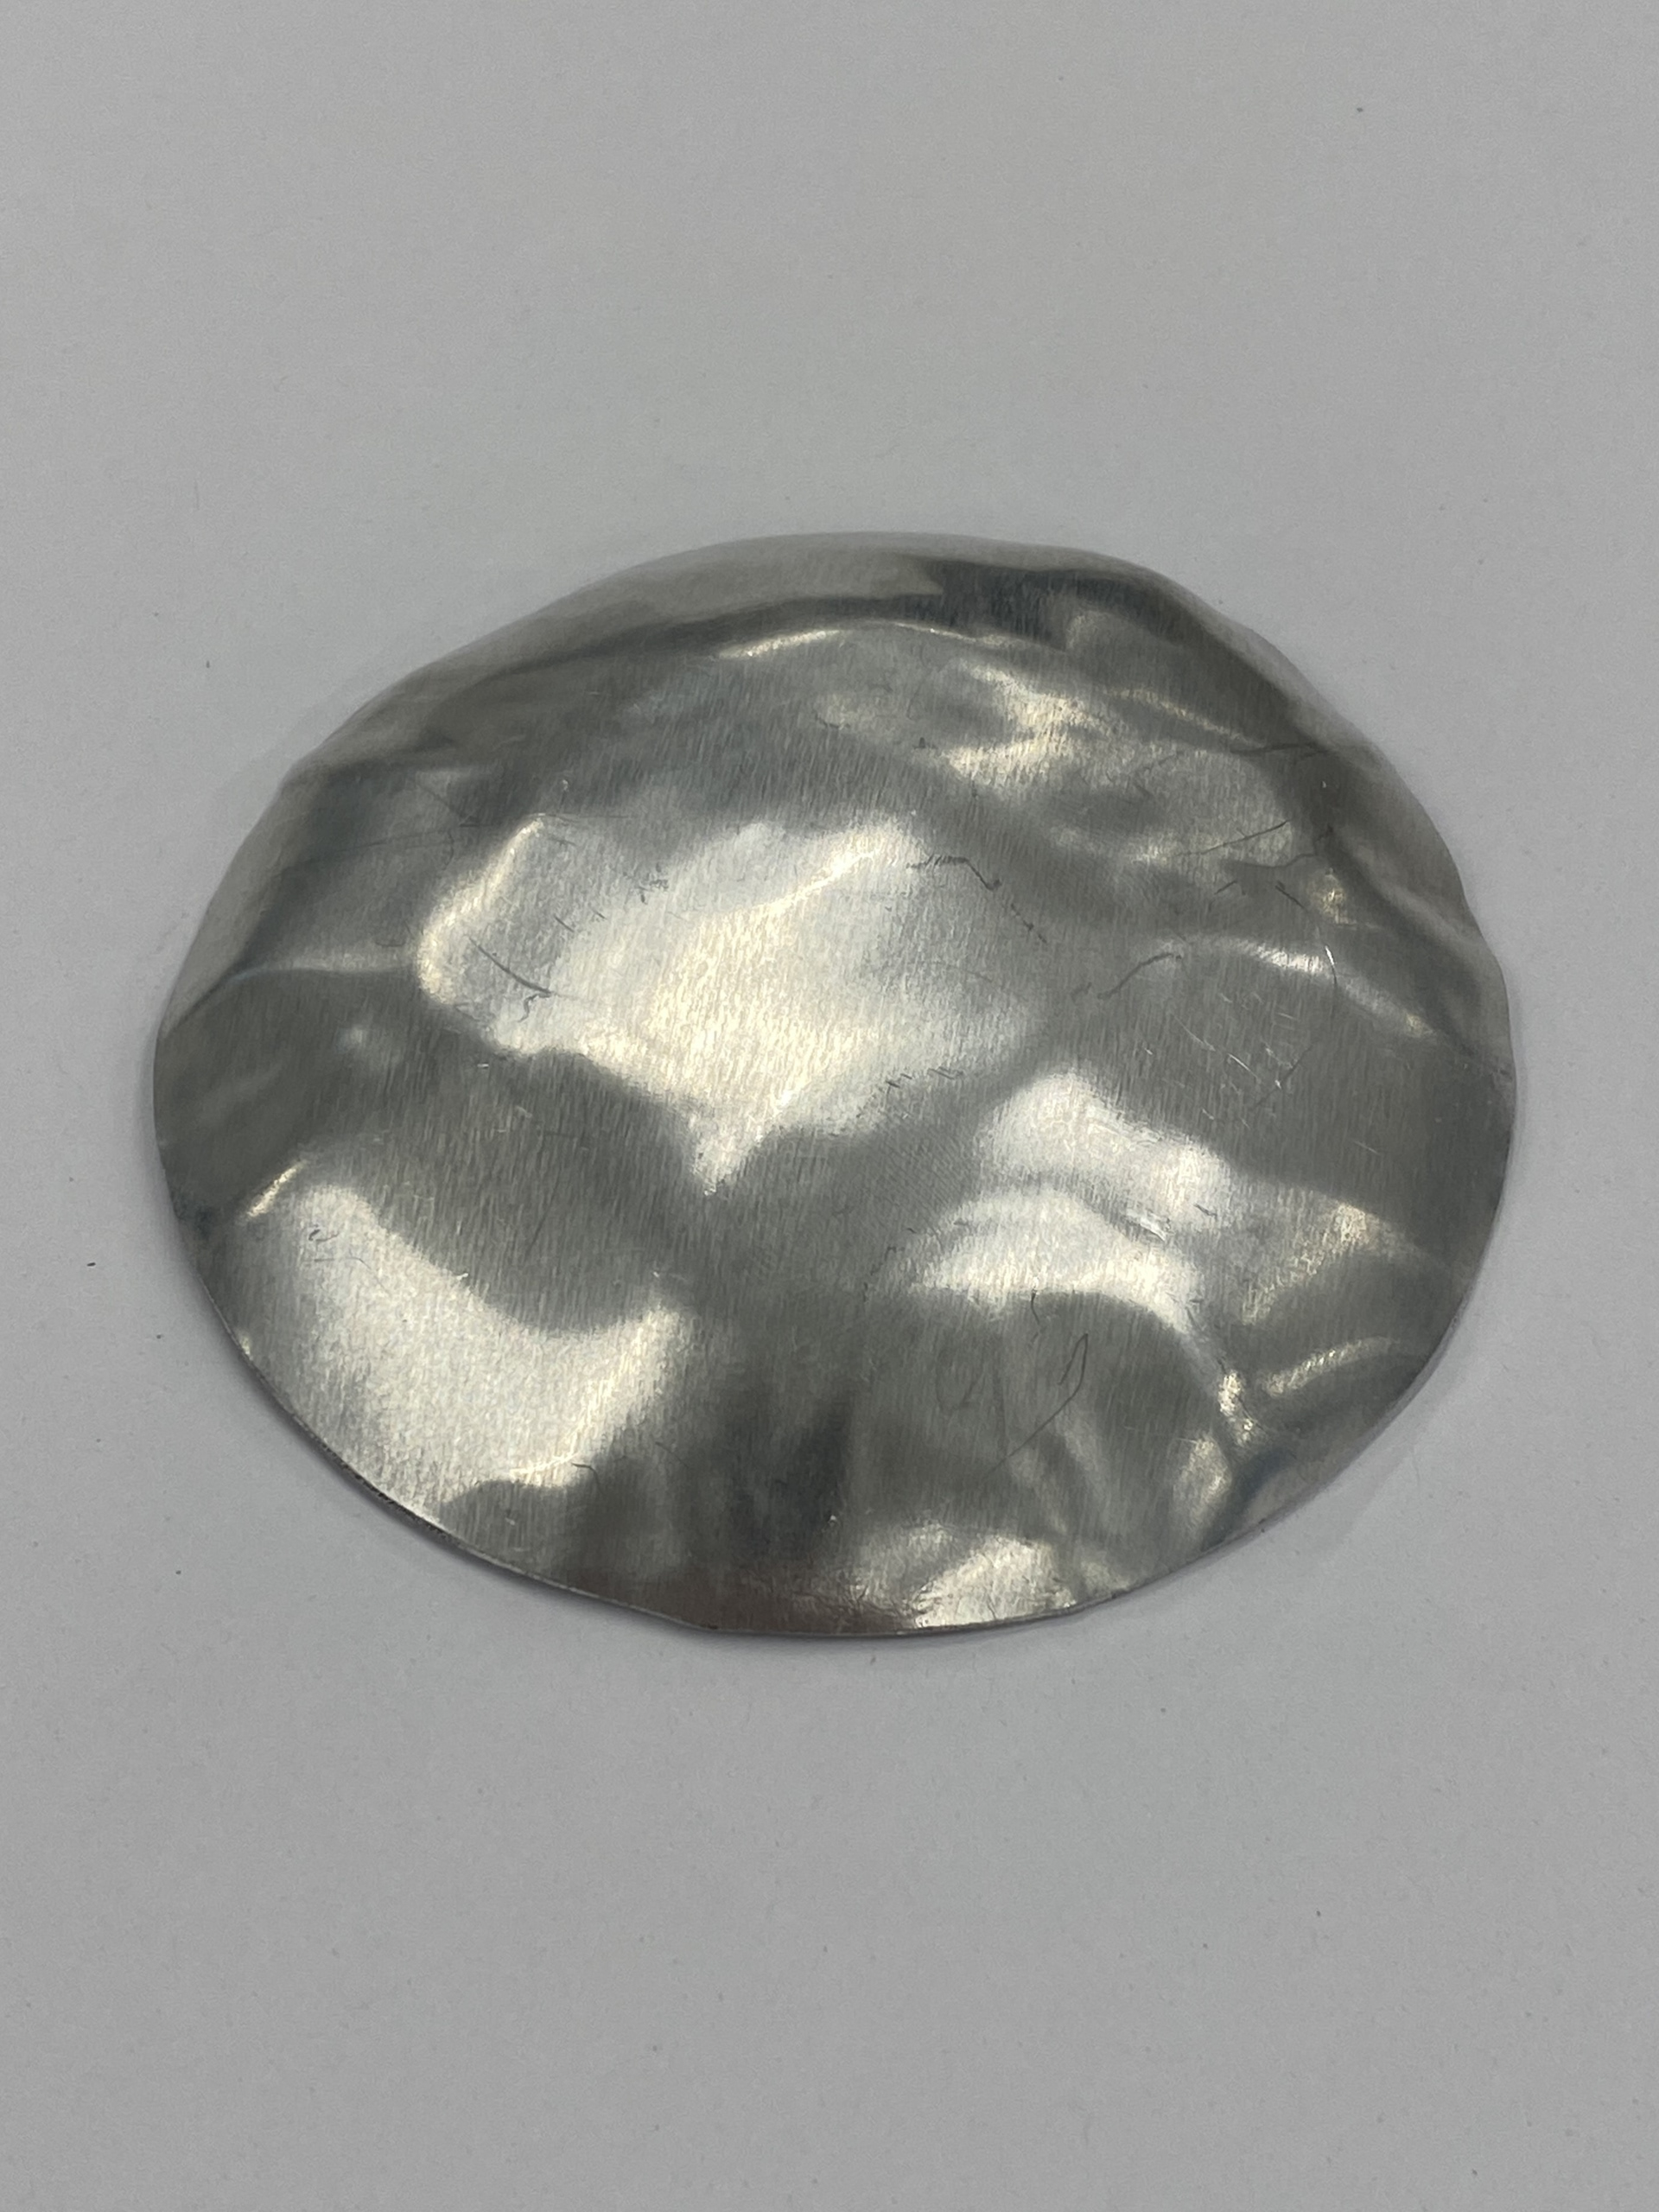
I transferred my paper template into 1mm aluminium to look at the way metal forms over the body. Through my making process I discovered that I could enhance my design by creating additional form and refinement through adding in raised and domed areas down the front piece.
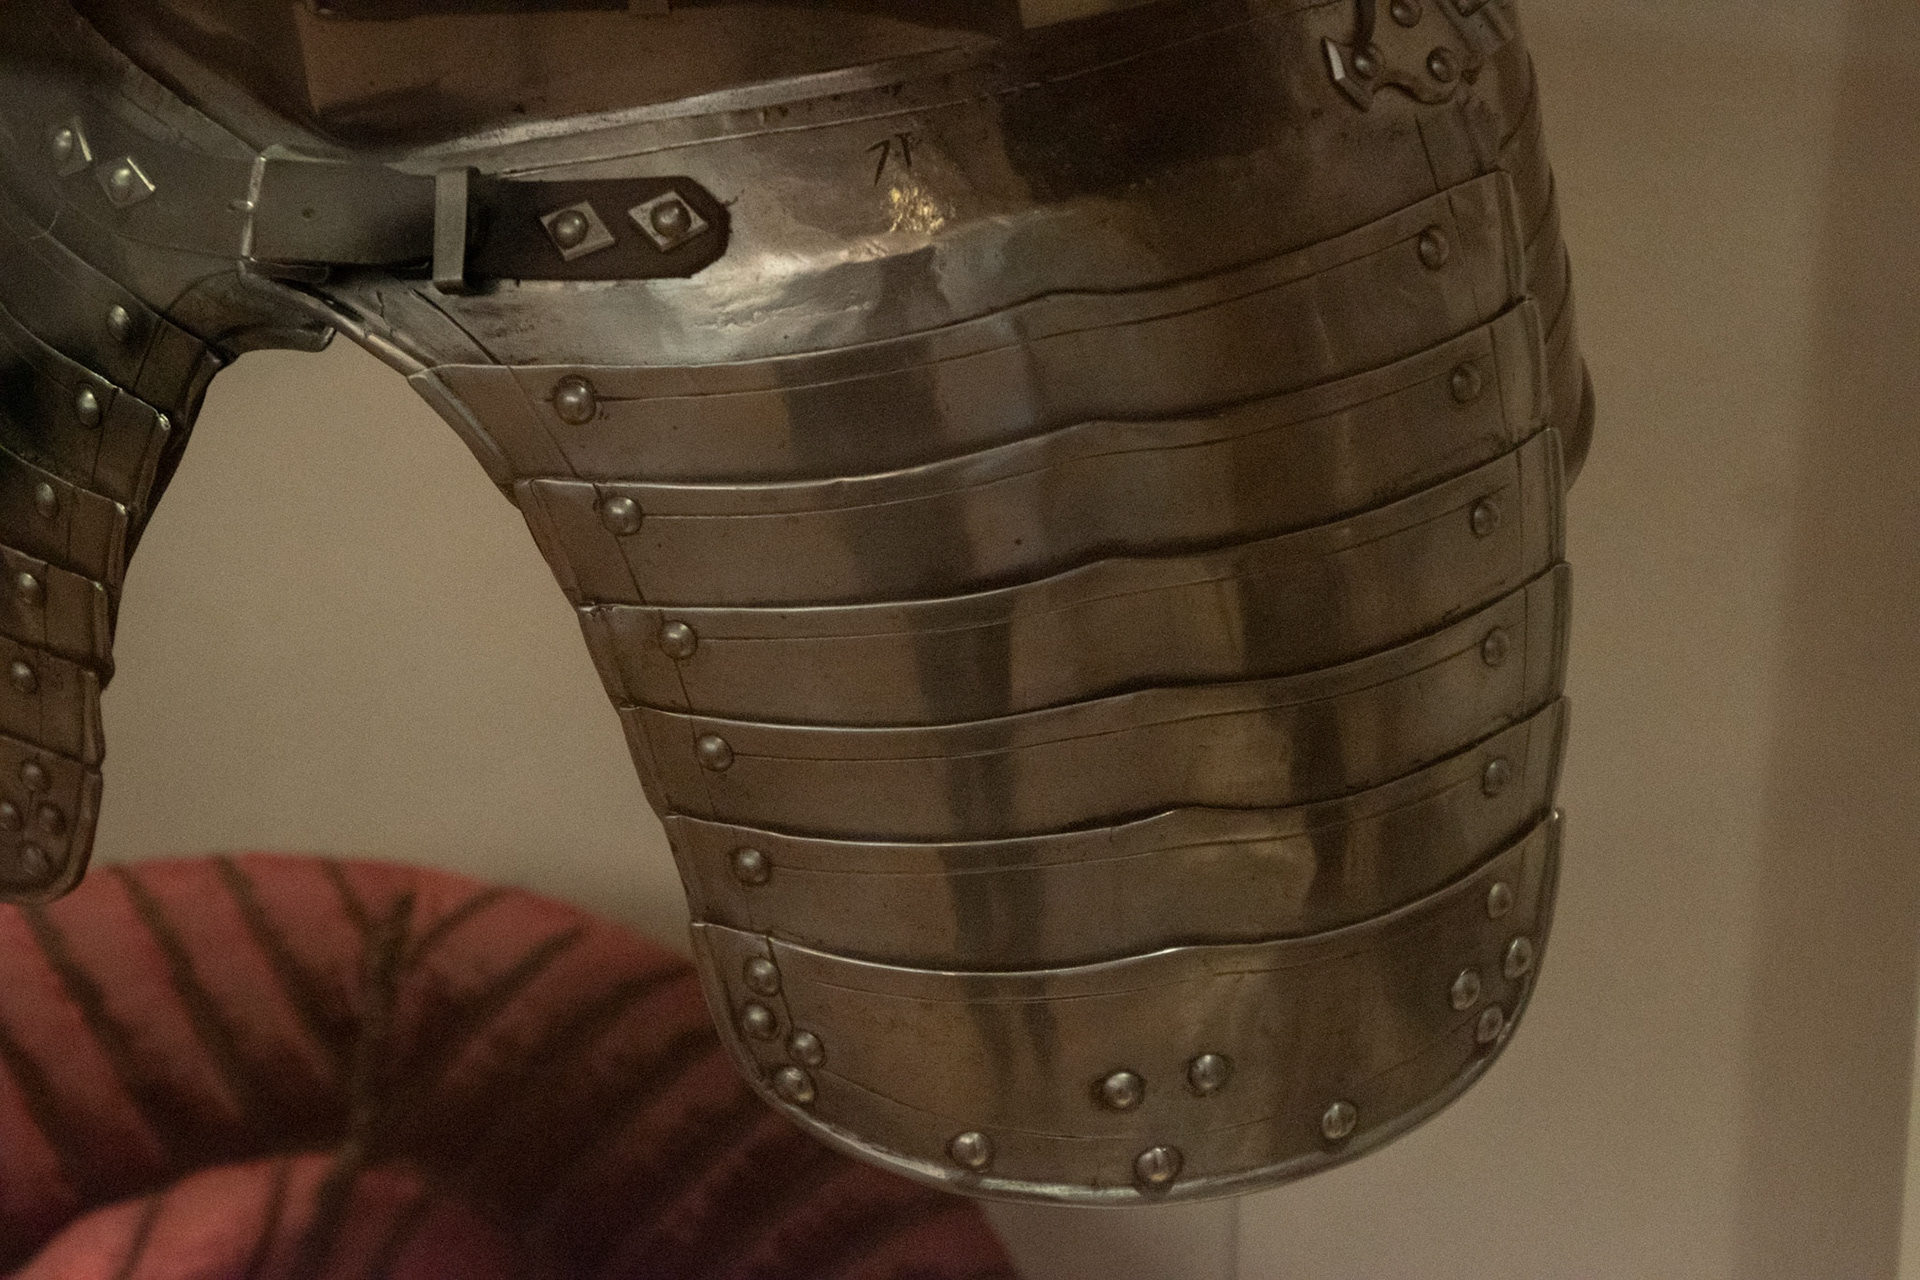
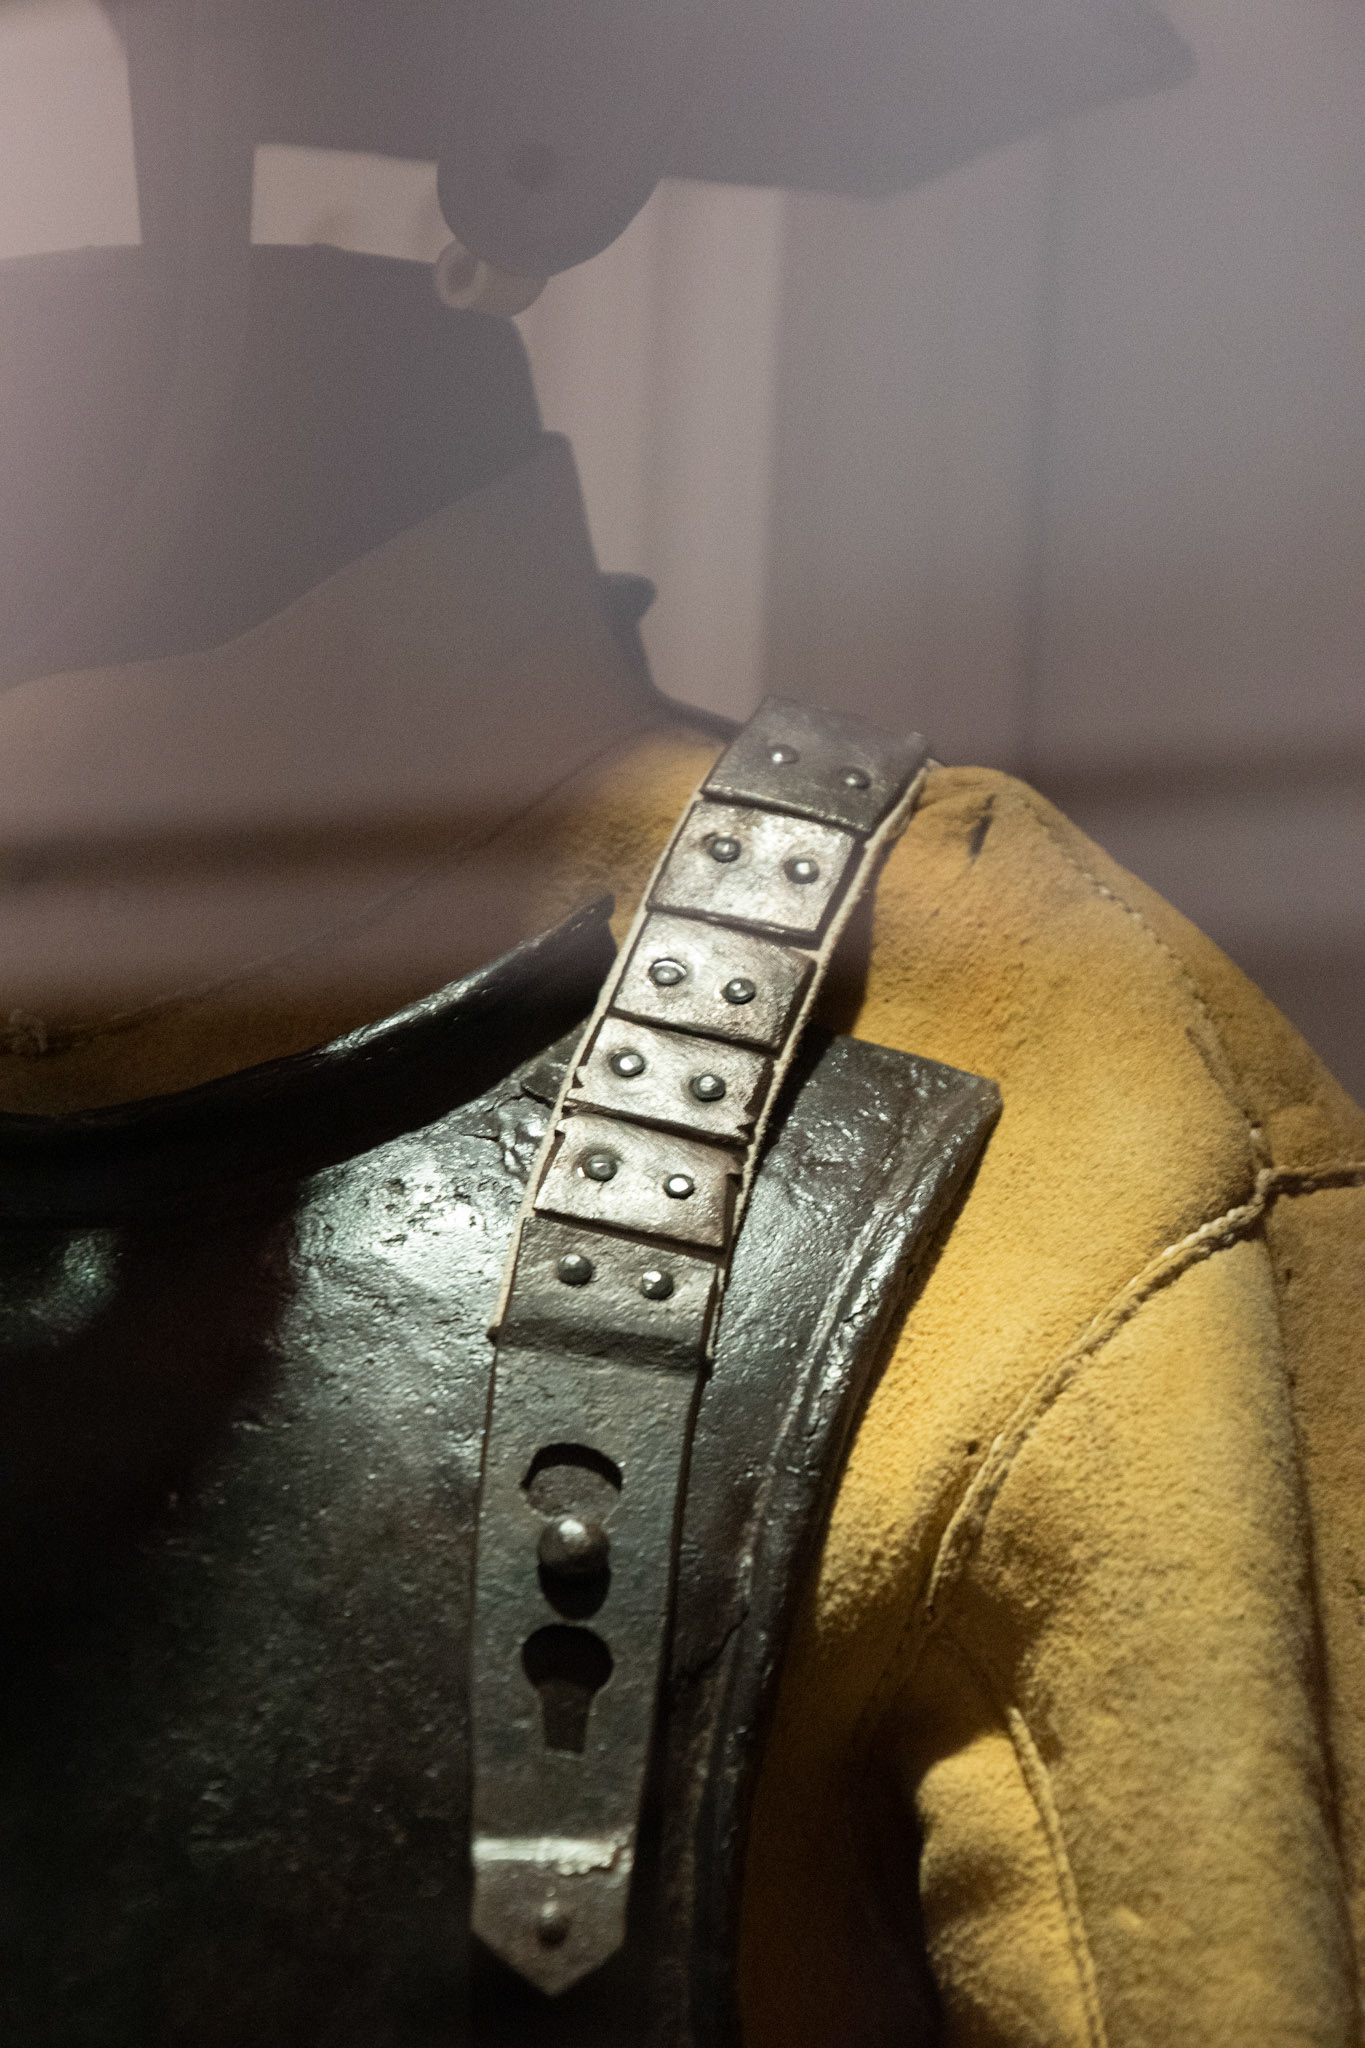
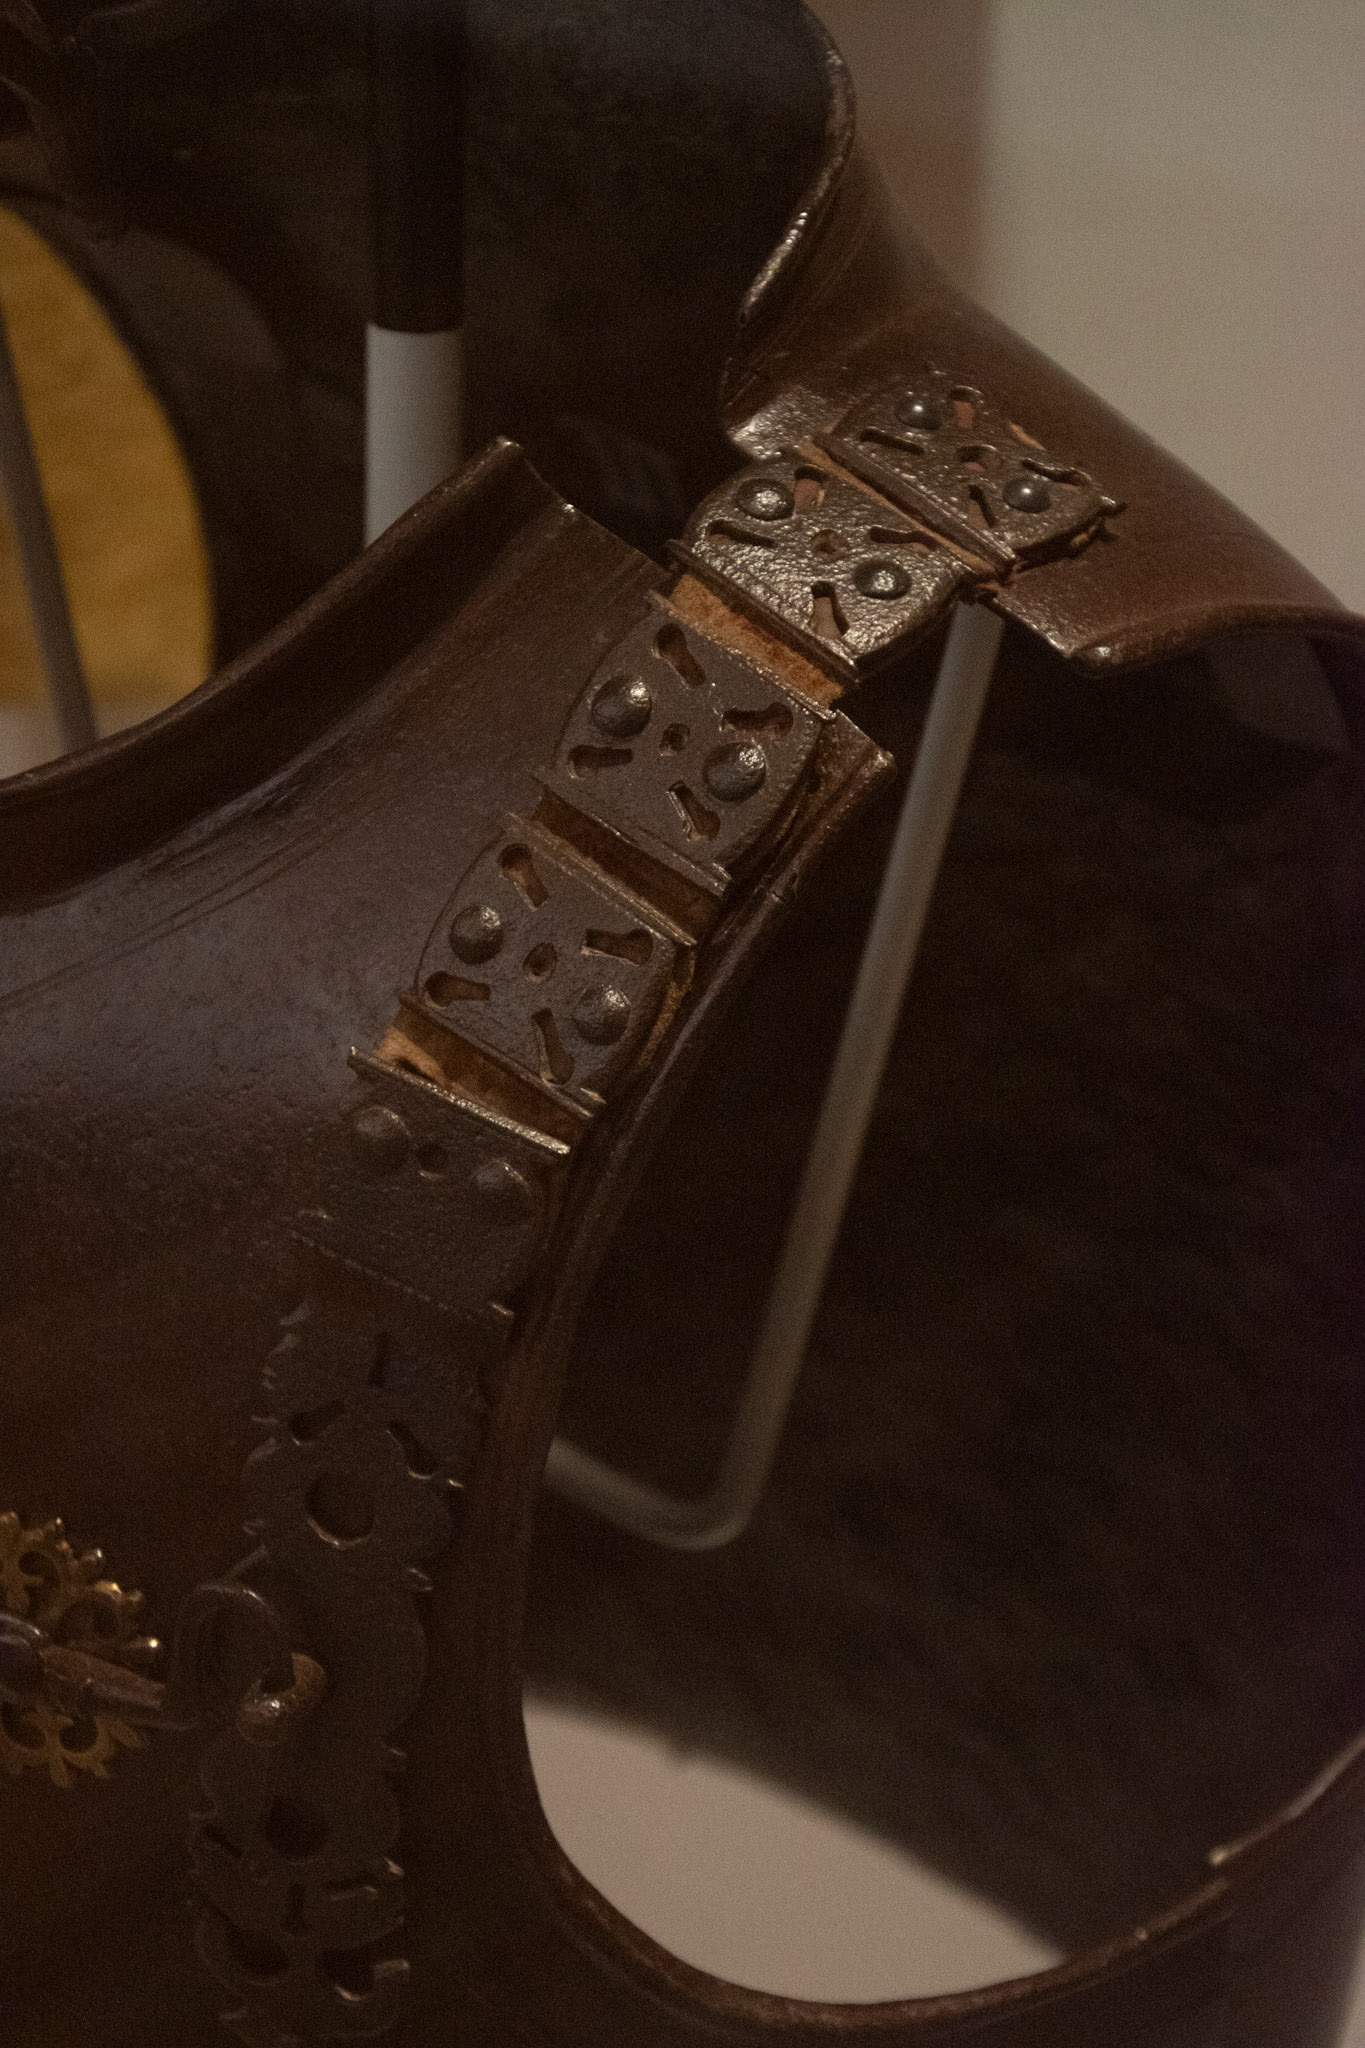
Looking back at how sections of traditional armour were buckled together, most of the pieces on display used a simple Pin Buckle where a pin would slot through a hole in the opposite piece of leather. Most of these buckels were riveted onto the sheet metal using the same rivets used to conect sheet to sheet. I like the additional embelishment the photos above have as the buckels have been used as an area to create complex detail and it breaks up the large polished sheet metal.
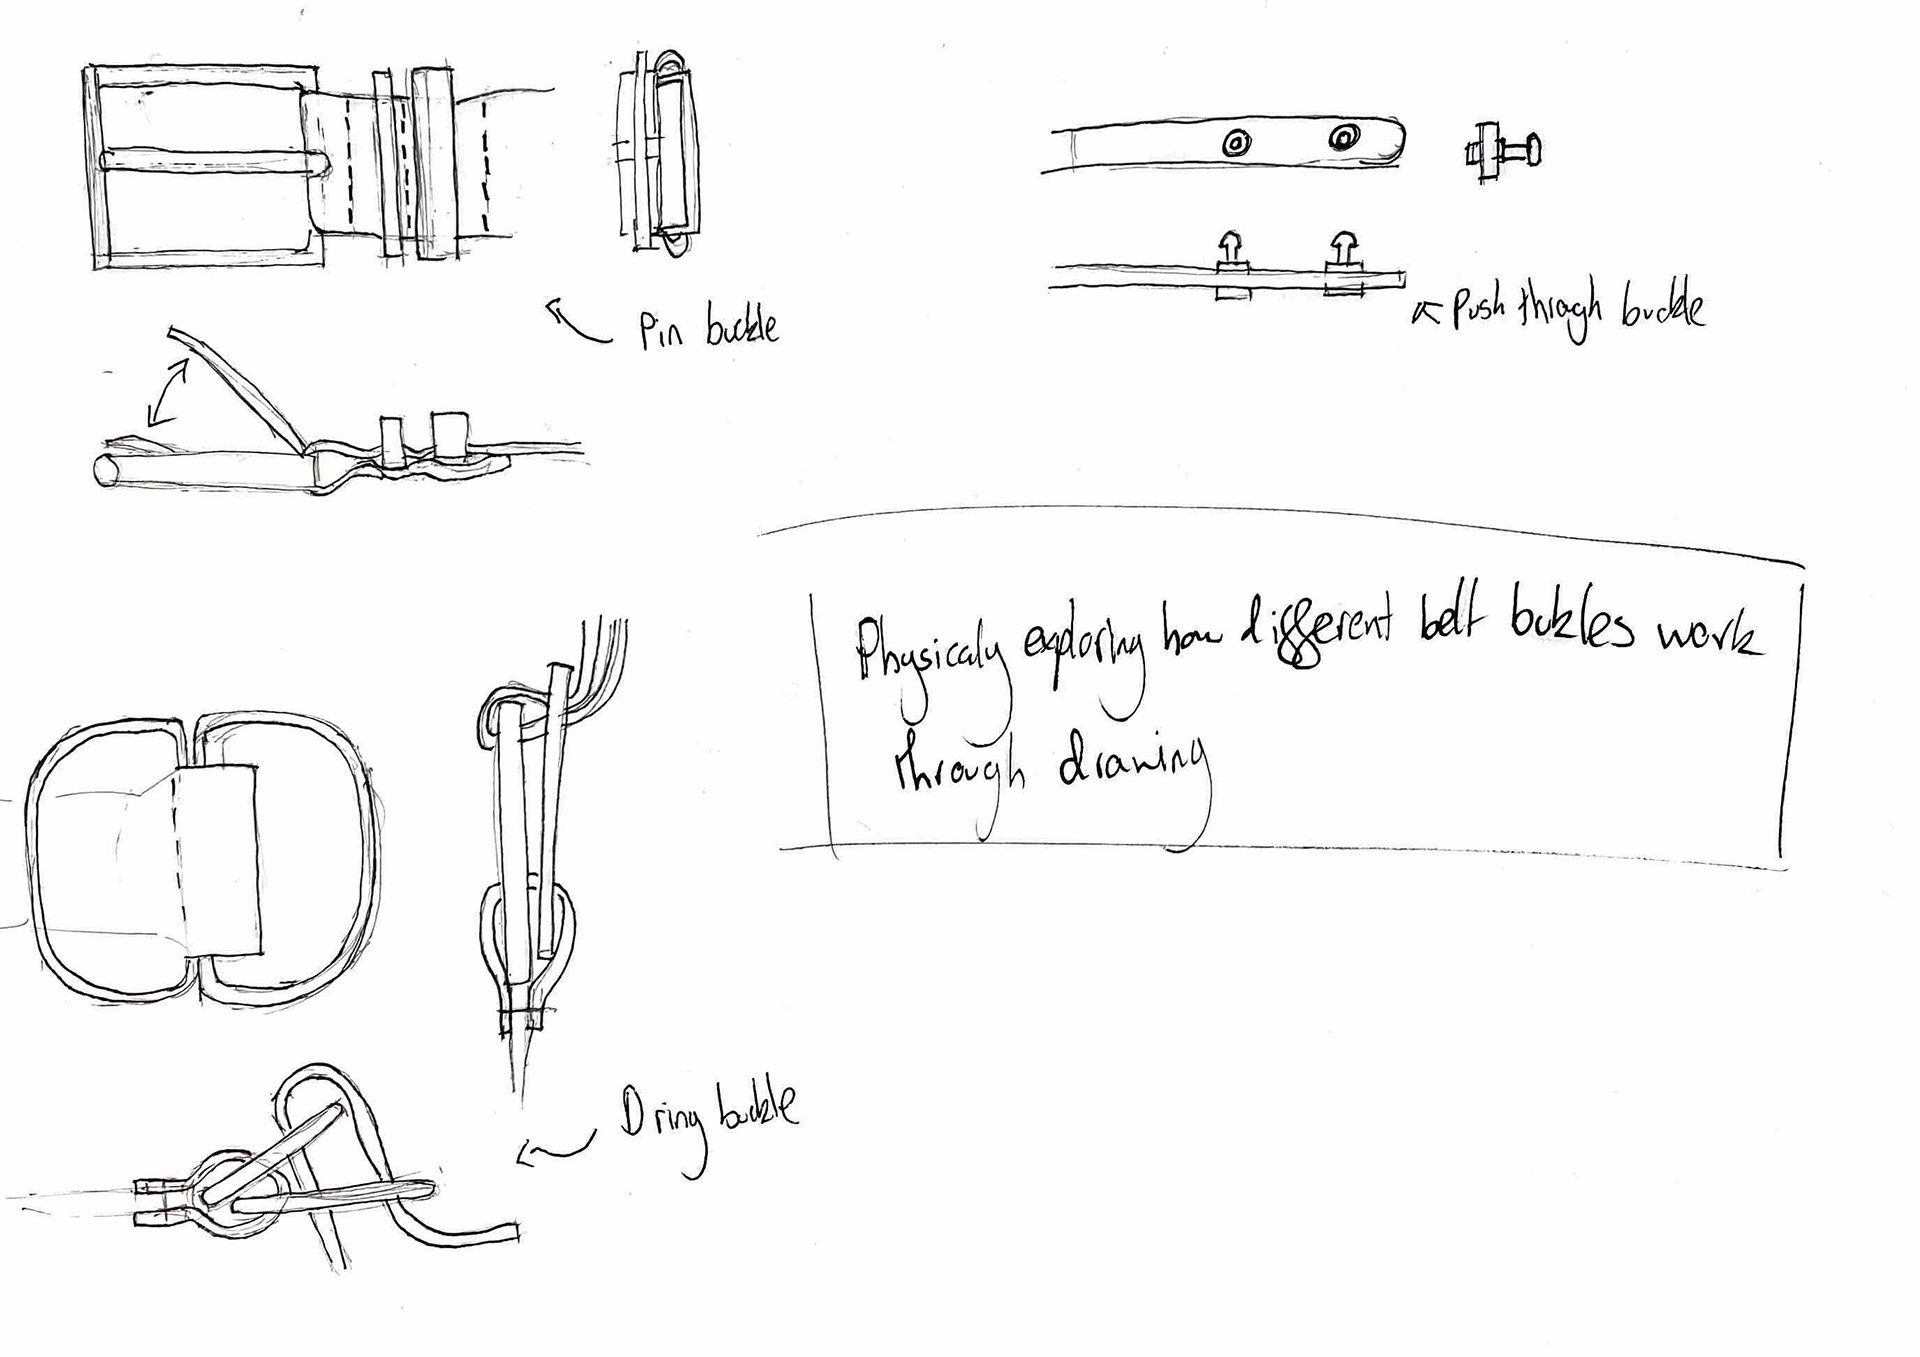
Reviewing my drawings I have decided that the D-ring style of belt buckle would work best for the straps on my piece. The main reason is that they can be easily and increasingly tightened by pulling on the strap without needing to push a pin through a premade hole. Additionally, this will be the easiest to make by soldering a loop of copper wire together.
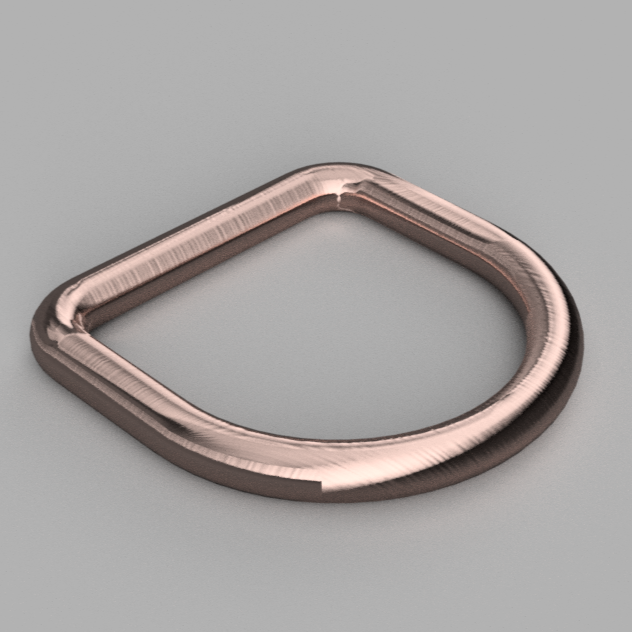
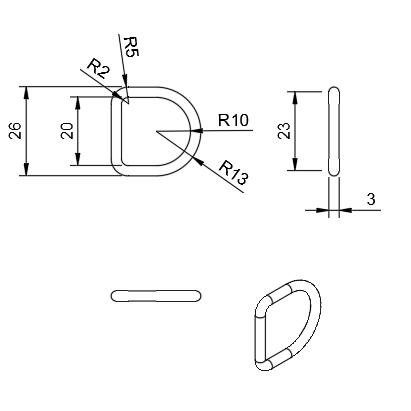

Having decided on a simple stacked D-ring shaped belt buckle, I created a 3D file in Fusion 360 to get the exact measurements.
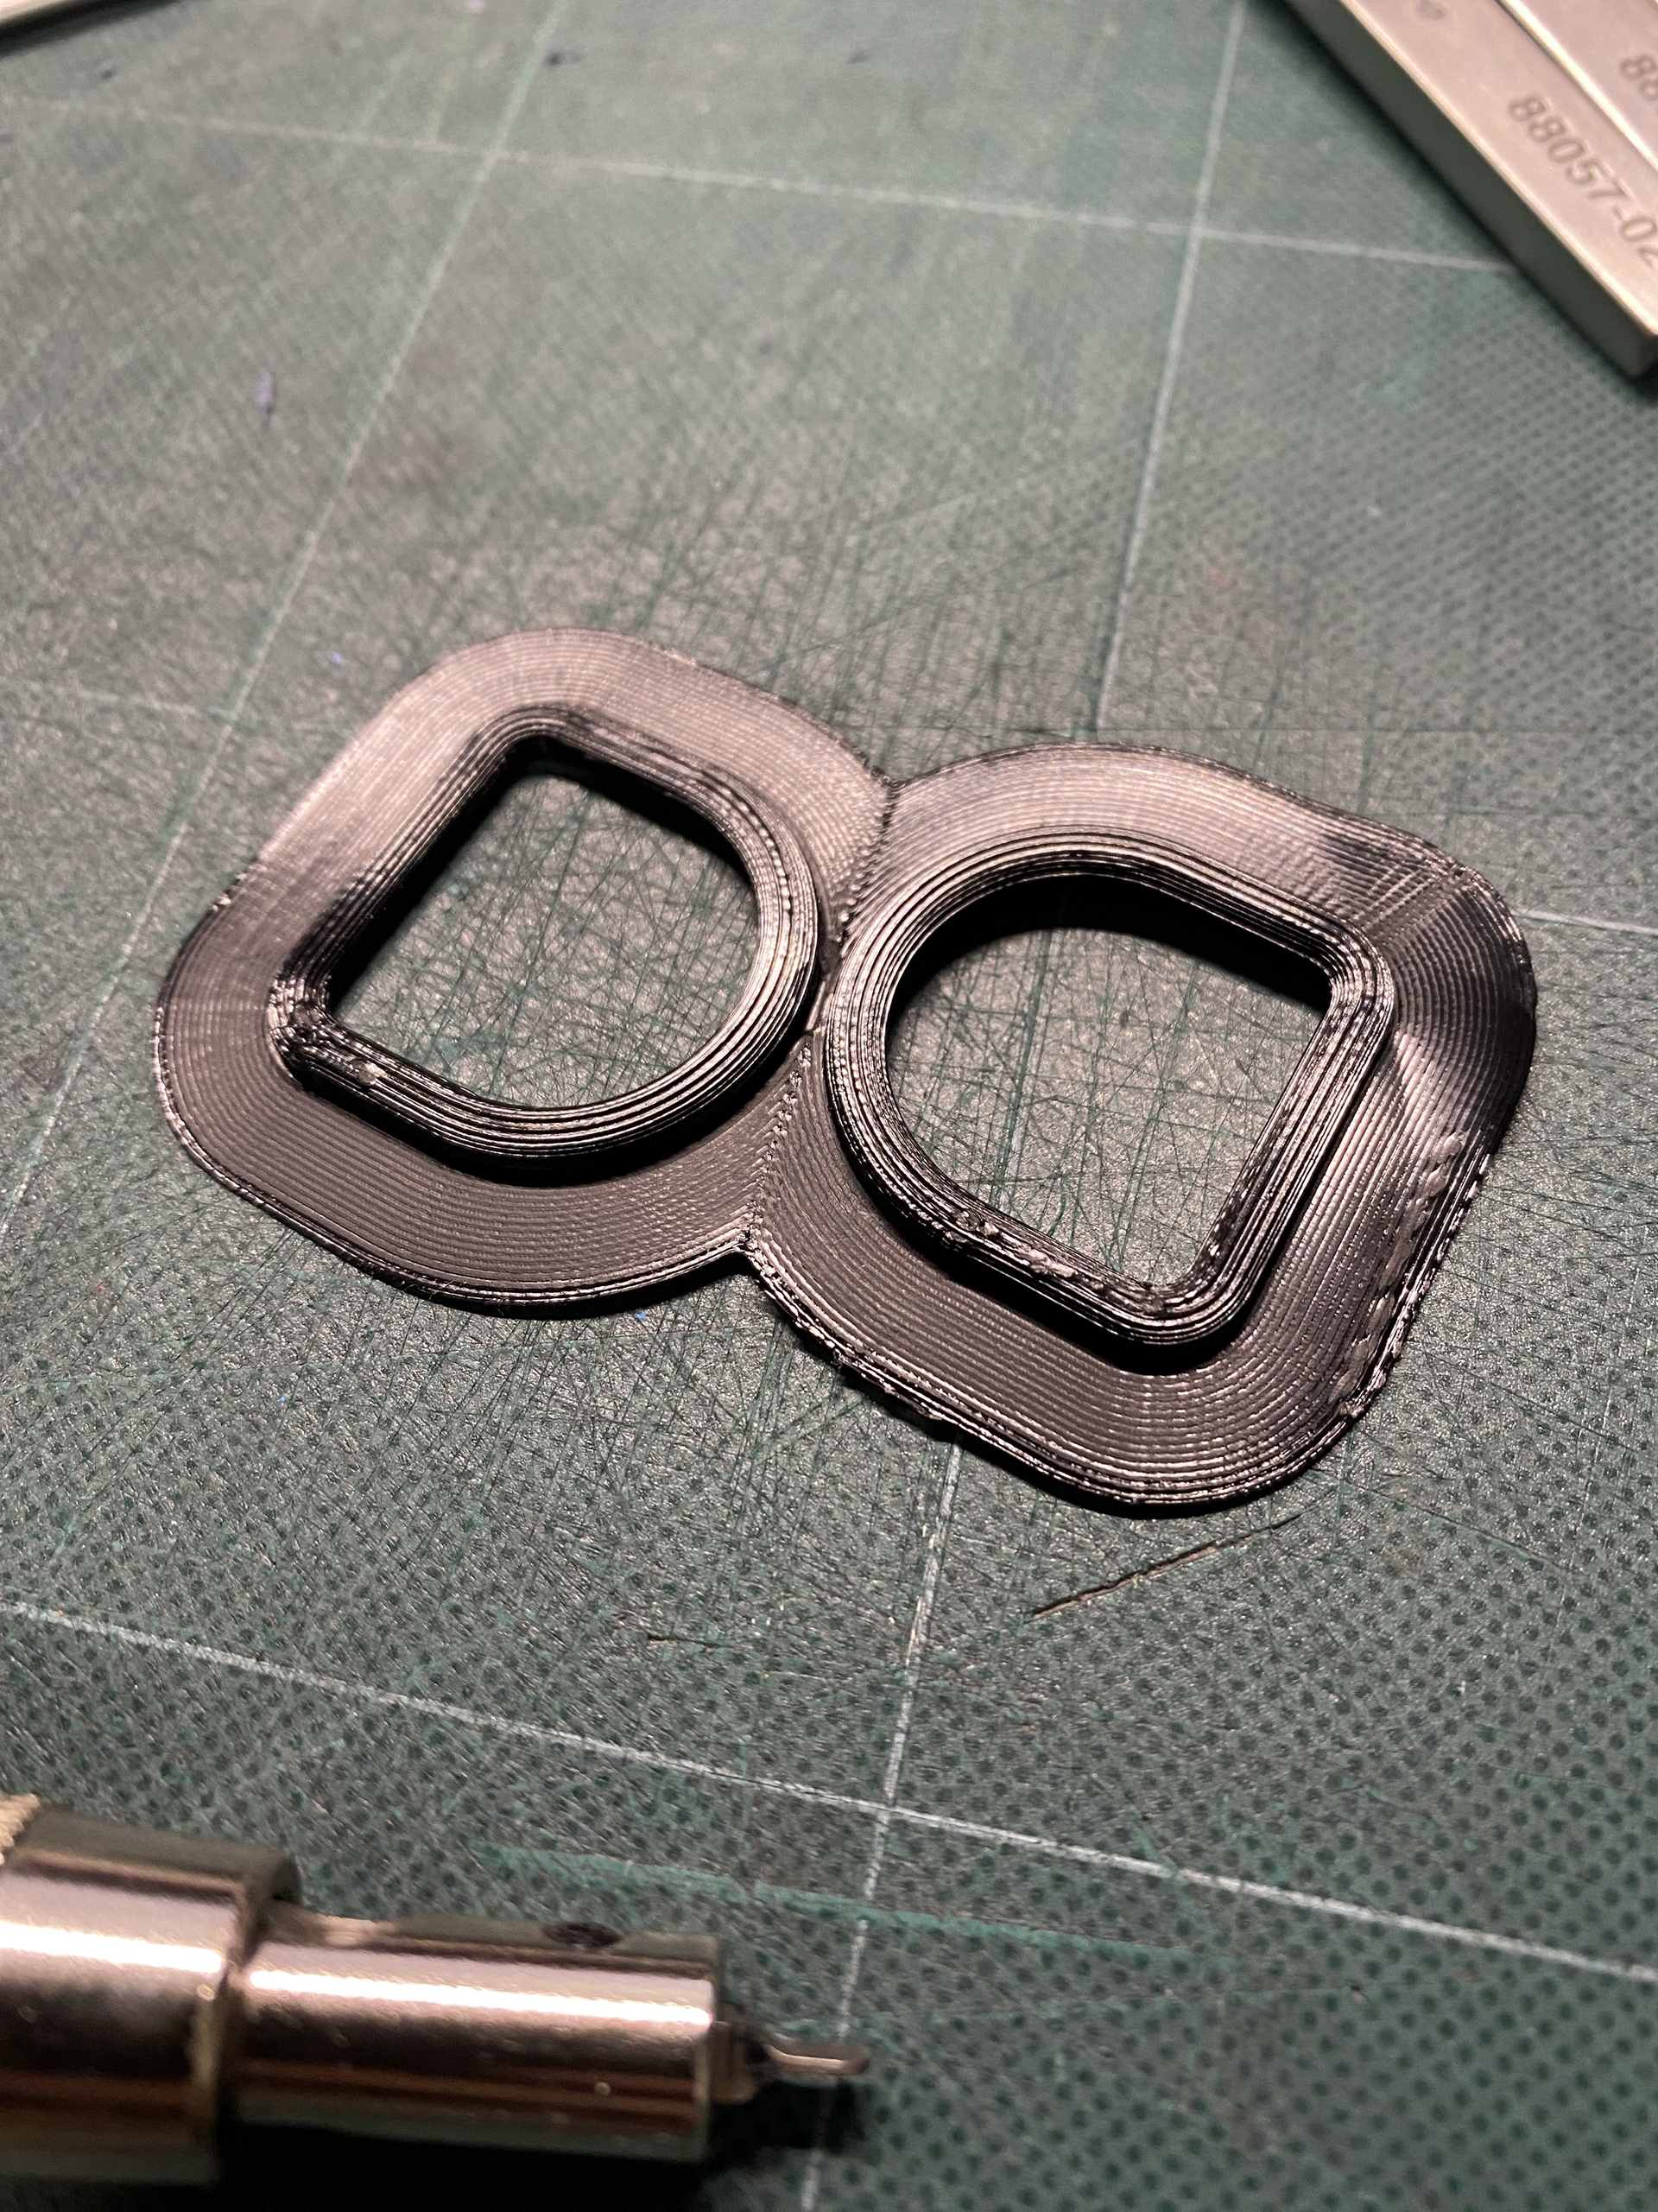

I then 3D printed the file to create quick mock-ups and test the leather work.
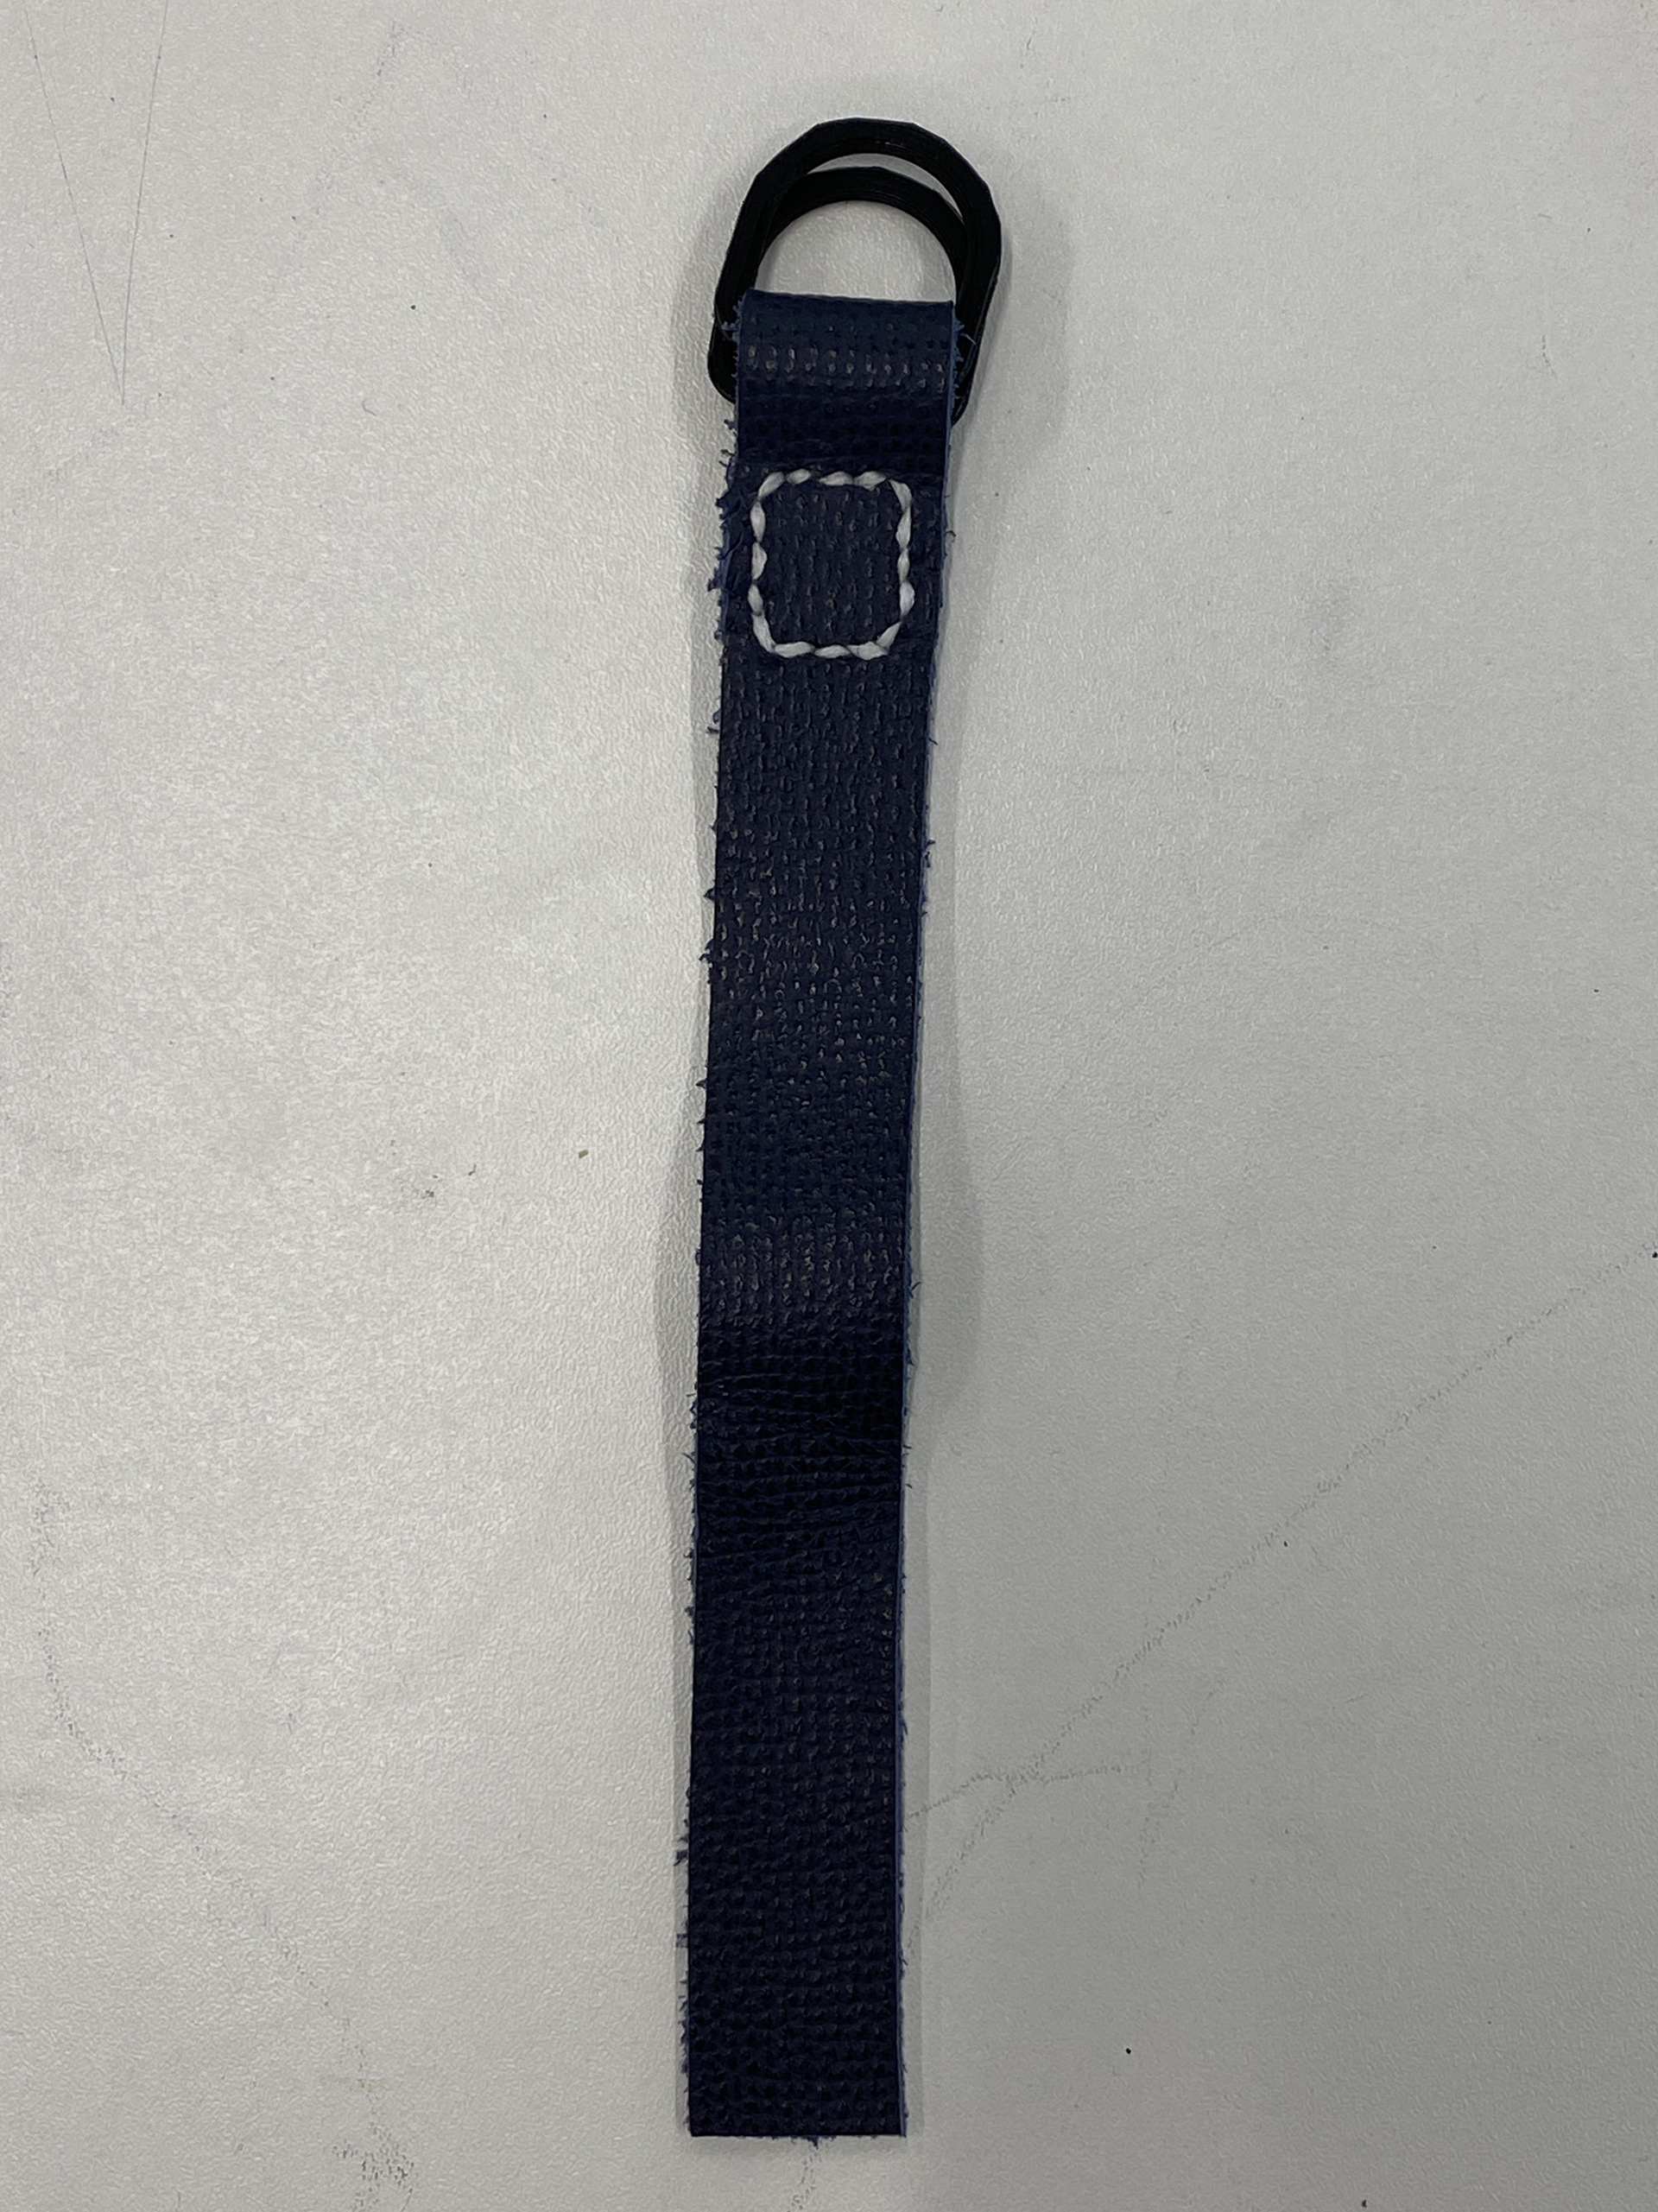
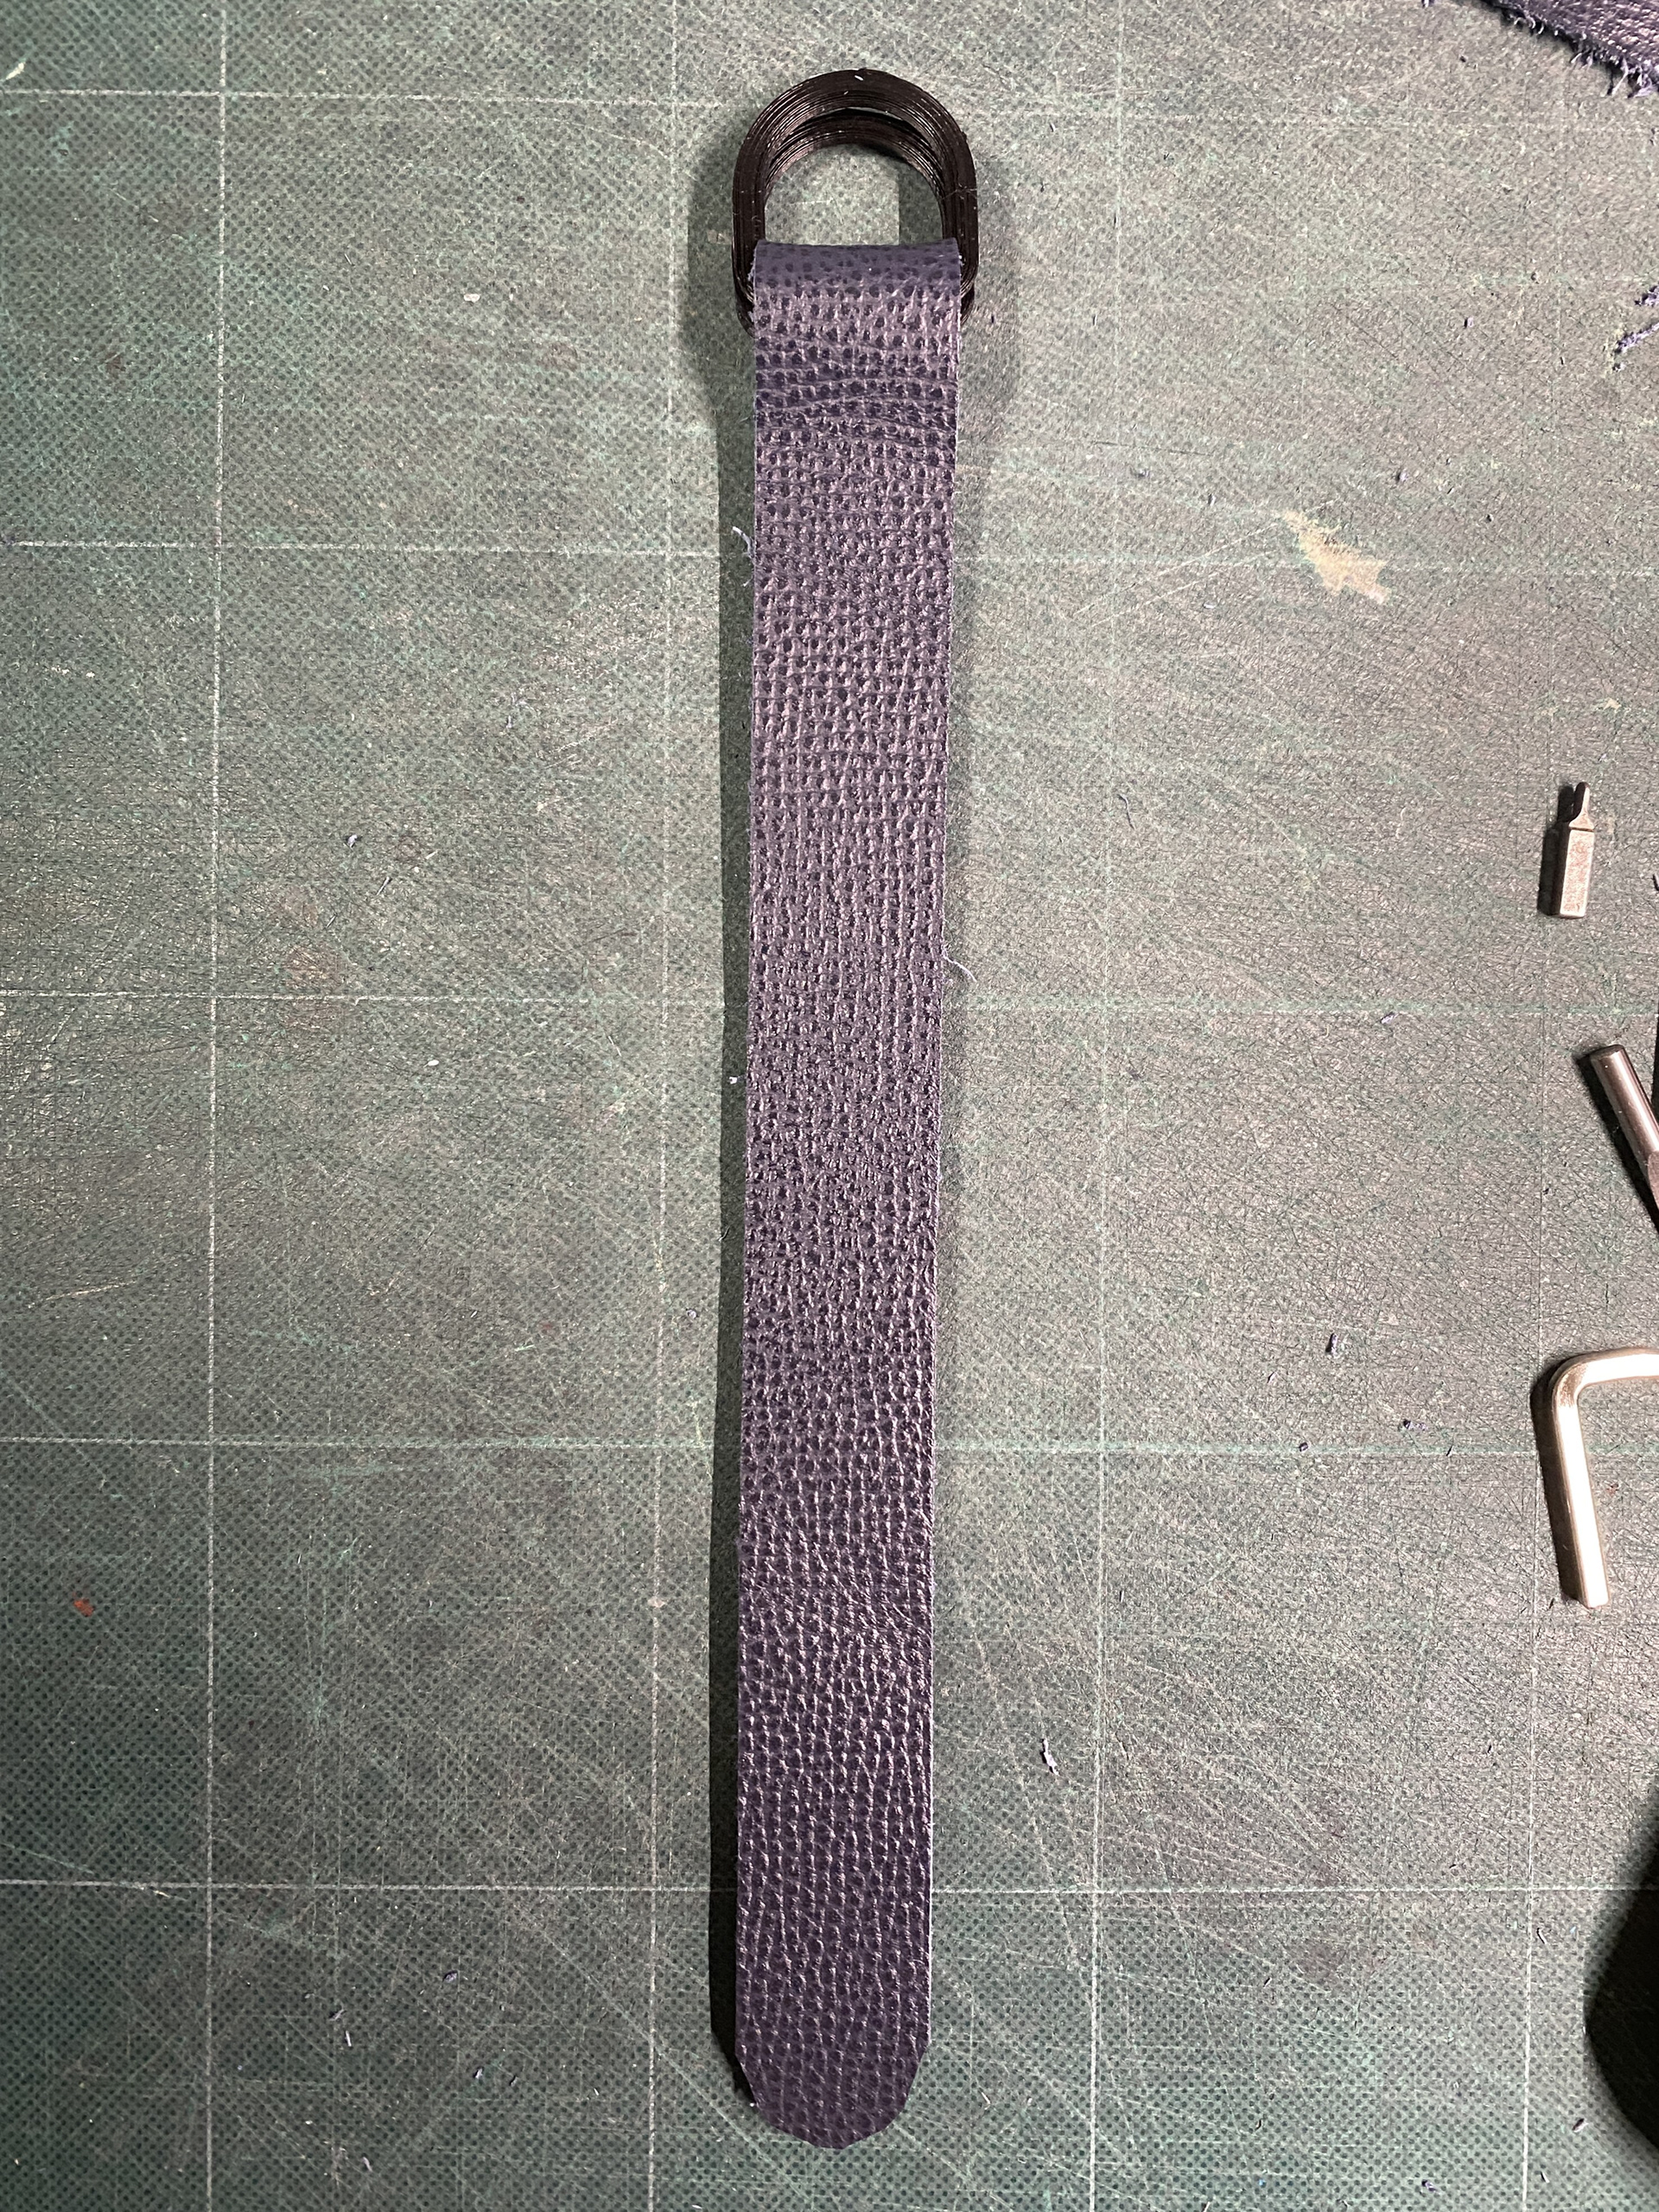
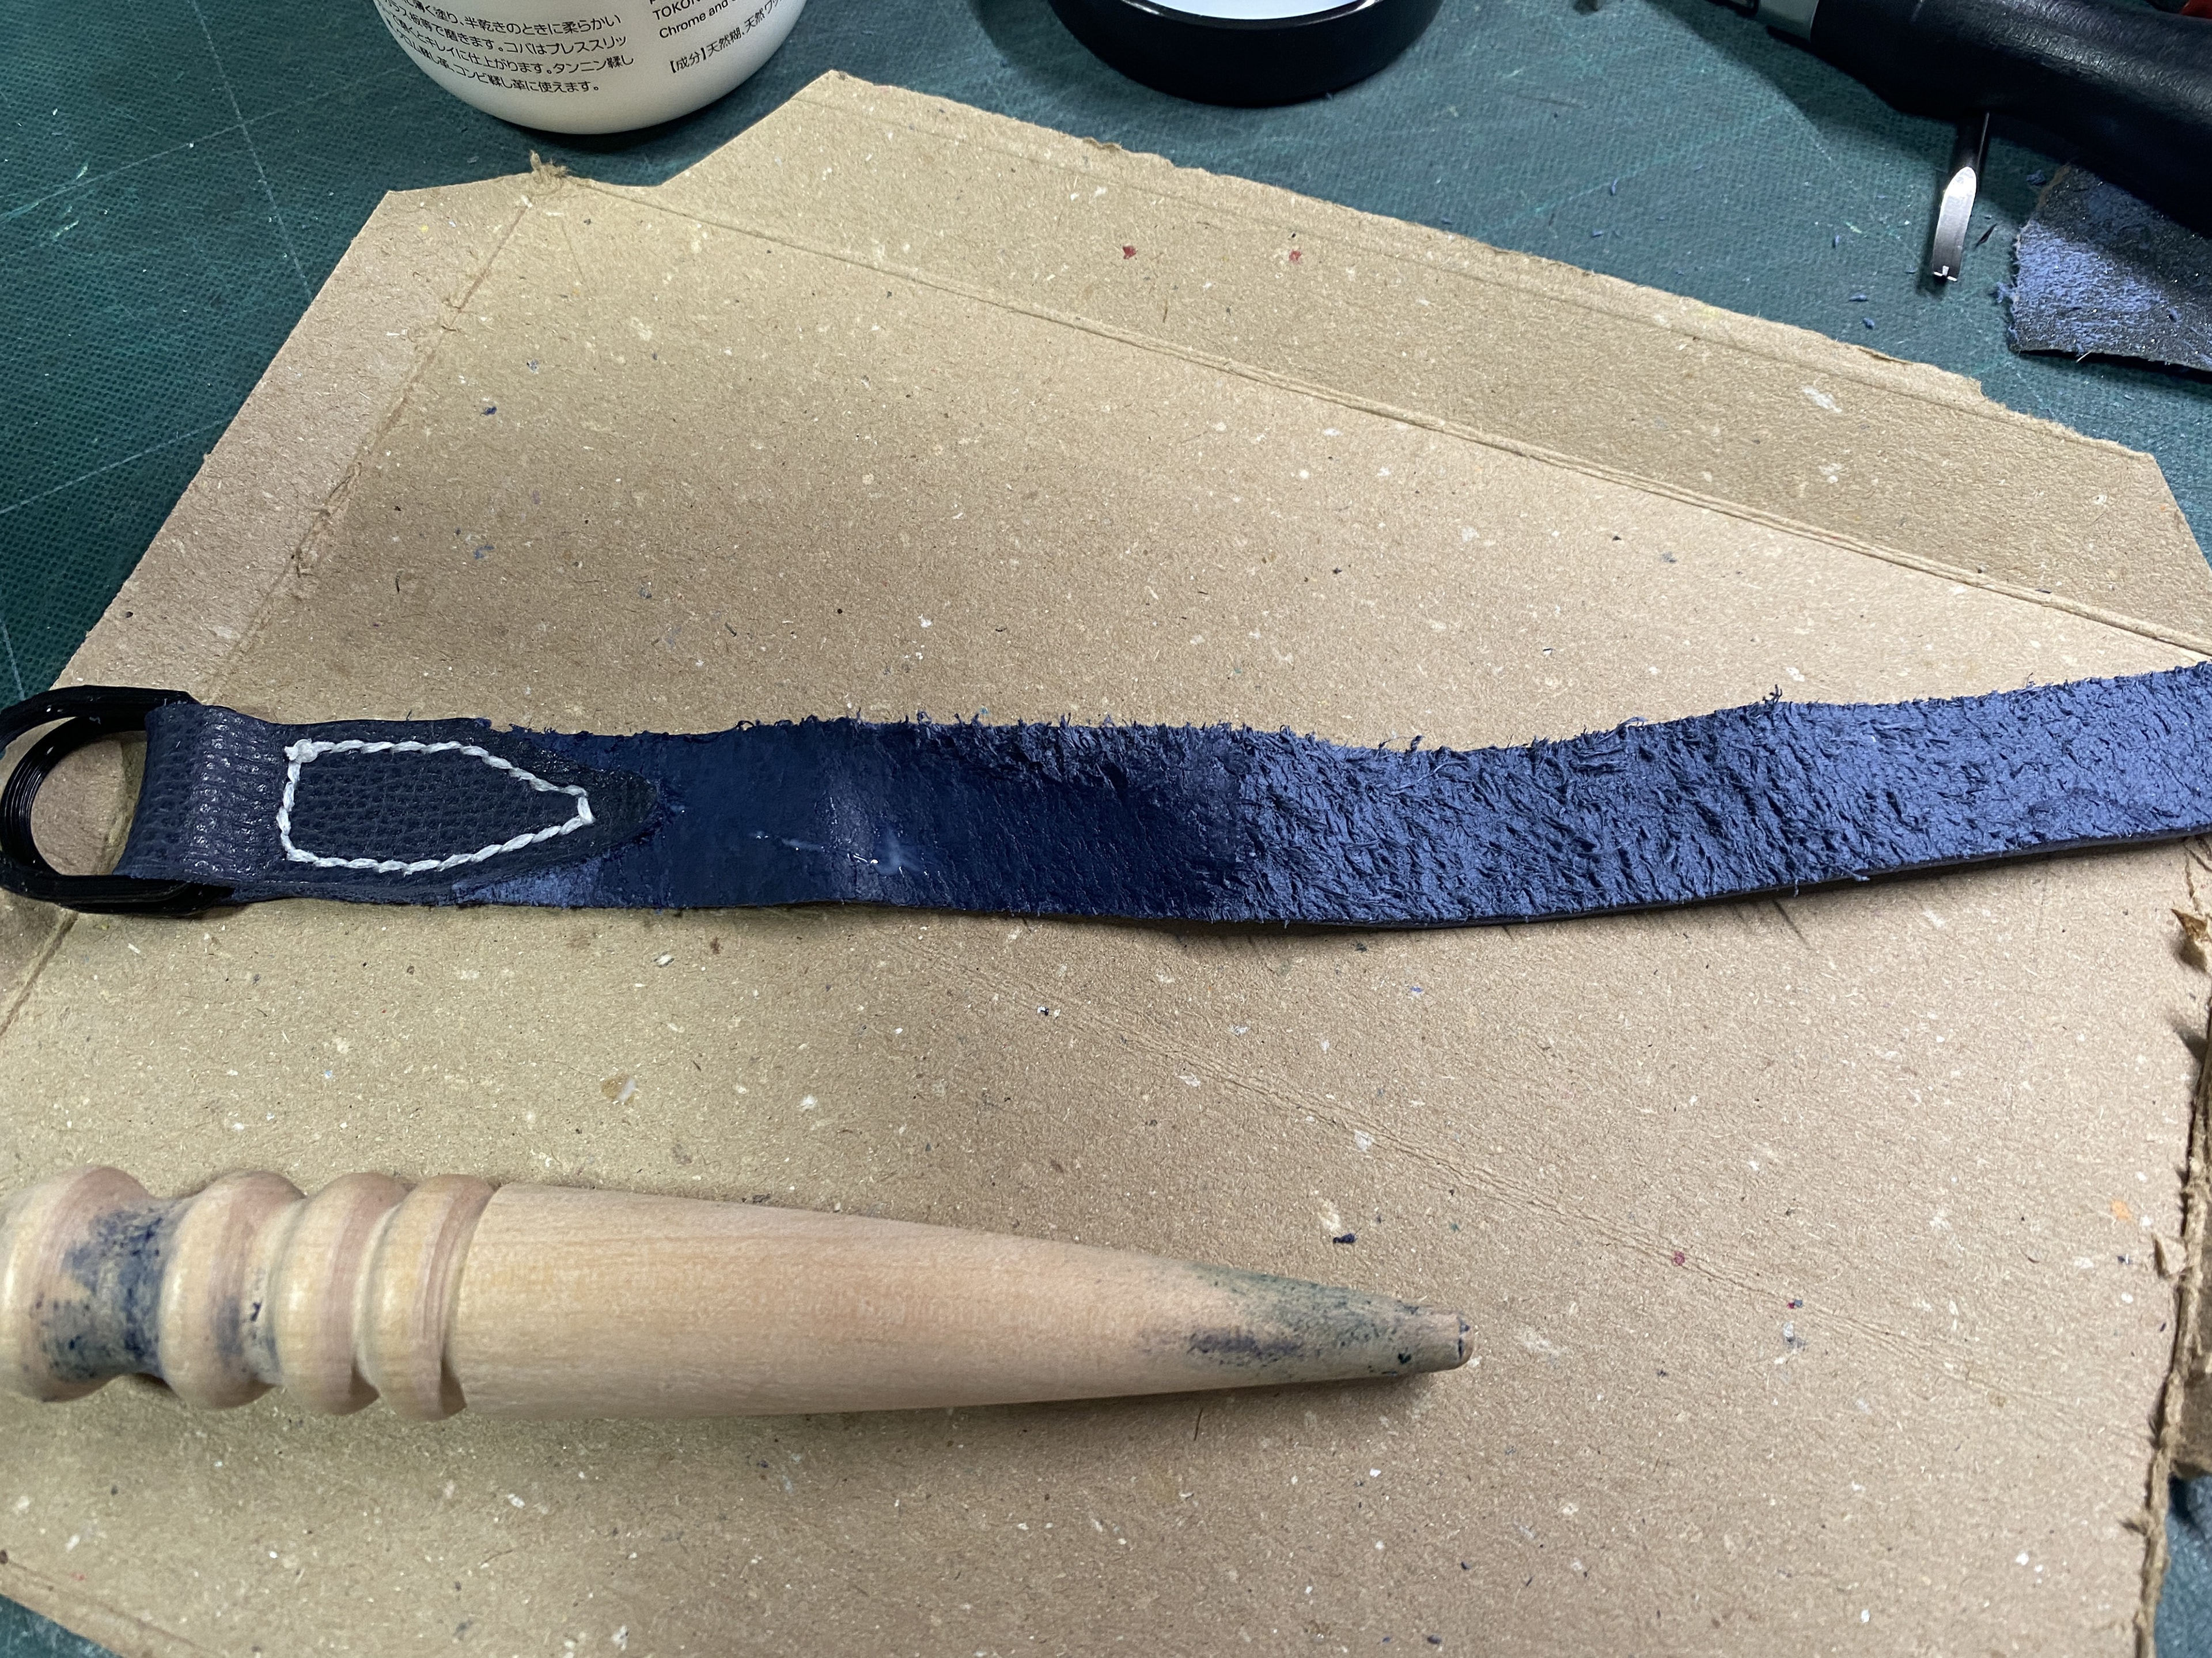
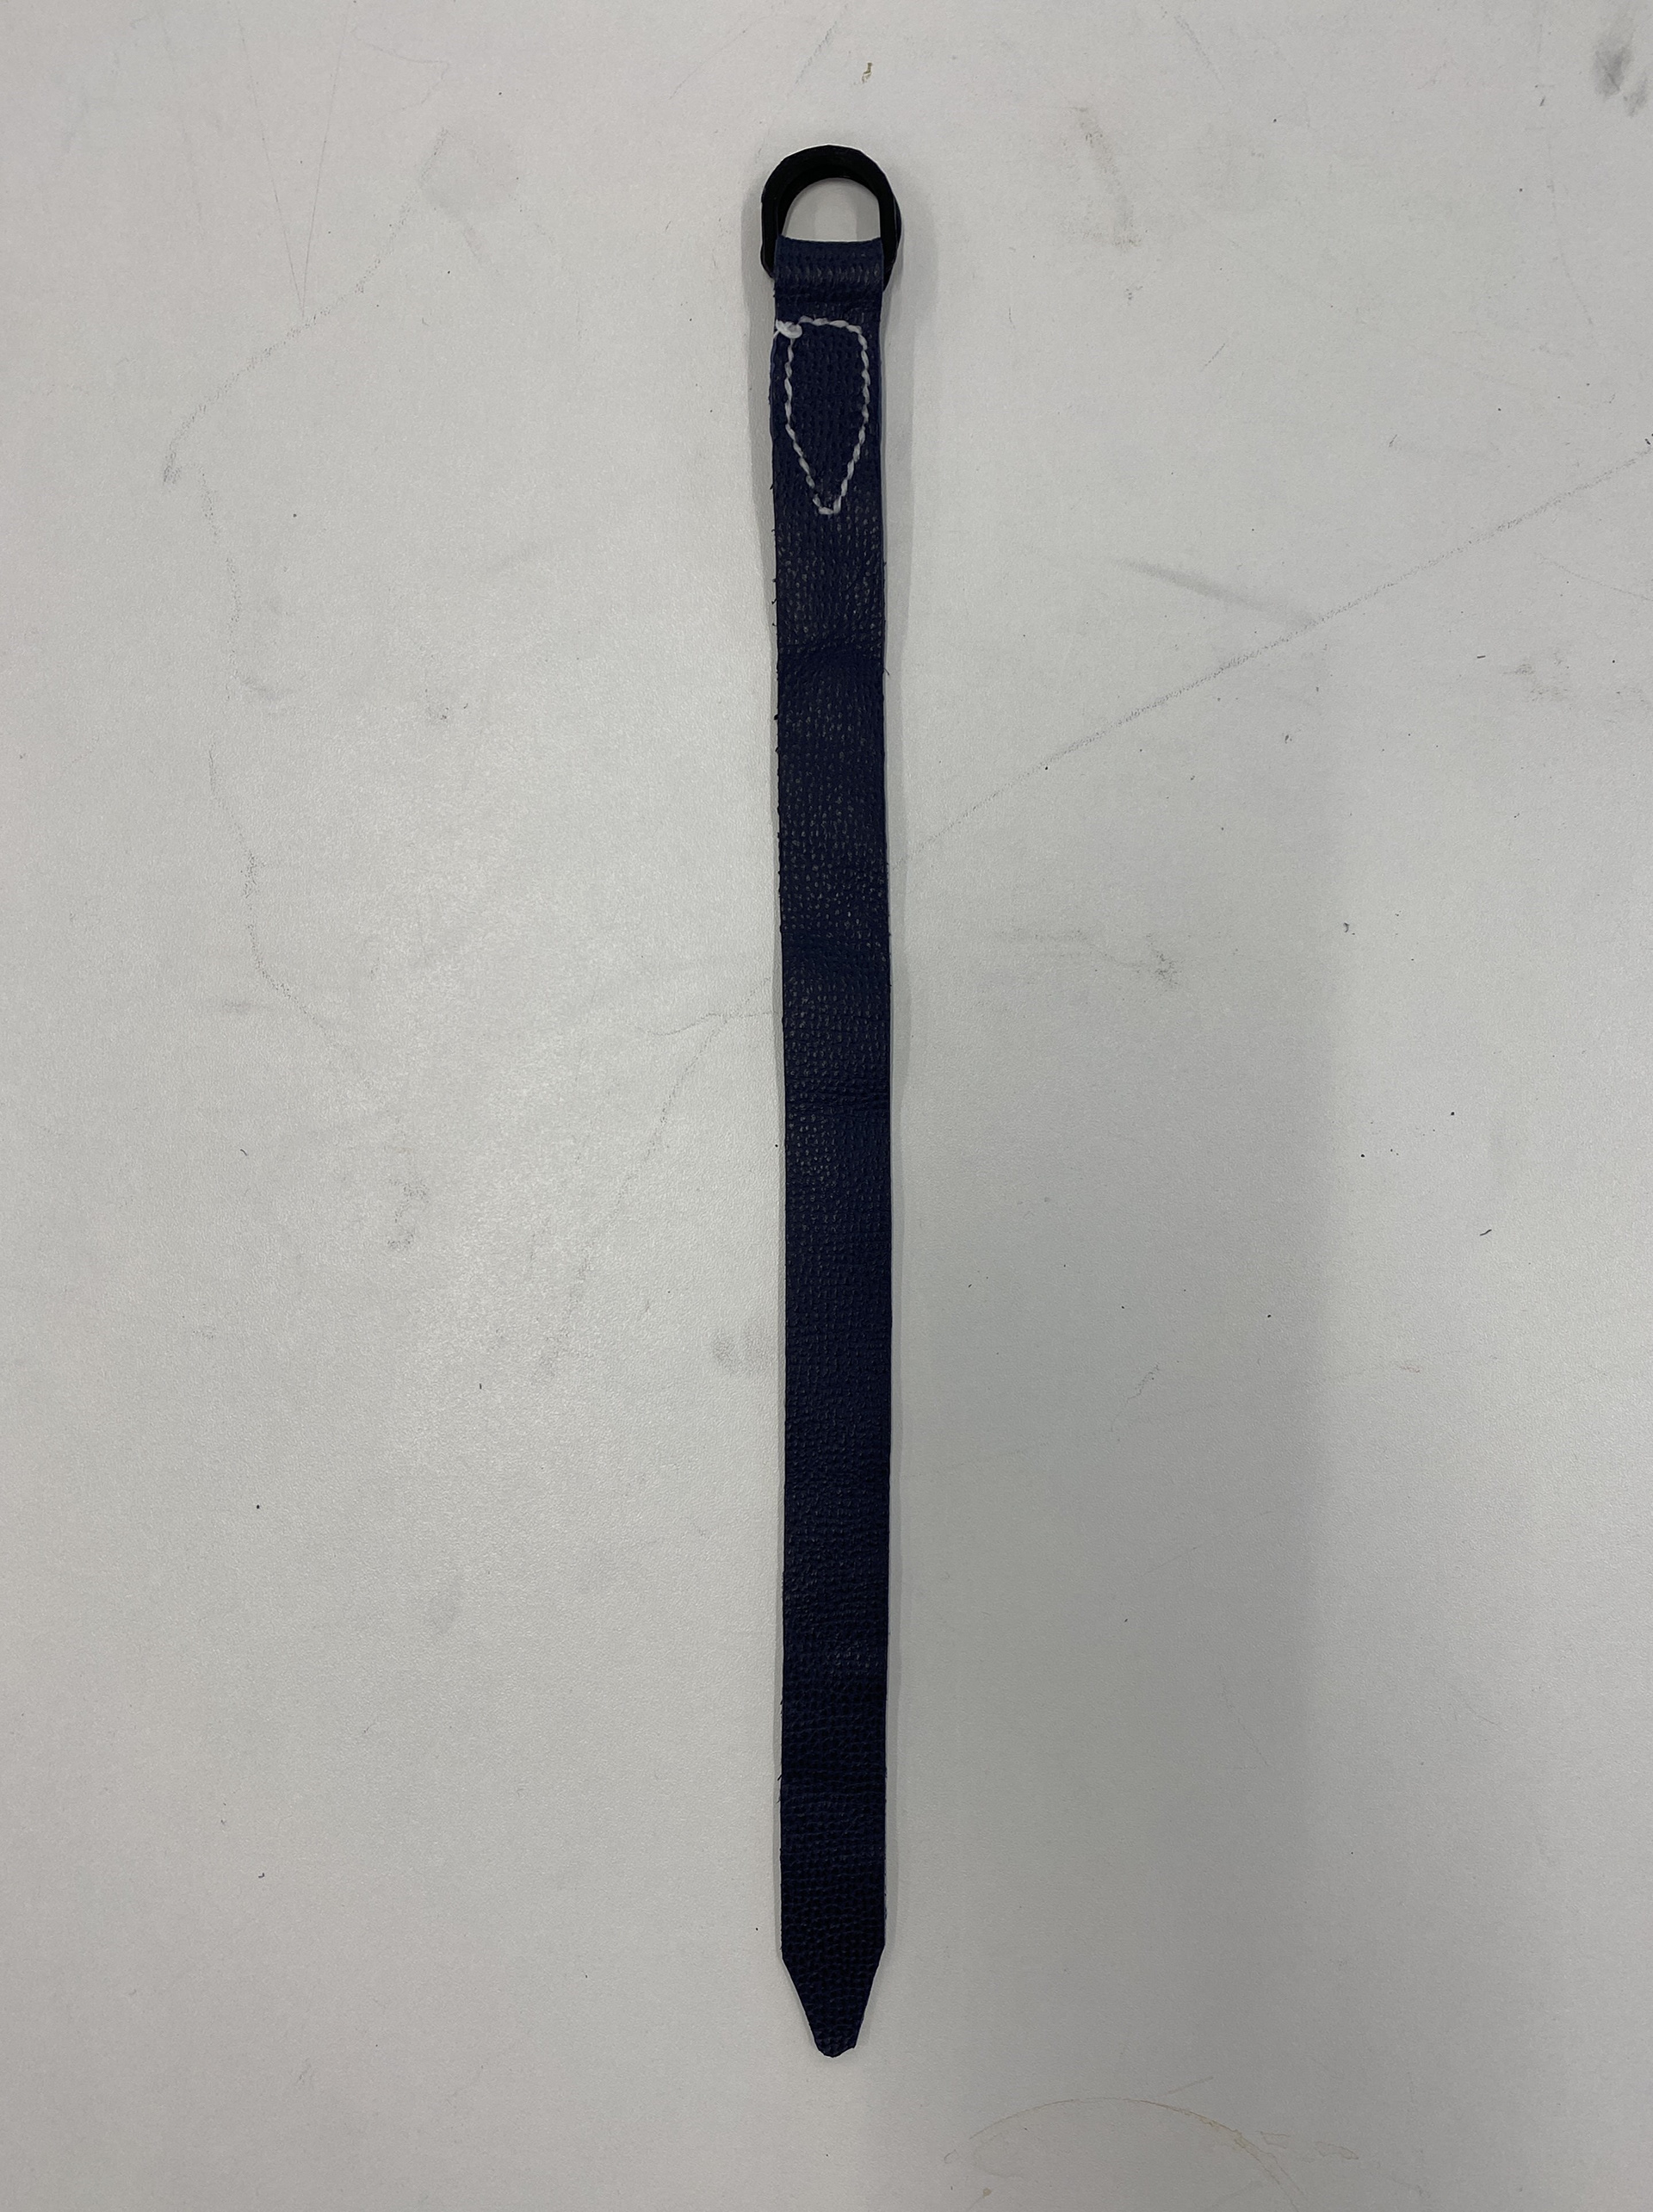
I started by creating a simple rectangular leather design with the leather looping back through the D-rings and being glued and sewn together. I found this worked but the end of the leather was difficult to loop through with the square end. Also I don’t like the aesthetic of the rough back of the leather and need to test further.
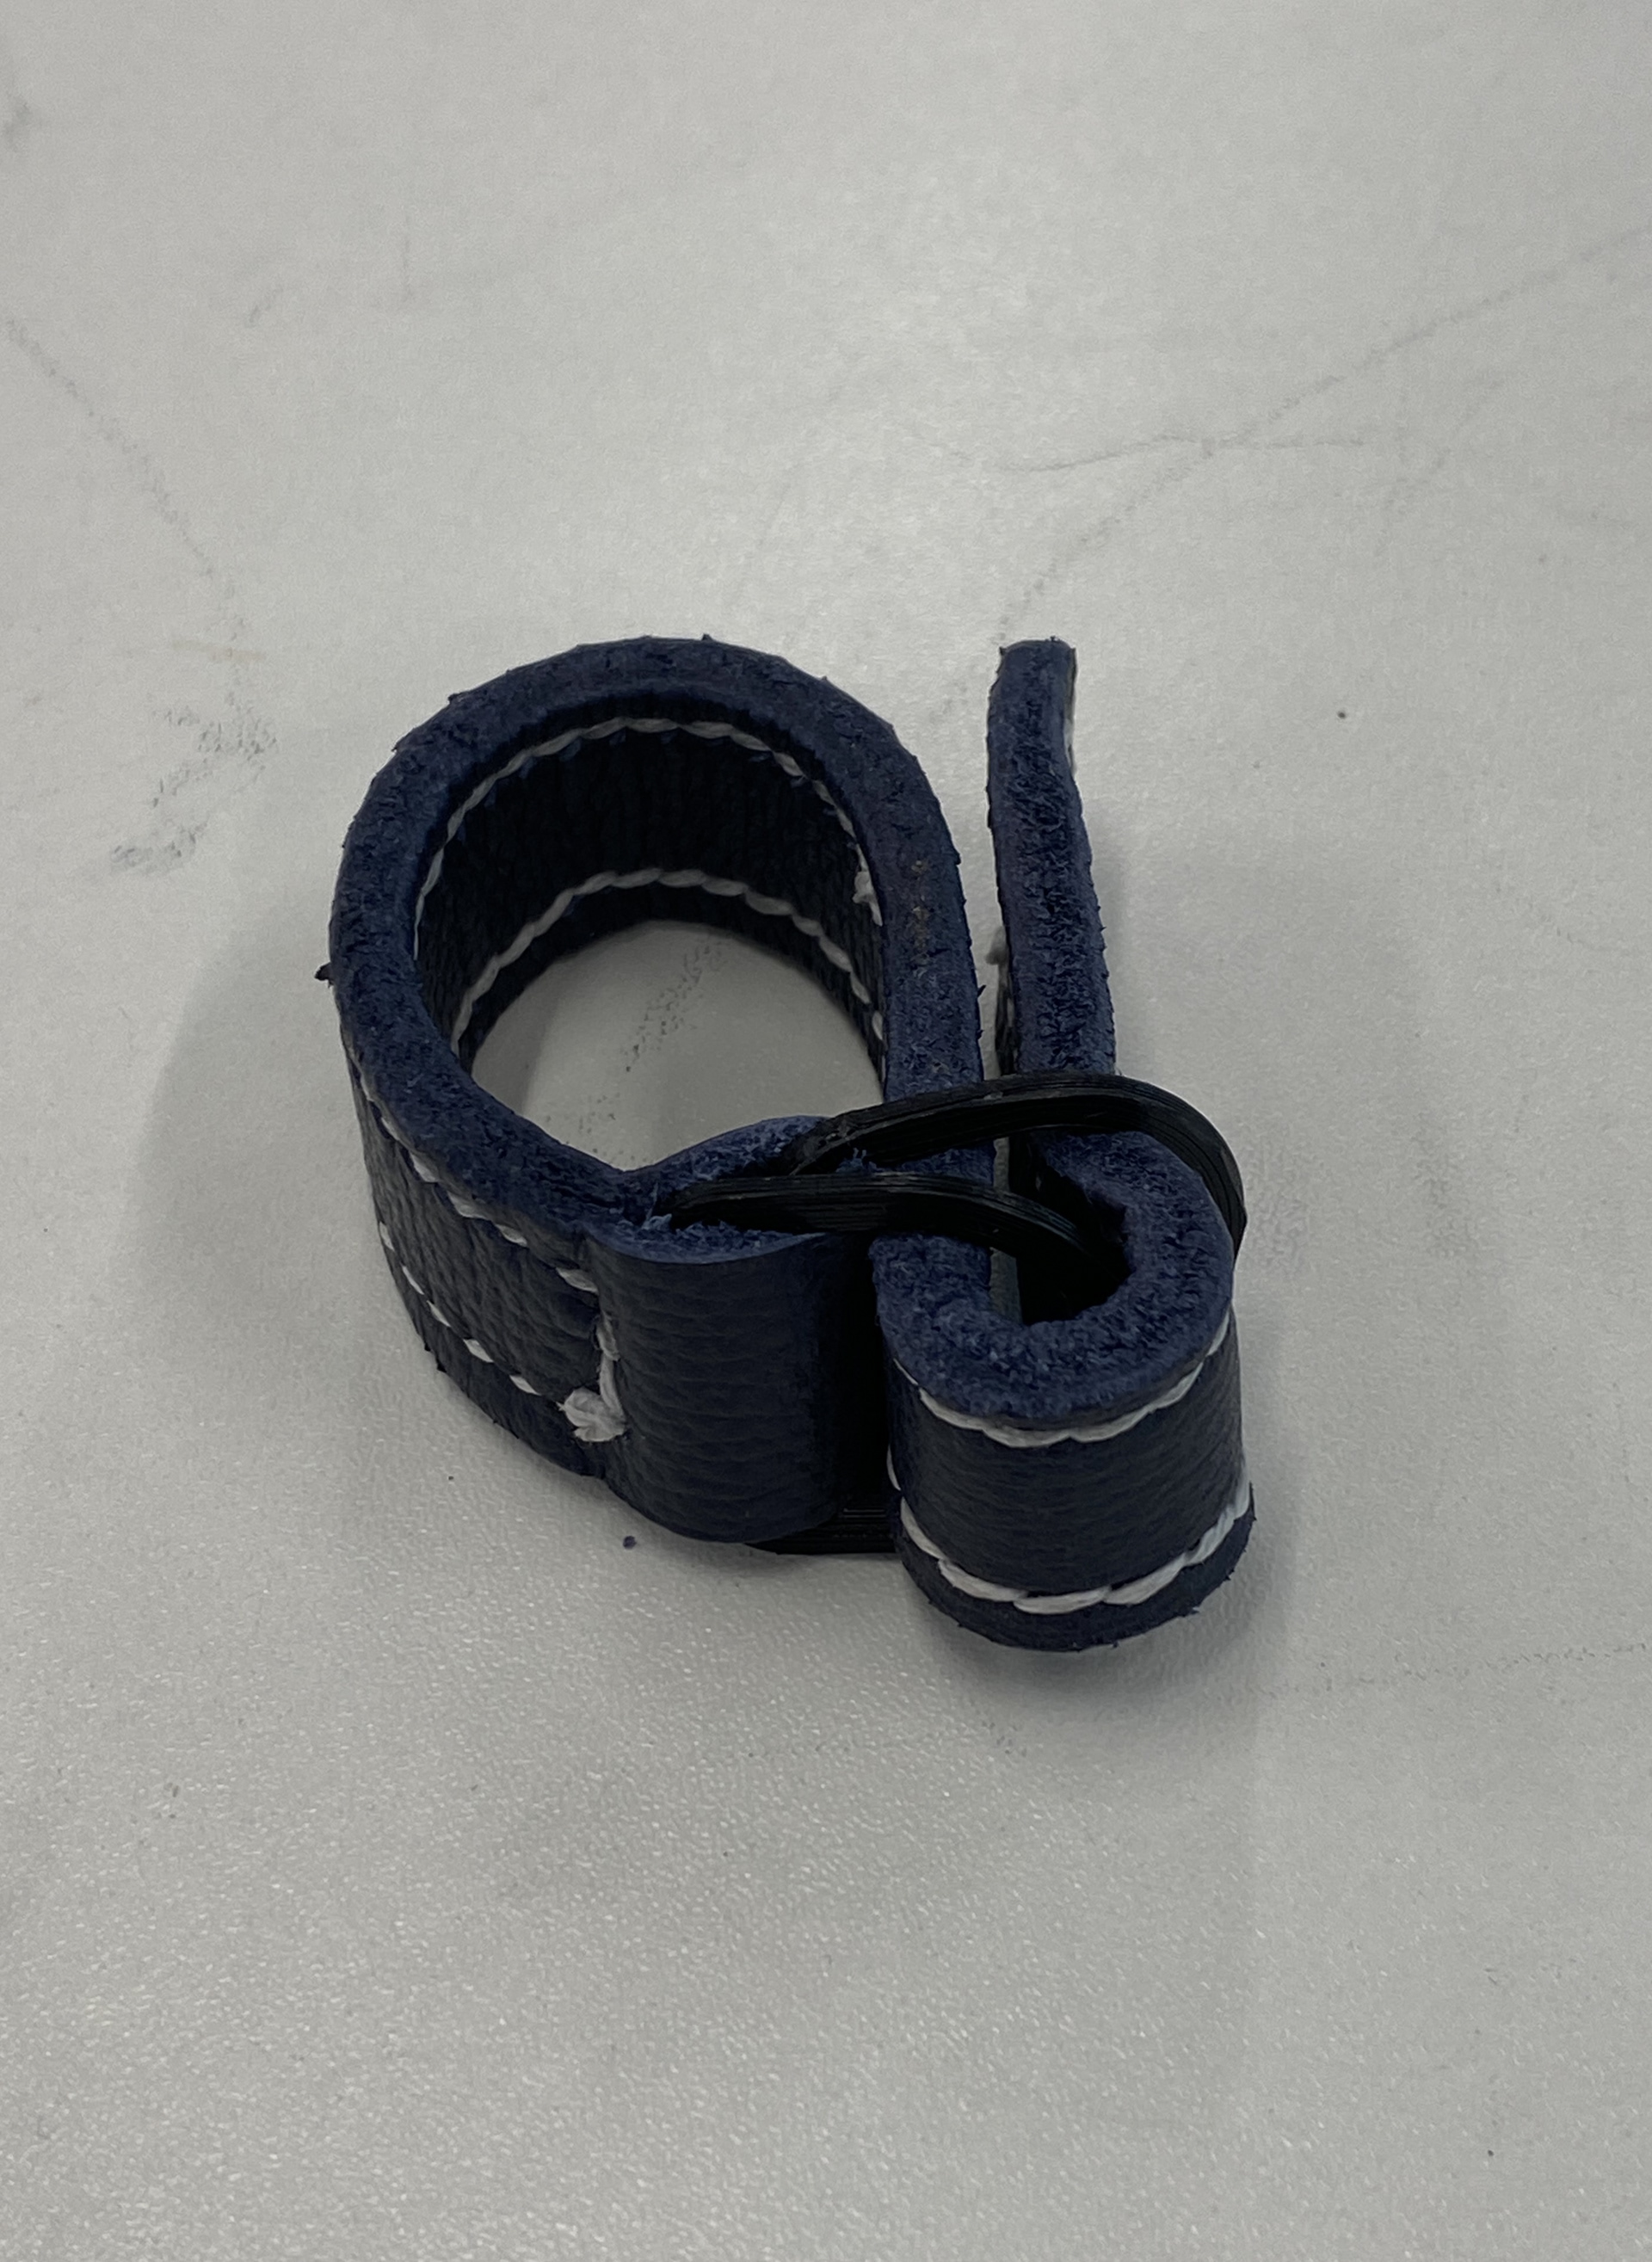
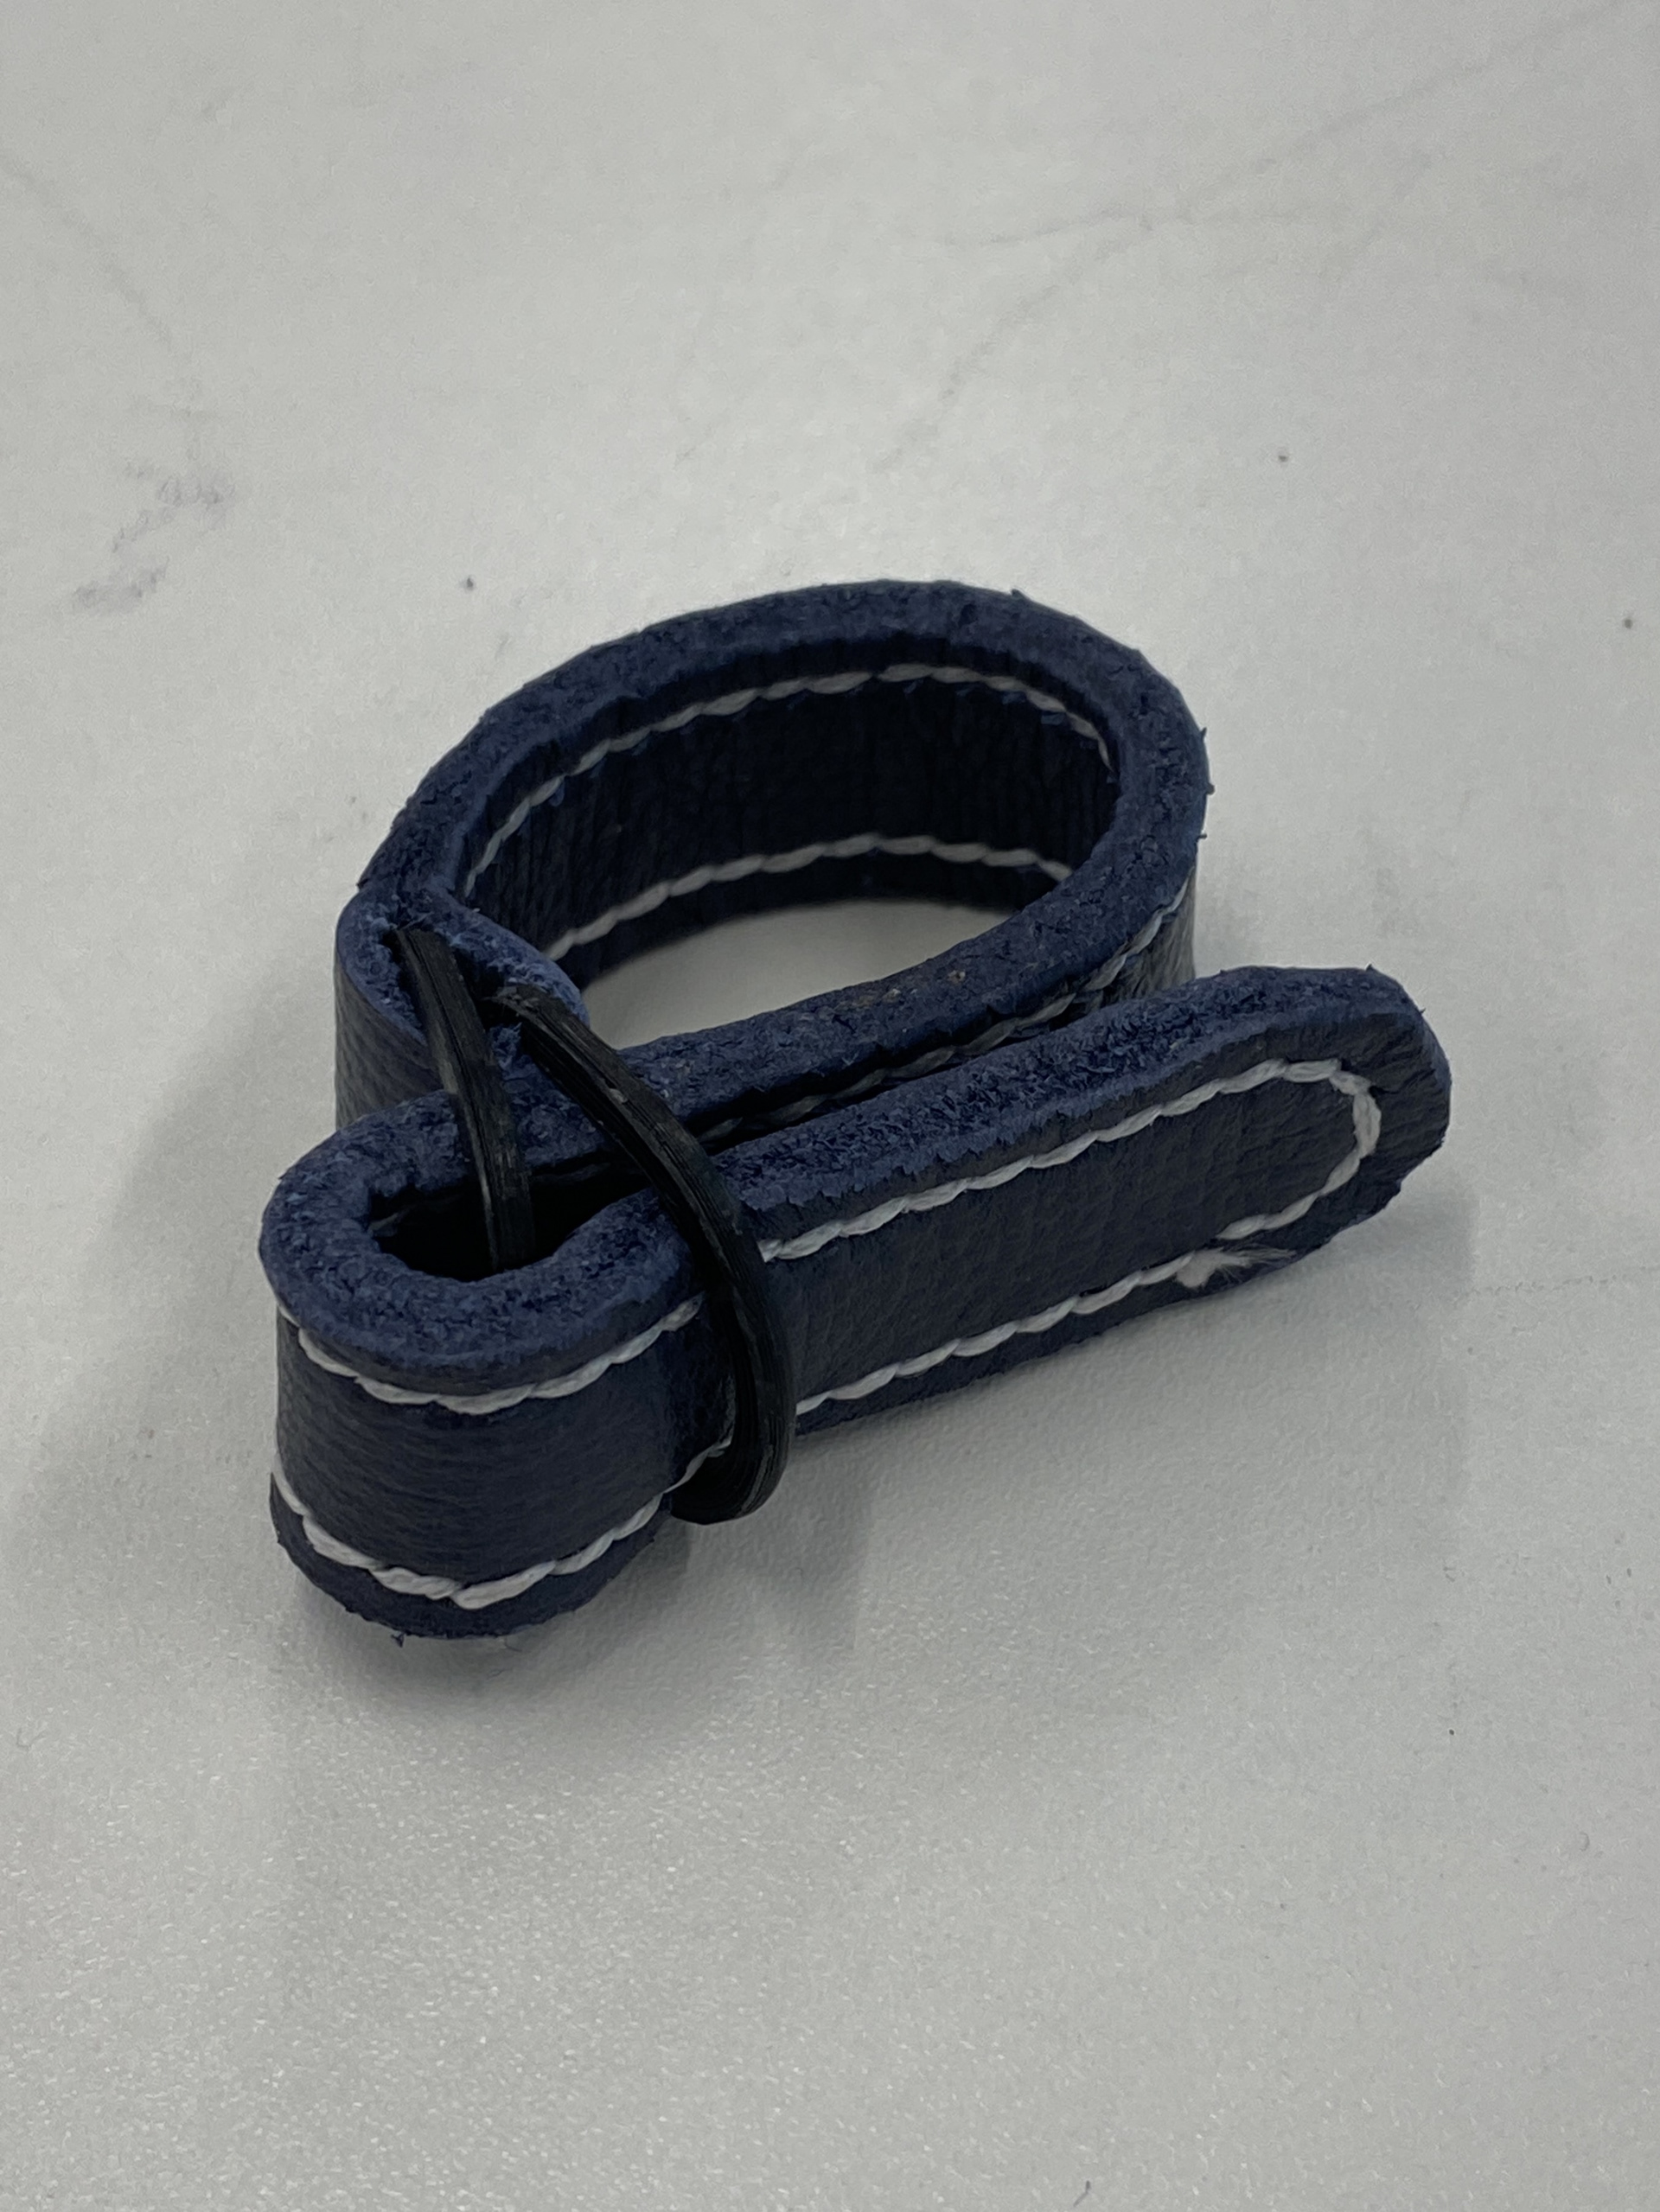
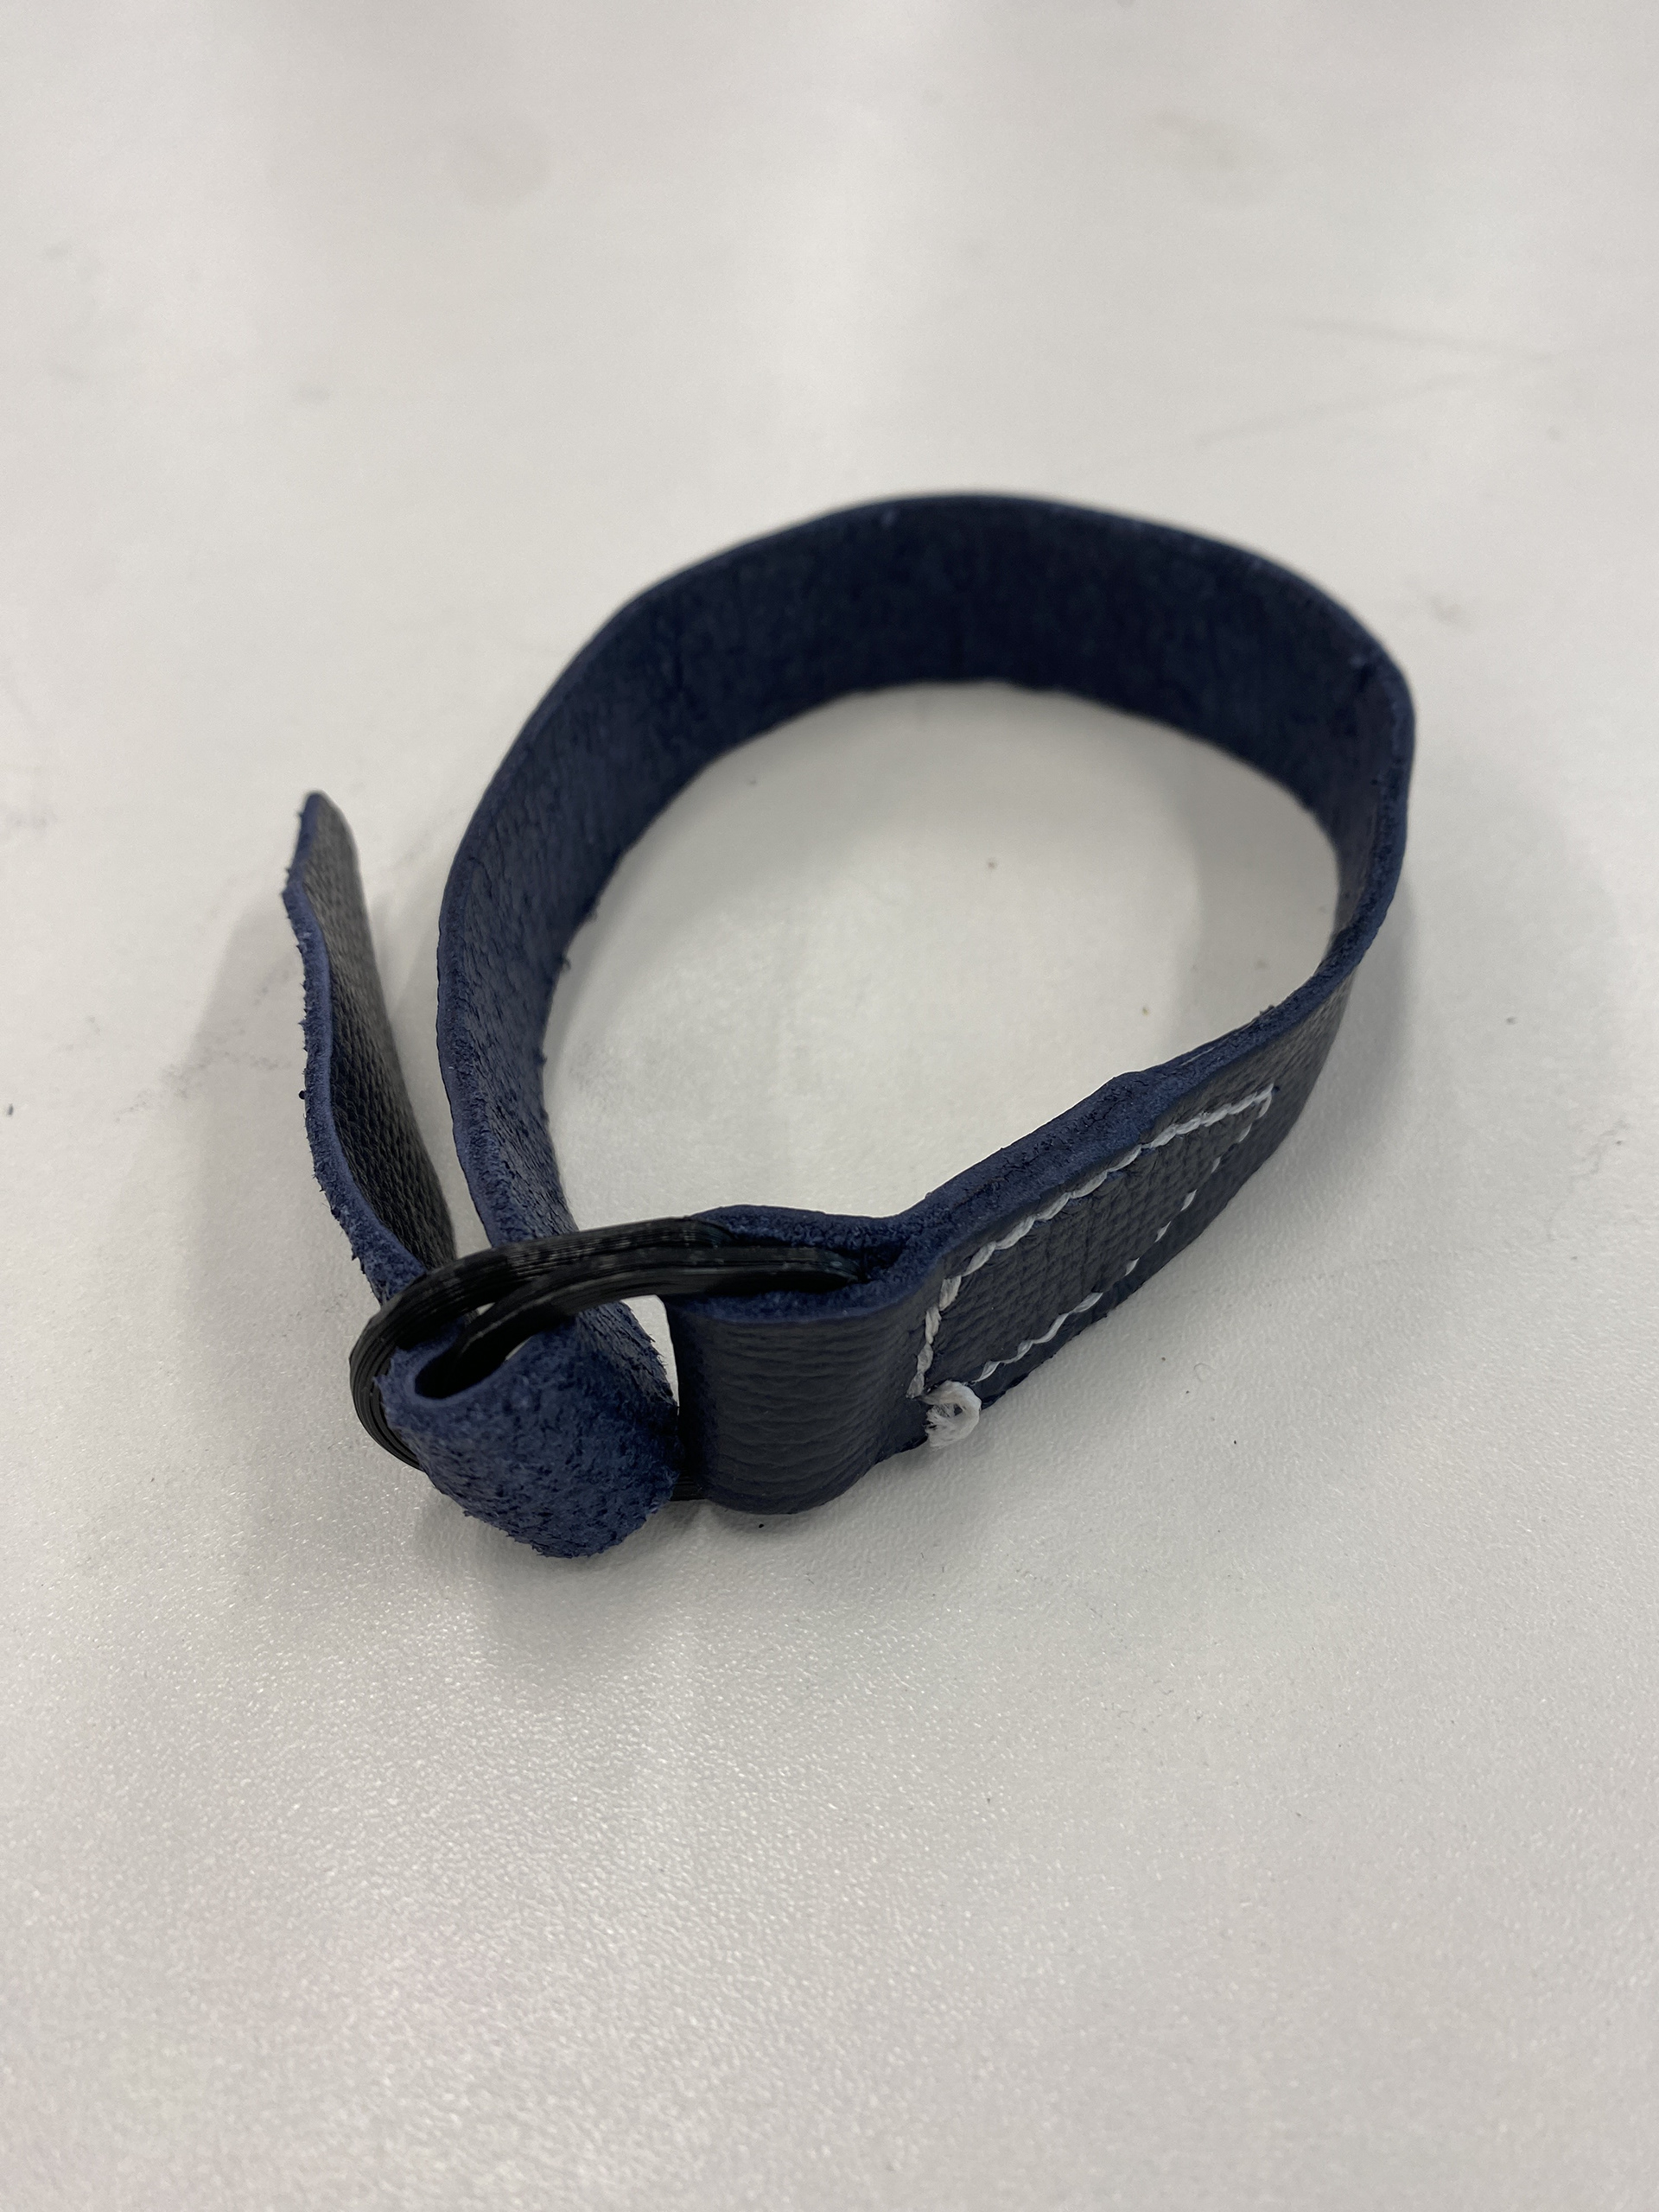
For my next test, I tried doubling up the leather, gluing and saddle stitching it together to hide the backing. This made it look a lot neater, but I found it very hard to loop the leather strap through the D-rings. I would have to significantly increase the size of the D-rings if I stuck with the doubled-up leather, but this would make it too cumbersome on the arm and distract from the overall design of the piece. I tested rounding the end from the strap which did help with threading it through the buckle.
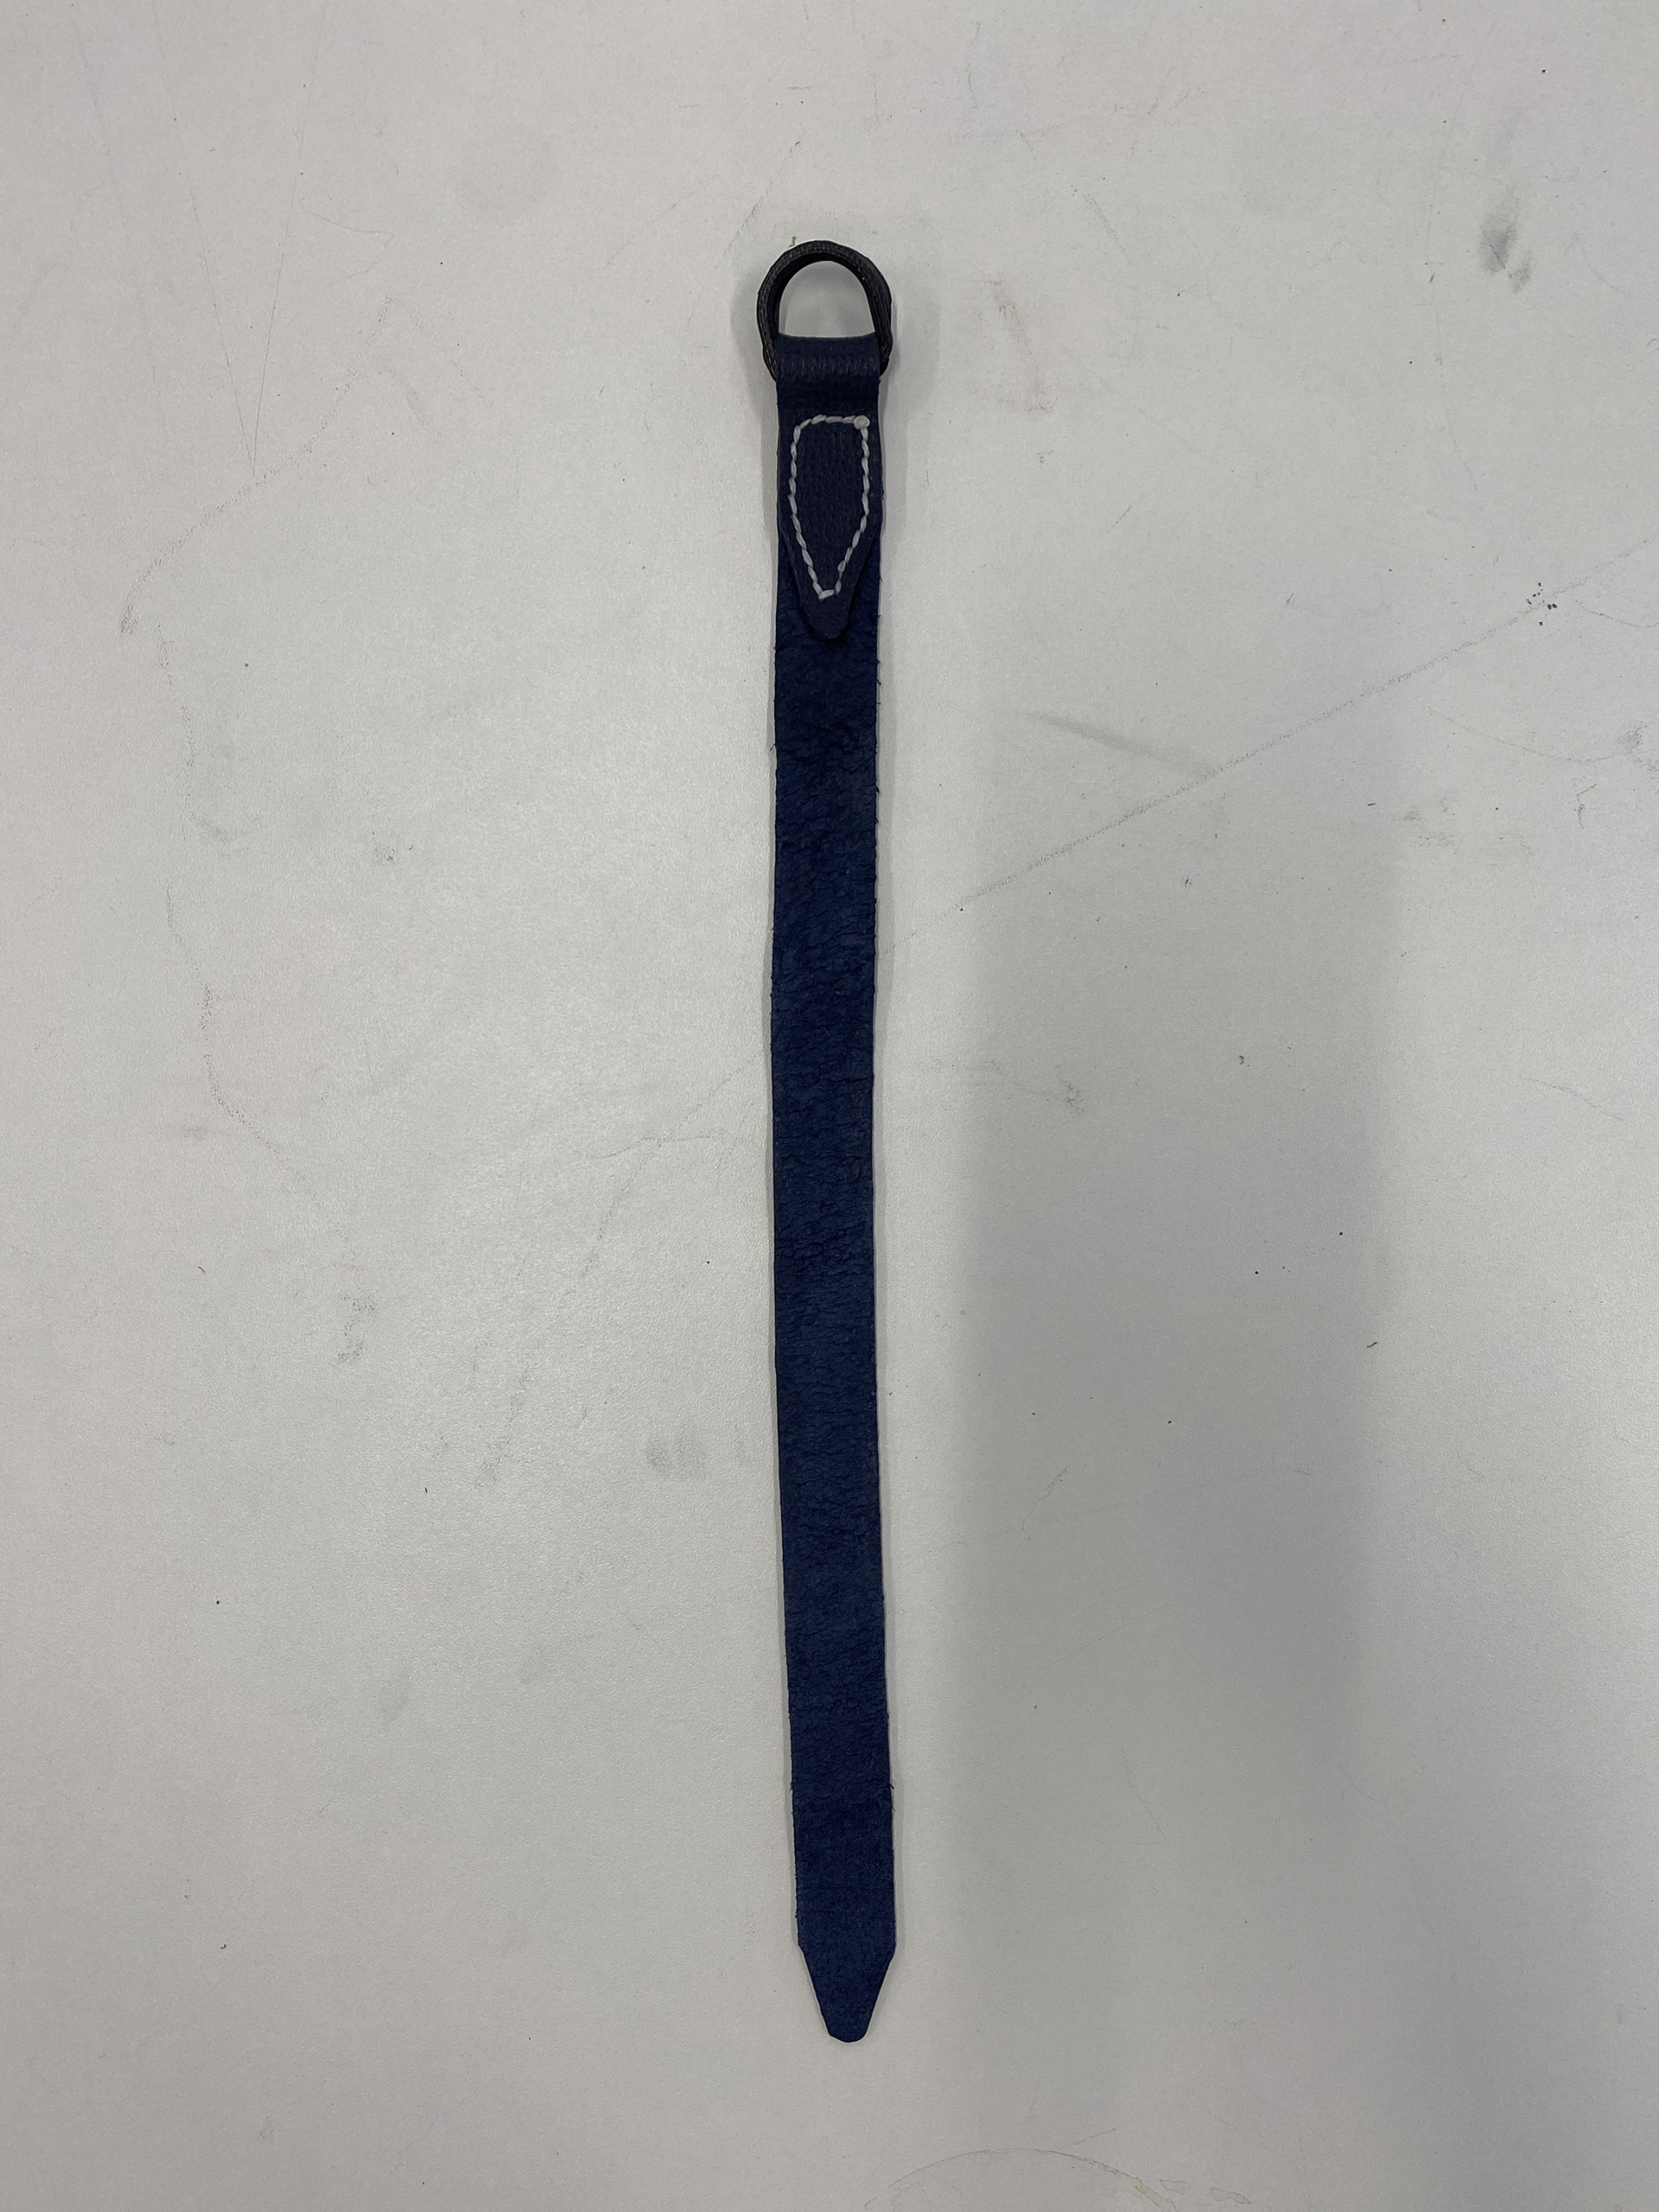
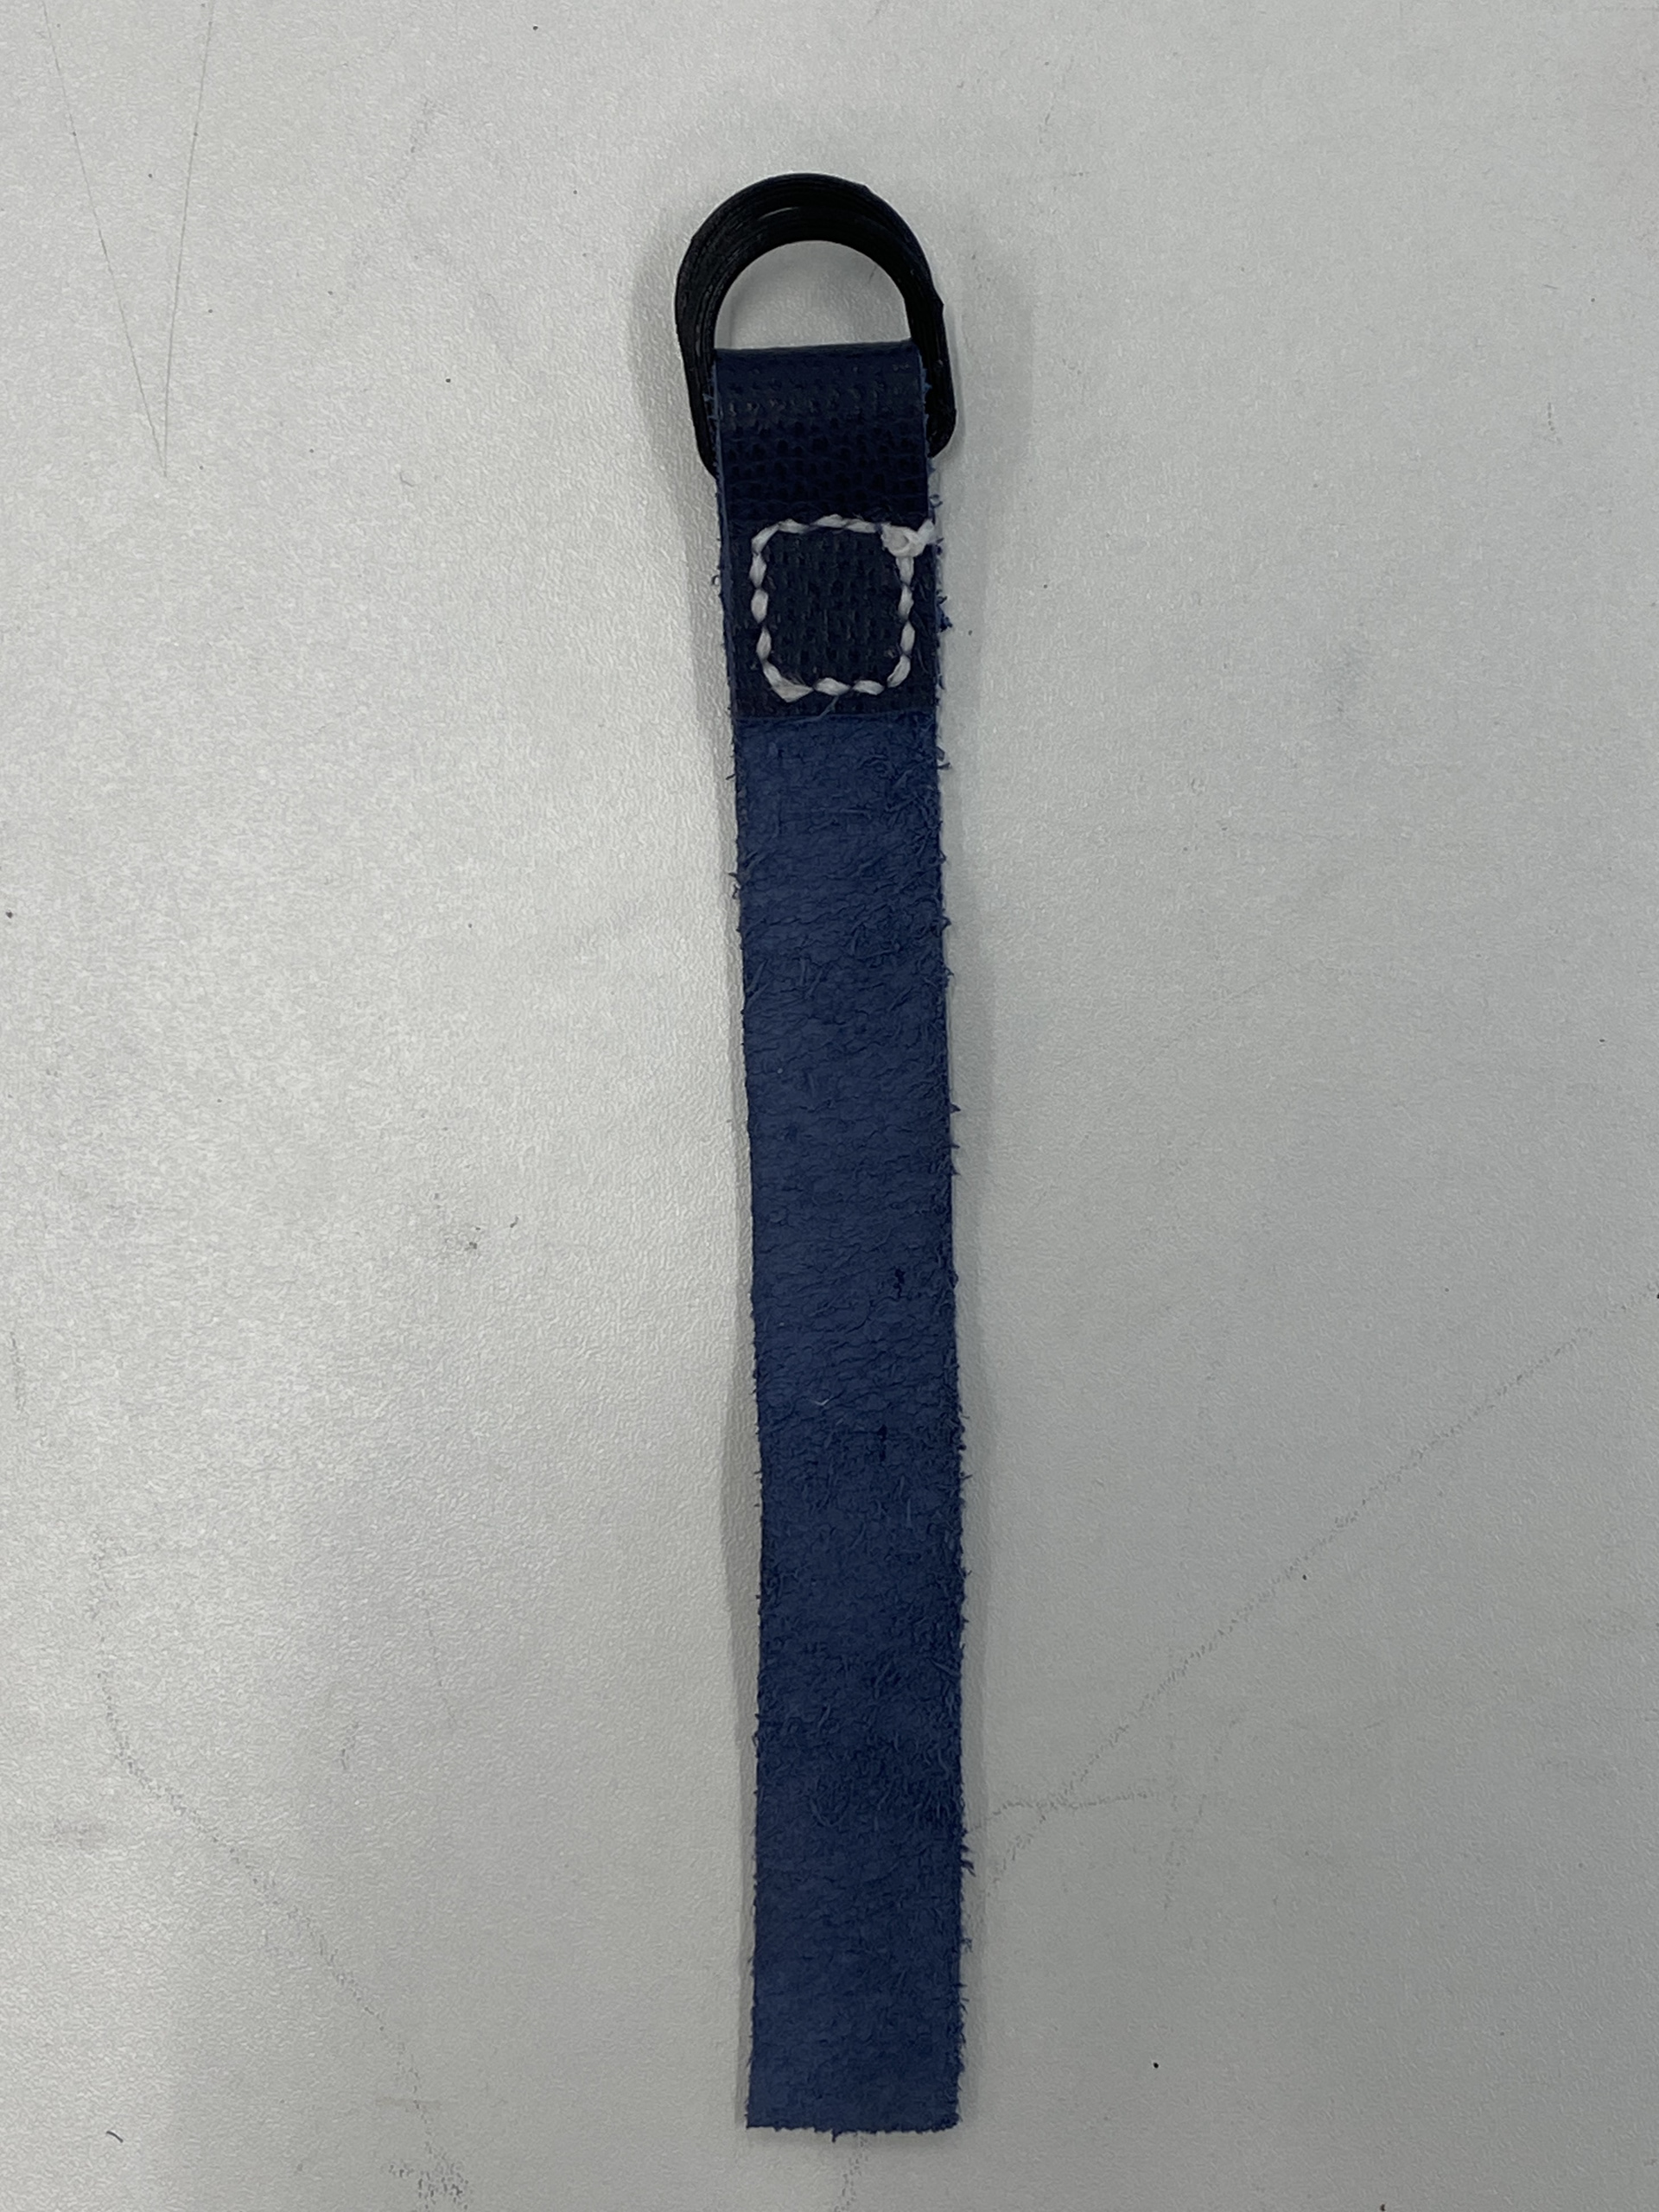
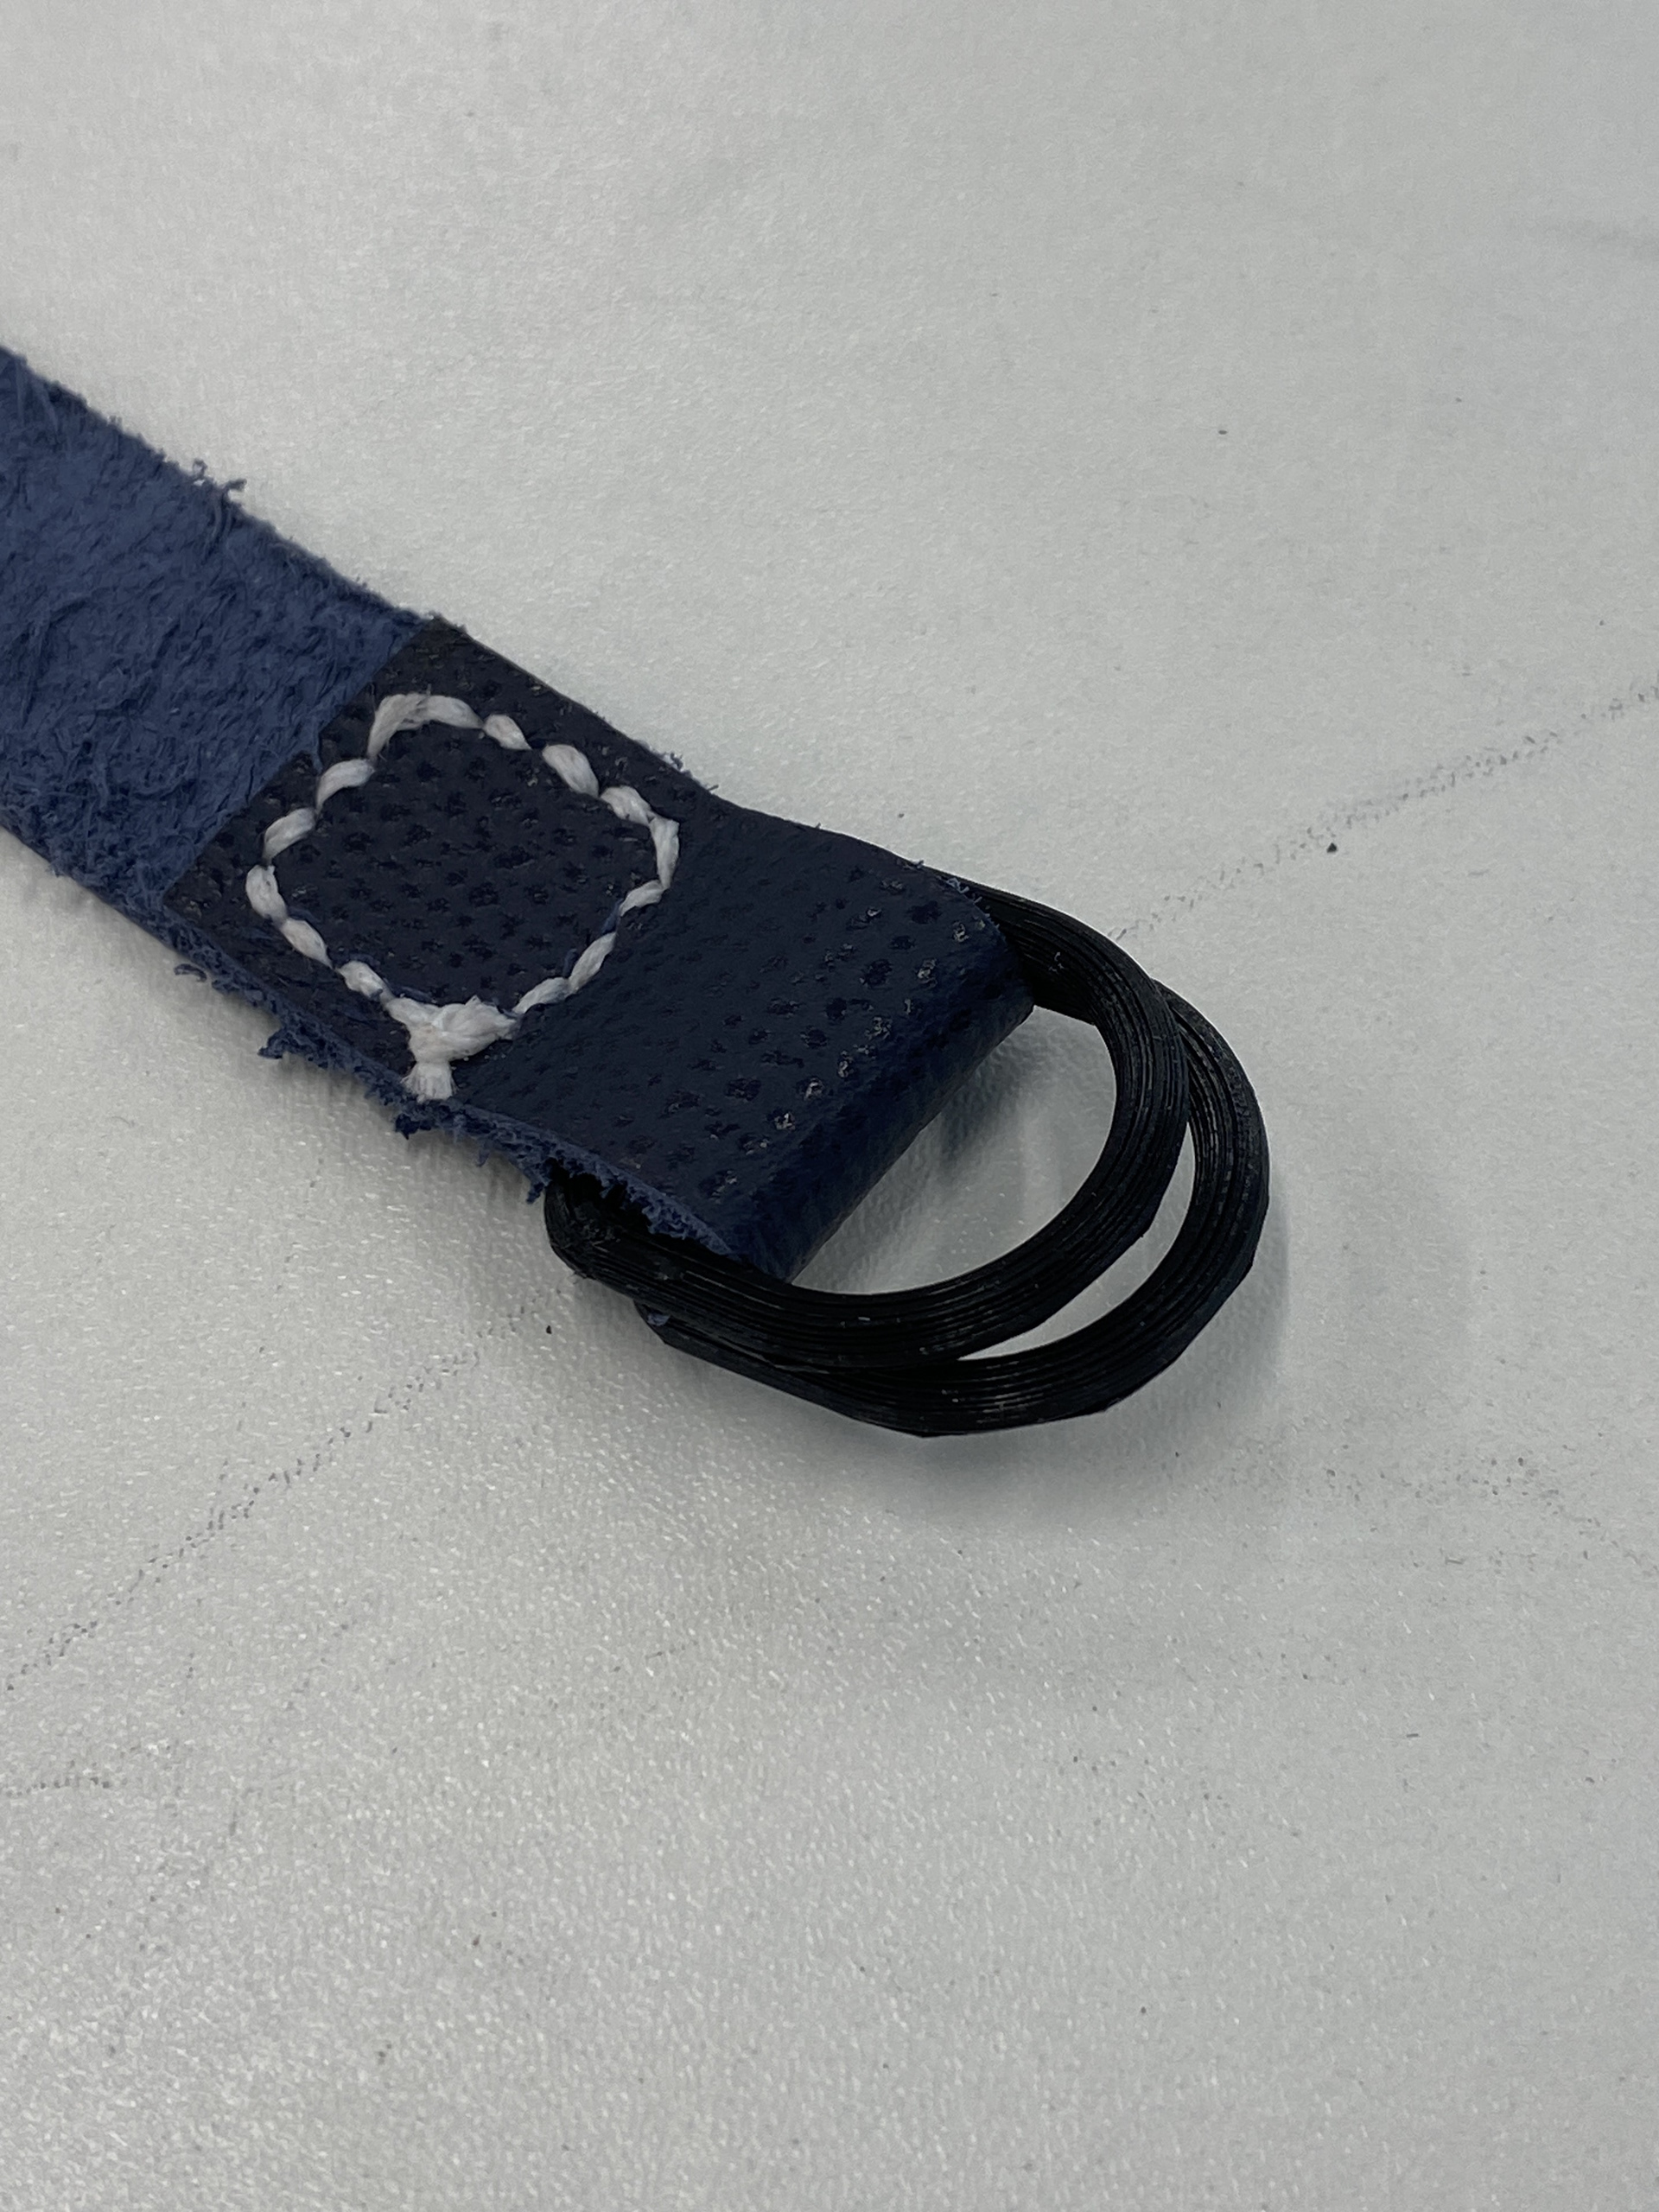
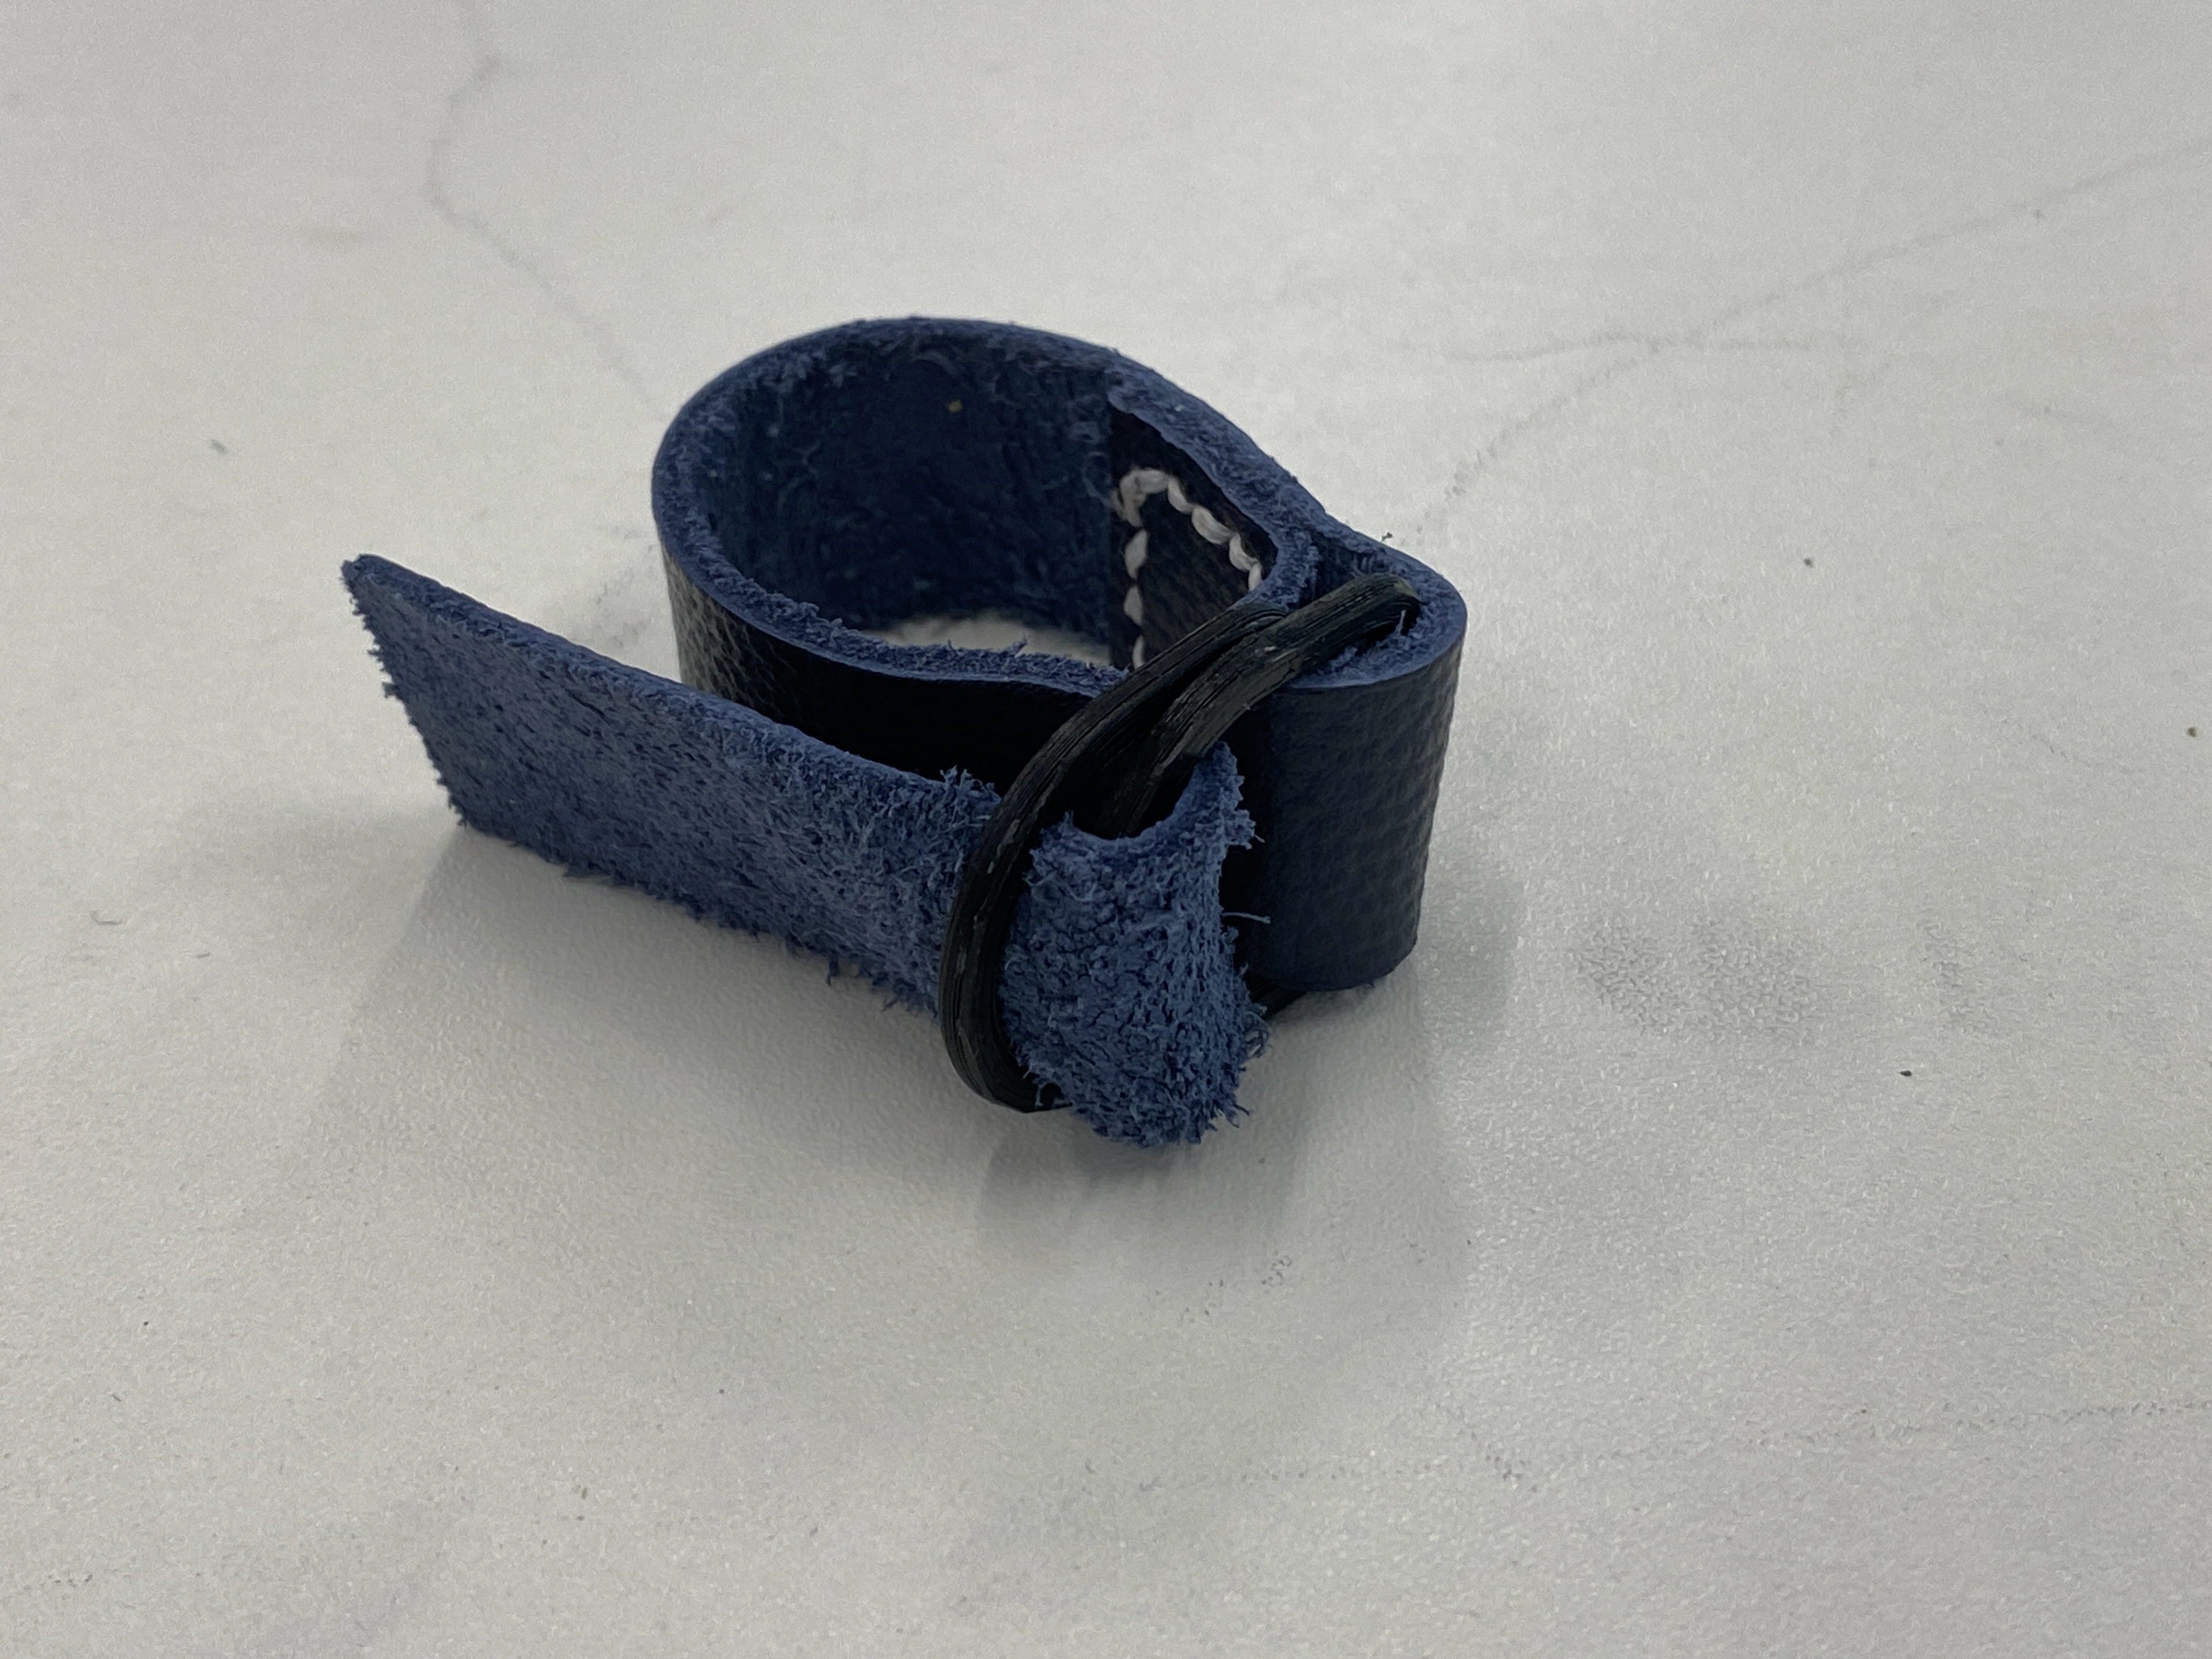
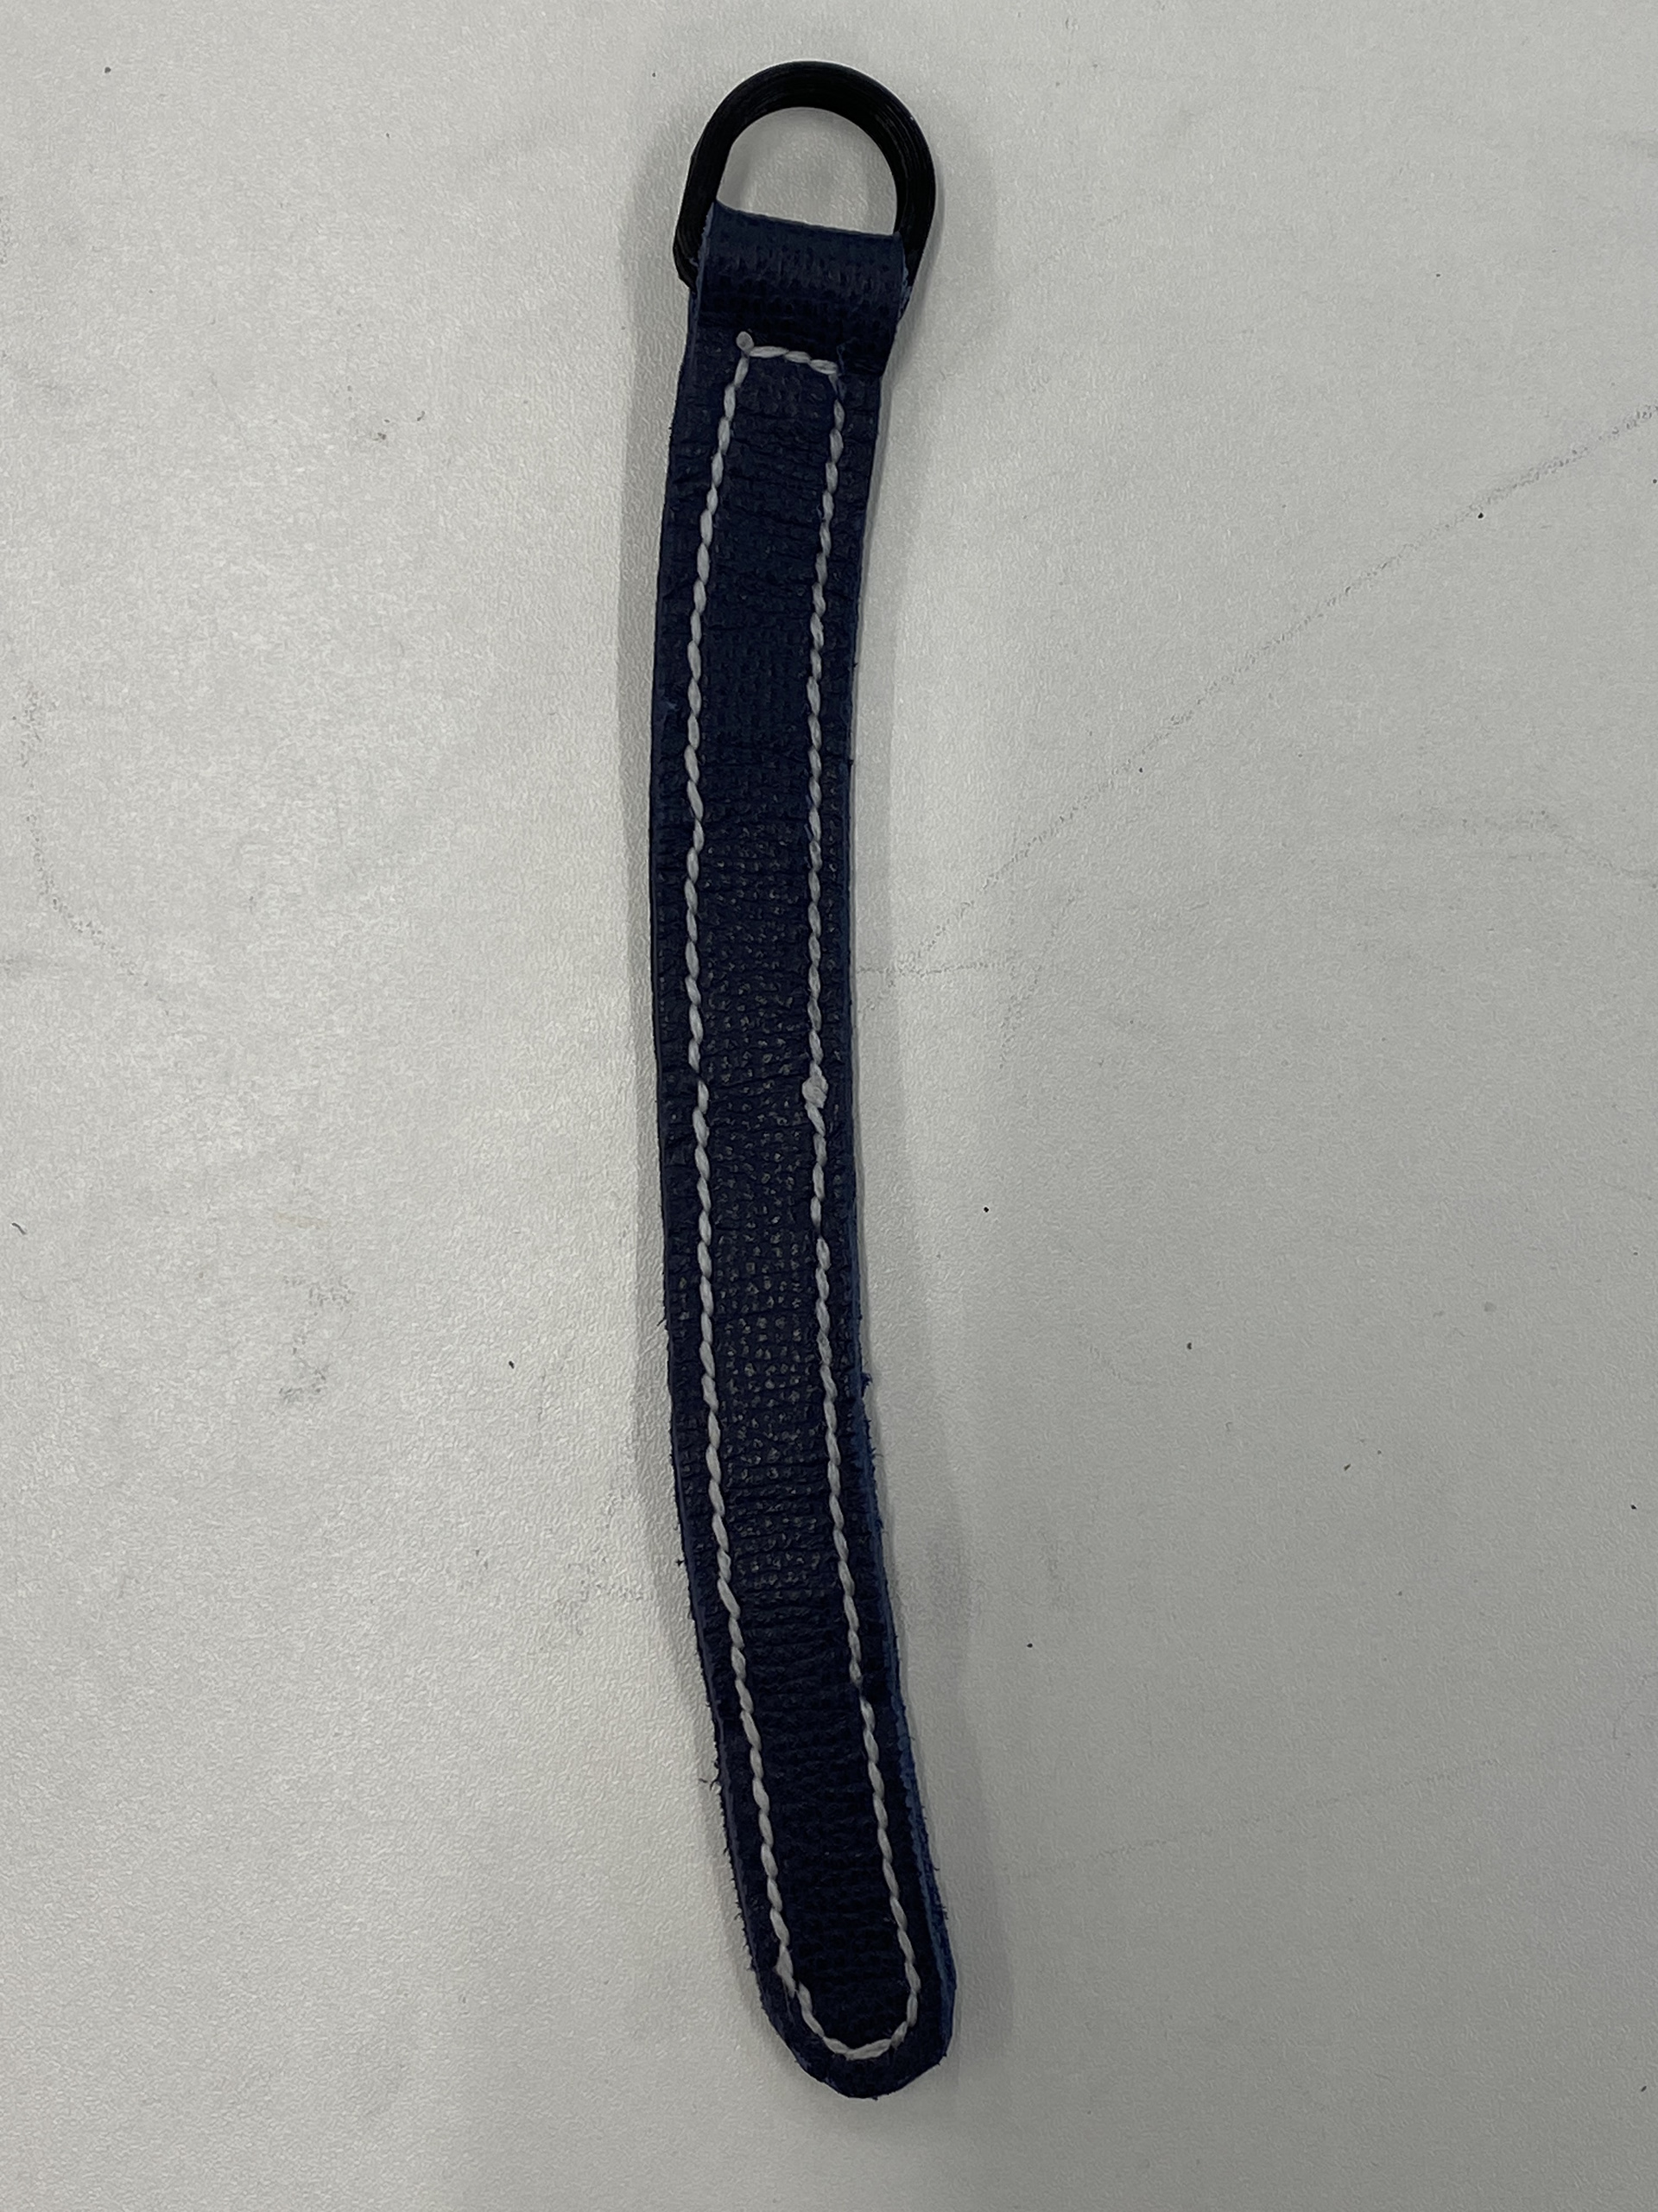
I then tested using Tokonole and a burnisher to smoothen out the backing of the leather as well as the sides. This worked well and gave a cleaner finish whilst still being as easy to bend through the buckle as my first test. I also explored using a tapered end to the strap and copied the design for the looped over material on the buckle end. This test works well, and I will take it into my final design.
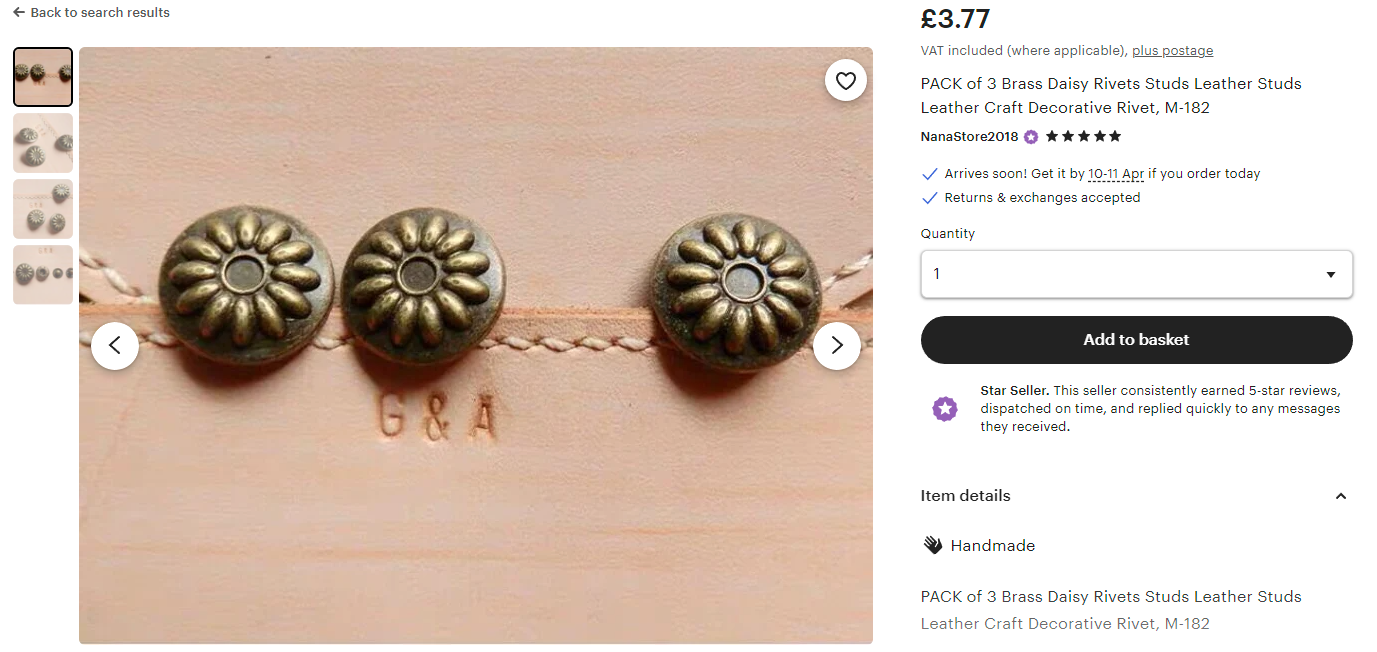
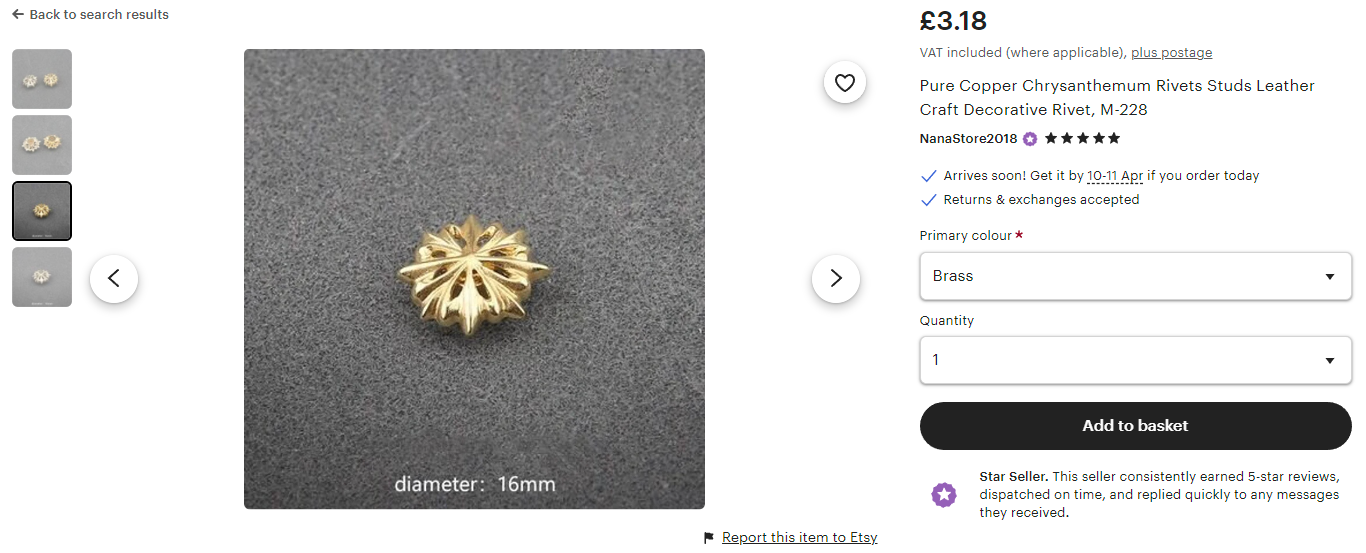
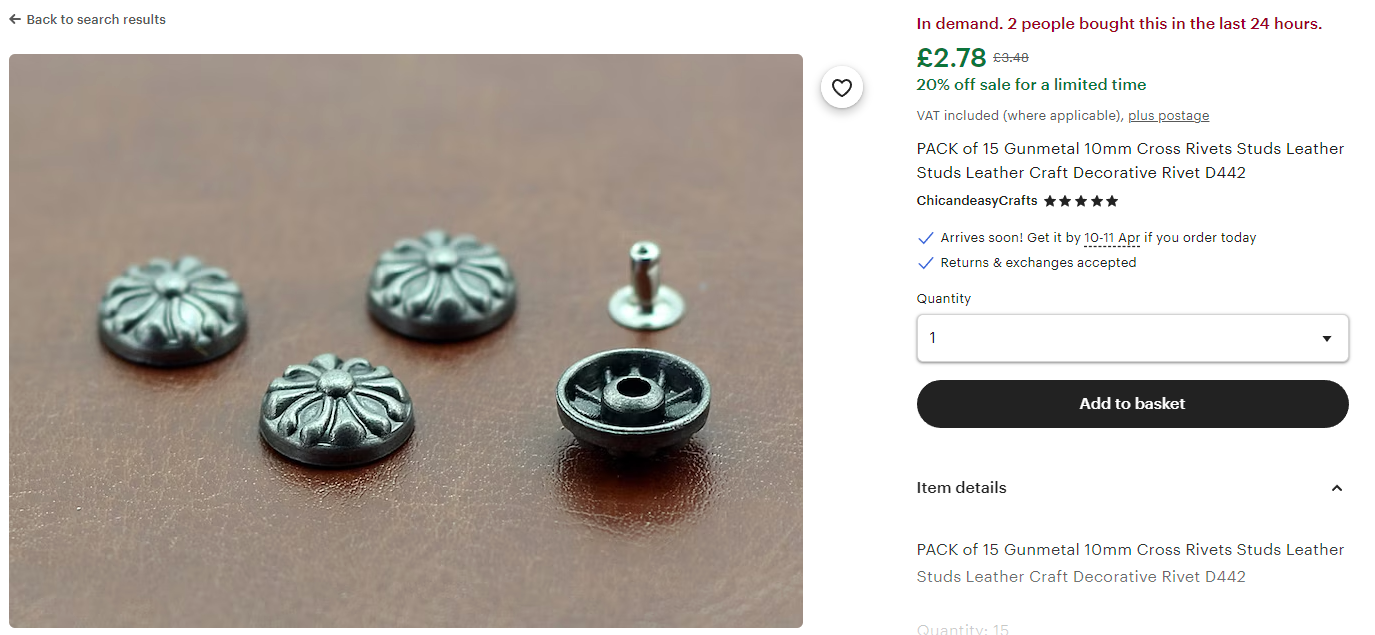
Exploring different rivets to attach the leather straps to the metal
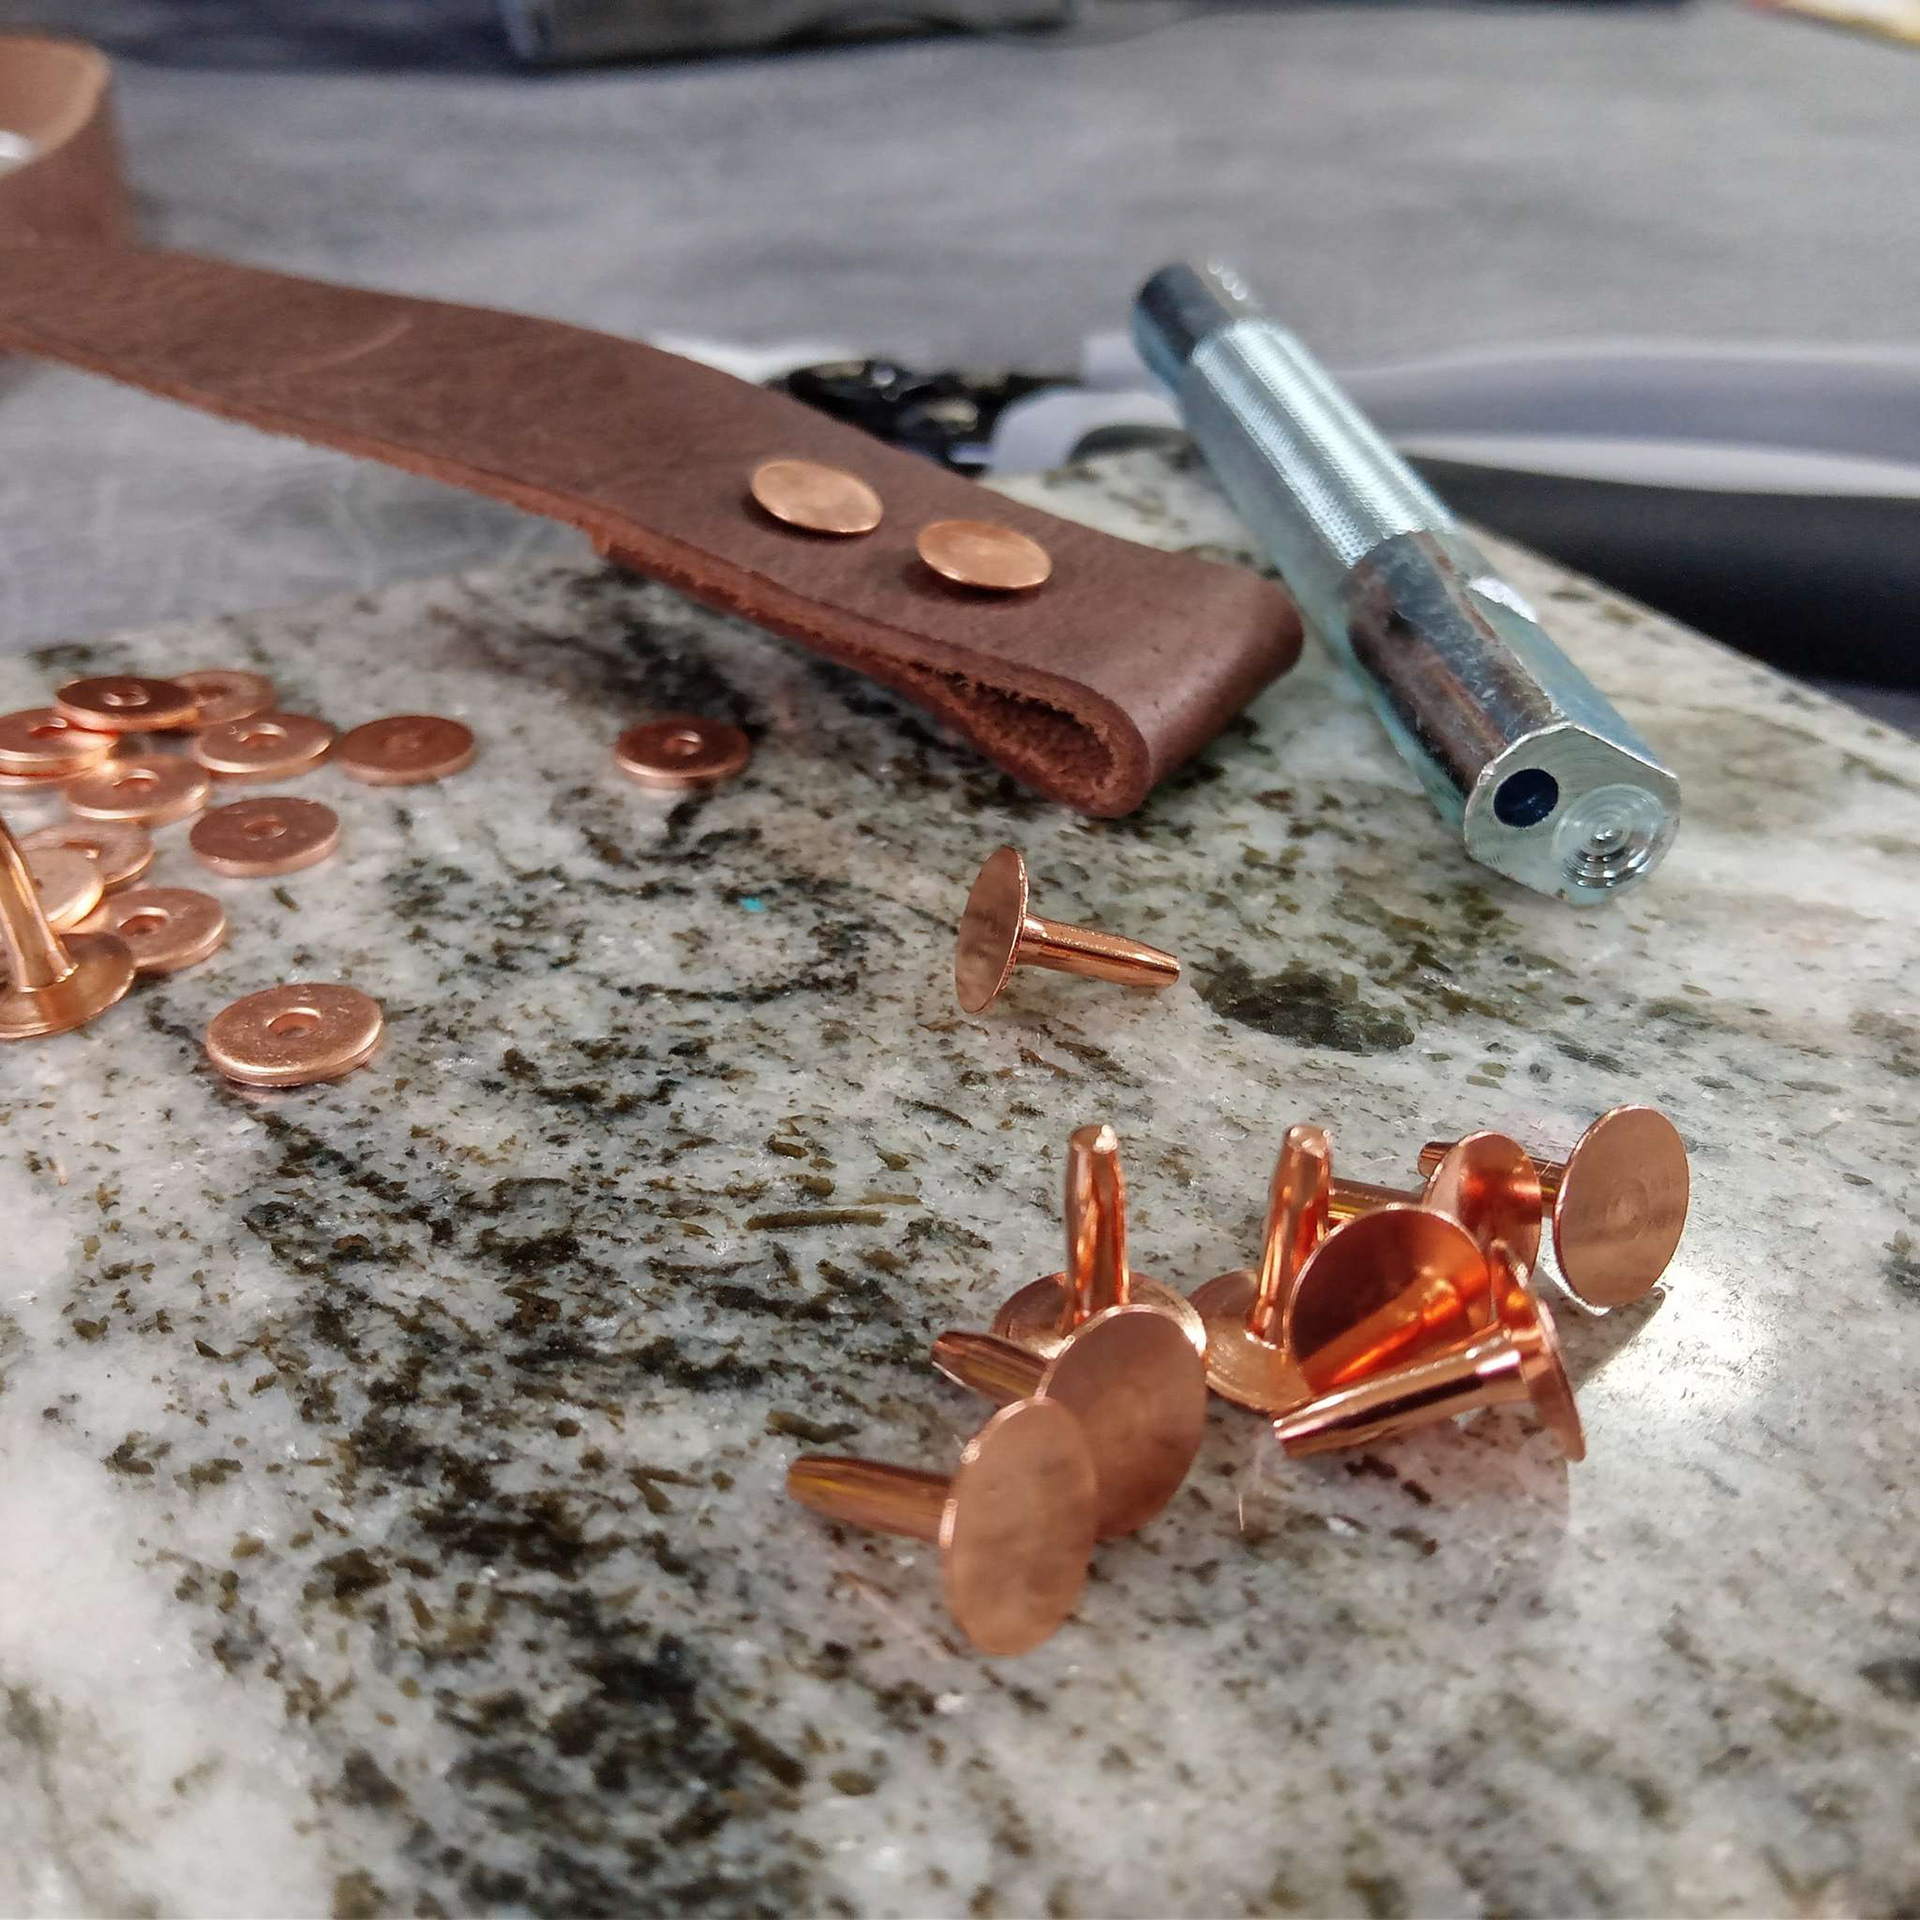
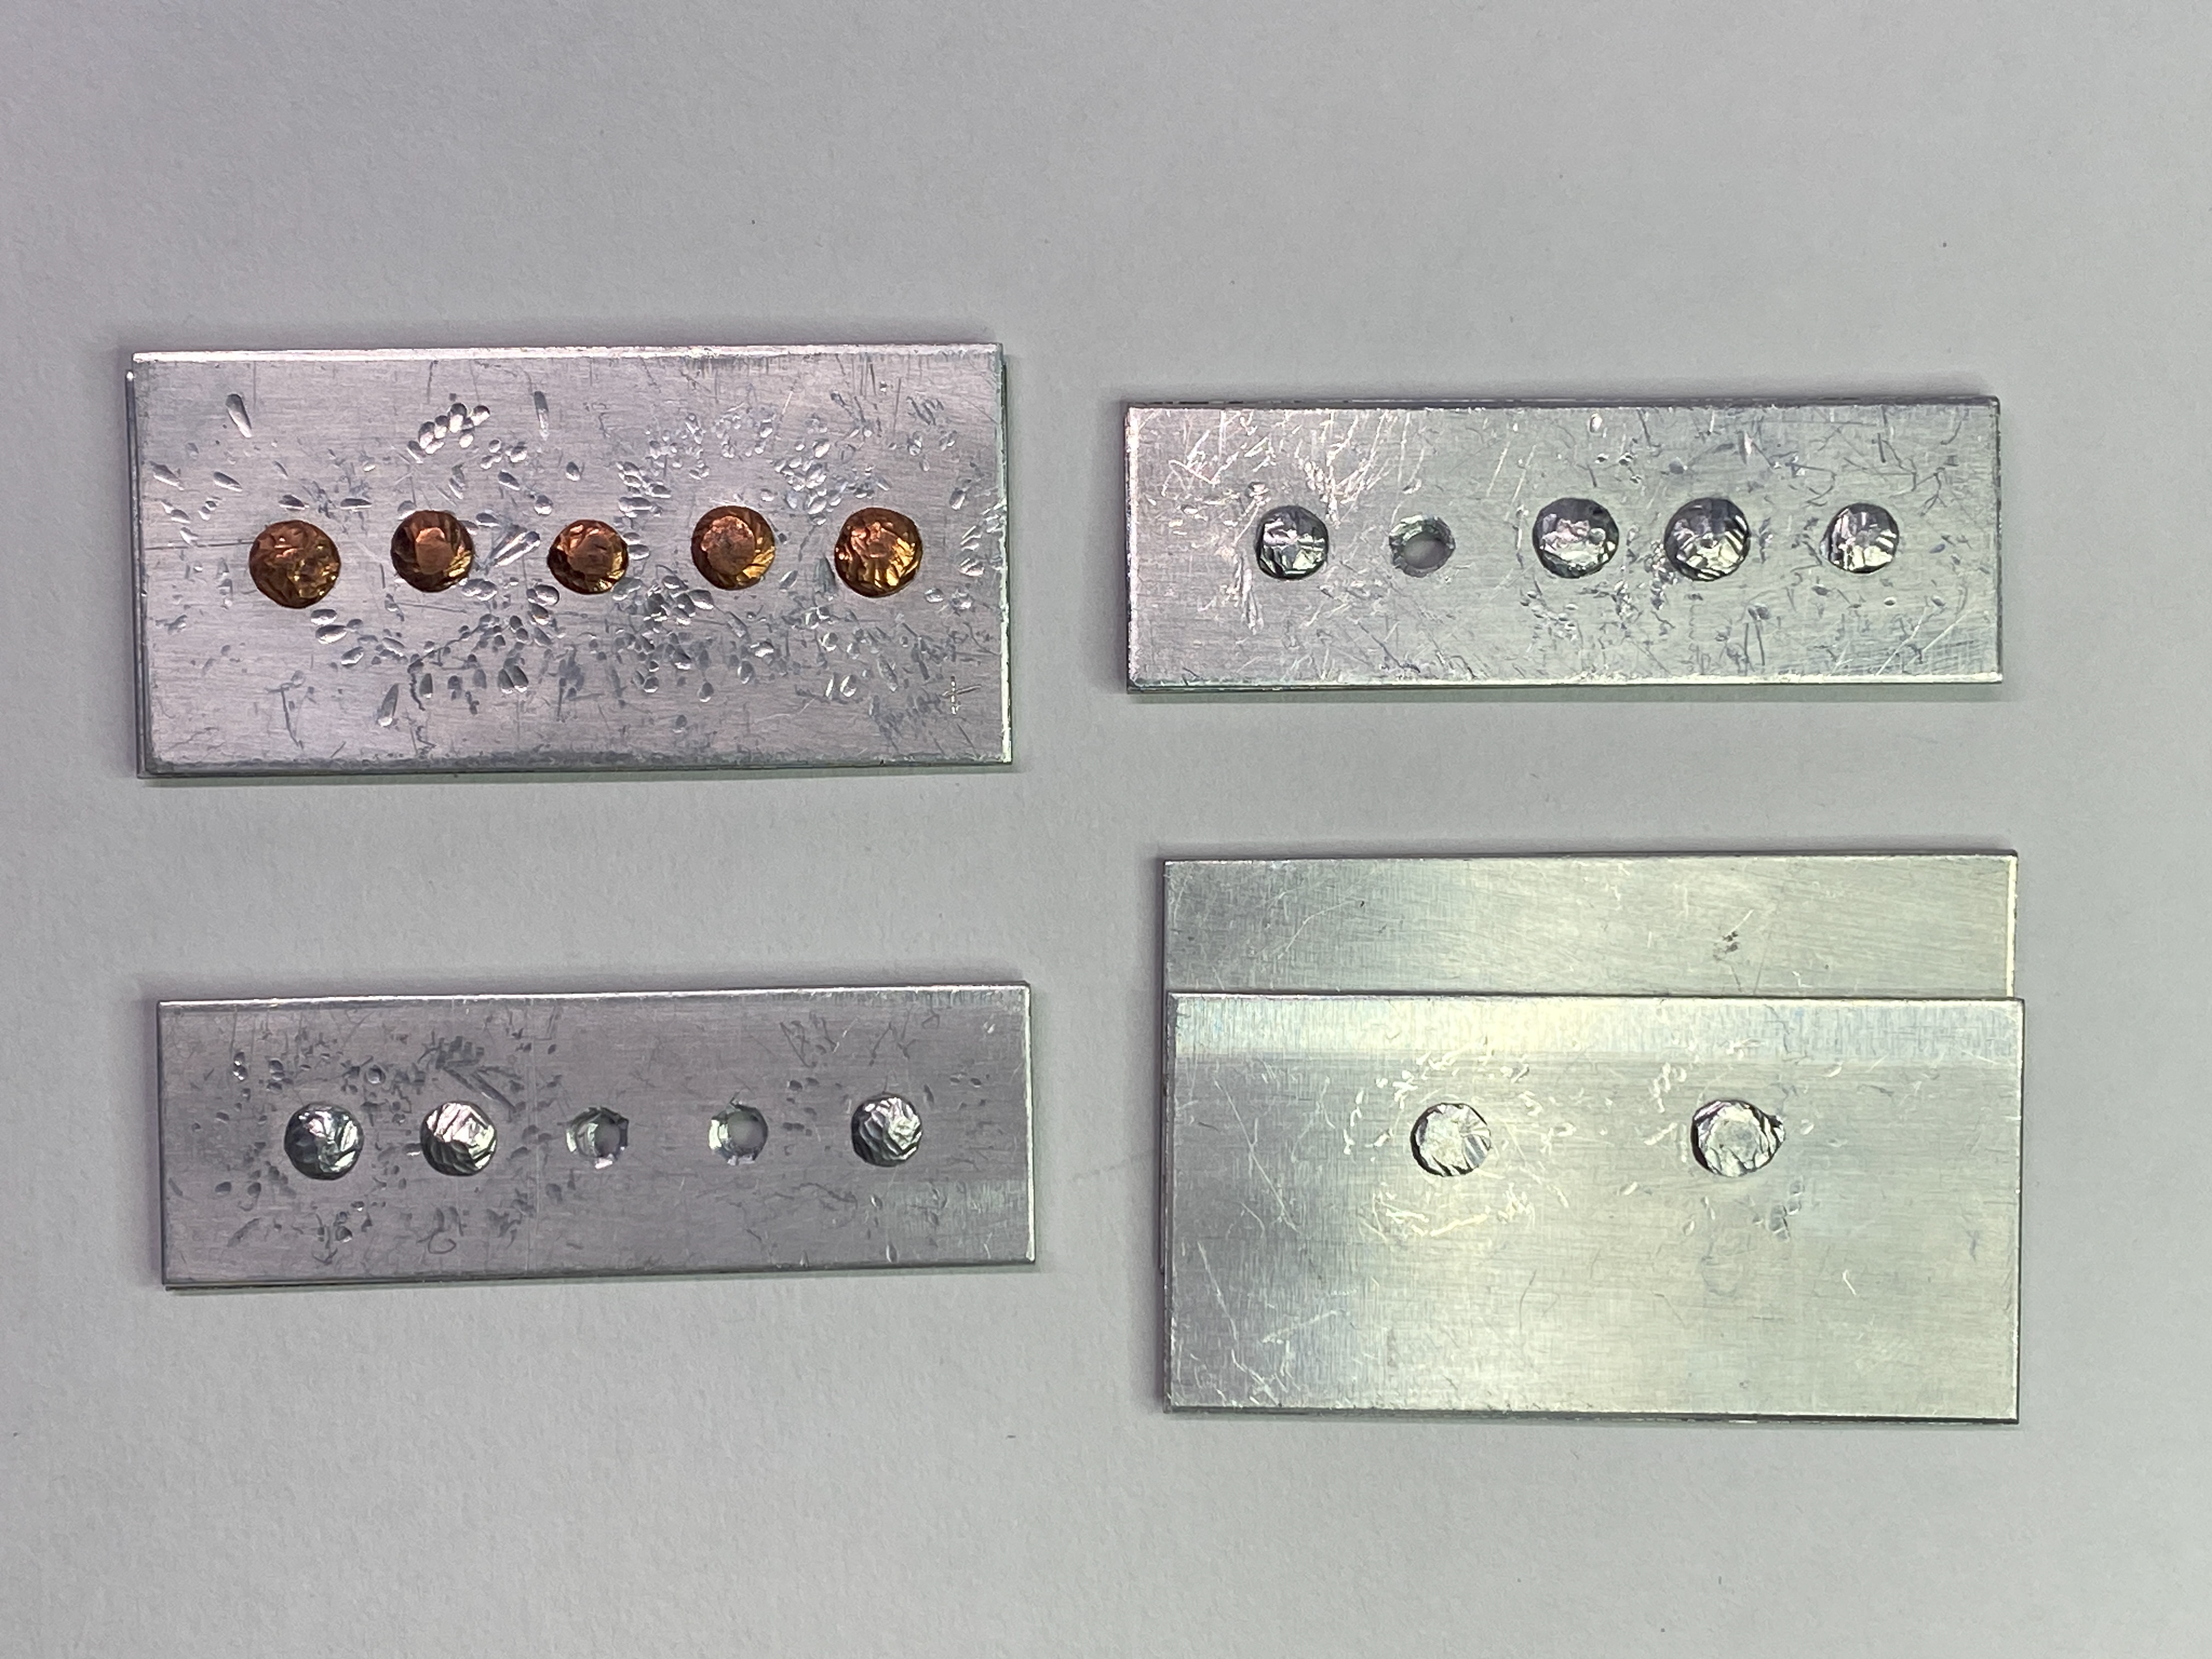
To join the leatherwork to the metal pieces I am concerned that using traditional copper leather rivets as seen in the left image above will create a jarring contrast. The highly textural hand rivets that I use to join the sheet metal and the perfectly circular and machined factory leather rivets may clash when placed next to each other.
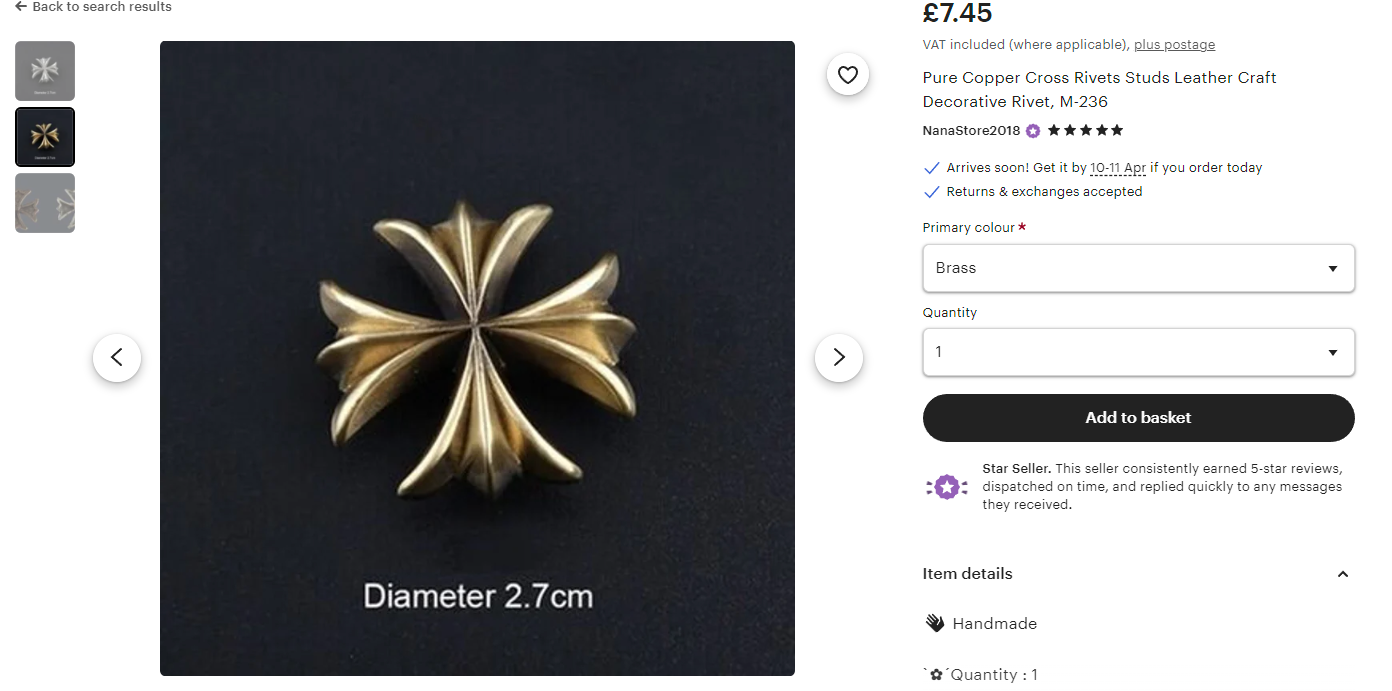
https://www.etsy.com/uk/listing/734012227/pure-copper-cross-rivets-studs-leather?ga_order=most_relevant&ga_search_type=all&ga_view_type=gallery&ga_search_query=decorative+rivets&ref=sr_gallery-8-4&sts=1&content_source=9359274b31778395bcf2d752ff0b91c5b60e44c8%253A734012227&organic_search_click=1&variation0=1174114114

https://www.etsy.com/uk/listing/235021317/pack-of-round-dome-flower-rapid-rivet?ga_order=most_relevant&ga_search_type=all&ga_view_type=gallery&ga_search_query=decorative+rivets&ref=sr_gallery-9-3&content_source=b338d6f06c931df84466e05b176a24e9f1c3bef7%253A235021317&organic_search_click=1&variation0=693547353&variation1=693562191
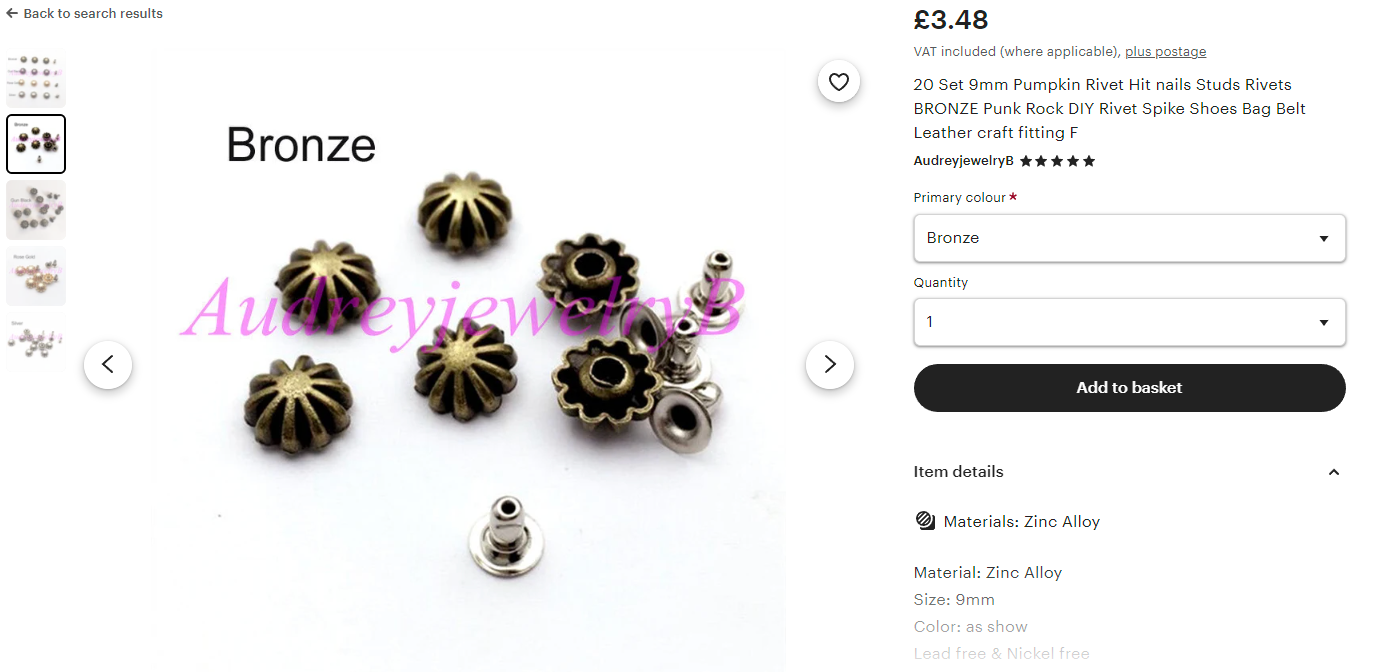
https://www.etsy.com/uk/listing/227623125/20-set-9mm-pumpkin-rivet-hit-nails-studs?ga_order=most_relevant&ga_search_type=all&ga_view_type=gallery&ga_search_query=decorative+rivets&ref=sr_gallery-7-19&content_source=bf7ee691537ac4330608146de0f23c81eee31271%253A227623125&organic_search_click=1&variation0=563516524
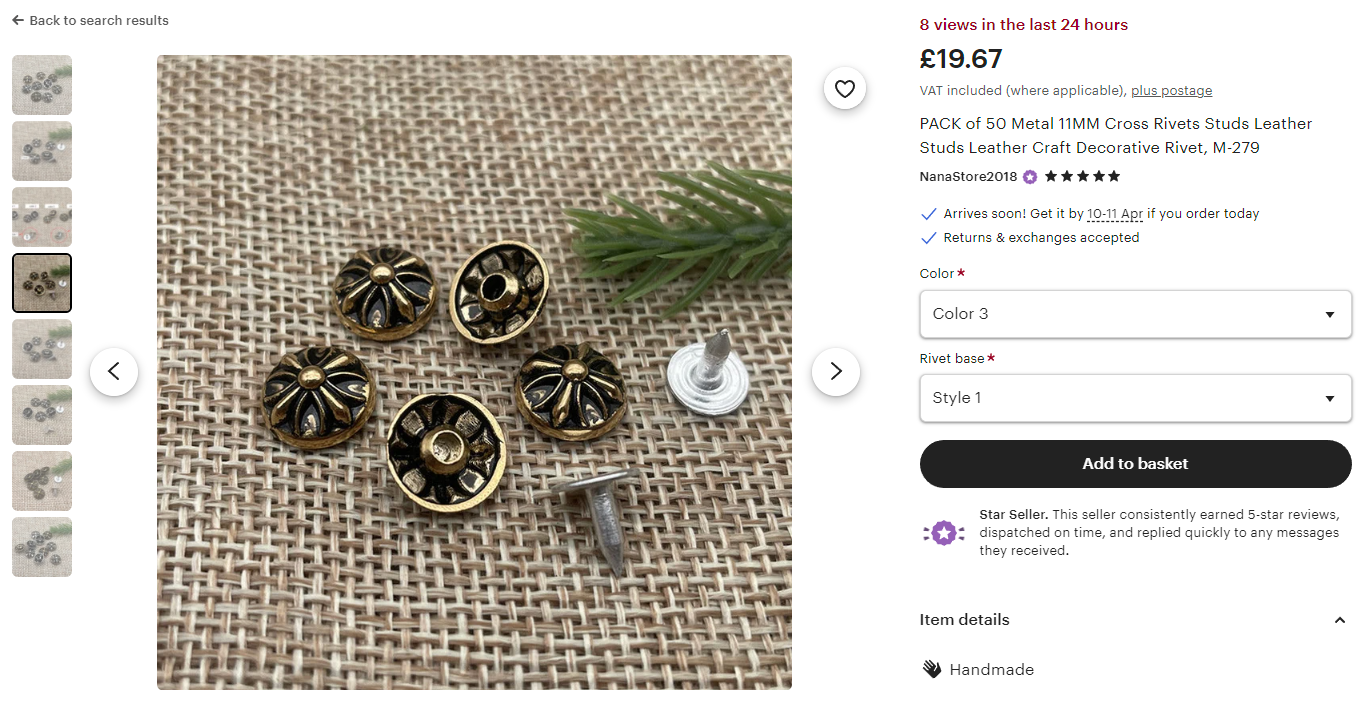
https://www.etsy.com/uk/listing/1682437987/pack-of-50-metal-11mm-cross-rivets-studs?ga_order=most_relevant&ga_search_type=all&ga_view_type=gallery&ga_search_query=decorative+rivets&ref=sr_gallery-5-12&sts=1&content_source=d629ce6f7a37055300c0ac0d6fba4c8ad48819a7%253A1682437987&organic_search_click=1&variation0=4297543732&variation1=4318036409
https://www.etsy.com/uk/listing/684951967/pack-of-3-brass-daisy-rivets-studs?click_key=c6ff96fca0d5510d04f71c413e1e8d5720ba3131%3A684951967&click_sum=cd5c1fc3&ga_search_query=decorative%2Brivets&ref=shop_items_search_173&sts=1
https://www.etsy.com/uk/listing/733069813/pure-copper-chrysanthemum-rivets-studs?click_key=65dedb94bbc19c5bf50b44eb38314f2264682e53%3A733069813&click_sum=bfba80d0&ga_search_query=decorative%2Brivets&ref=shop_items_search_148&sts=1&variation0=1170981036
https://www.etsy.com/uk/listing/616878817/pack-of-15-gunmetal-10mm-cross-rivets?ga_order=most_relevant&ga_search_type=all&ga_view_type=gallery&ga_search_query=decorative+rivets&ref=sr_gallery-1-7&pro=1&content_source=e1c27f64c08a6cb8ea2977d6f7954d8c5578f9e1%253A616878817&organic_search_click=1
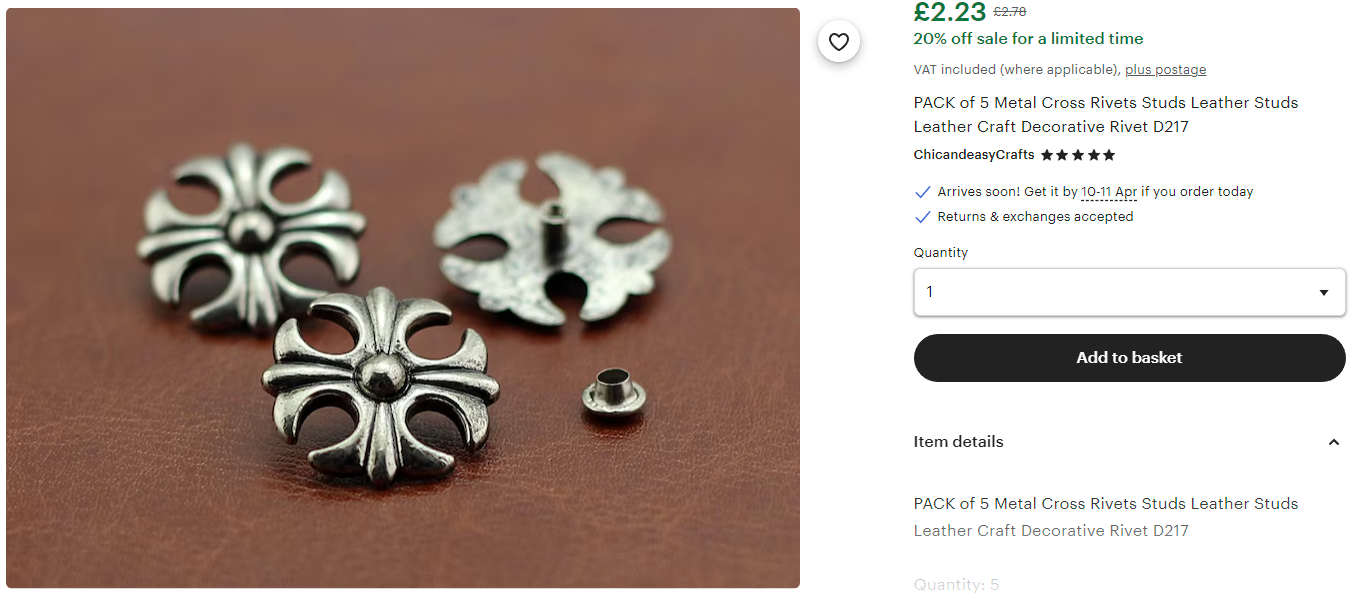
https://www.etsy.com/uk/listing/602140844/pack-of-5-metal-cross-rivets-studs?ga_order=most_relevant&ga_search_type=all&ga_view_type=gallery&ga_search_query=decorative+rivets&ref=sr_gallery-1-34&pro=1&content_source=8301b1886f4b4e3c090672975fe6a52b00ef7cdd%253A602140844&organic_search_click=1
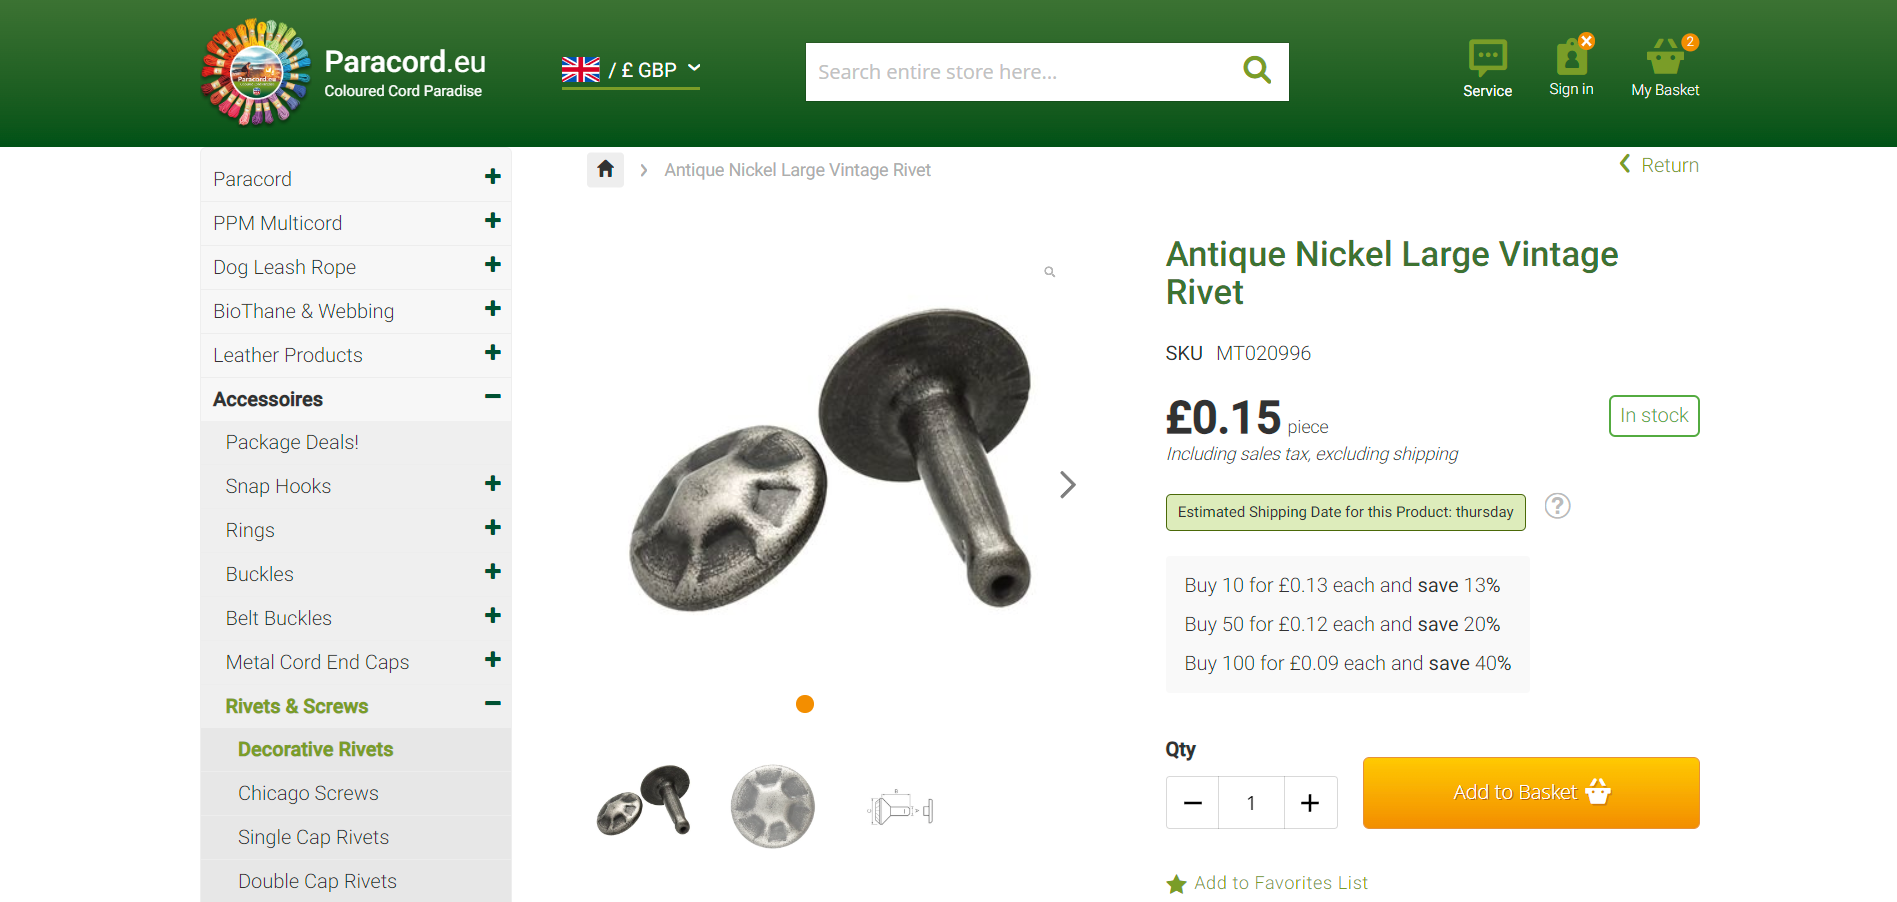
https://www.paracord.co.uk/paracord-accessory/rivets/decorative-rivets/antique-nickel-large-vintage-rivet
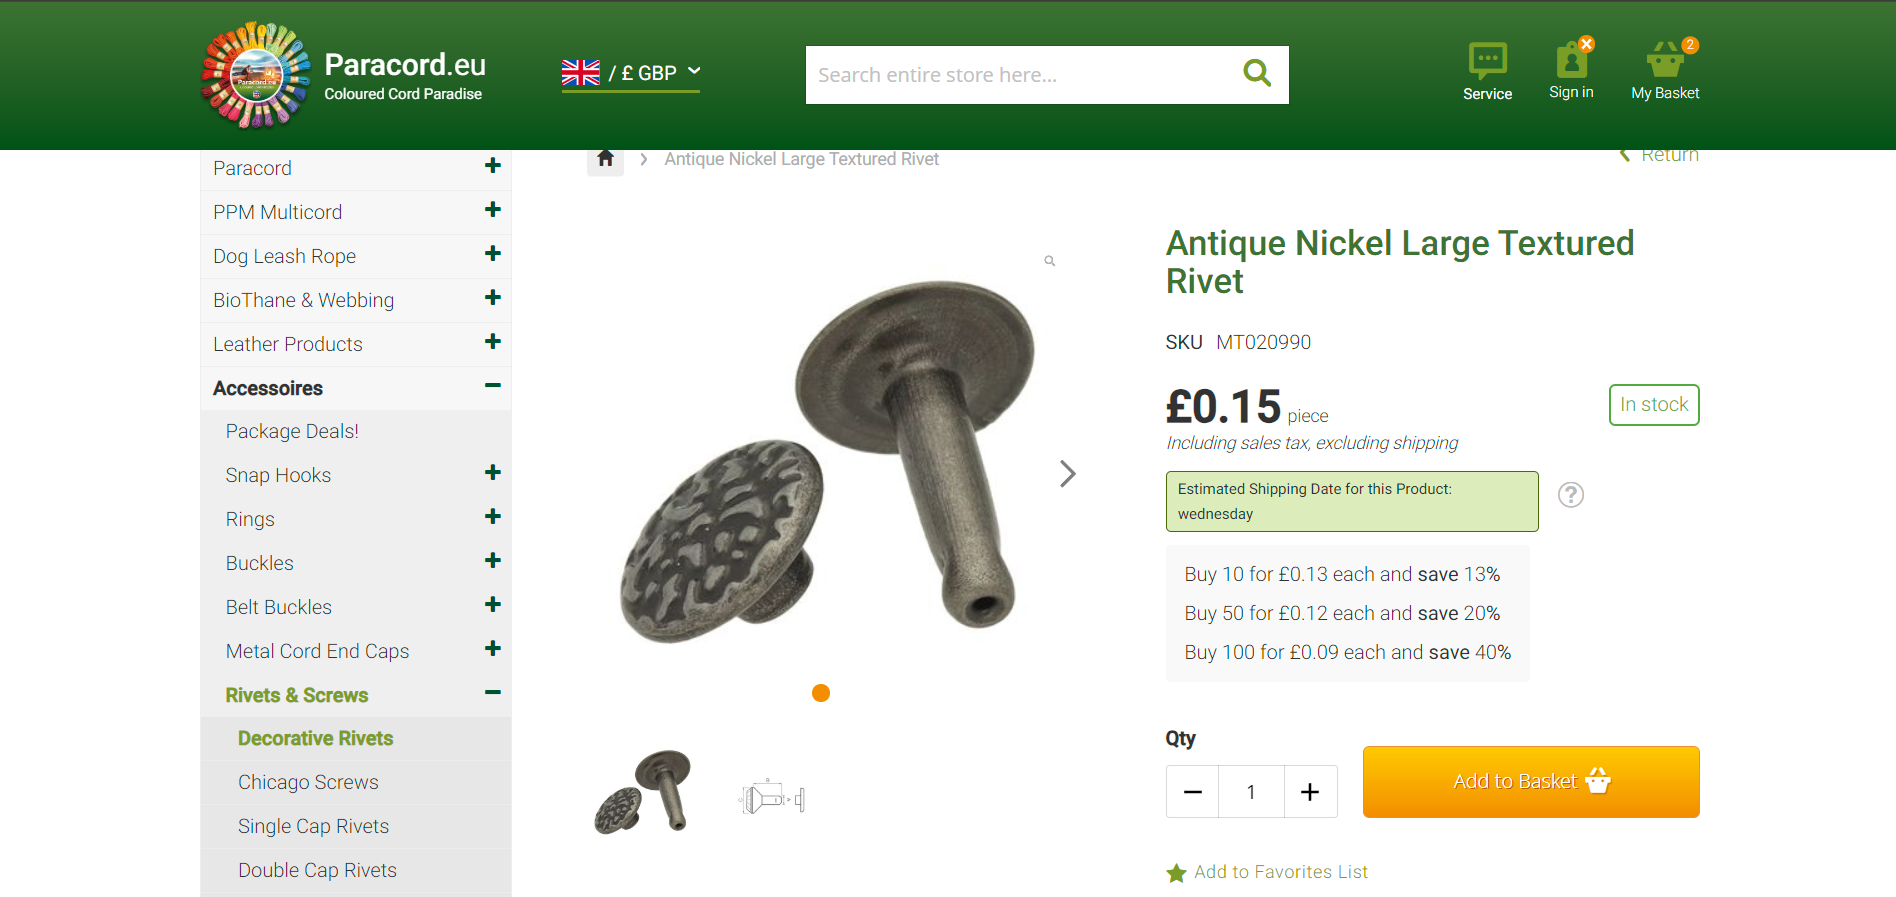
https://www.paracord.co.uk/antique-nickel-large-textured-rivet
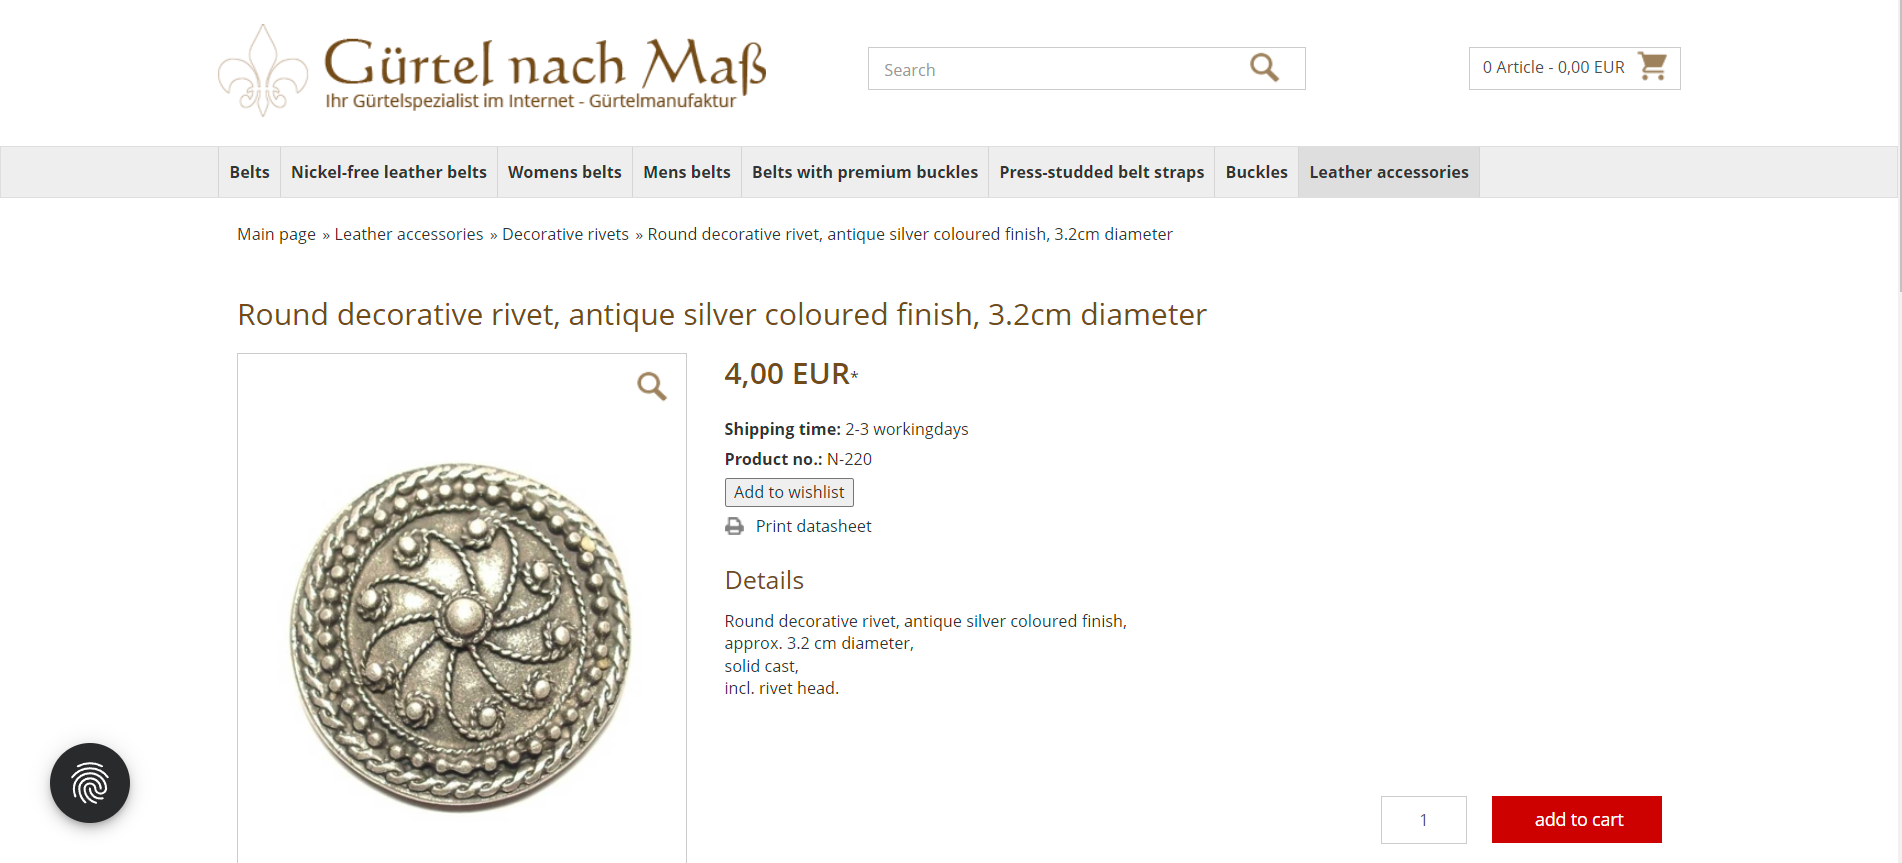
https://www.guertel-nach-mass.de/round-decorative-rivet-antique-silver-coloured-finish-32cm-diameter.html
I investigated a variety of different decorative leather rivets but found that either the quality looked poor, or they were being sold individually making the overall cost very high. Additionally, I couldn't find rivets with a long enough shaft to go through the 3 layers of metal and 2 layers of leather on the shoulder piece.
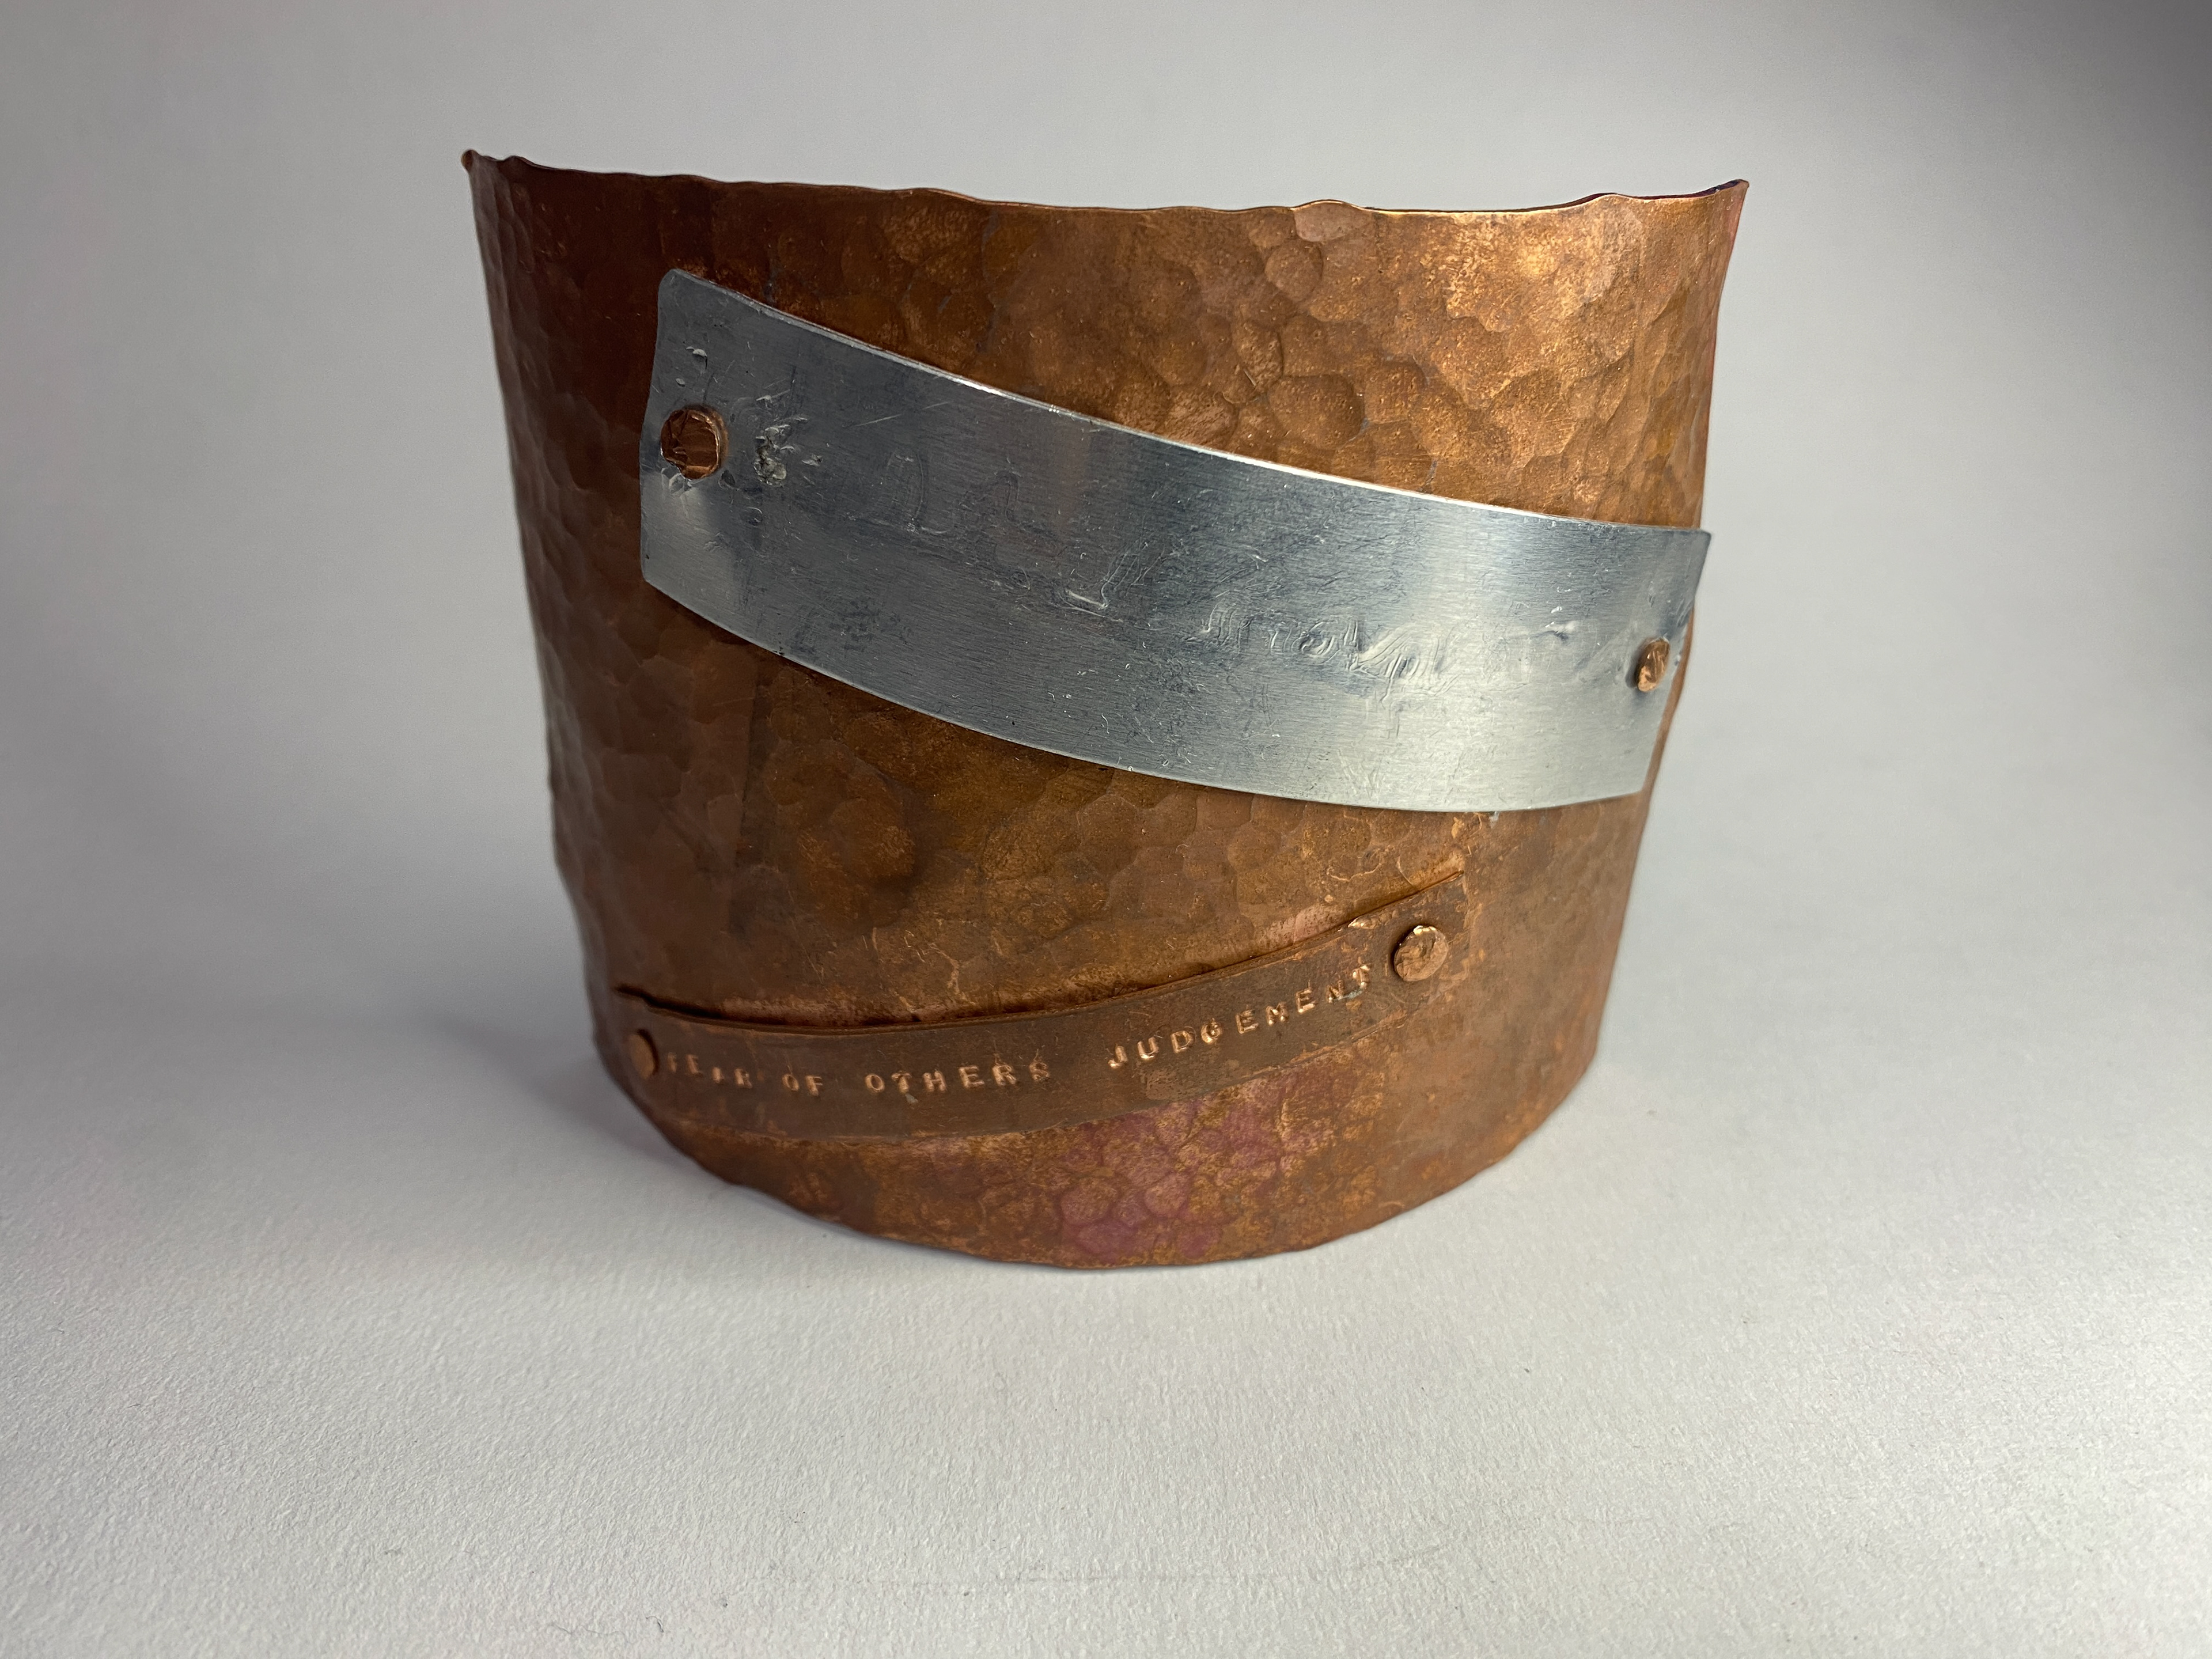
Therefore, I have chosen to use the traditional leather copper rivets for all my joints. I will use the rivet head on the back and place the shaft through so I can keep the hand hammered aesthetic of the metal-to-metal joints. With the leather I need to use the washers that disperse the force when riveting. Therefore, I will place these on the back and the head on the front of the piece. For all the rivet heads I will use a chasing tool to create perfectly flush and domed heads whilst keeping the handmade aesthetic.
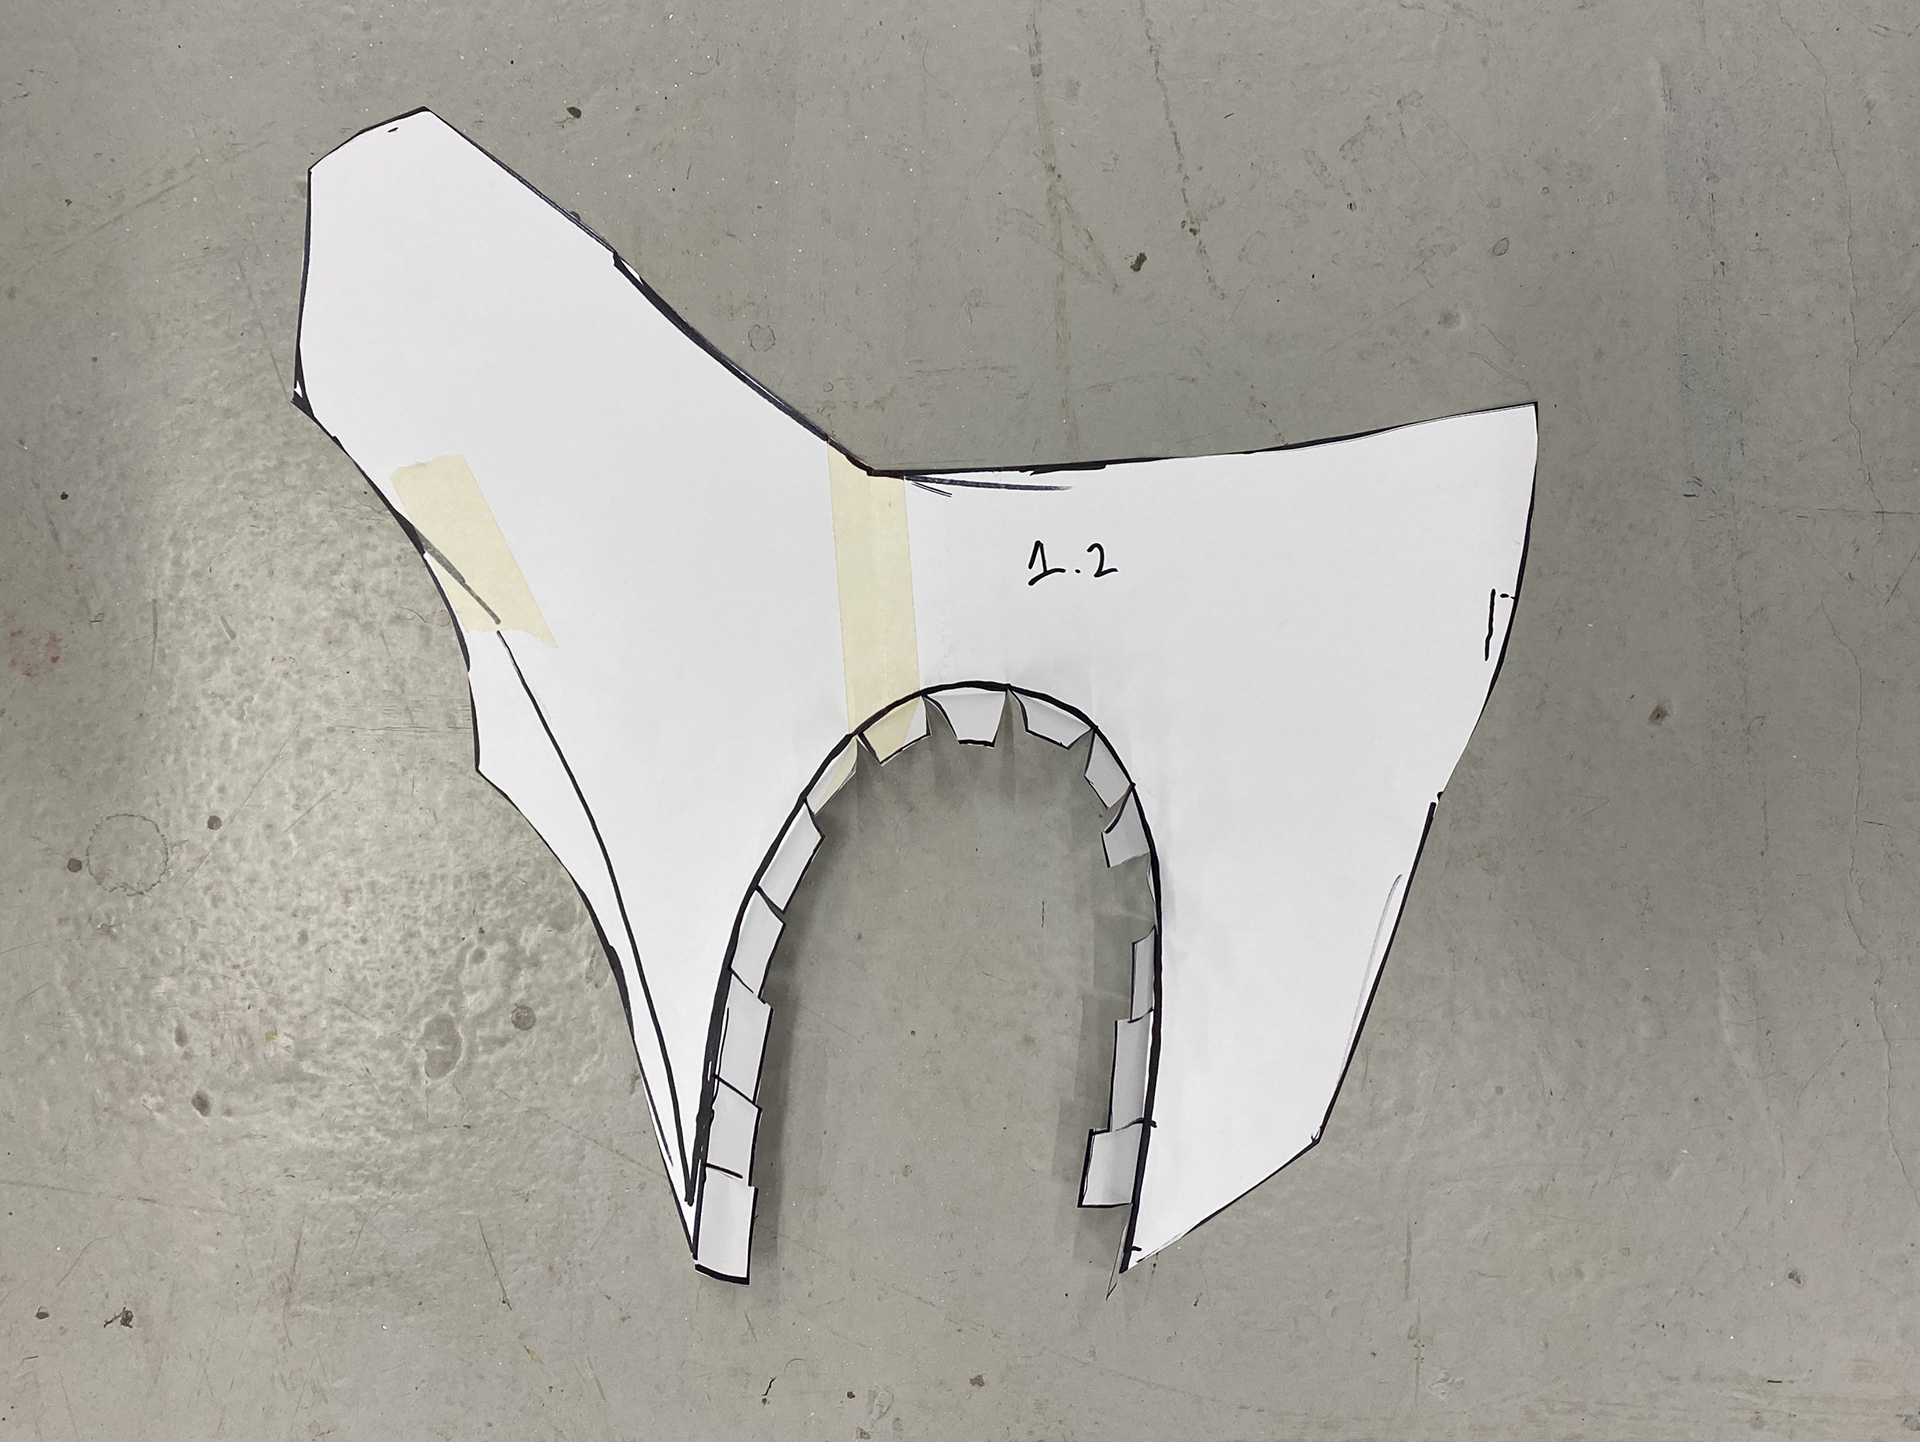
Developing the lower shoulder area
Looking at my first design, I decided that the grey paper section needed adjustment as it didn’t frame the shoulder or work well with the rest of the current design.
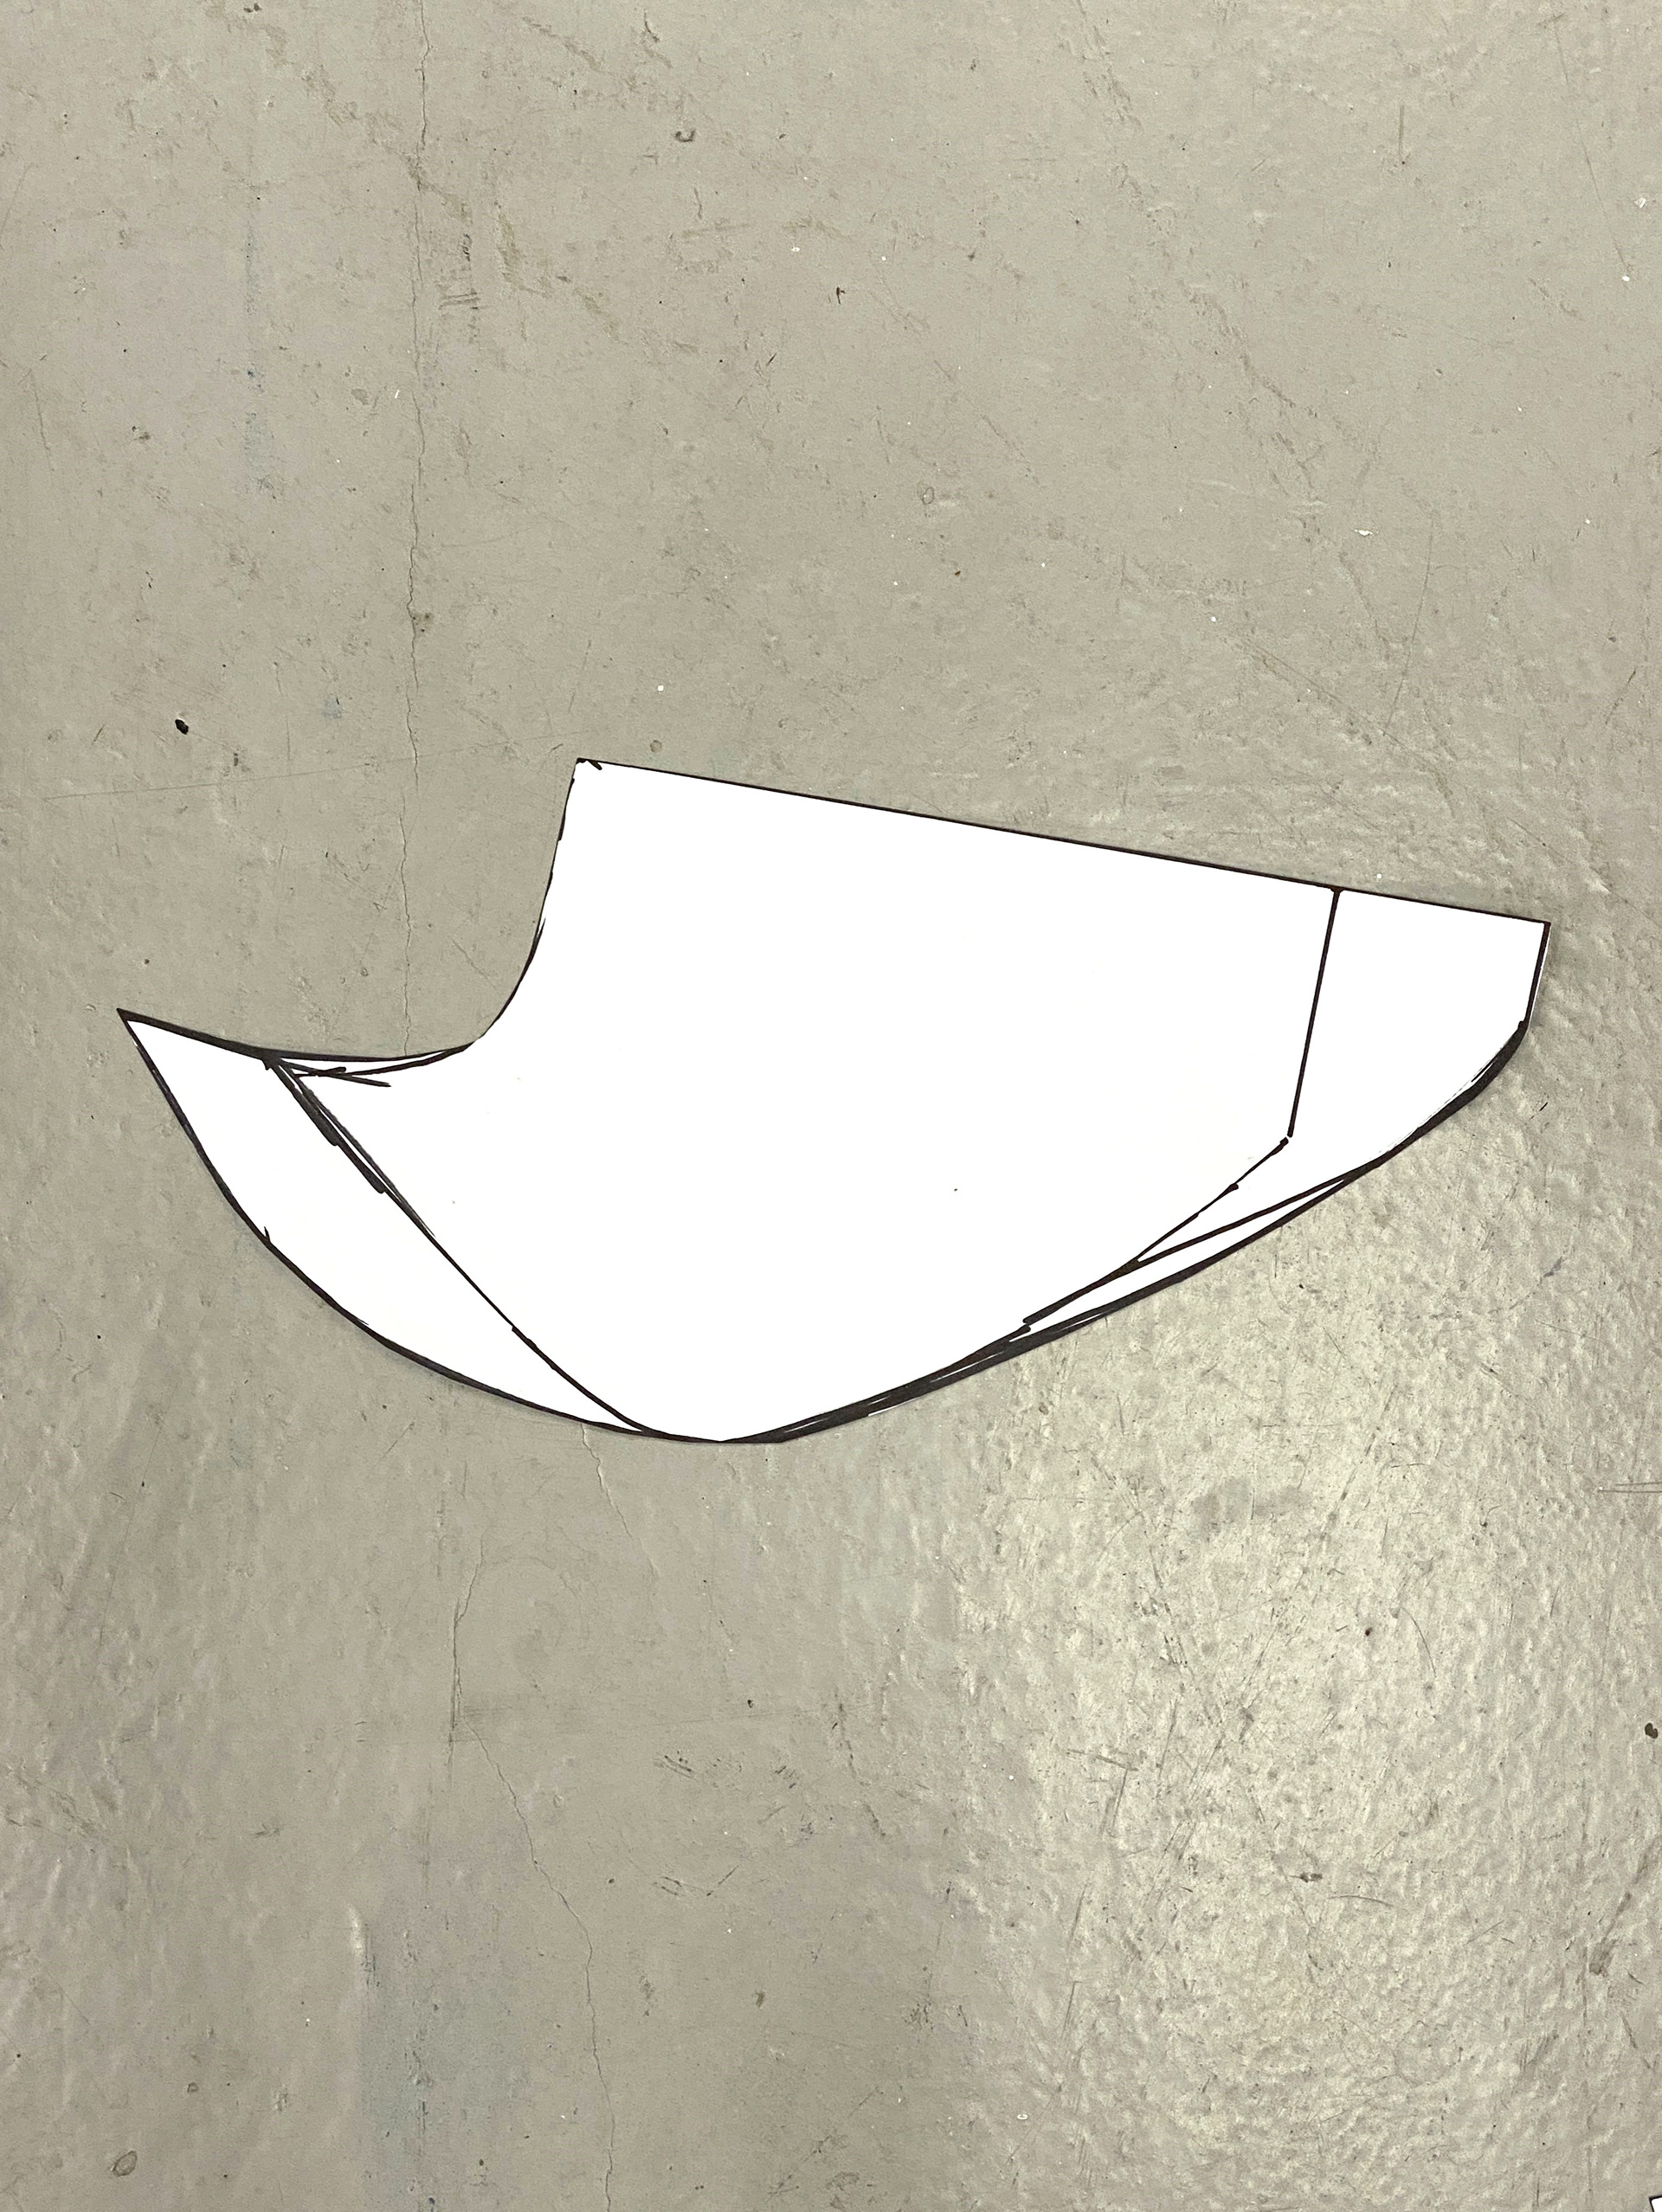
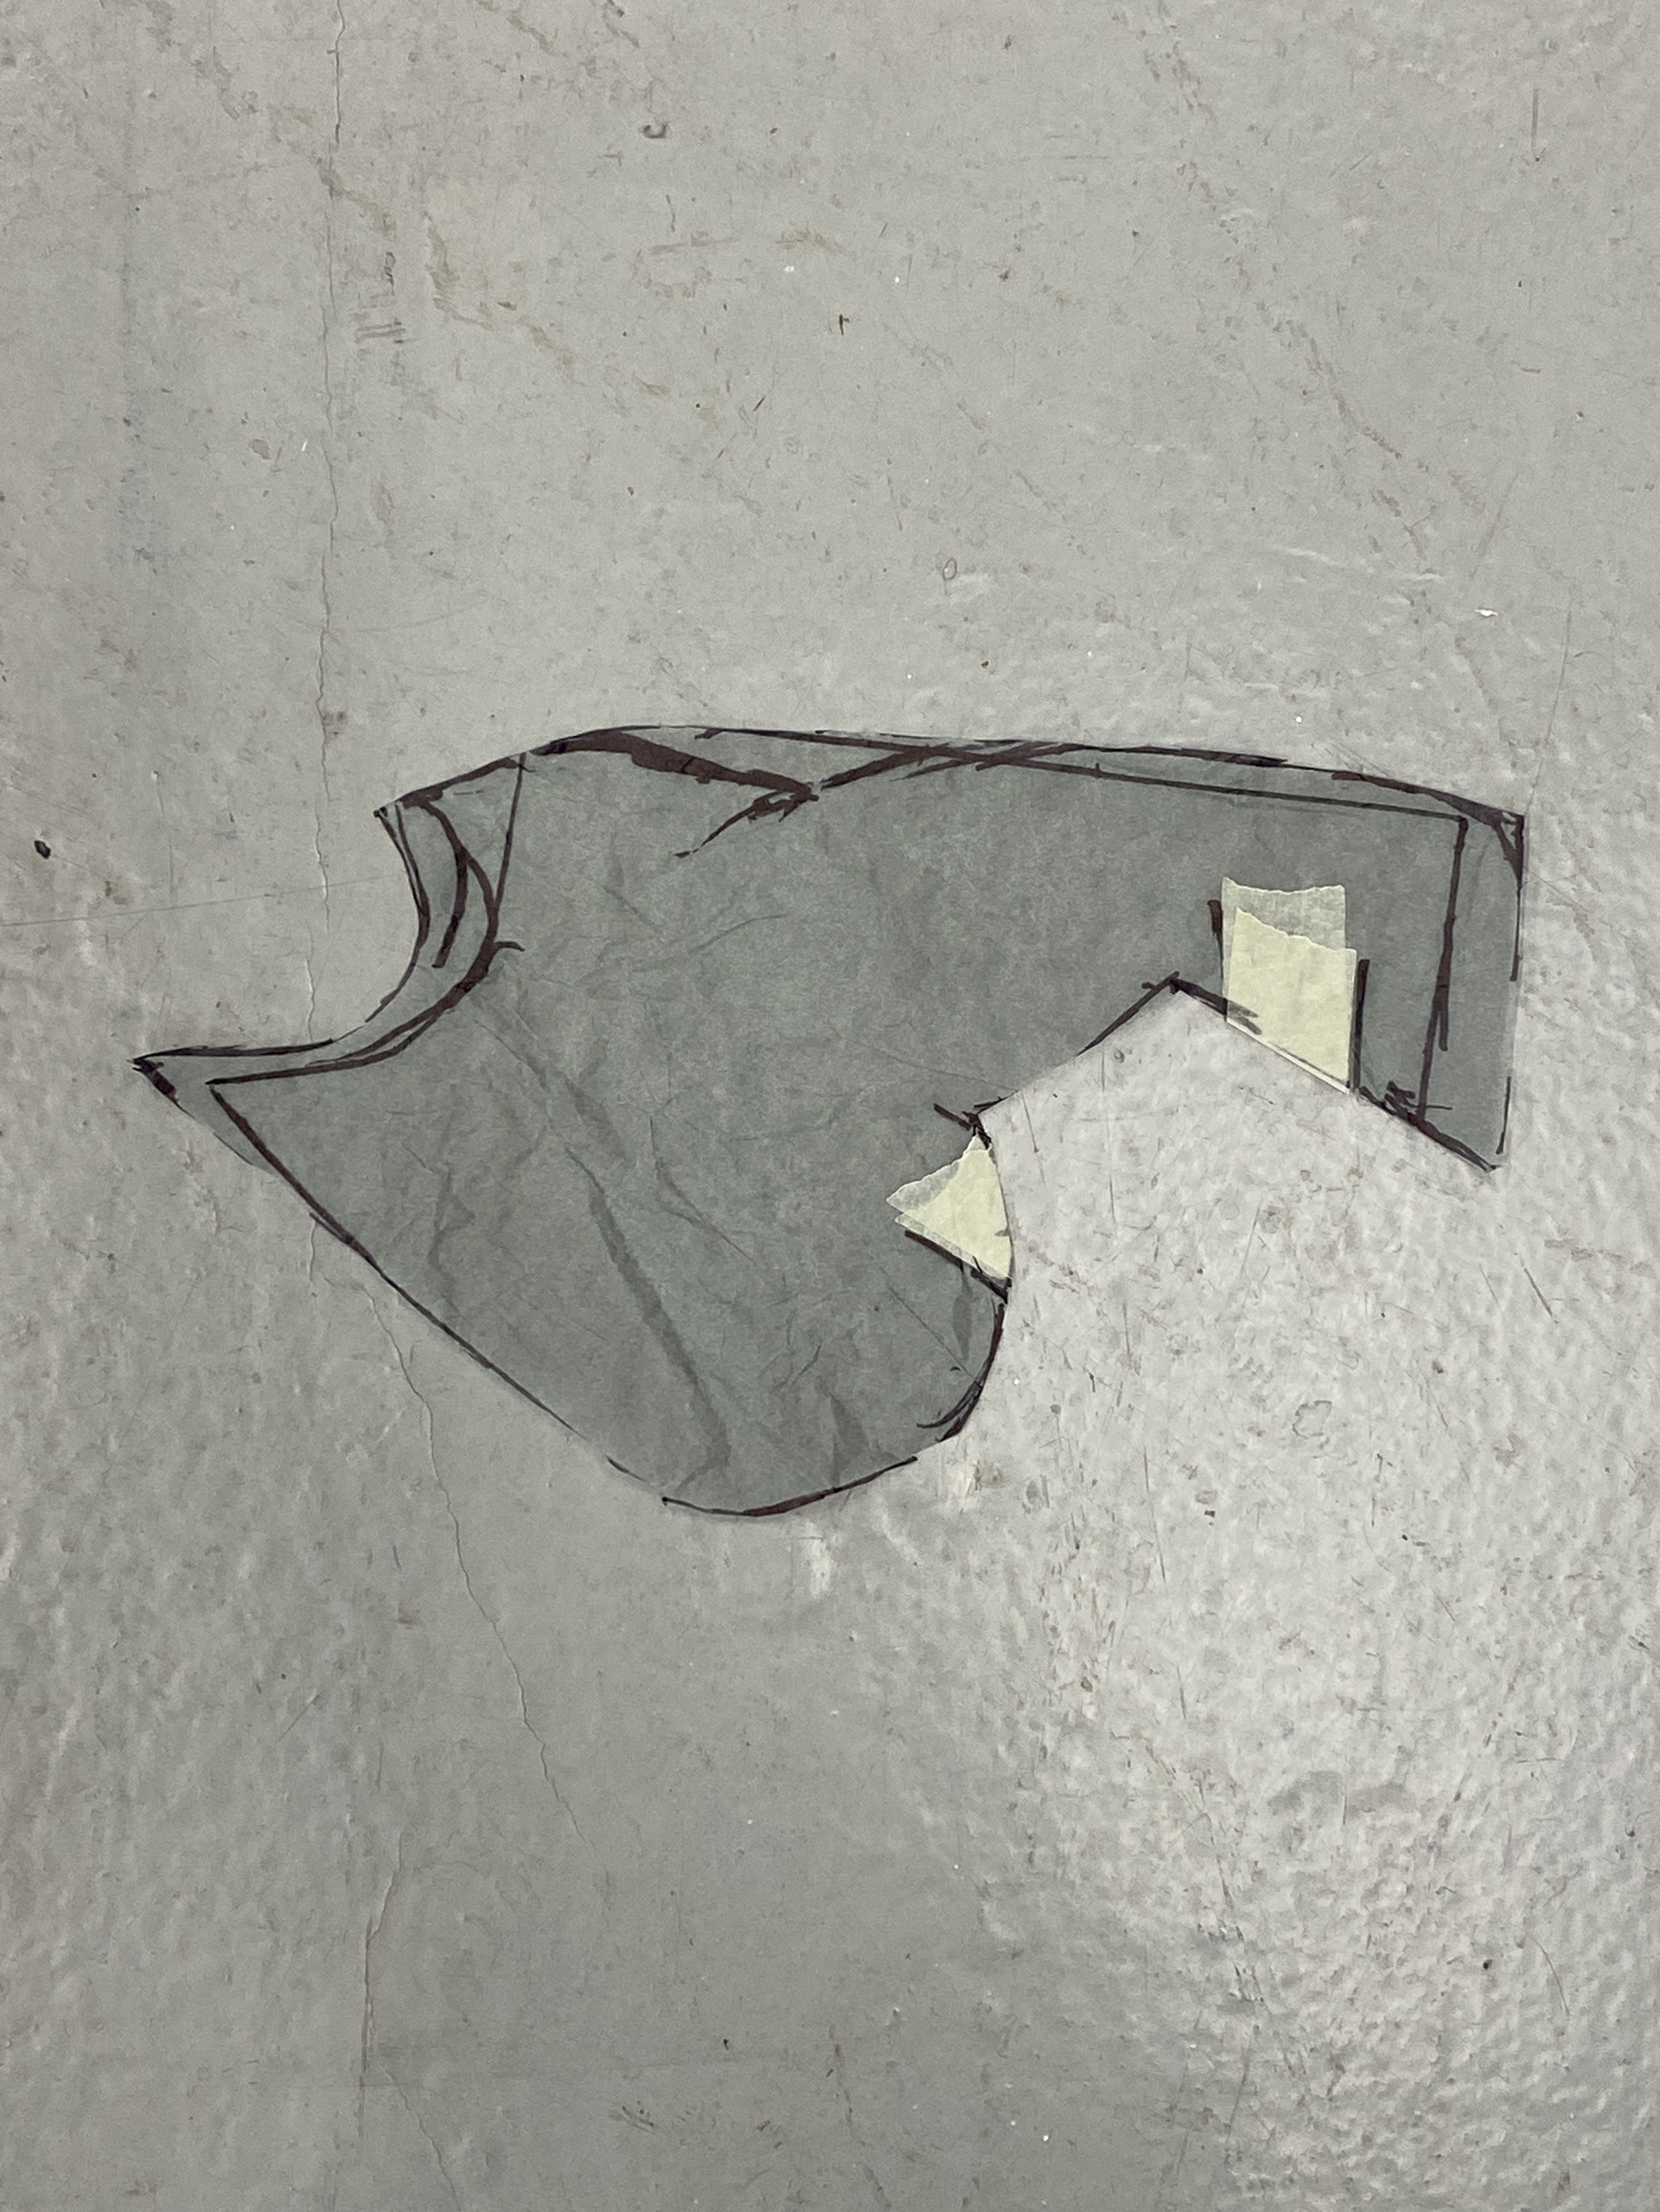
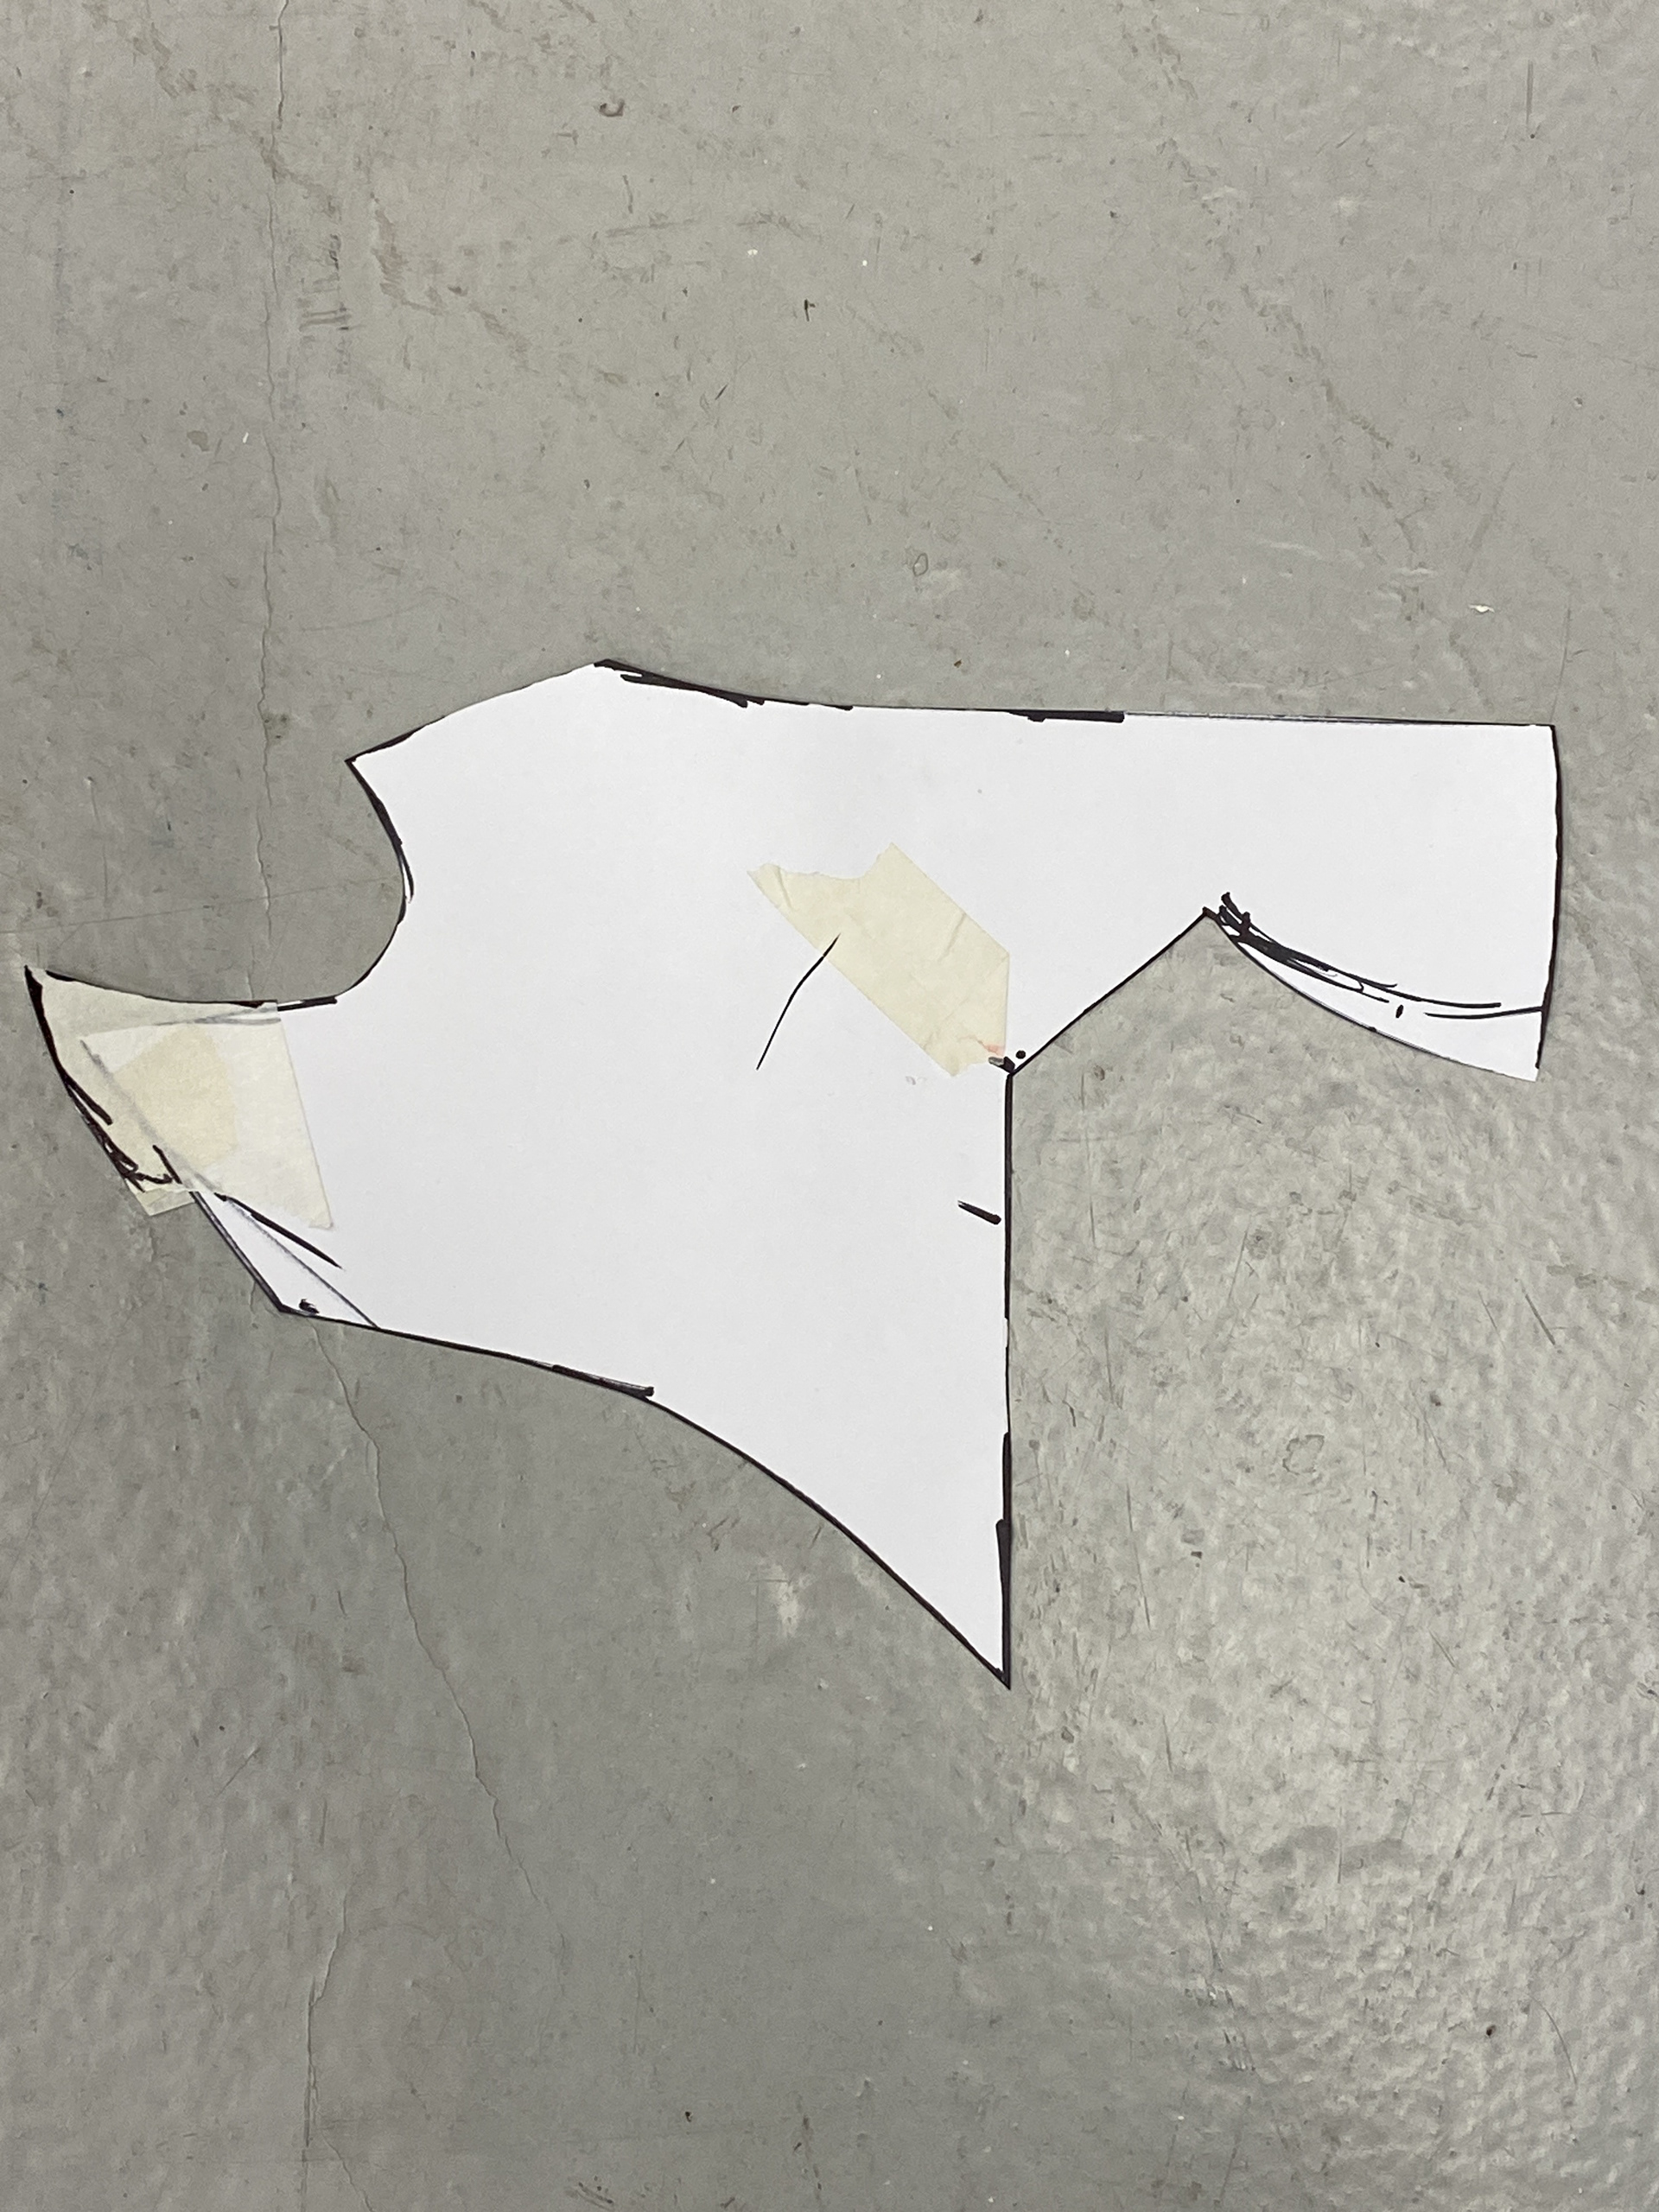
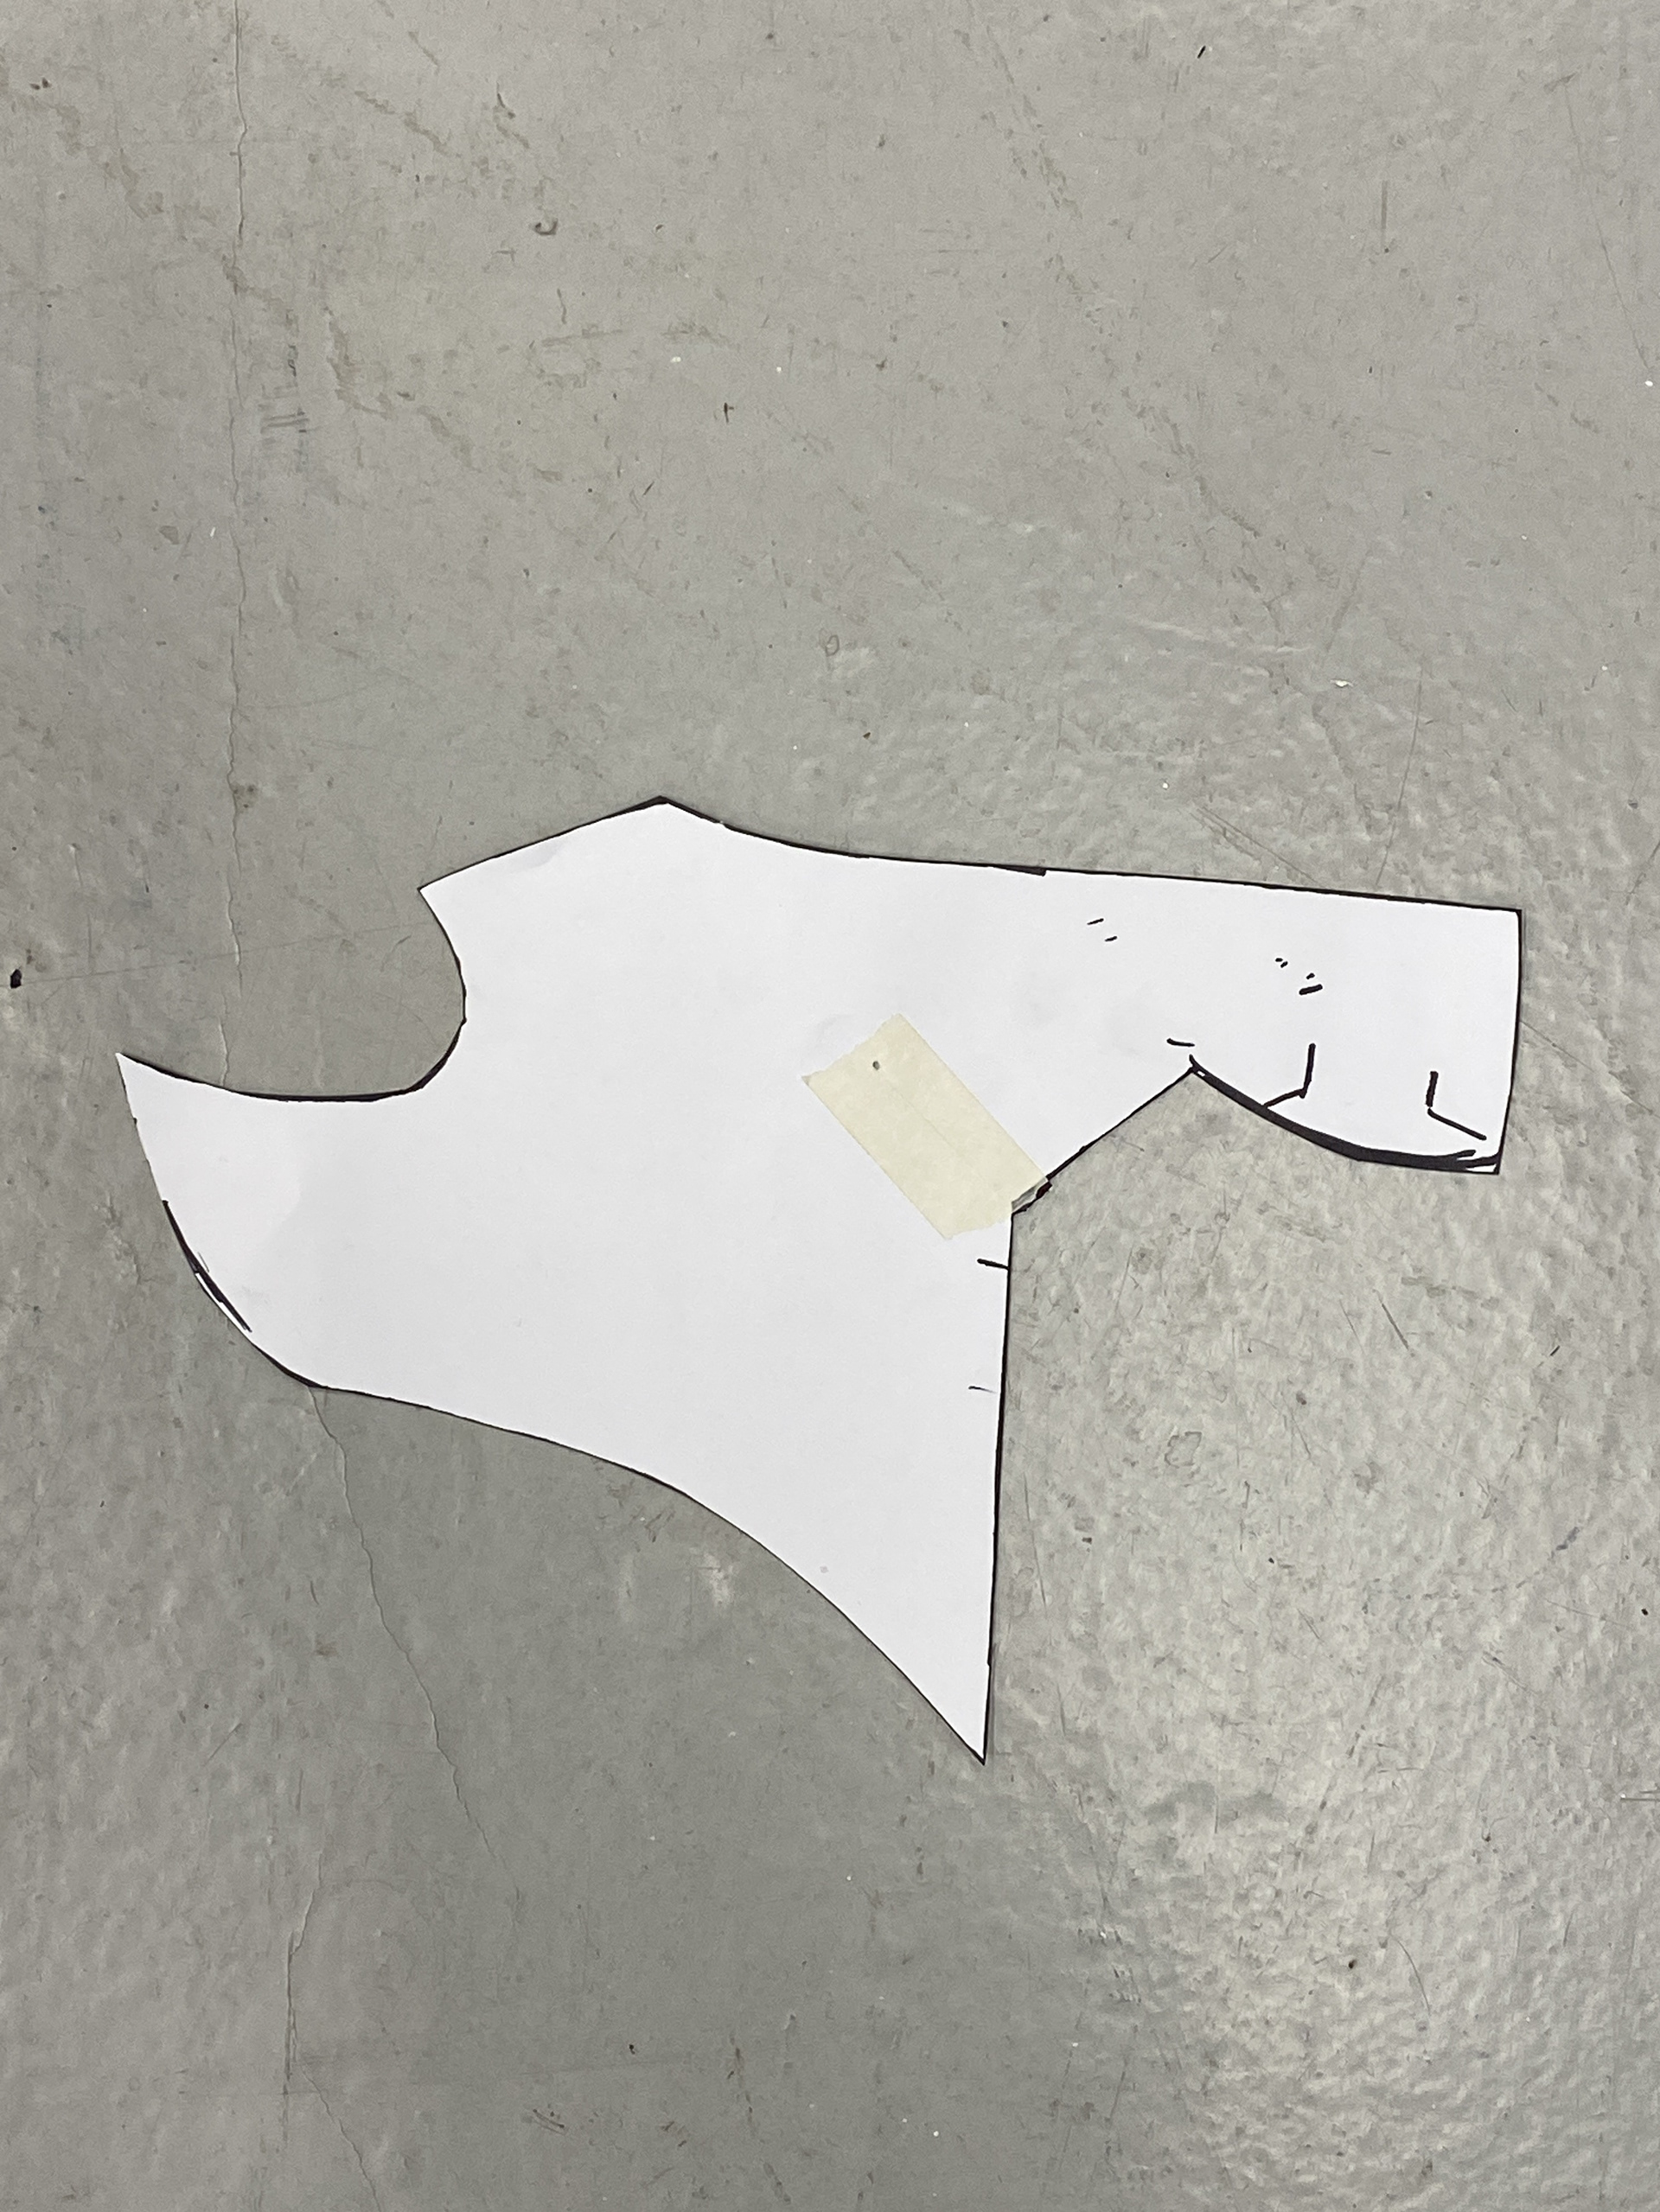
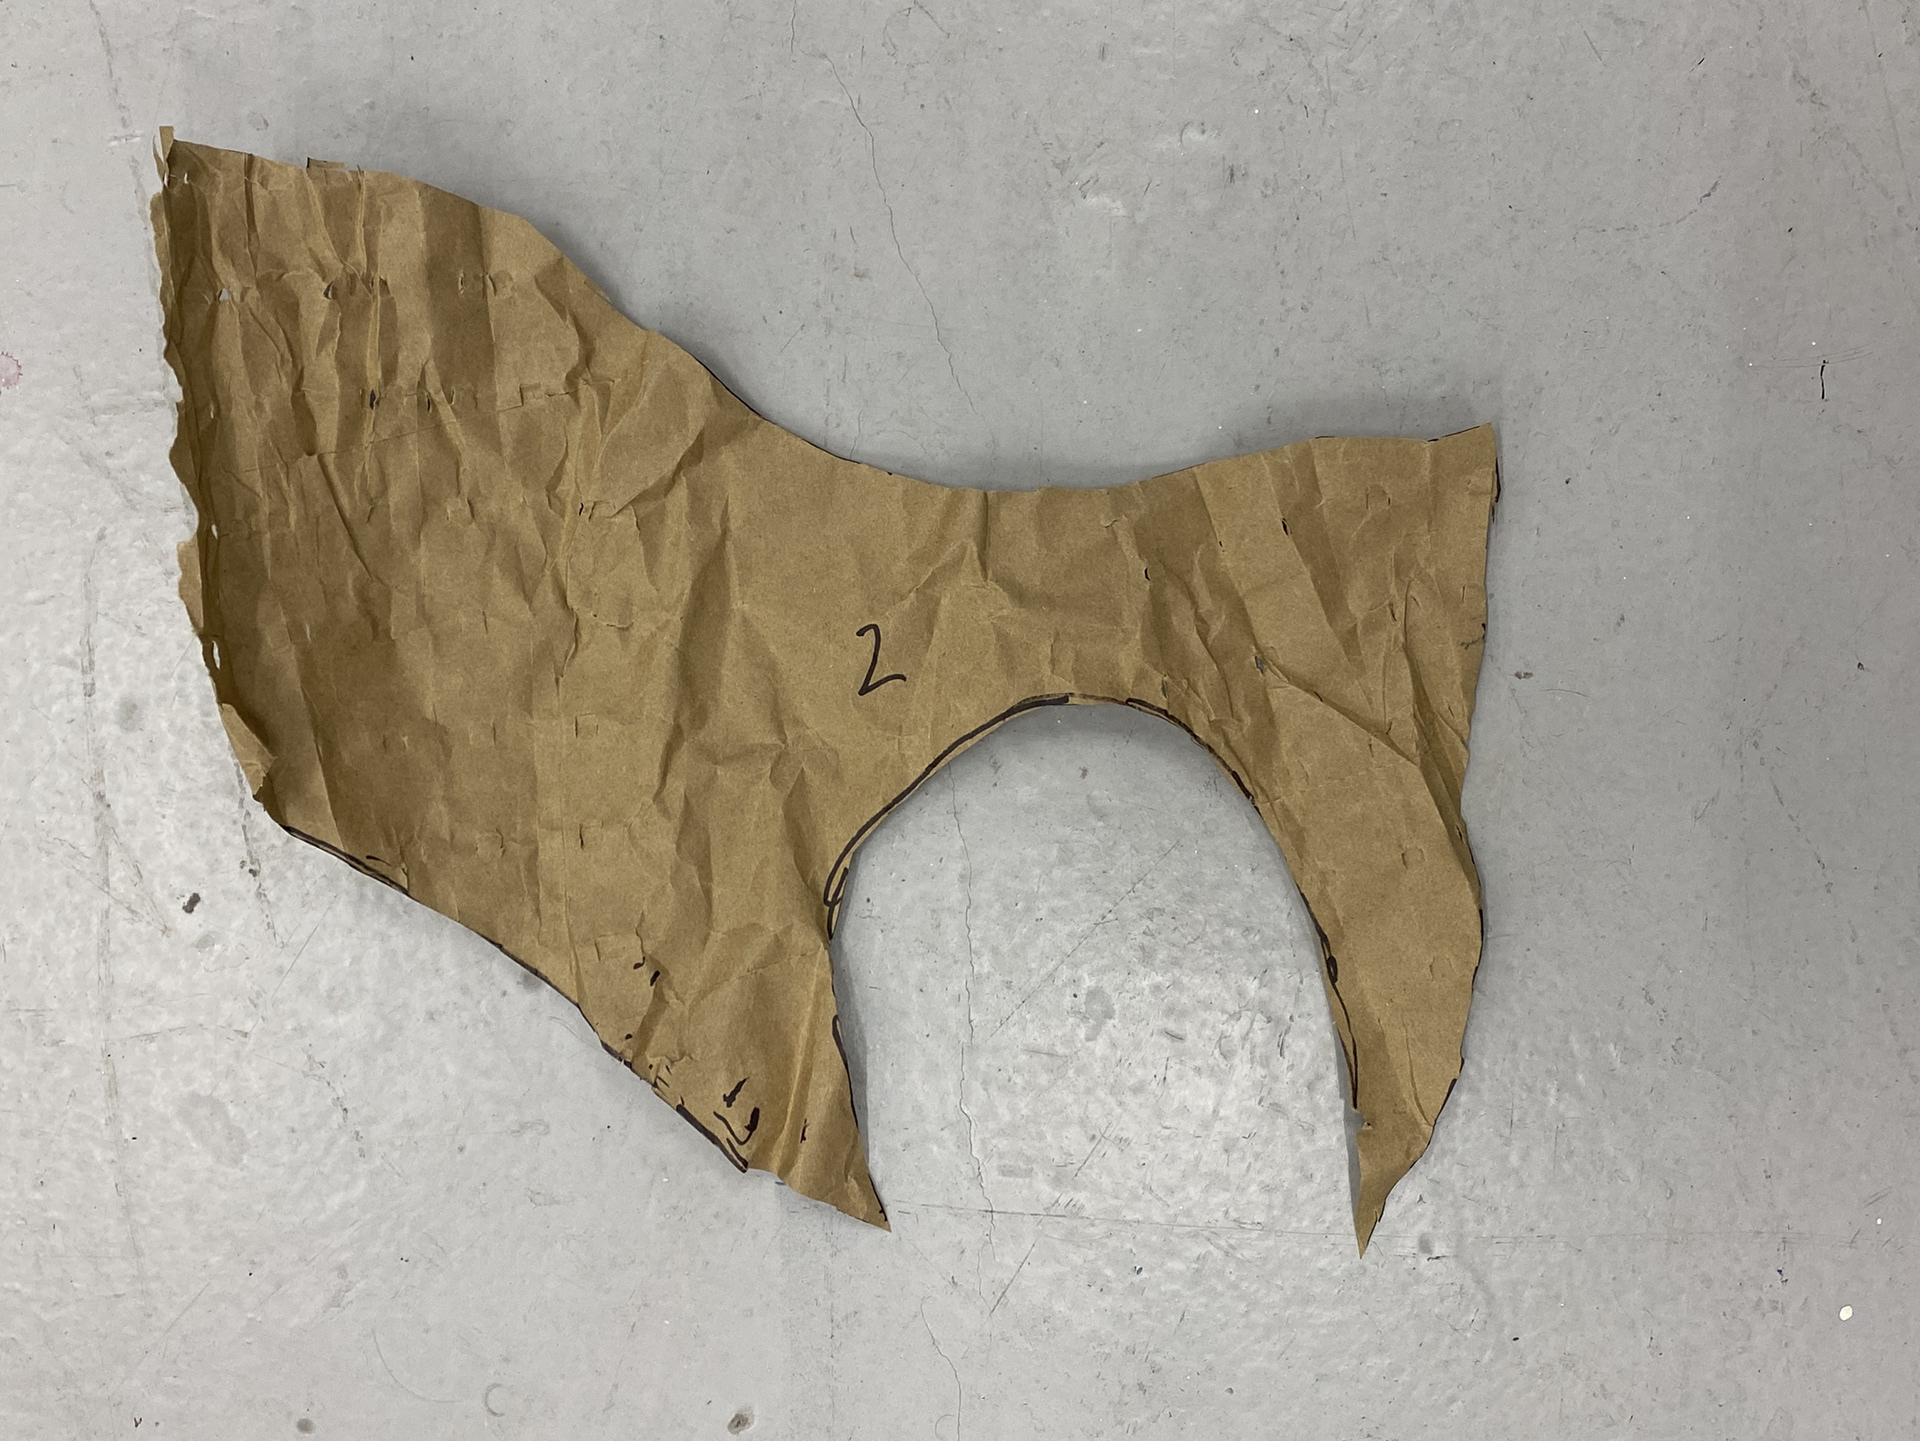
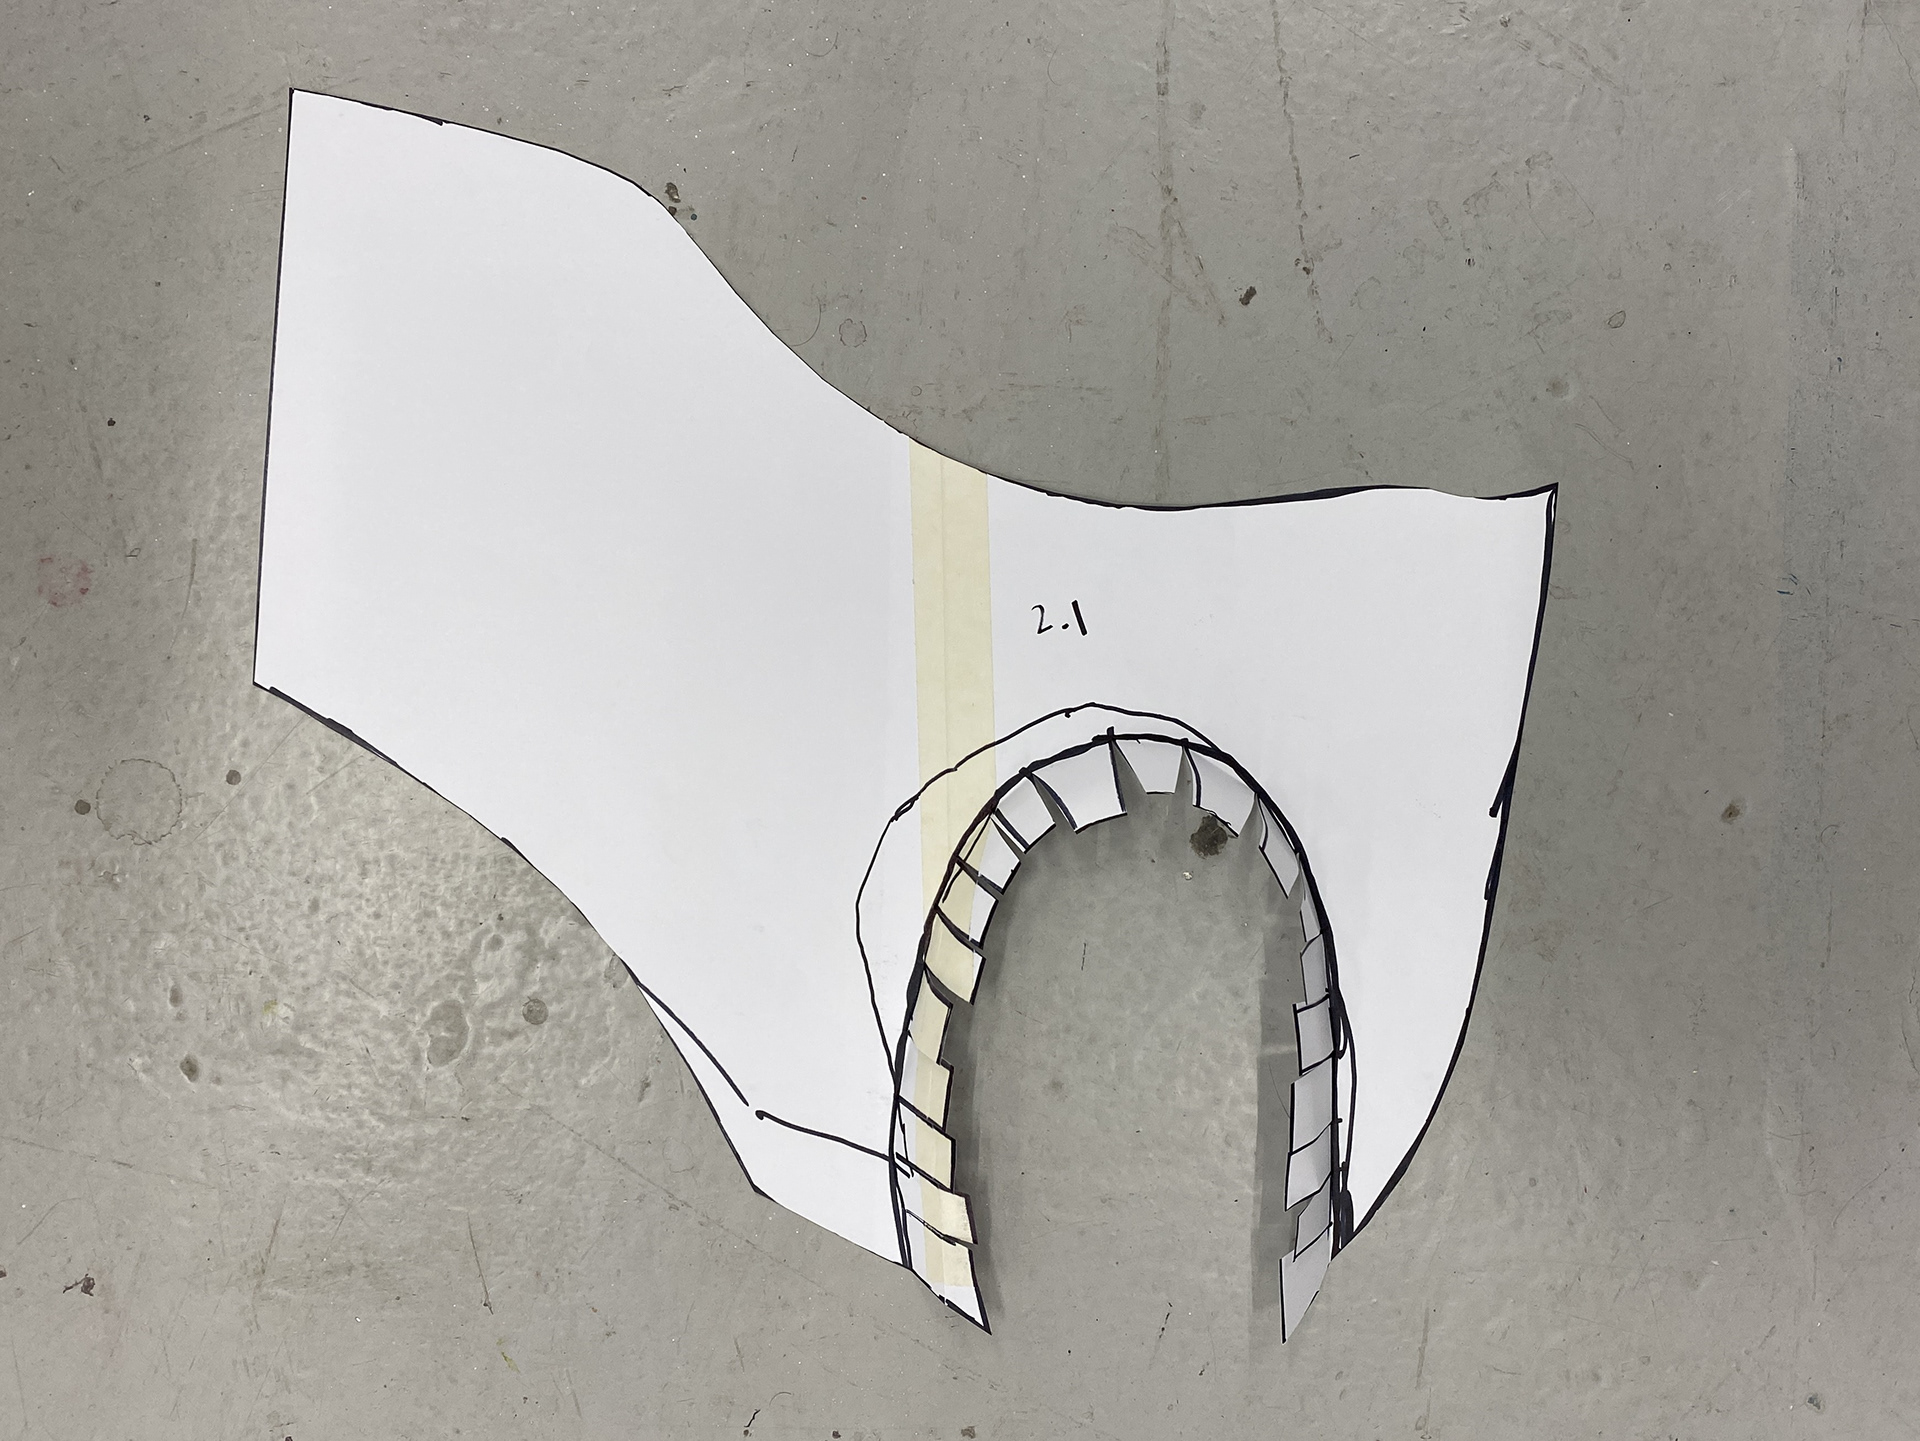
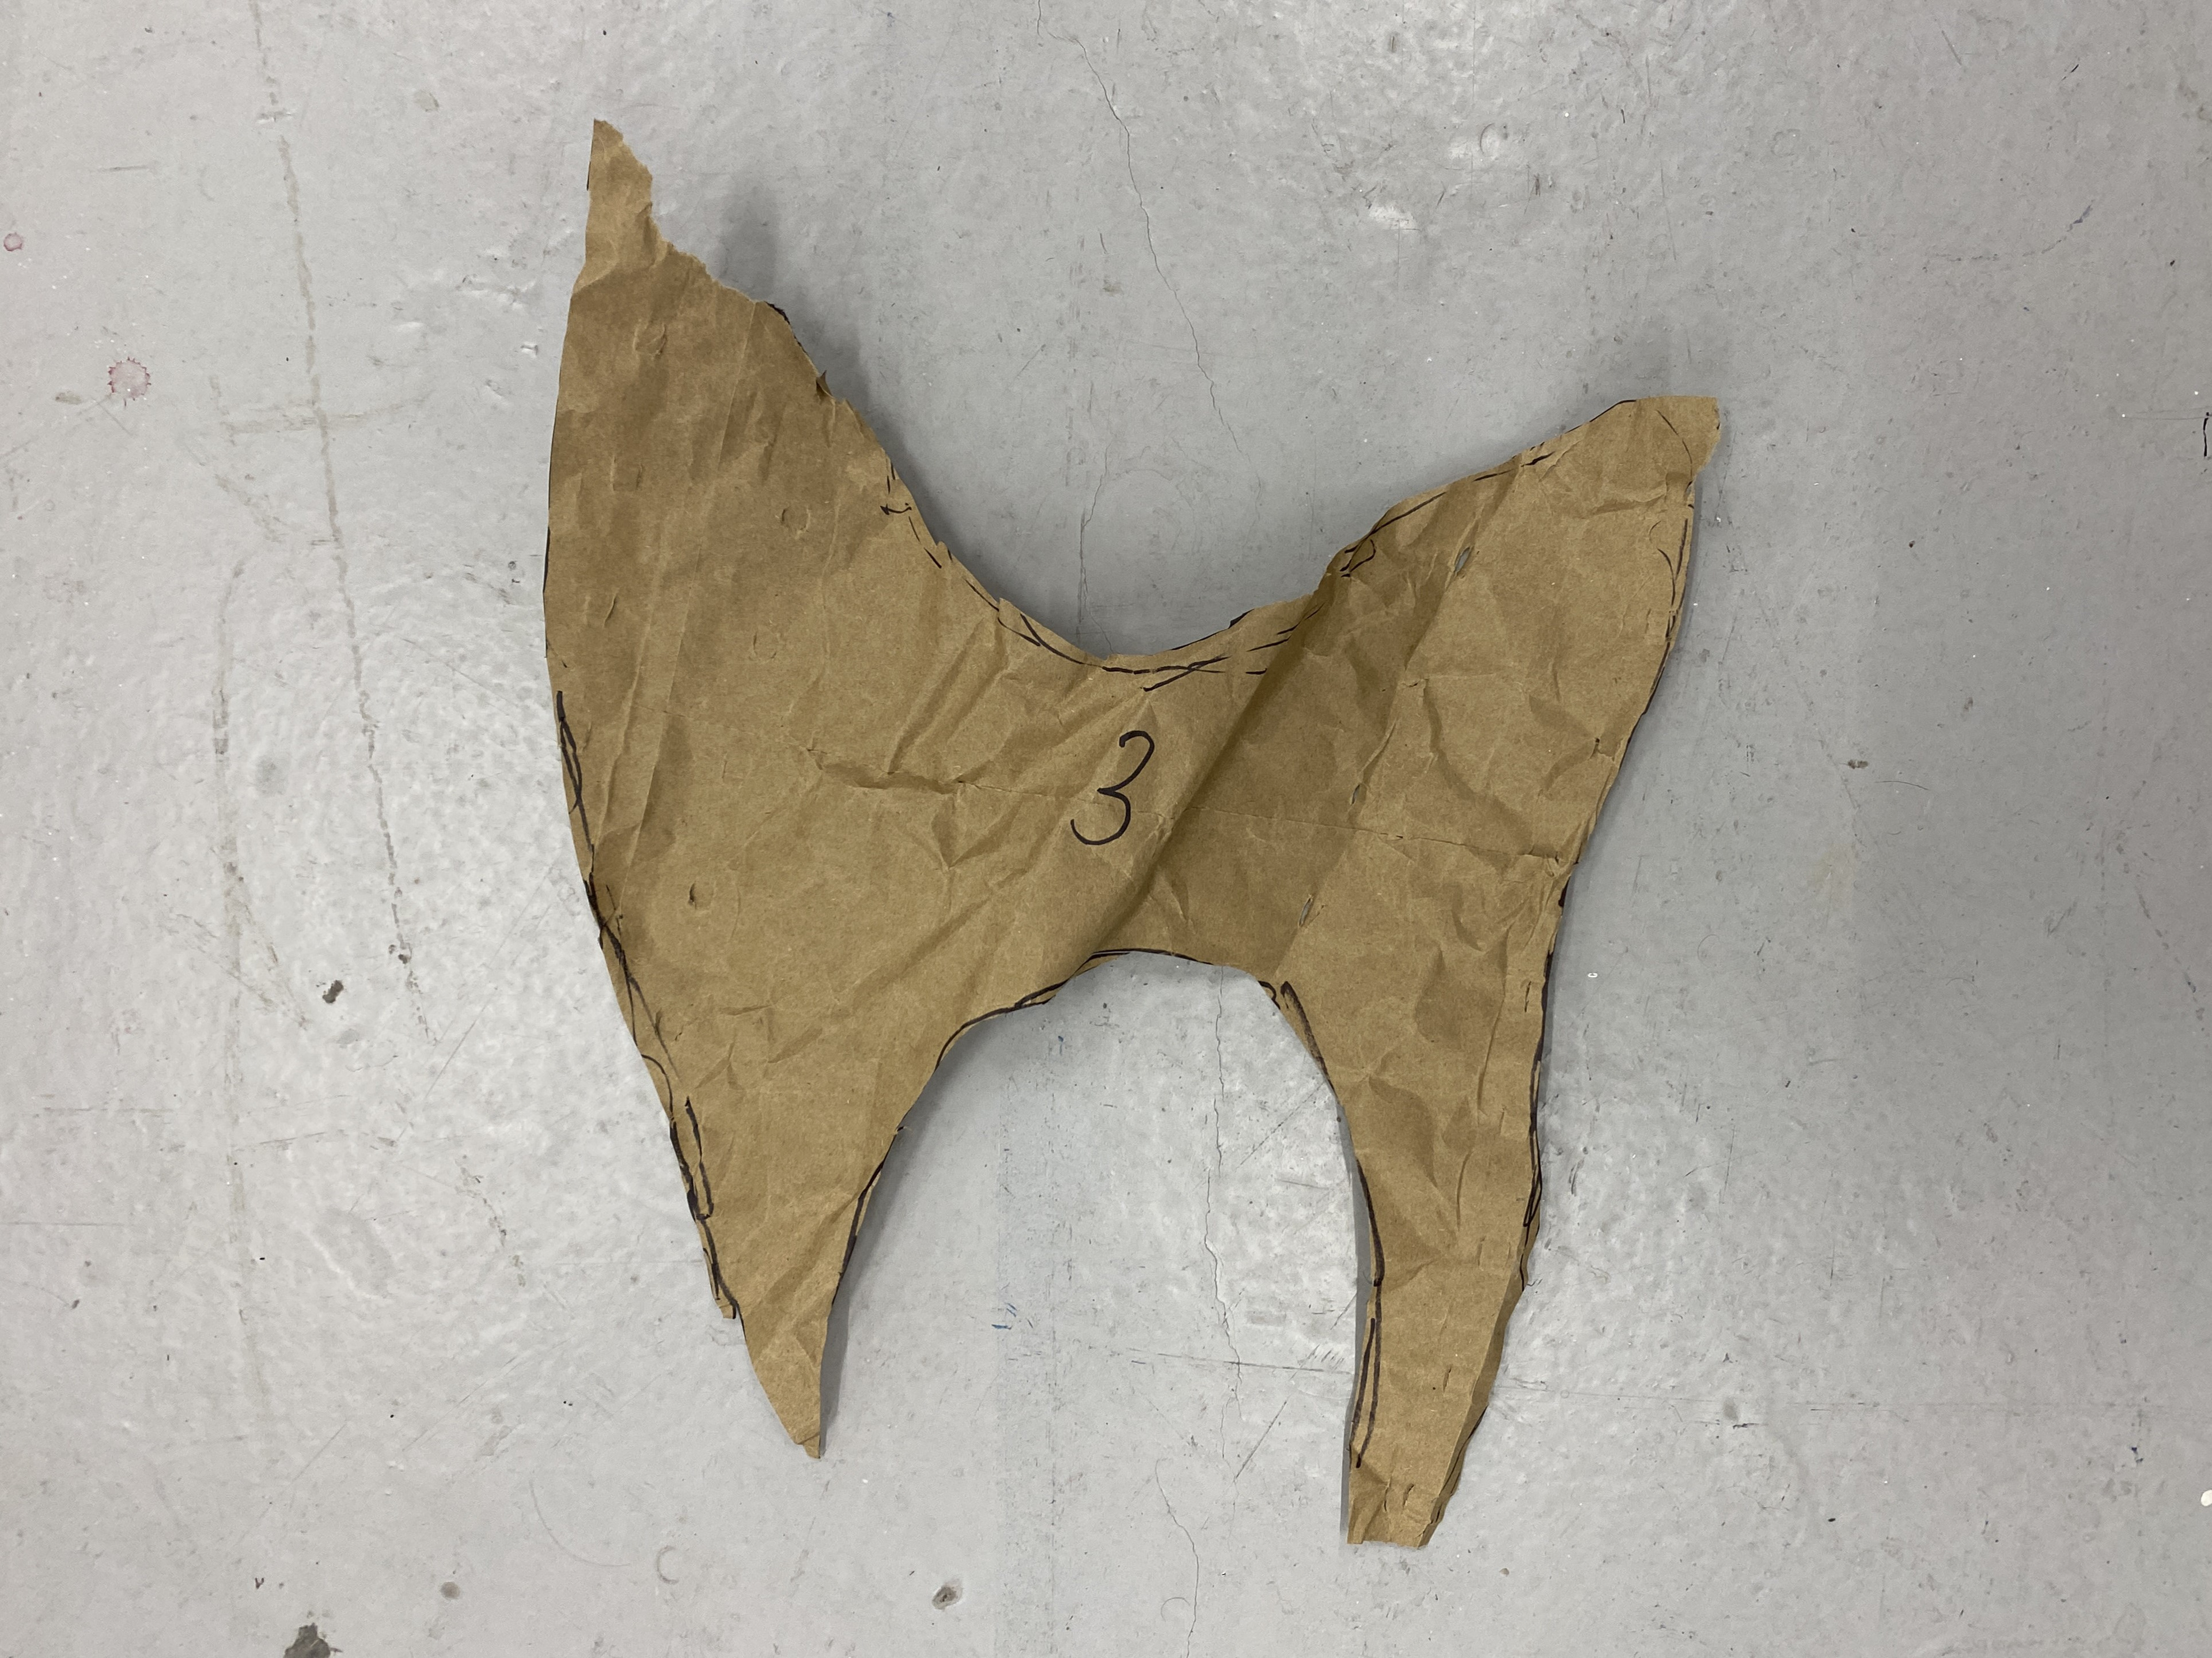
I went through many design iterations making templates and adjusting from one to another. I pinned each onto the cast and reflected and changed each line or element until I felt that the piece simultaneously enhanced the curves and form of the shoulder and created dynamic movement to cover the largely flat and uniform surface. A main consideration was the visual interplay between it and the top shoulder piece. I liked the bands of paper that connect the two and see these as aluminium with texted embossed into the surface.

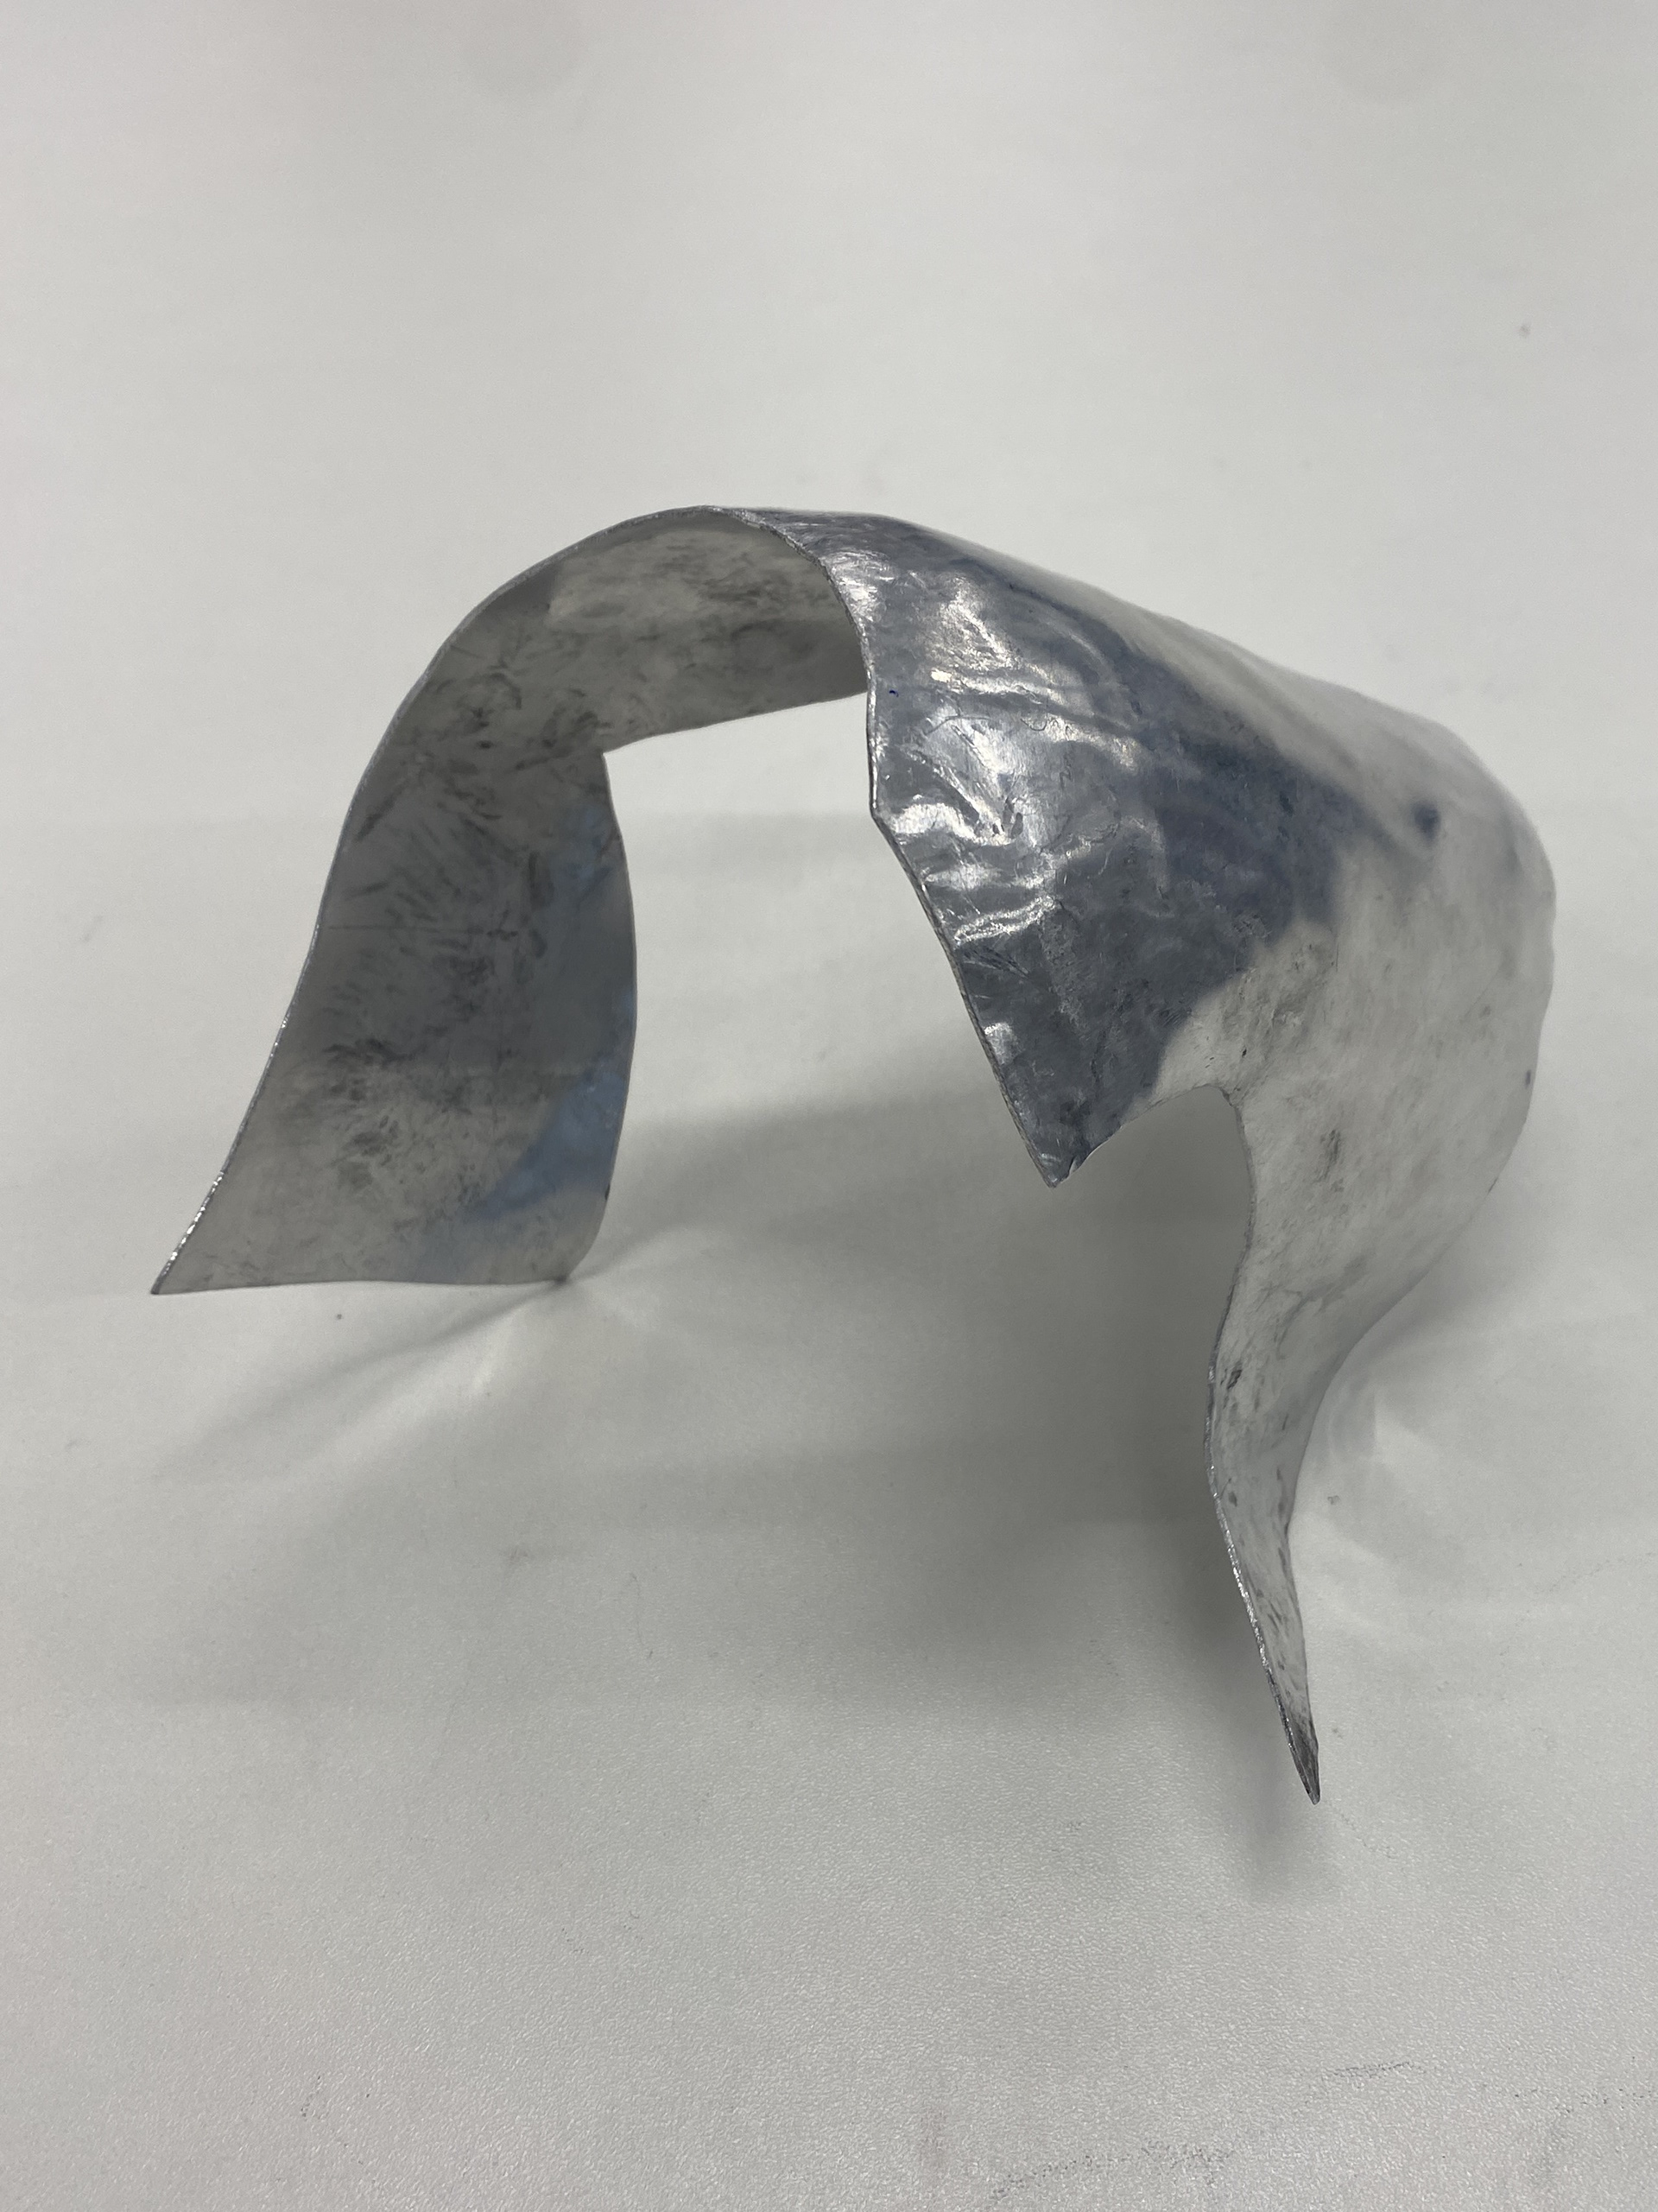
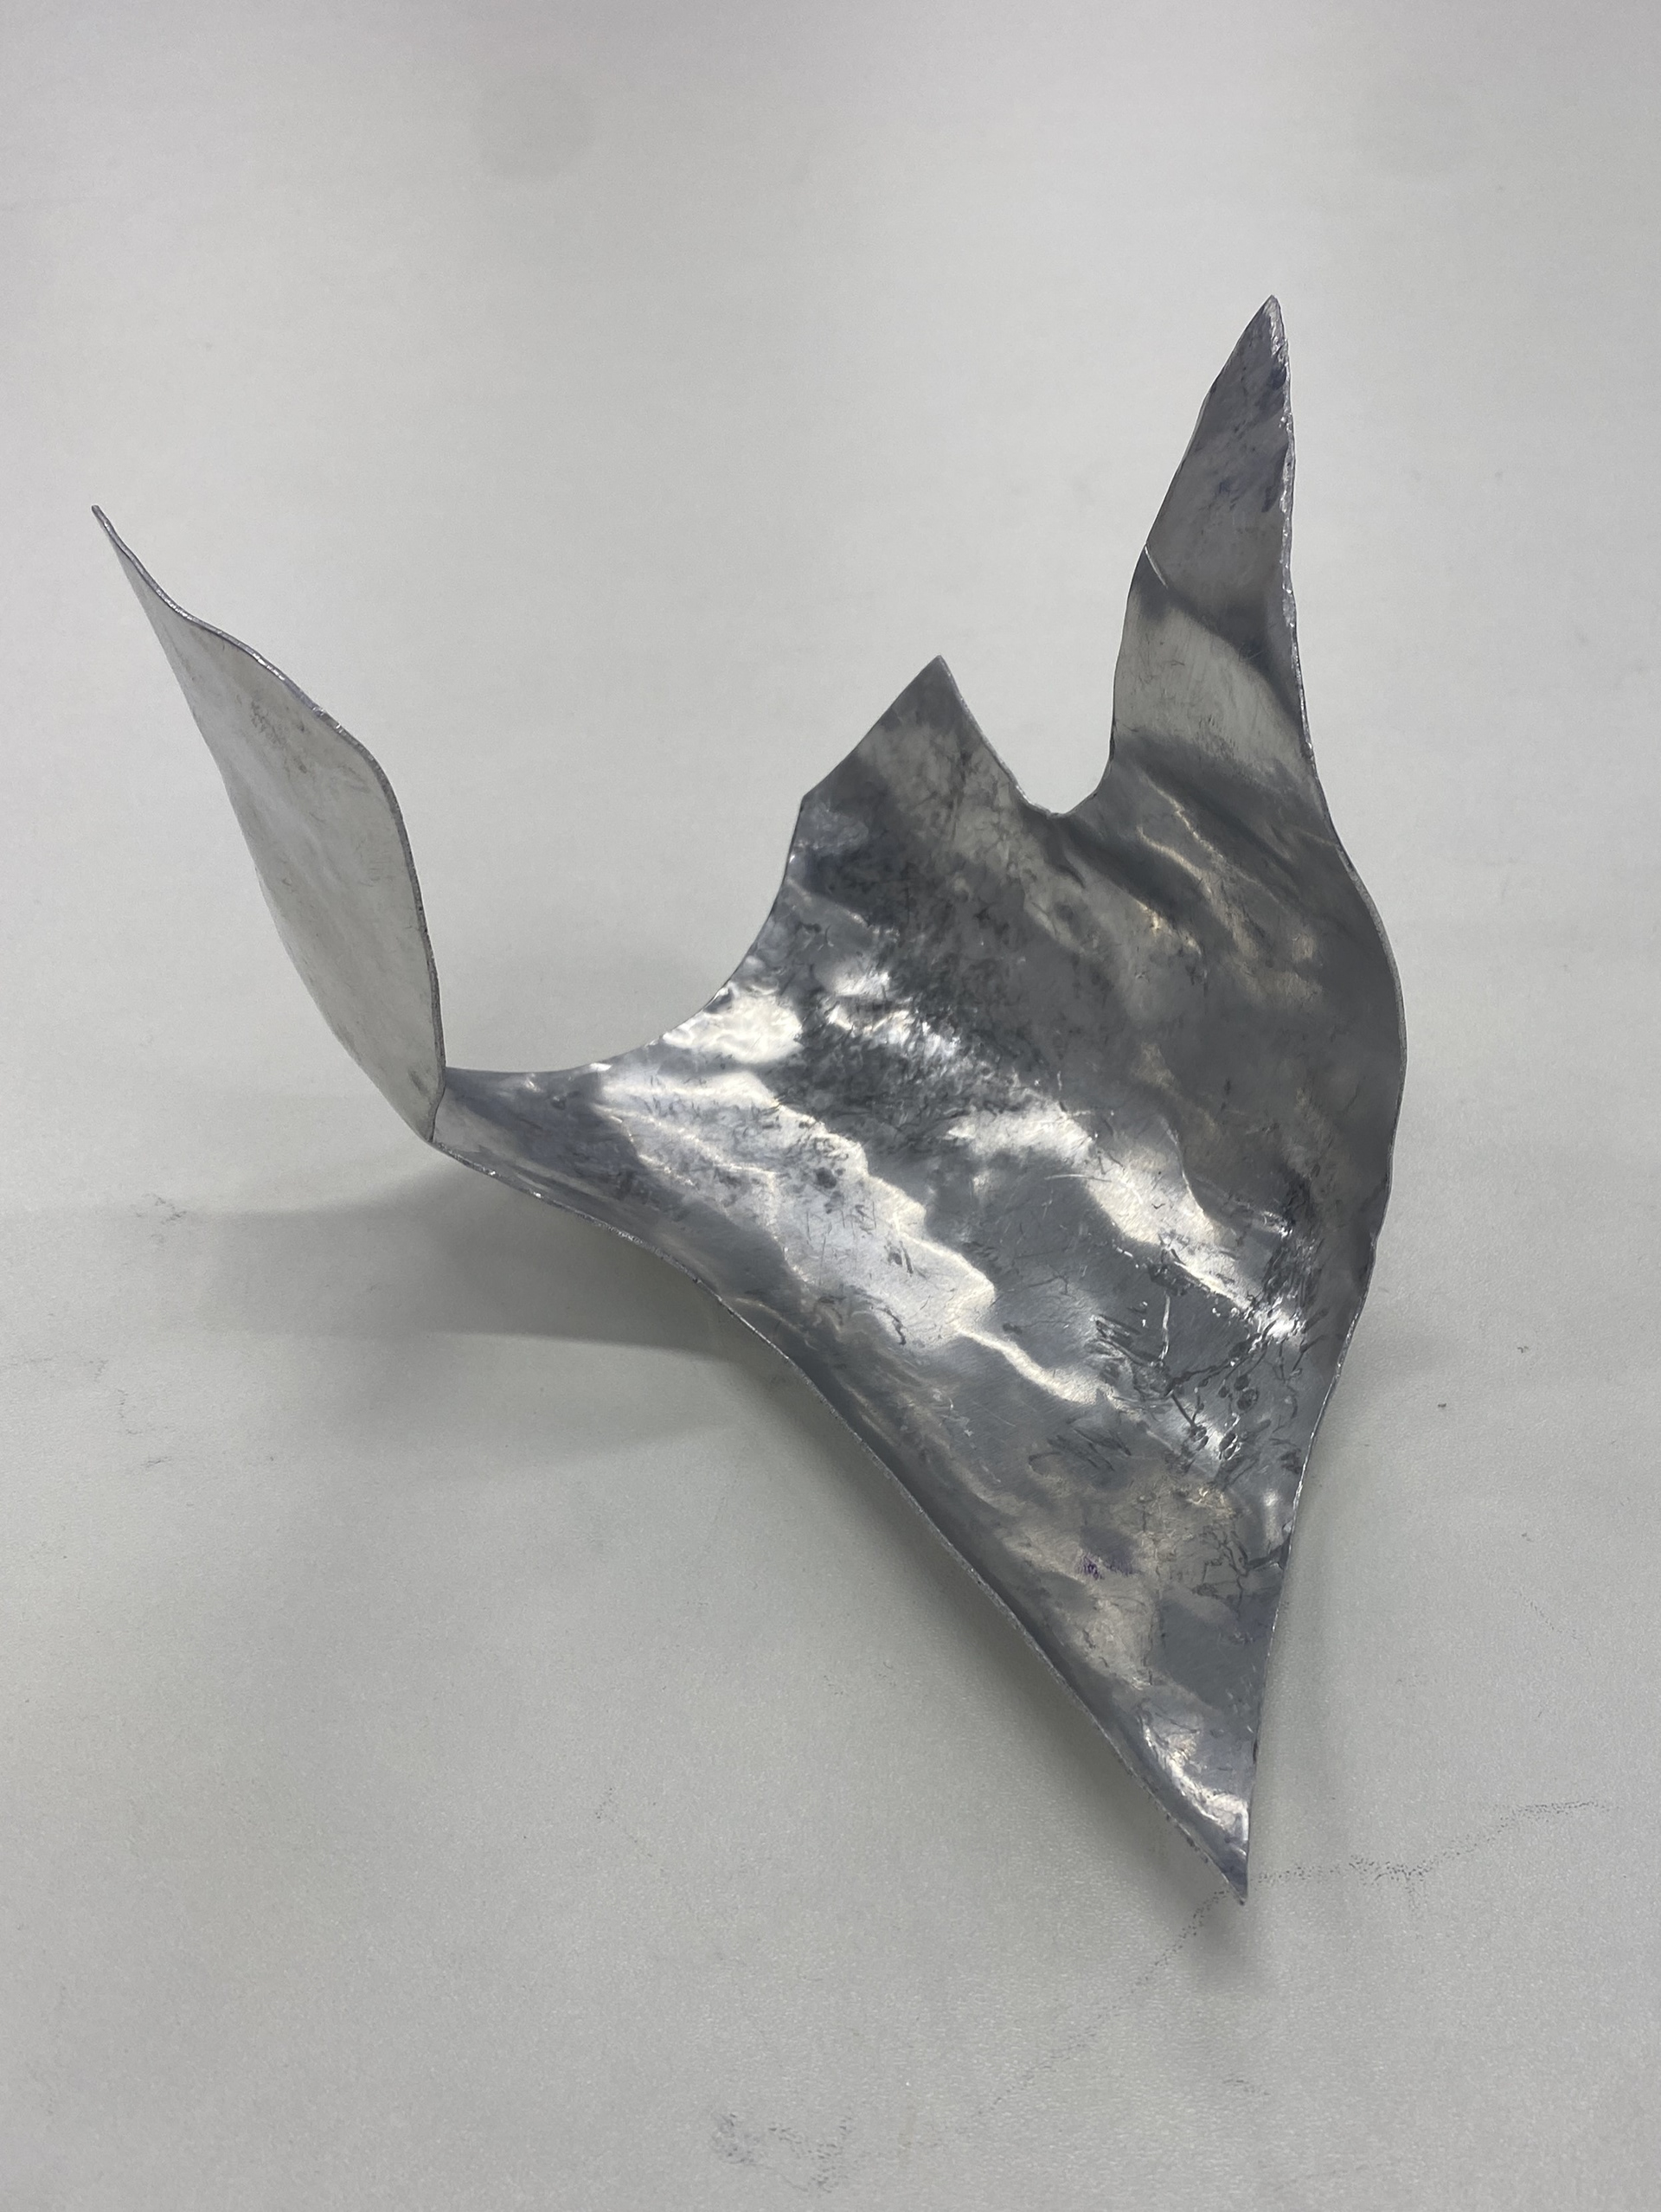
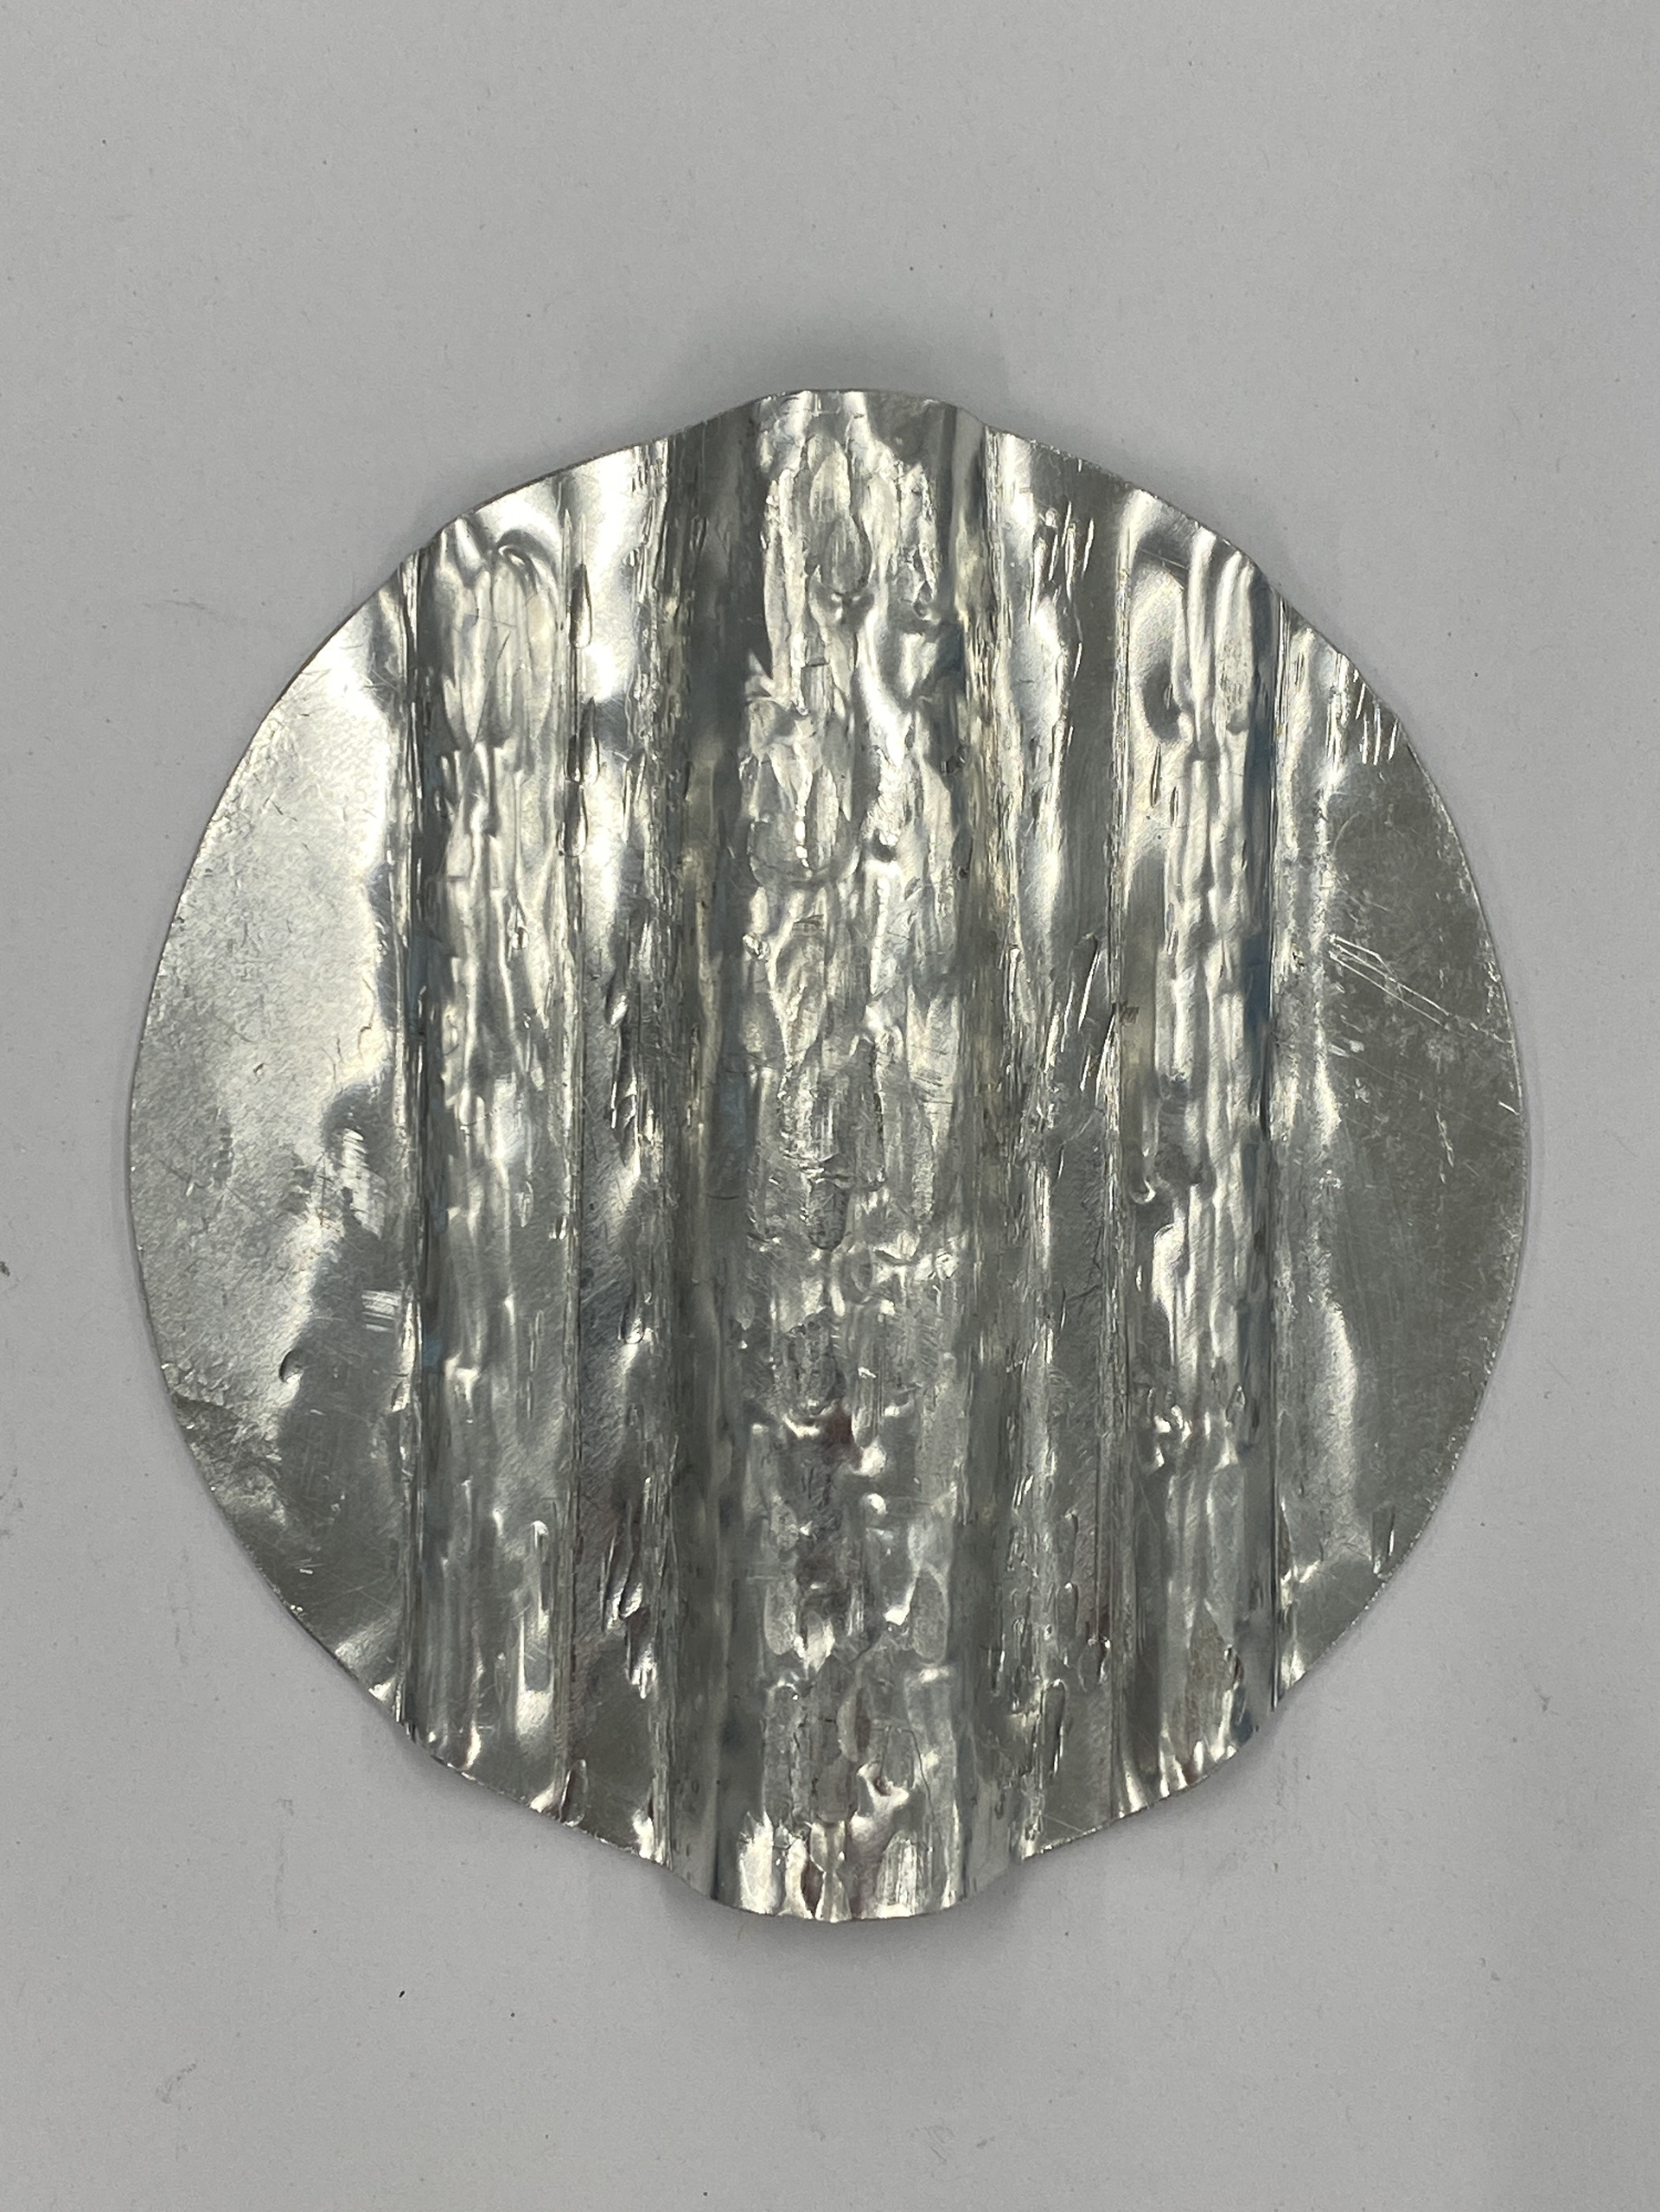
I transferred the paper templates into 1mm aluminium models and found that the design sits well on the body and cast, and no further adjustments are needed.
Developing the circular armpit section (Besagew)

Examples of the Besagews from my research
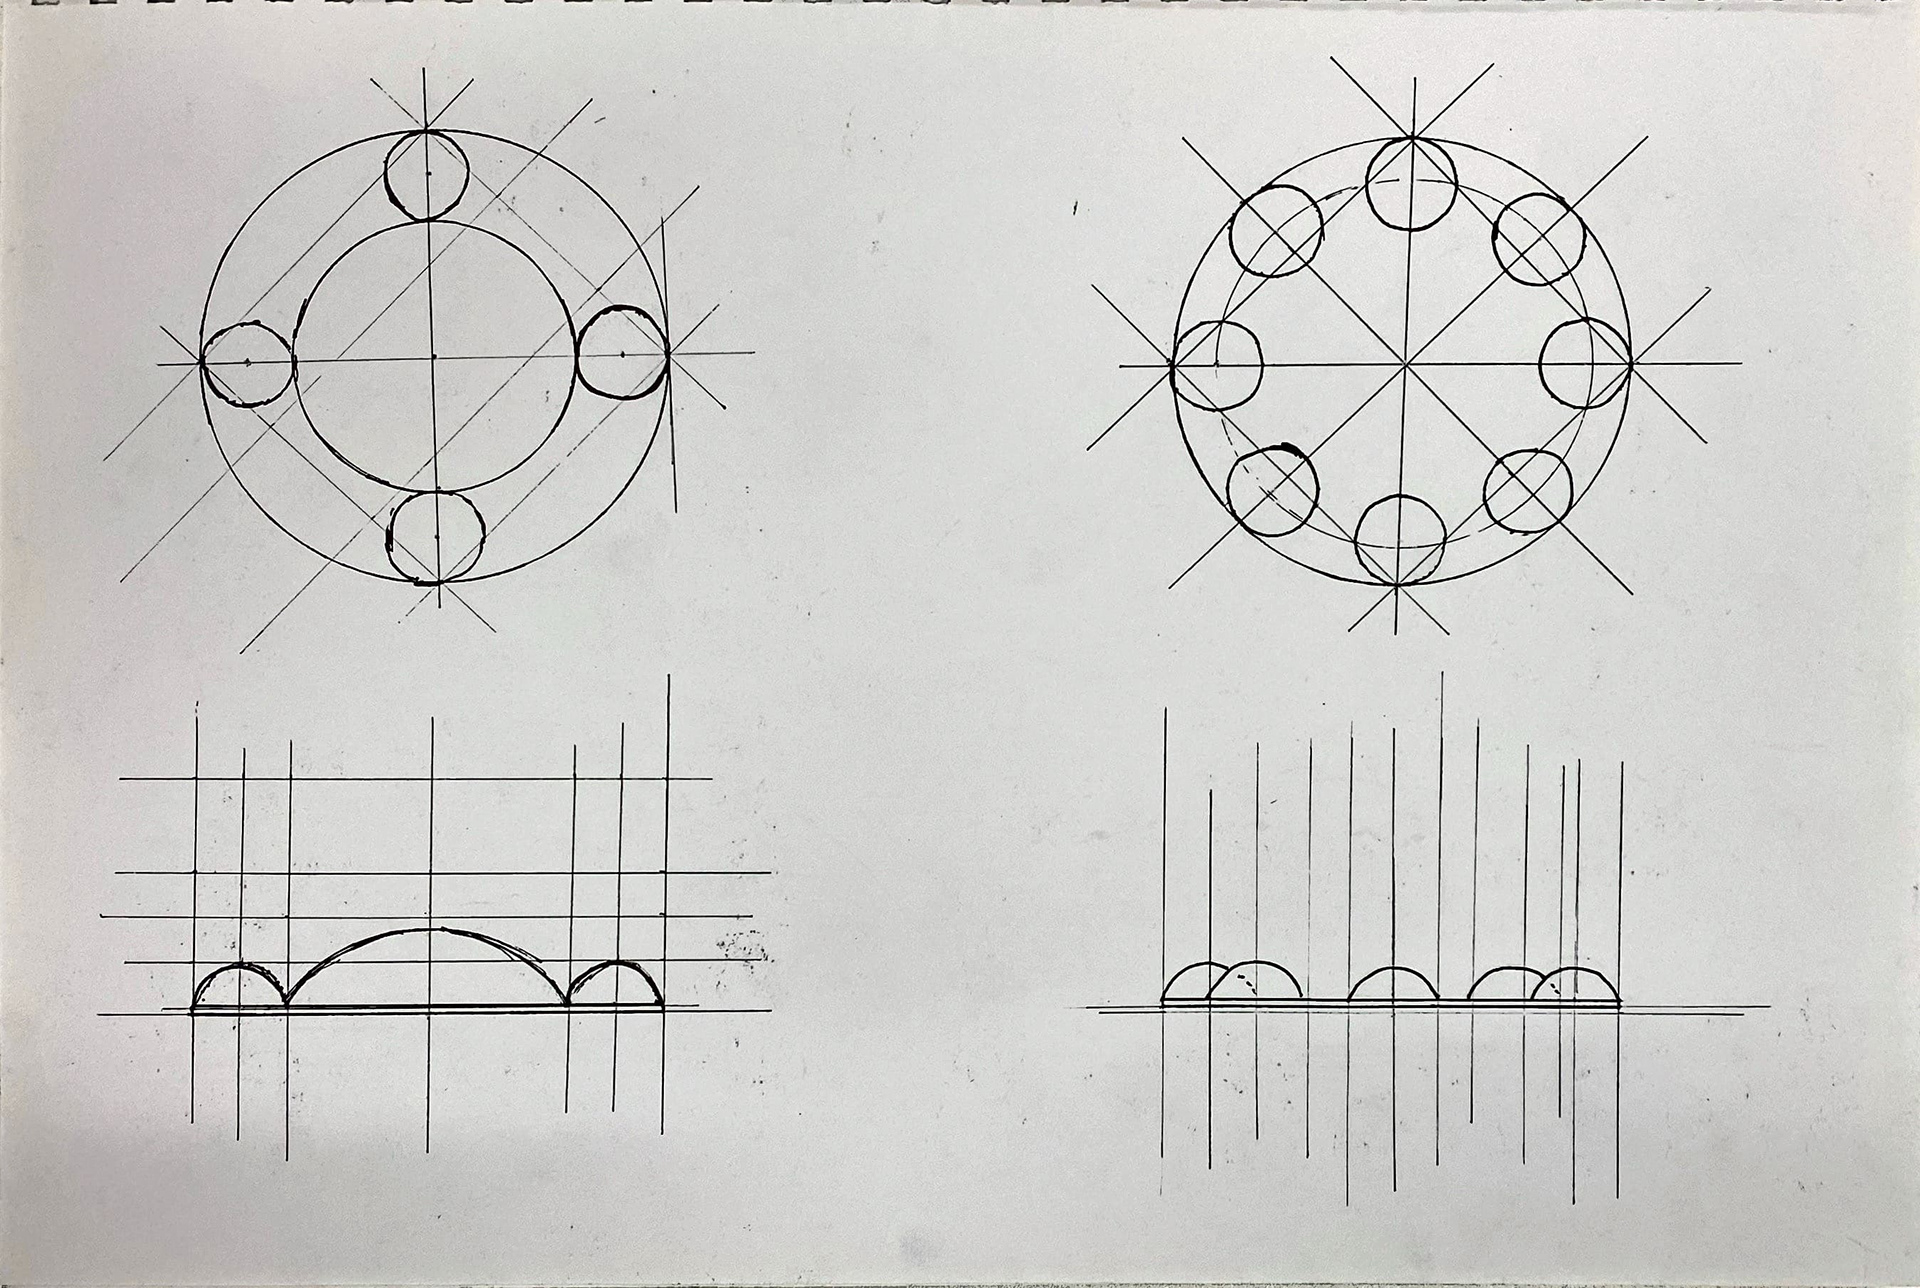

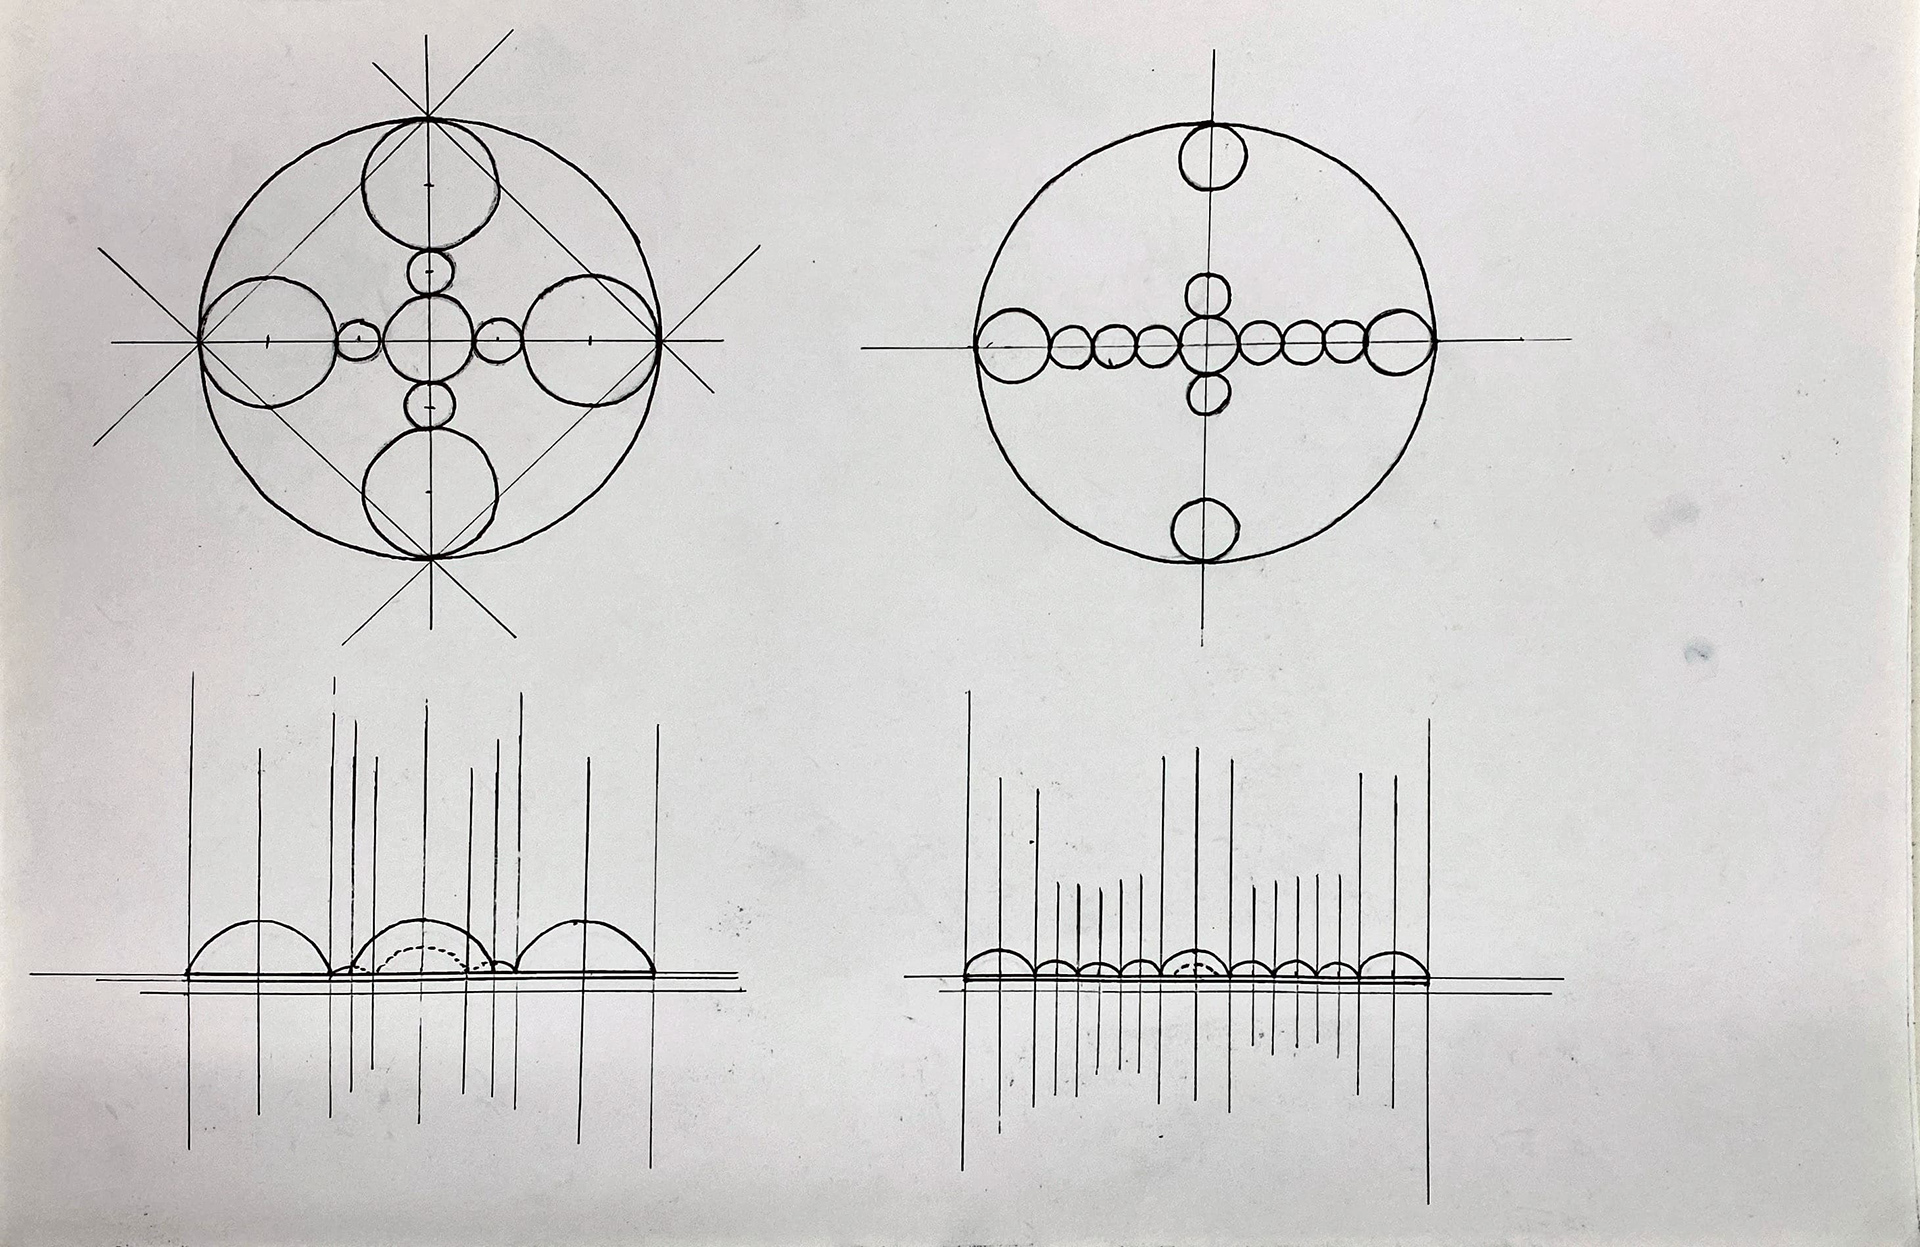
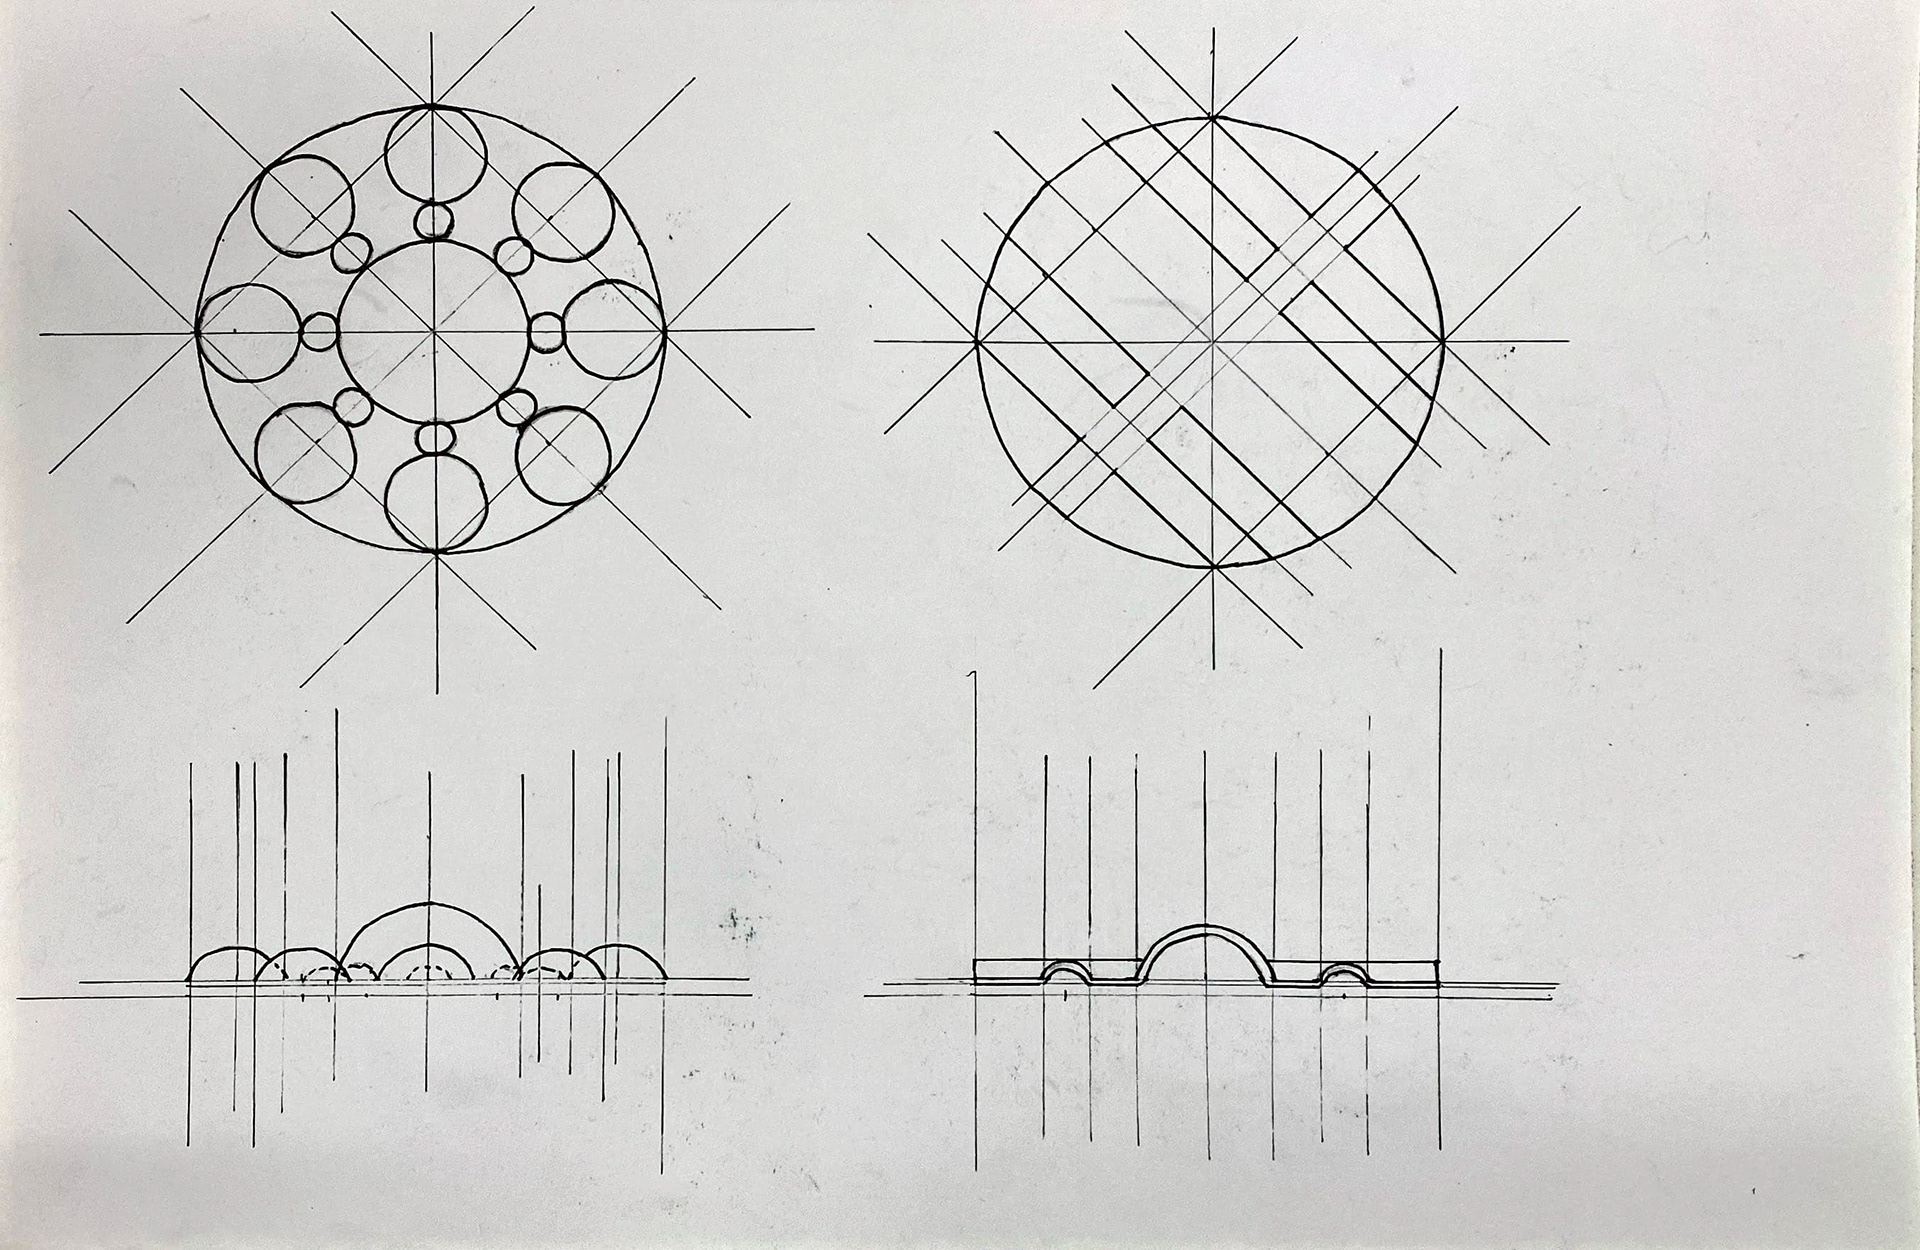
Taking inspiration from my research into the Besagews, I wanted this to be a site for detail that is framed by the body and rest of the design. Therefore, I created a series of modern contemporary geometric designs, looking at adornment through the addition of form rather than for example embellishment through engraving and inlay. I designed these to be moulded using swage and doming block. I wanted to create a cohesive design style matching the elbow piece so included many lines of symmetry.
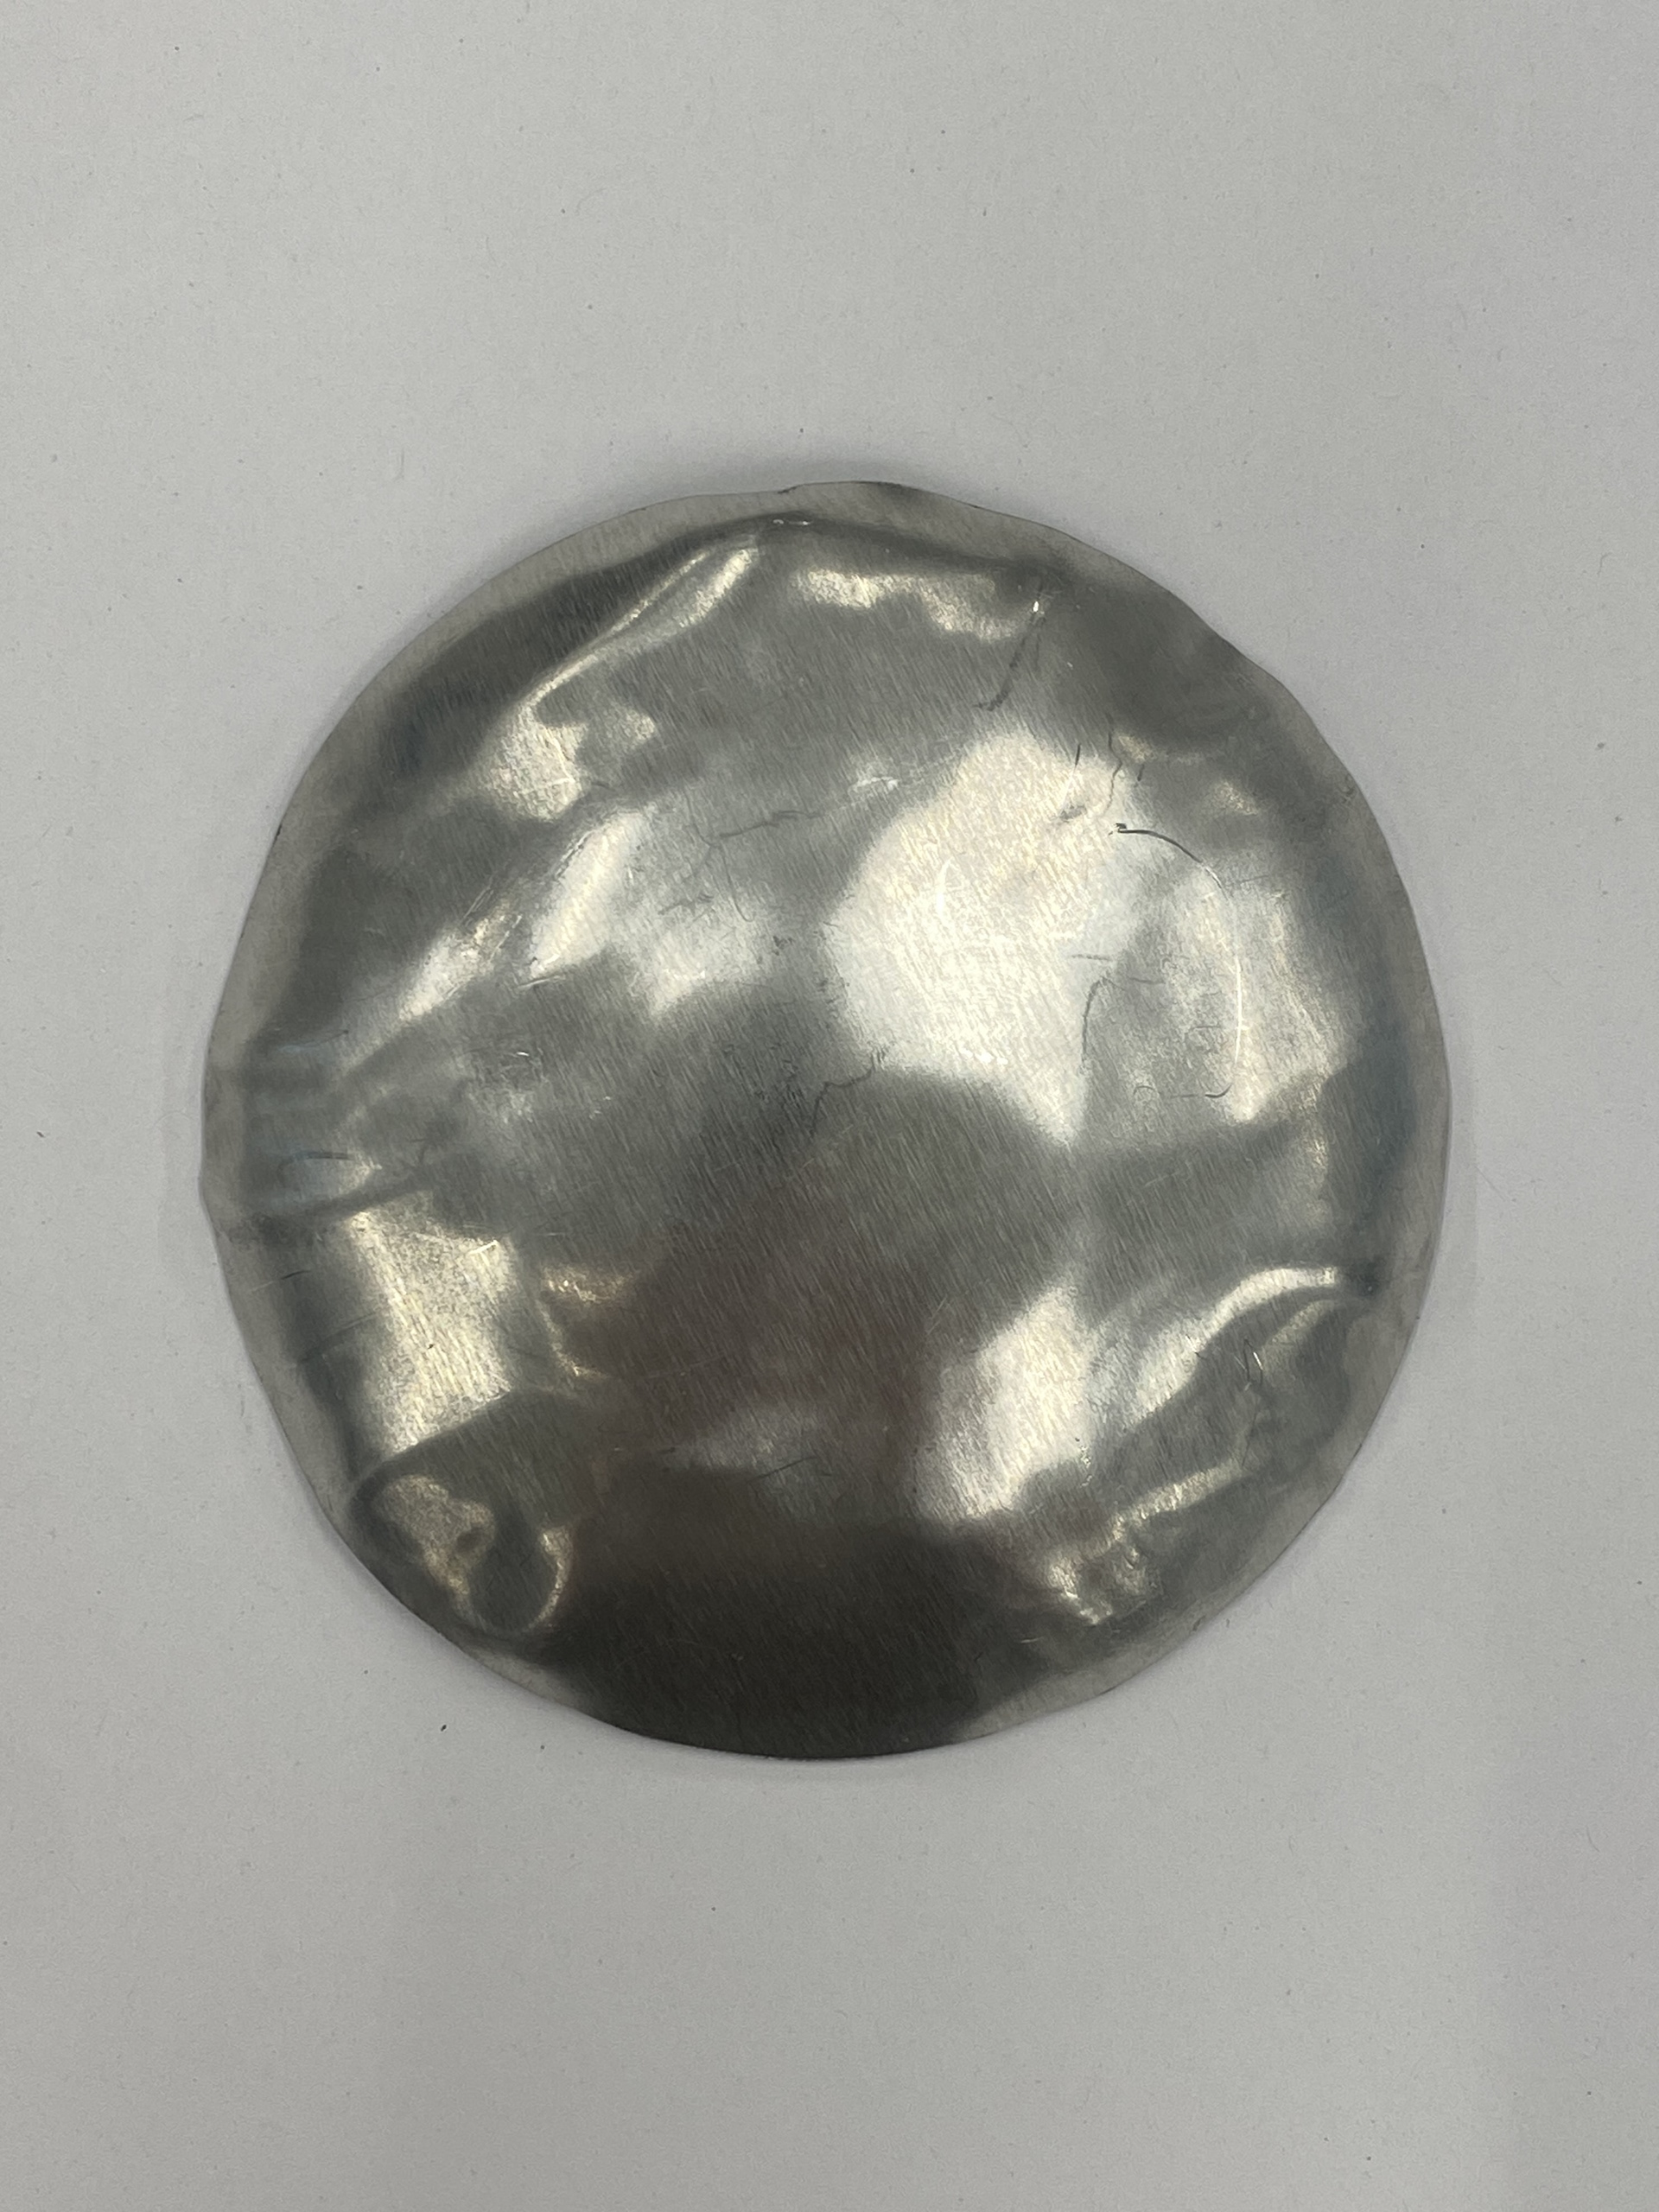
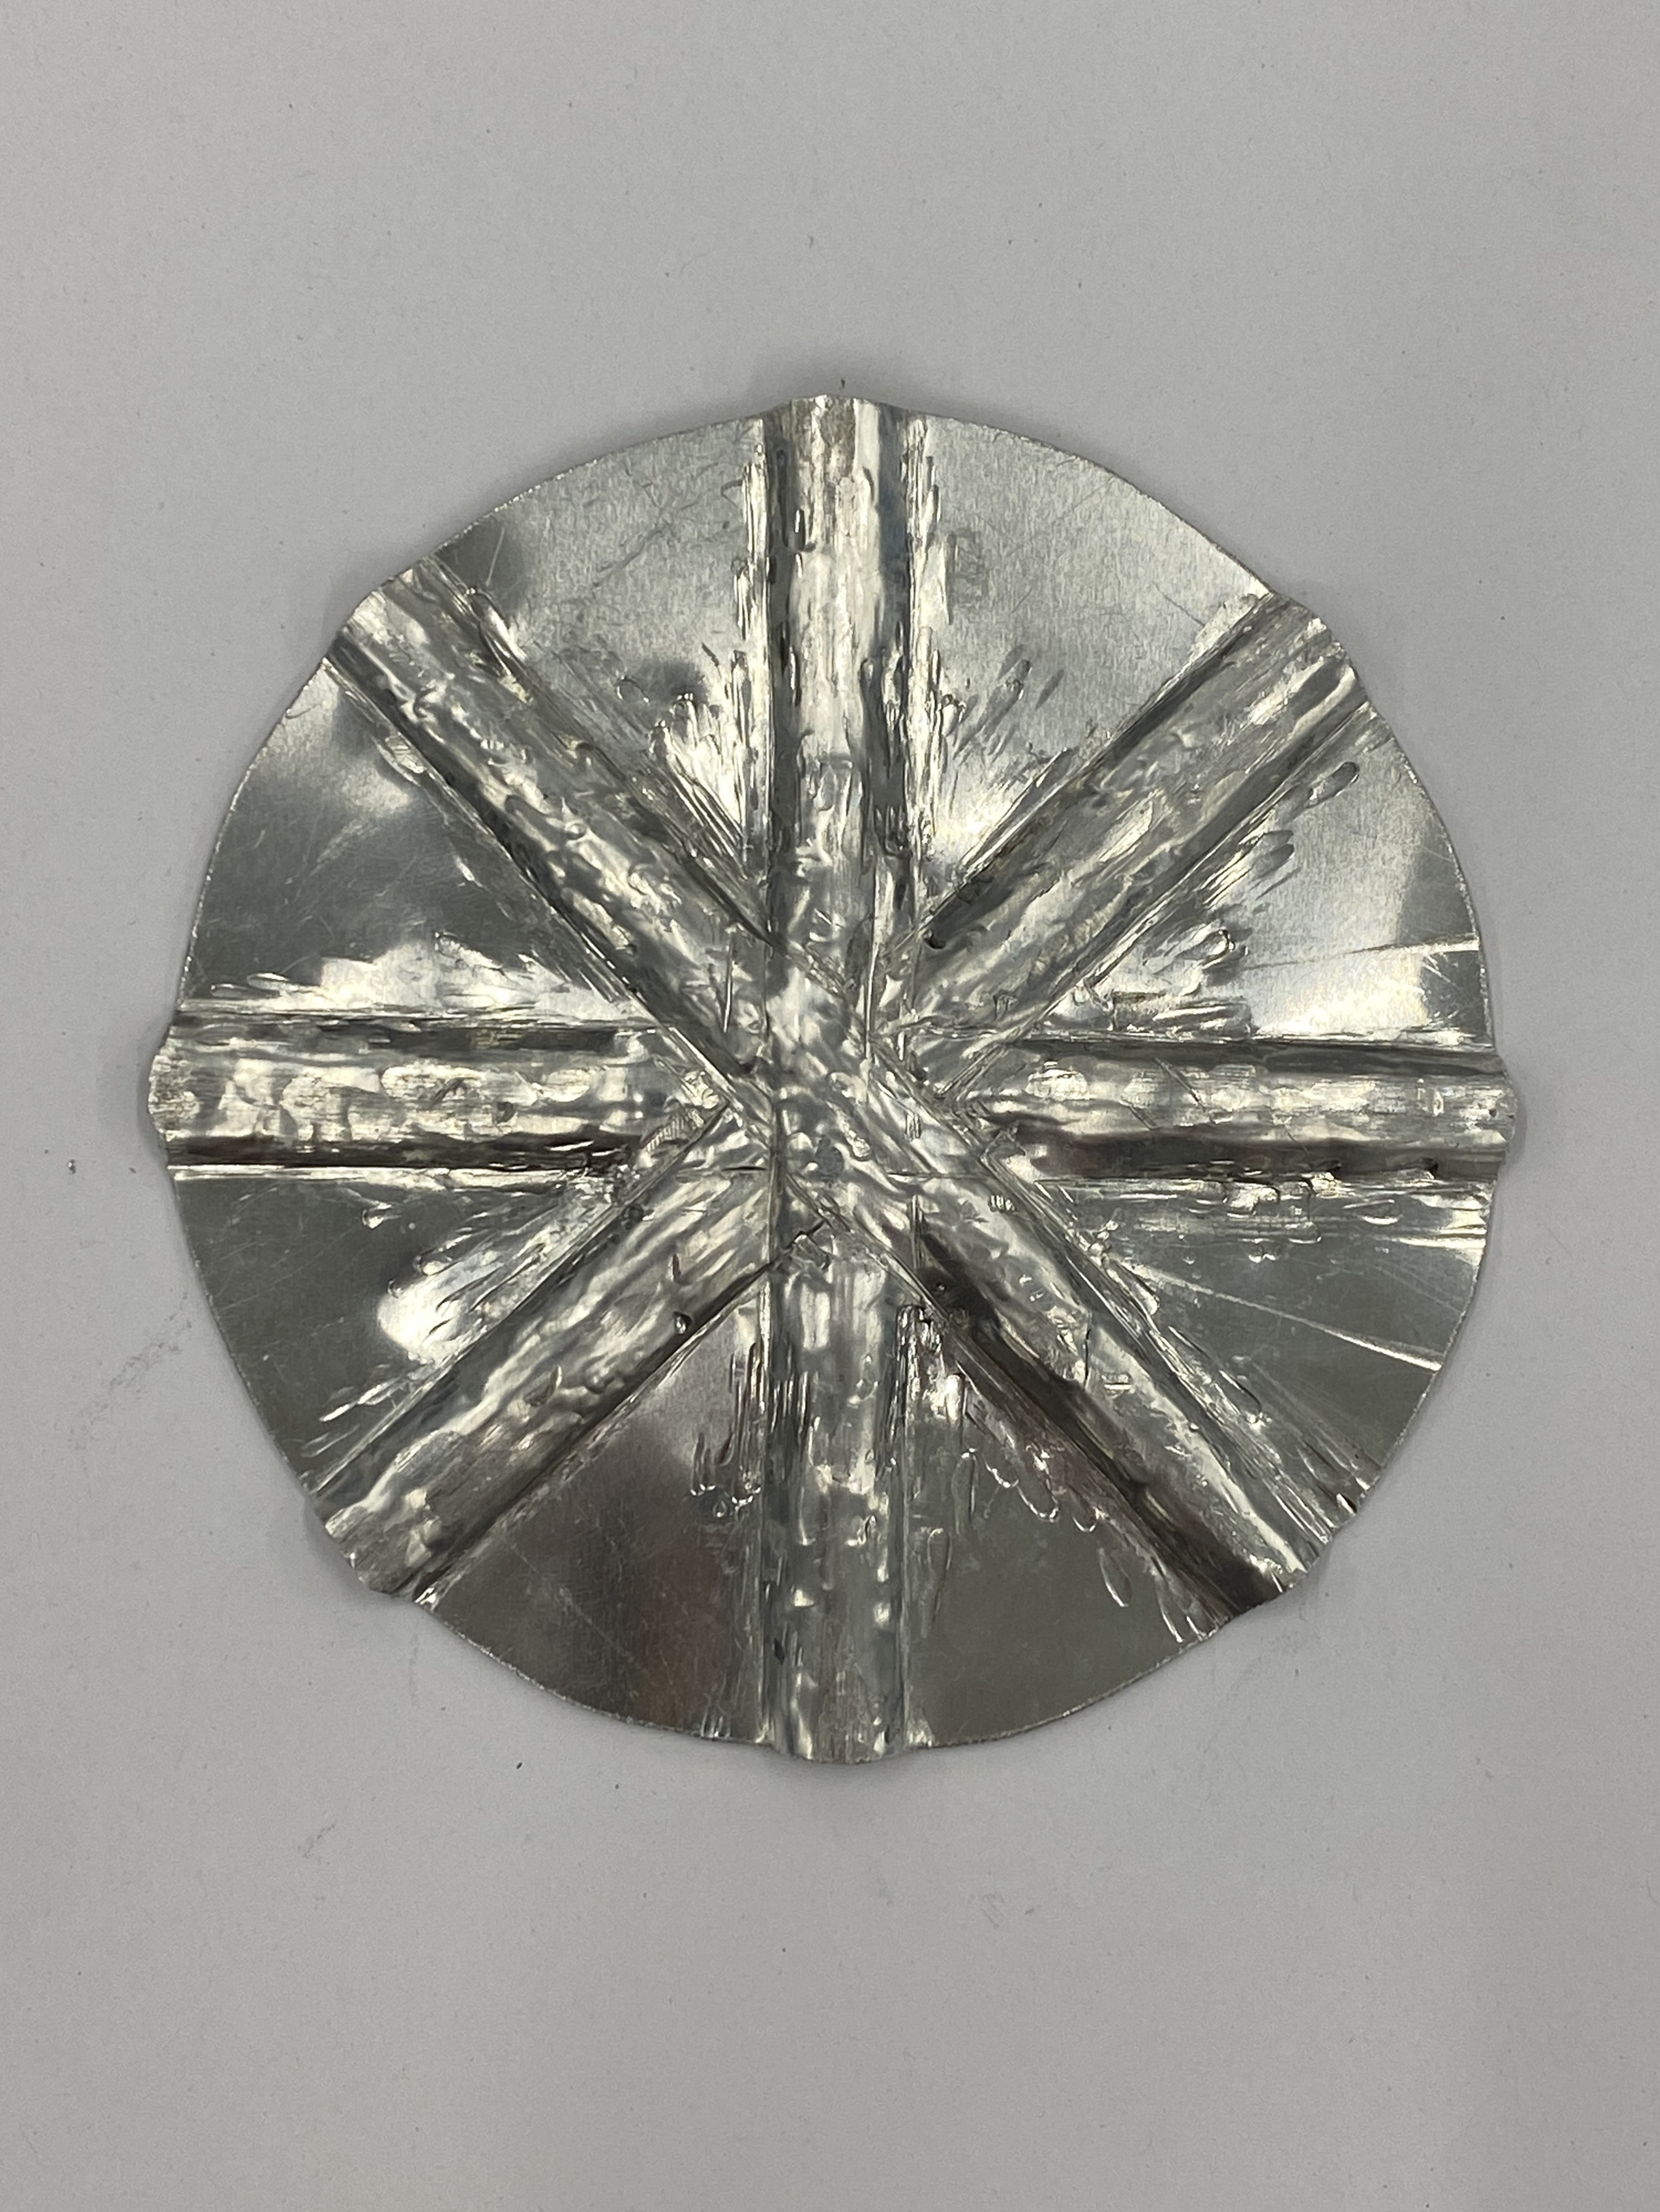
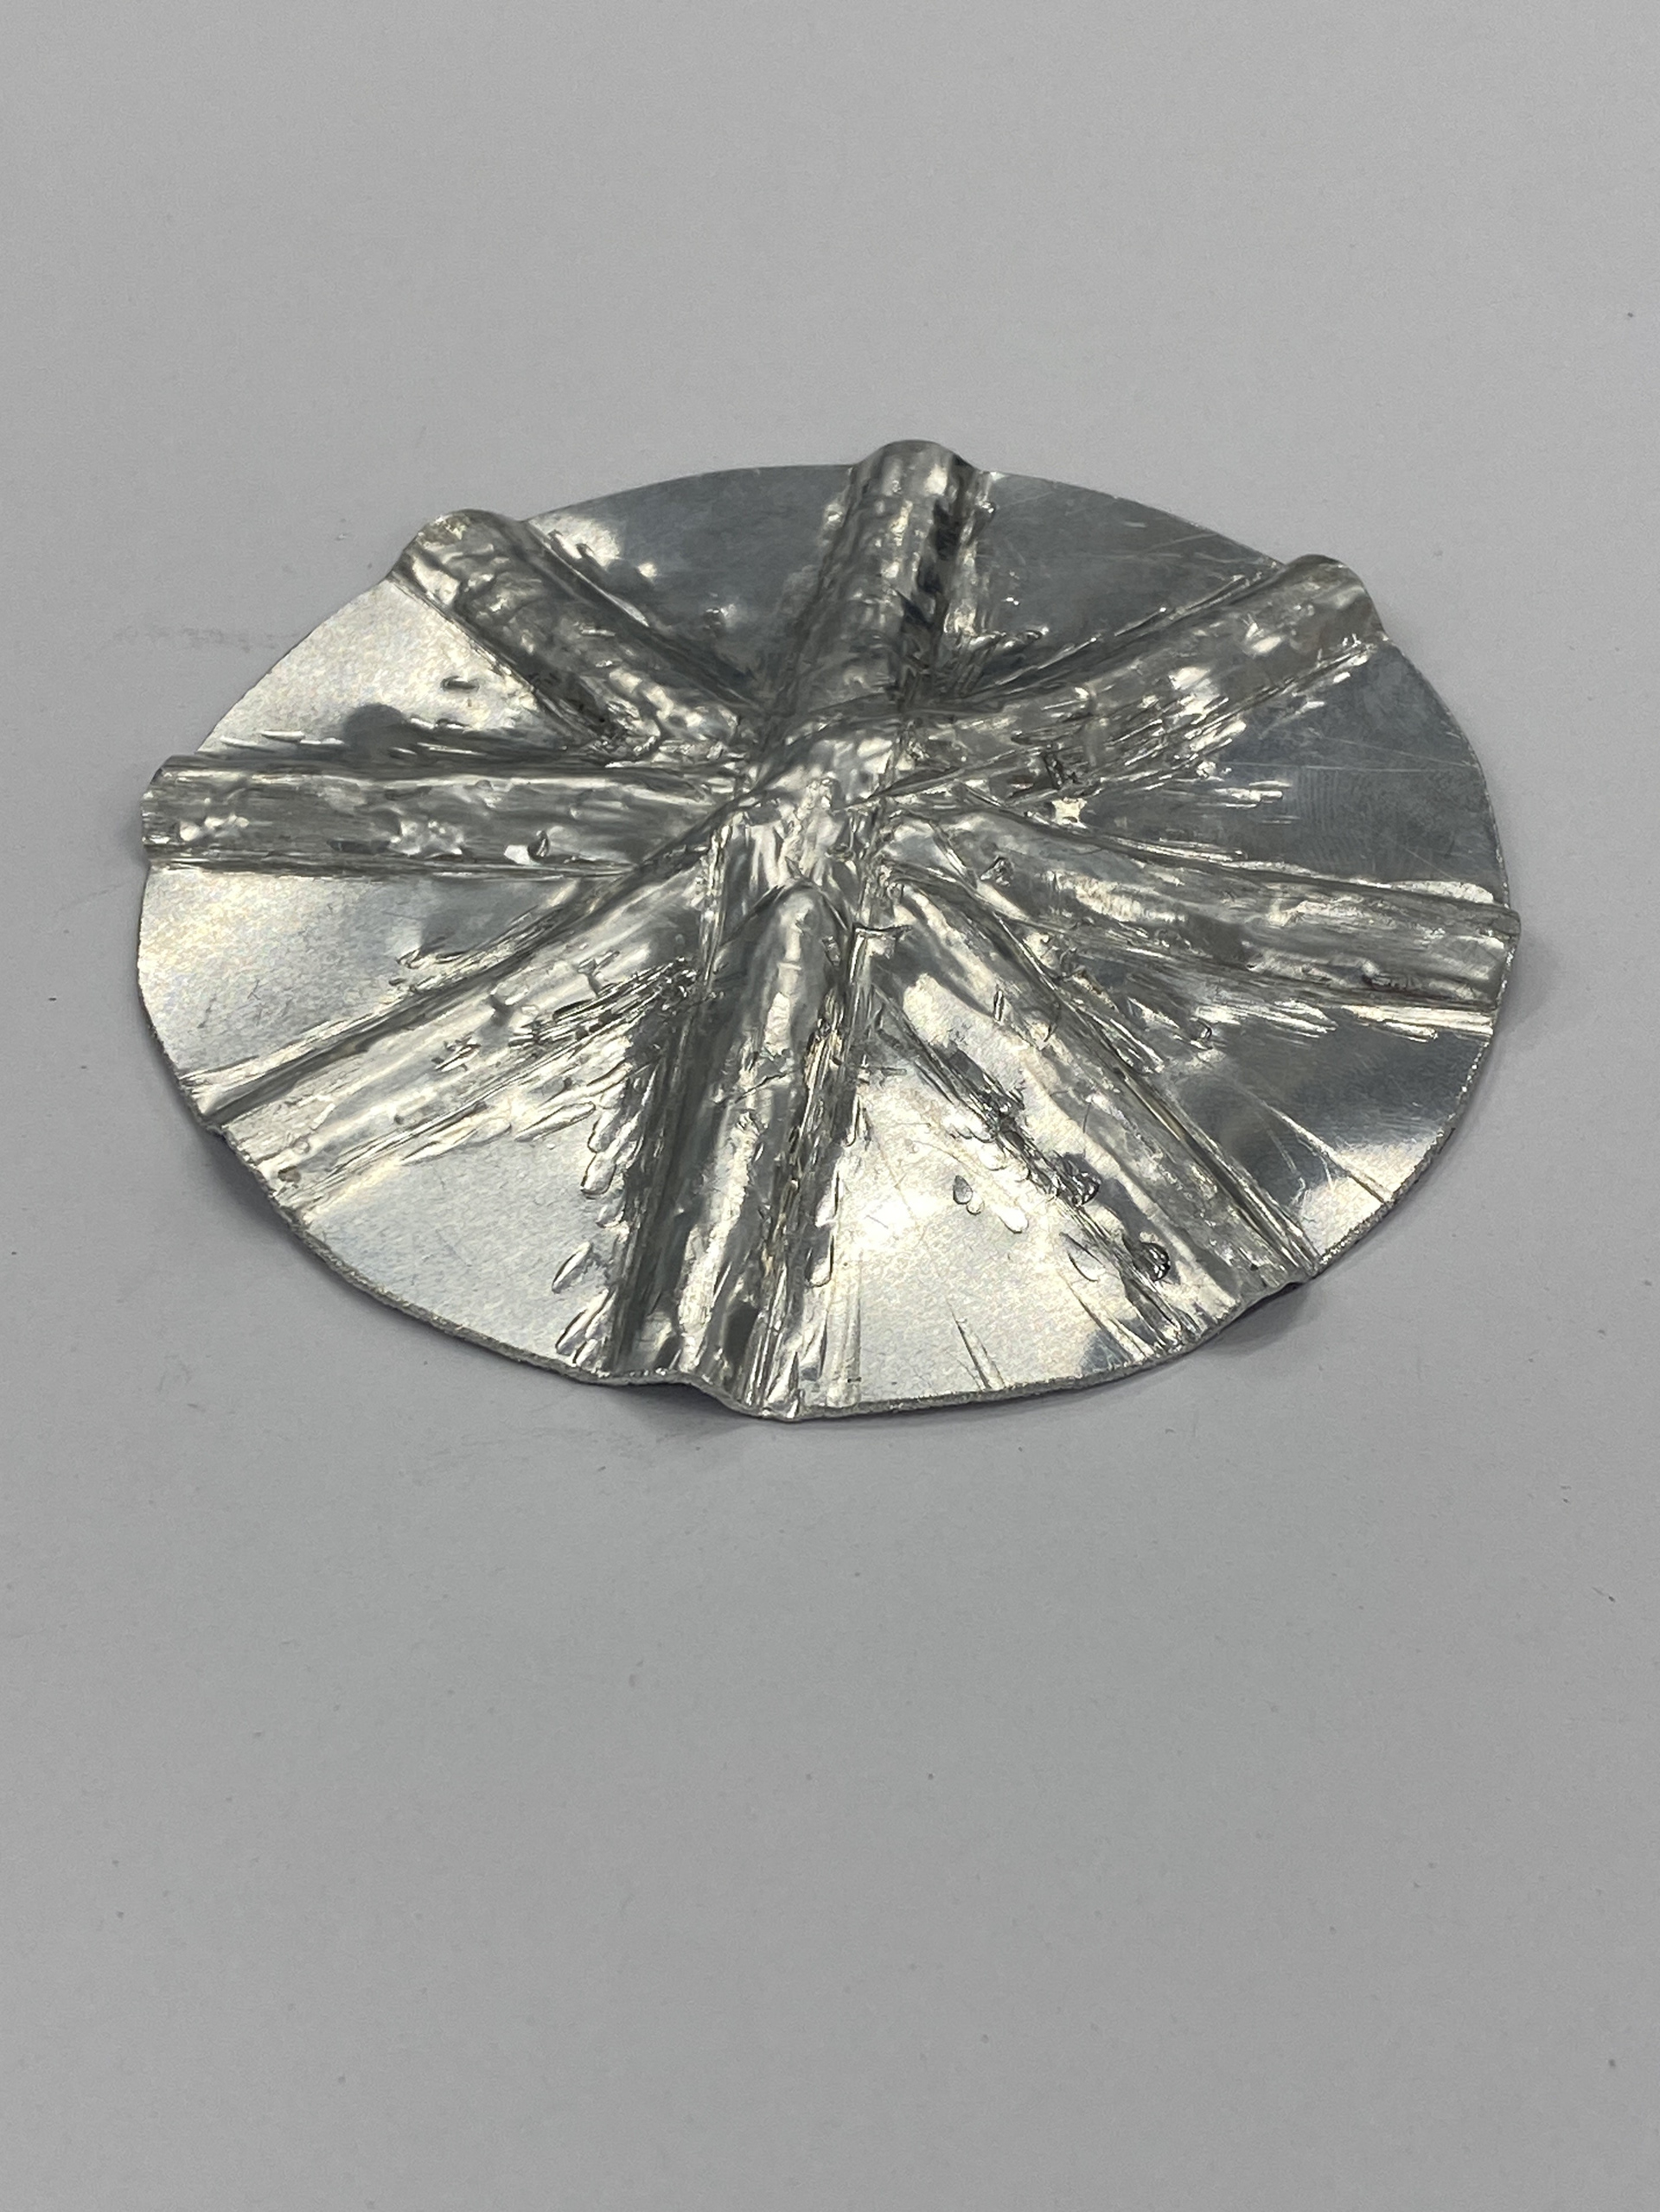
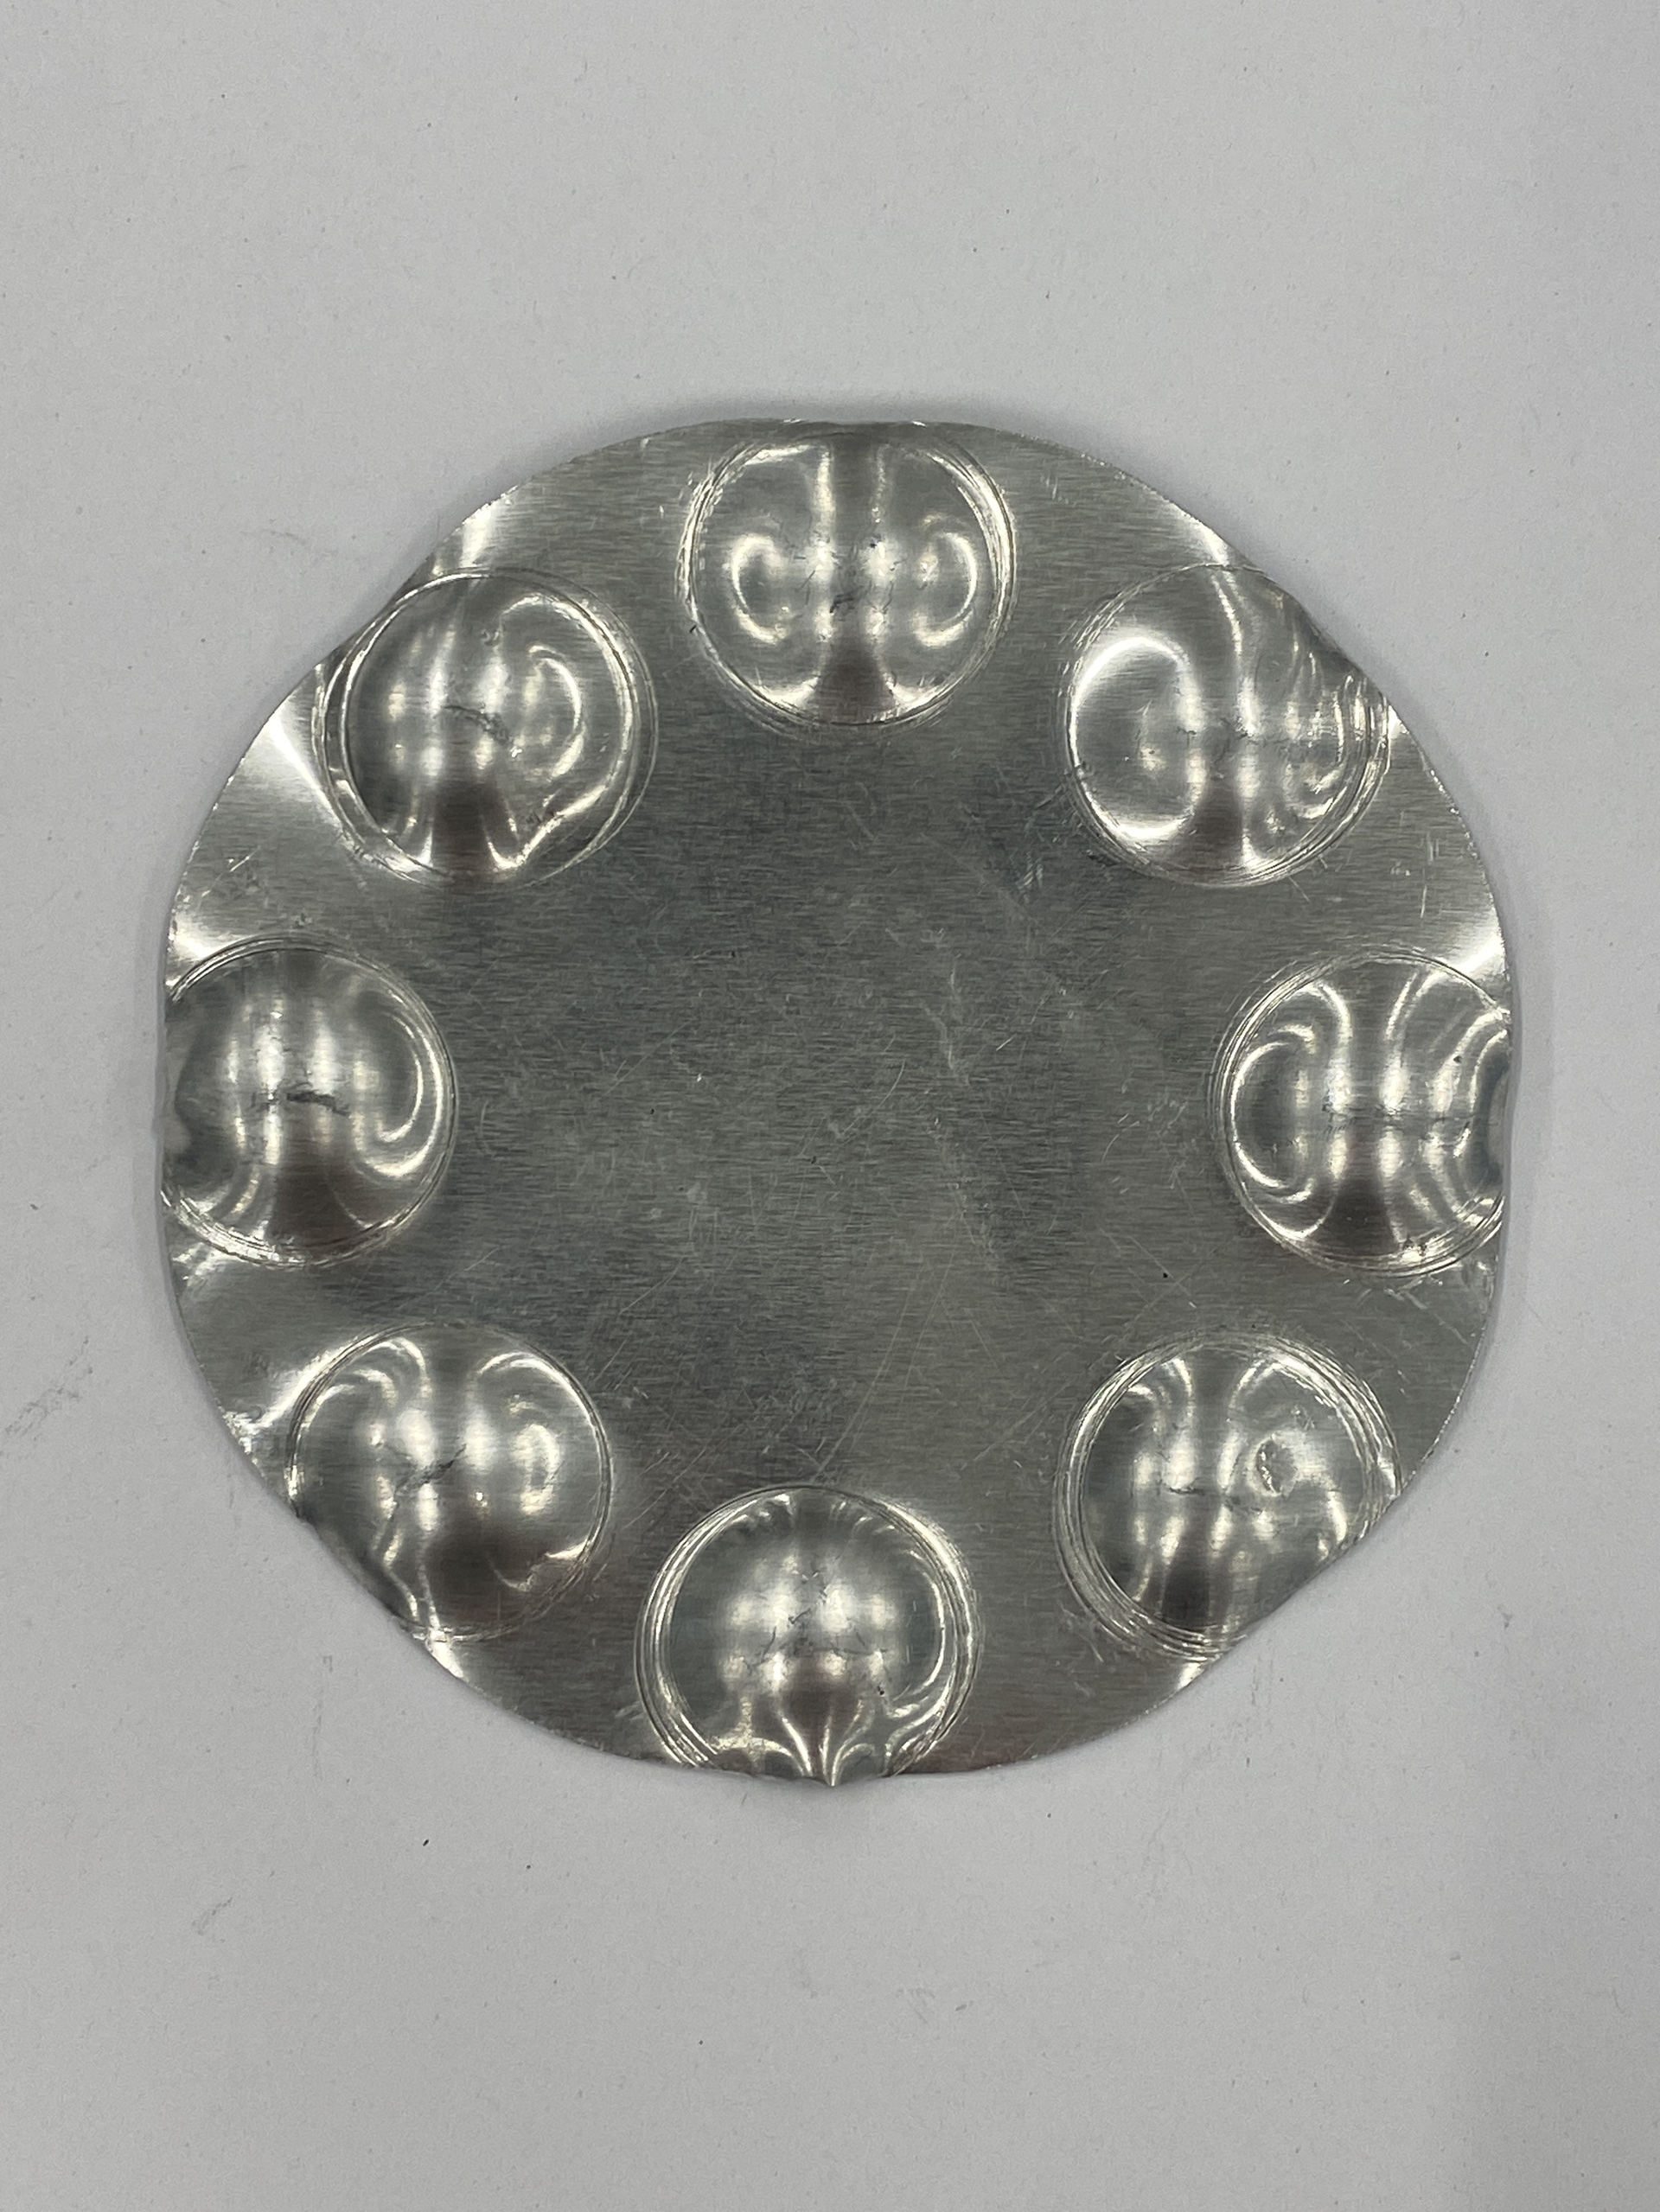
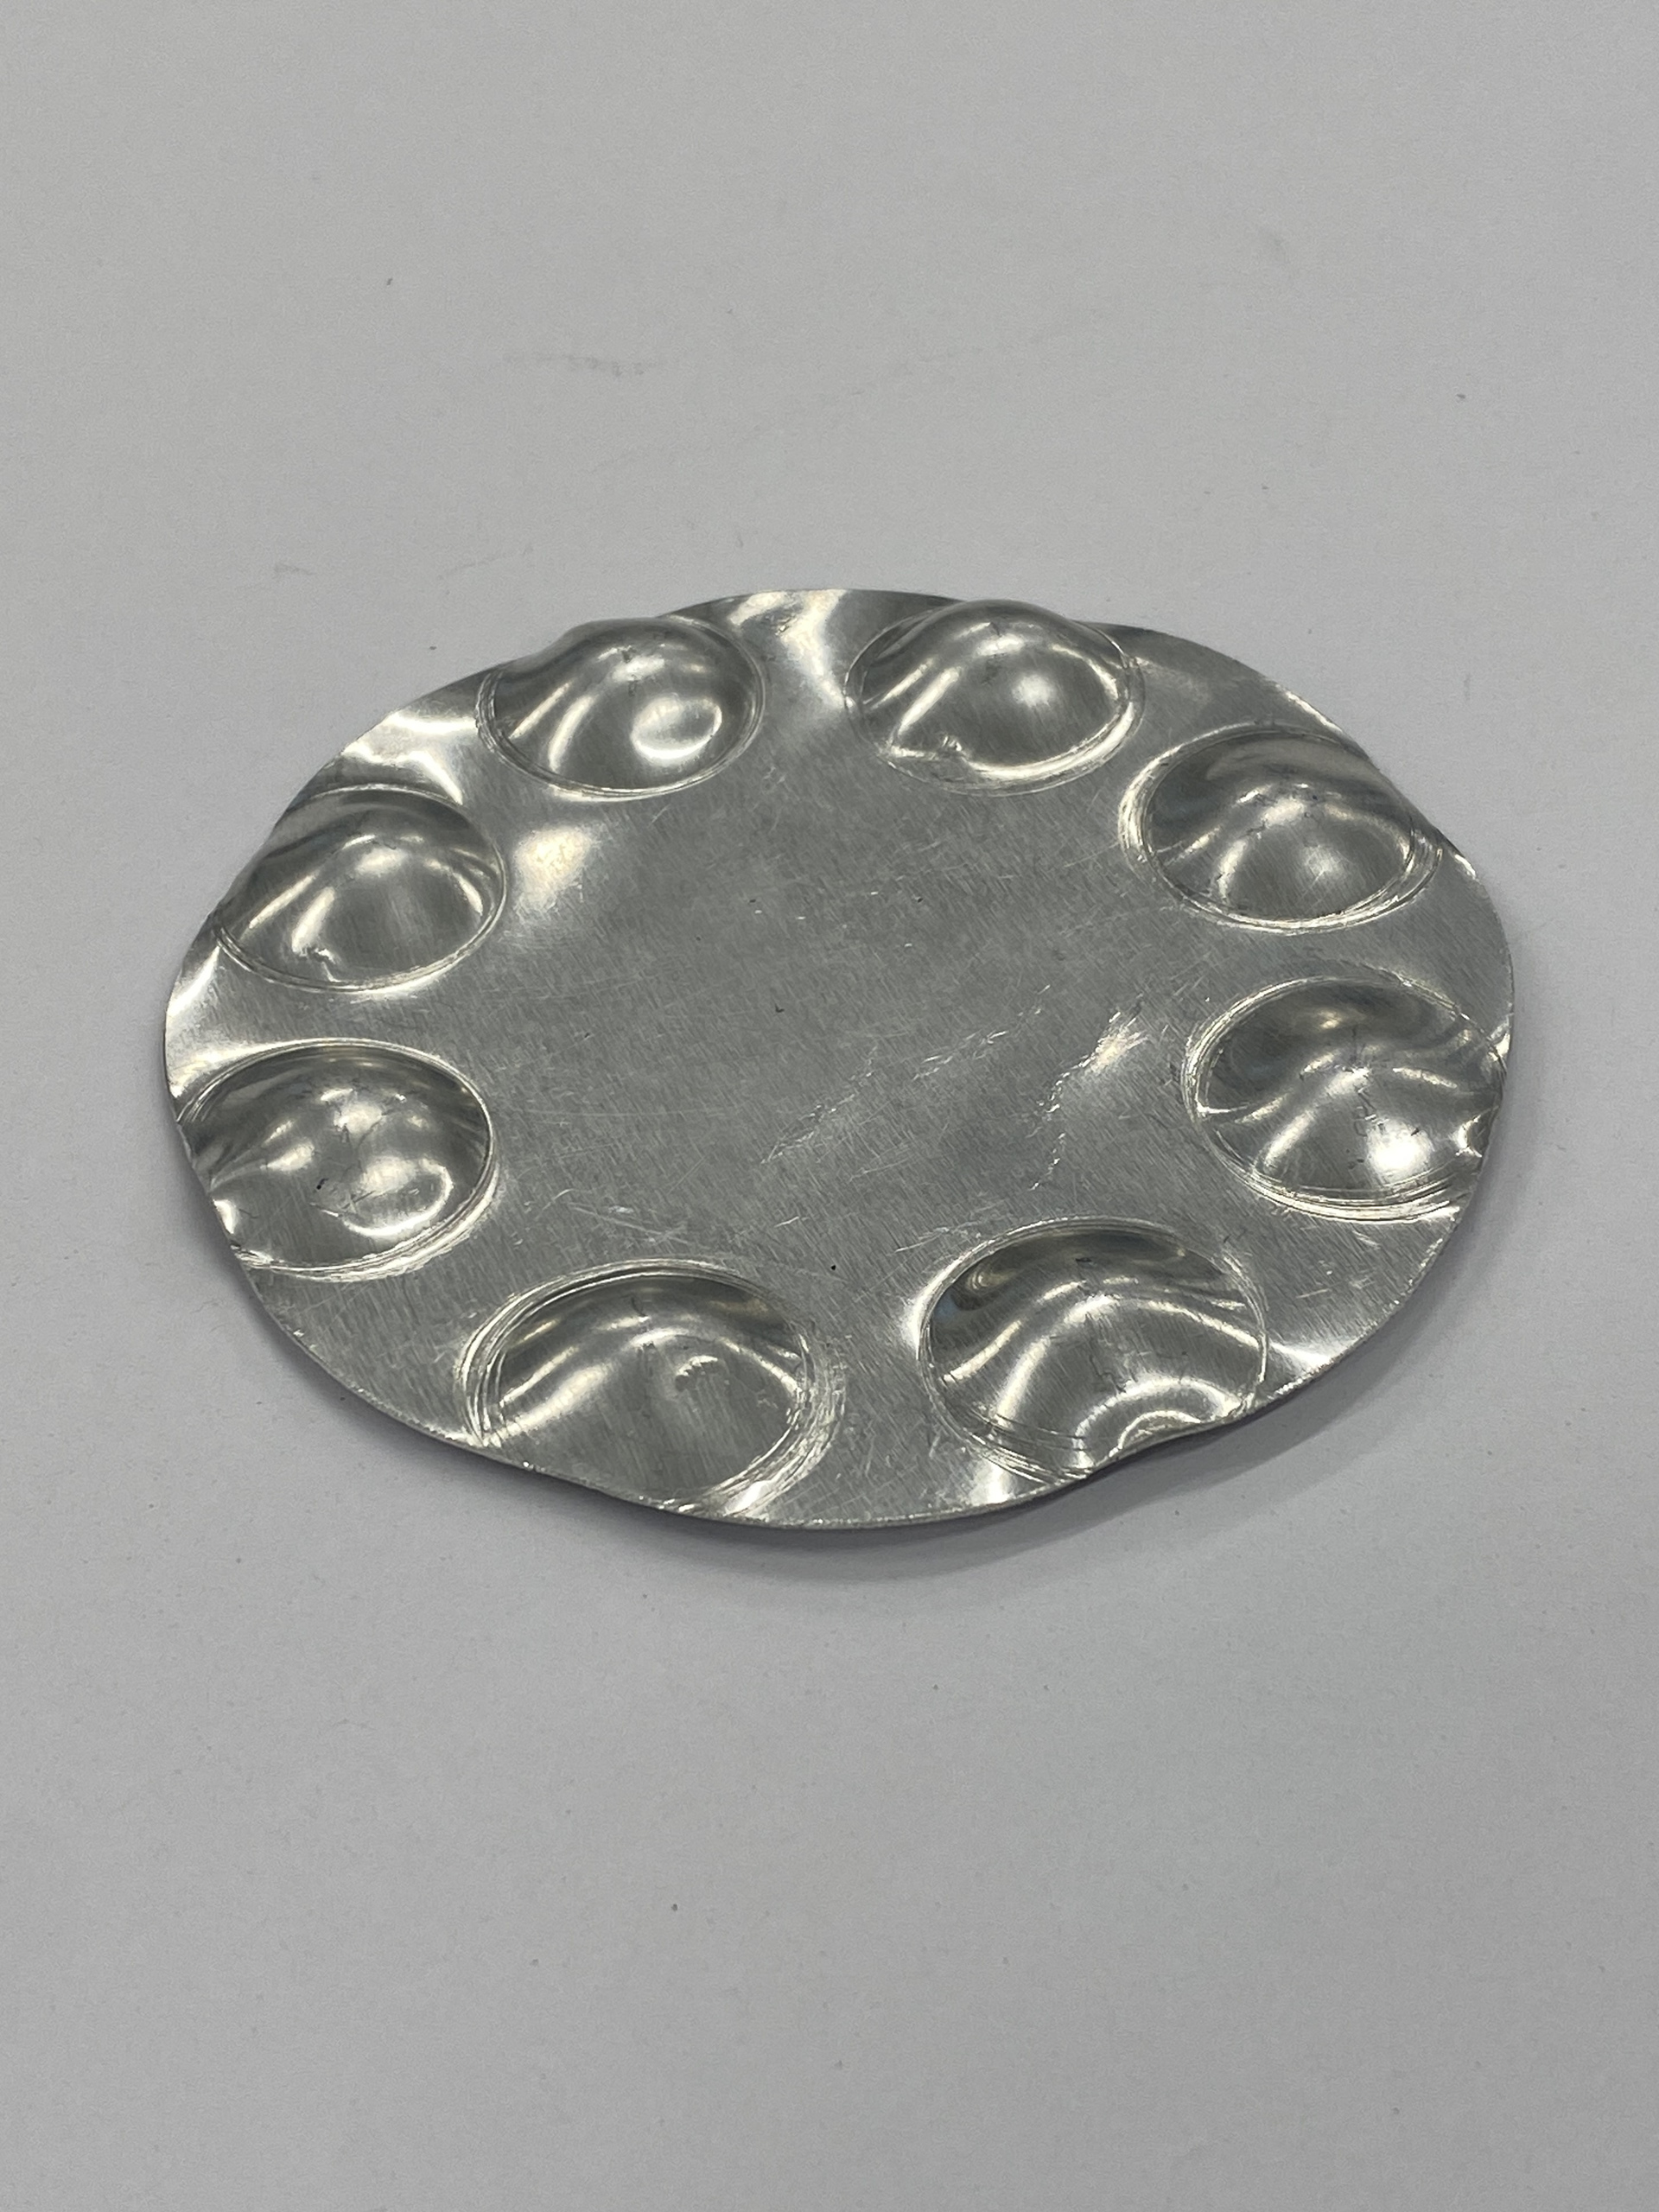

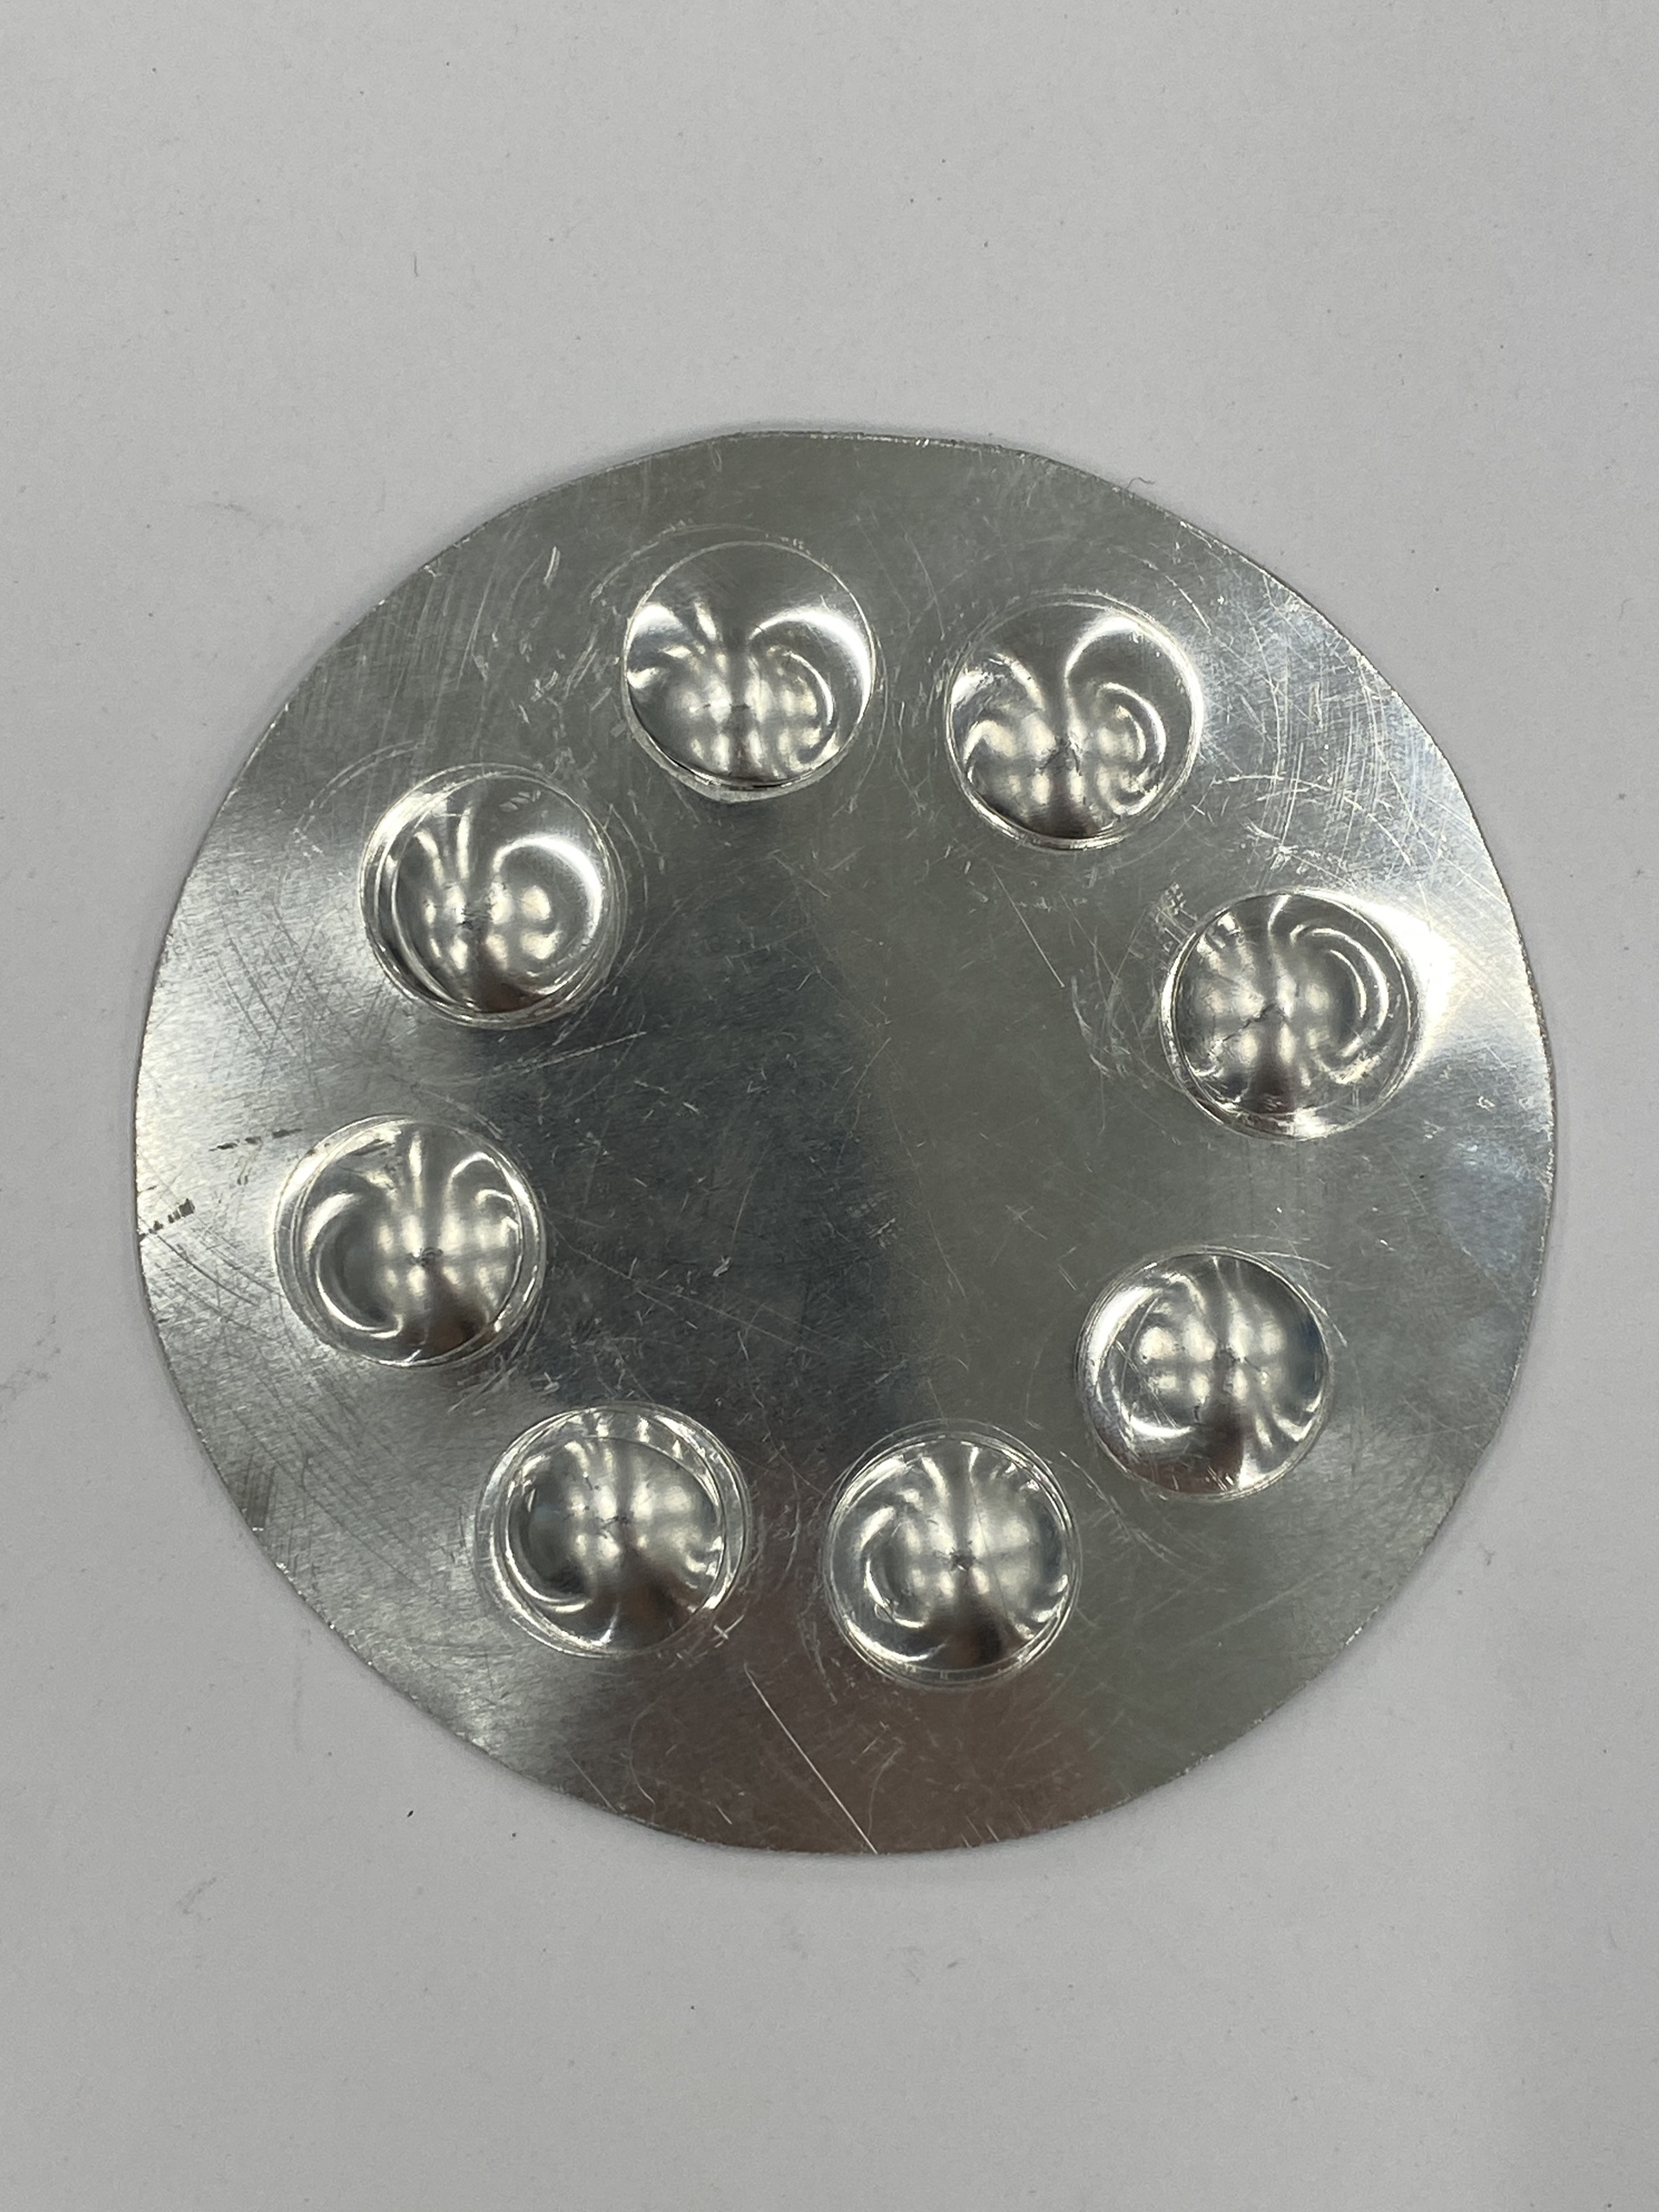

I tested my designs in 1mm aluminium to practice and explore how the swage and doming process would work with each design. I found that the doming process wasn’t working well for my designs and preferred the swage block designs.
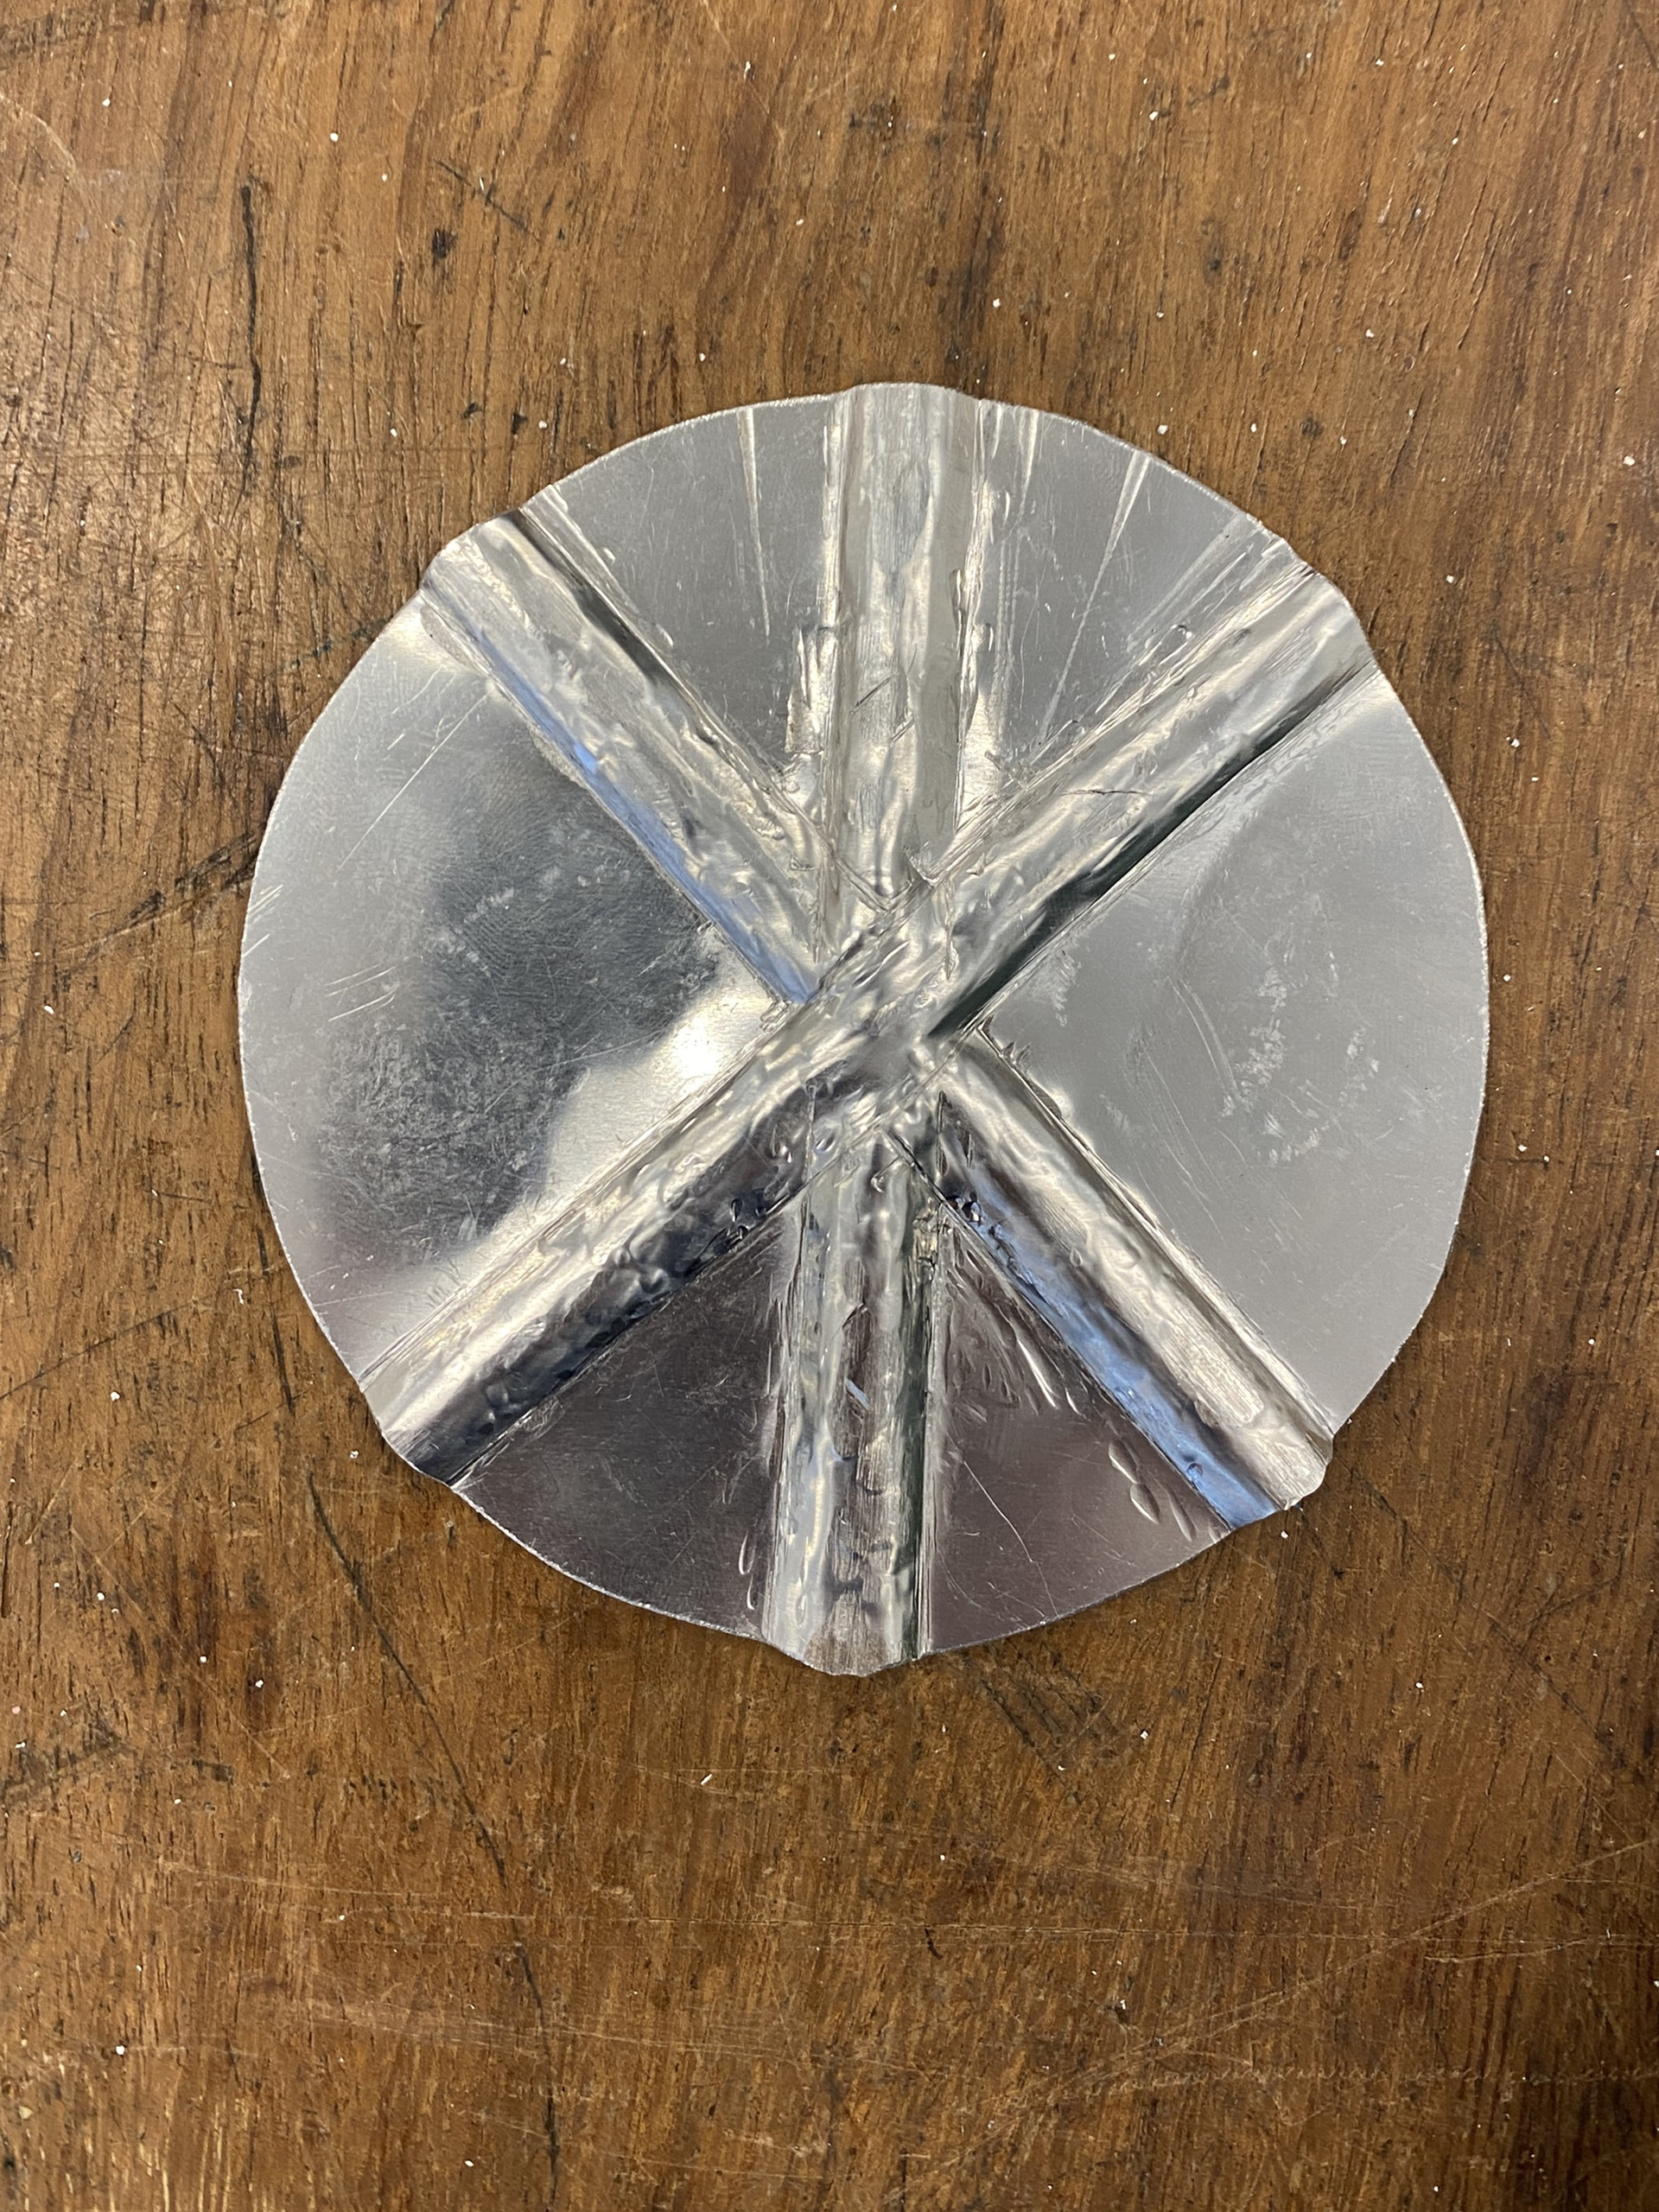
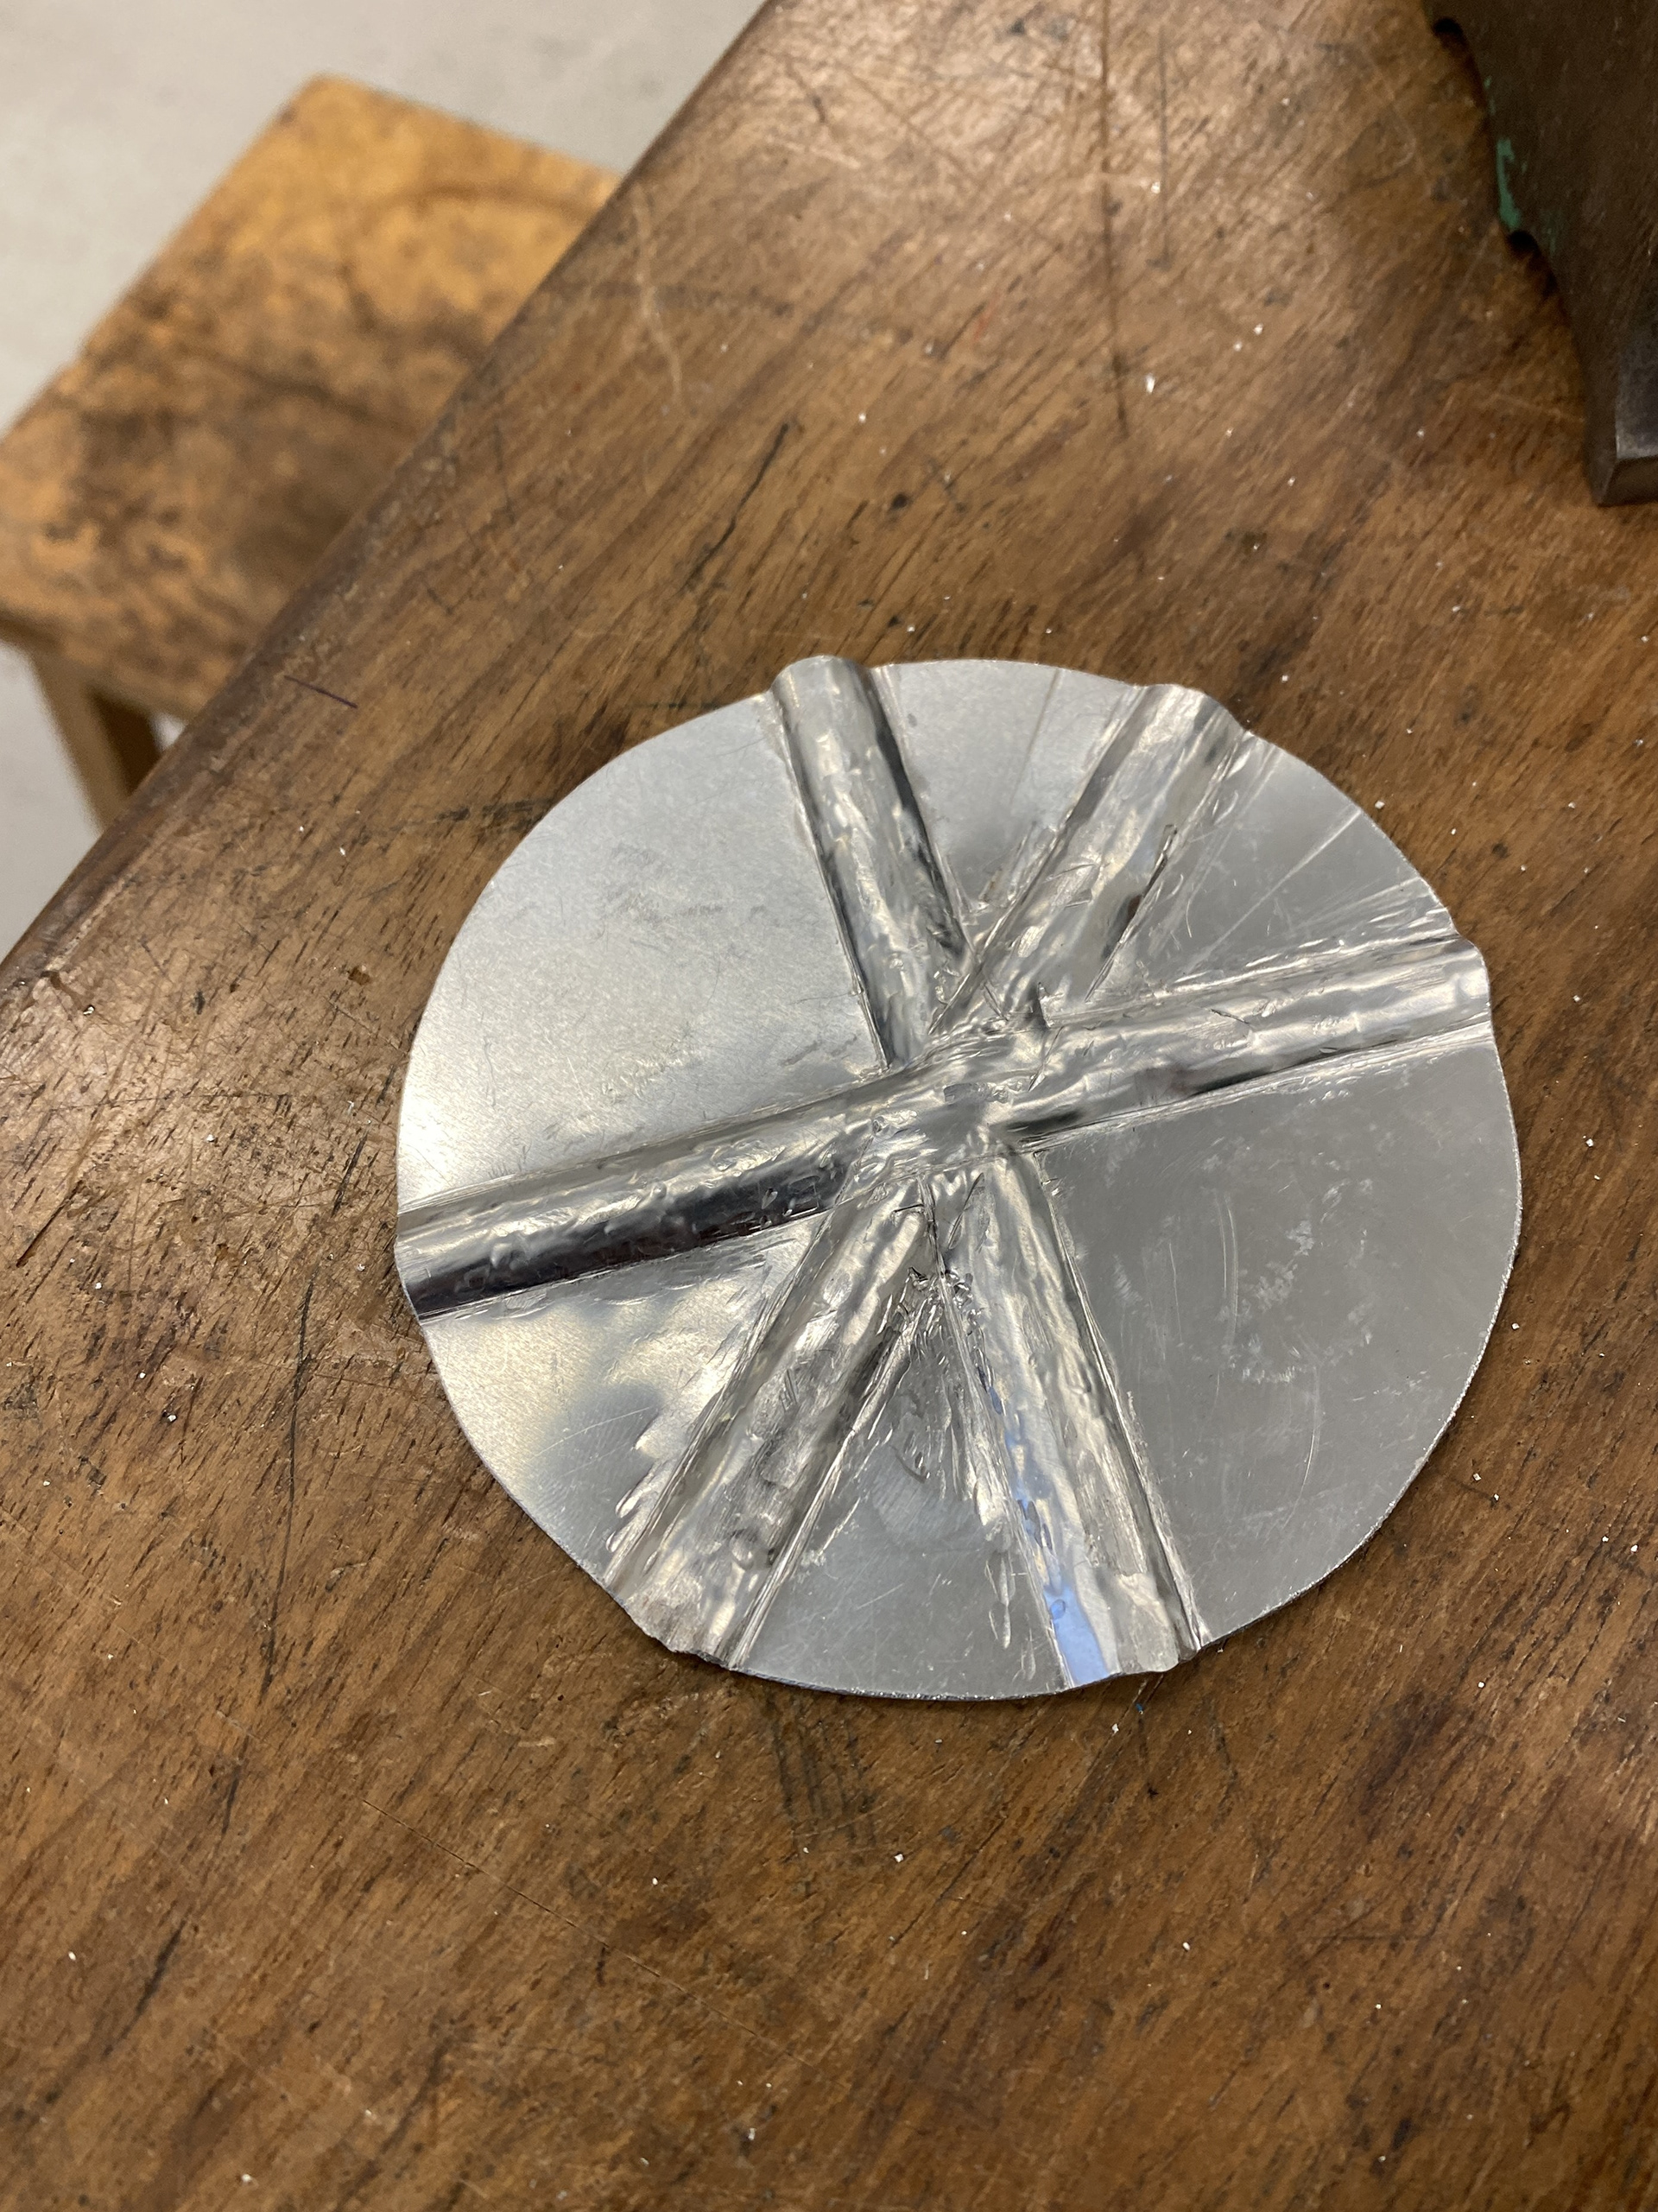
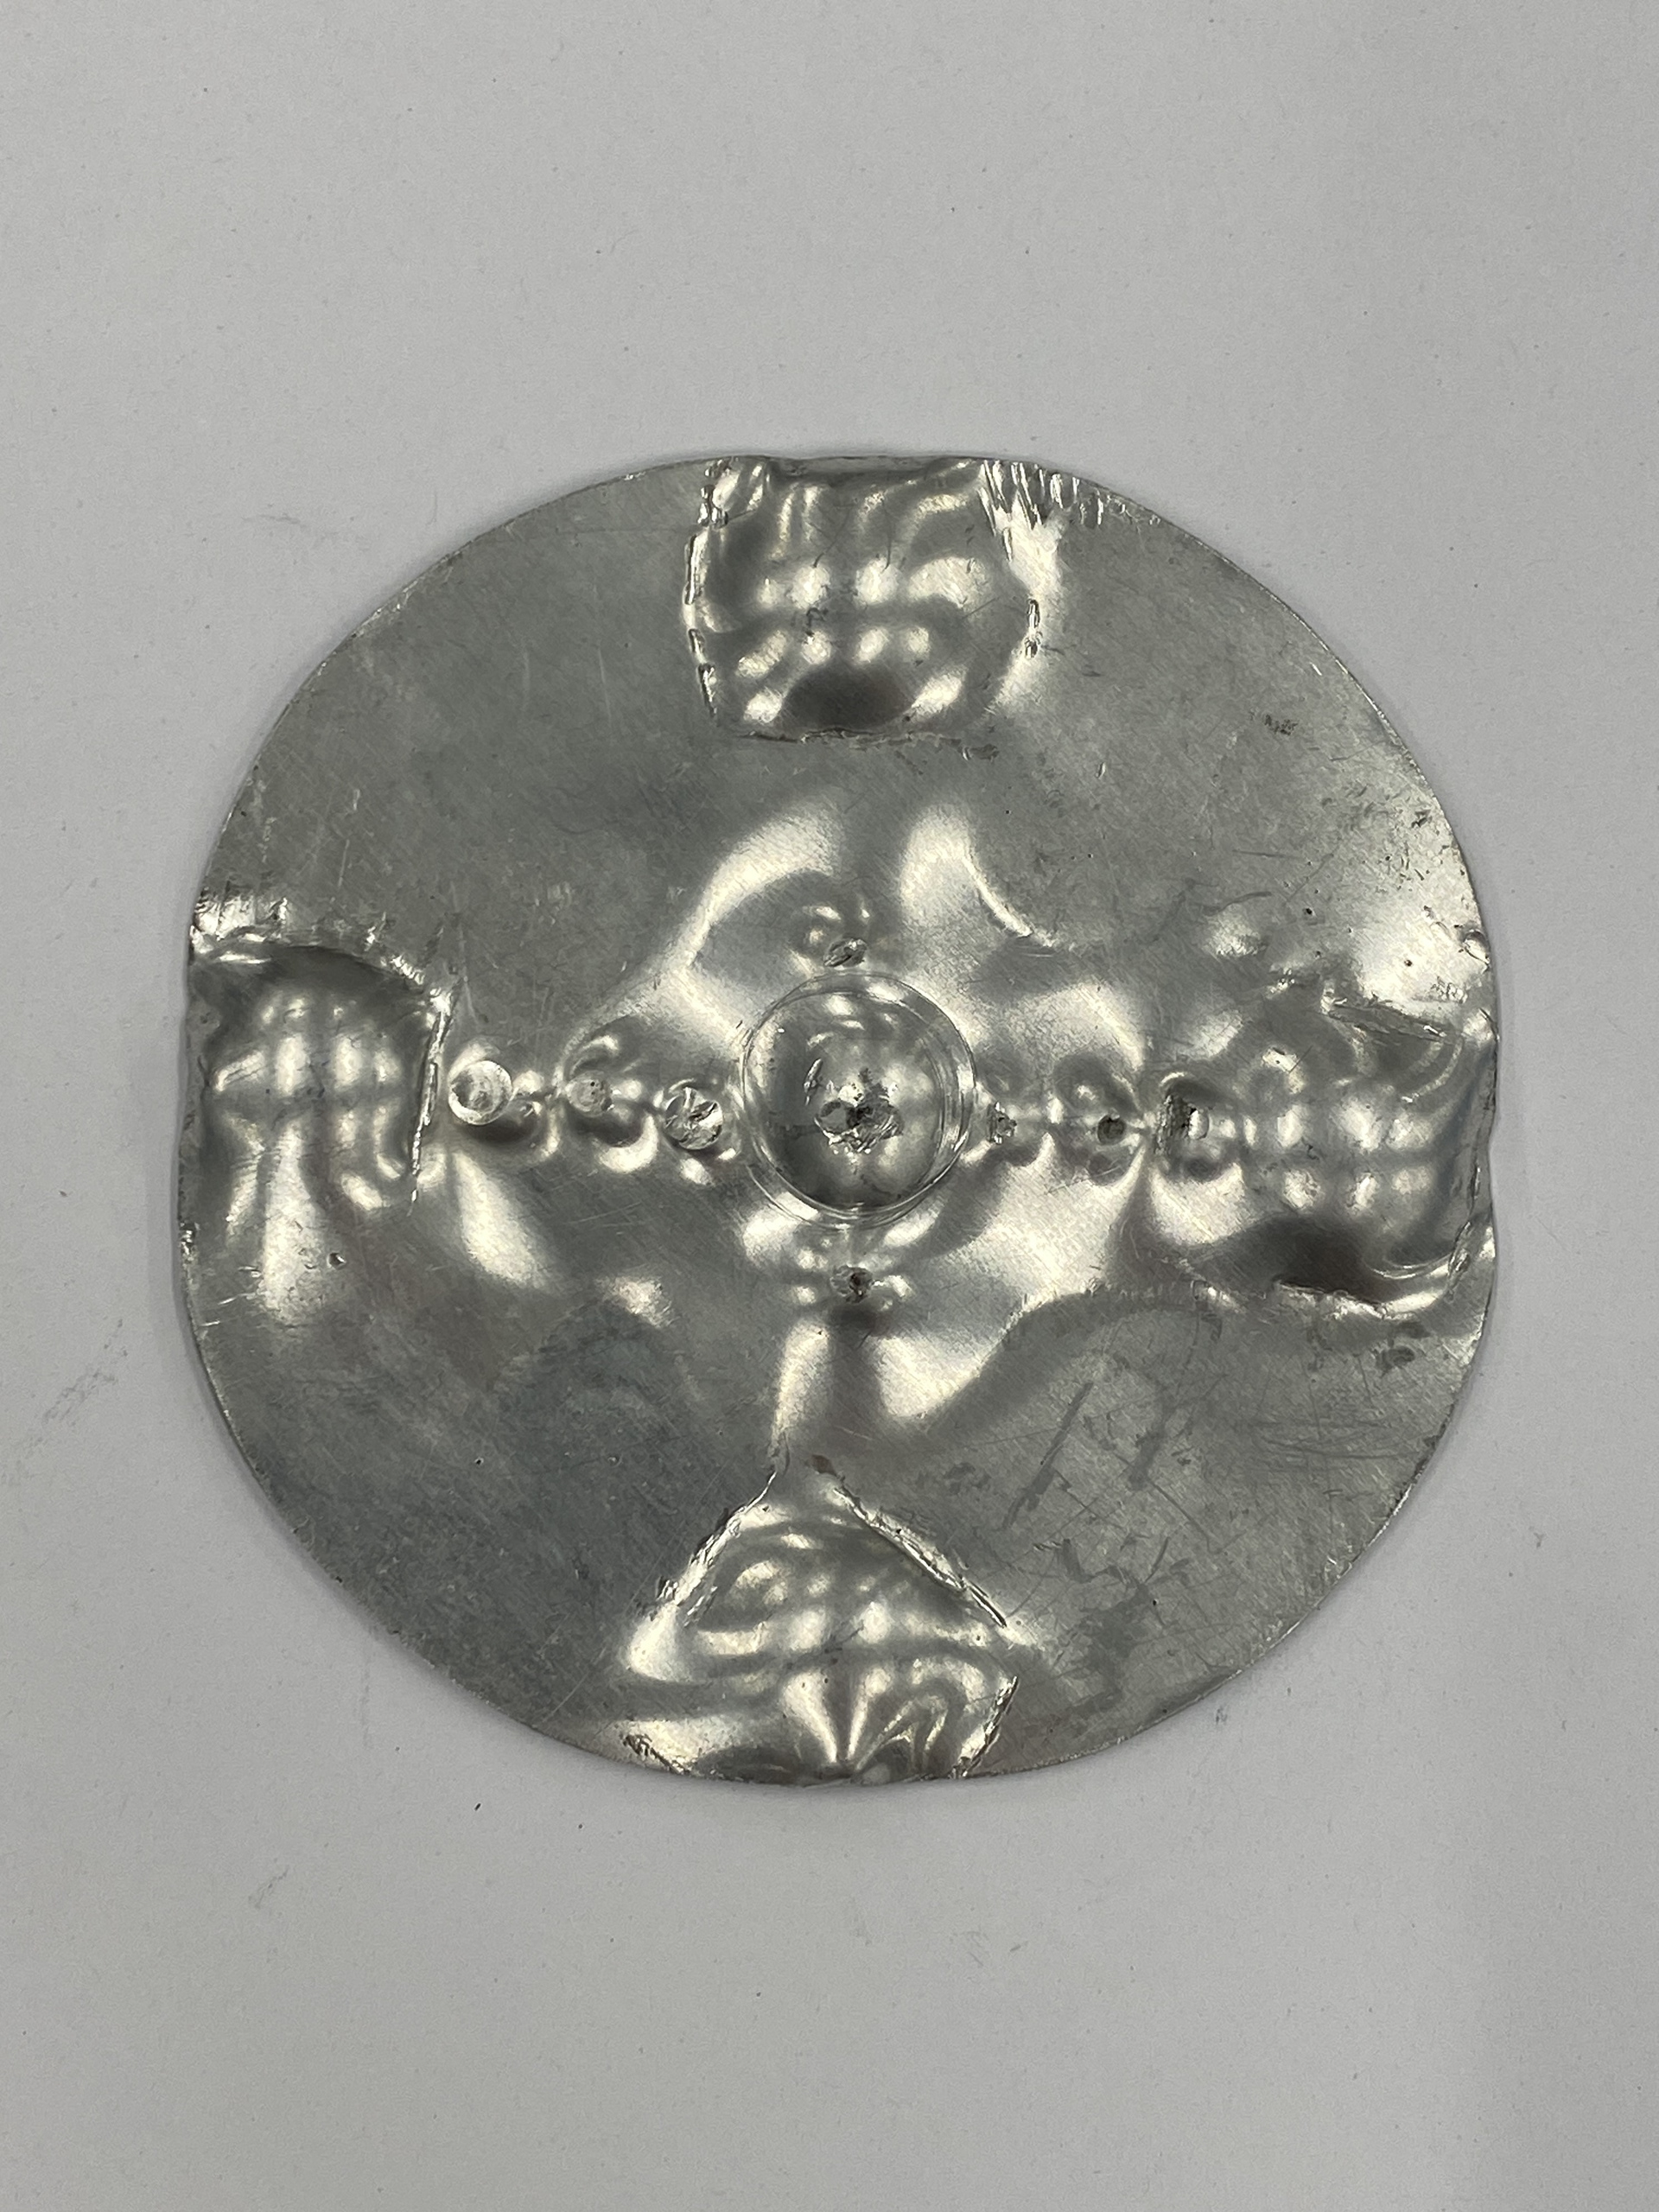
During the making of the cross design, I liked the negative space 3 diameter lines created. Additionally, I think that this will be a good area to add in the buckles that will connect the piece to the rest of the wearable. I want to explore texturing these flat spots differently from the smooth raised curves.
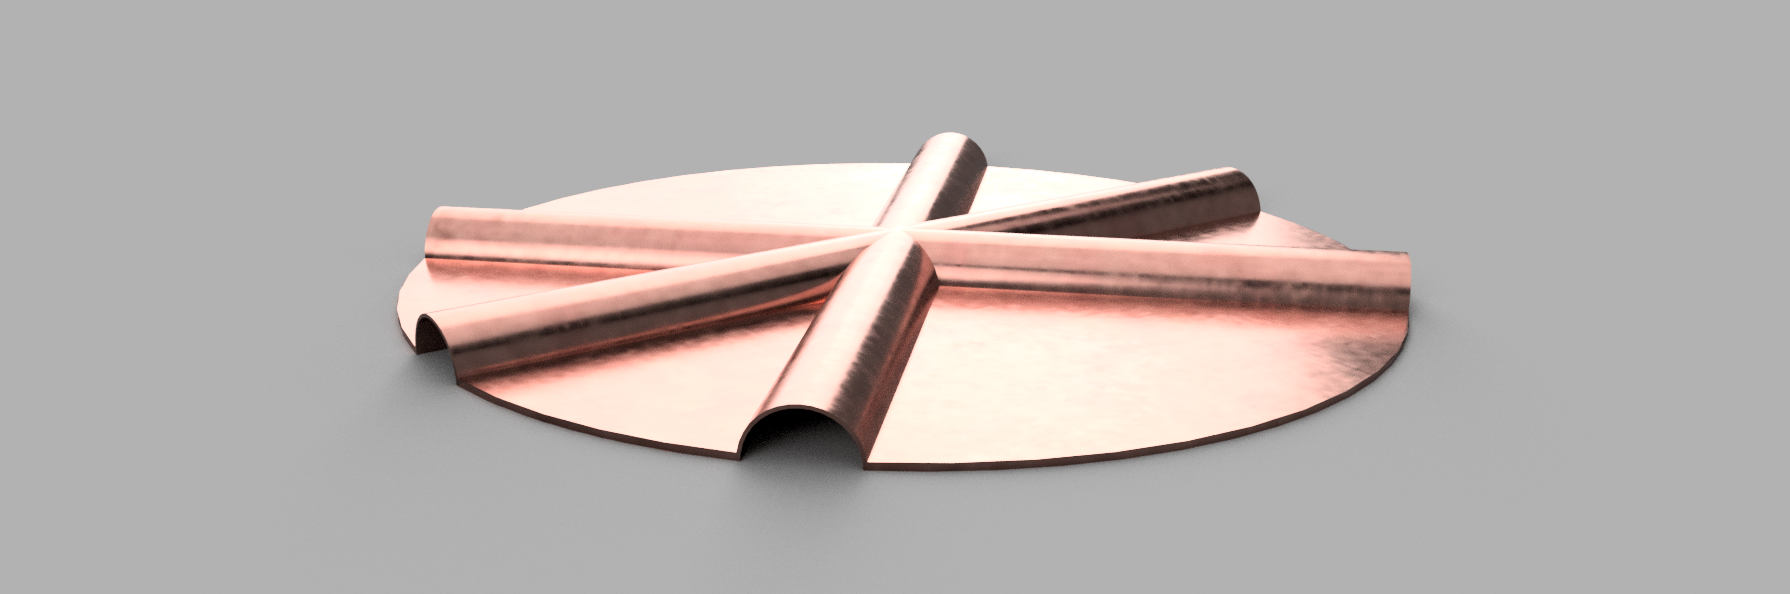
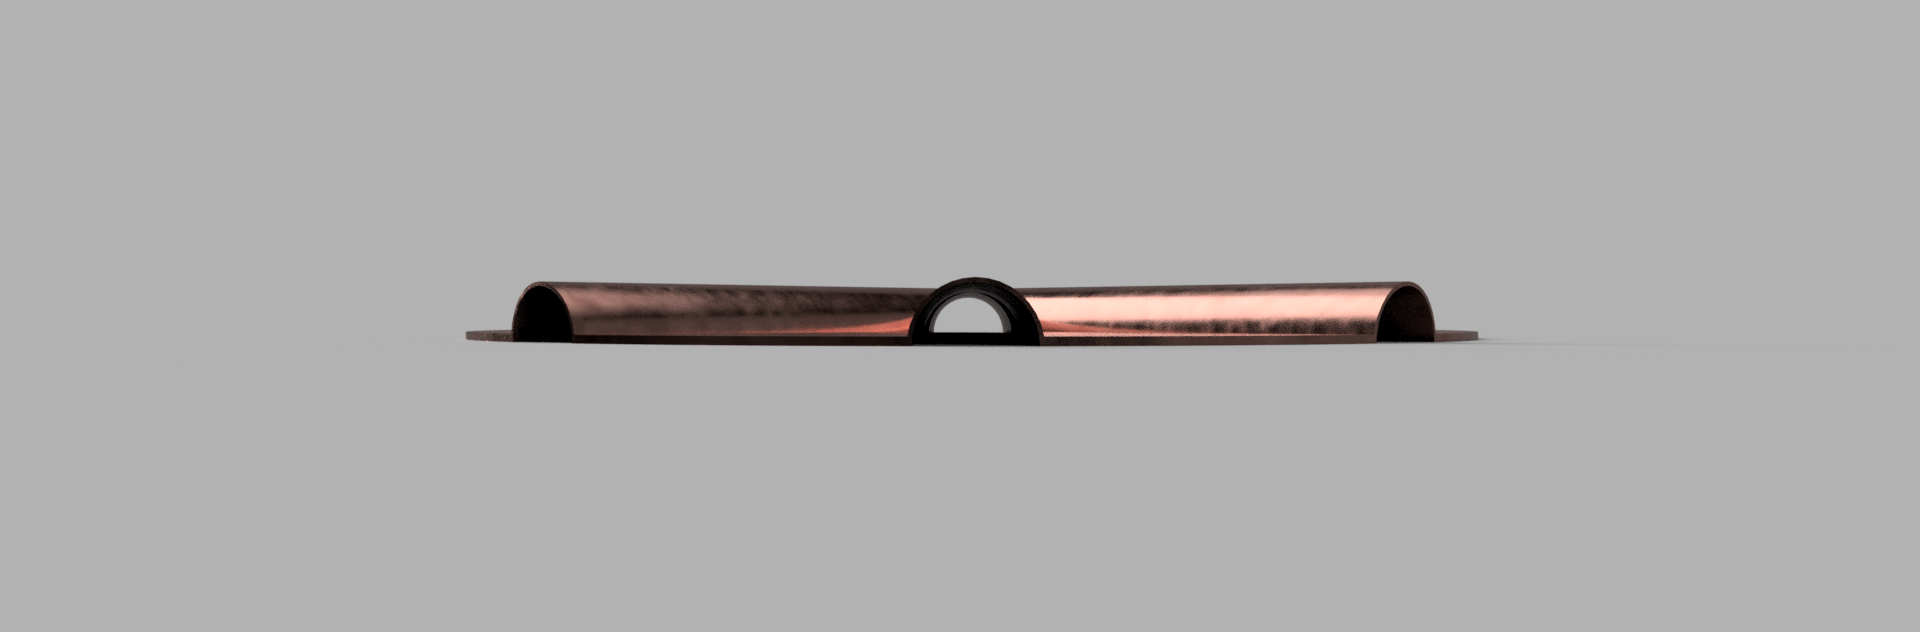
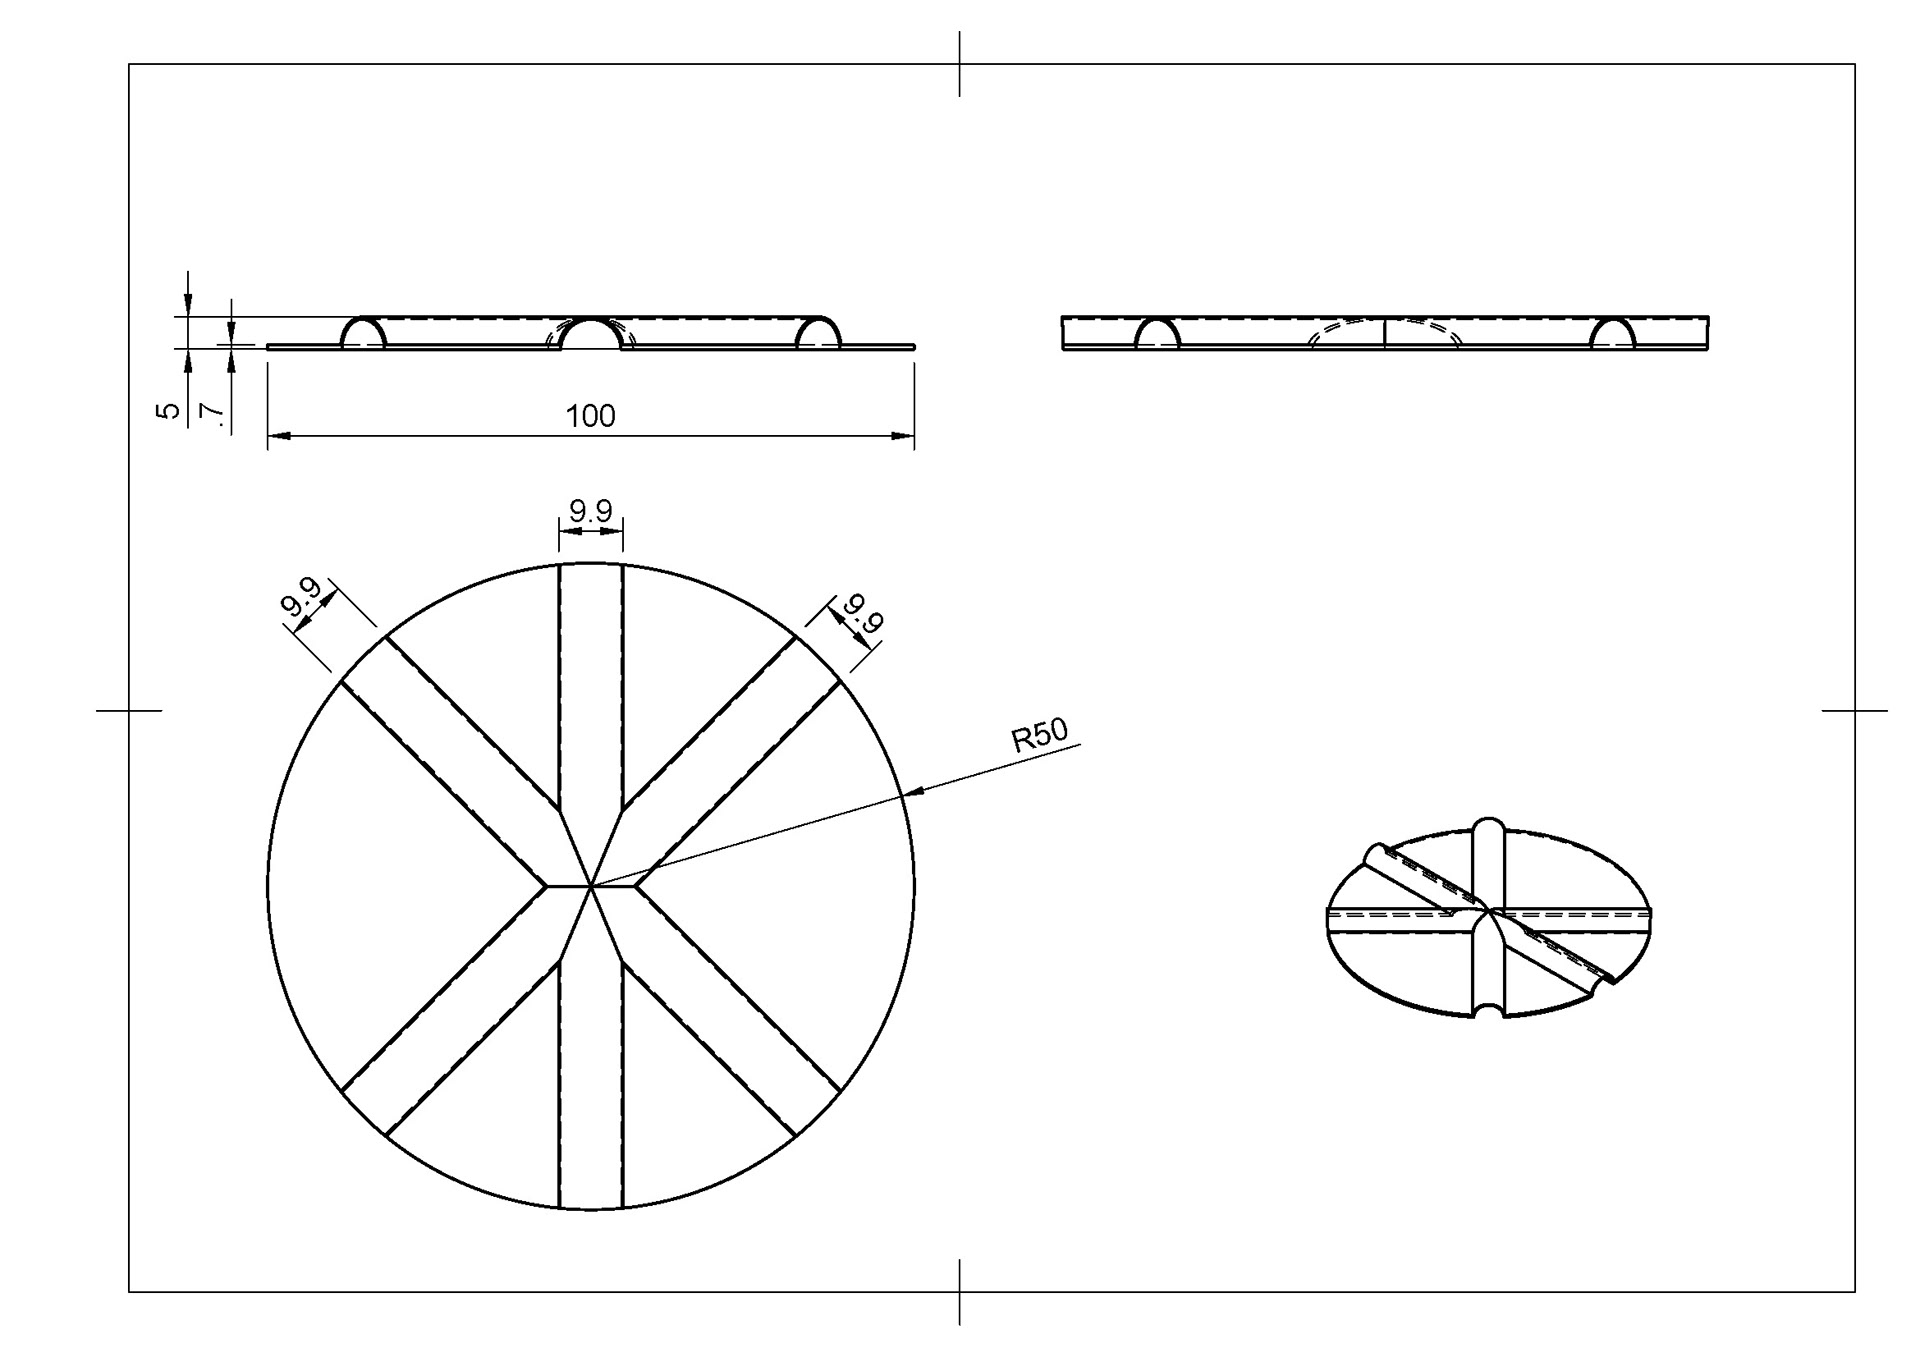
I created a CAD model using Fusion 360 to have an accurate drawing to reference when making the design in the workshop as well as to mock-up the design using copper.
Developing the upper shoulder area
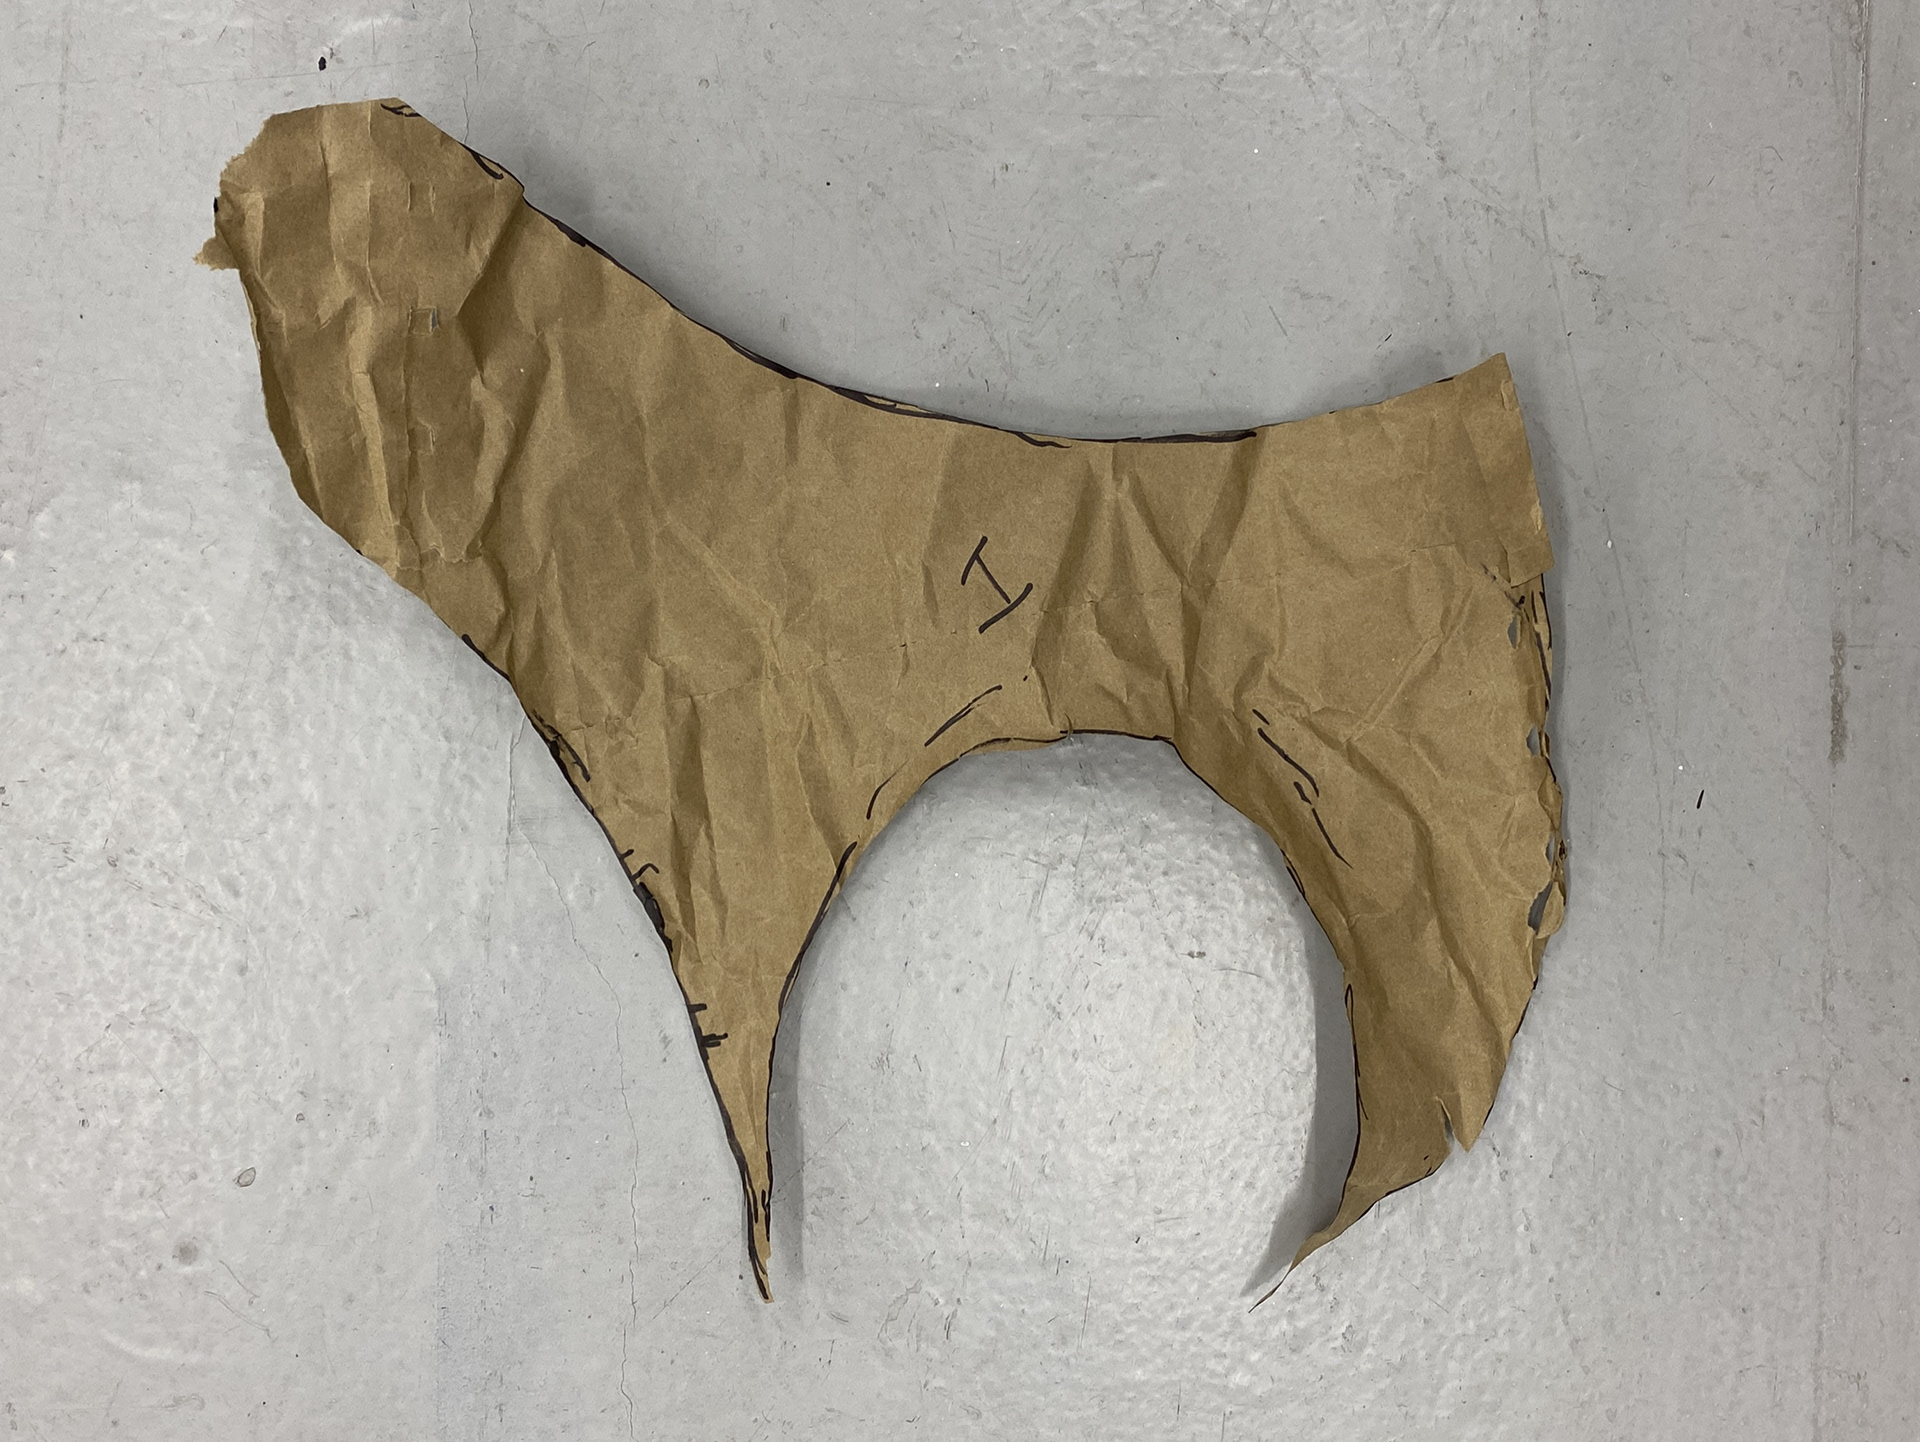
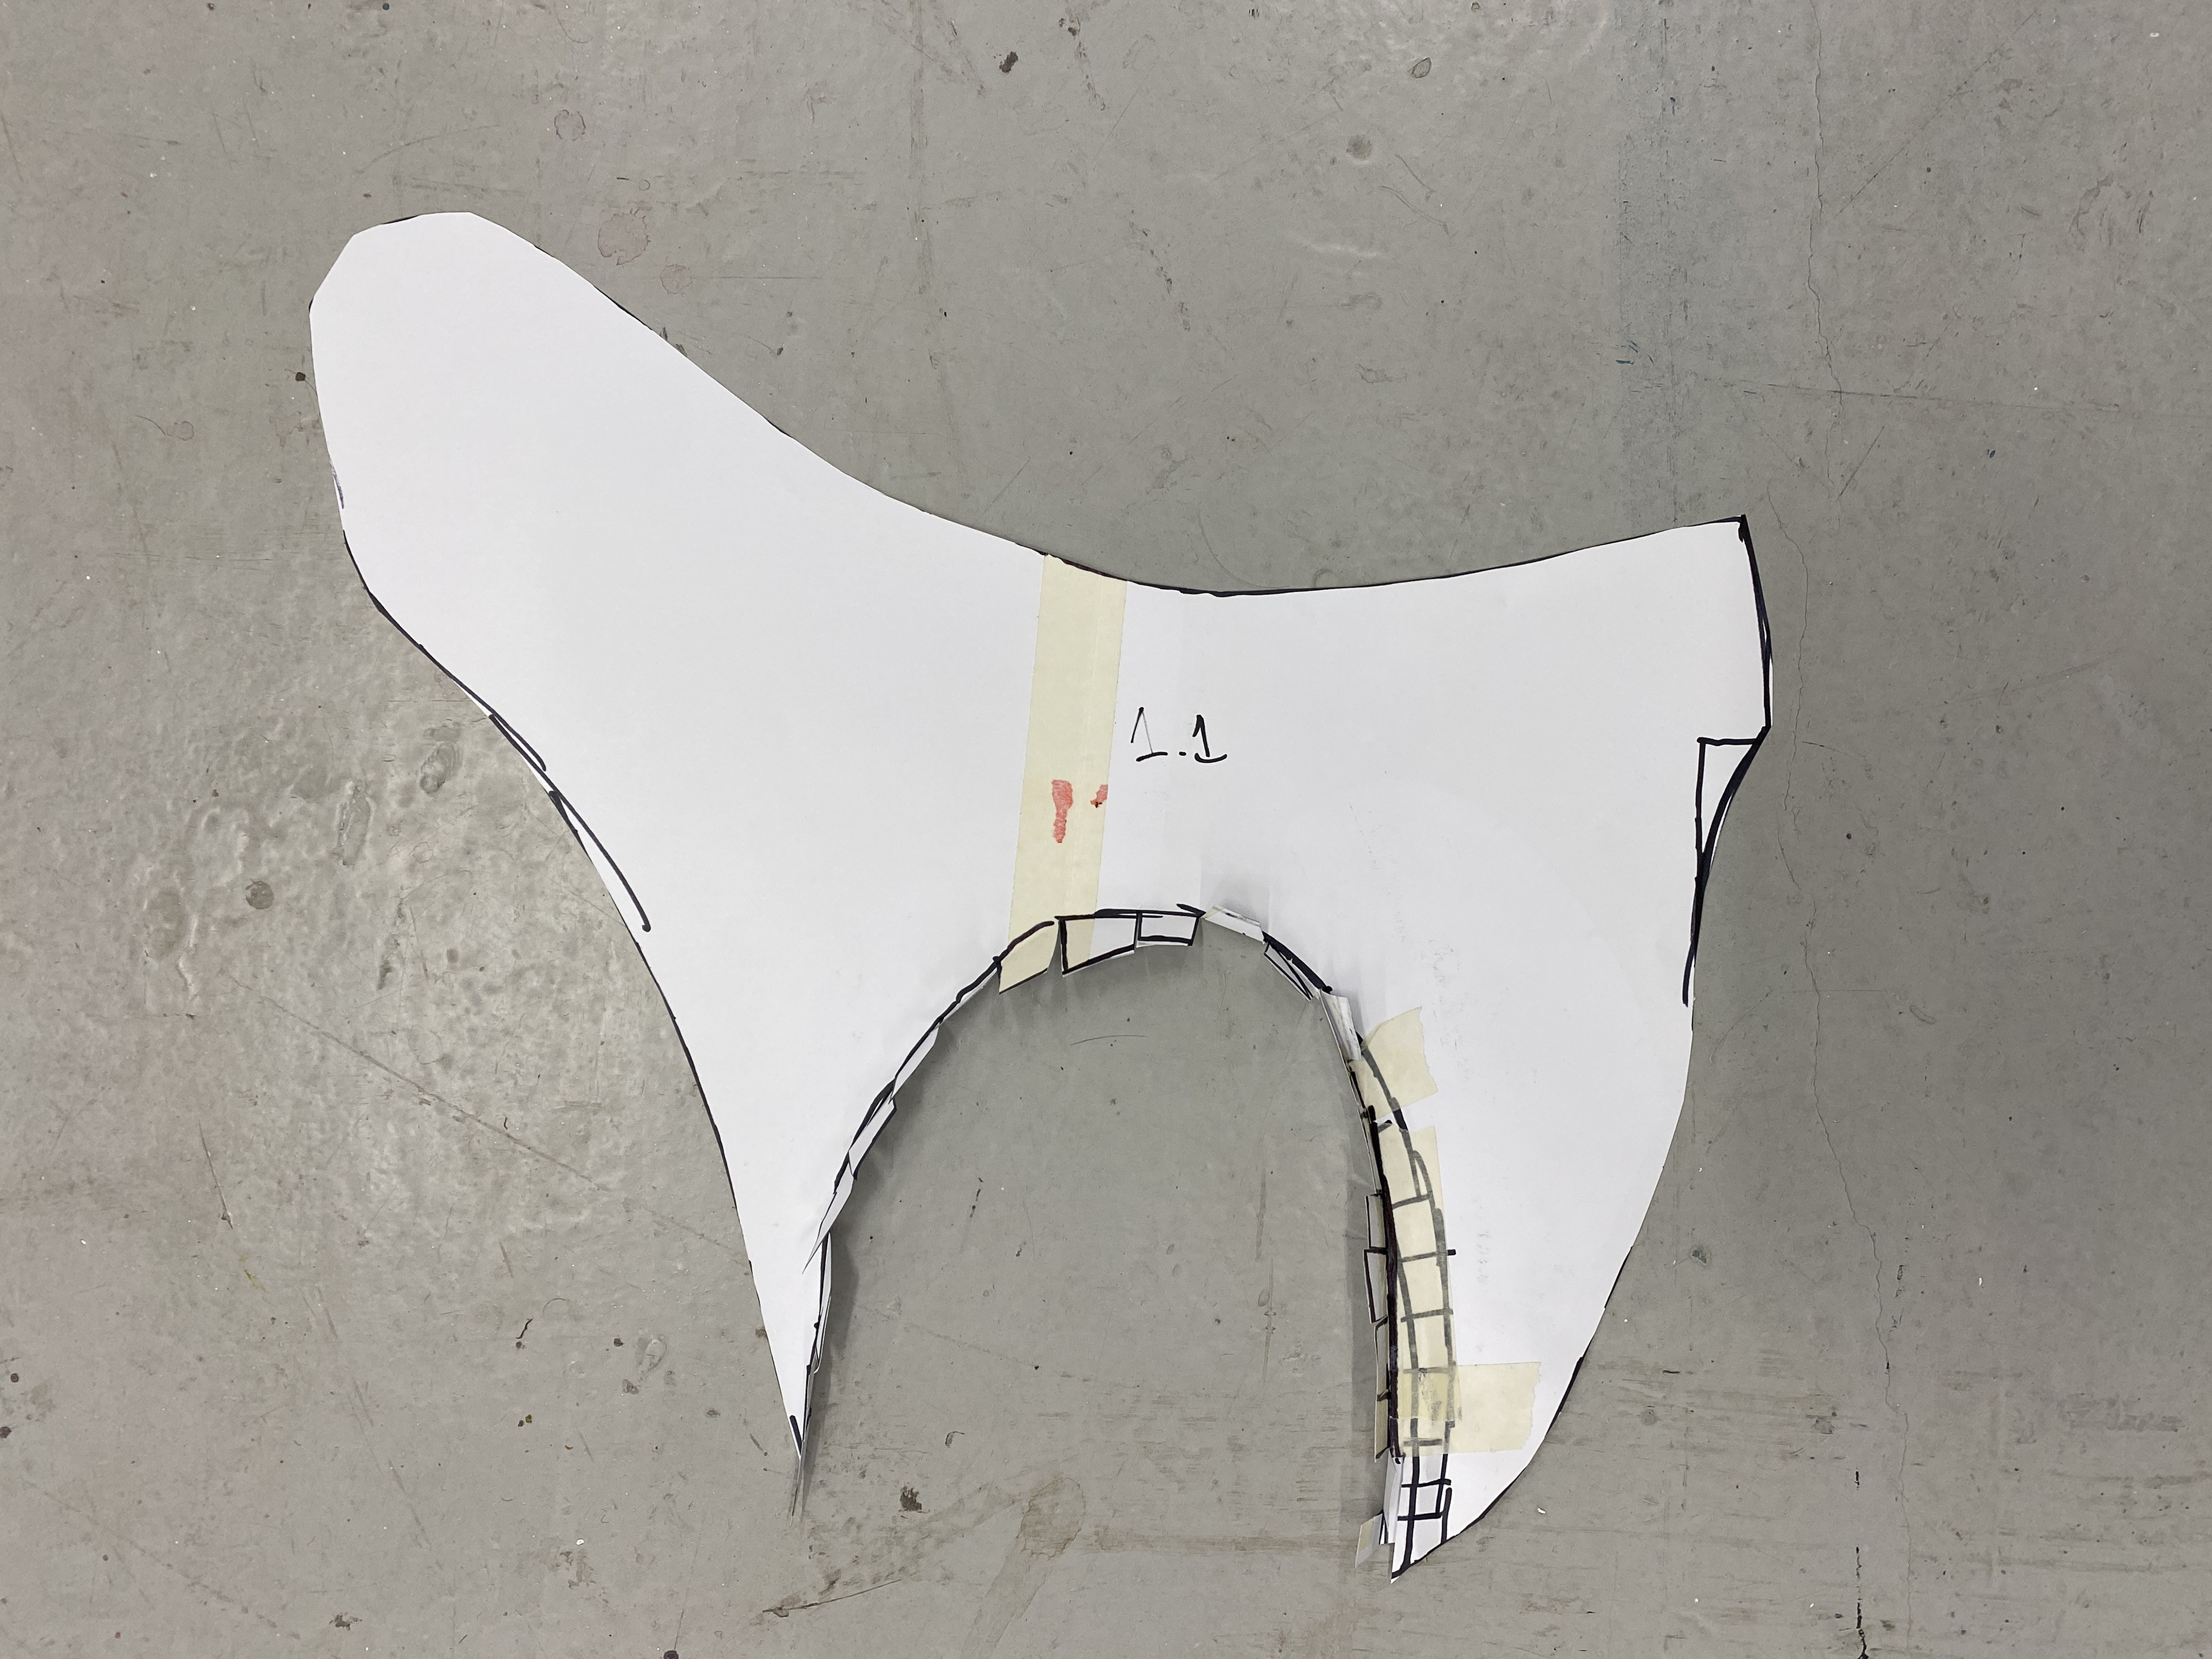
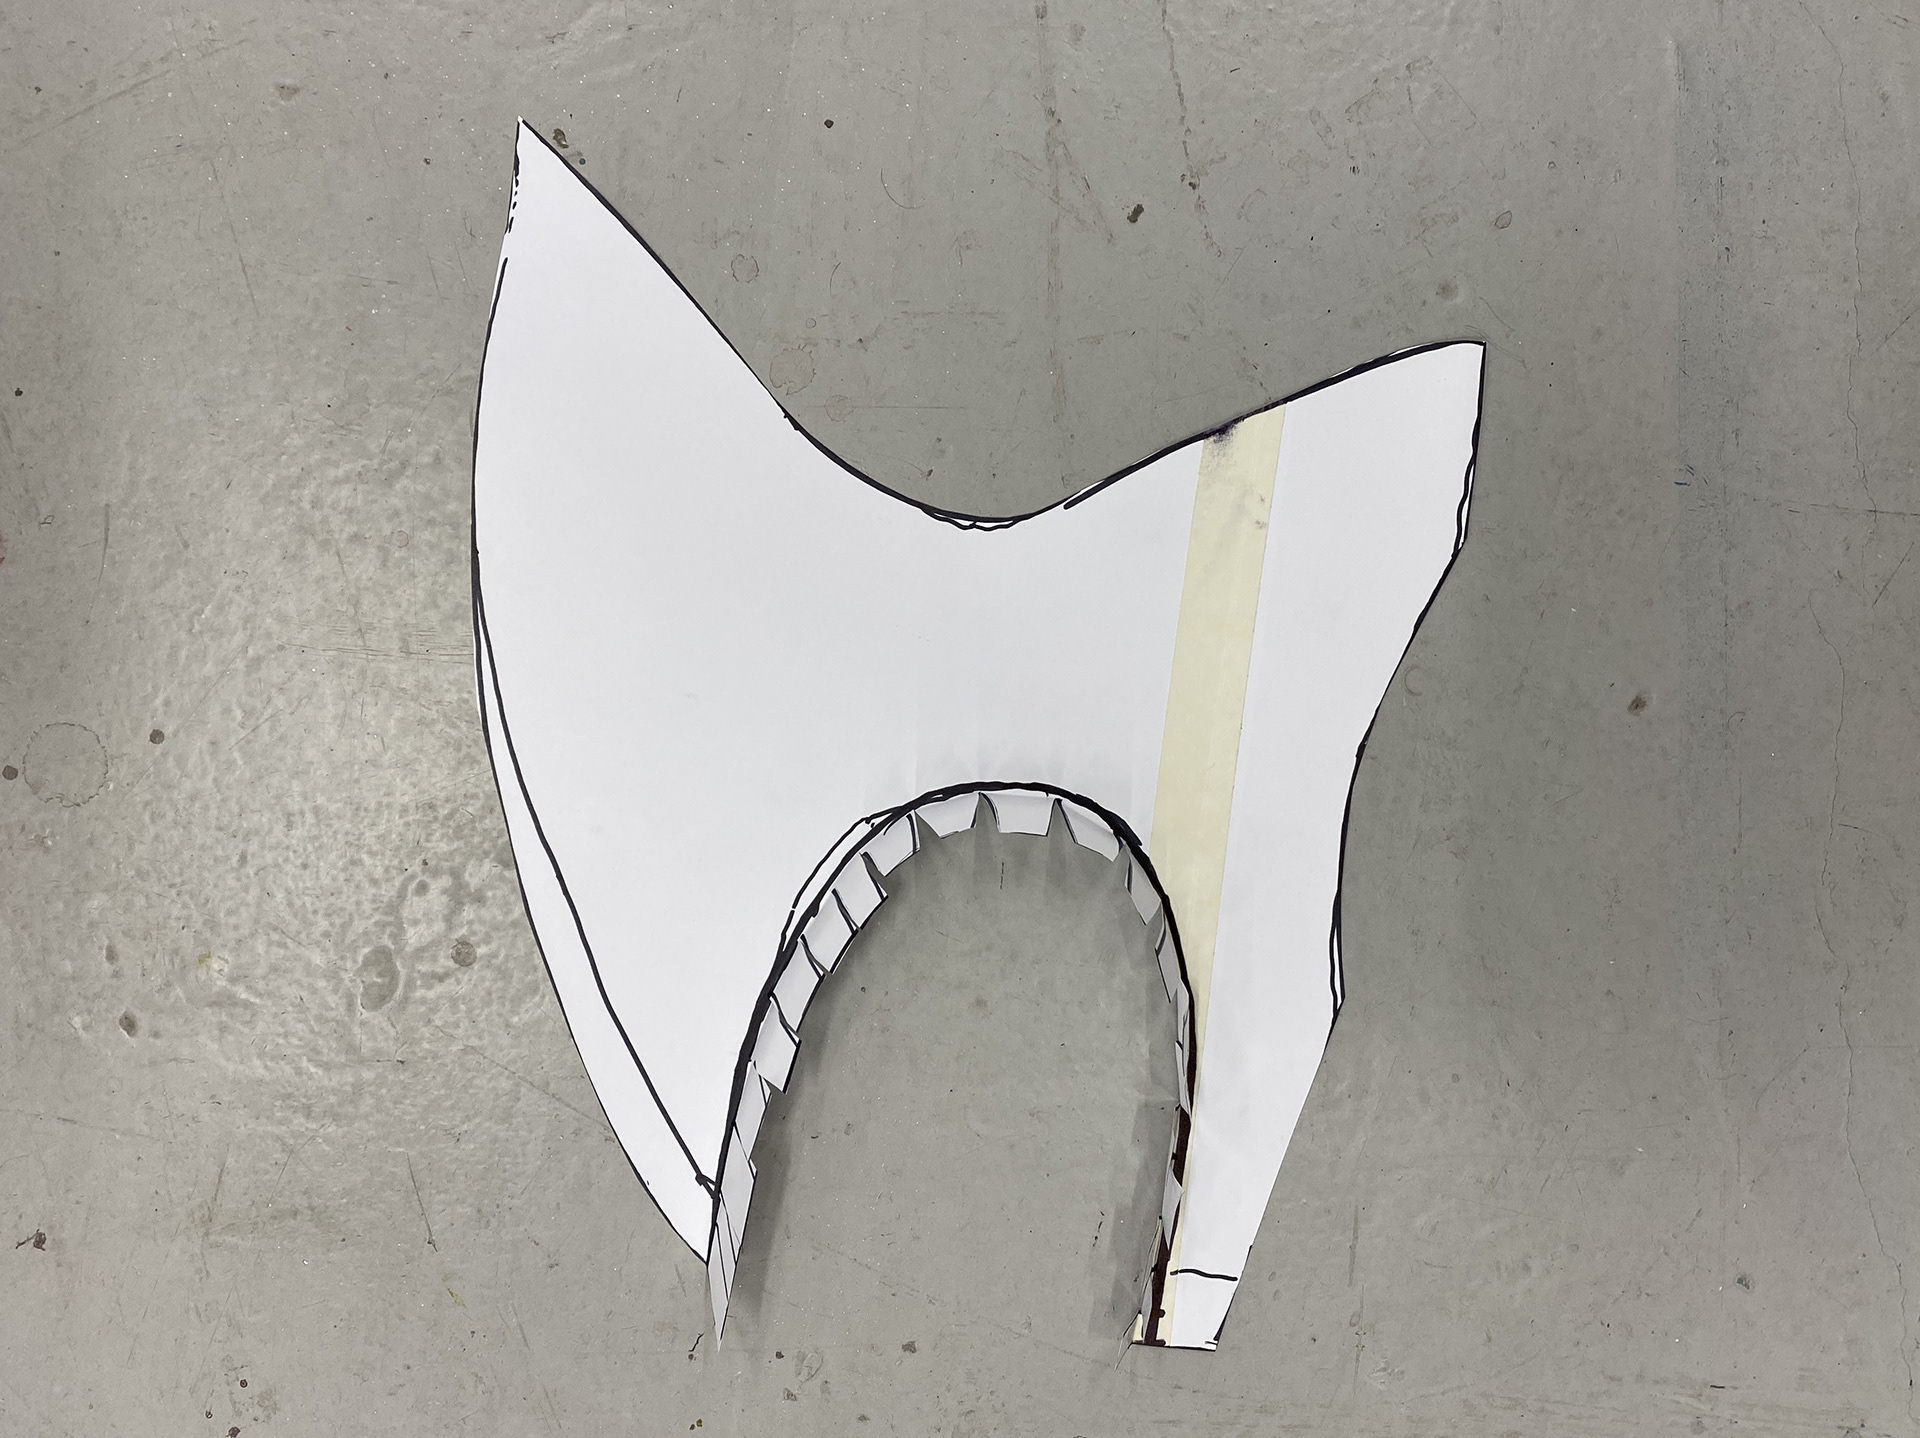
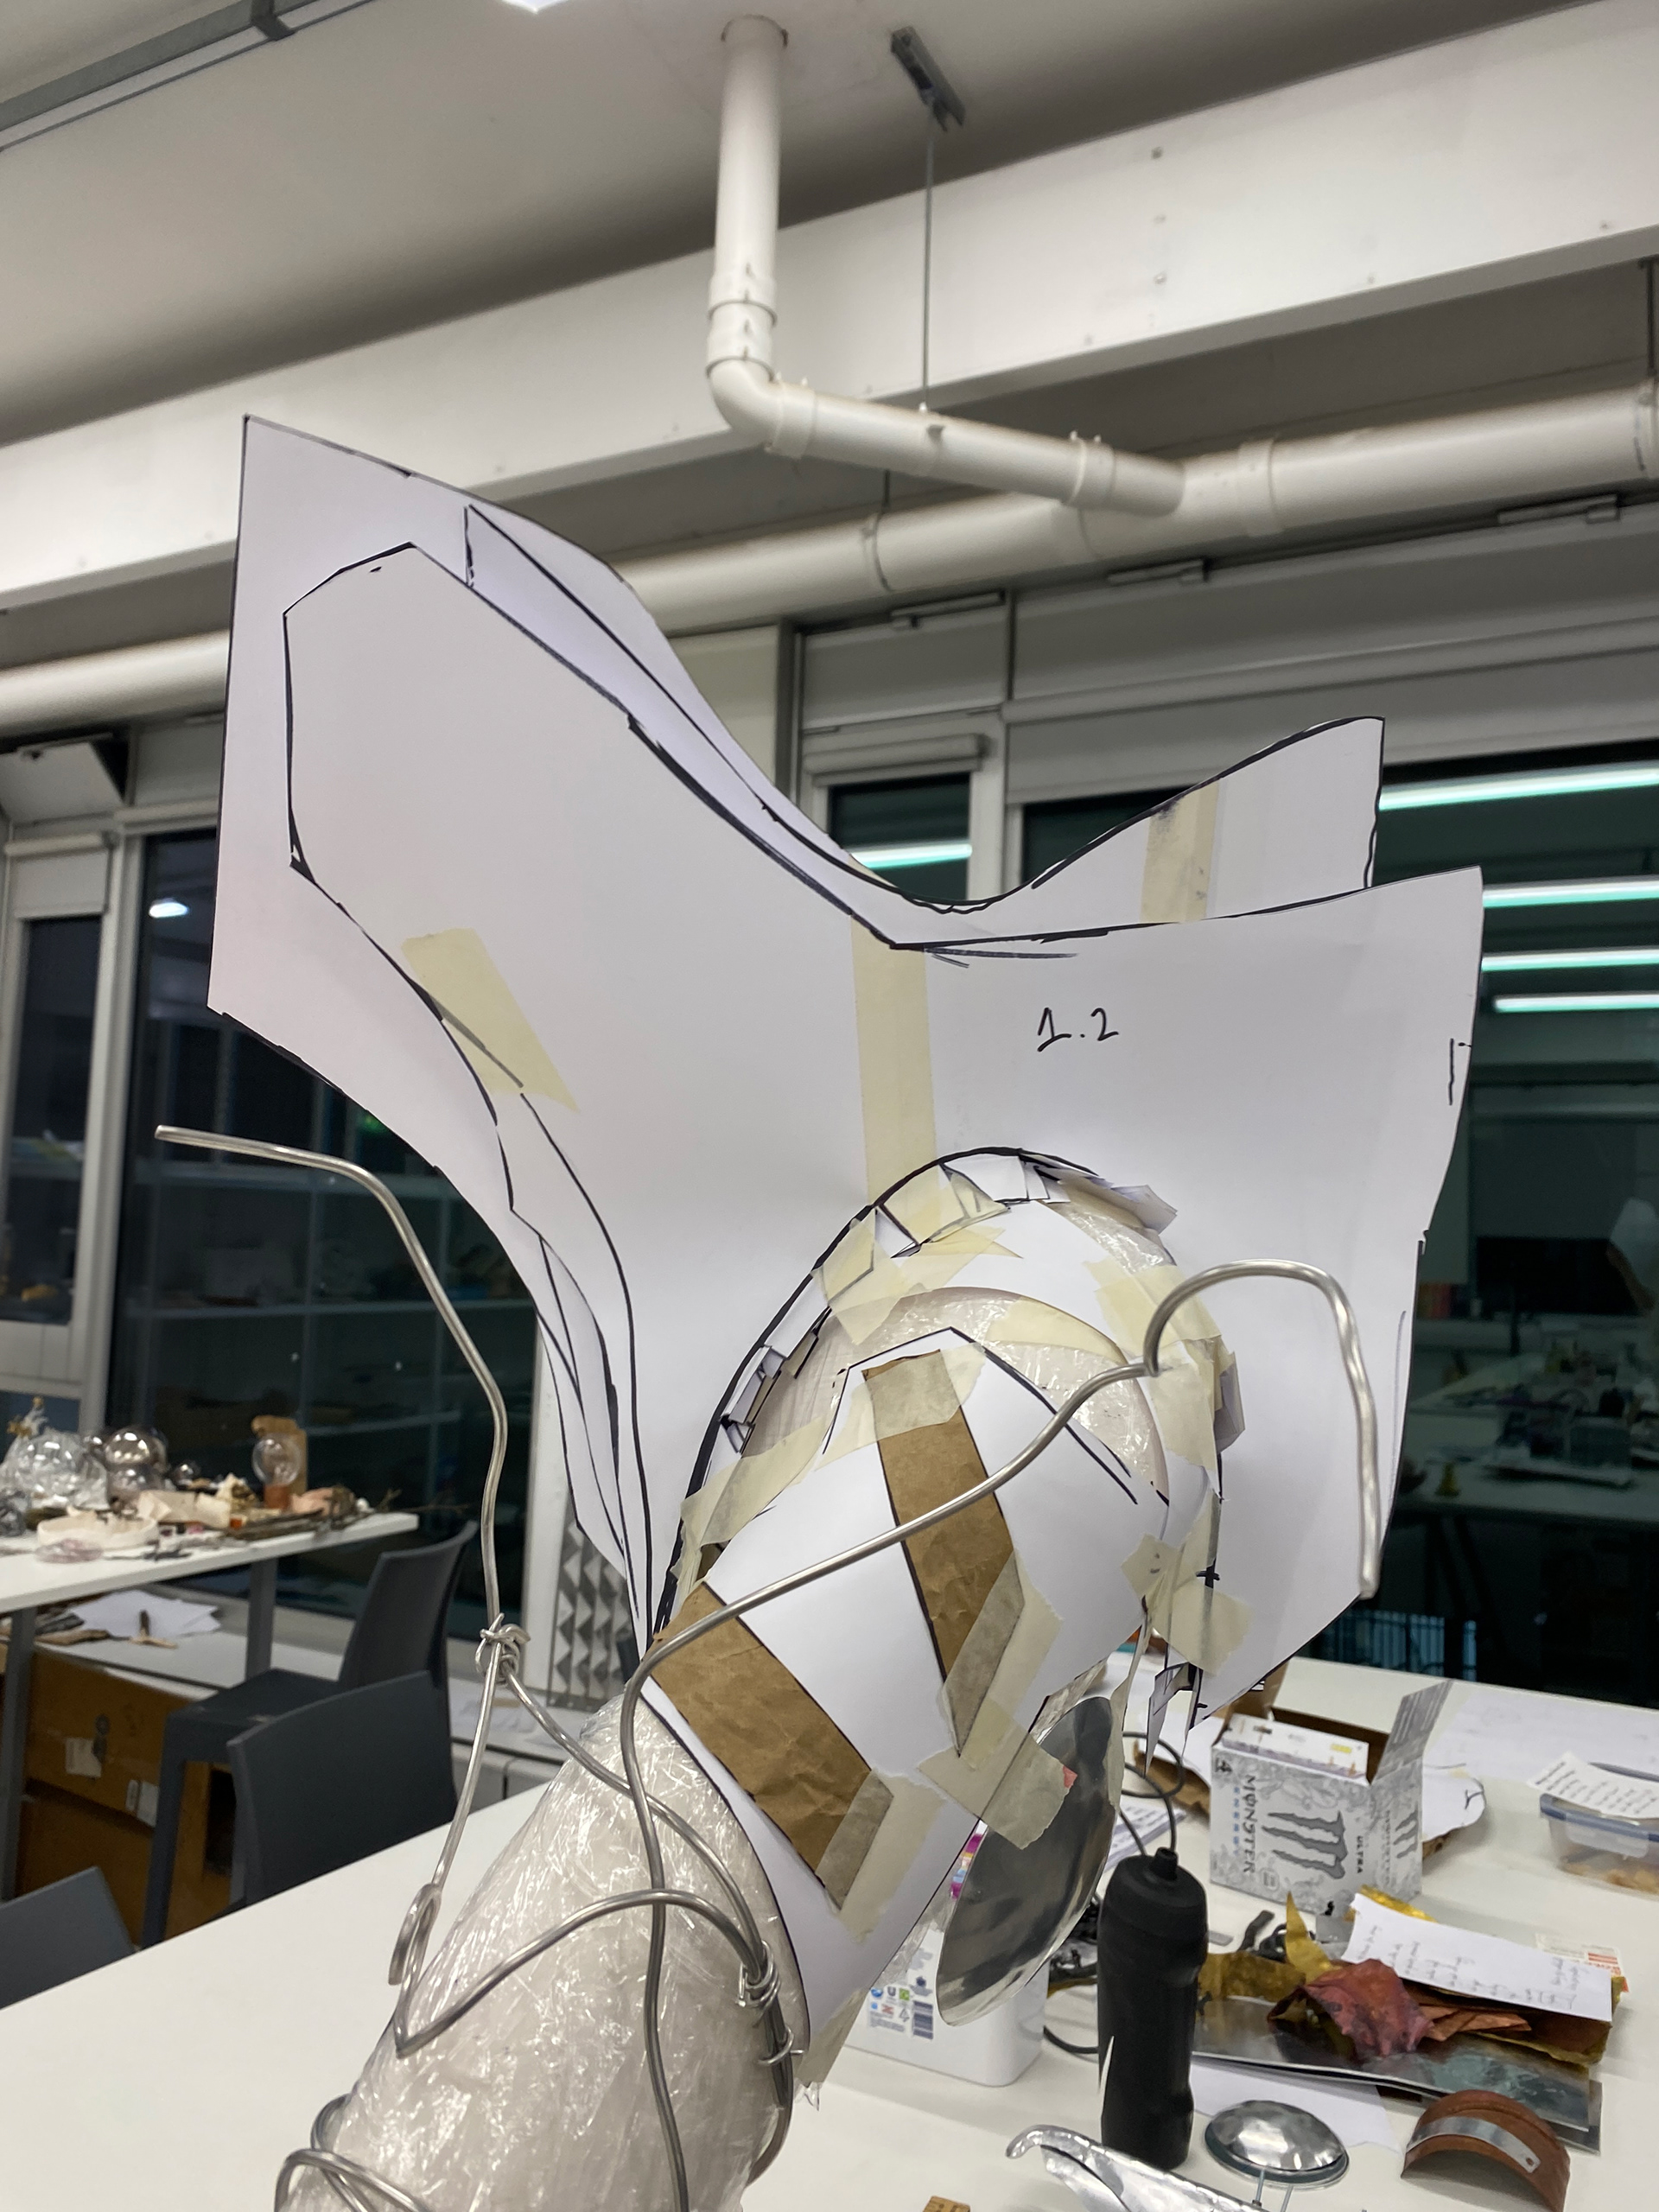
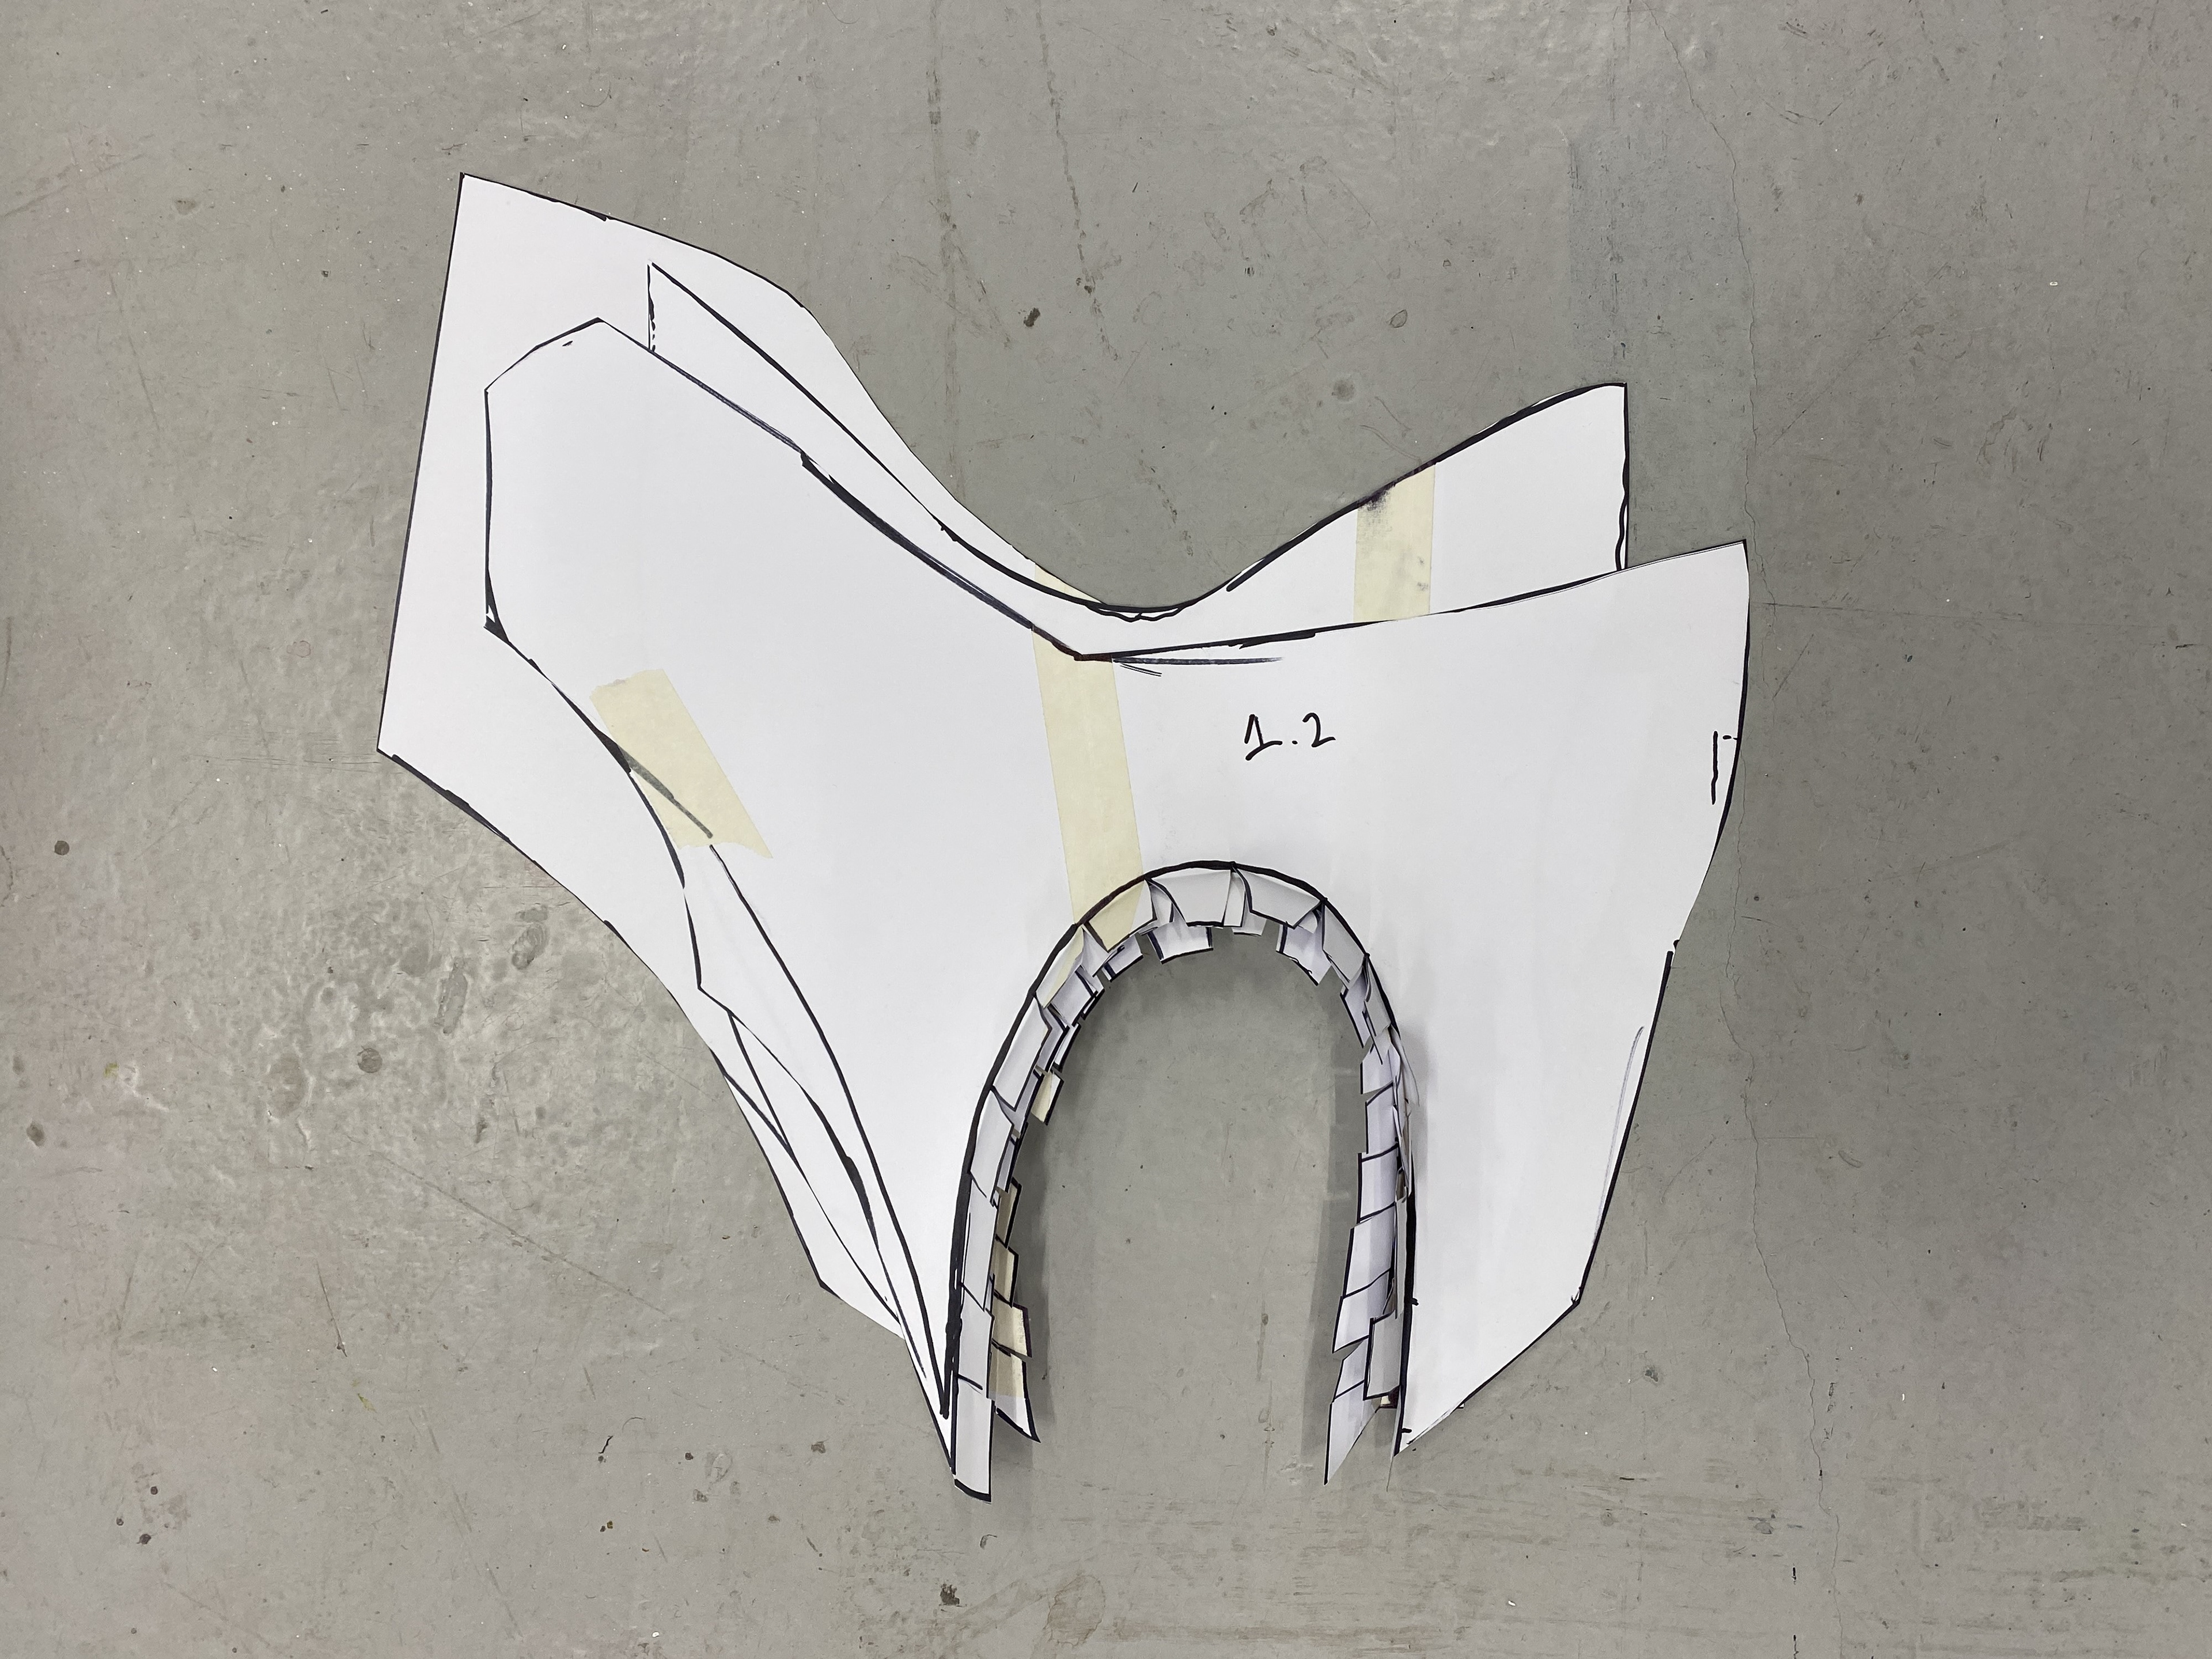
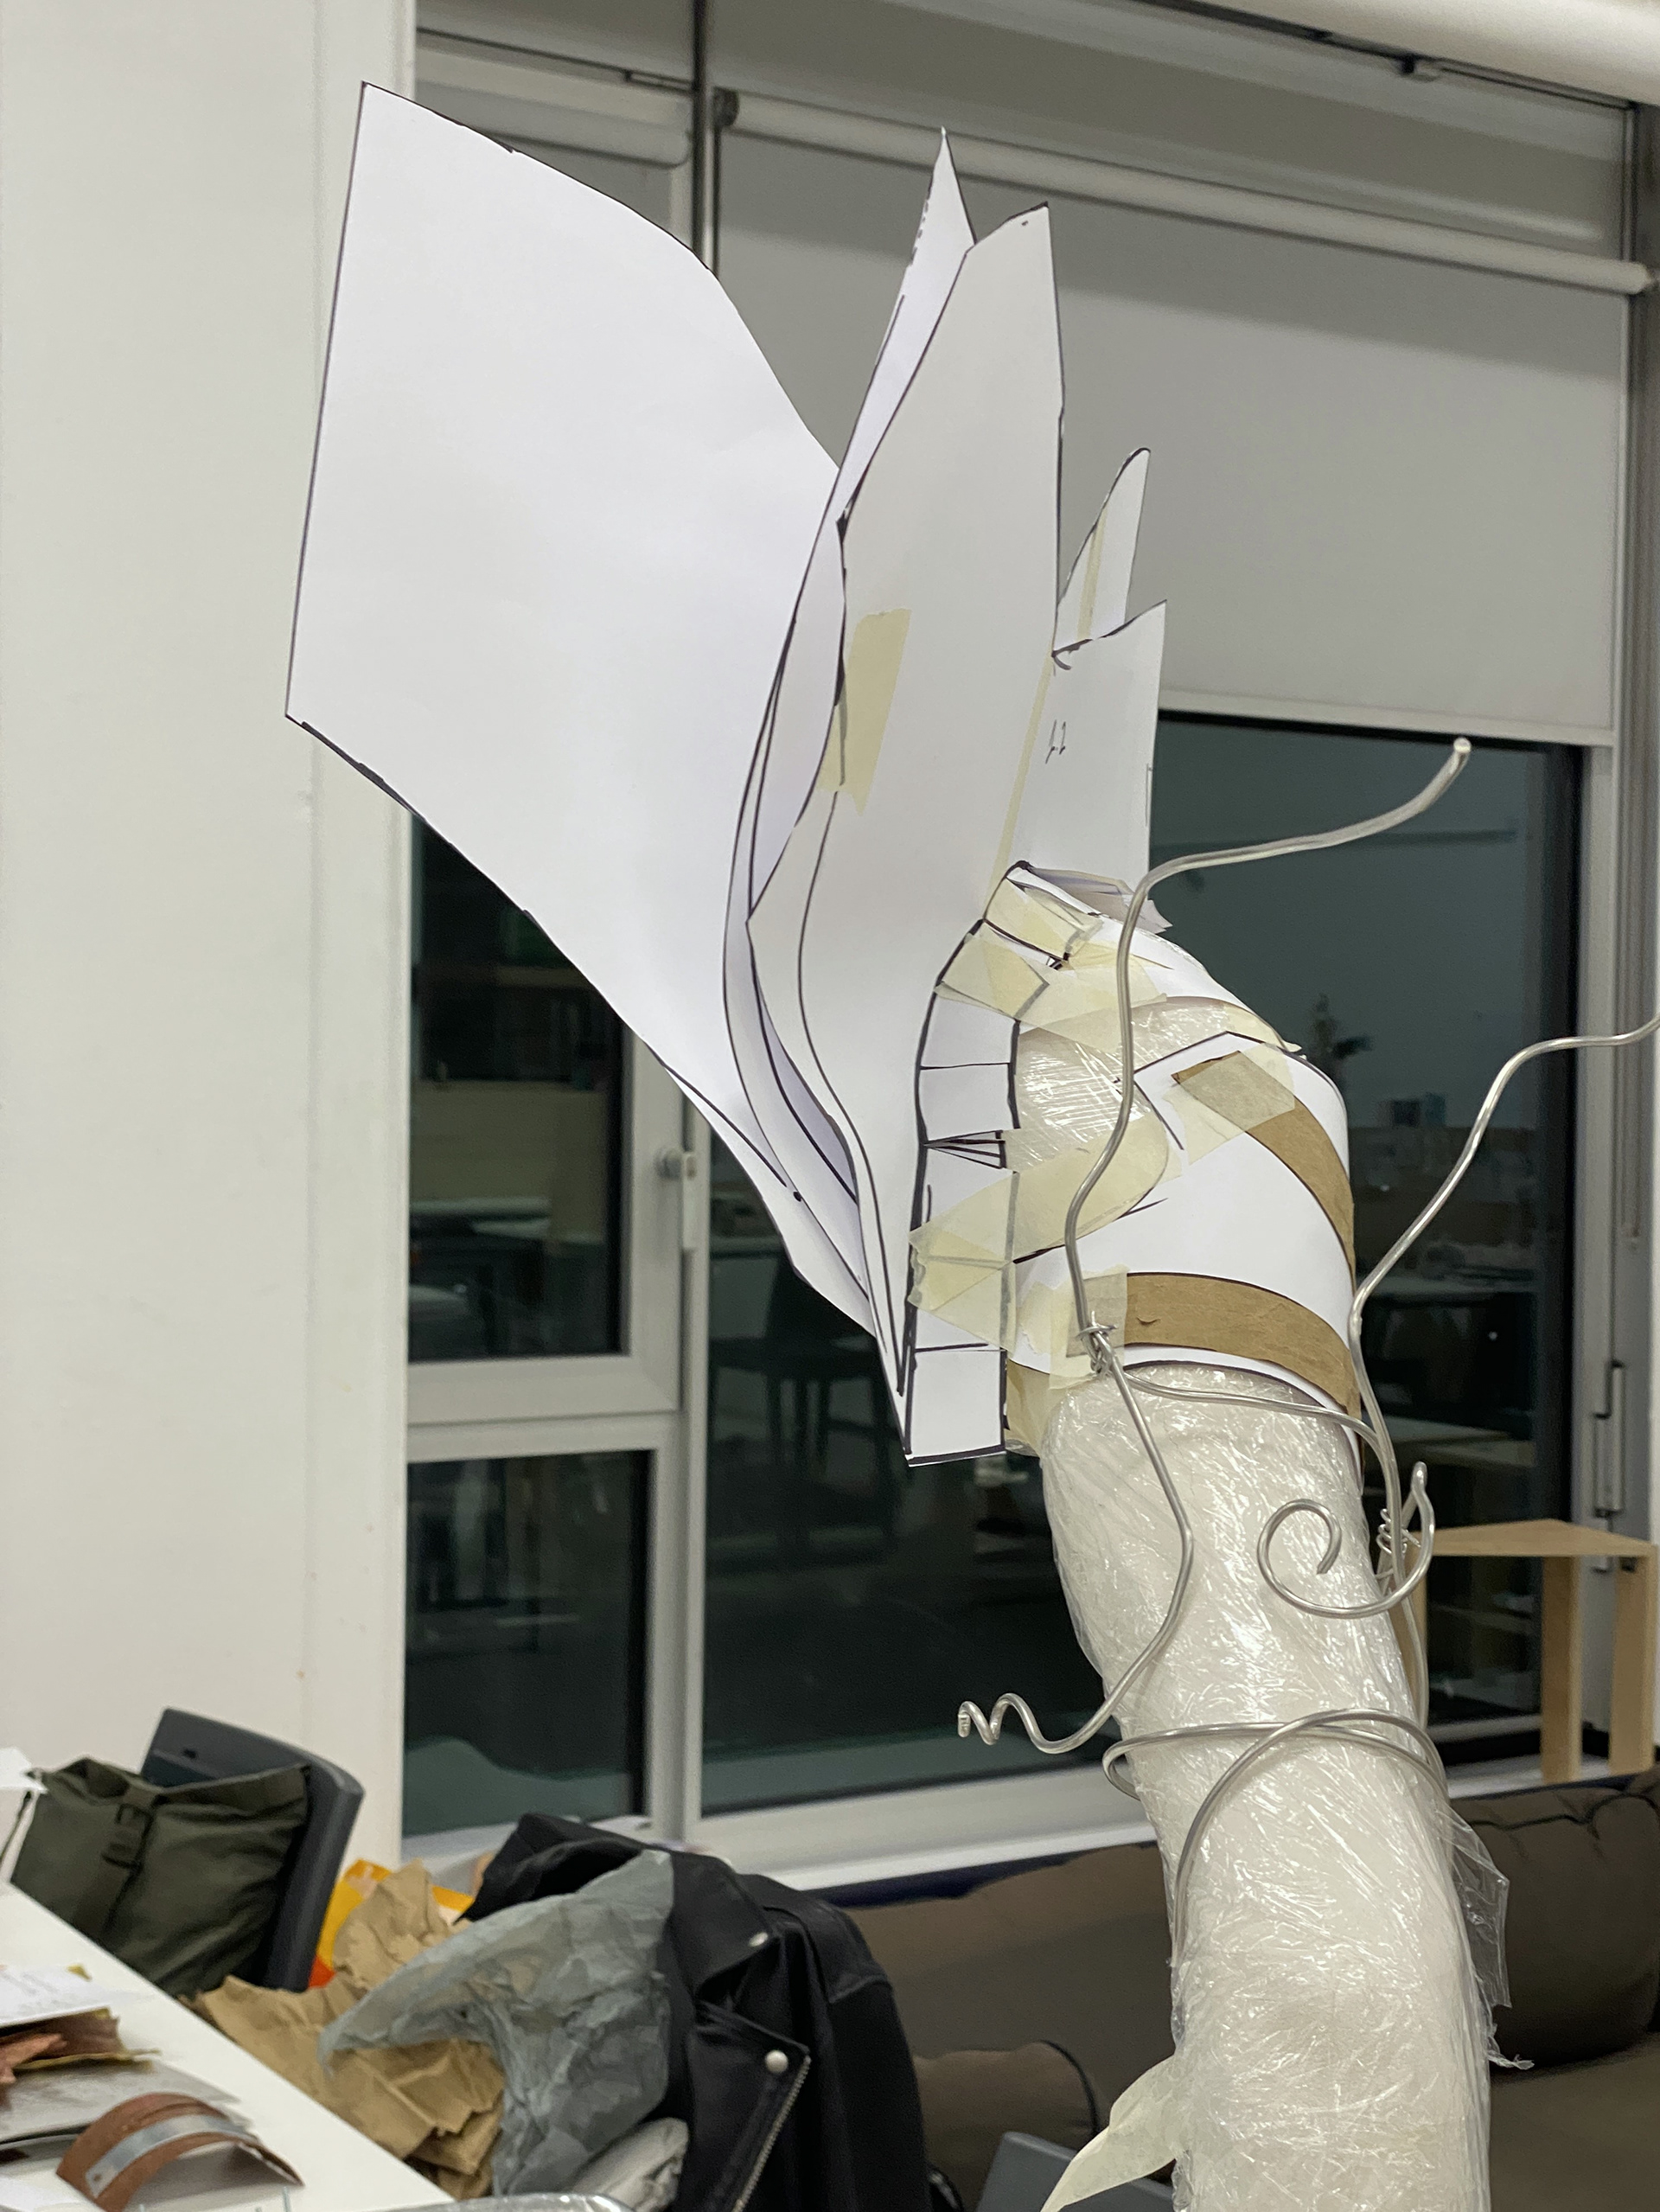
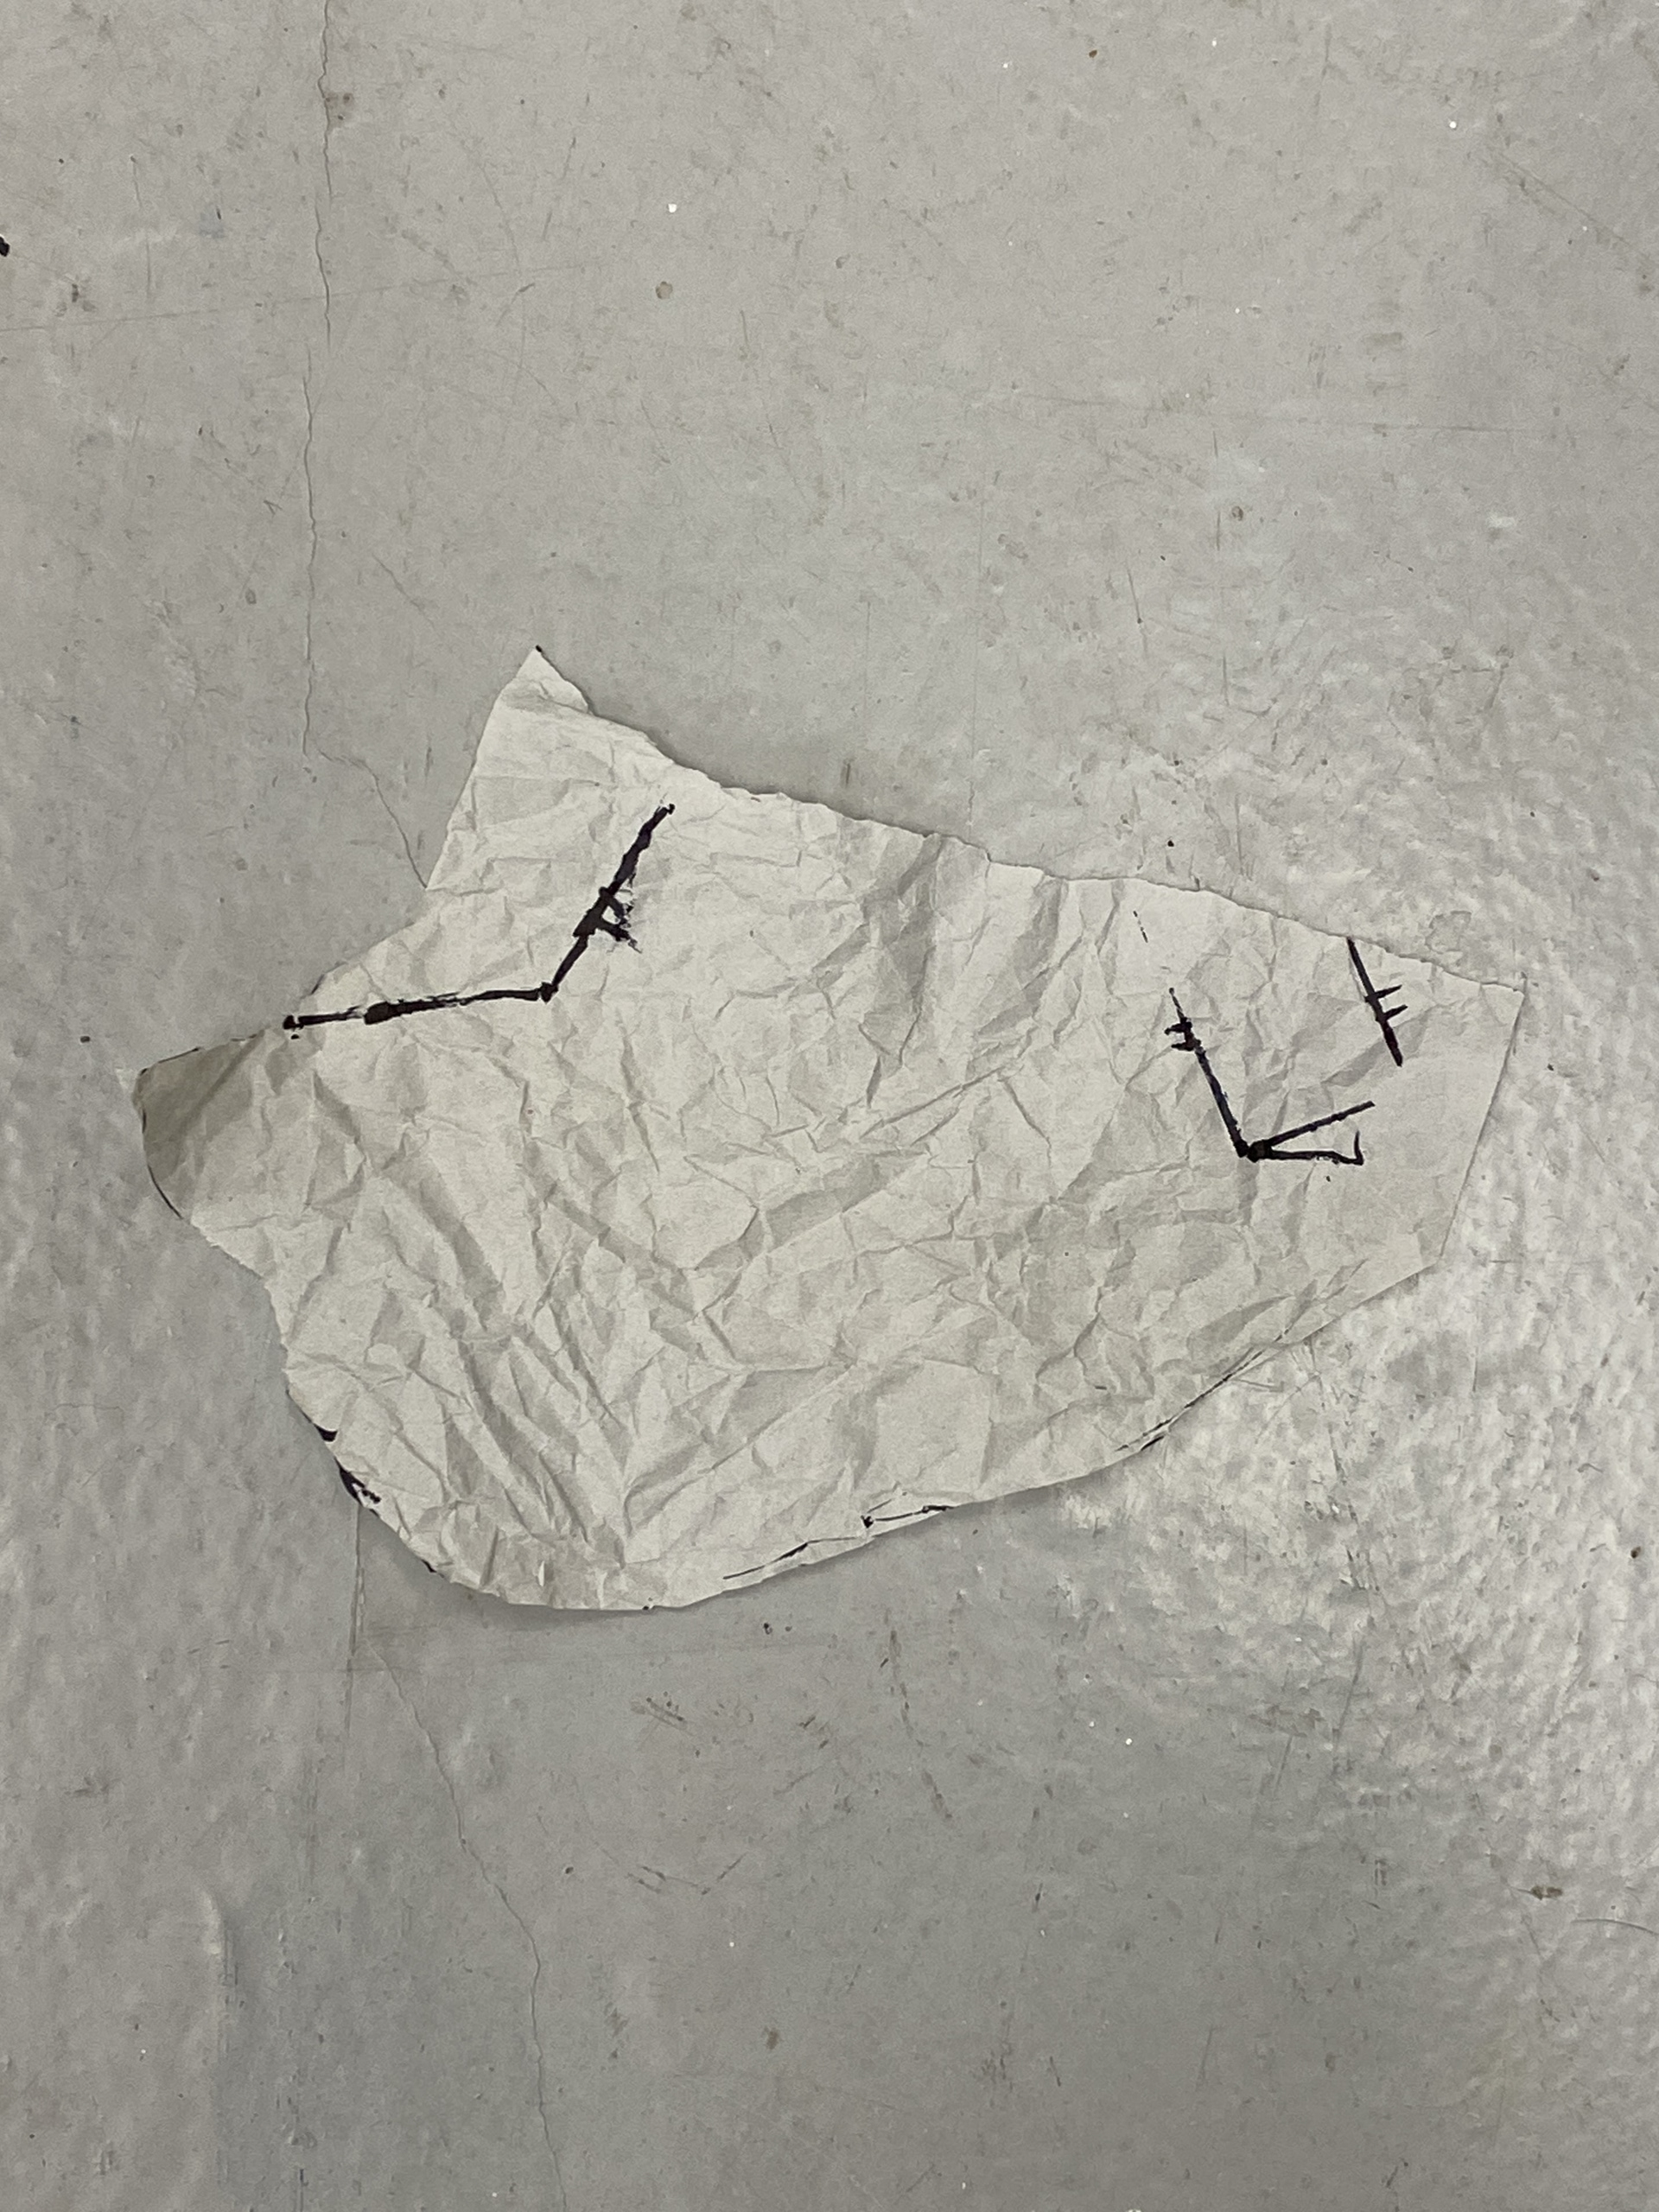
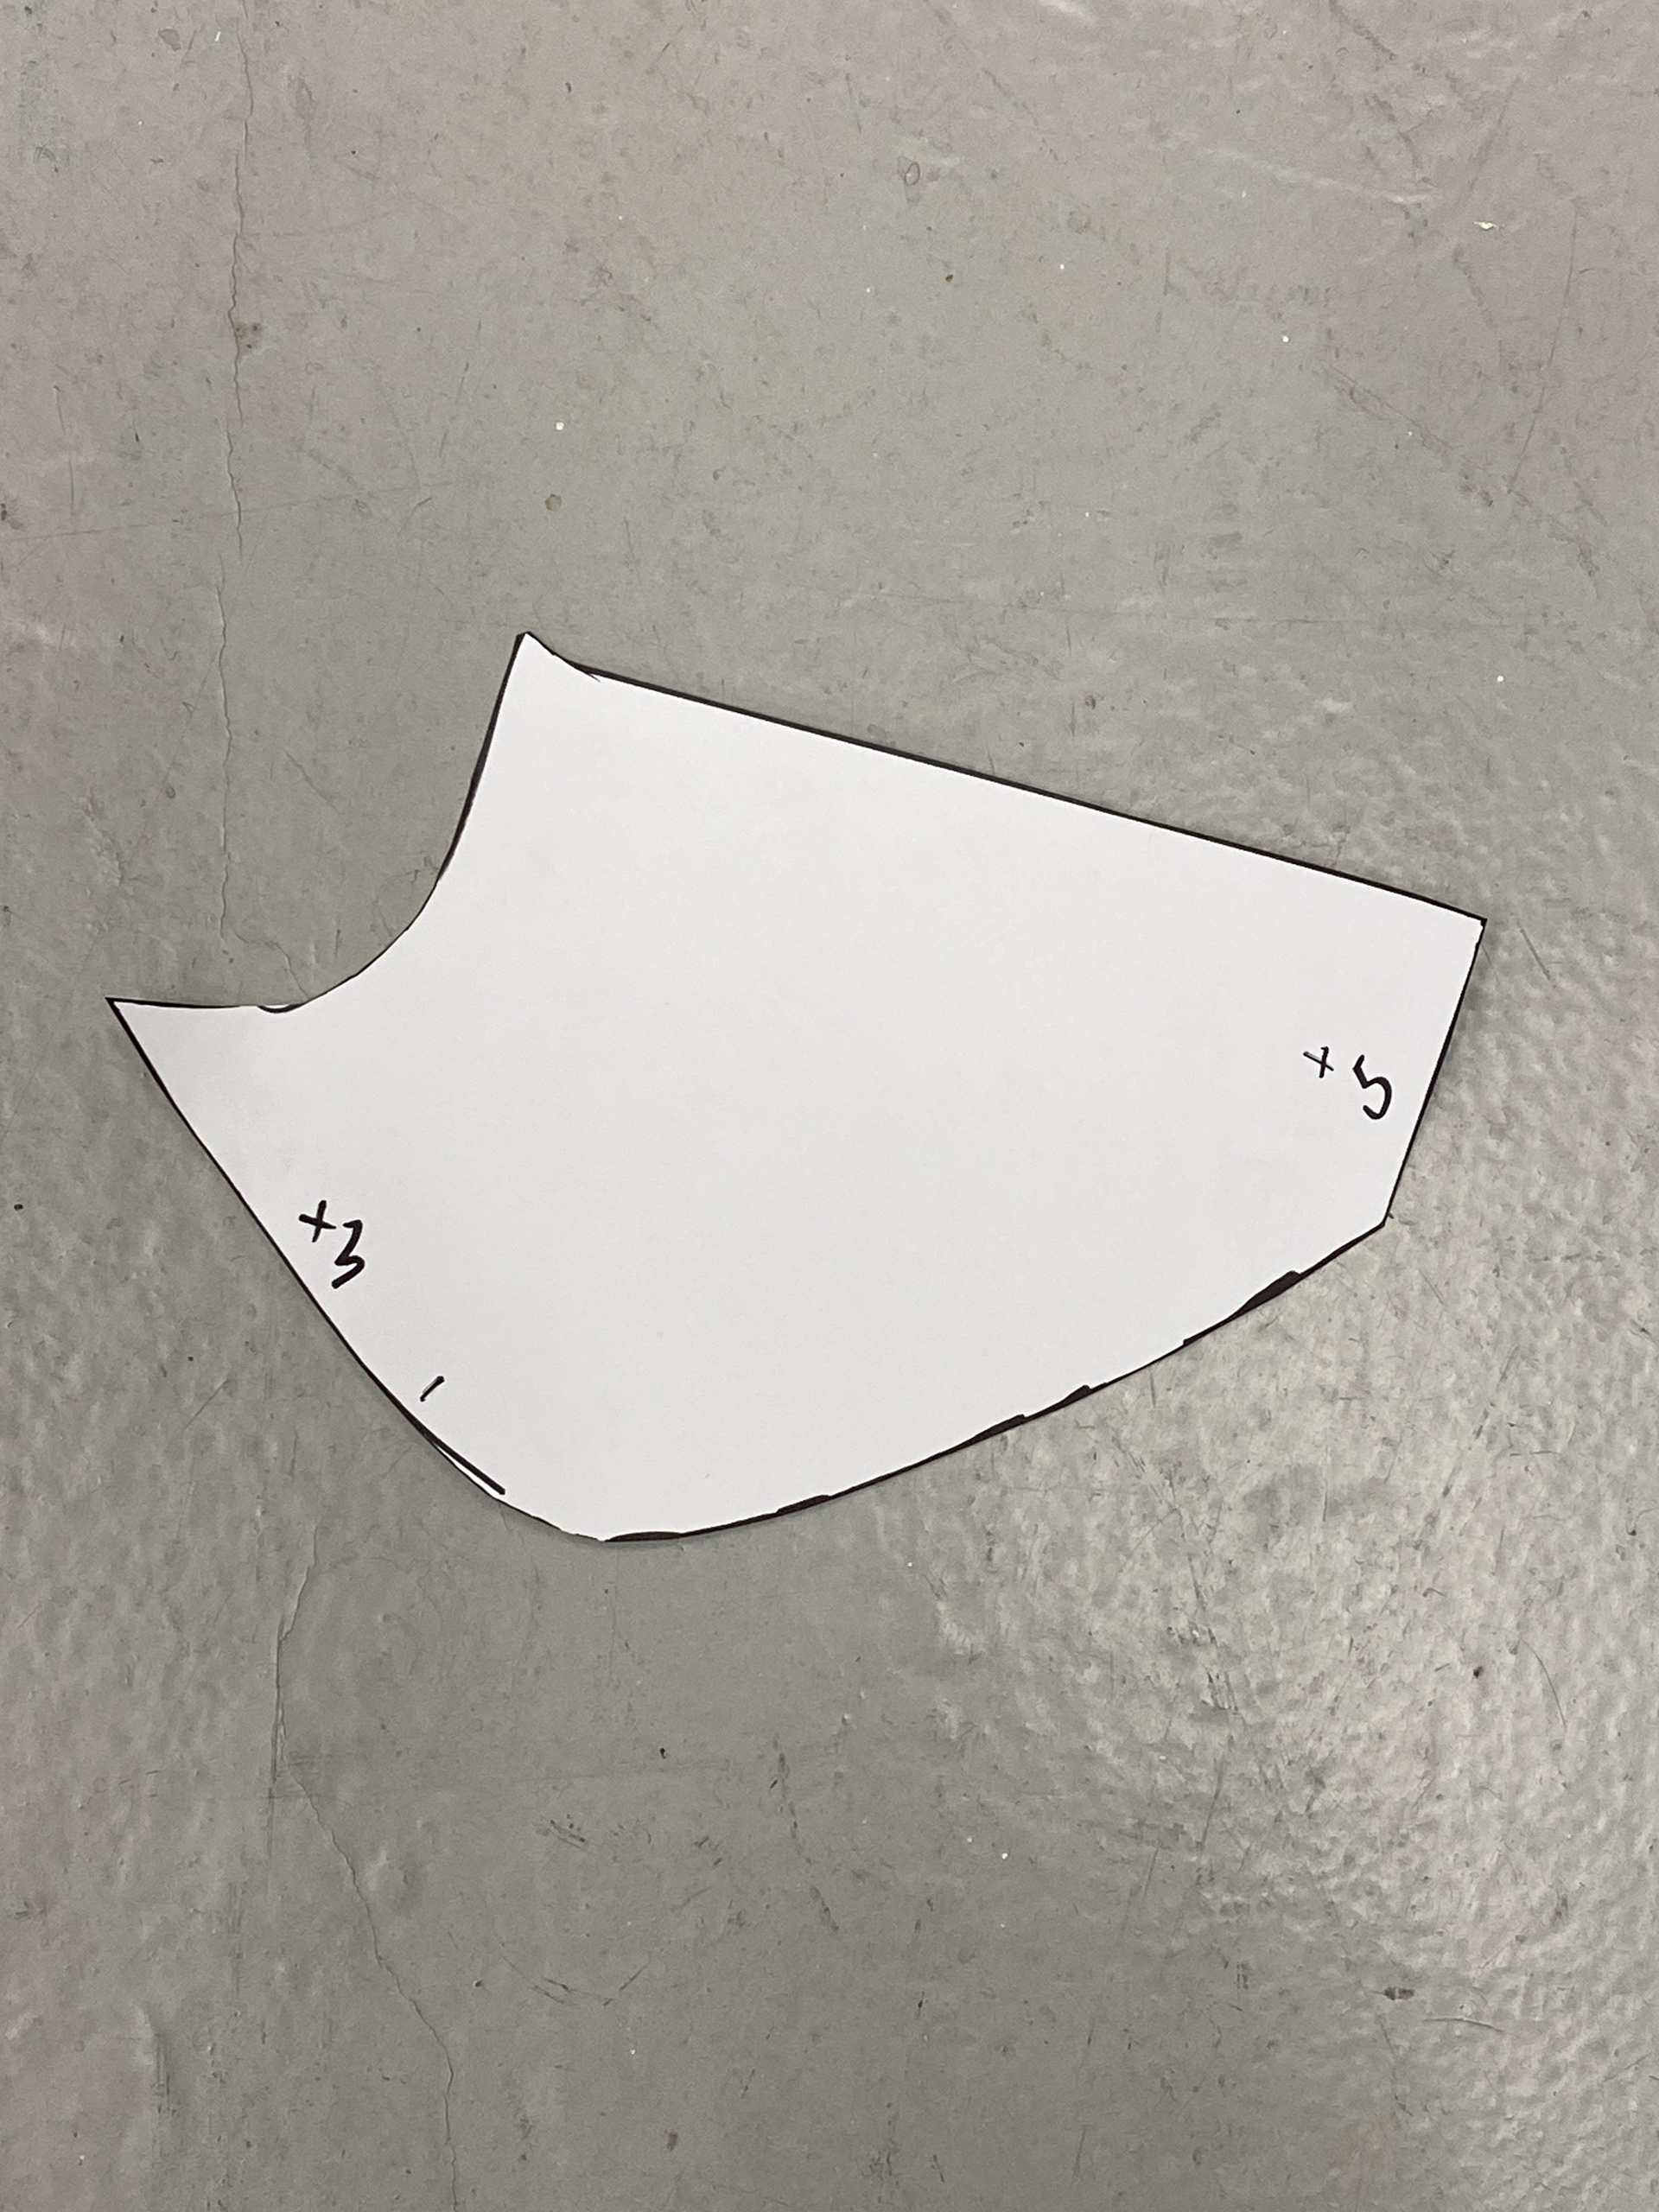
The upper shoulder section was the hardest to develop as it needs to contour over the body perfectly as well as be visually interesting. For my first designs I worked by cutting the paper directly on the cast to get a rough form. I liked these forms but felt they needed some changes and adjusted them to fit in line with the rest of the wearable. I included more curved areas that jut out of the overall sweeping lines. I also changed the order in which the pieces sit by bringing the back piece into the middle, making it more staggered vertically, showing off more of the details between each piece. I found it hard to manipulate the paper to mock-up how I will create the final textured and bent form, and think that I need to take this and develop further in aluminium to achieve a better understanding.
I found it hard to profile the bottom section using these paper templates as the paper doesn’t like to be bent in multiple directions. Therefore, I created multiple tabs that I could fold out to emulate the raised final metal form. I need to test this before making a full-sized aluminium model as it would be a waste of material and money.
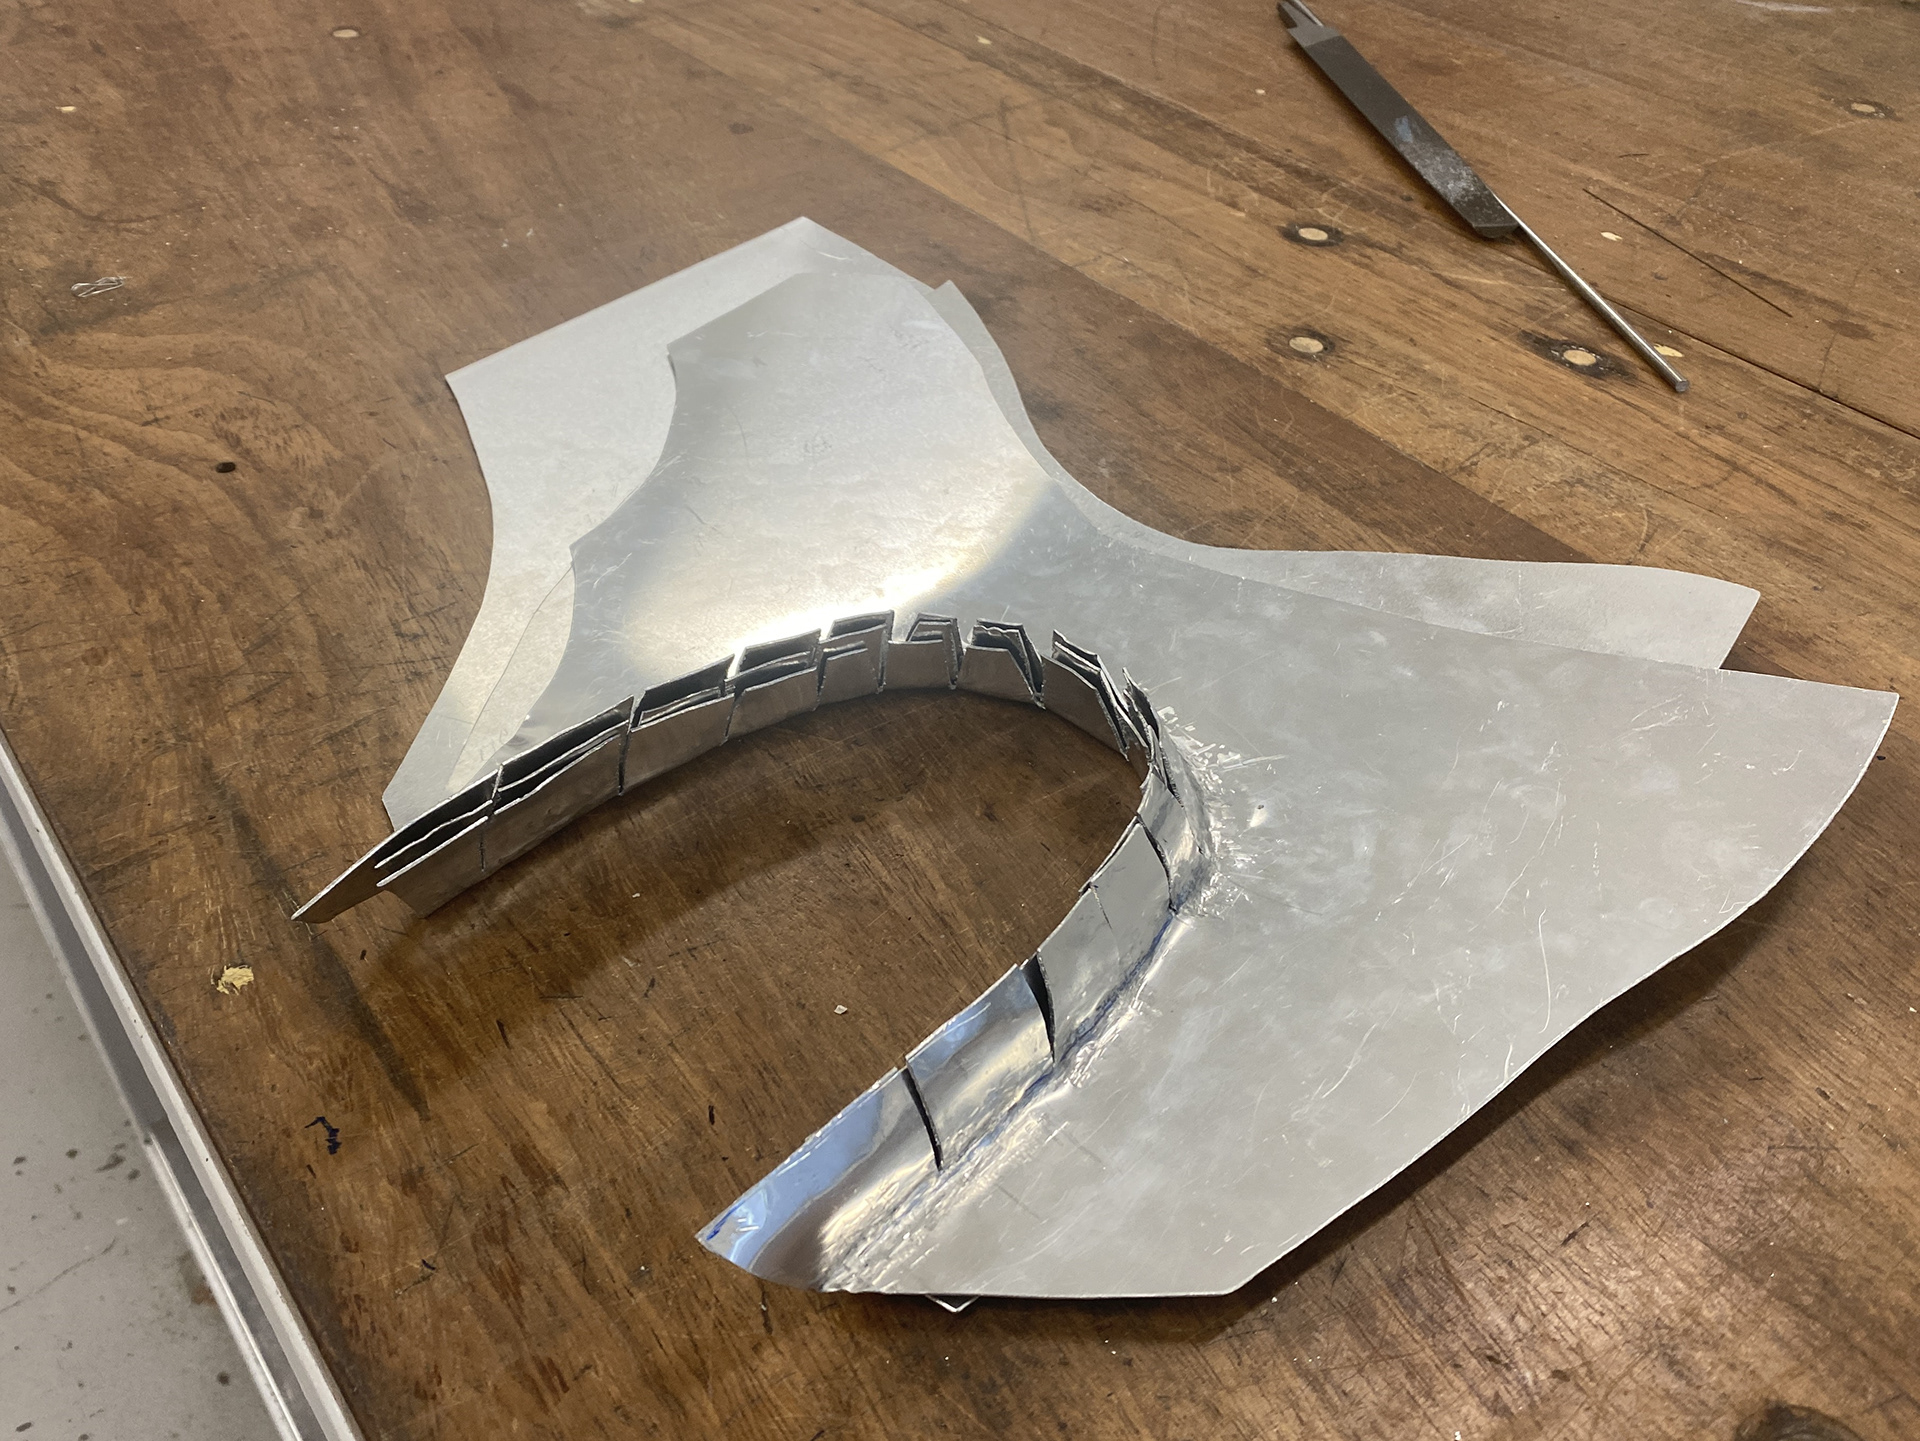

Throughout my material testing I found that raising the curved section that fits over the shoulder wasn't the best approach. Therefore, I have resorted to cutting a series of slits into the metal sheets and bending them to create the desired form and covered this with leather to create a refined outcome. I also shaped the staggered sheets to emphasise the idea of protecting the wearer's face from view whilst simultaneously broadening out the shoulders.
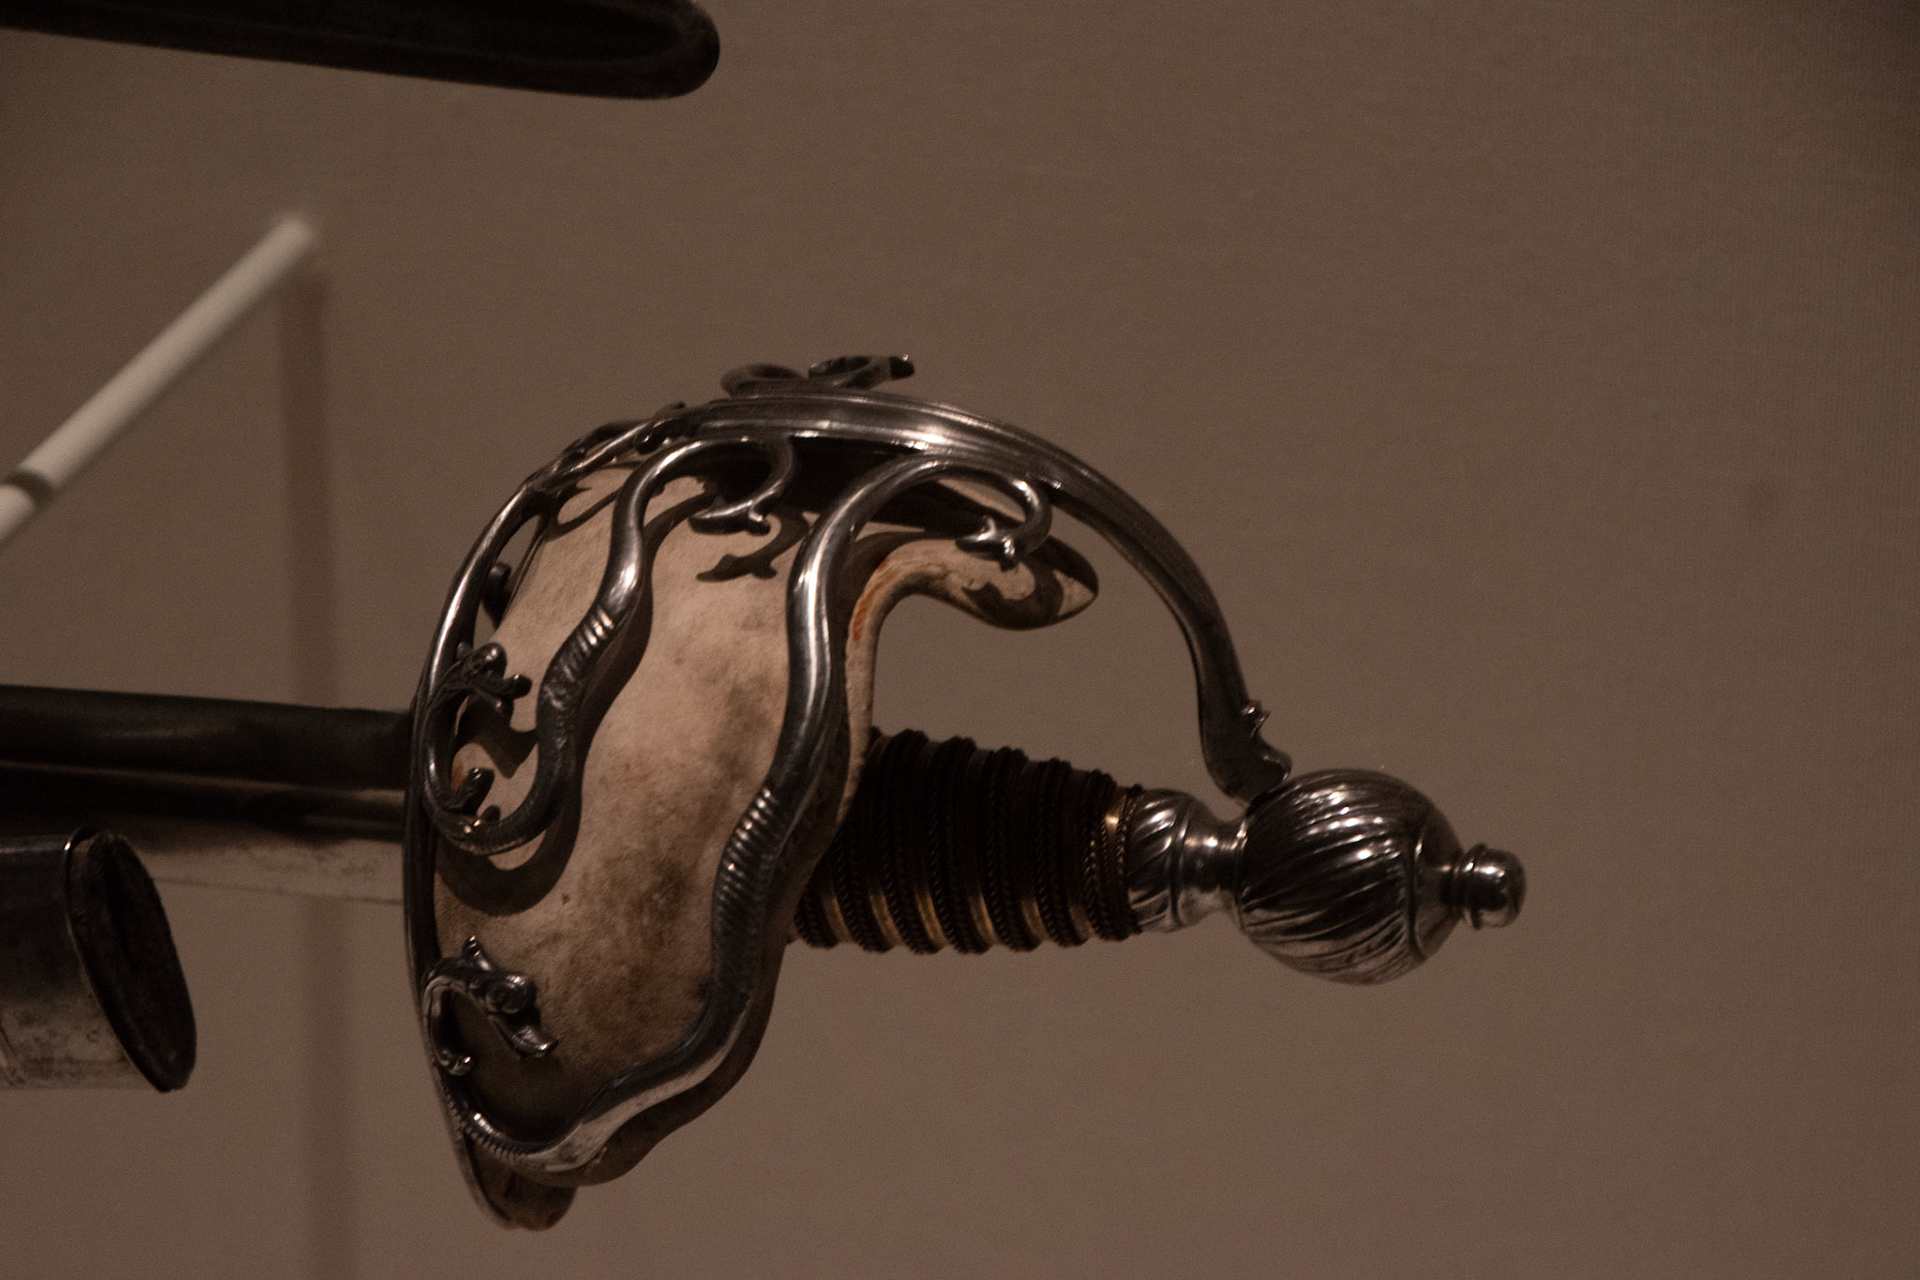
Developing twisted rod section
Originaly my designs used forging to emulate the curves and forms of the sword hilts I documented from my trip to the Royal Armouries Museum Leeds. However, through development in paper modeling onto my cast arm I found that the spiked and trapped aestetic didn't work with the overall design. I shifted the idea of entrapment to explore encapsulating the body inside the armour for vulnerability rather than protection.
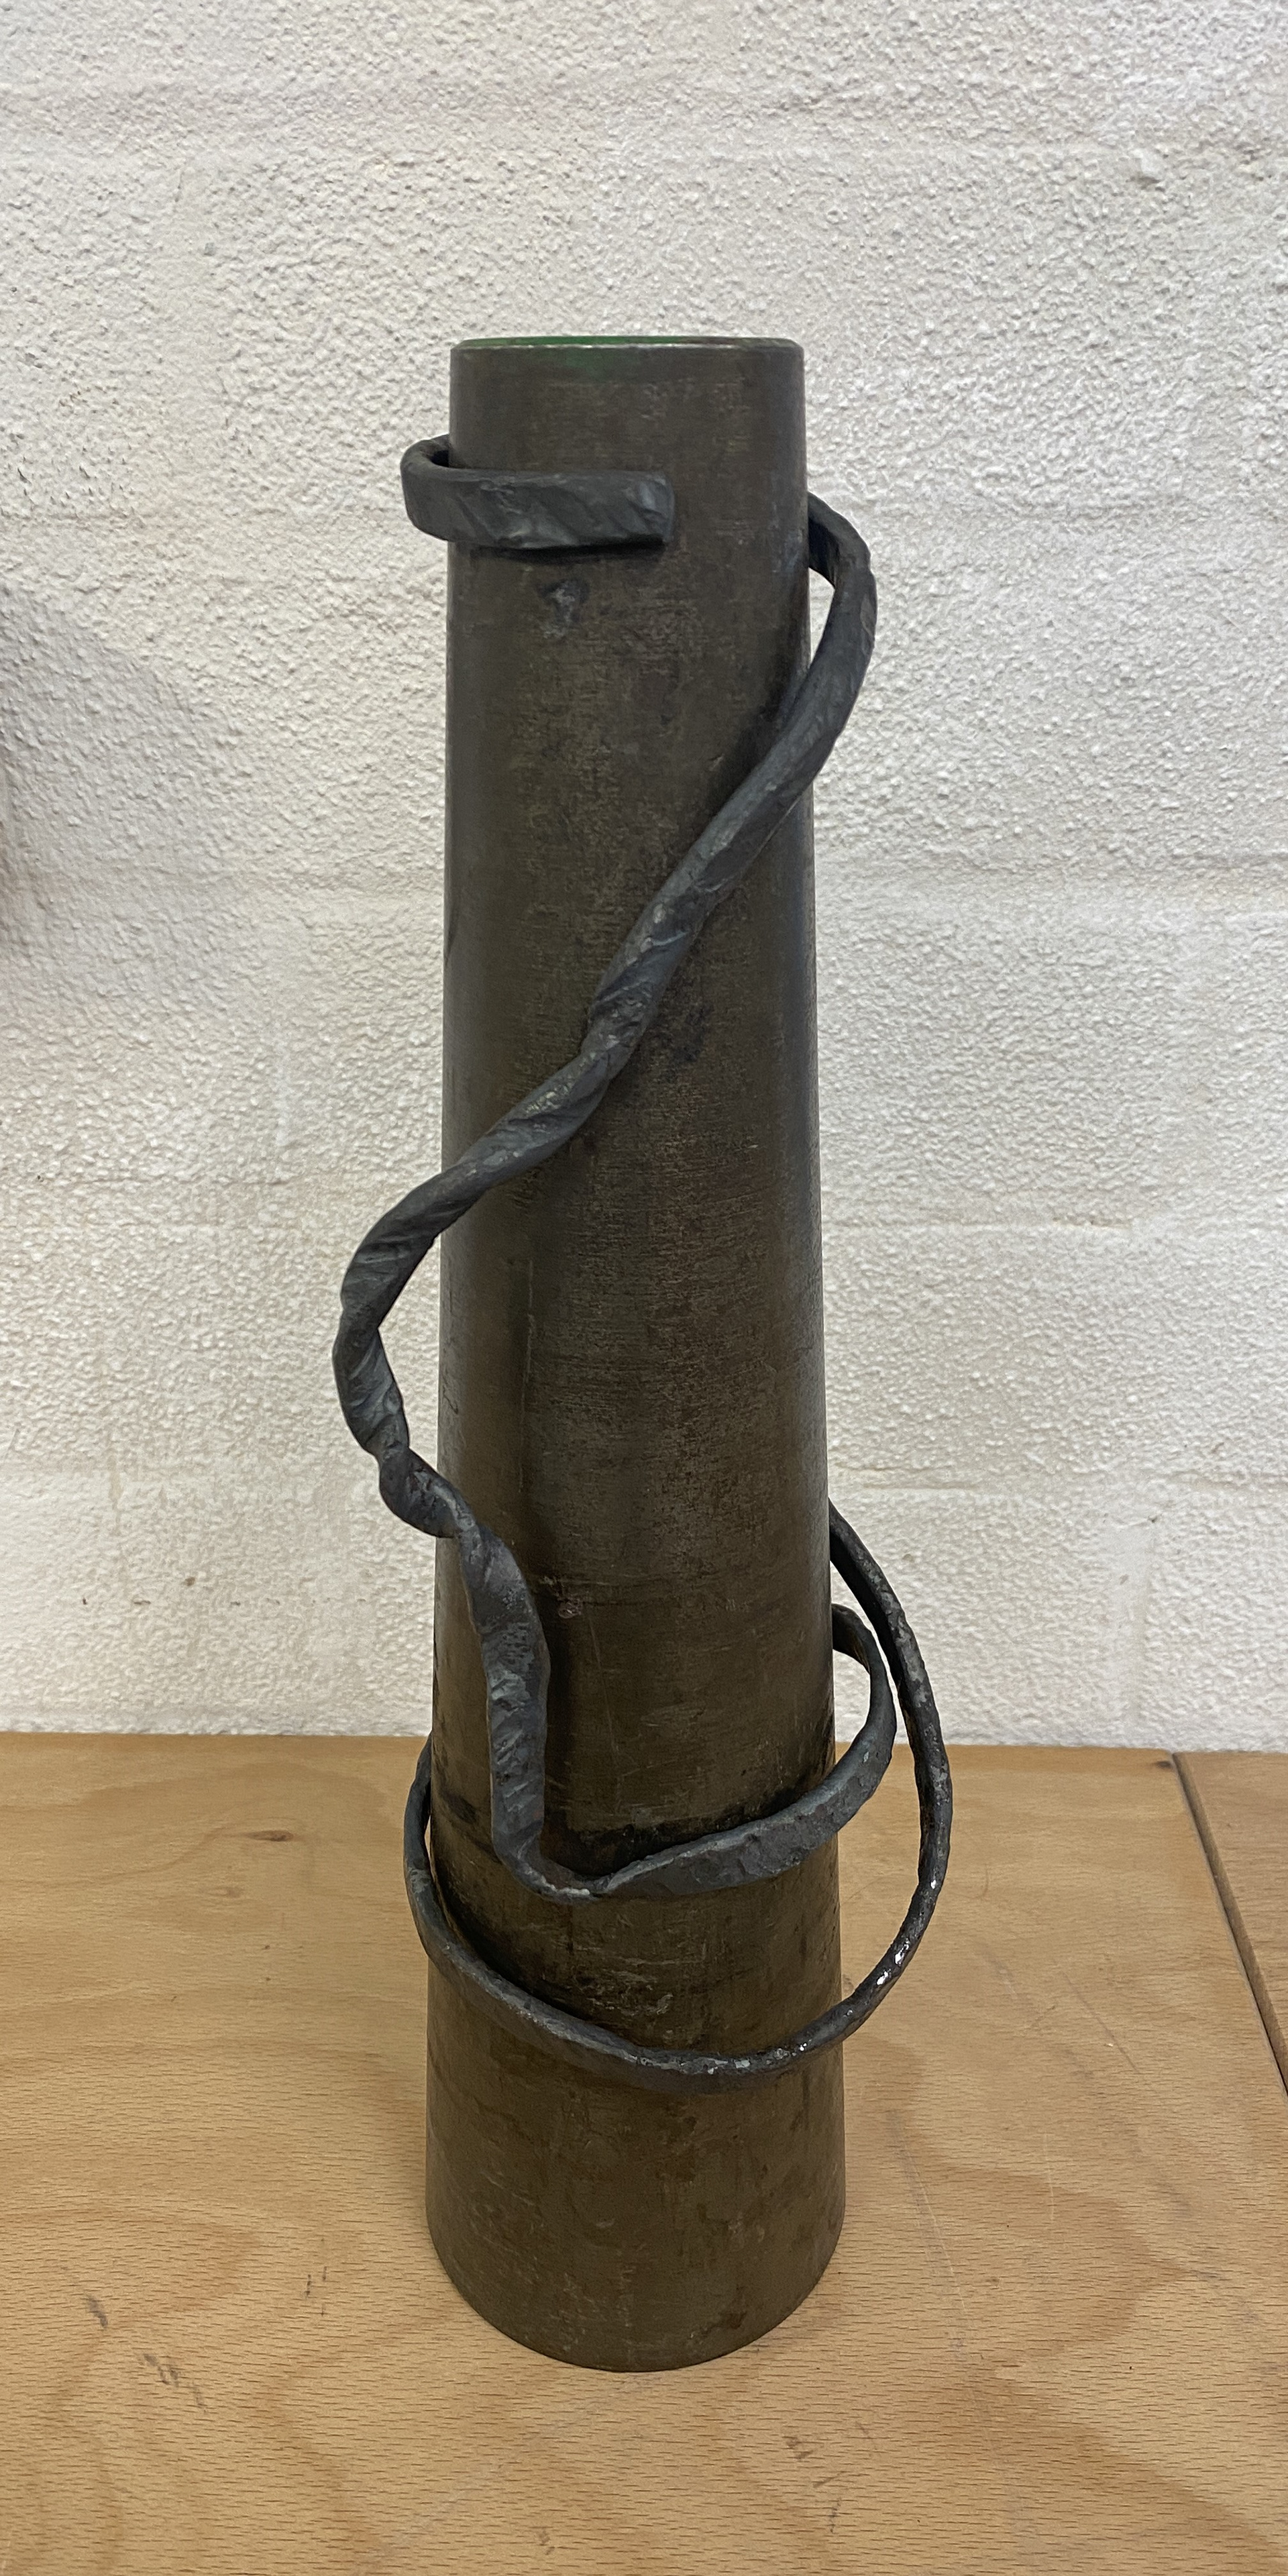
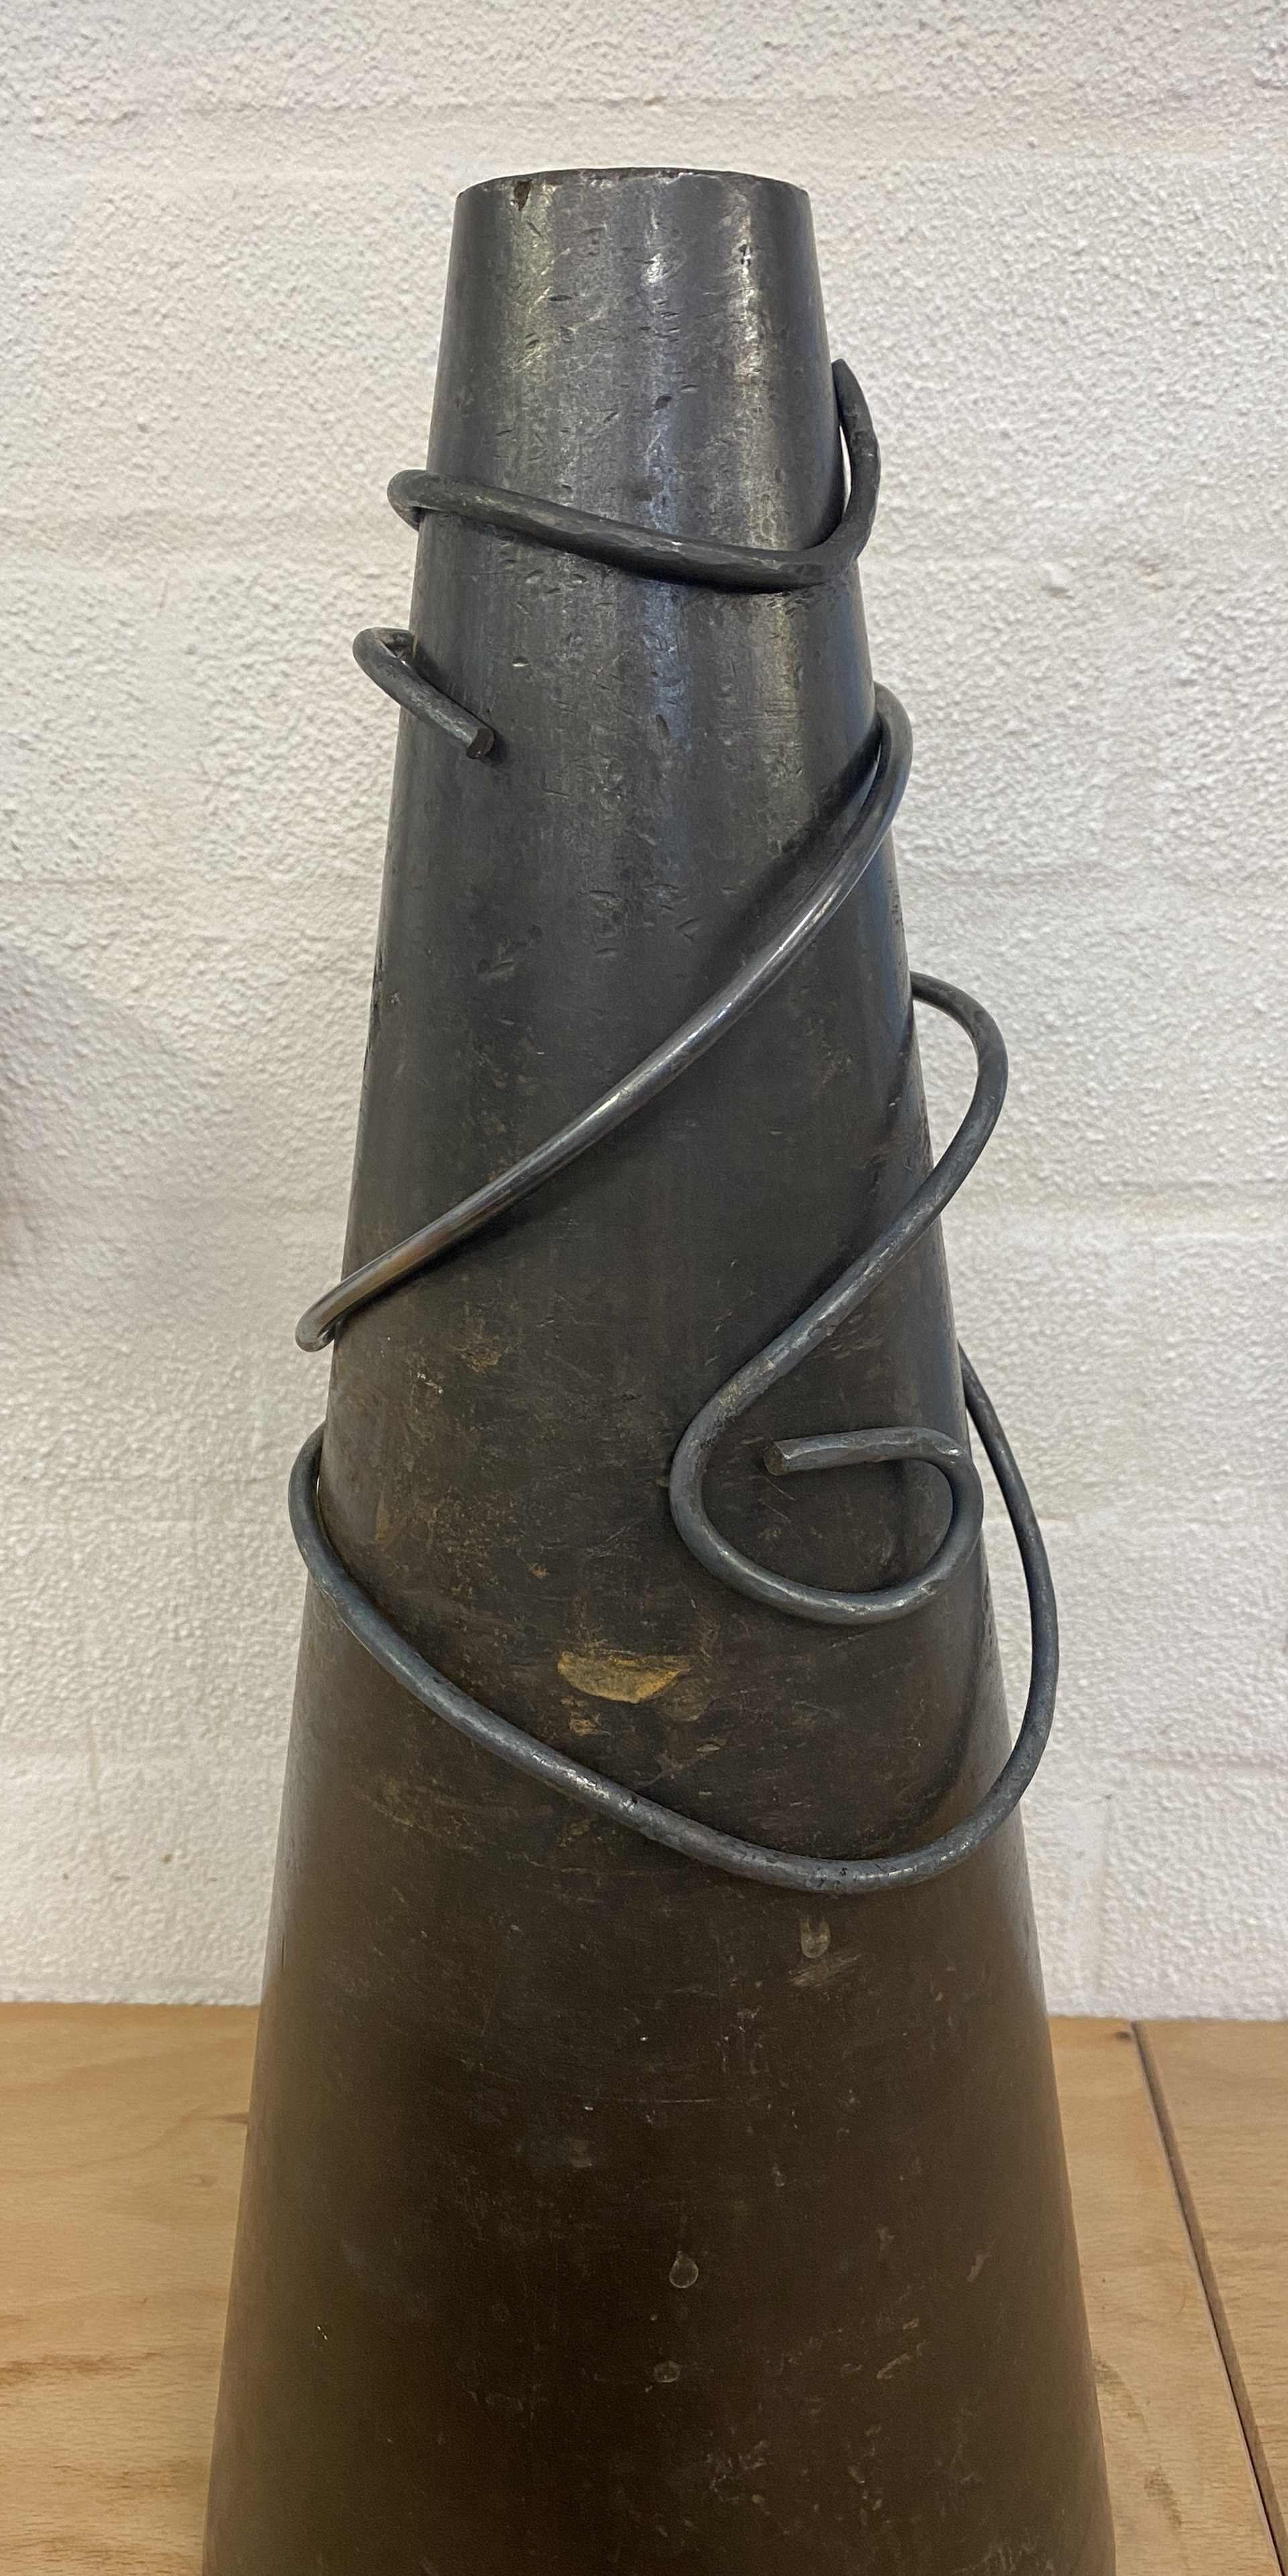

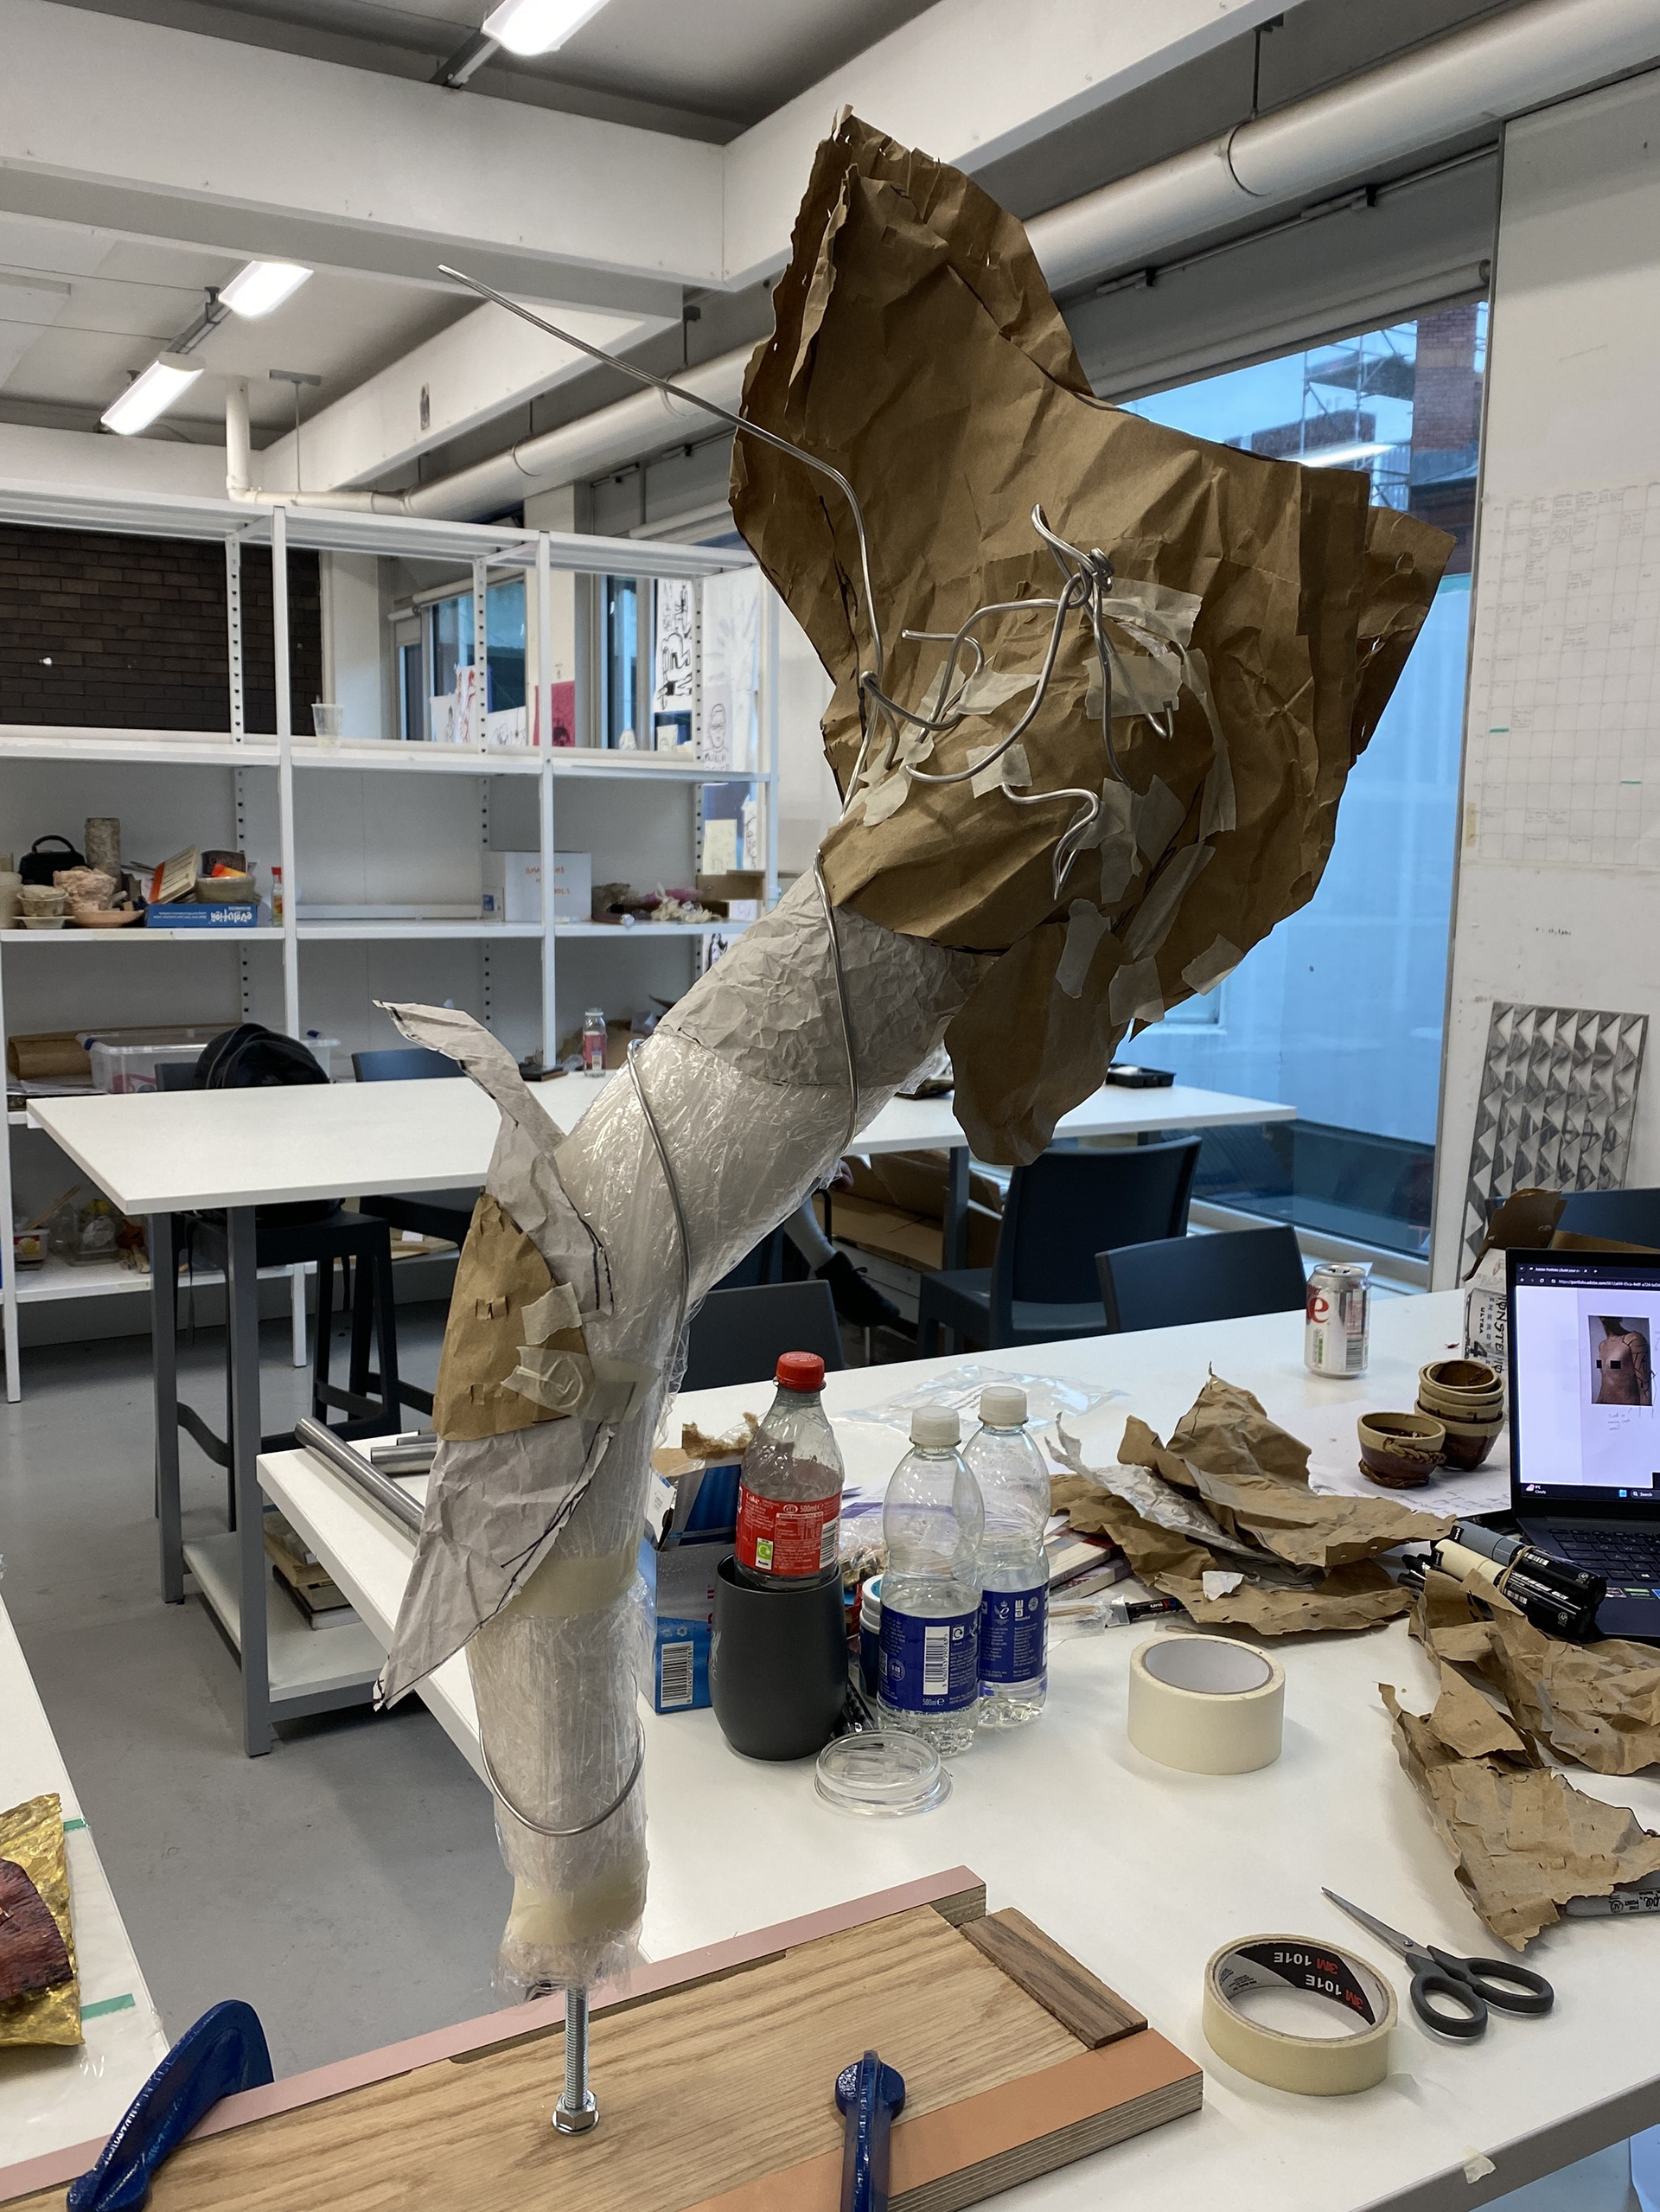
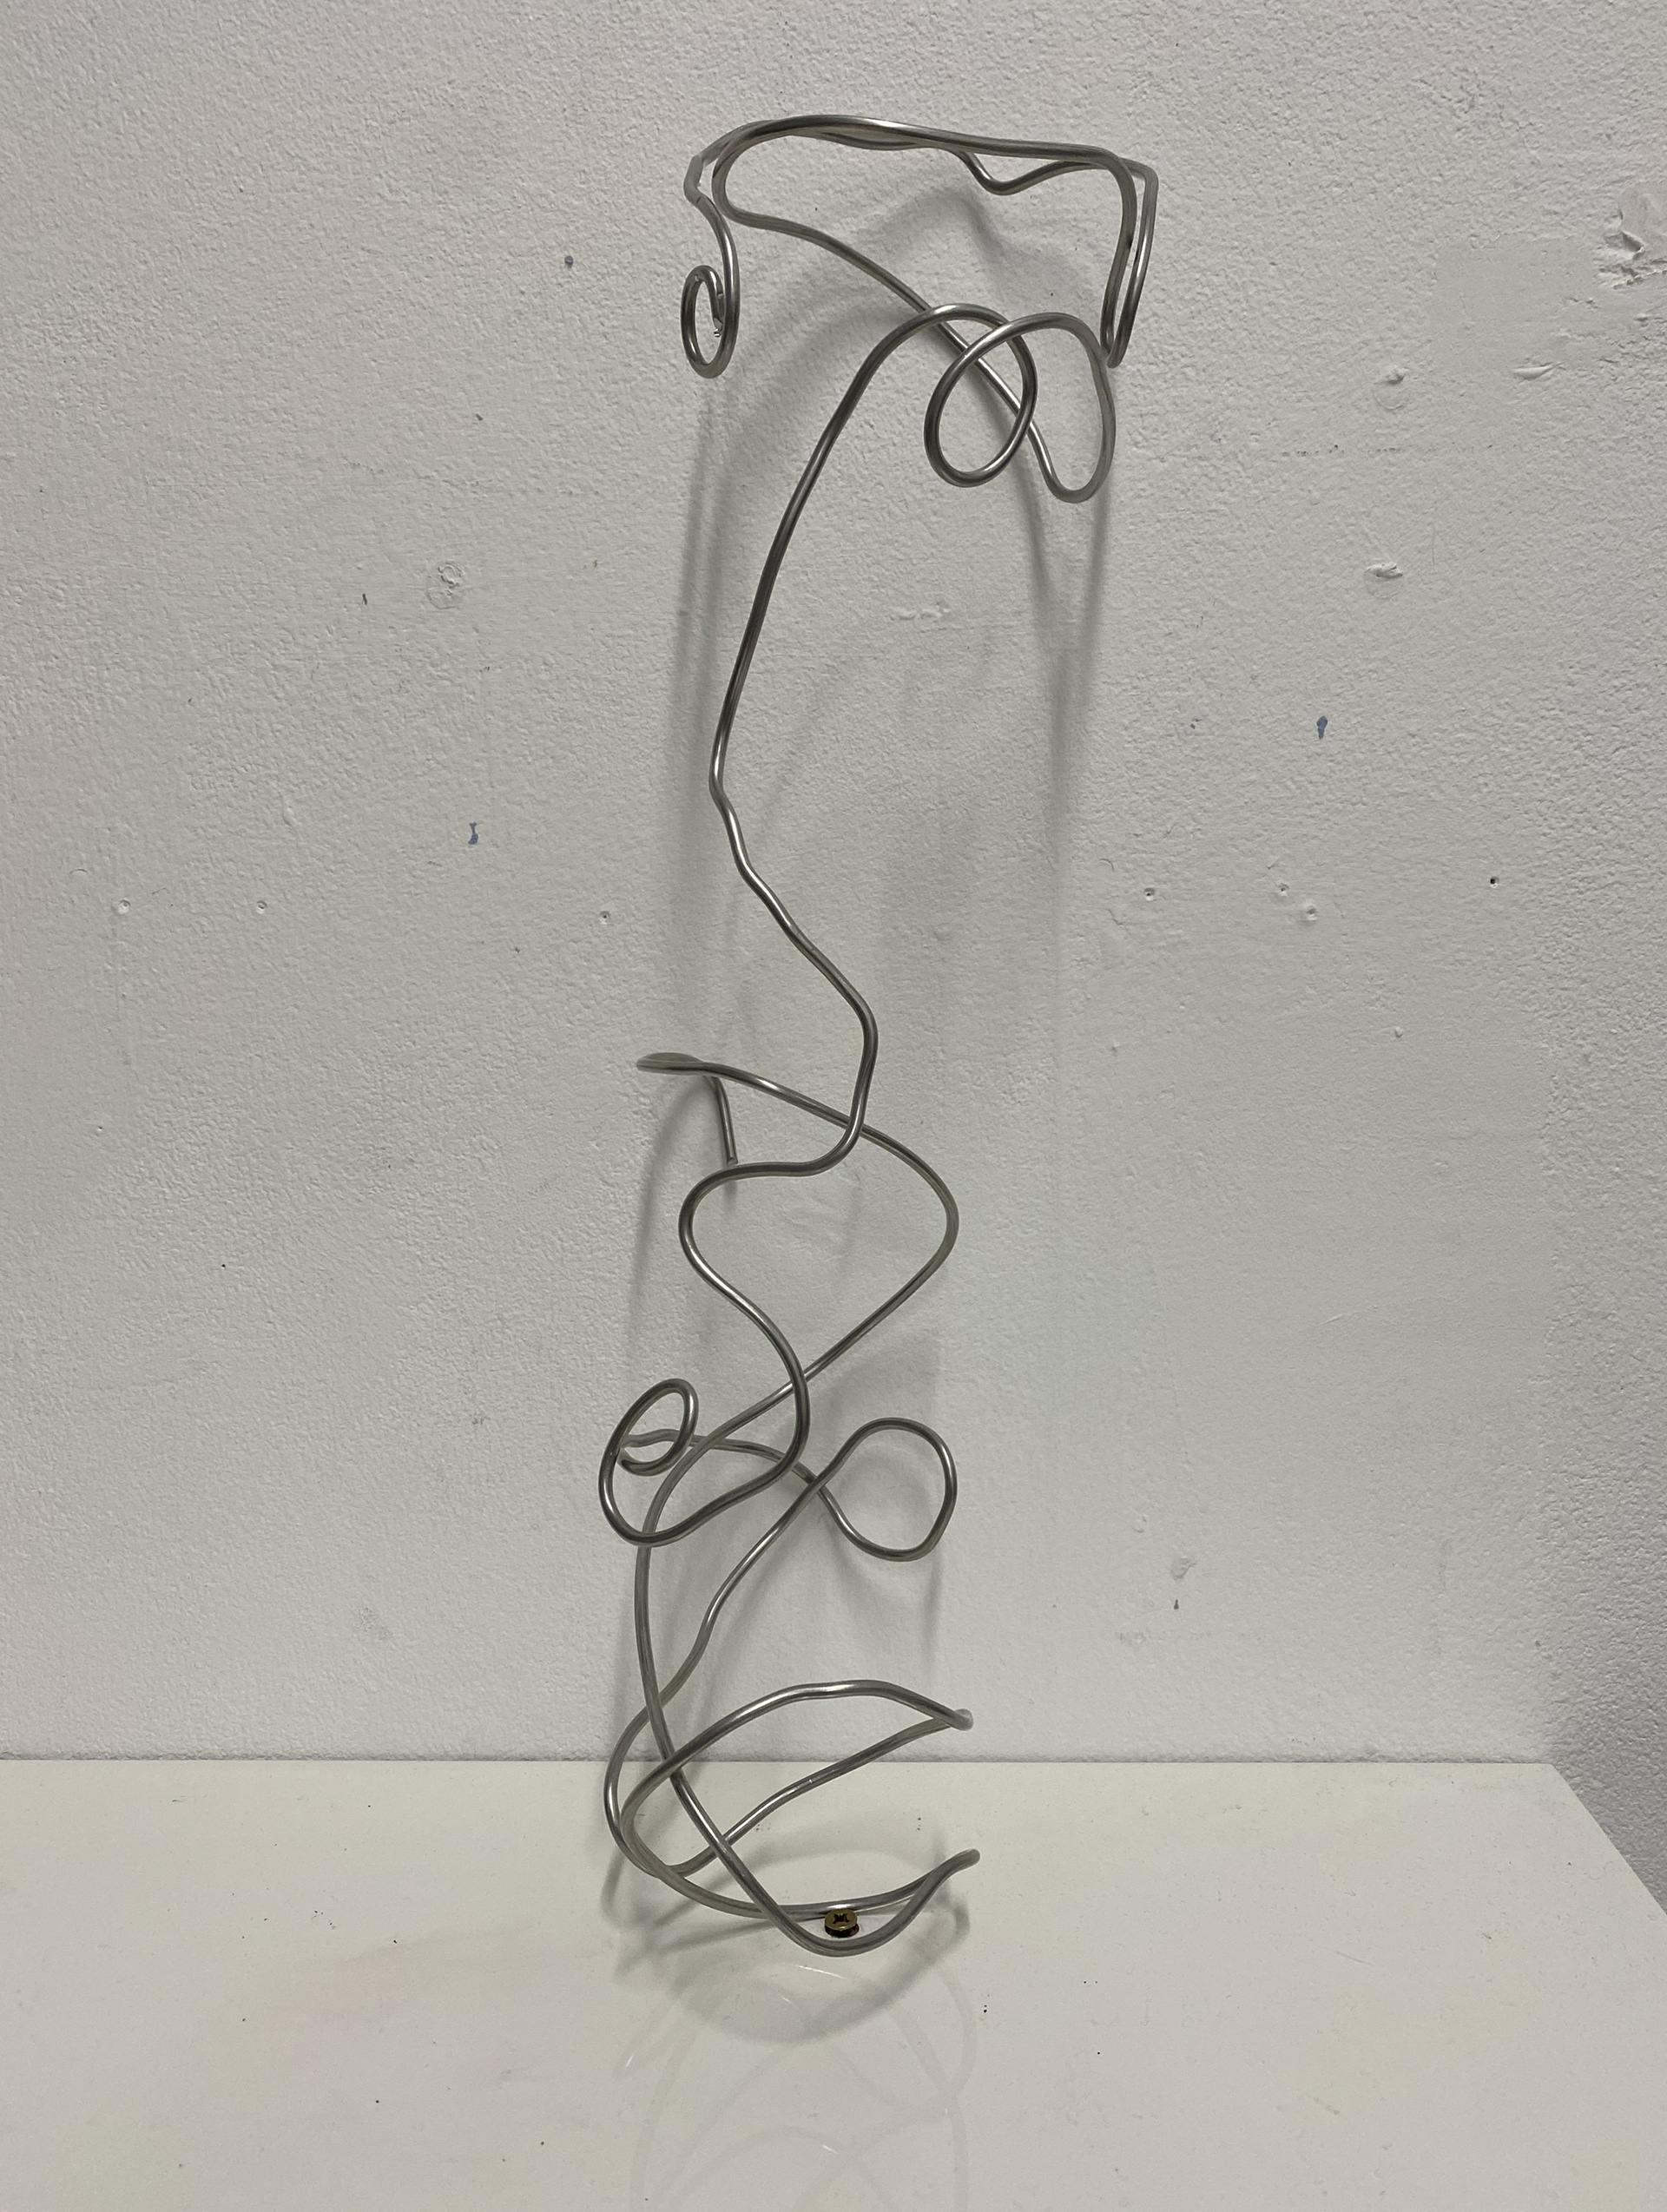
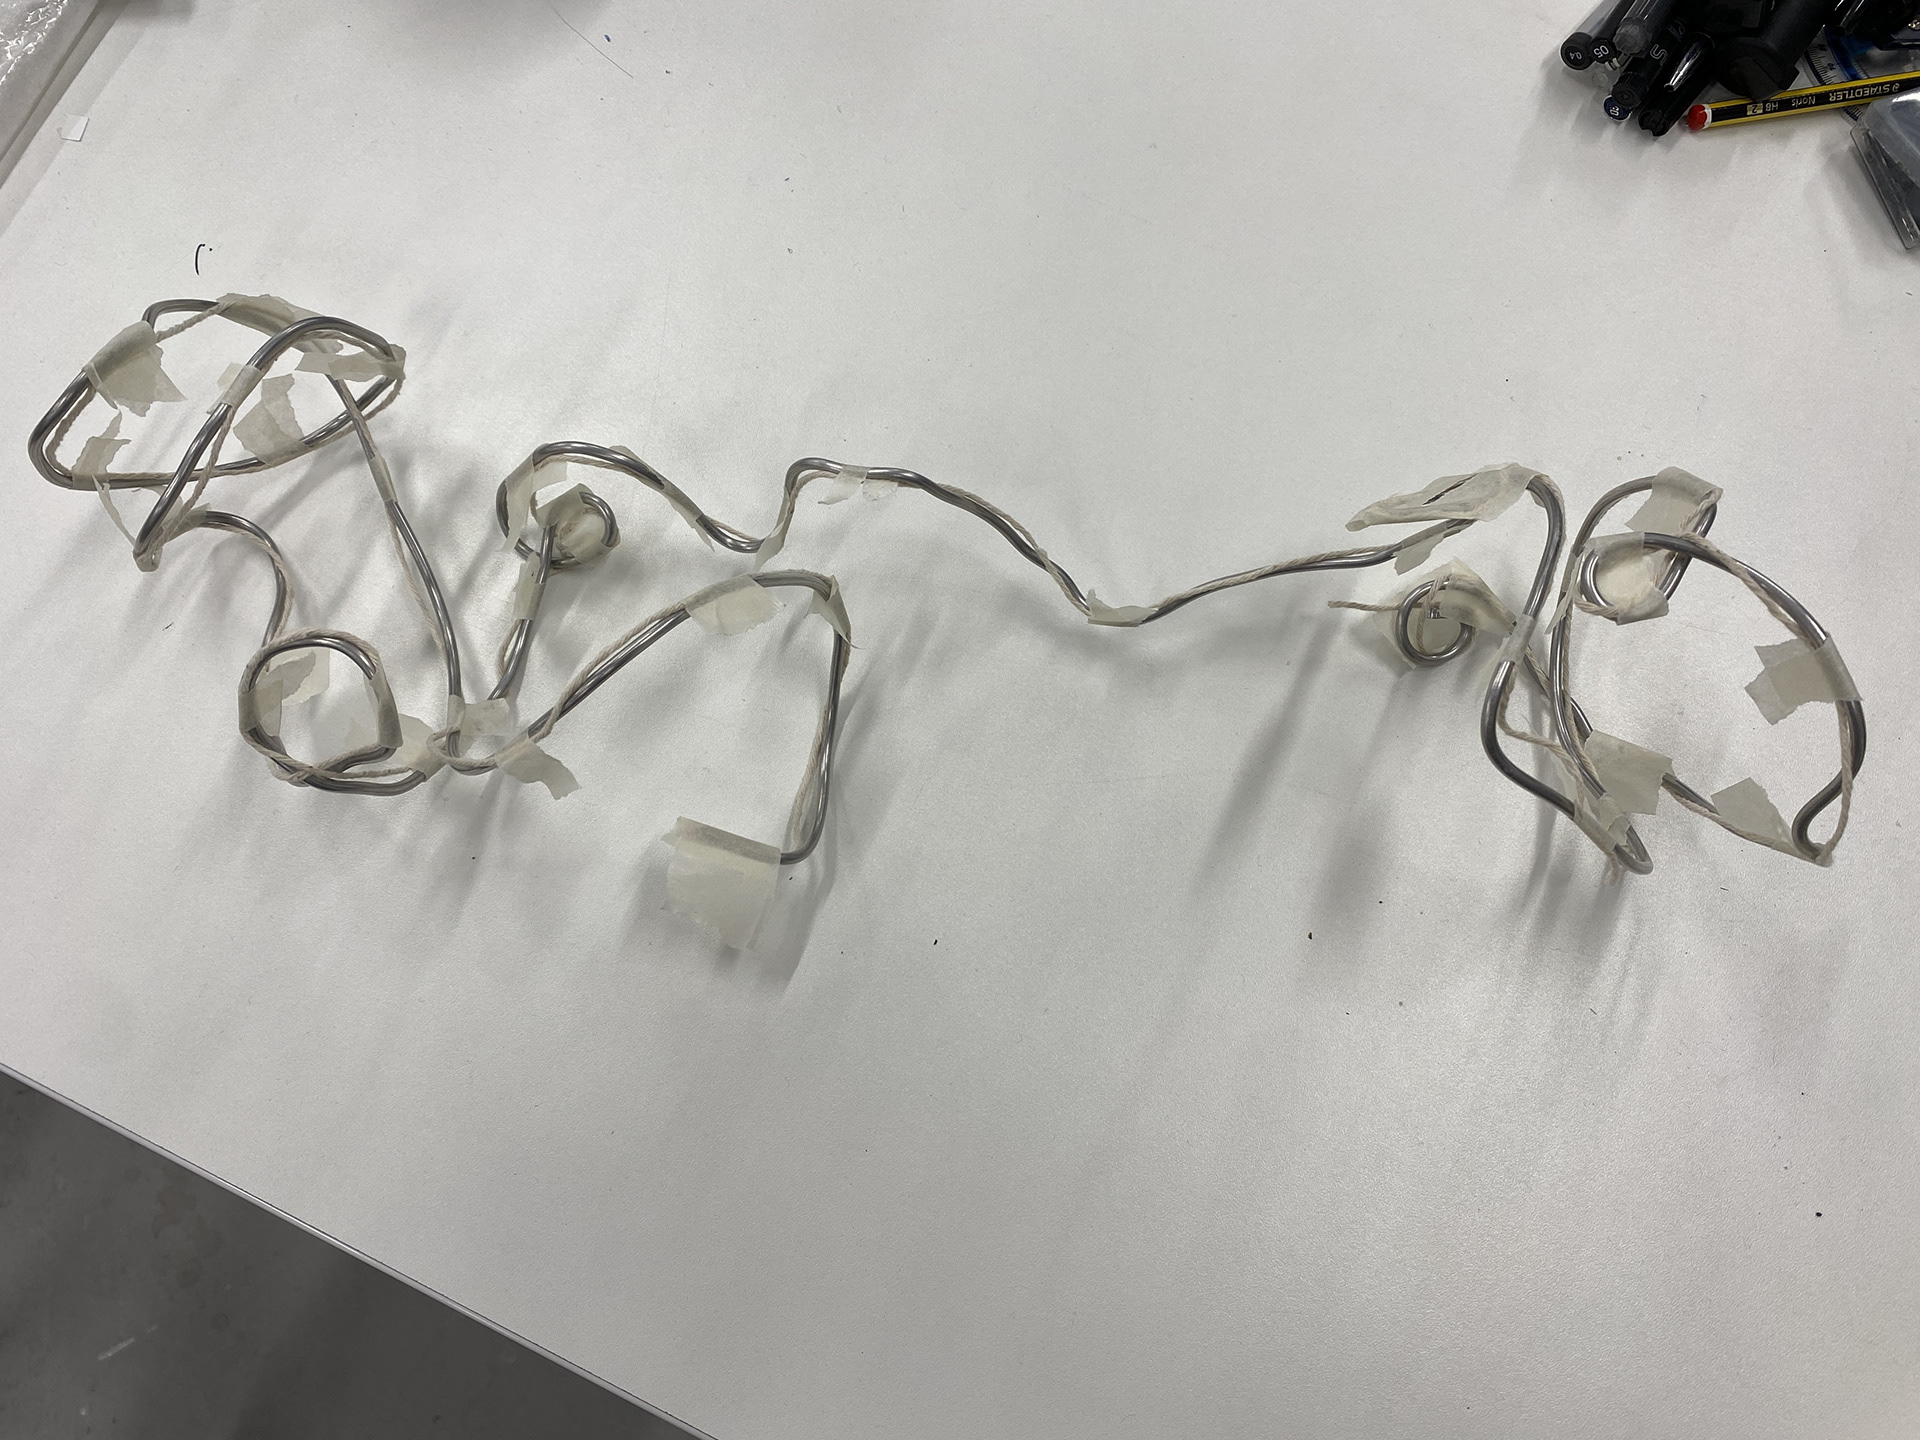
I referenced my forging tests to look at how I could wrap rods around the arm. My focus was to bring the different sections of the design together by twisting and moving the viewers eyes up and around the arm into the shoulder. I was focusing on how this filled space and the interaction between the different elements, so this design was impractical and couldn’t be taken off without bending and destroying the form.
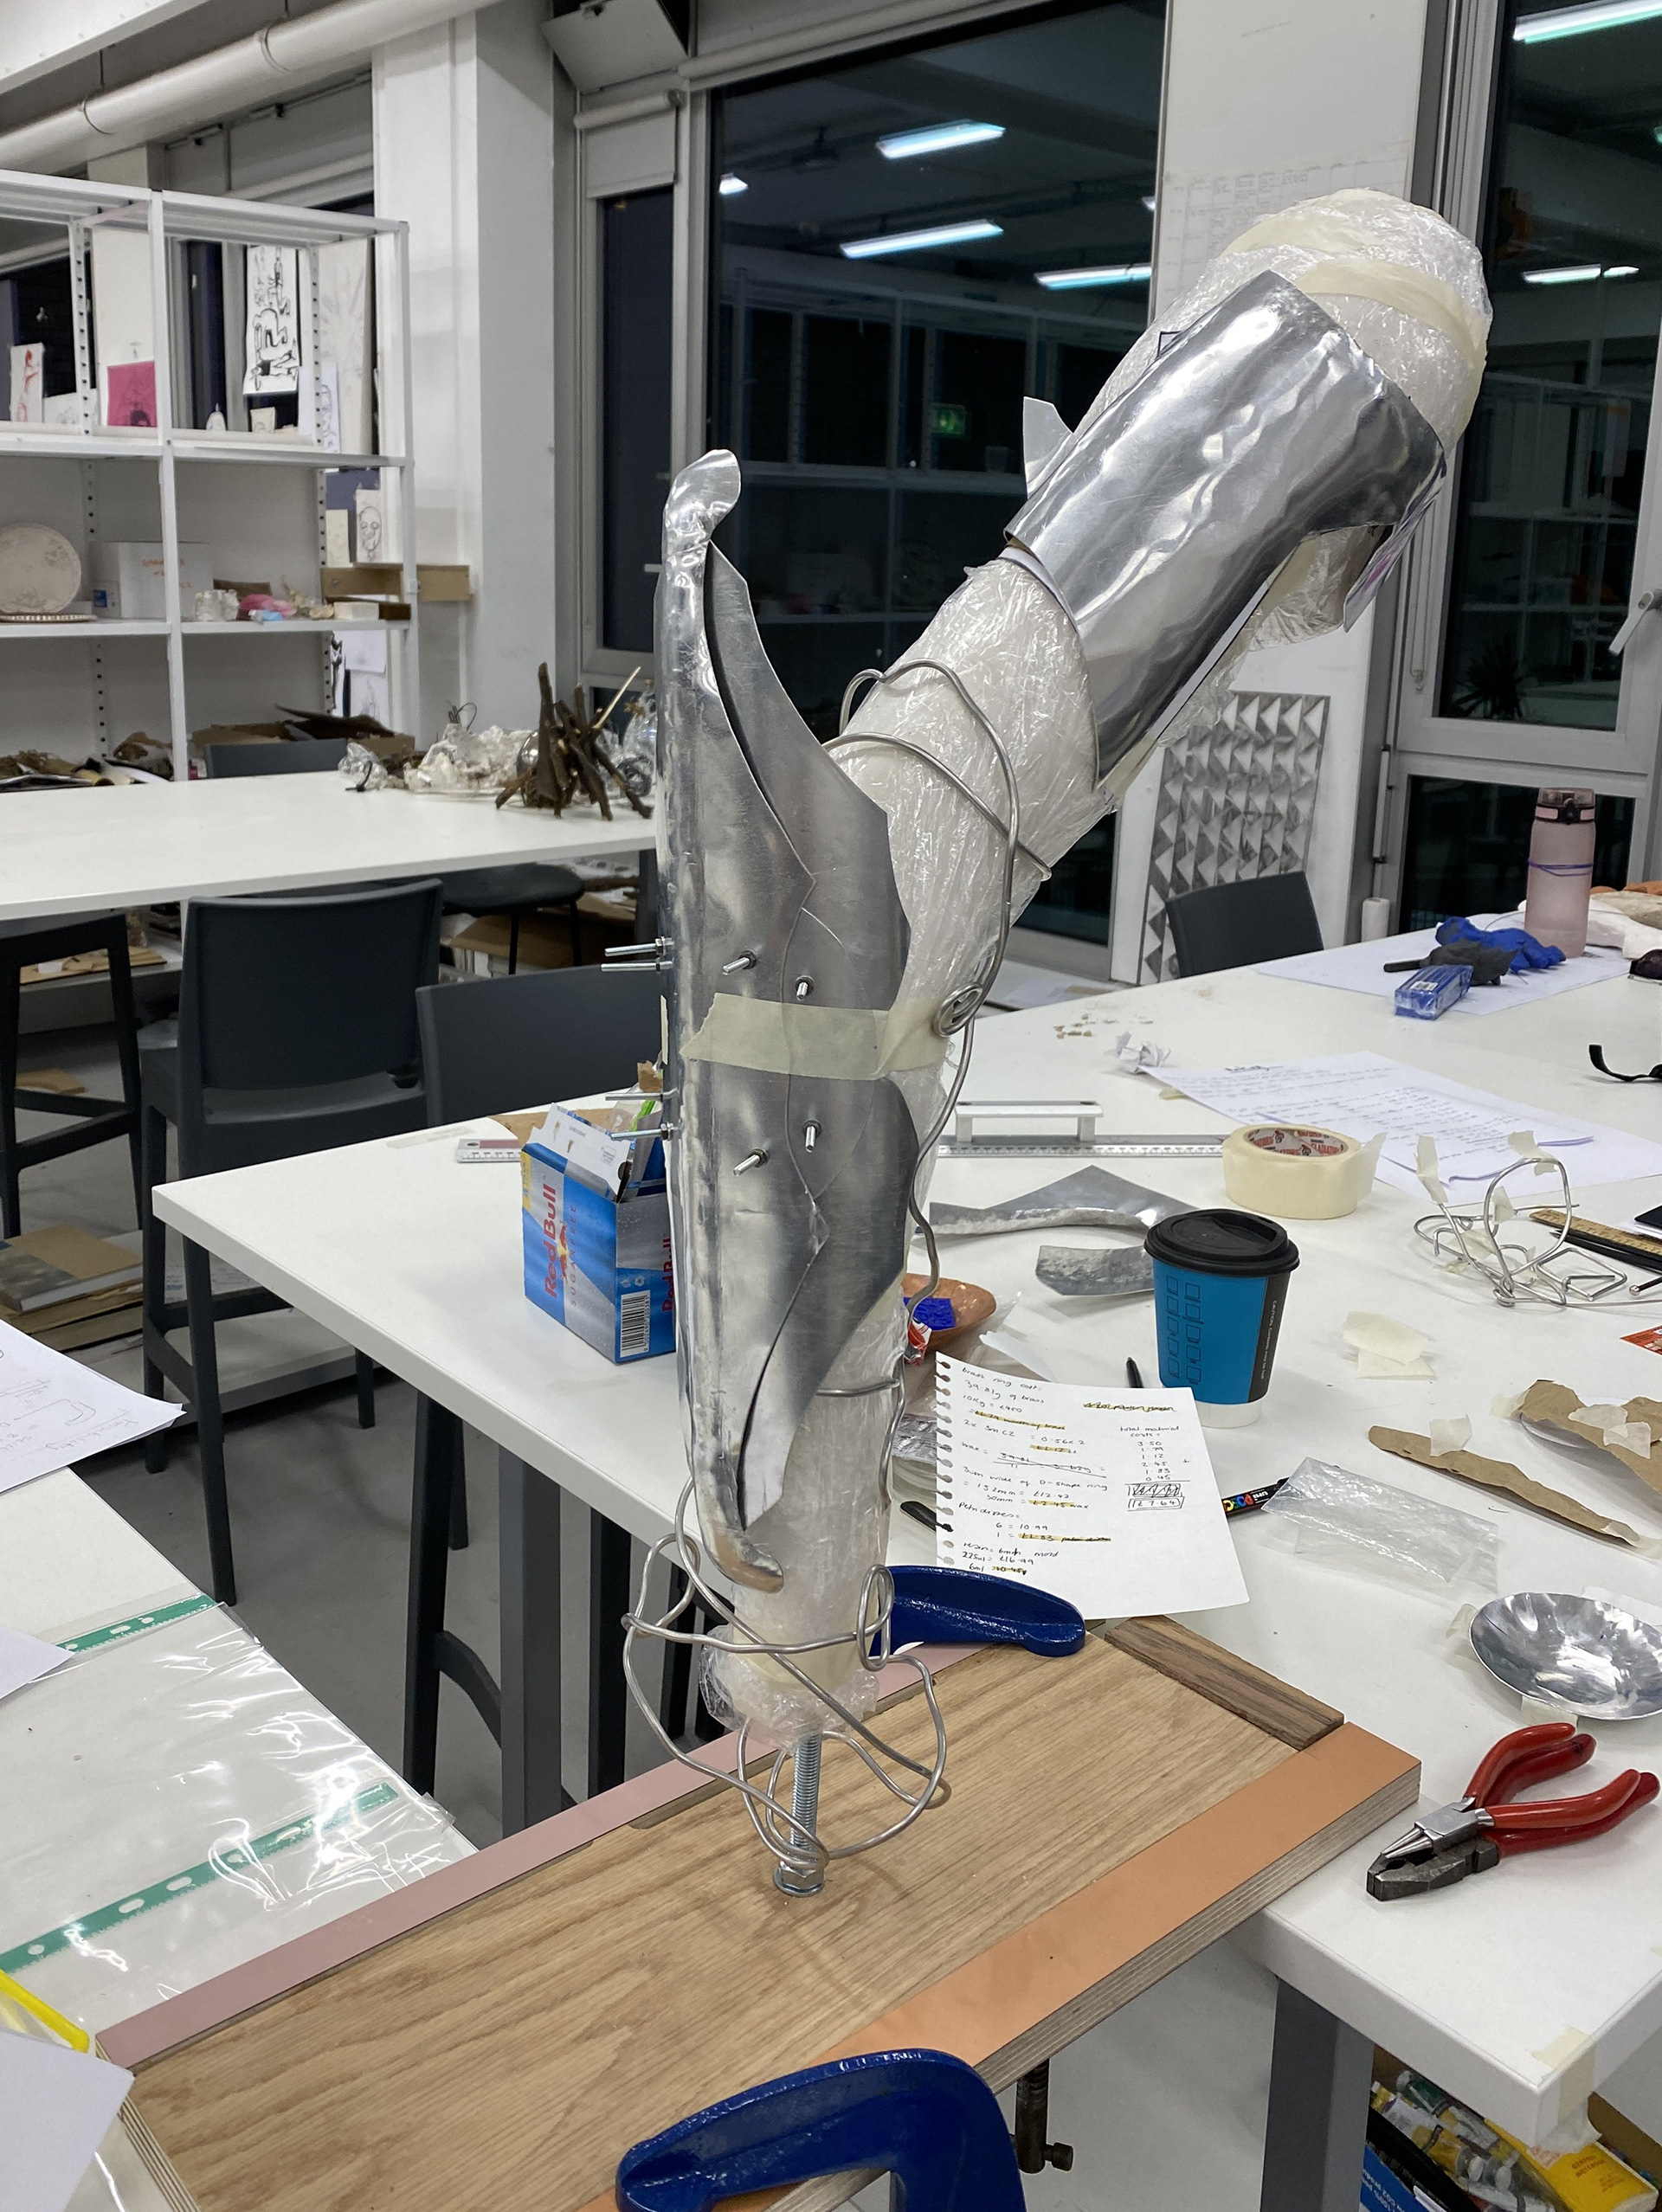
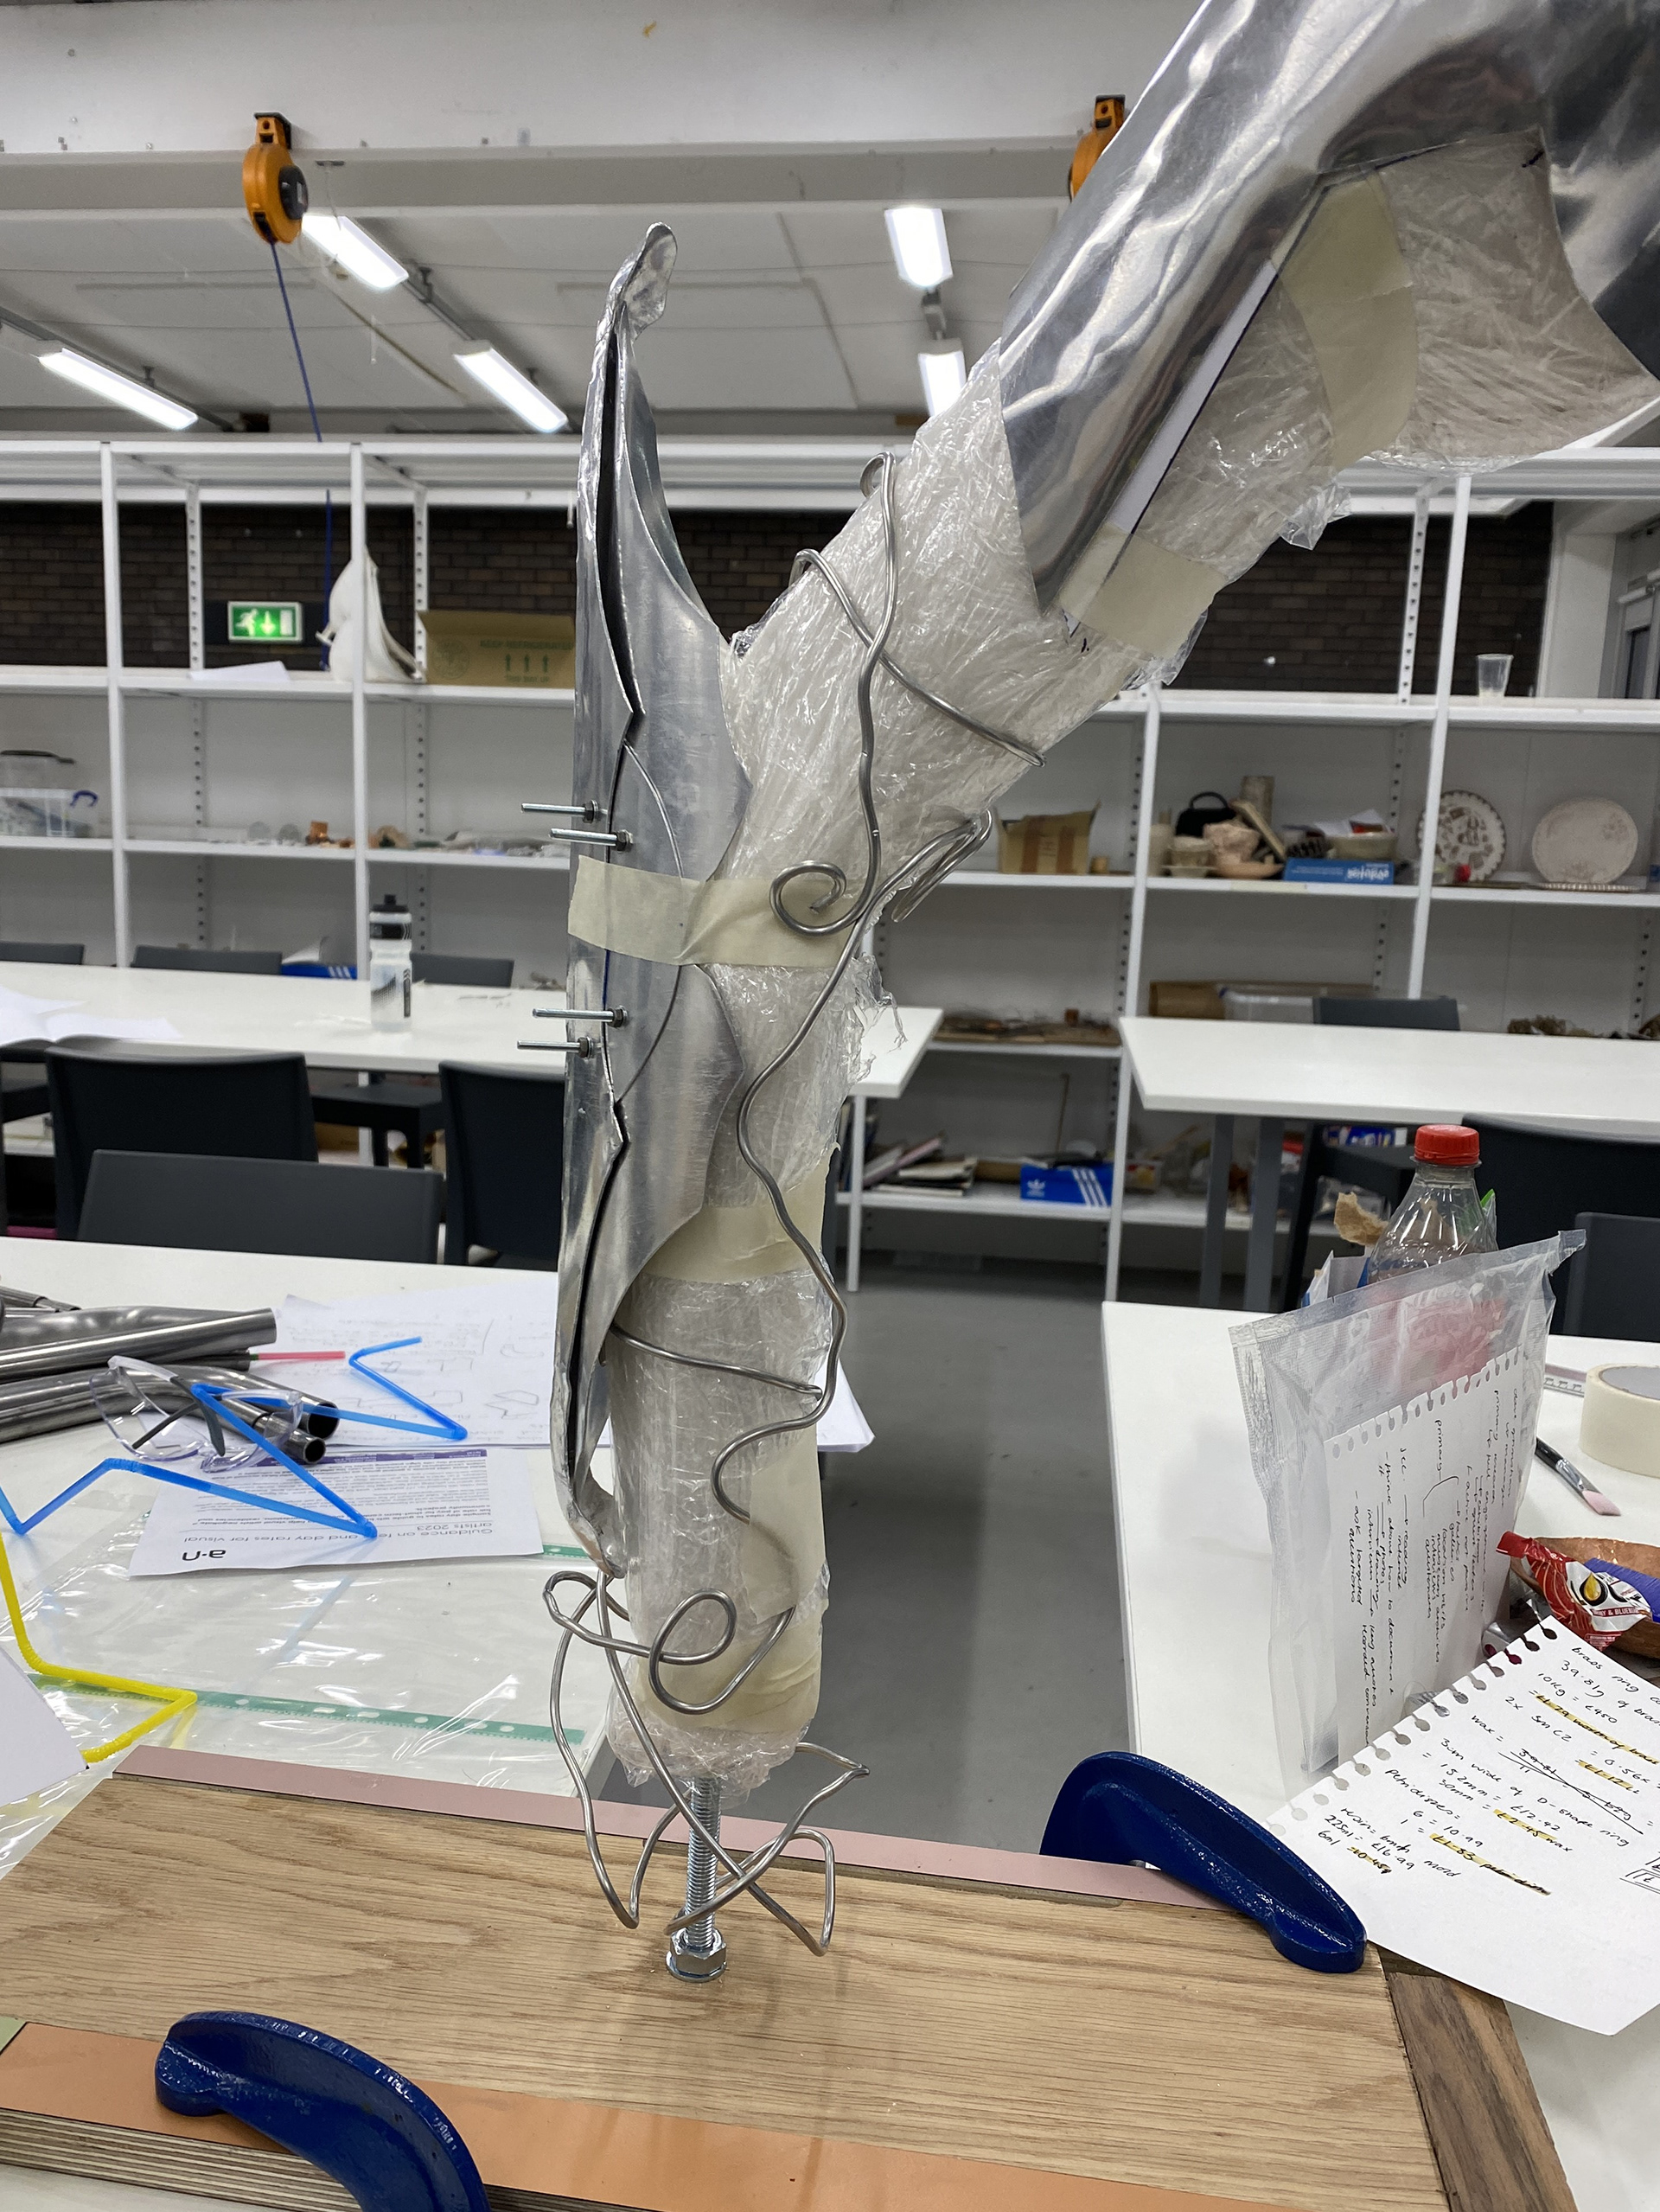
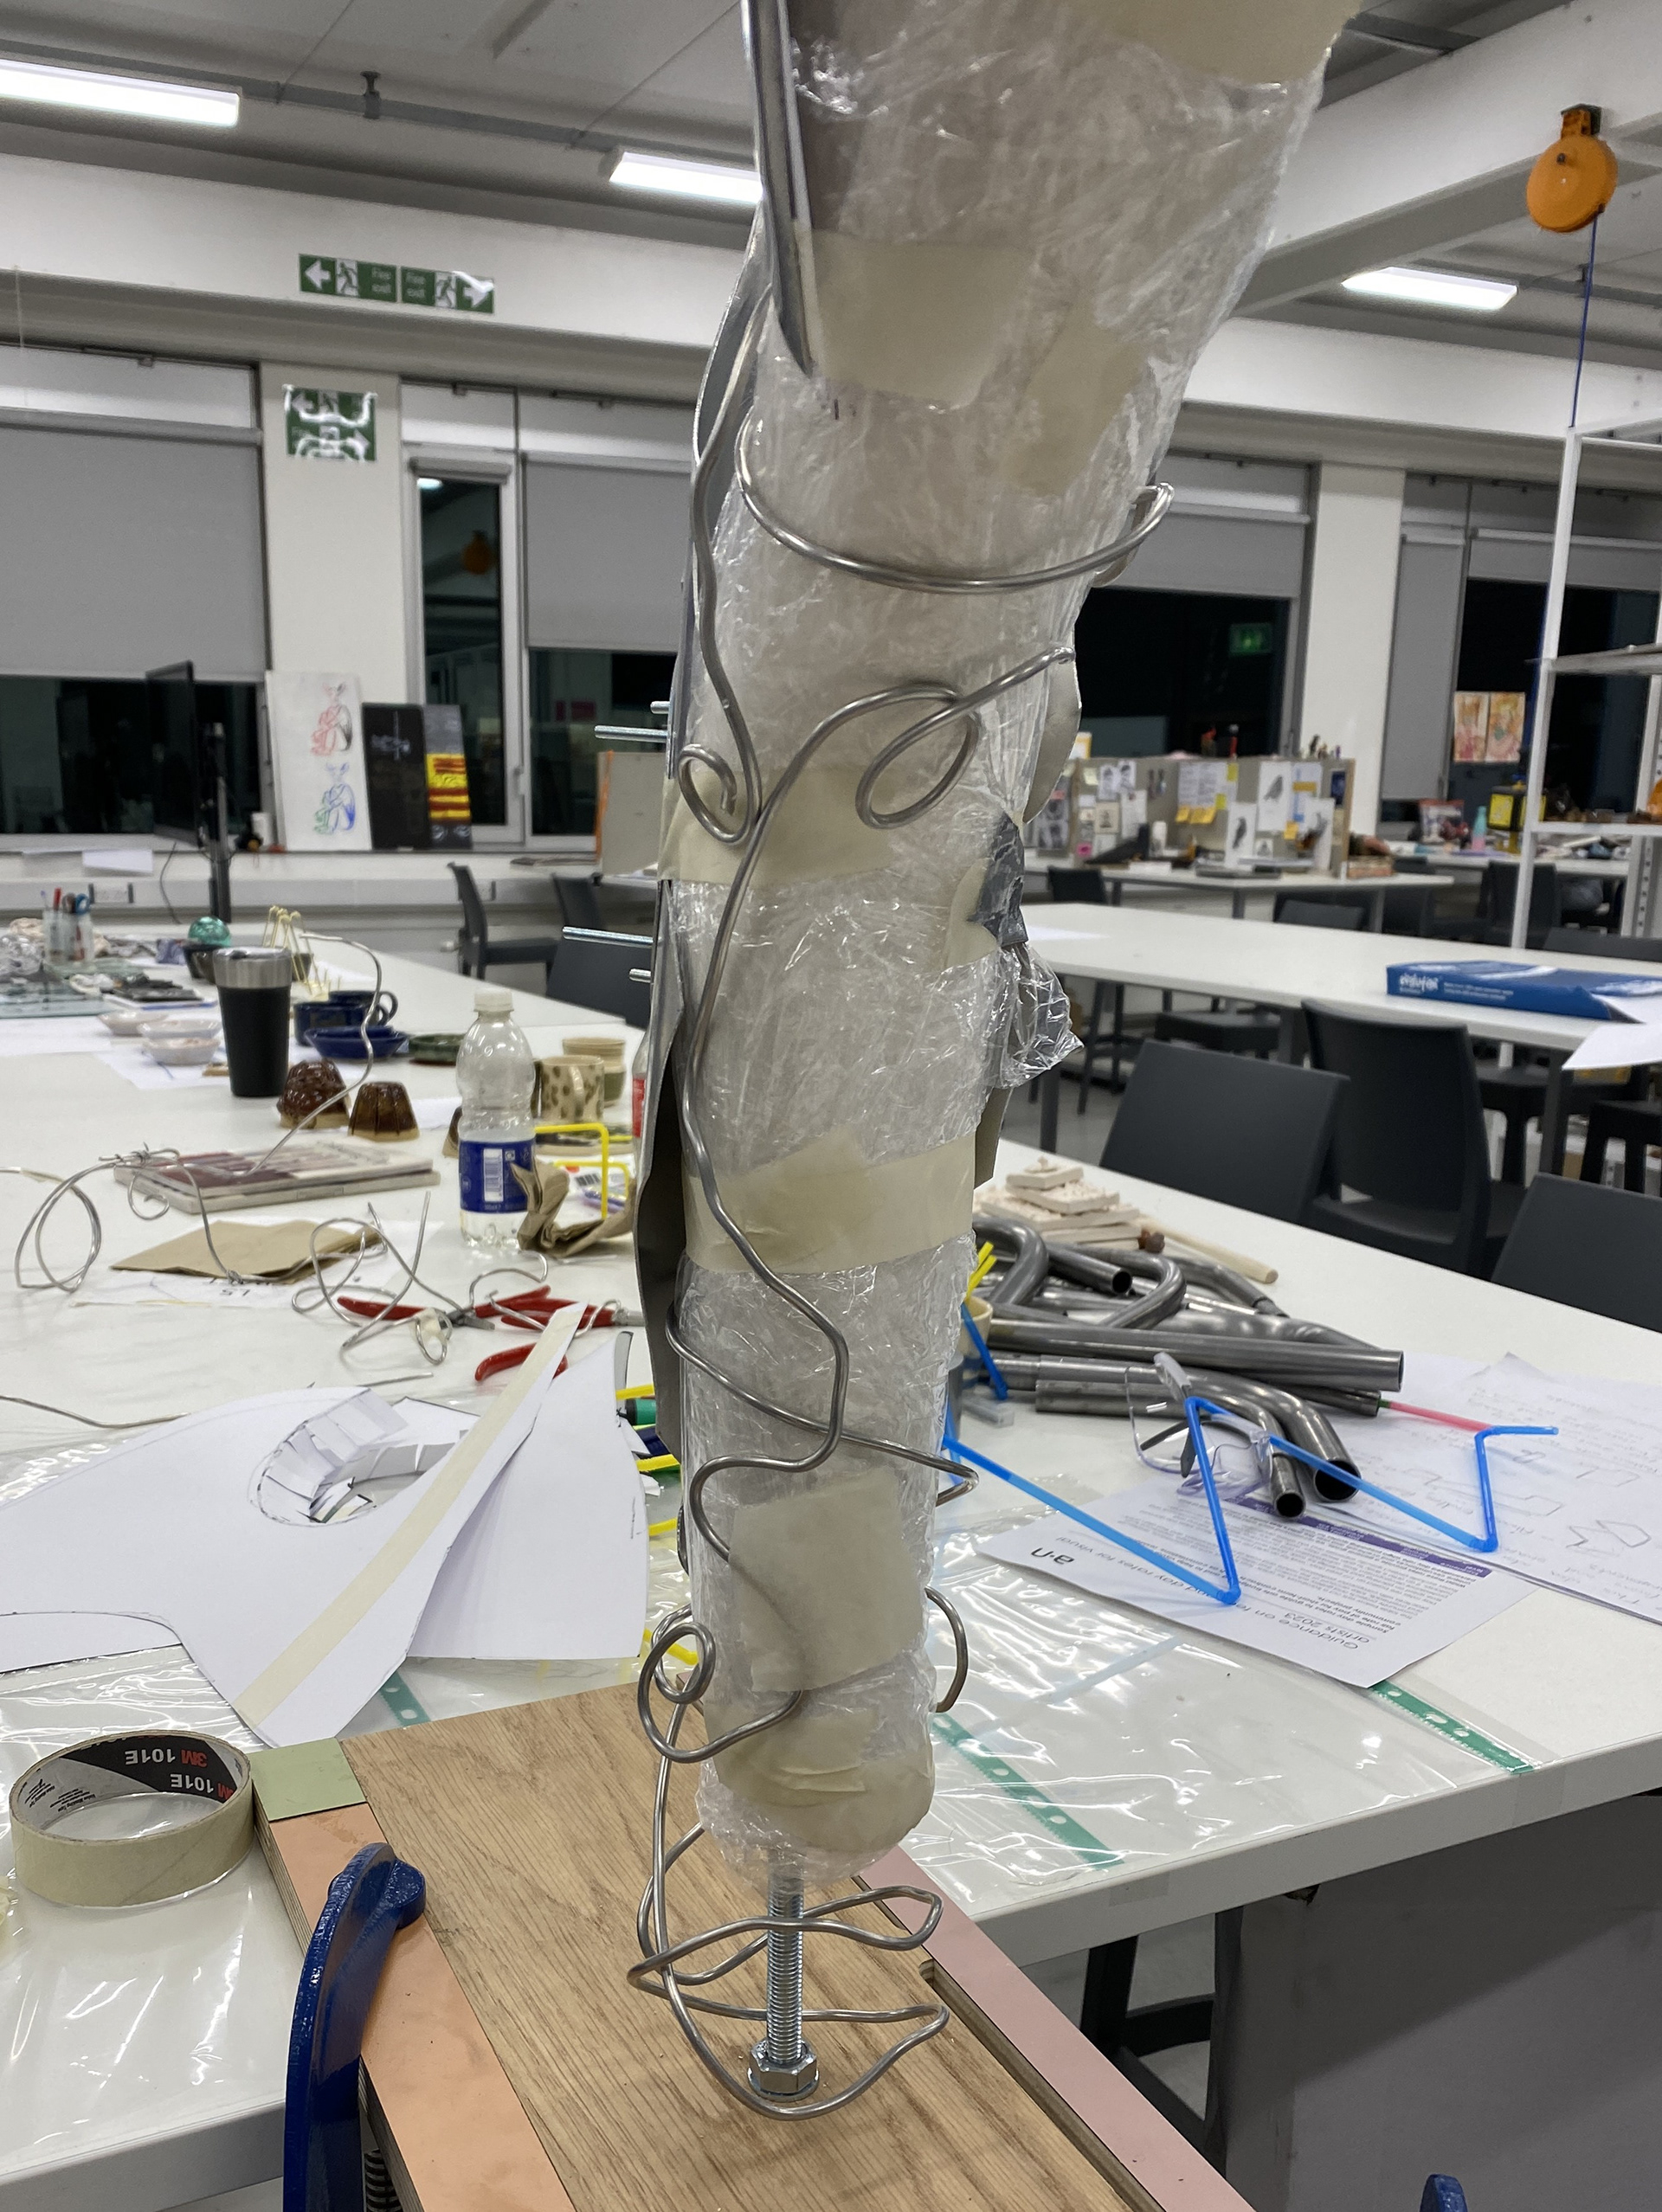
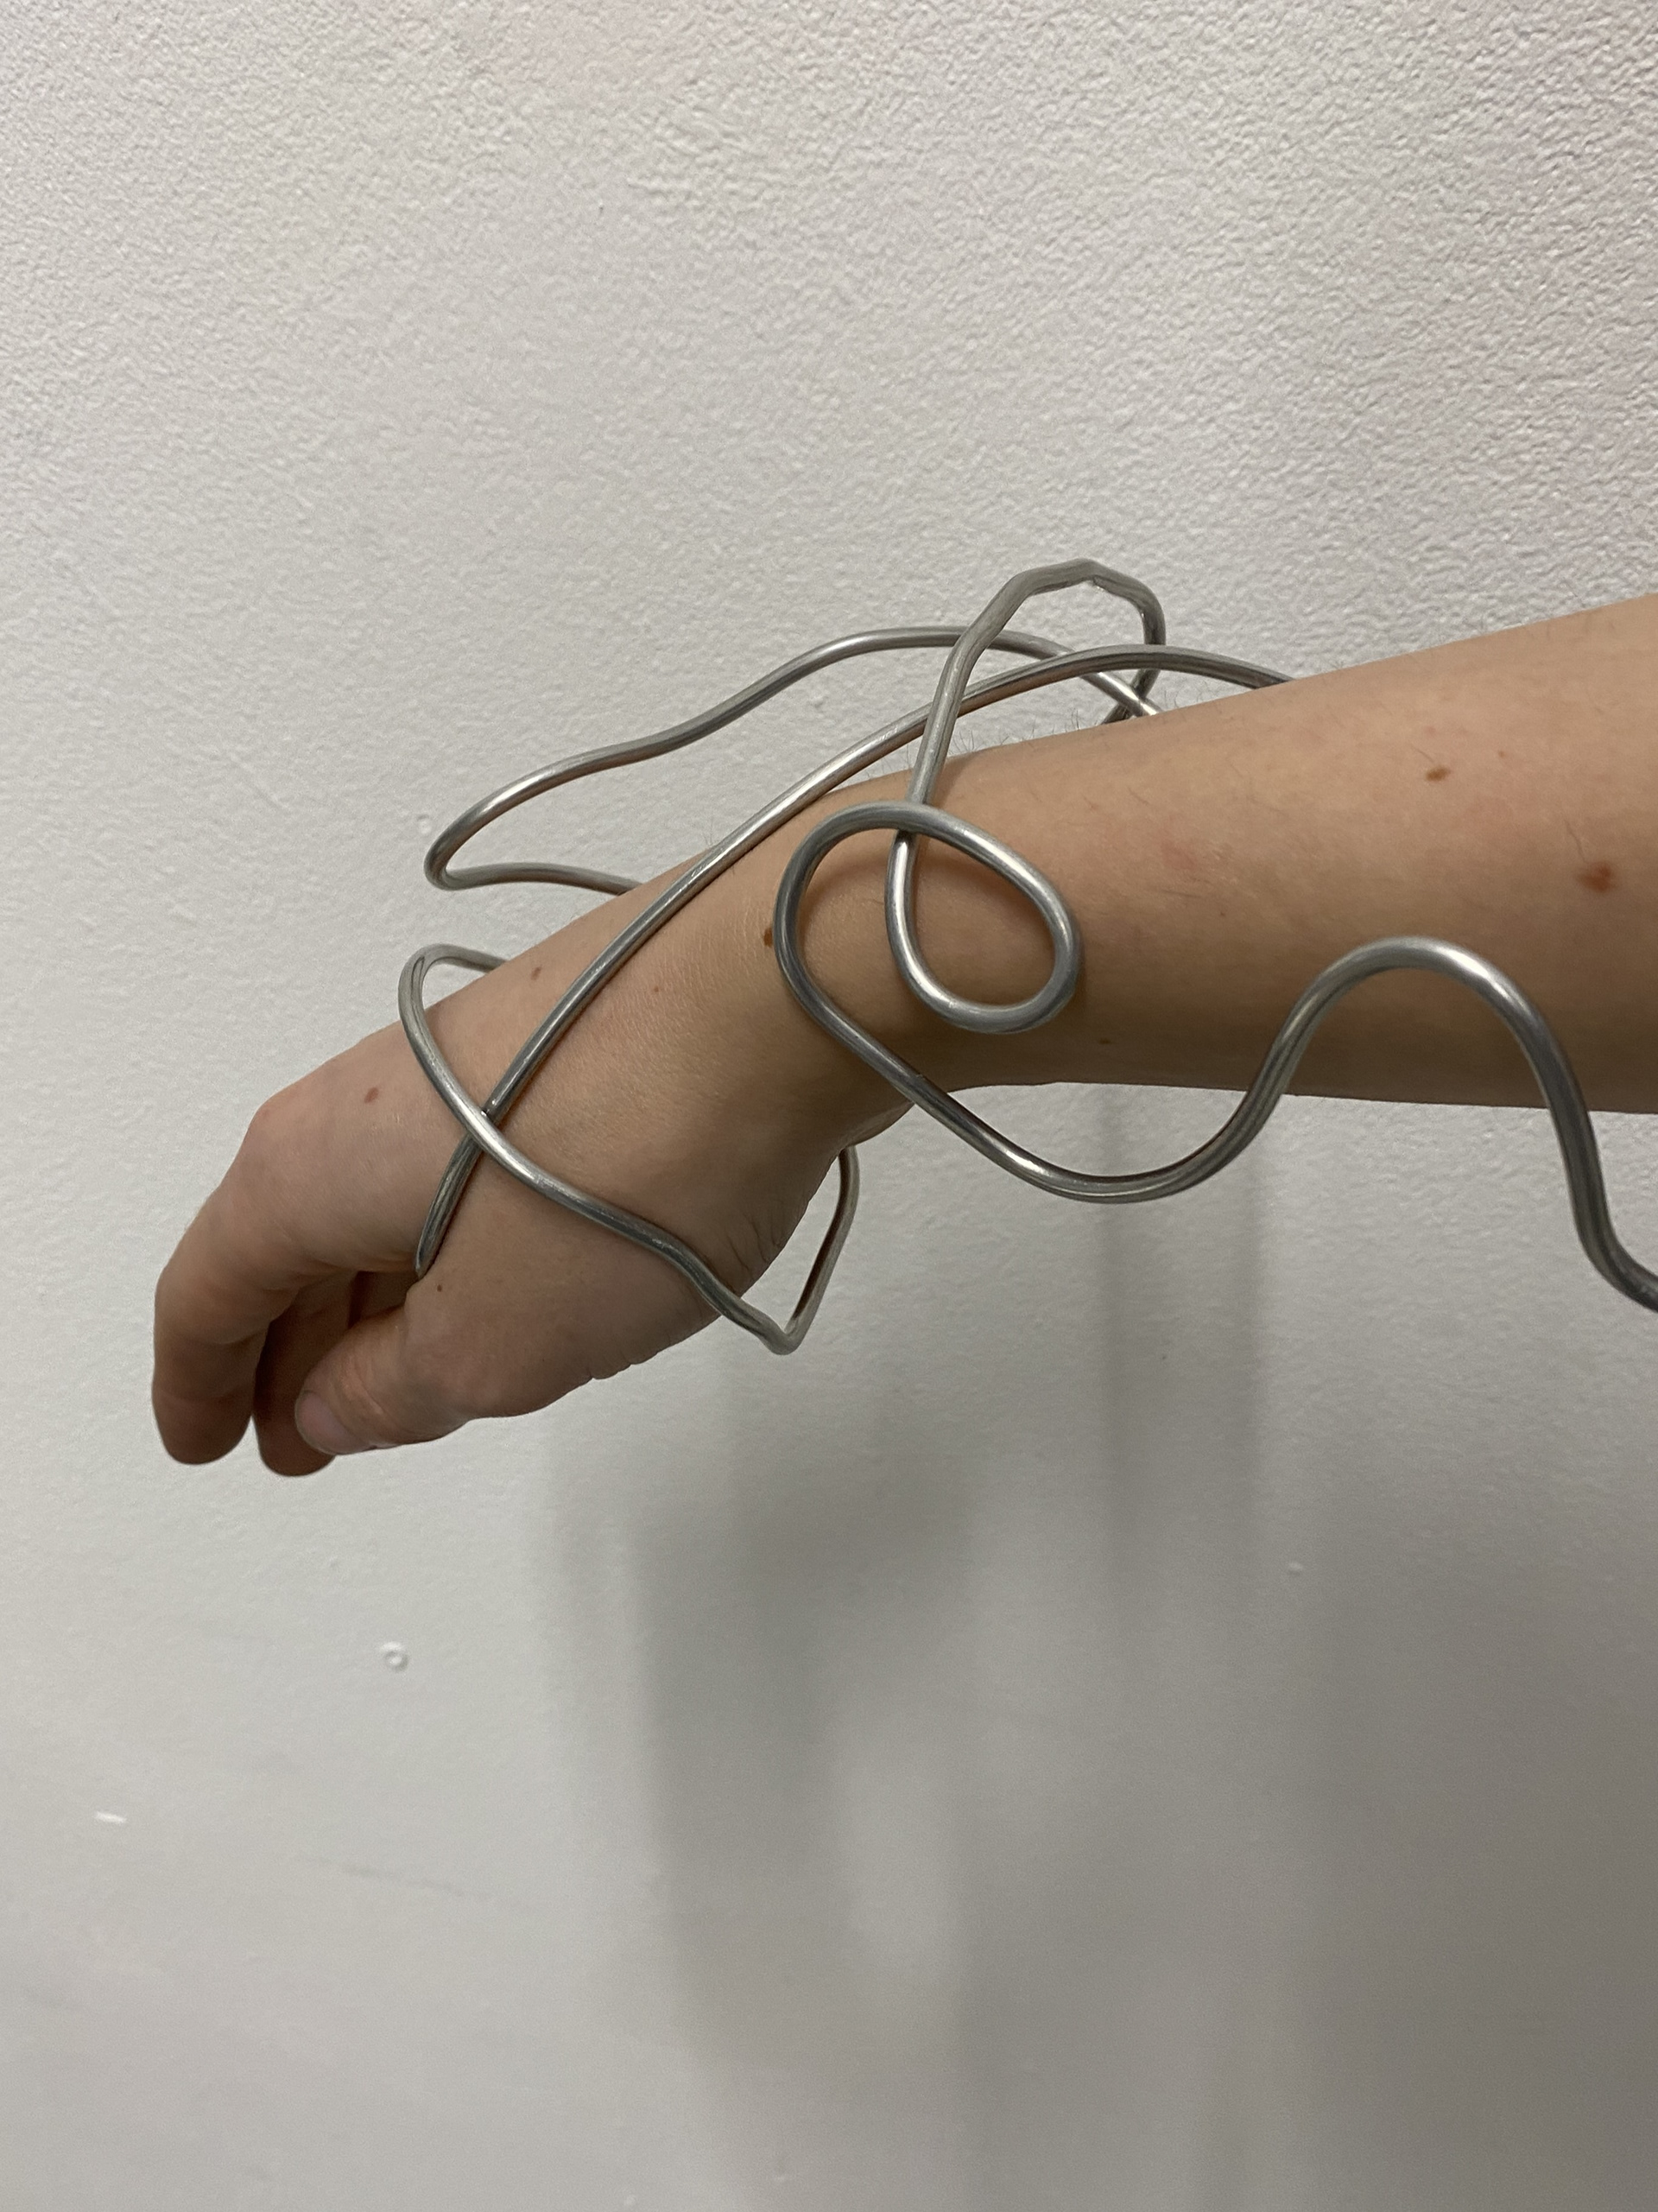
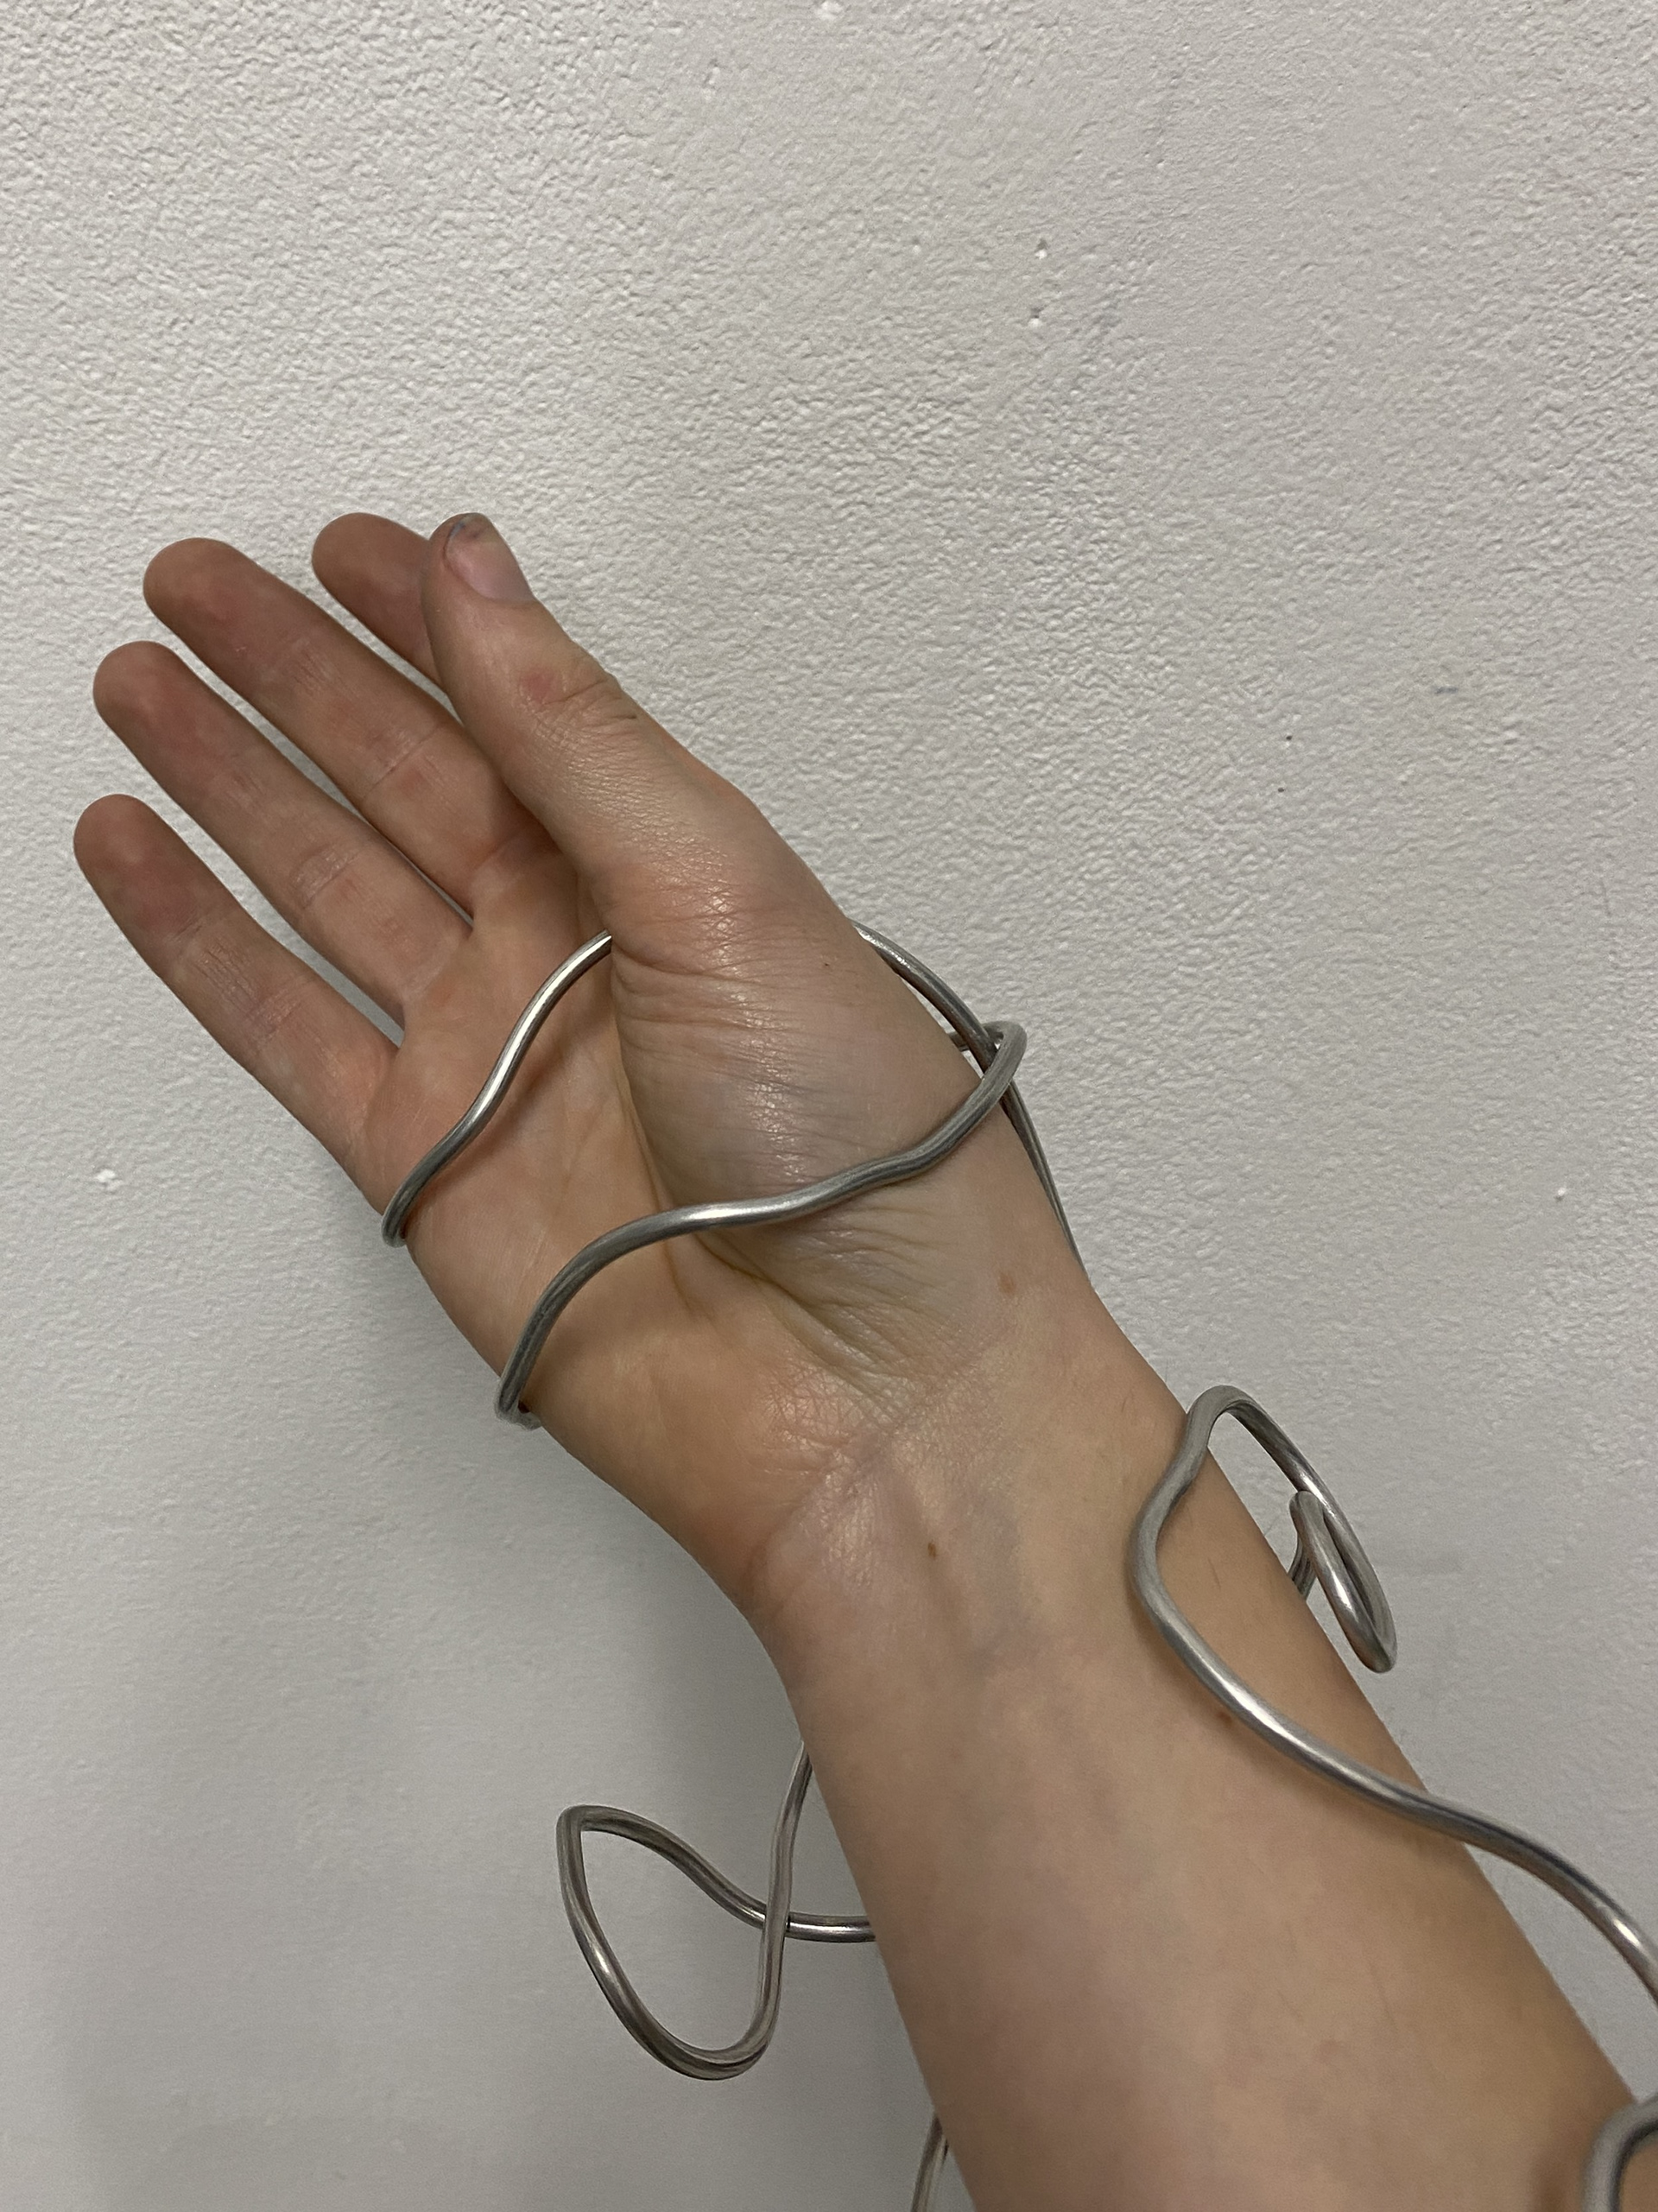
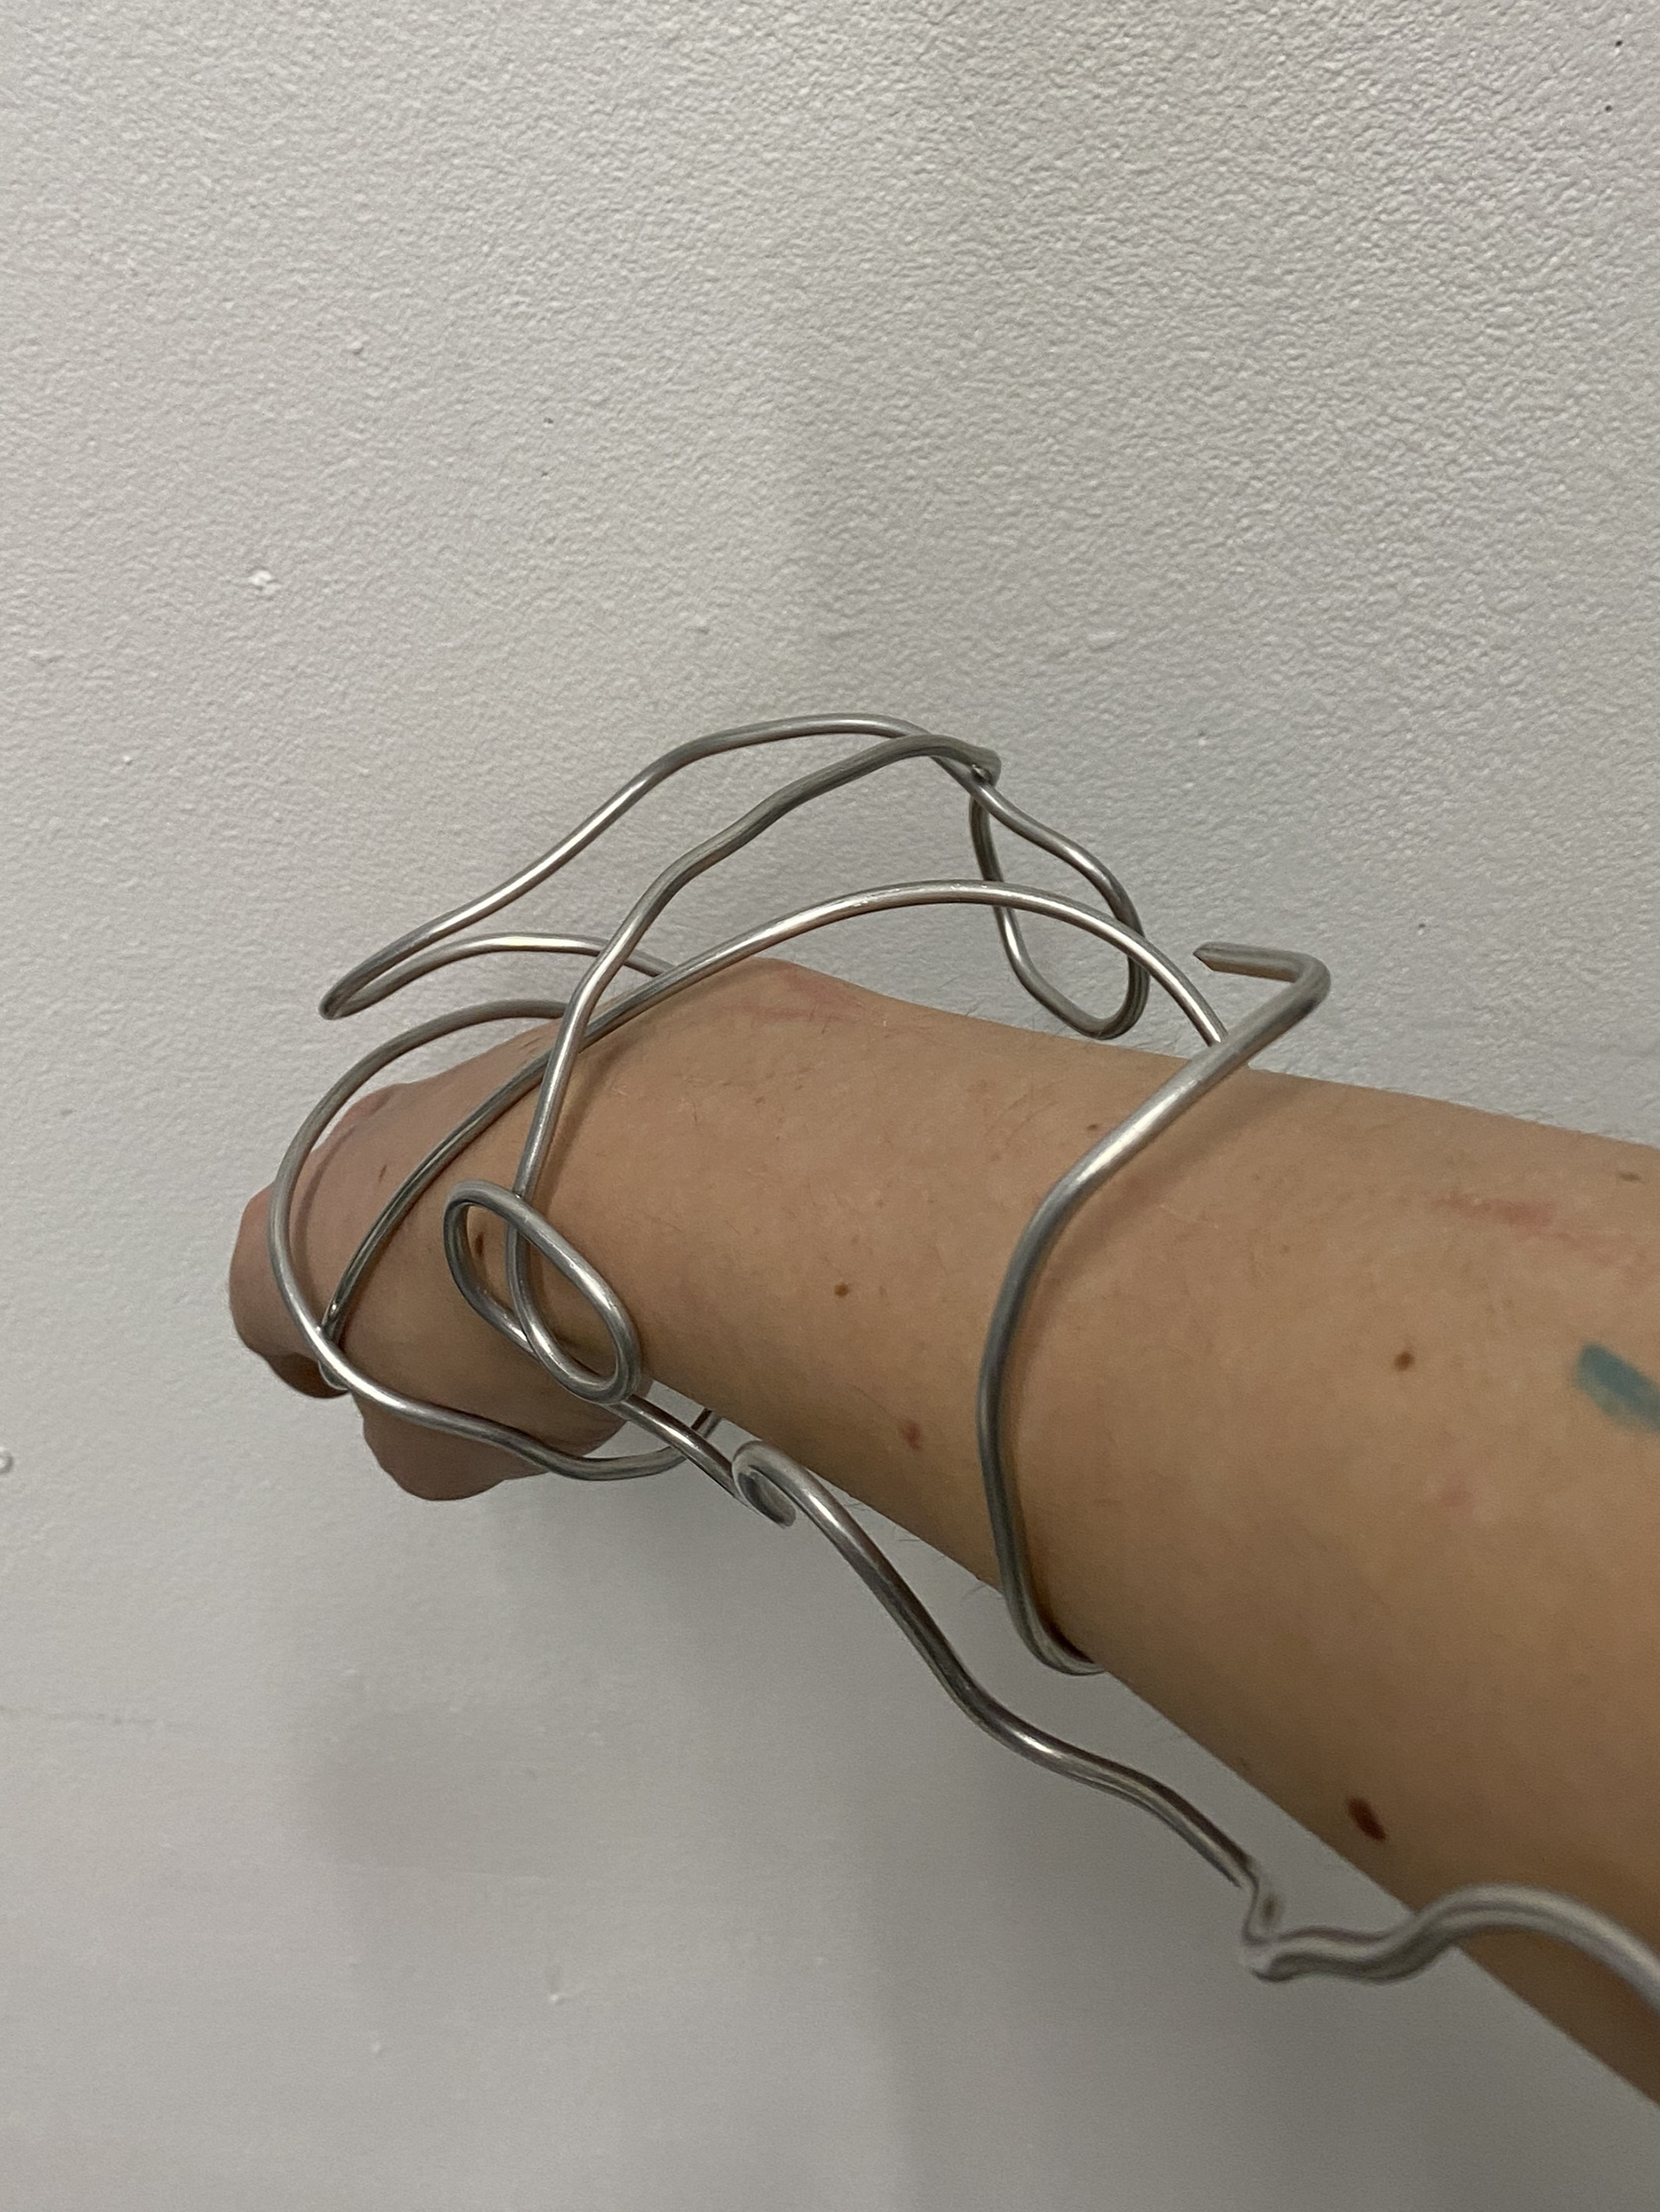
I altered the section to focus on wearability. I started at the hand looking at how the rod can wrap around the wrist and be held between the thumb and palm of the hand. This will remove the need to create a design where two sections can be taken apart or hinged away from the arm, to be able to take the wearable off. This design looks at how the hand and arm can be placed through the top and put on as if it was a sleeve of a shirt. One challenge was ensuring that the hand could be removed and not creating a too narrow section around the wrist. By building directly onto the cast I could bend and manipulate the 3mm aluminium wire to avoid overlapping with other sections of the design and constantly adjust the negative space, focusing on the relationship each piece has with each other.
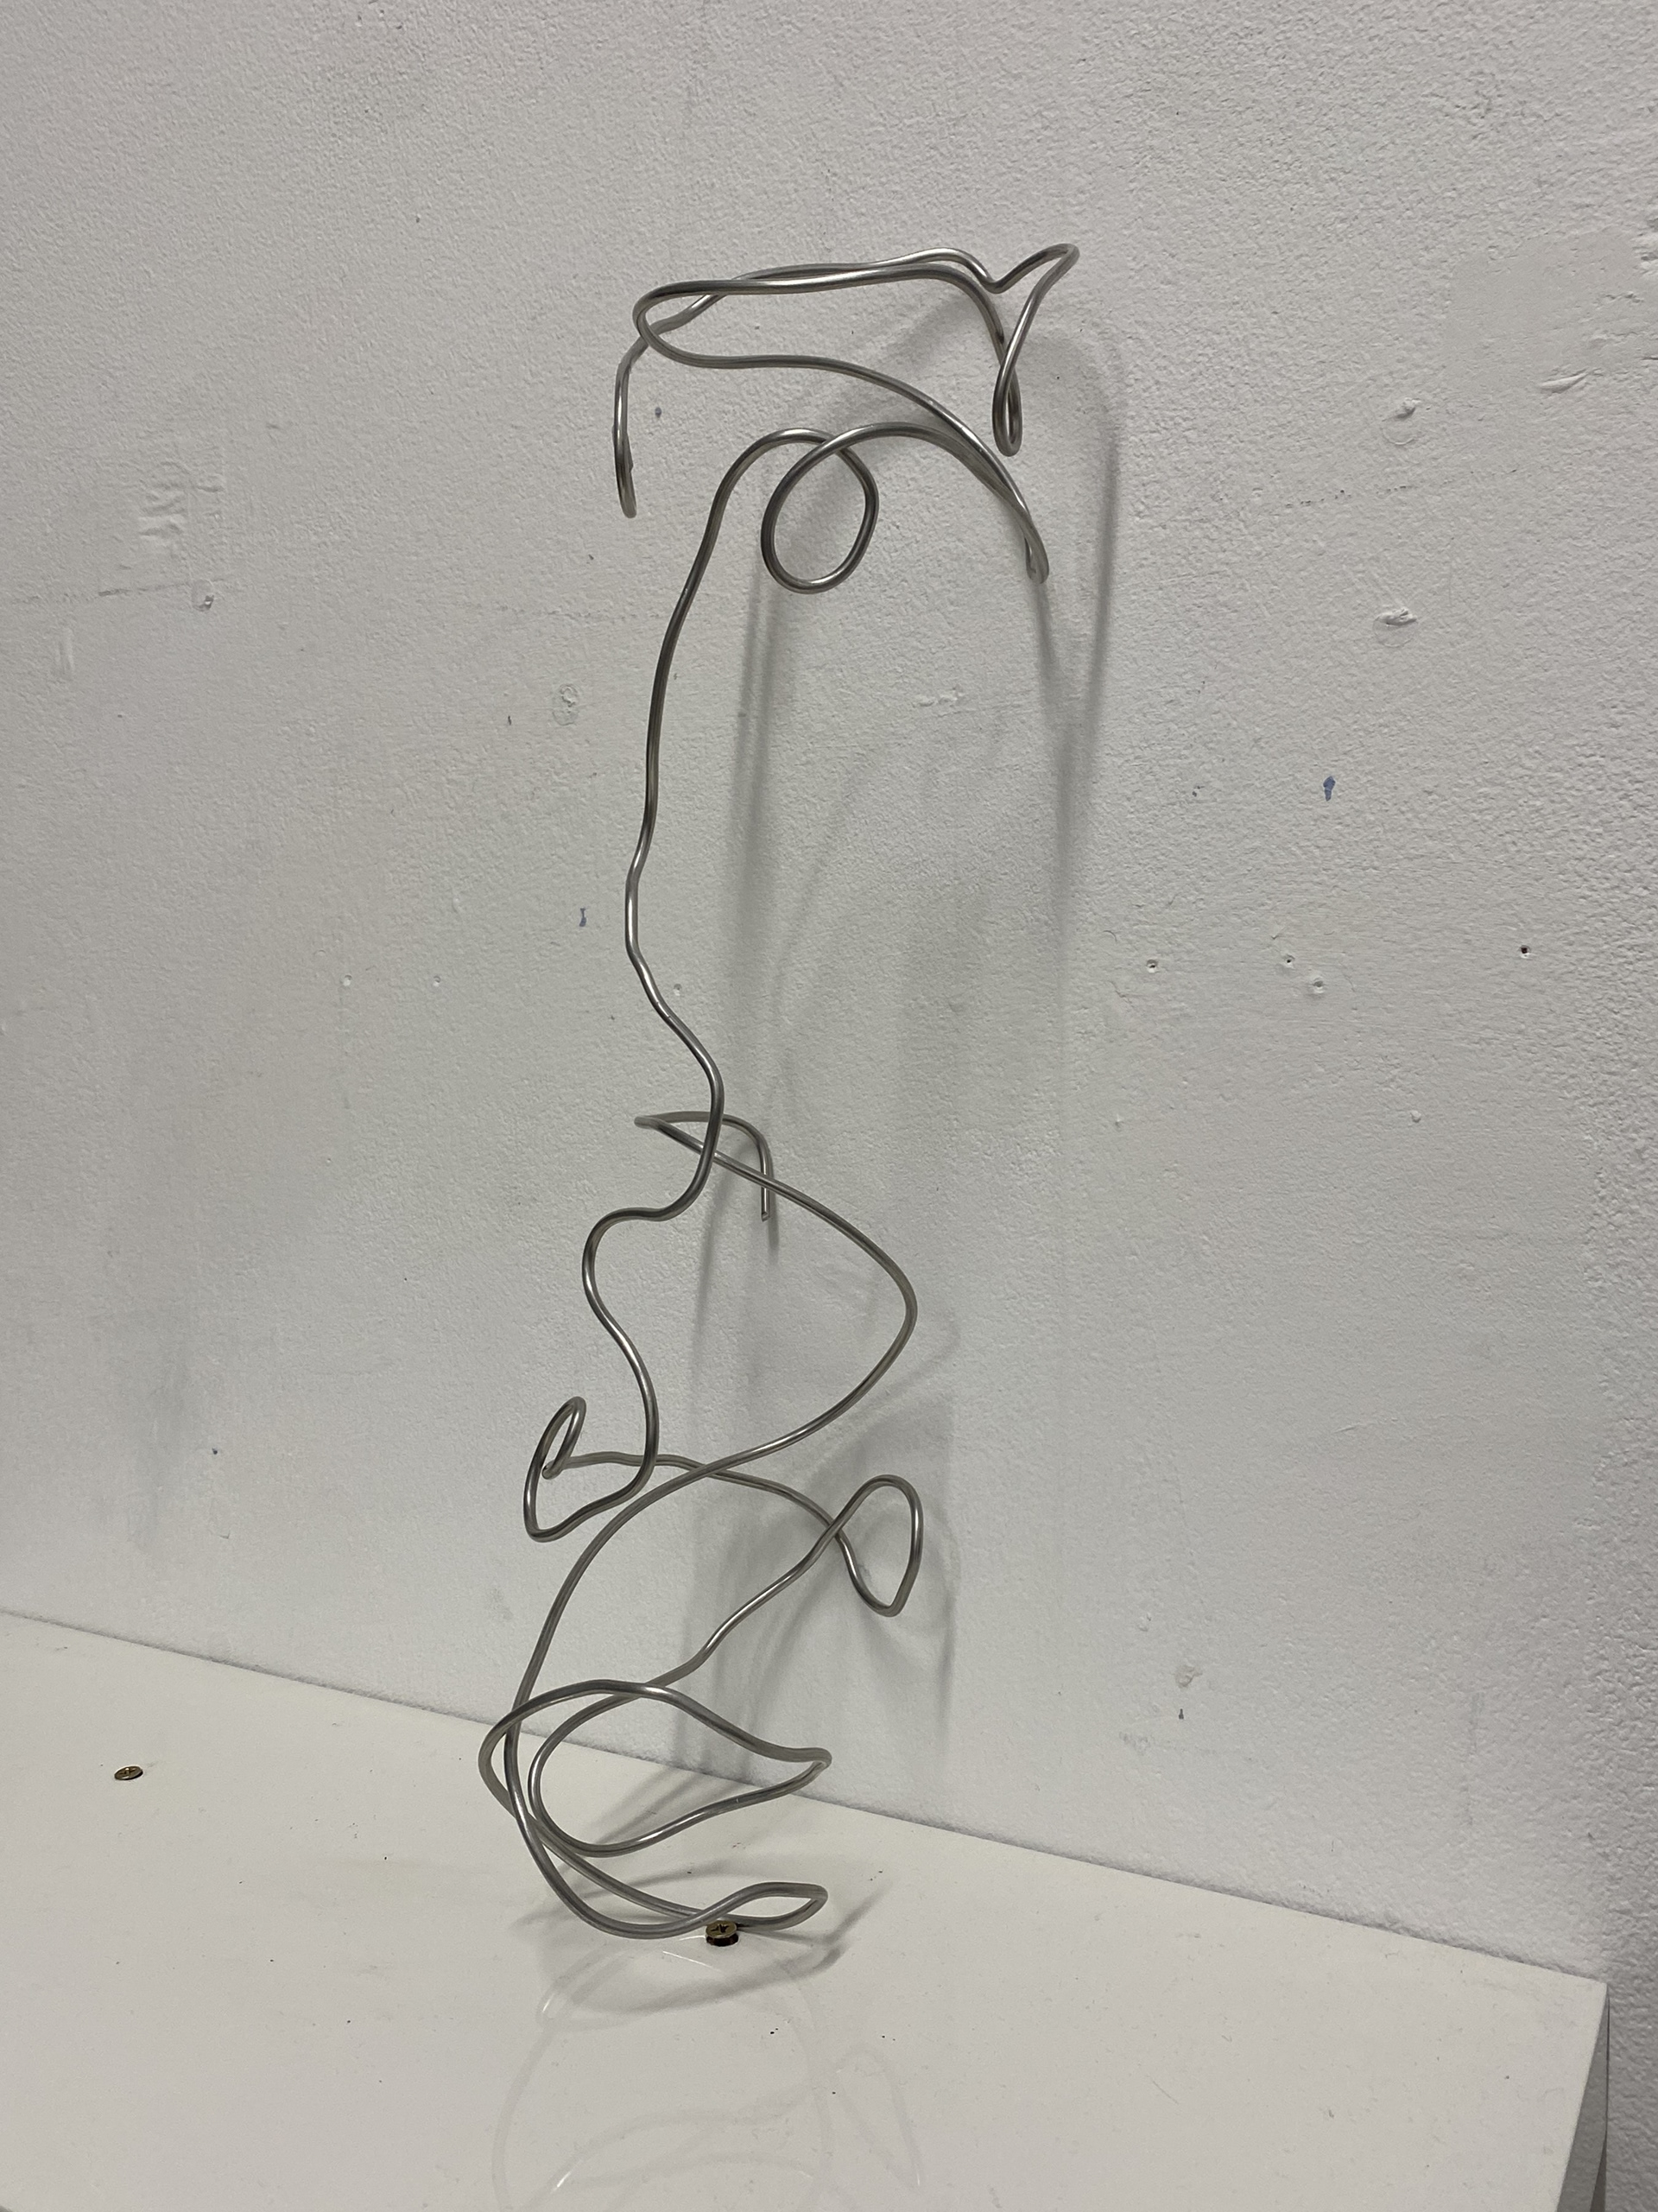
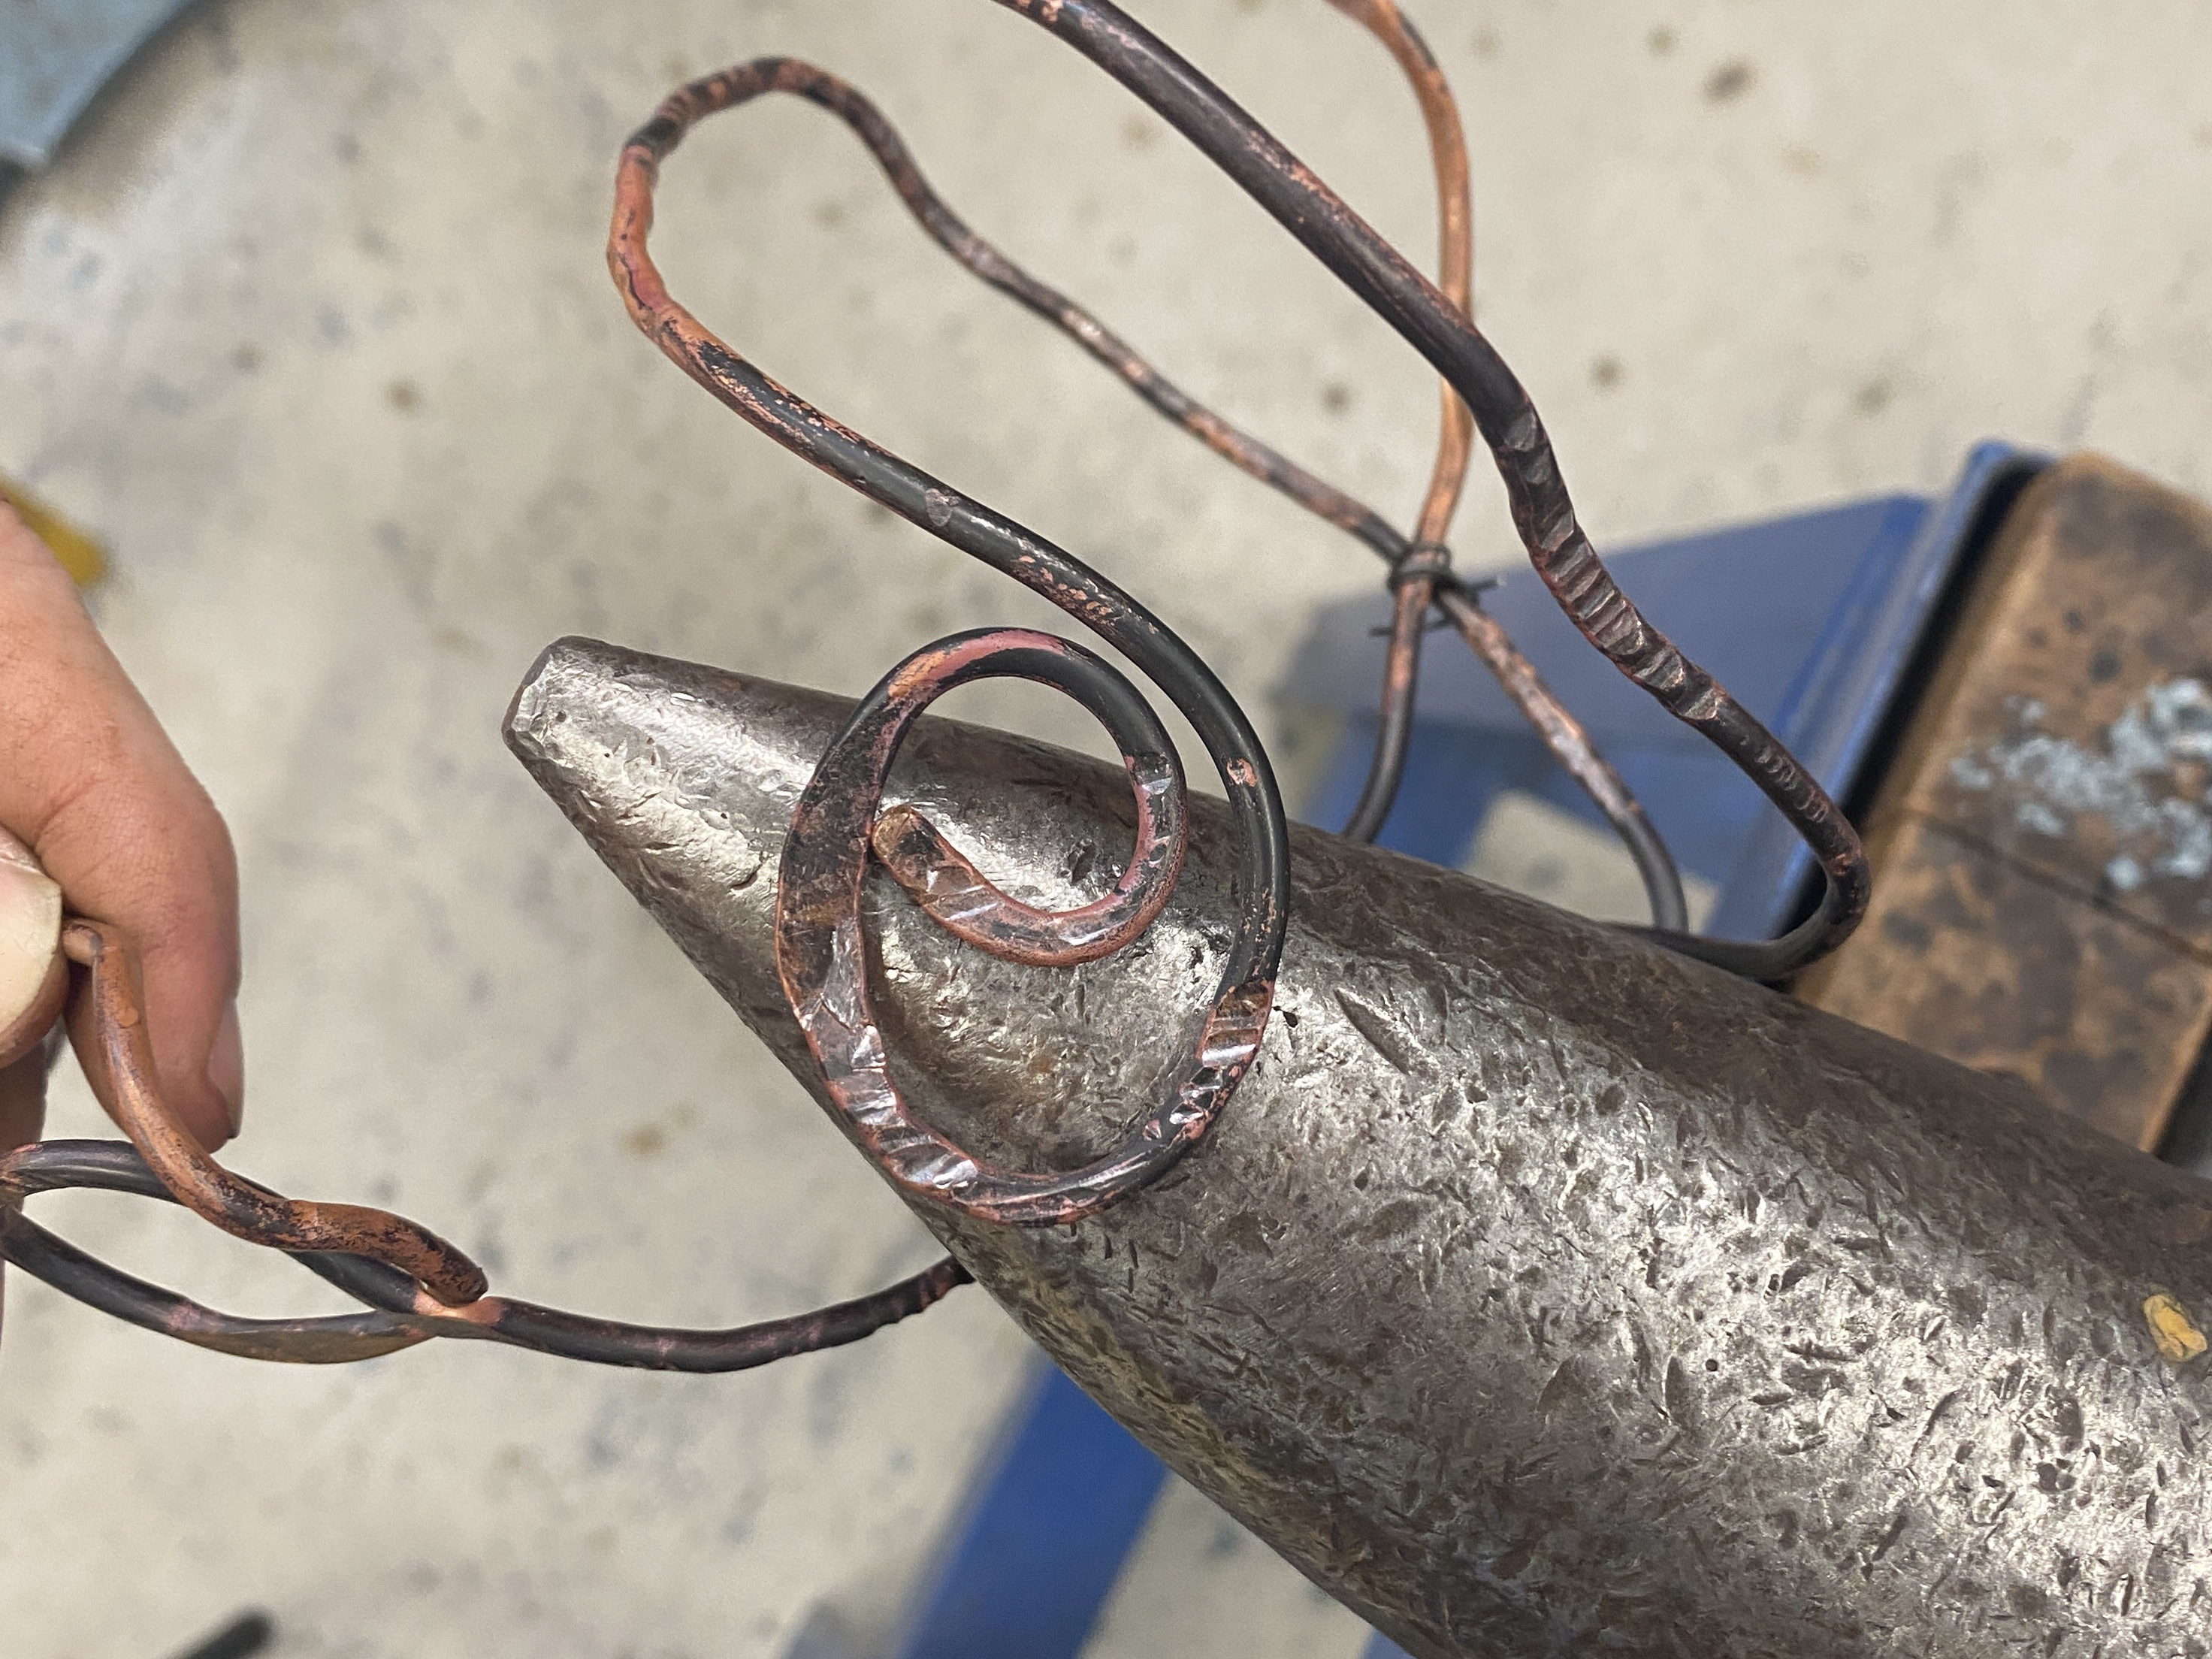
Throughout my designing process I had always seen that these elements would be made by forging steel. However, during the creation of the design above, I realised that this process and material isn’t suited to the application. By using string to measure out the length of the aluminium wire above, I worked out that I would need a 2.6m steel rod. This would be incredibly hard to heat up to the temperature required to bend such tight and intricate shapes. Also, I would need to use a blow torch on the hearth rather than the forge to heat the rod, as it would be too long to fit into the chip forge. This means I wouldn’t be able to introduce the same levels of texture and material thickness that I achieved in my material testing. Additionally, the time it would take to heat, bend and cool the steel to create a replica of the aluminium model would be too great.
Therefore, I have decided that I need to replace the forged sections with wire. I will use copper wire to create this section as I will still be able to hammer and create texture into the surface of the wire, as well as anneal it so that it can easily be bent into shape. Despite the aluminium being a success and potentially could be the final form, I think that it is too flexible and any movement whilst putting it on or wearing it would deform it.
Developing script
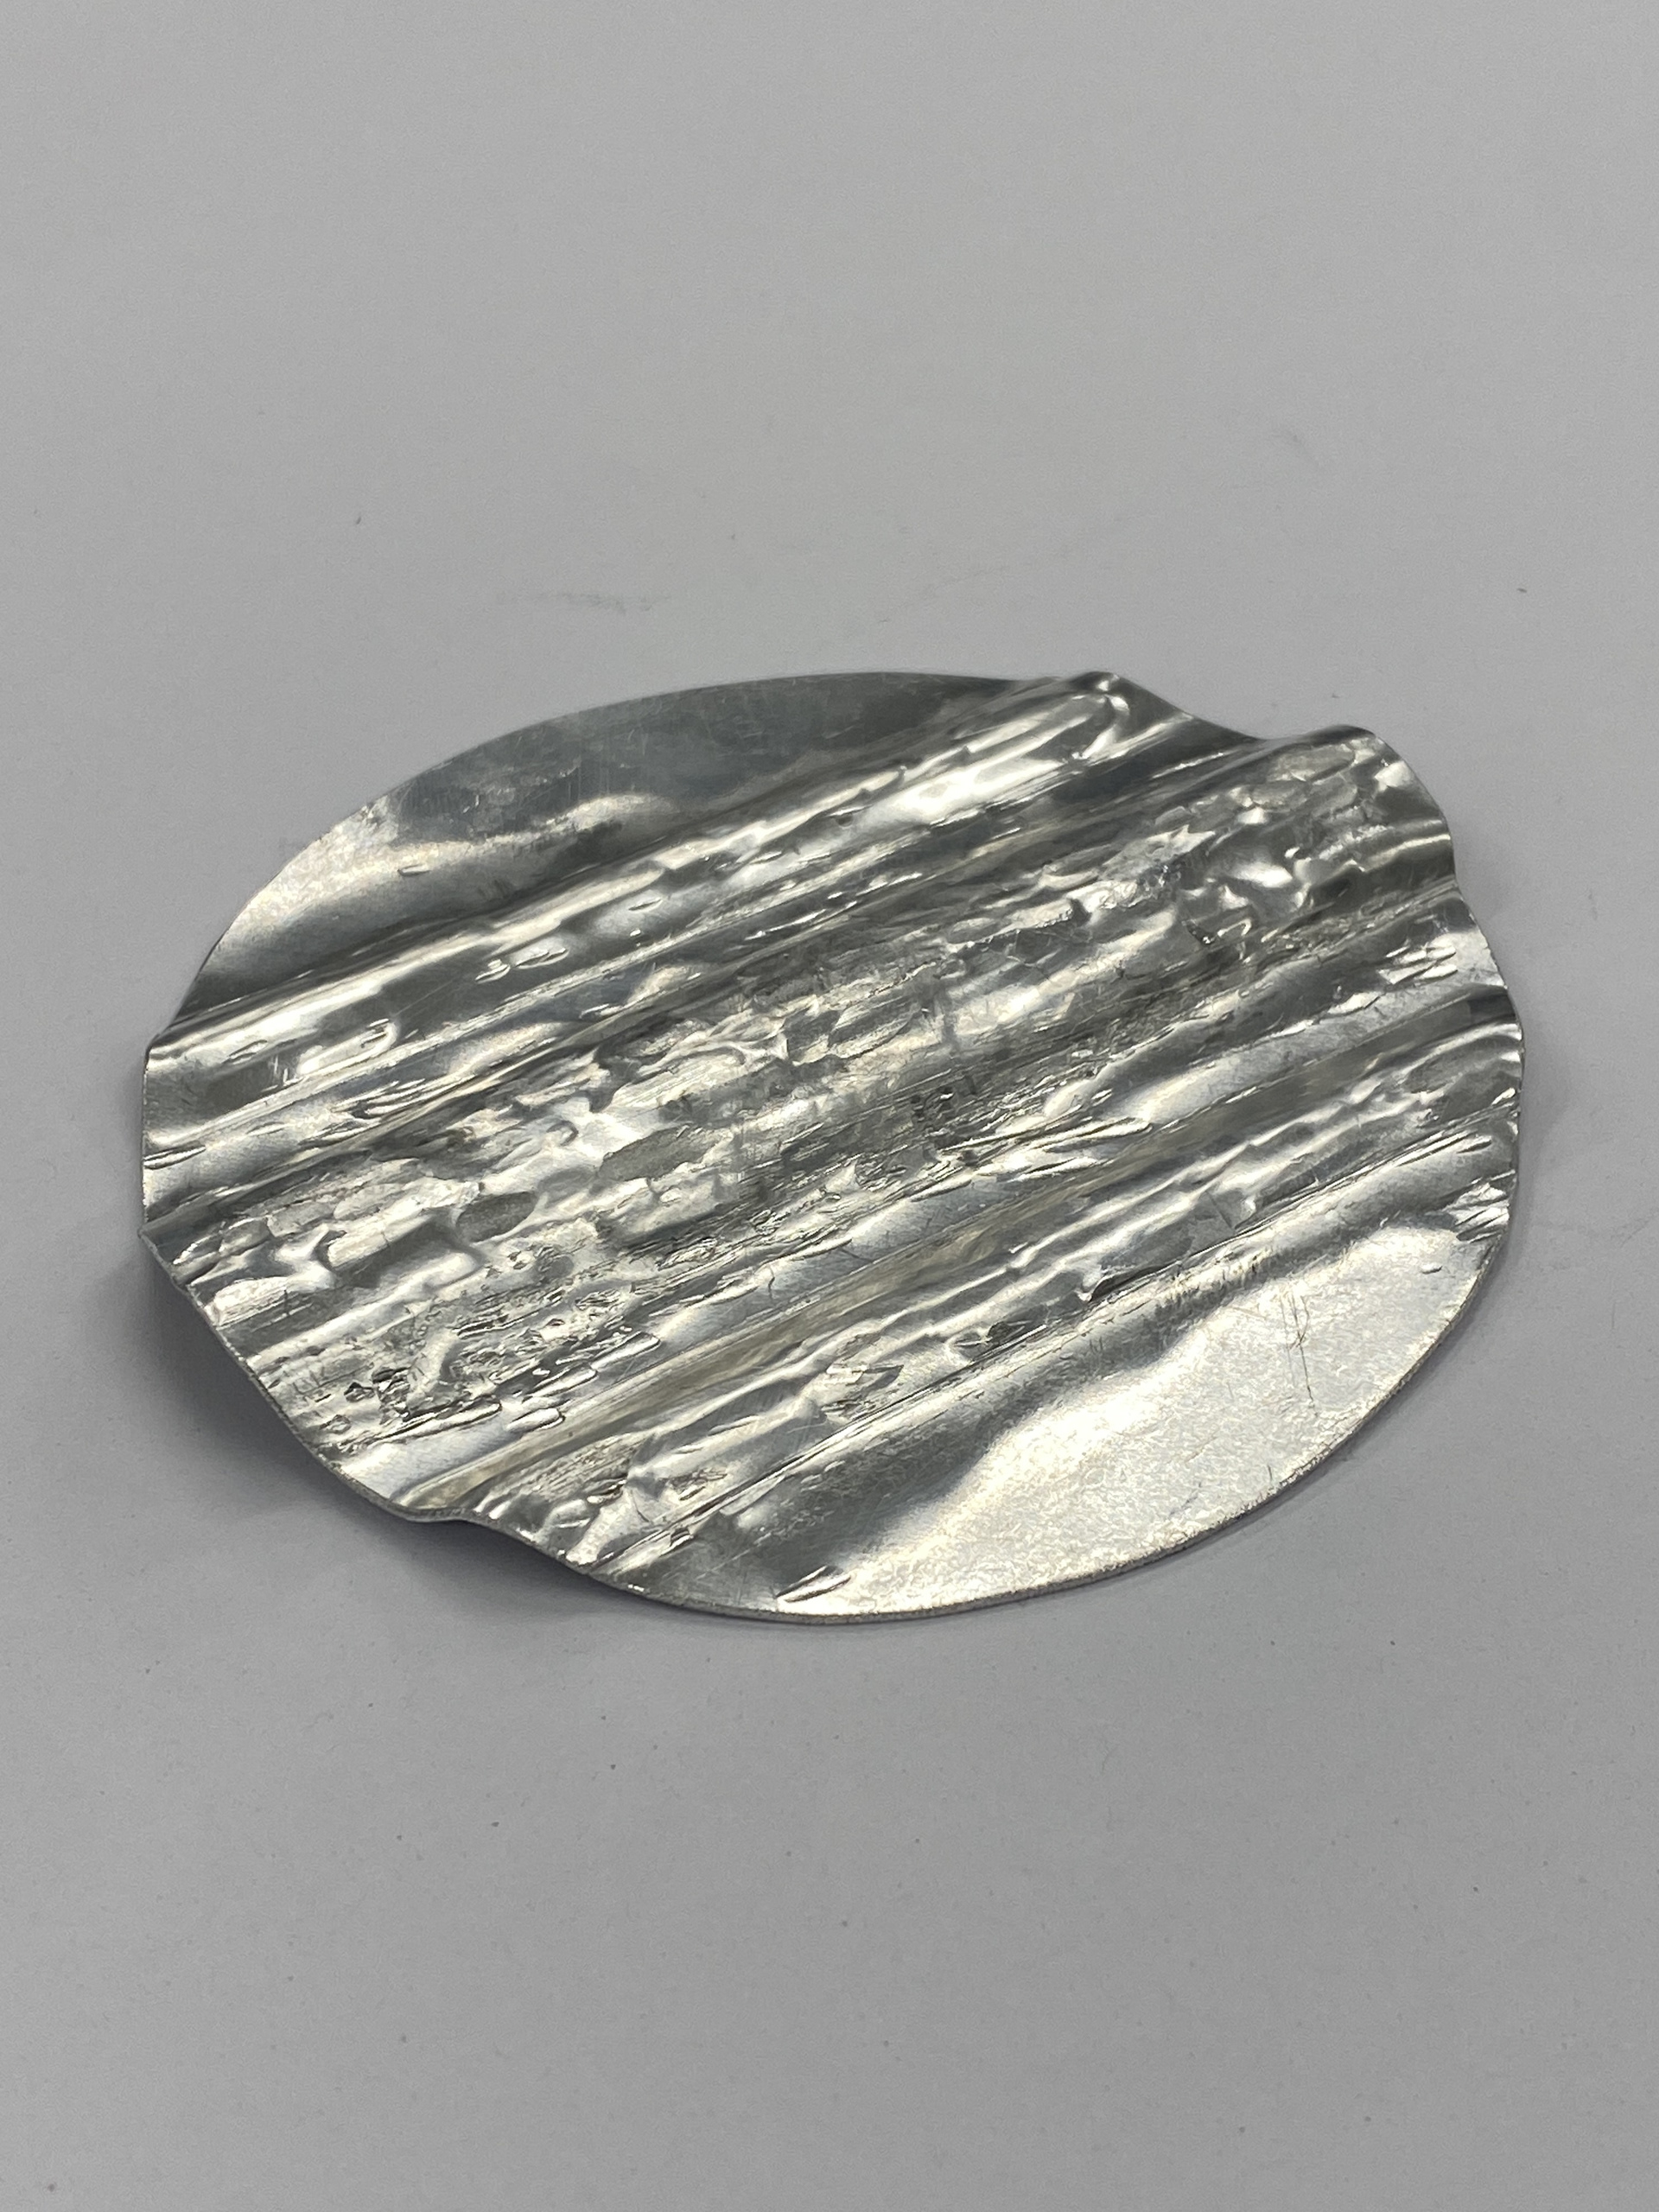
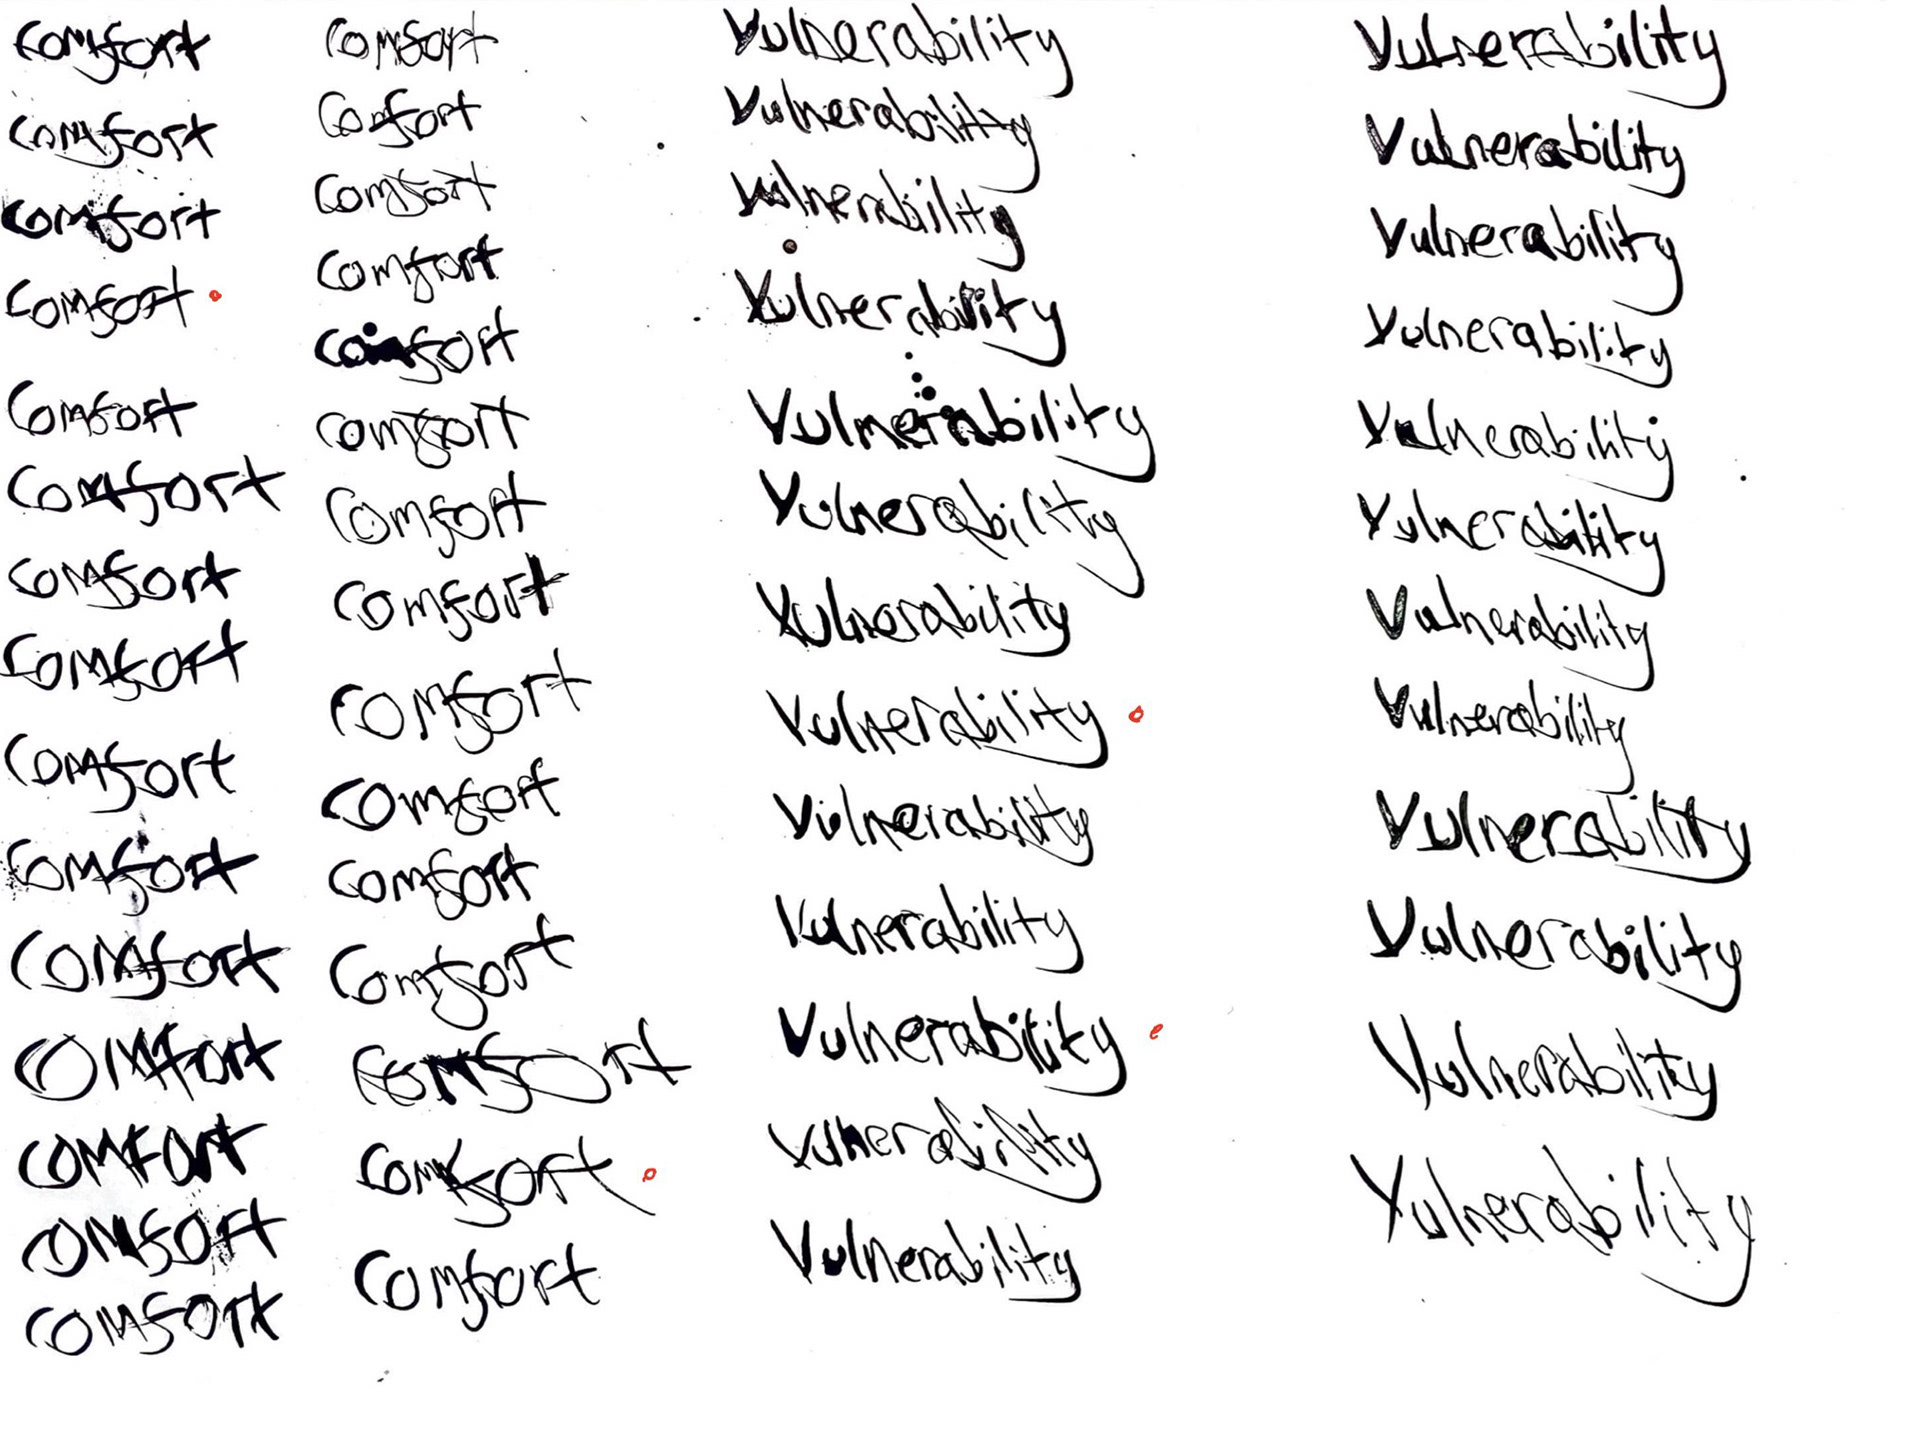
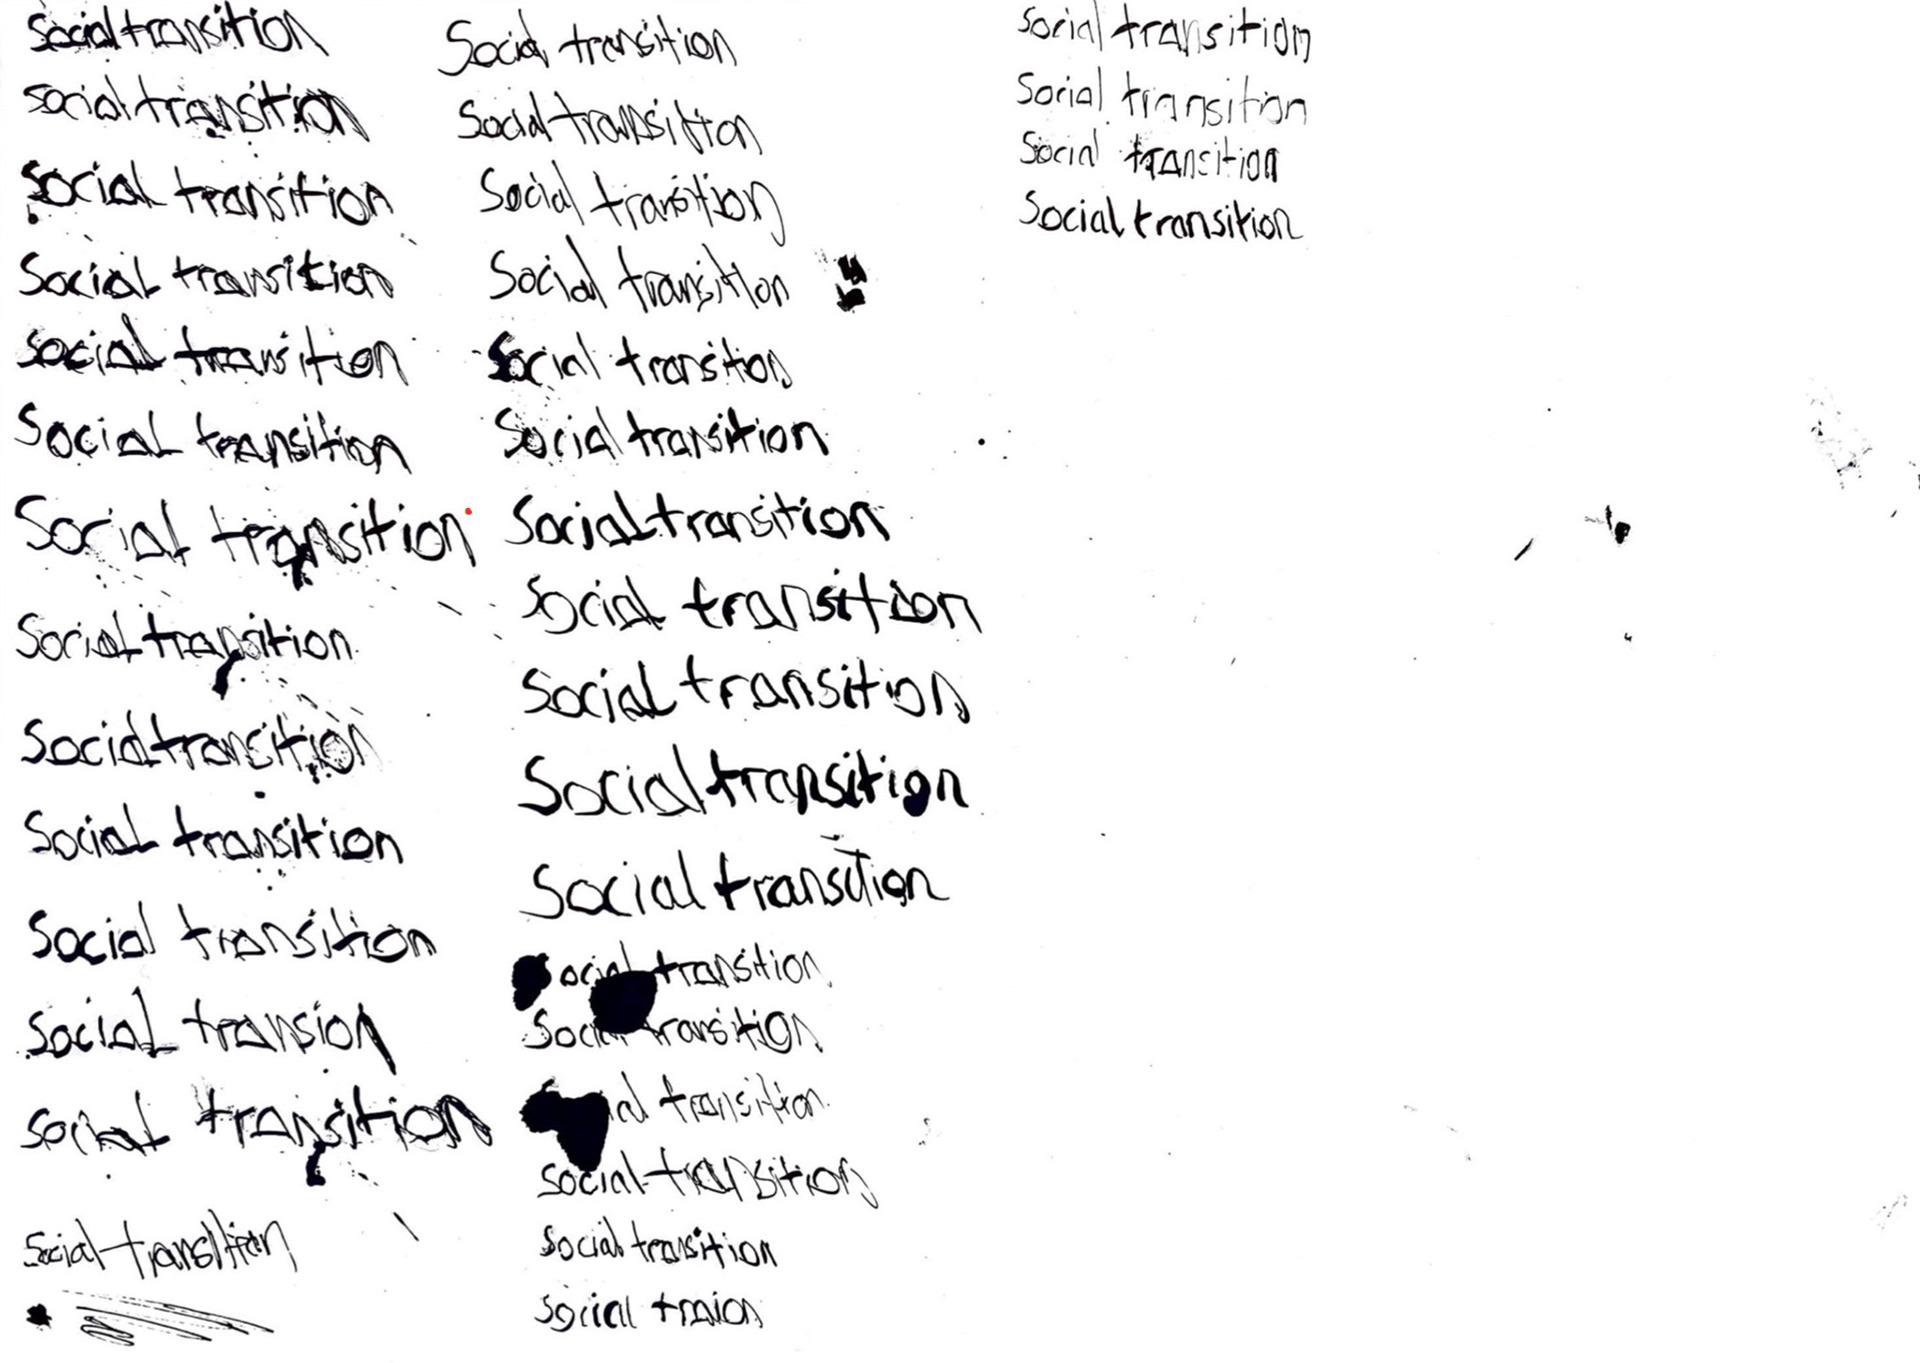
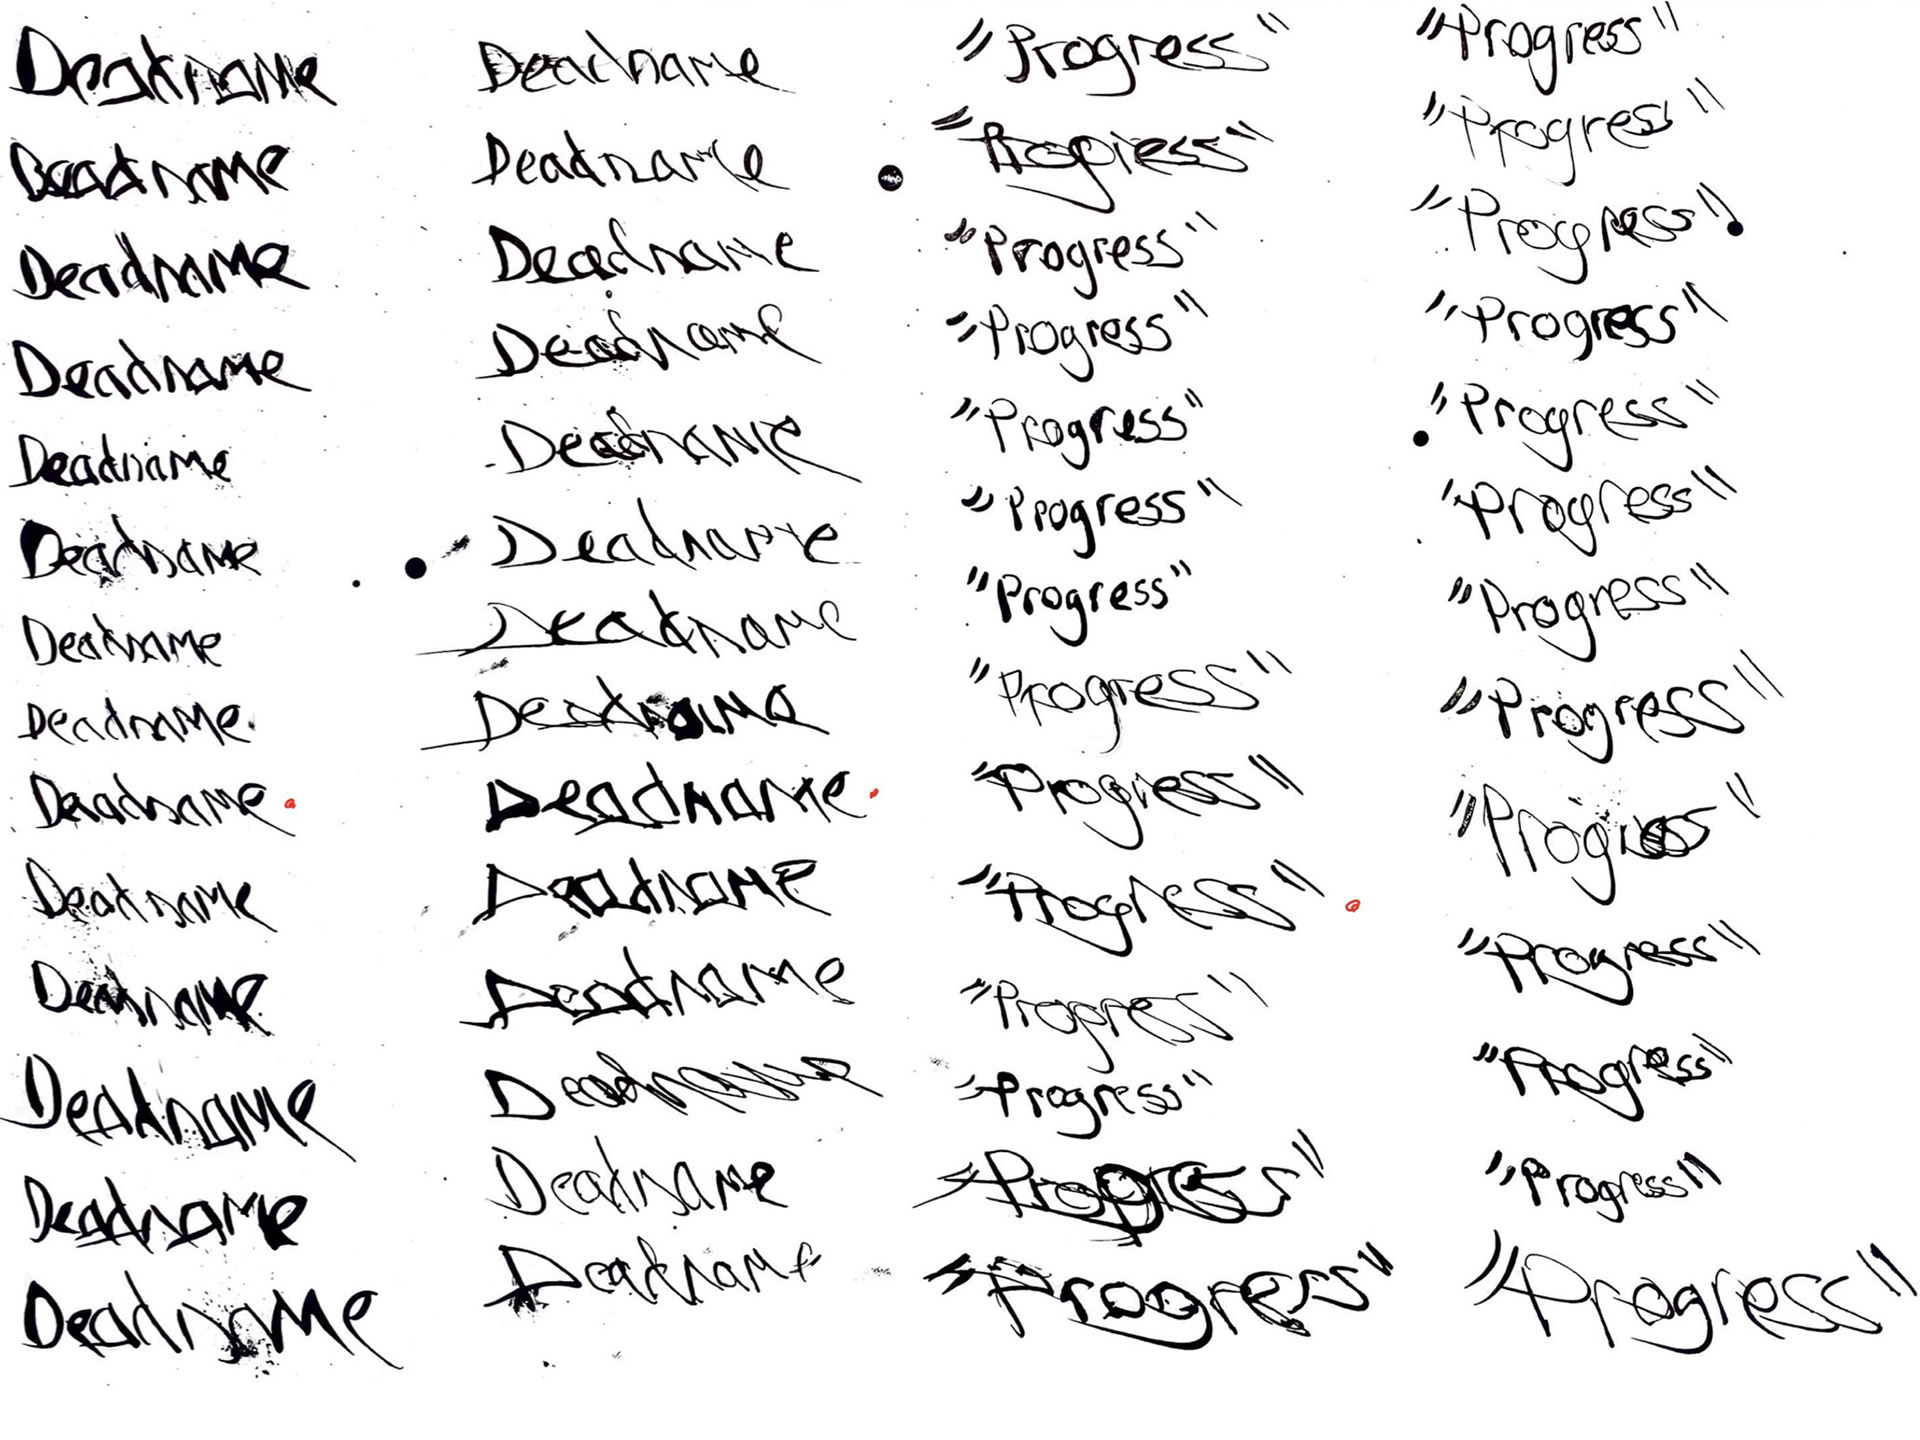
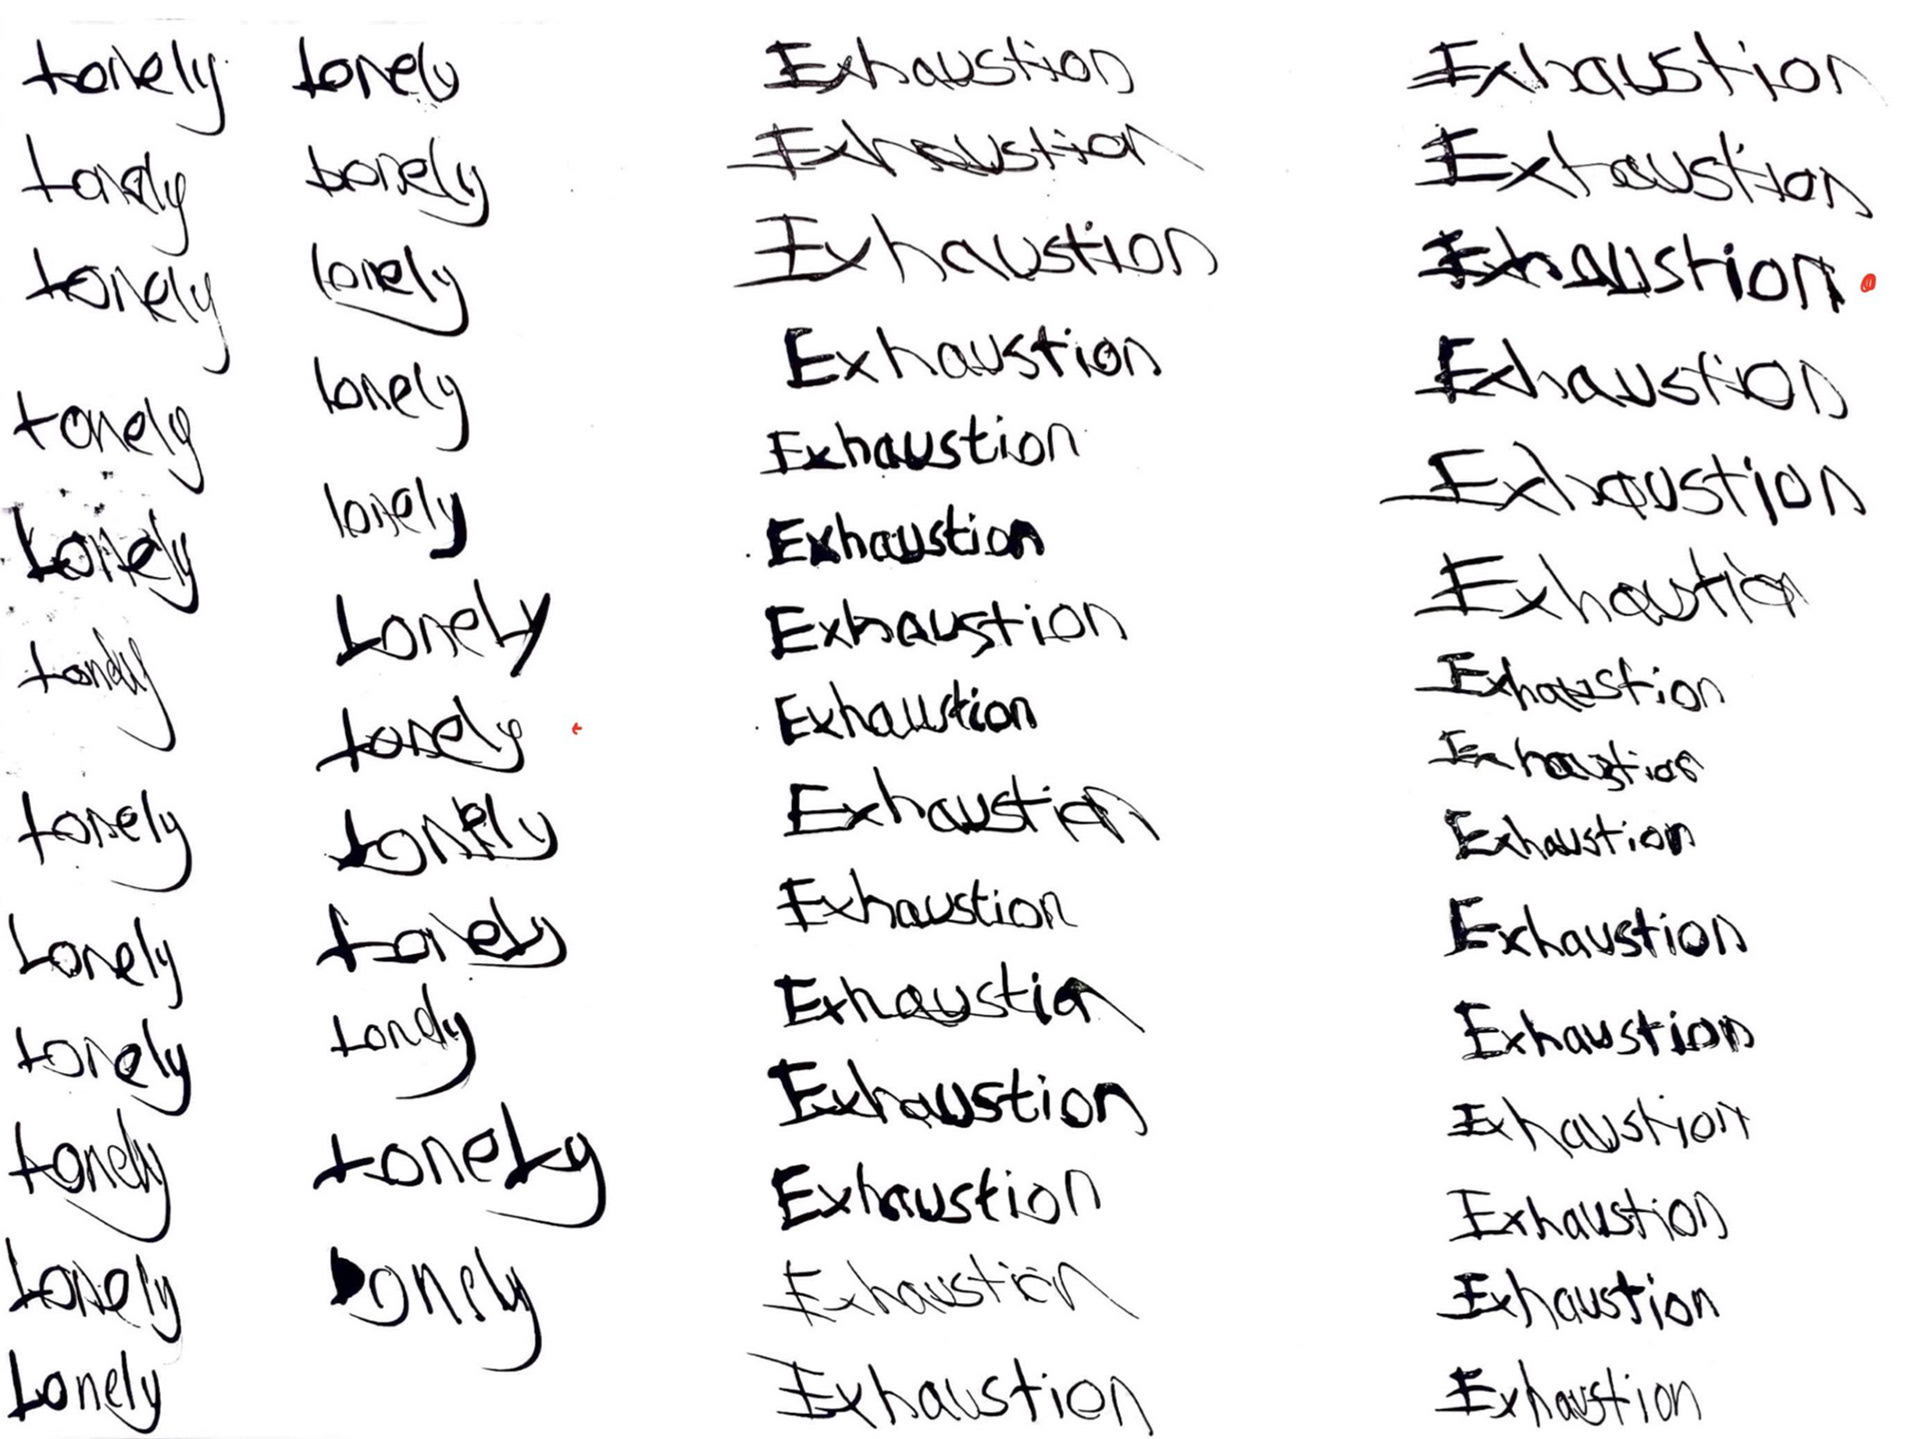
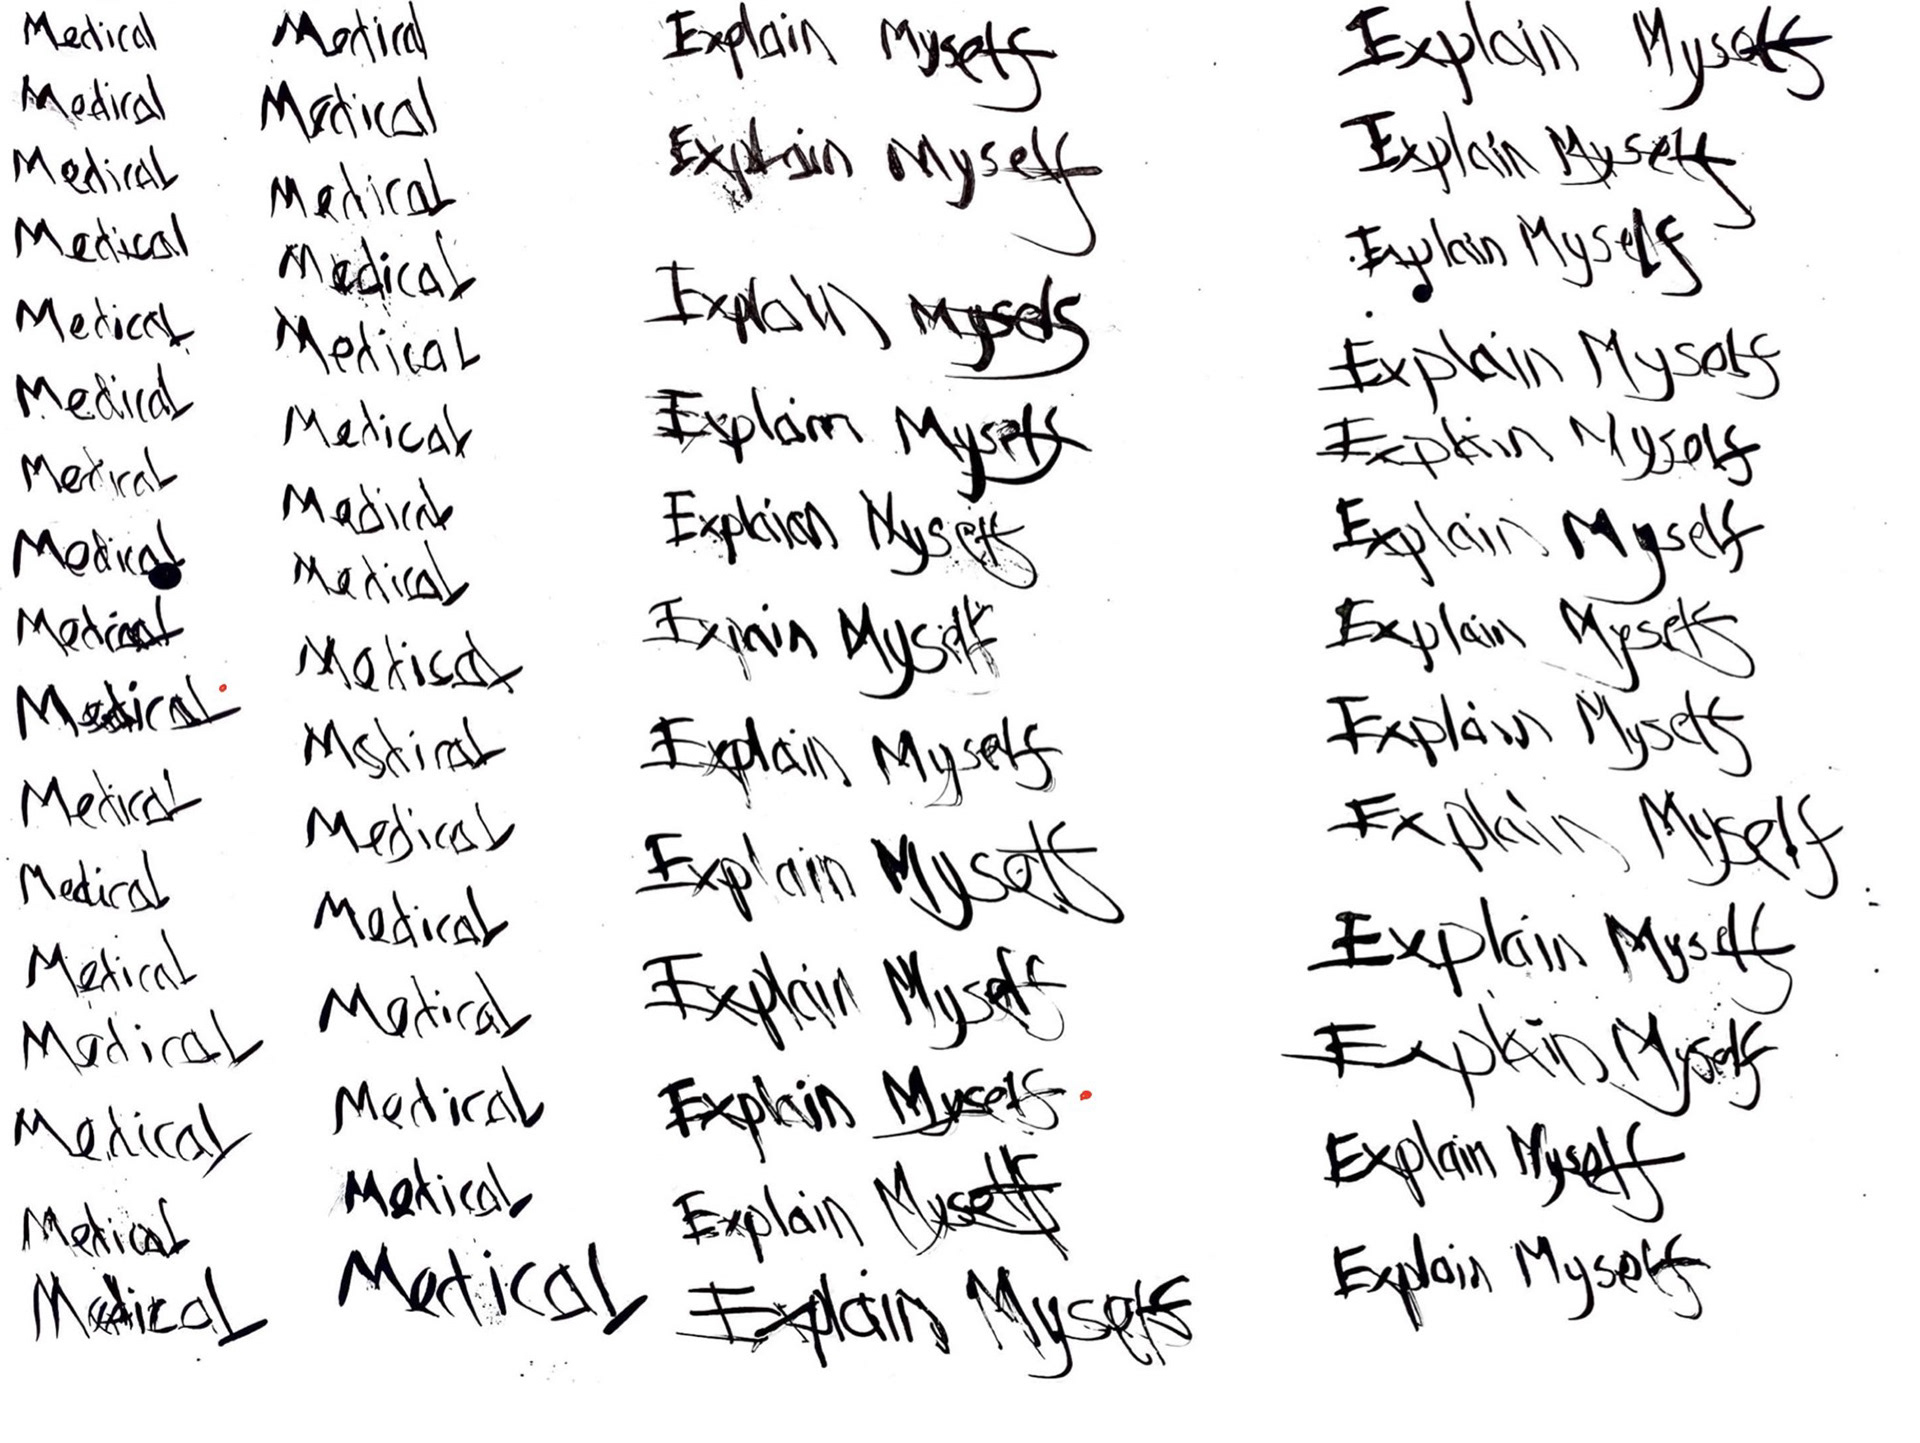
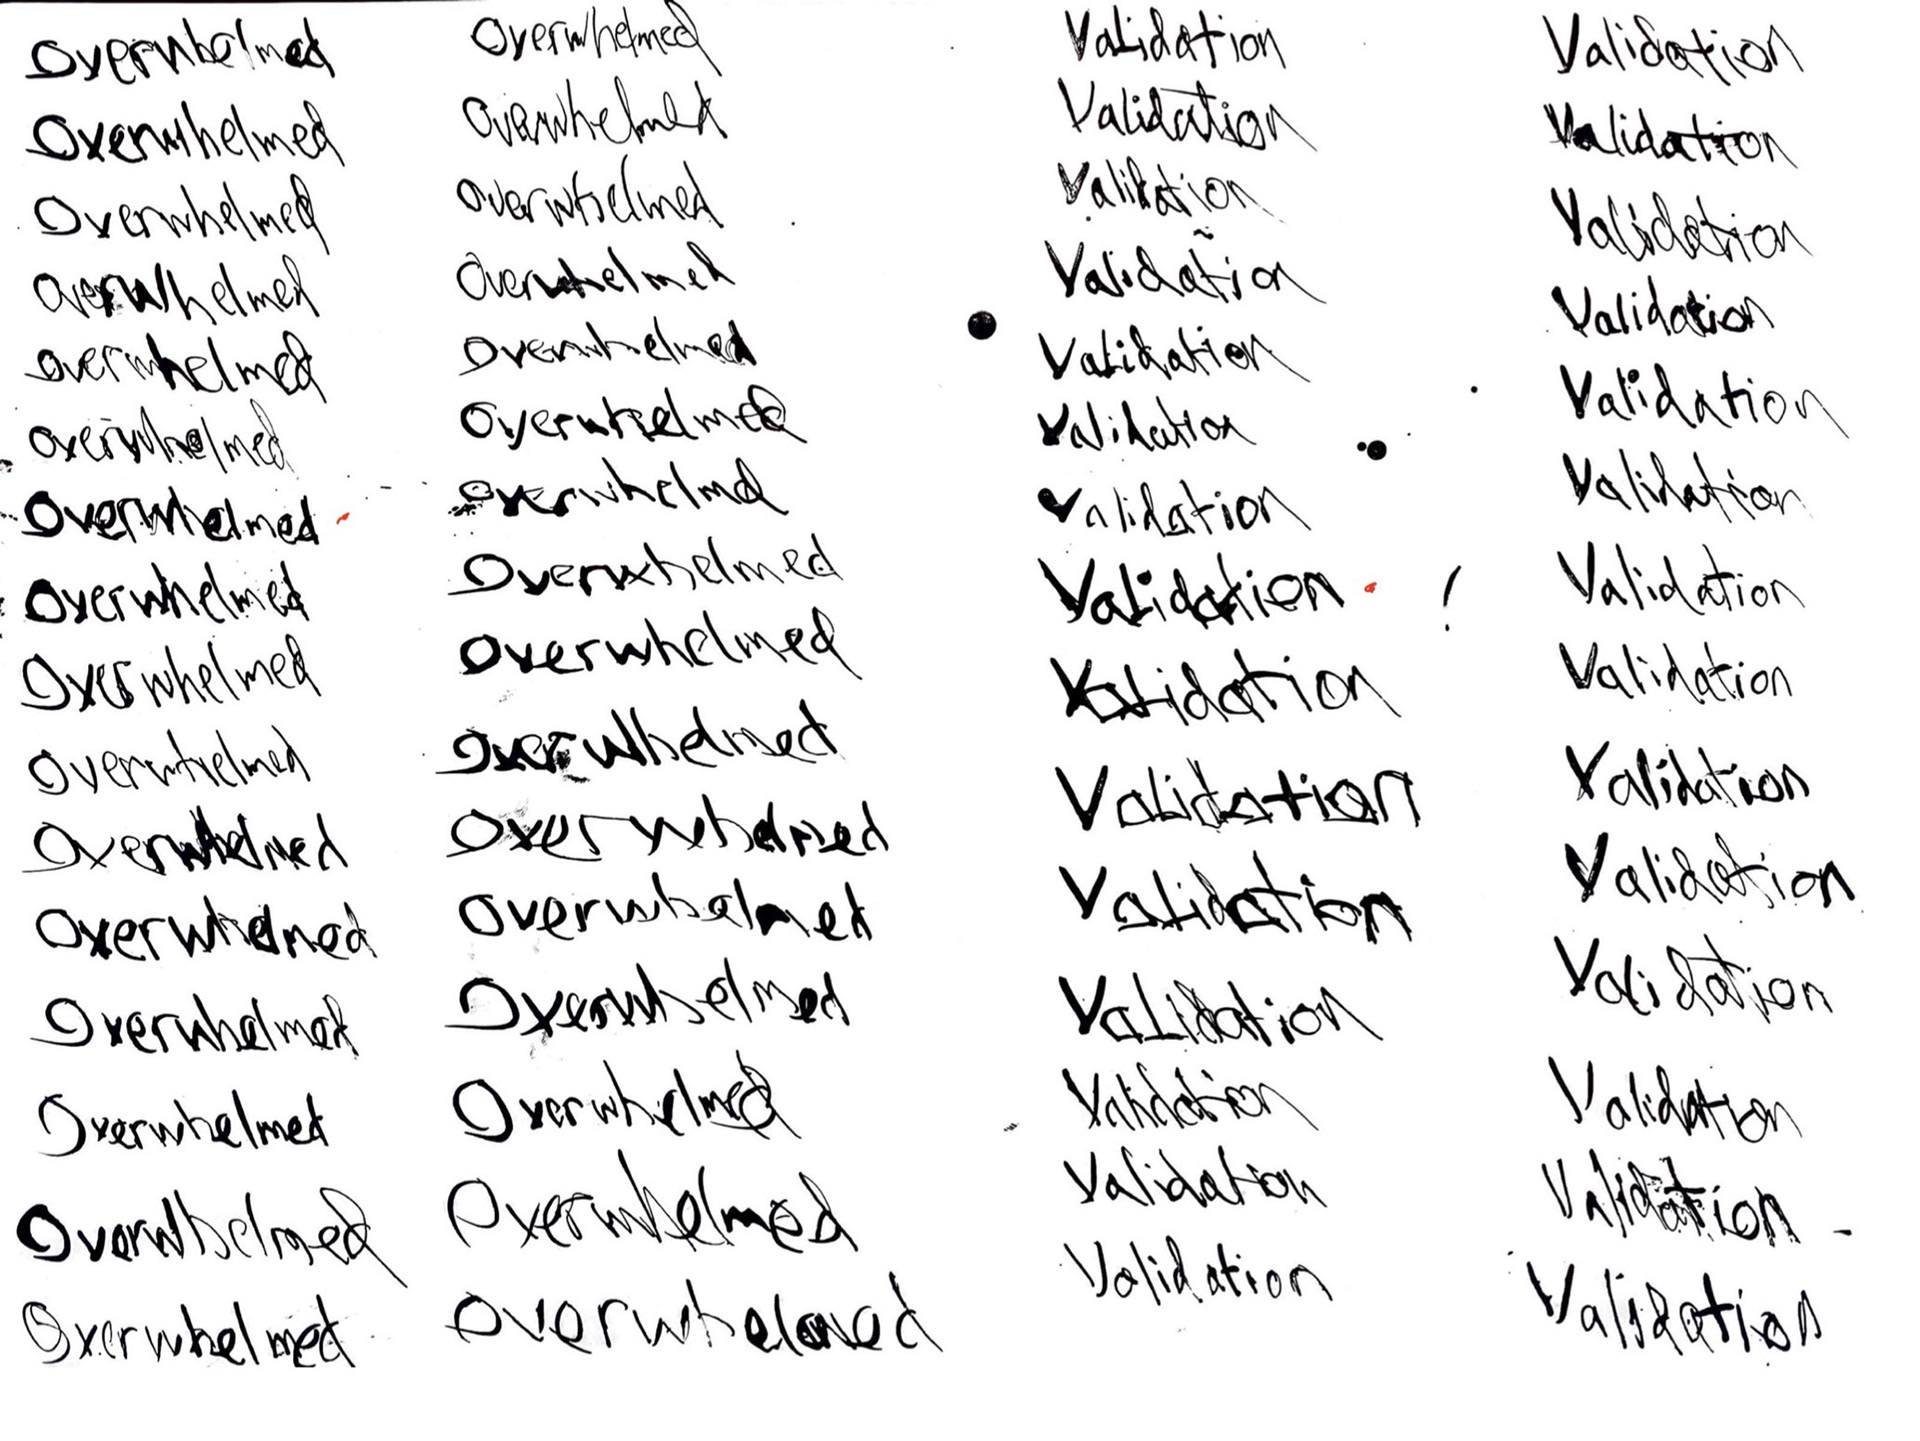
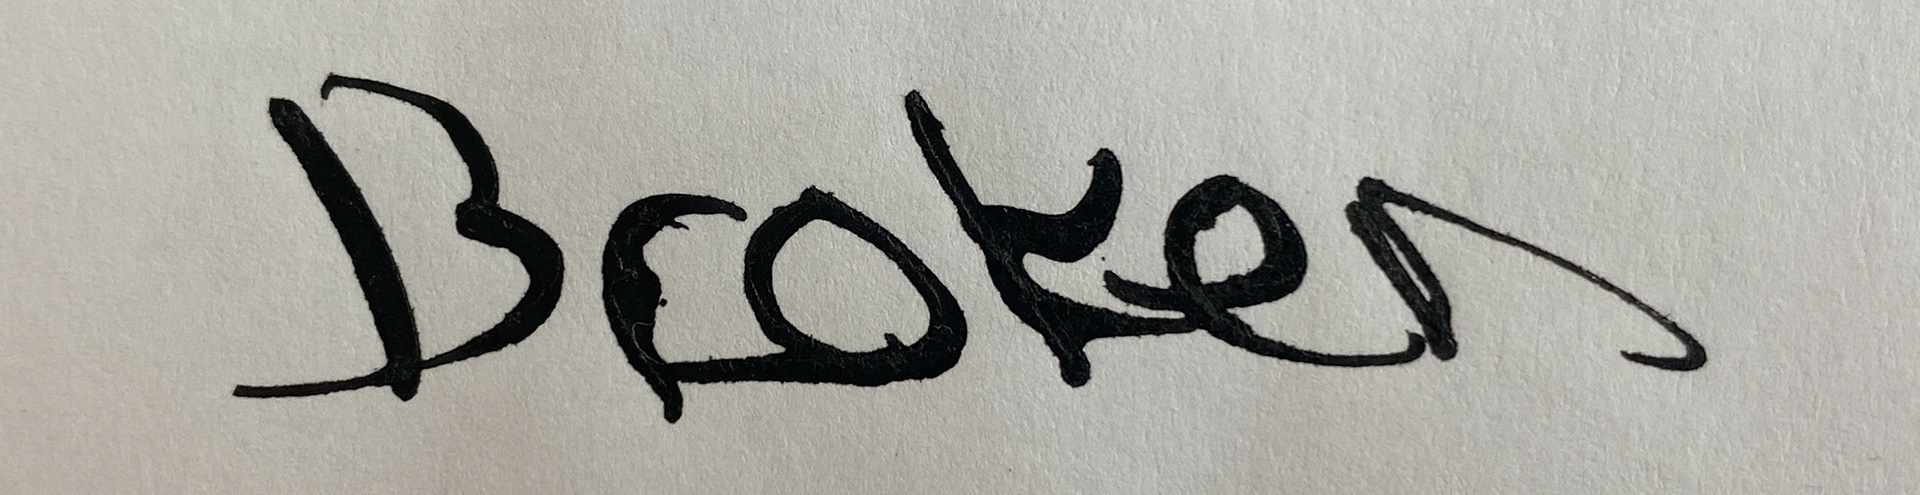
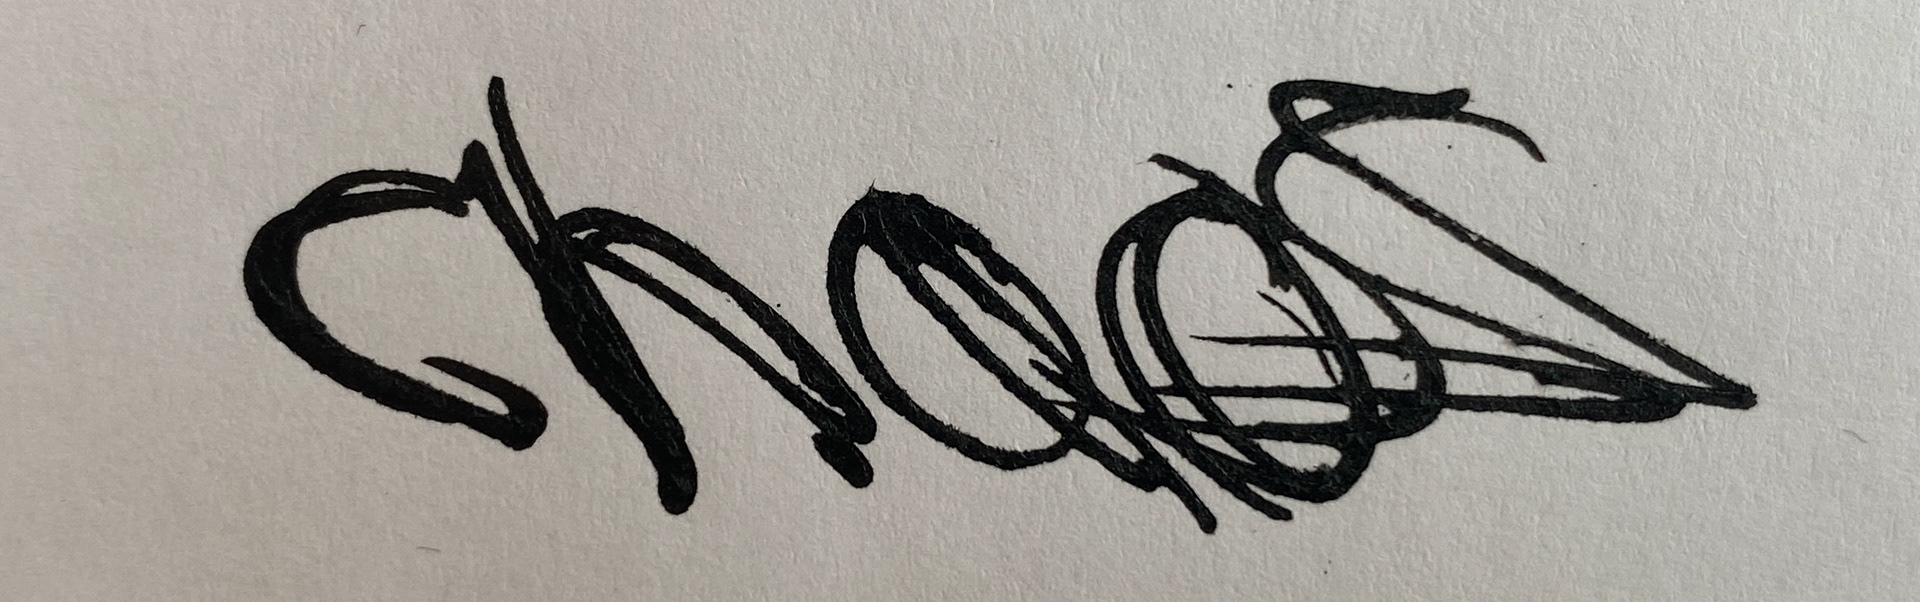
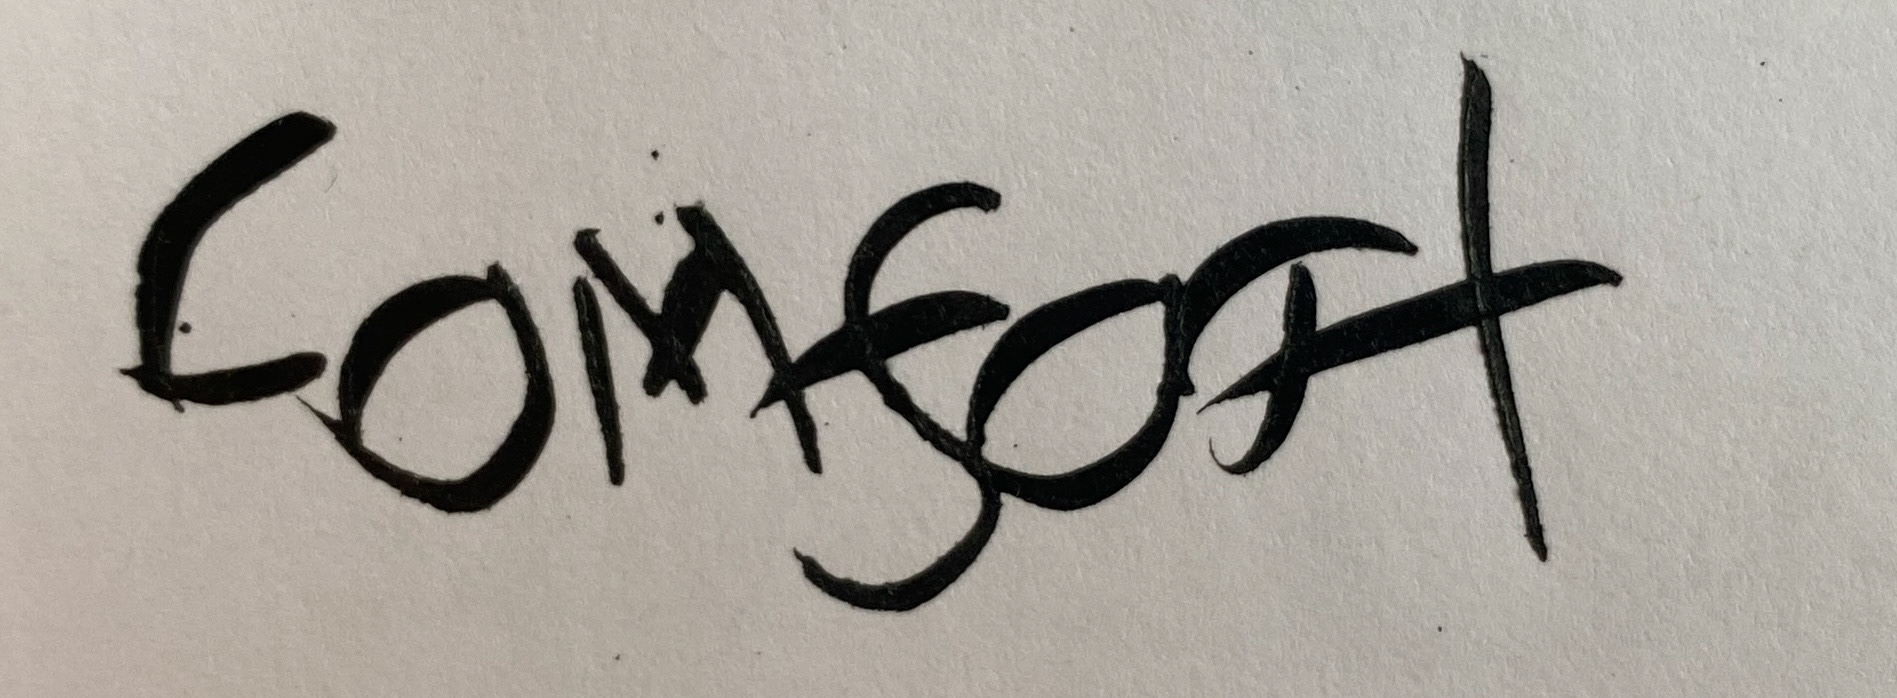
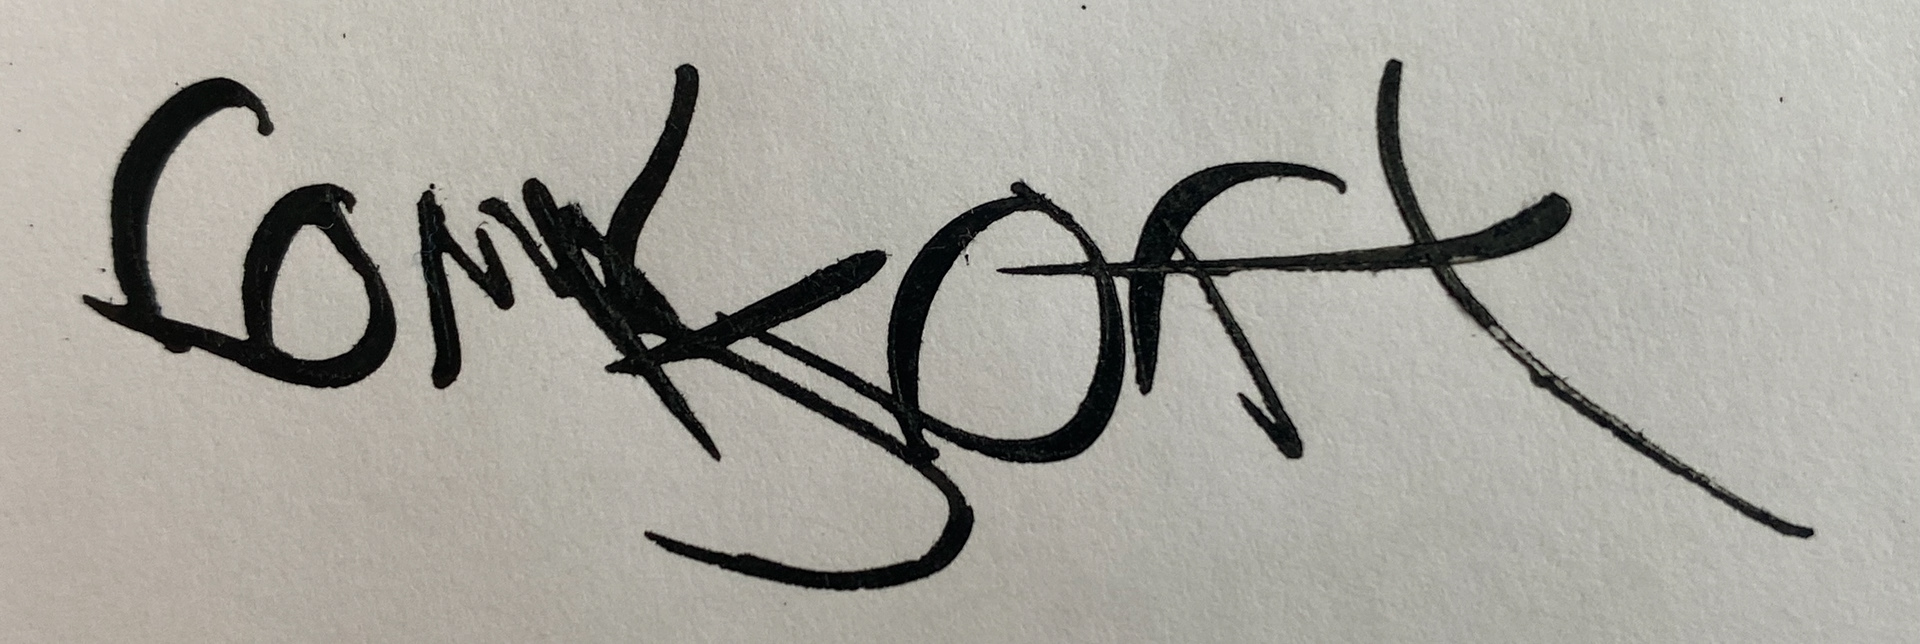
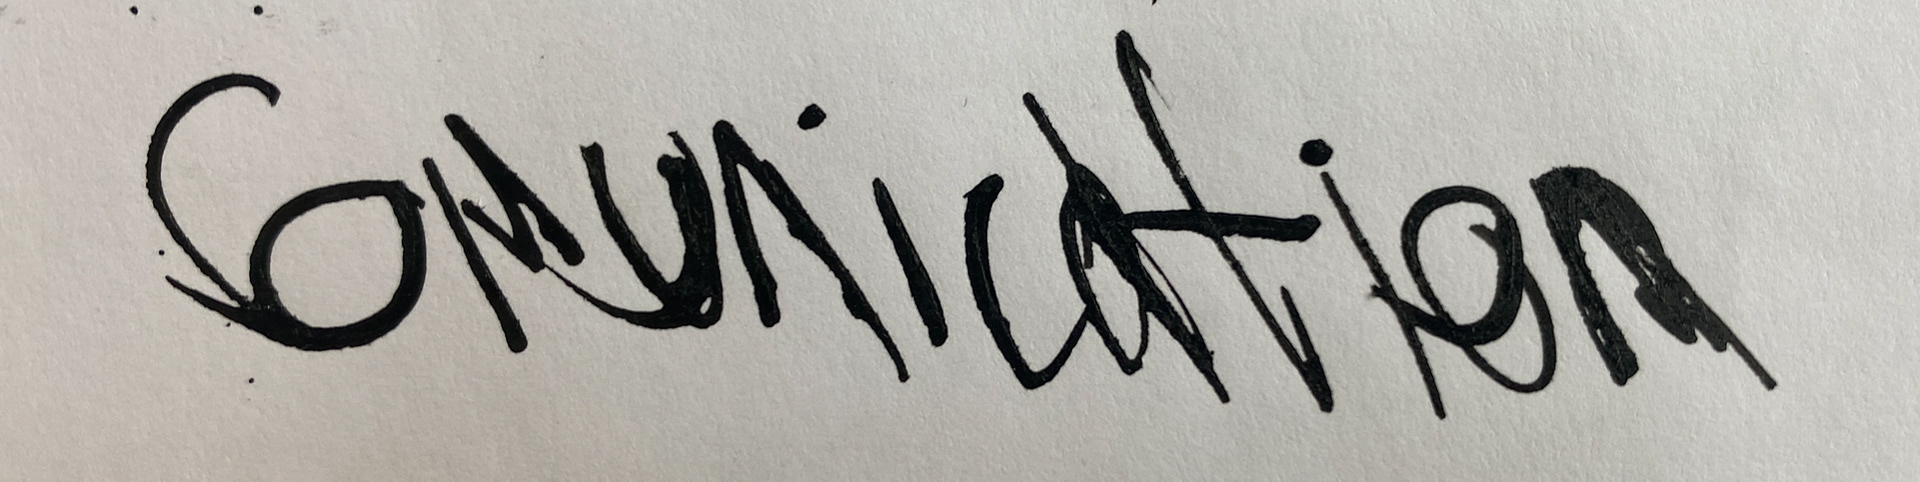
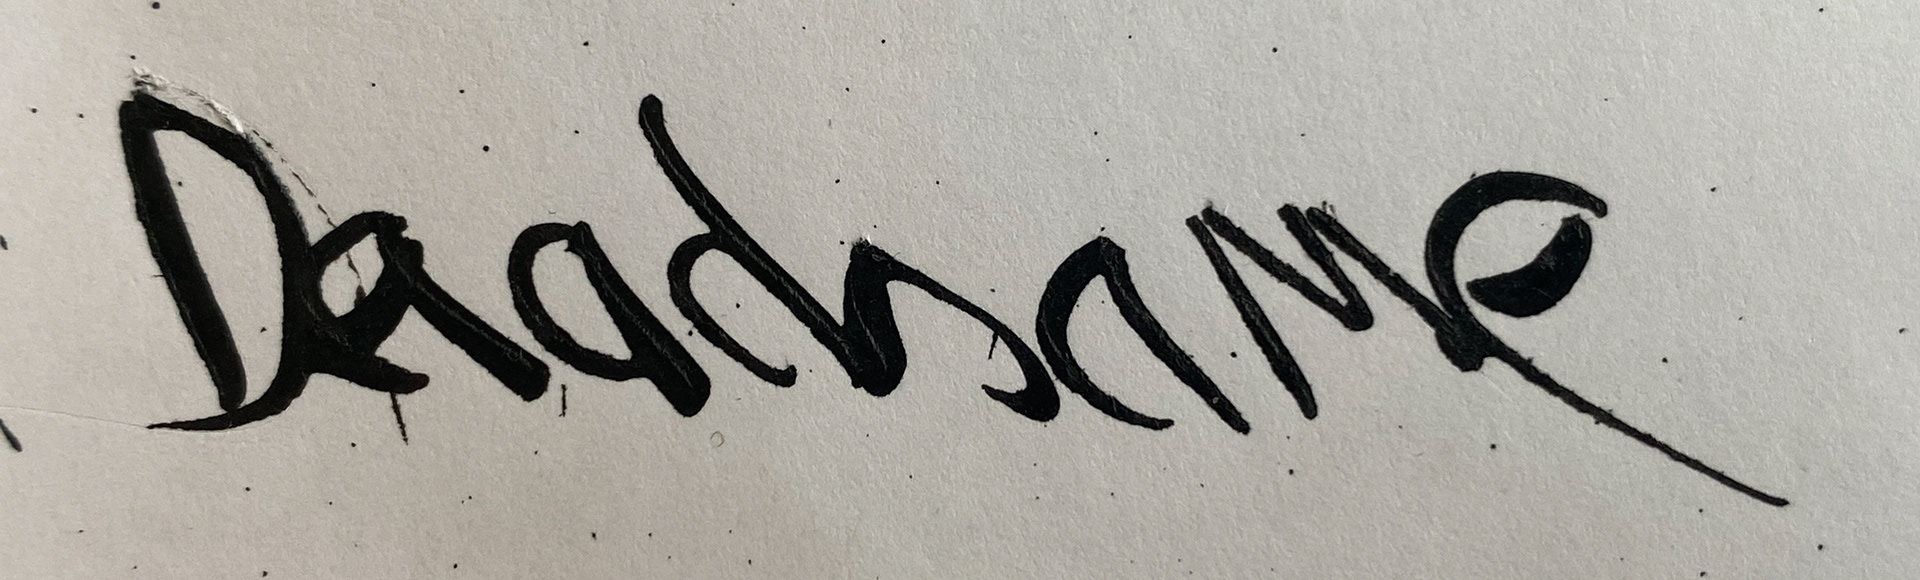
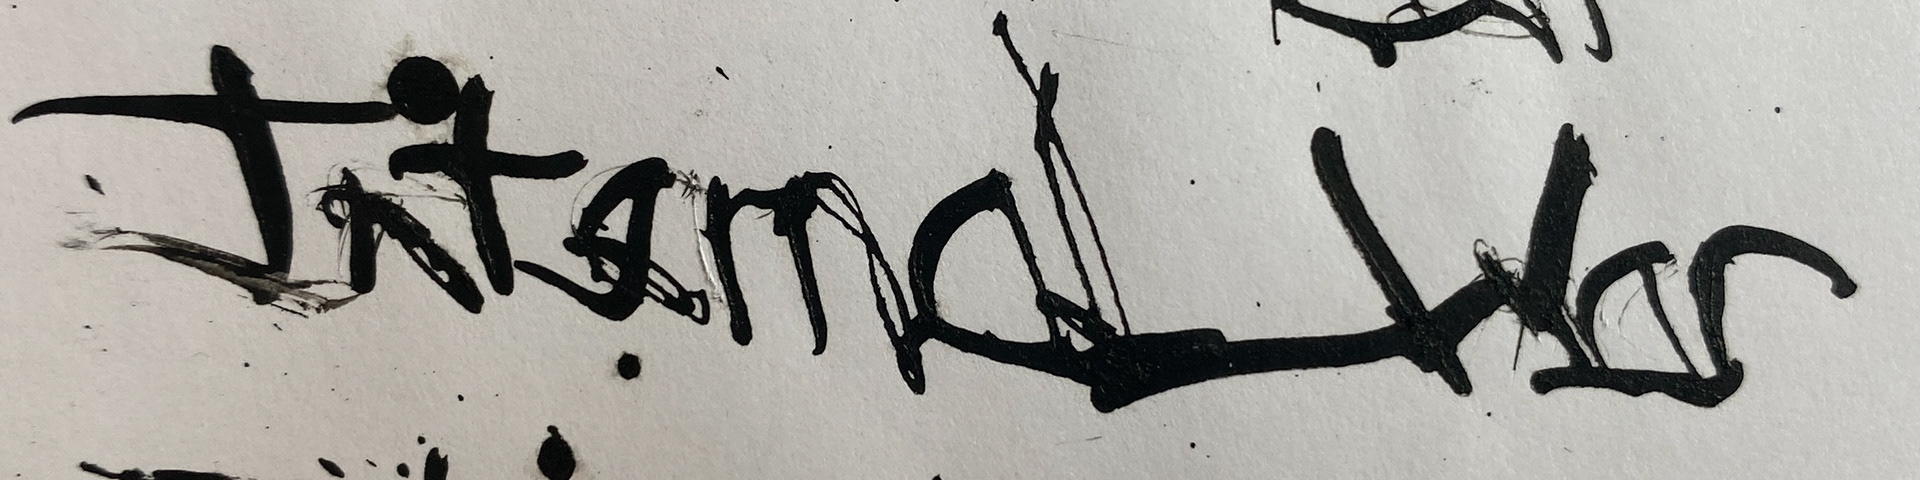
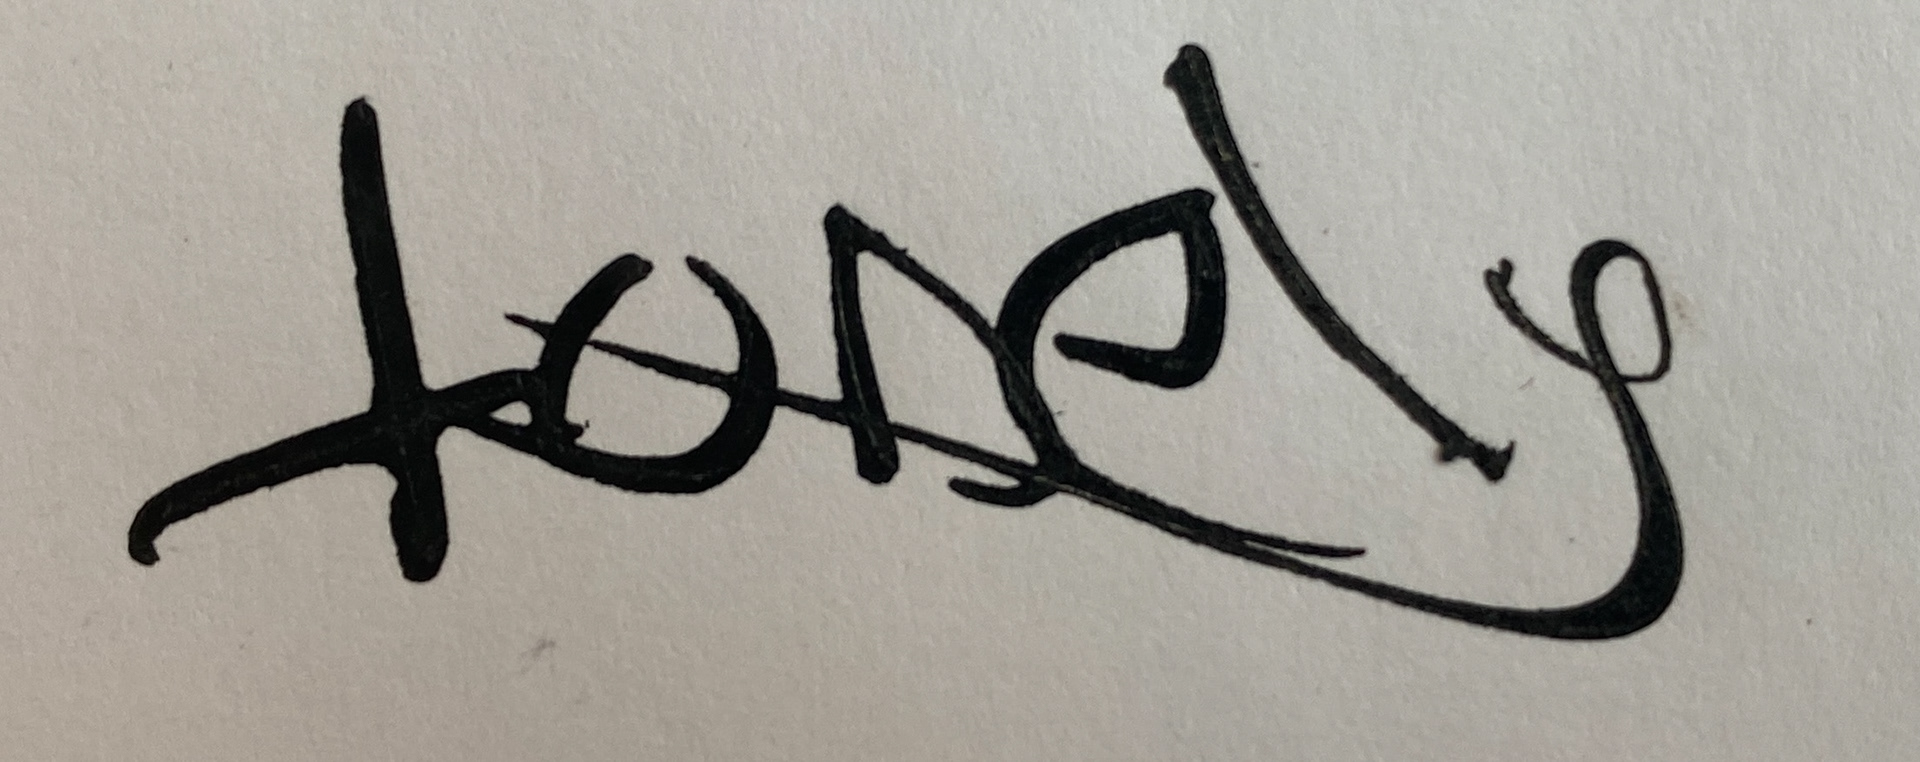
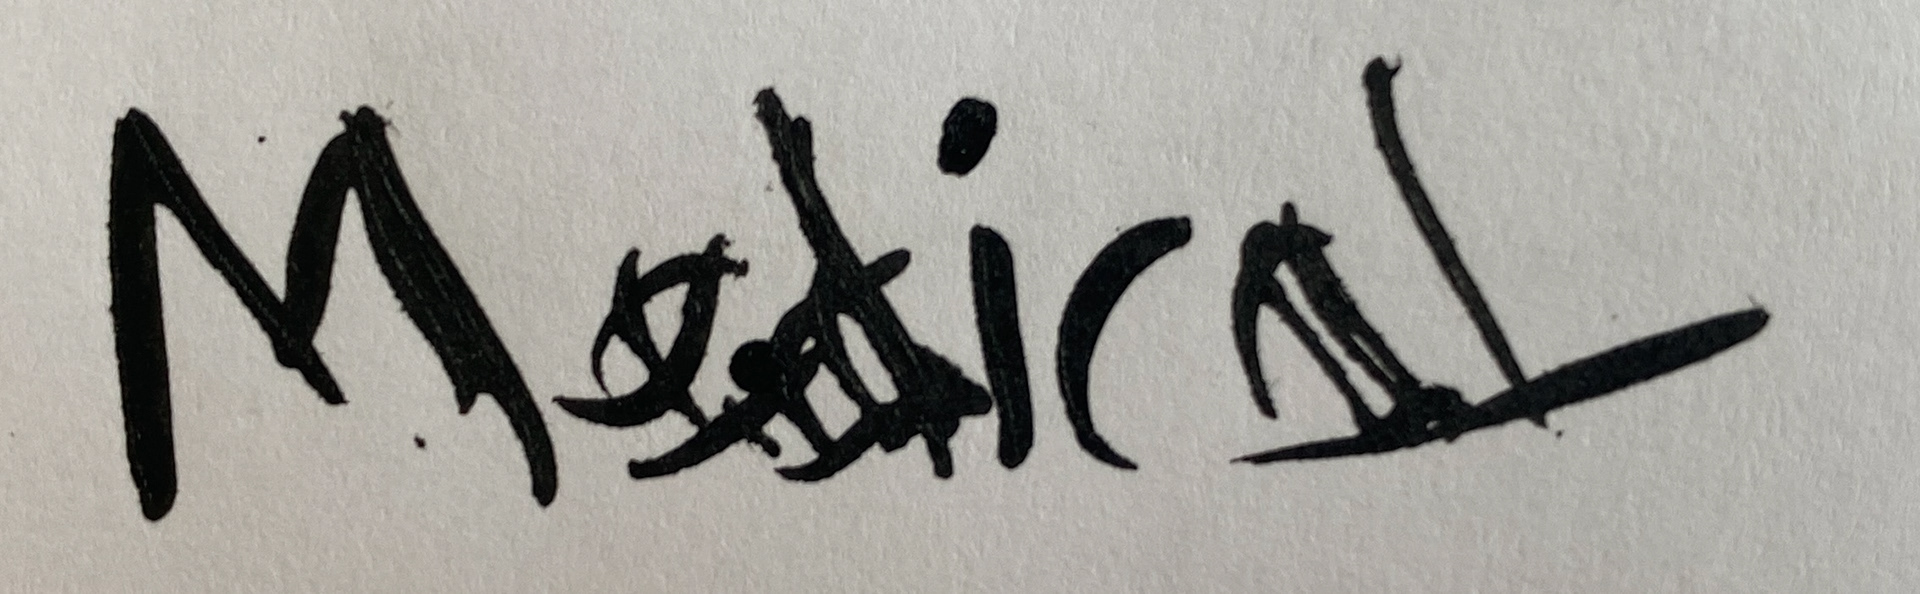
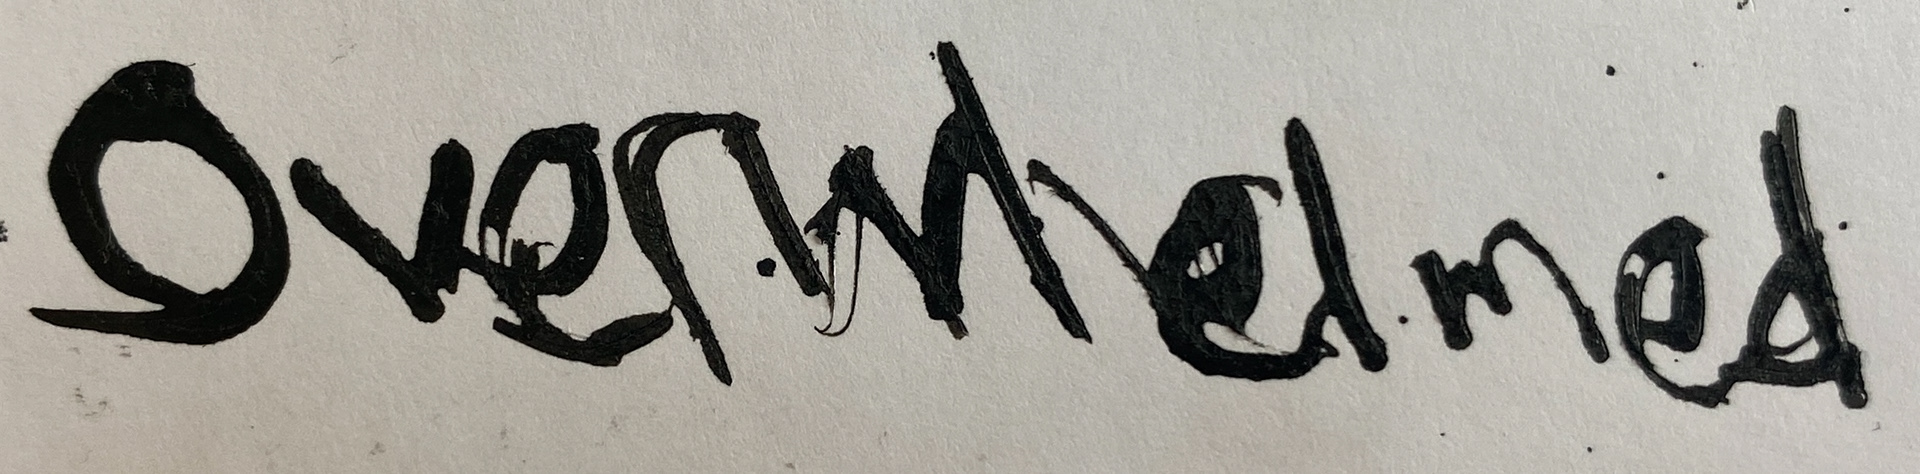
The inclusion of script into my work is more than adornment of the armour's surface as seen in traditional armour. I have taken key moments, phrases and words from my personal diary to explore how I can include my personal journey with vunerablility. I see the script as an emotional insight into the personal journey, whilst still having the power to choose what is included and how sensored my words are that I display. The process of including the words is through physicaly rolling and embosing the surface of the metal which permenantly embeds the emotion into the wearable.
I initially experimented with different ways to alter the way I wrote the words and the clarity as well as layering words to create a collage that could be passed through the roller to texture a larger sheet.
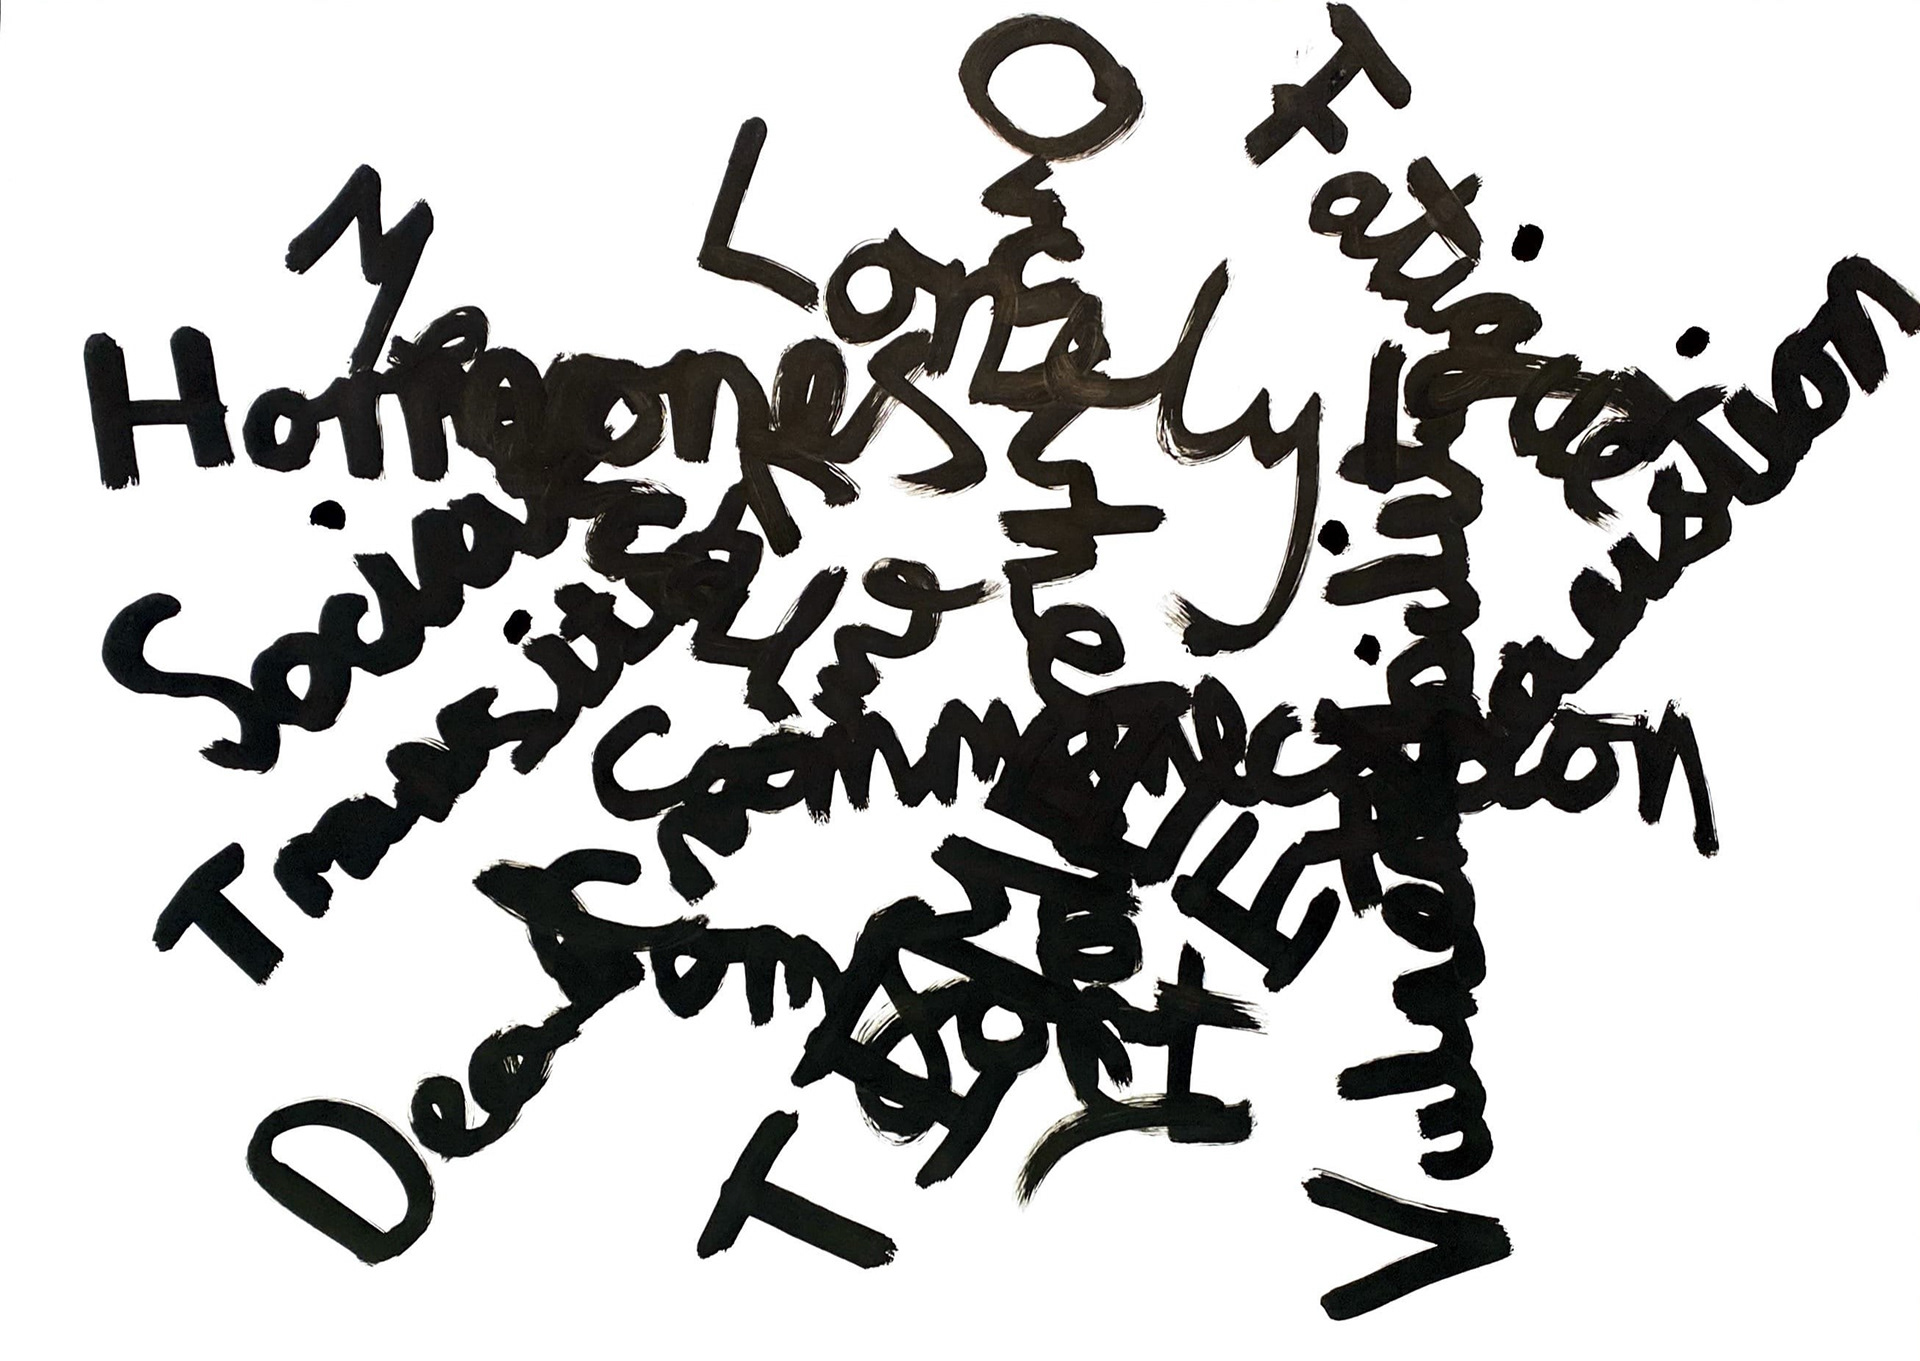
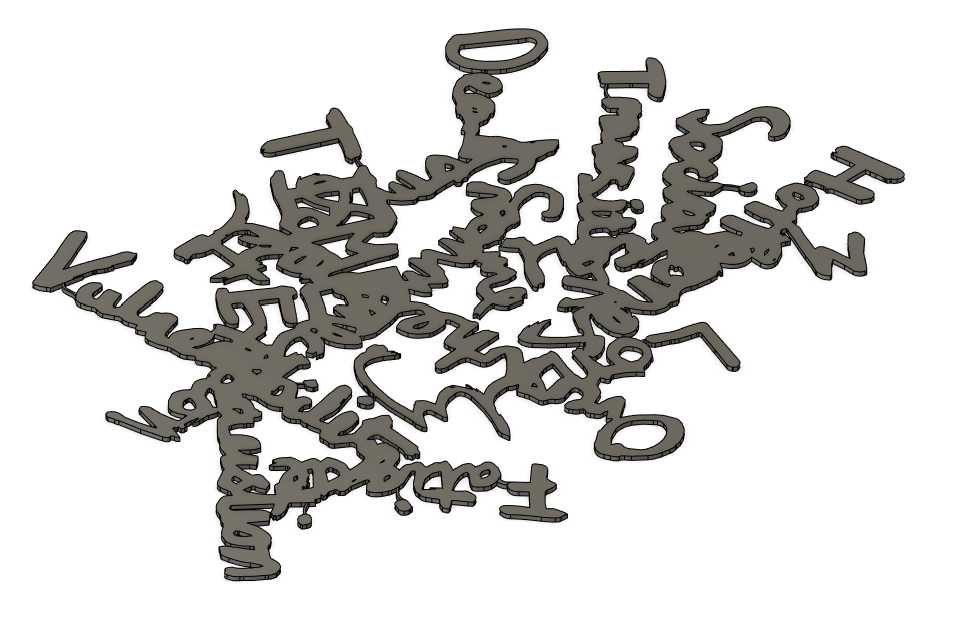
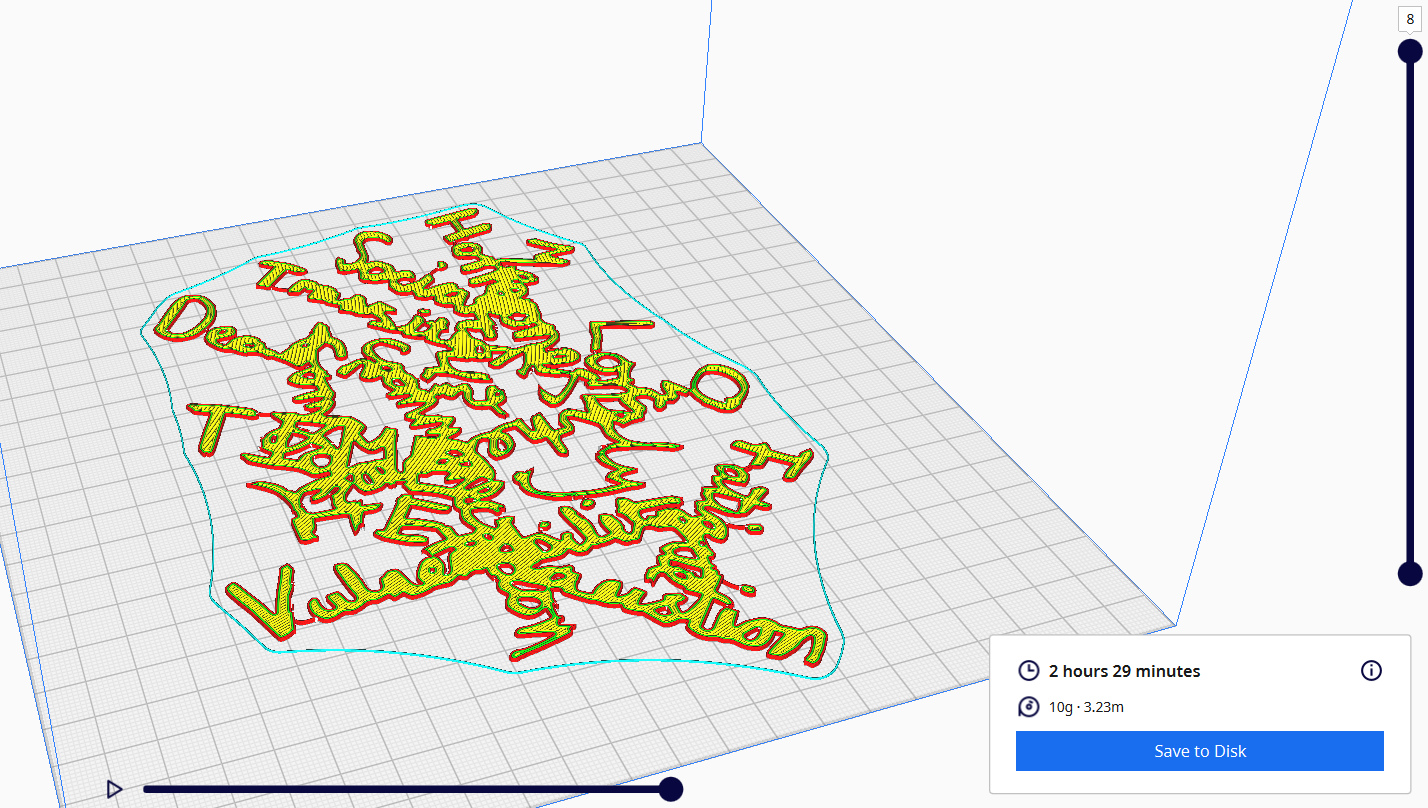
I chose to test overlaying multiple different words on top of each other, focusing on connecting the design to create one large sheet that would be easy to pass through the roller. Some areas were not connected when I did the first pen drawing, so I added small connection points in Fusion 360 when adjusting the SVG in the sketch before extruding it. I could then print this without a brim or backing plate to hold the design together.


When rolling the design through some areas where I added connections, they were too thin and letters fell off before being passed through the roller. However, I do think this is a successful test and a good way to include script in larger formats rather than one word or a sentence.
Piano by Gibran Alcocer Rock by The plot in you Country by Coltler Wall Electronic by fred again Rap by NF
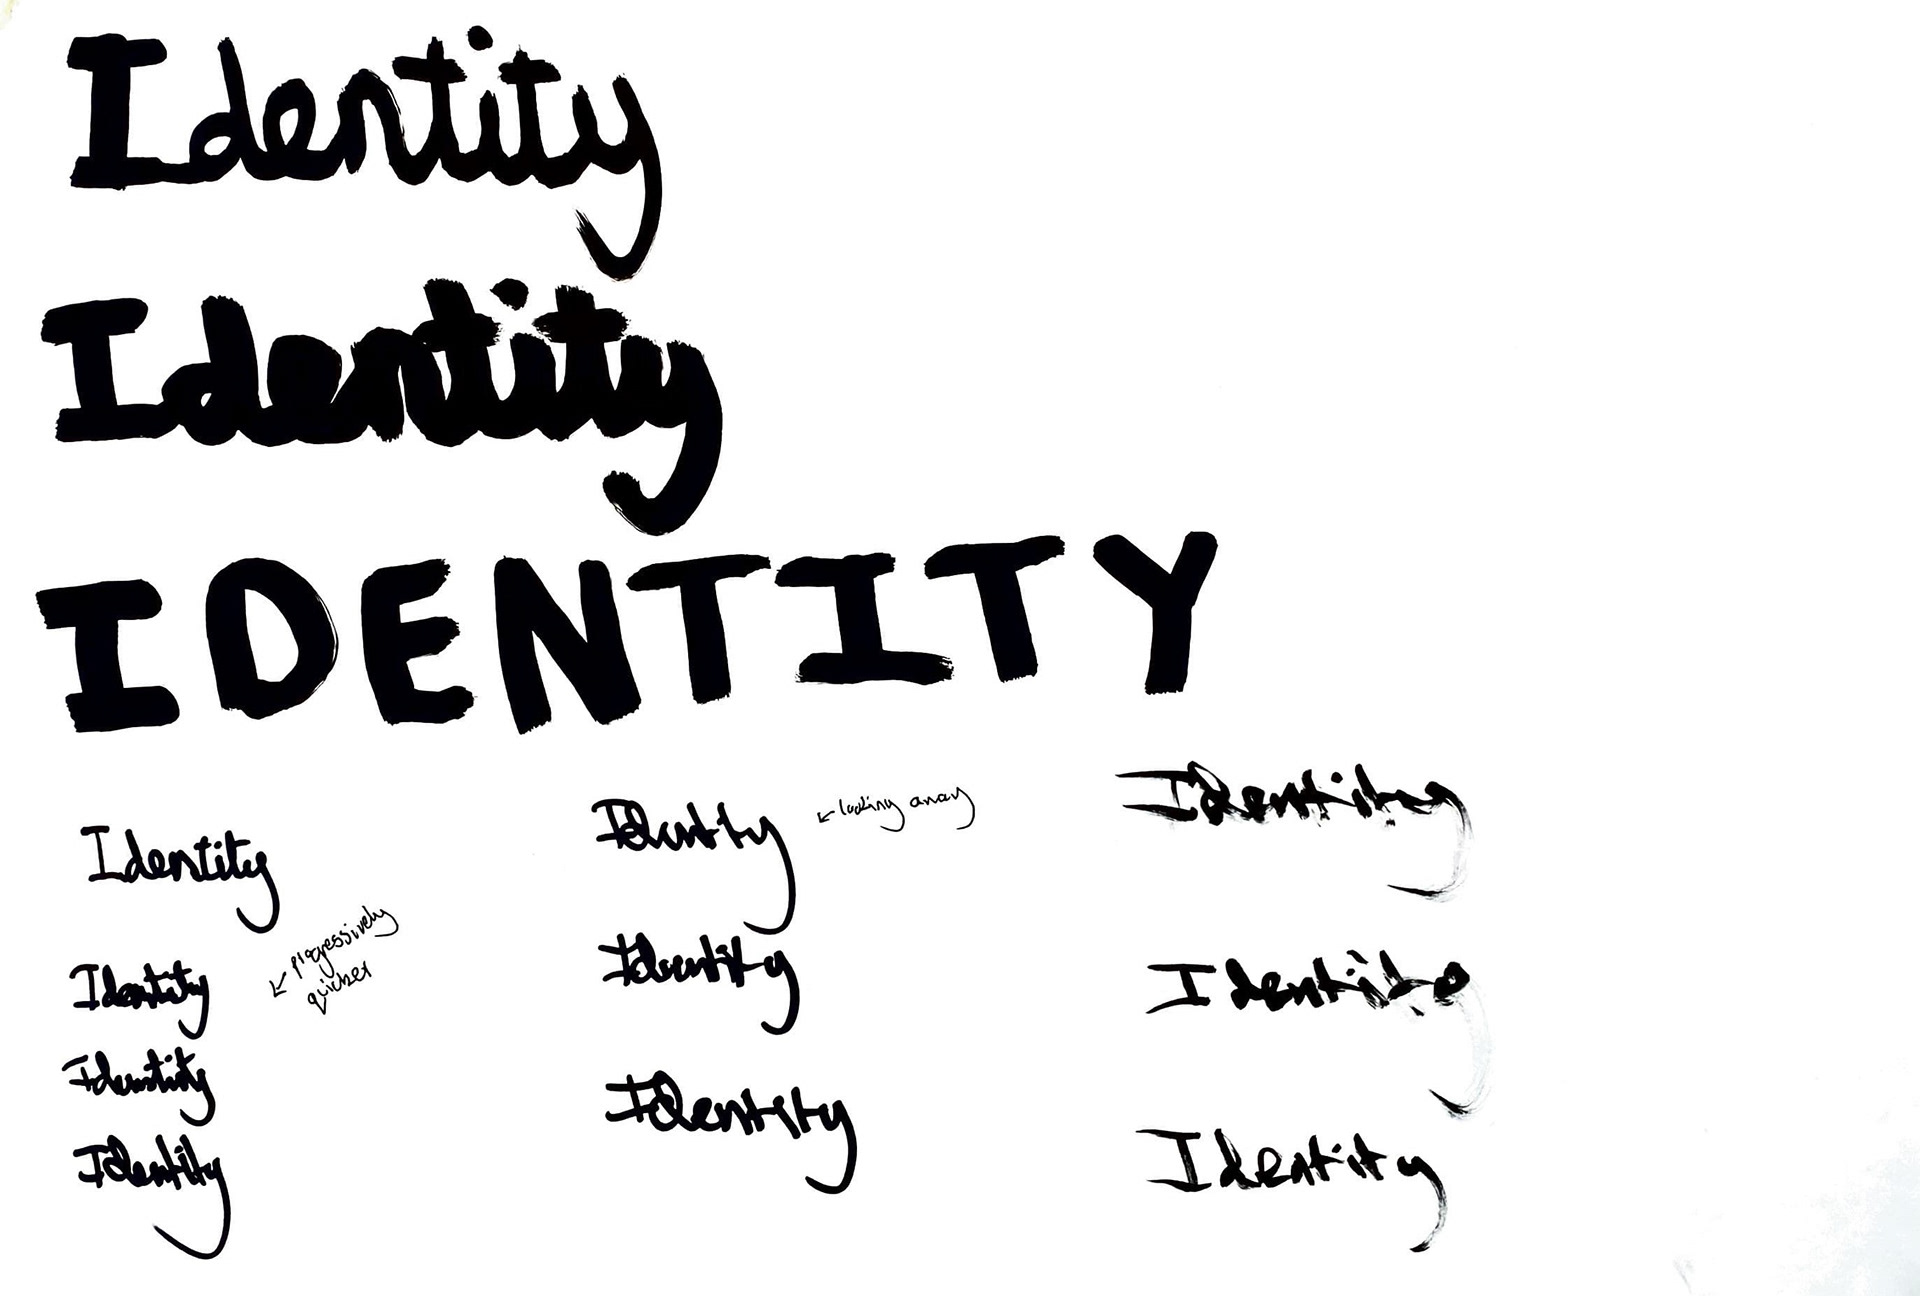
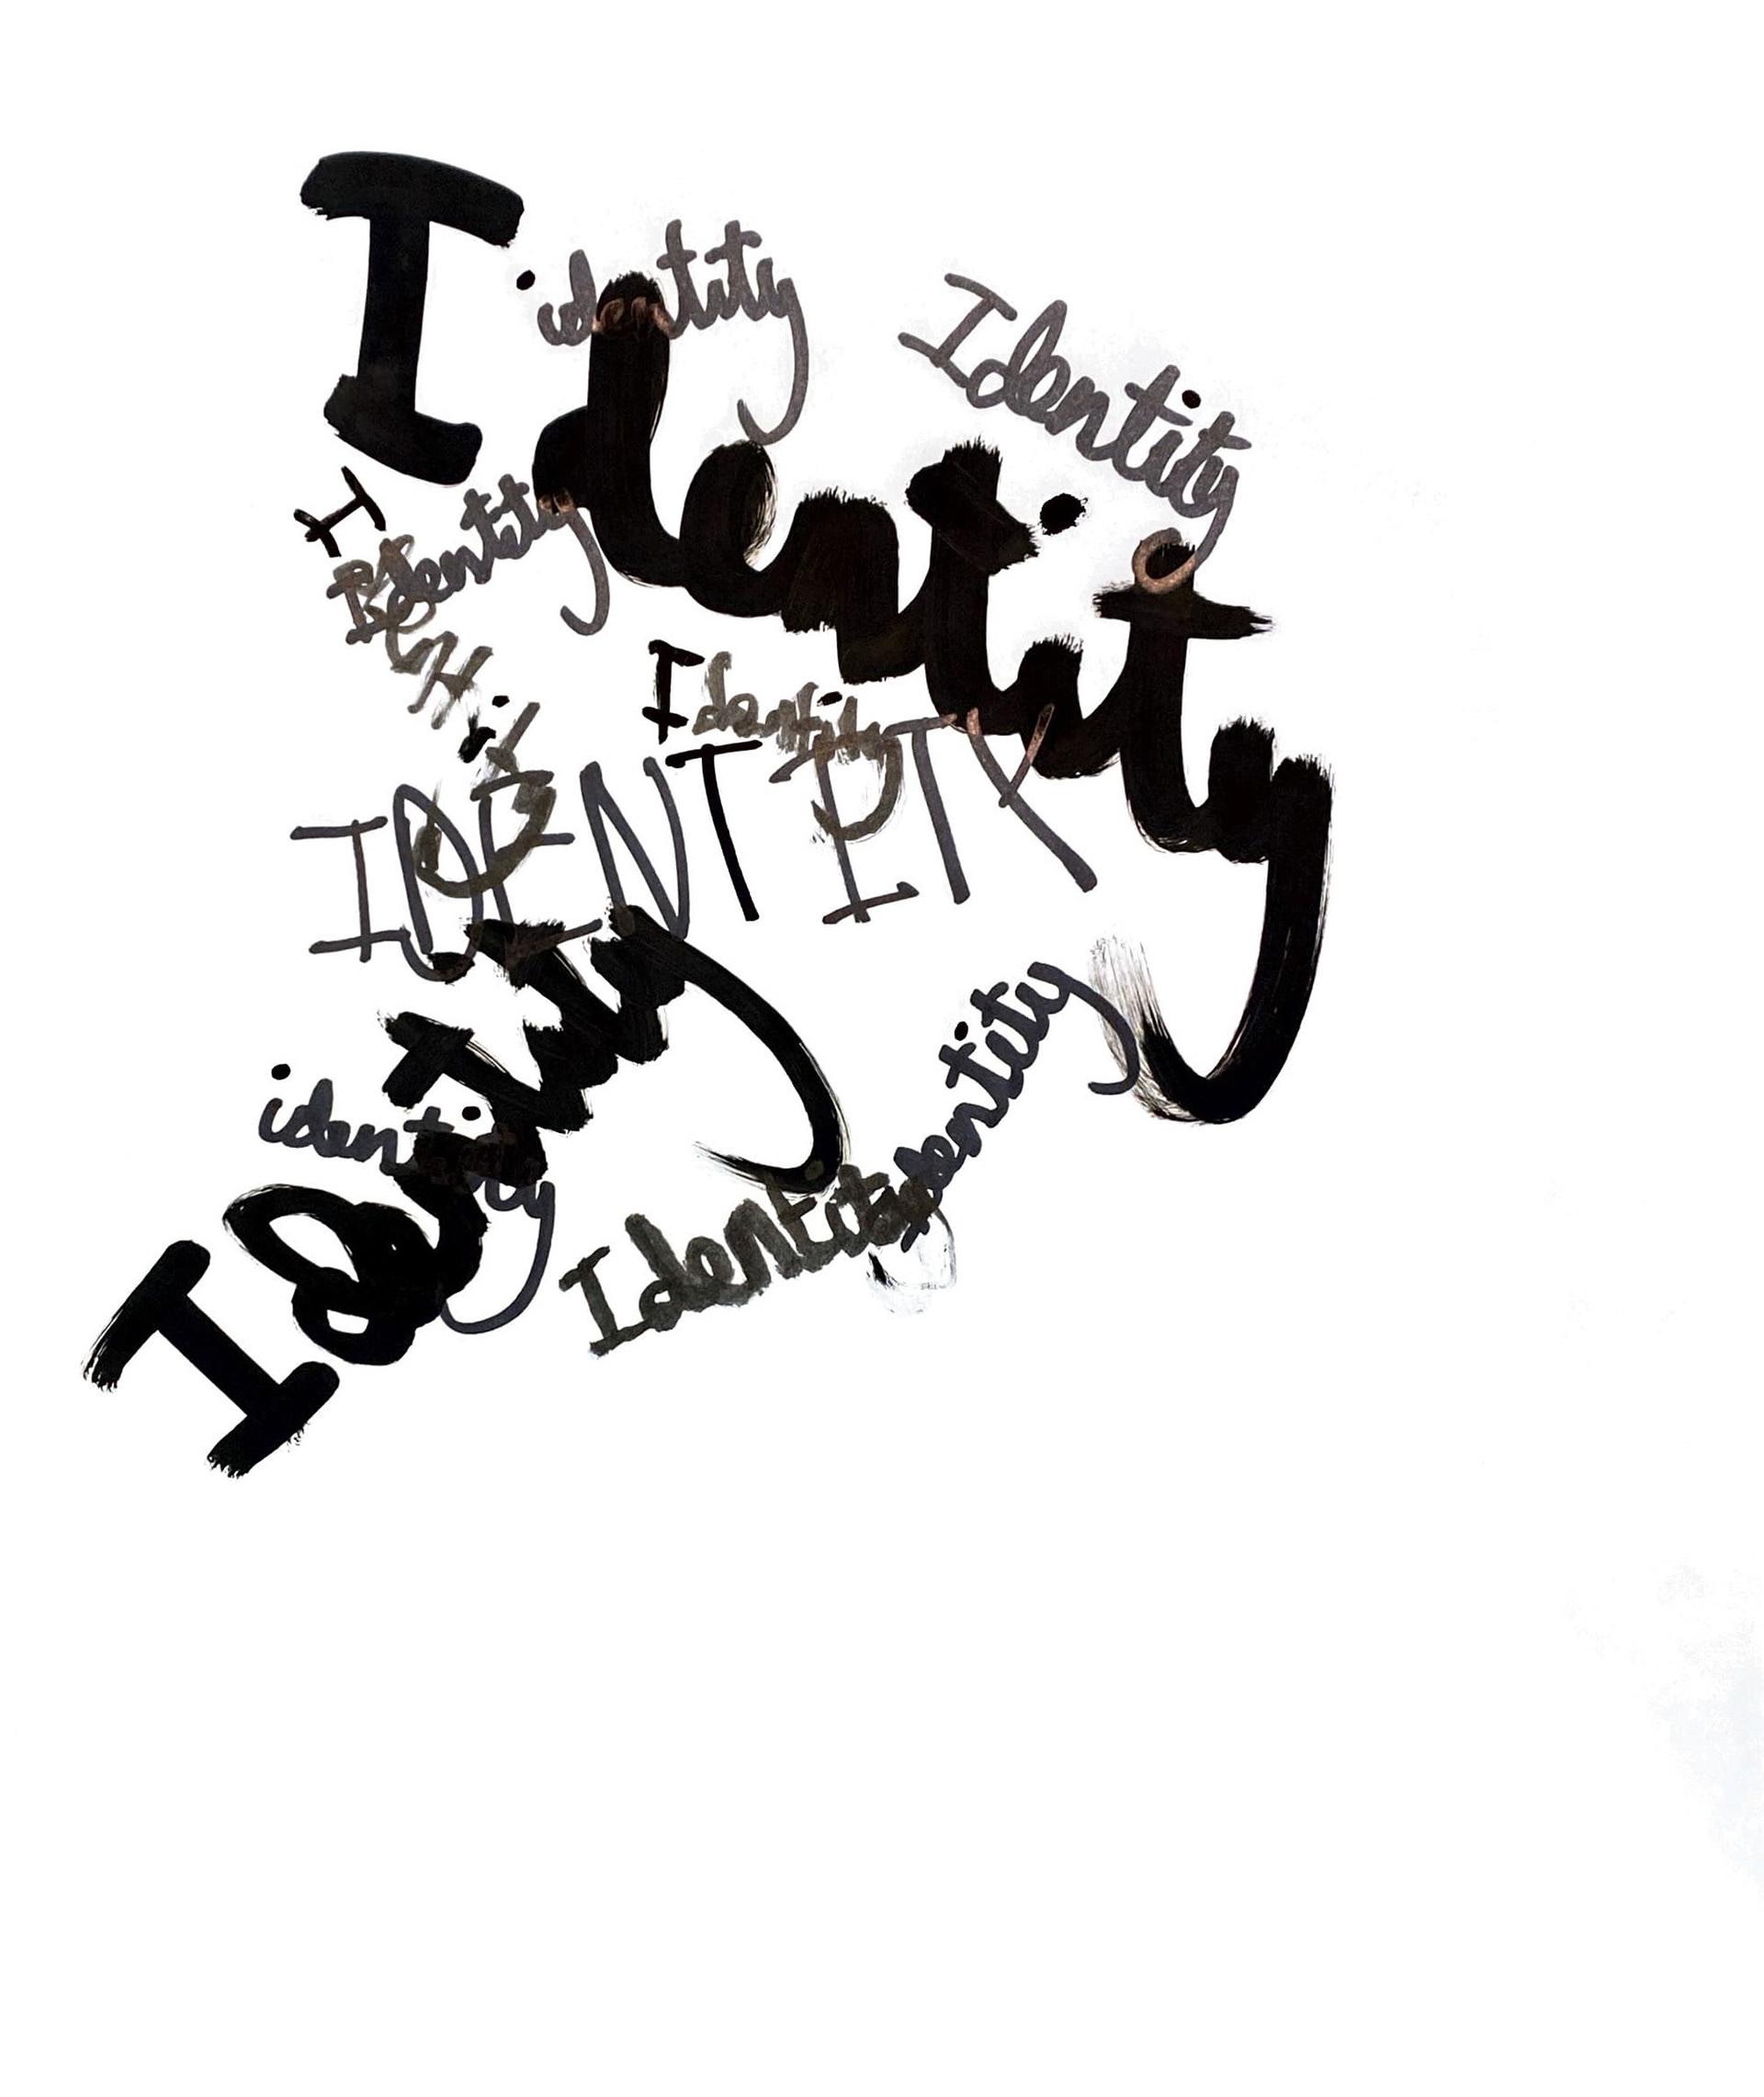
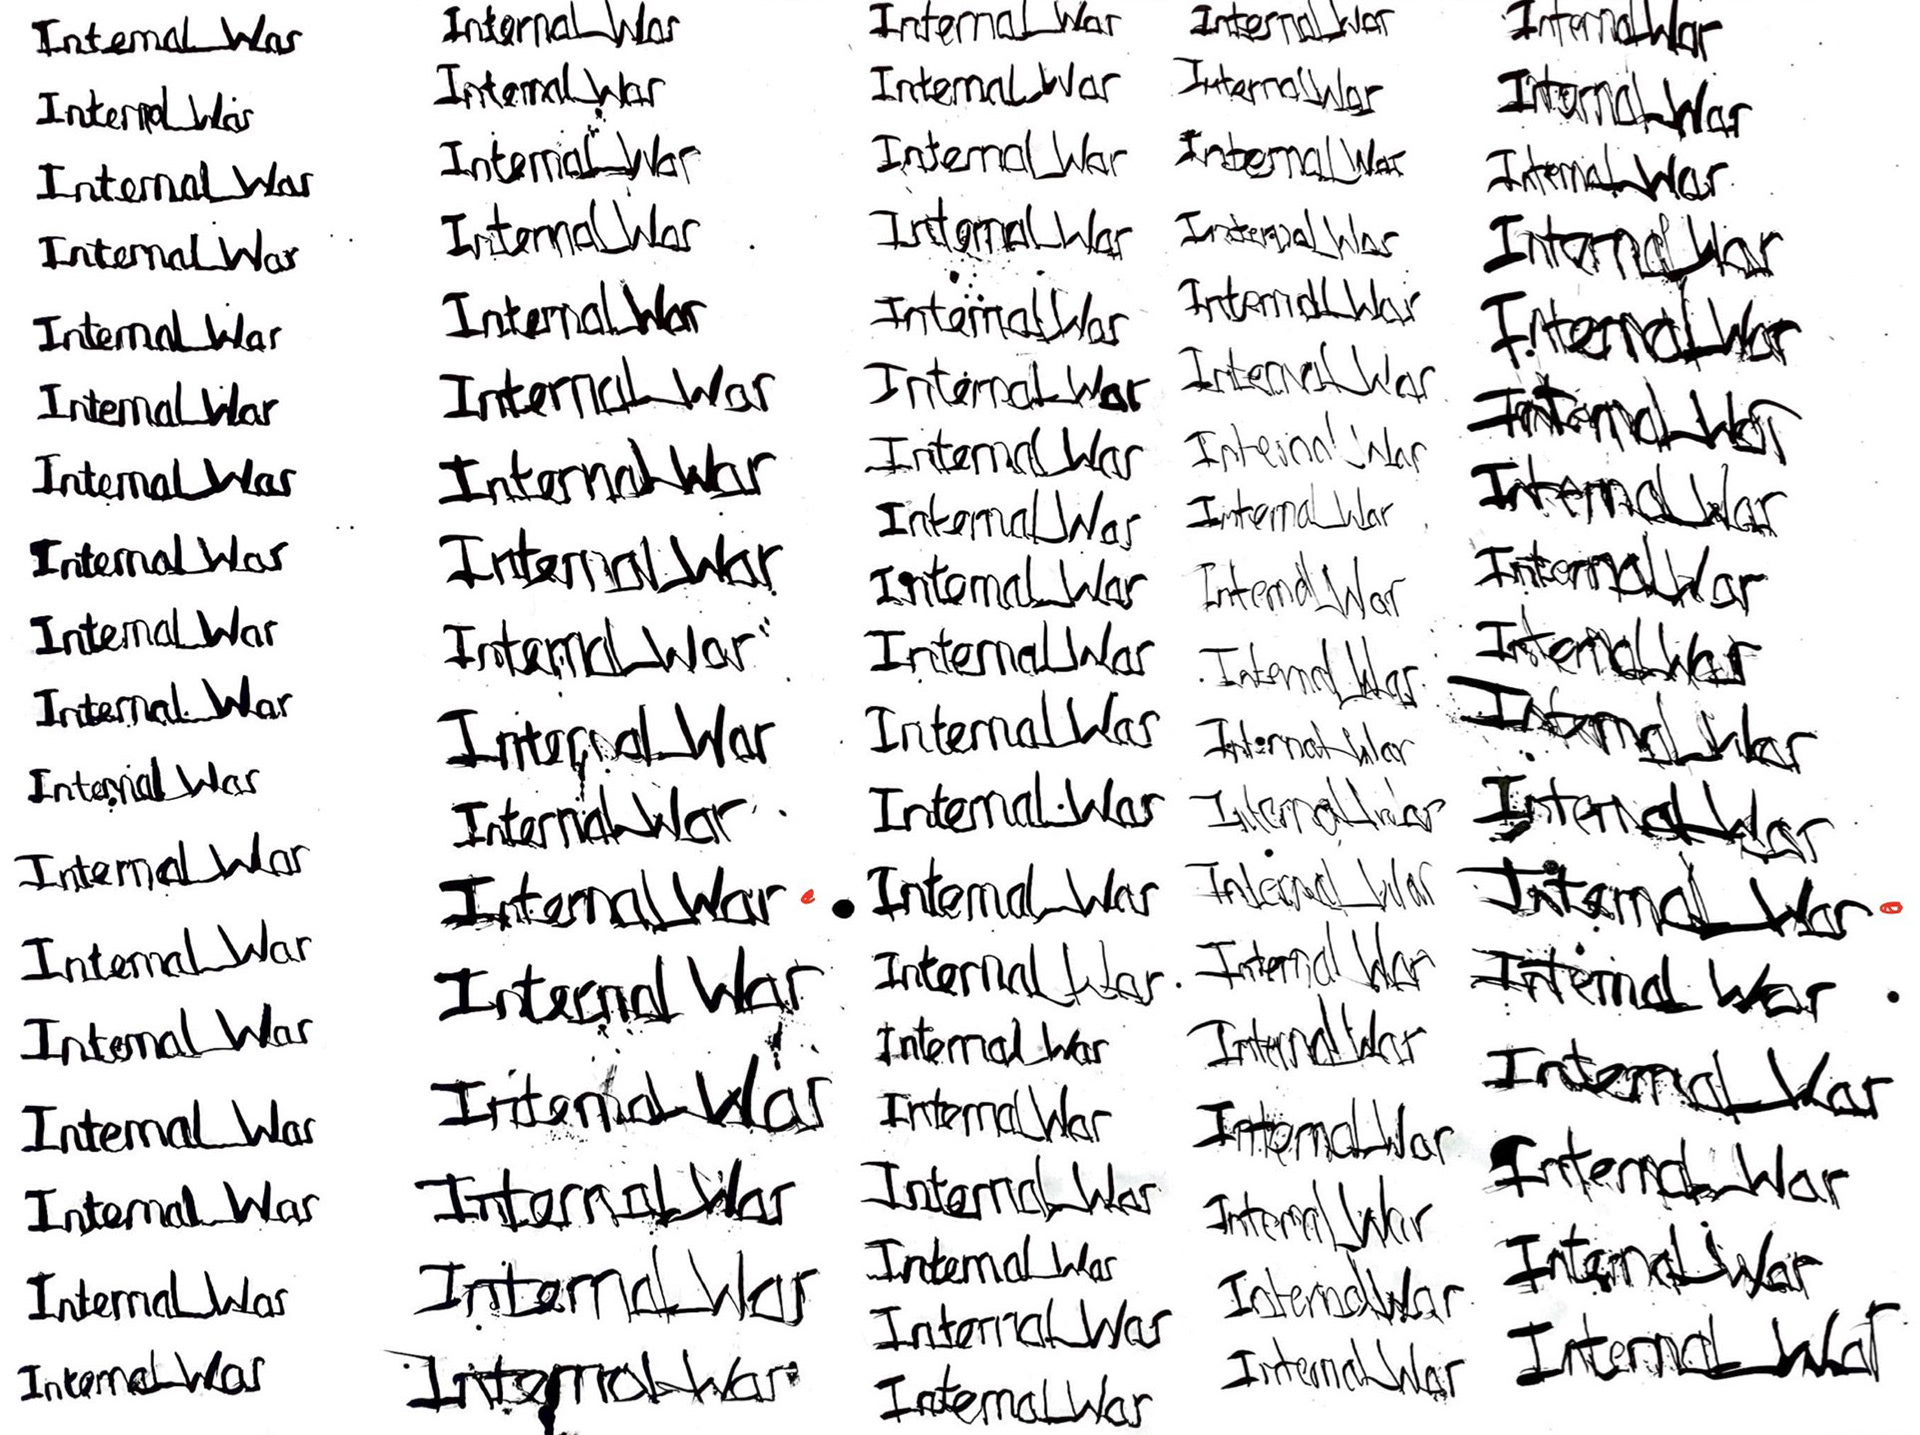
Reflecting on these tests, I found that the way I was writing, trying to connect the letters together, felt forced and didn’t express all the emotion behind the choice of words. Therefore, I looked at how music effects my making process and the importance music has on my day-to-day life. I listened to a series of different styles of music to explore how they affect my writing. This turned my writing into a much more expressive experience and almost became a dance form that I could let out the emotions that I felt behind the words.
I felt that this was very successful, but the choice of music didn’t always align with my emotions that lay alongside the words, and felt that using the music I listen to when writing my diary brought these closer. By repeating the words multiple times on one page it enabled me to develop and look back on my thoughts that I associate with each word and express them through my handwriting. I selected my favourites and placed a red dot next to them to mark which I would carry into my next rolling tests.


Chosen words:

Designing the plinth

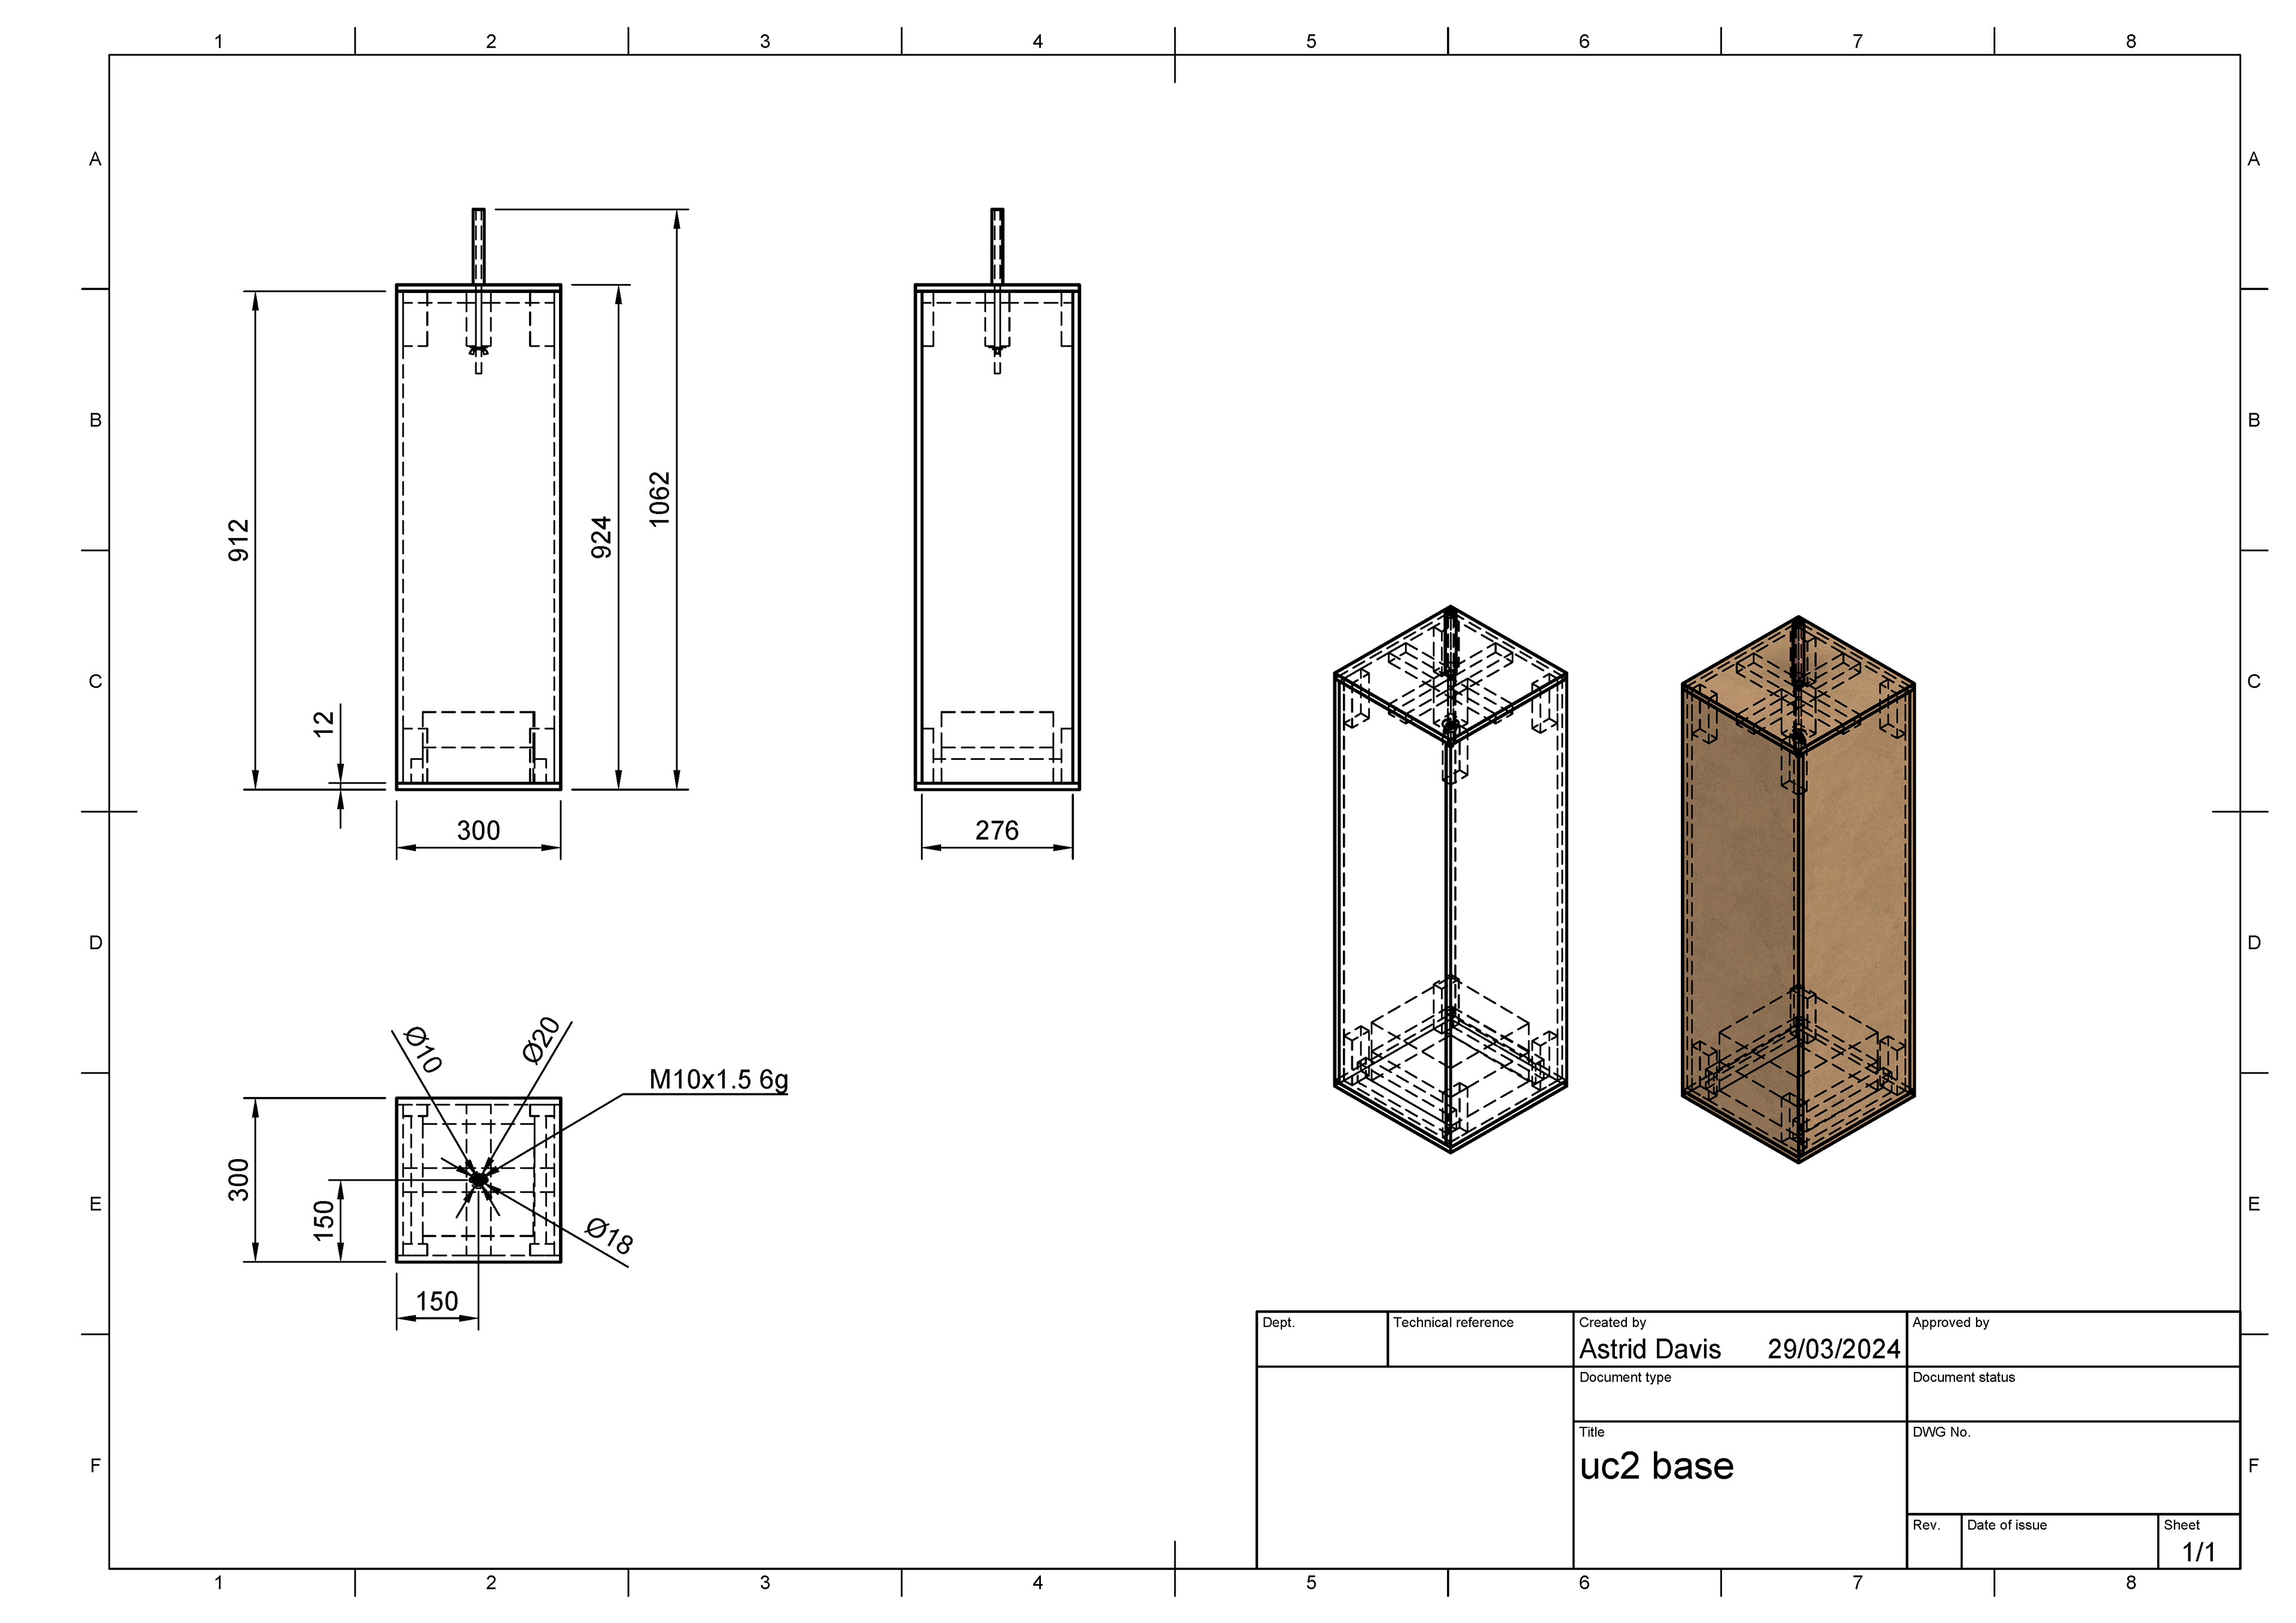
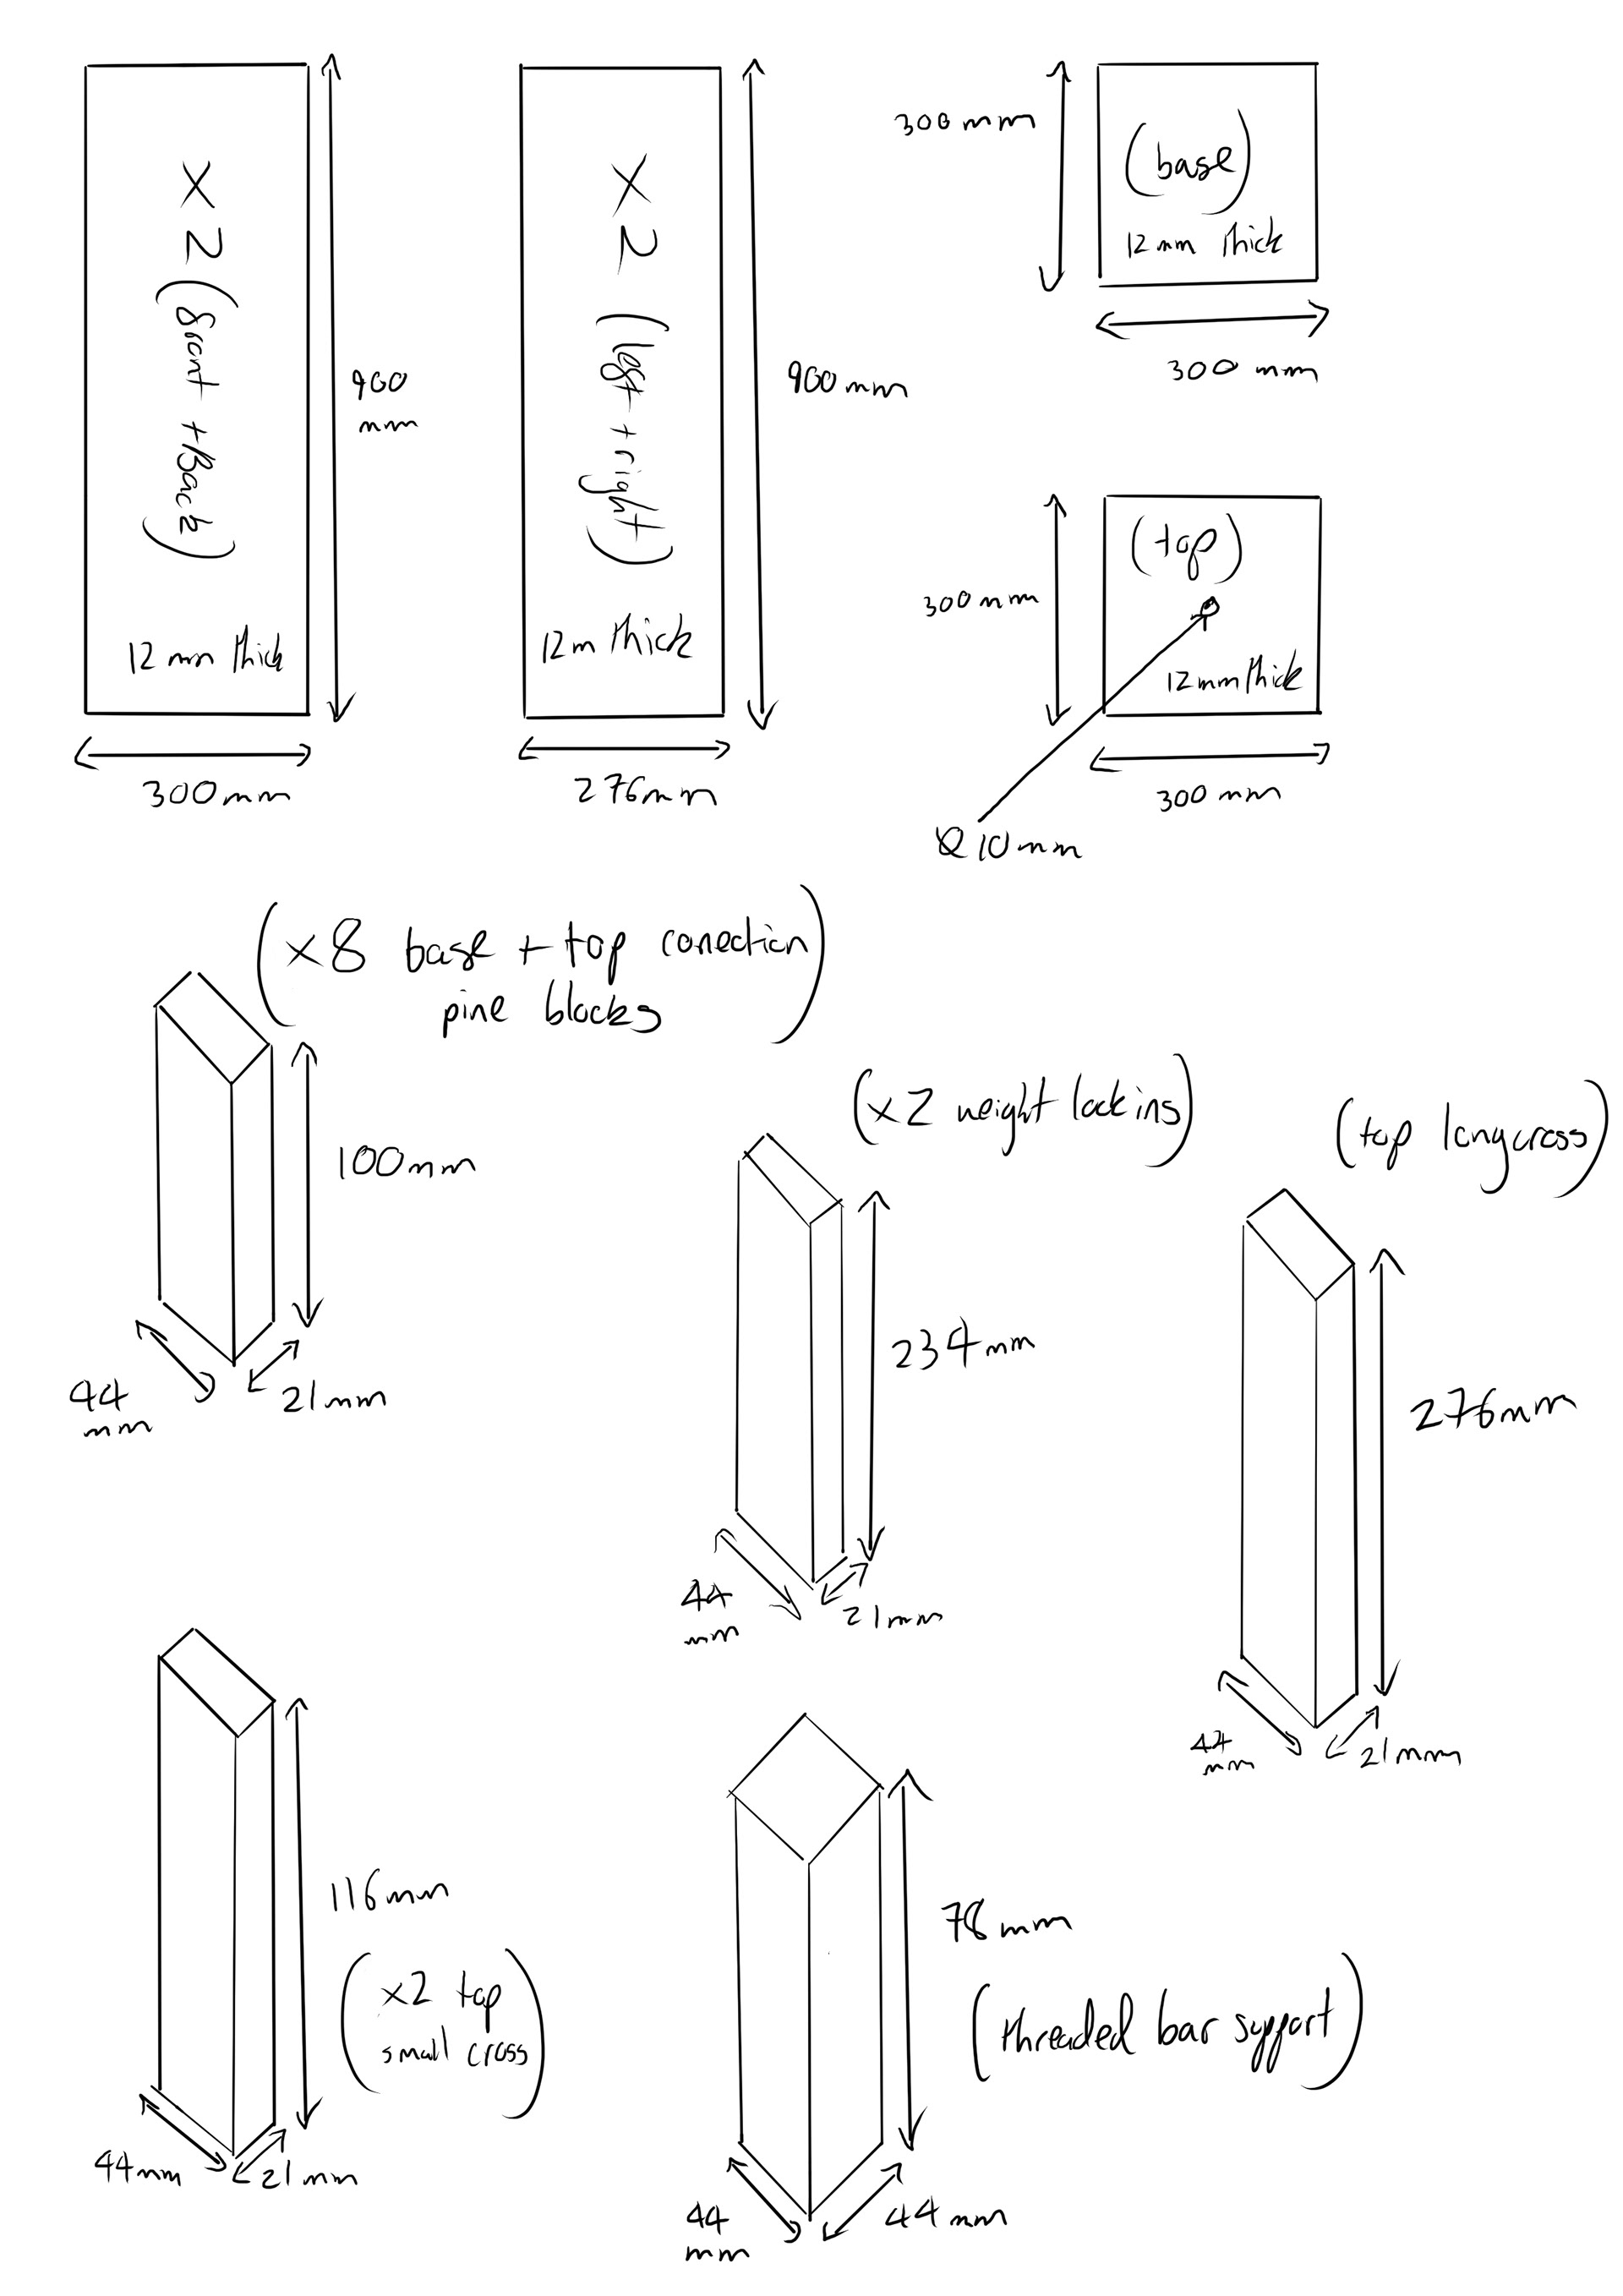
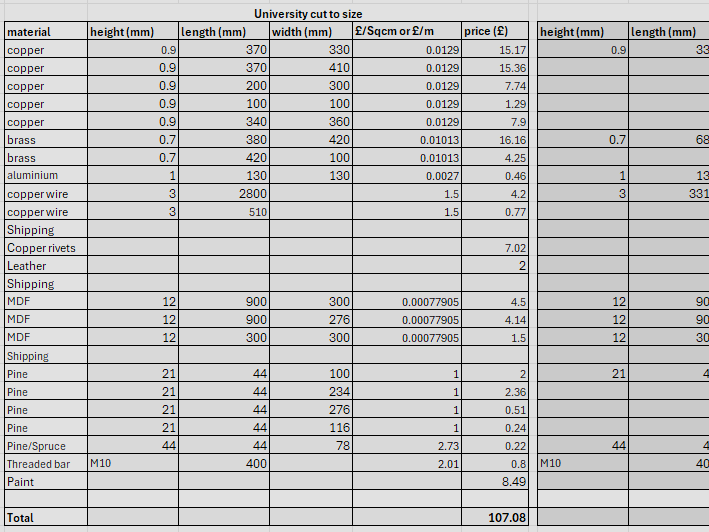
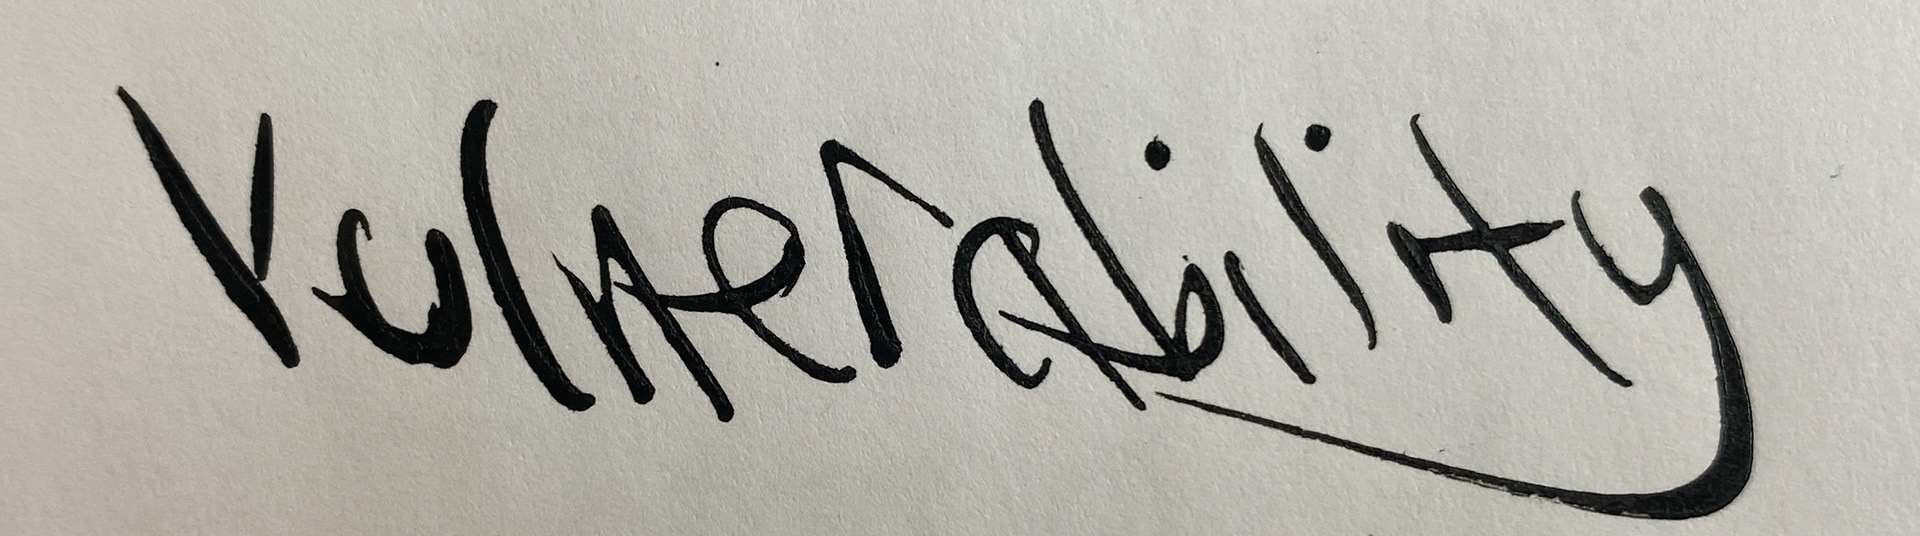
Reflecting on my research into how other contemporary practitioners display their work on plinths and how my preferred gallery FIVE presents their work at Collect, I decided to create a simple box design. I needed the plinth to be a modified design of the standard MDF construction to hold the weight of the cast and work placed above but also secure the cast into the structure of the base.
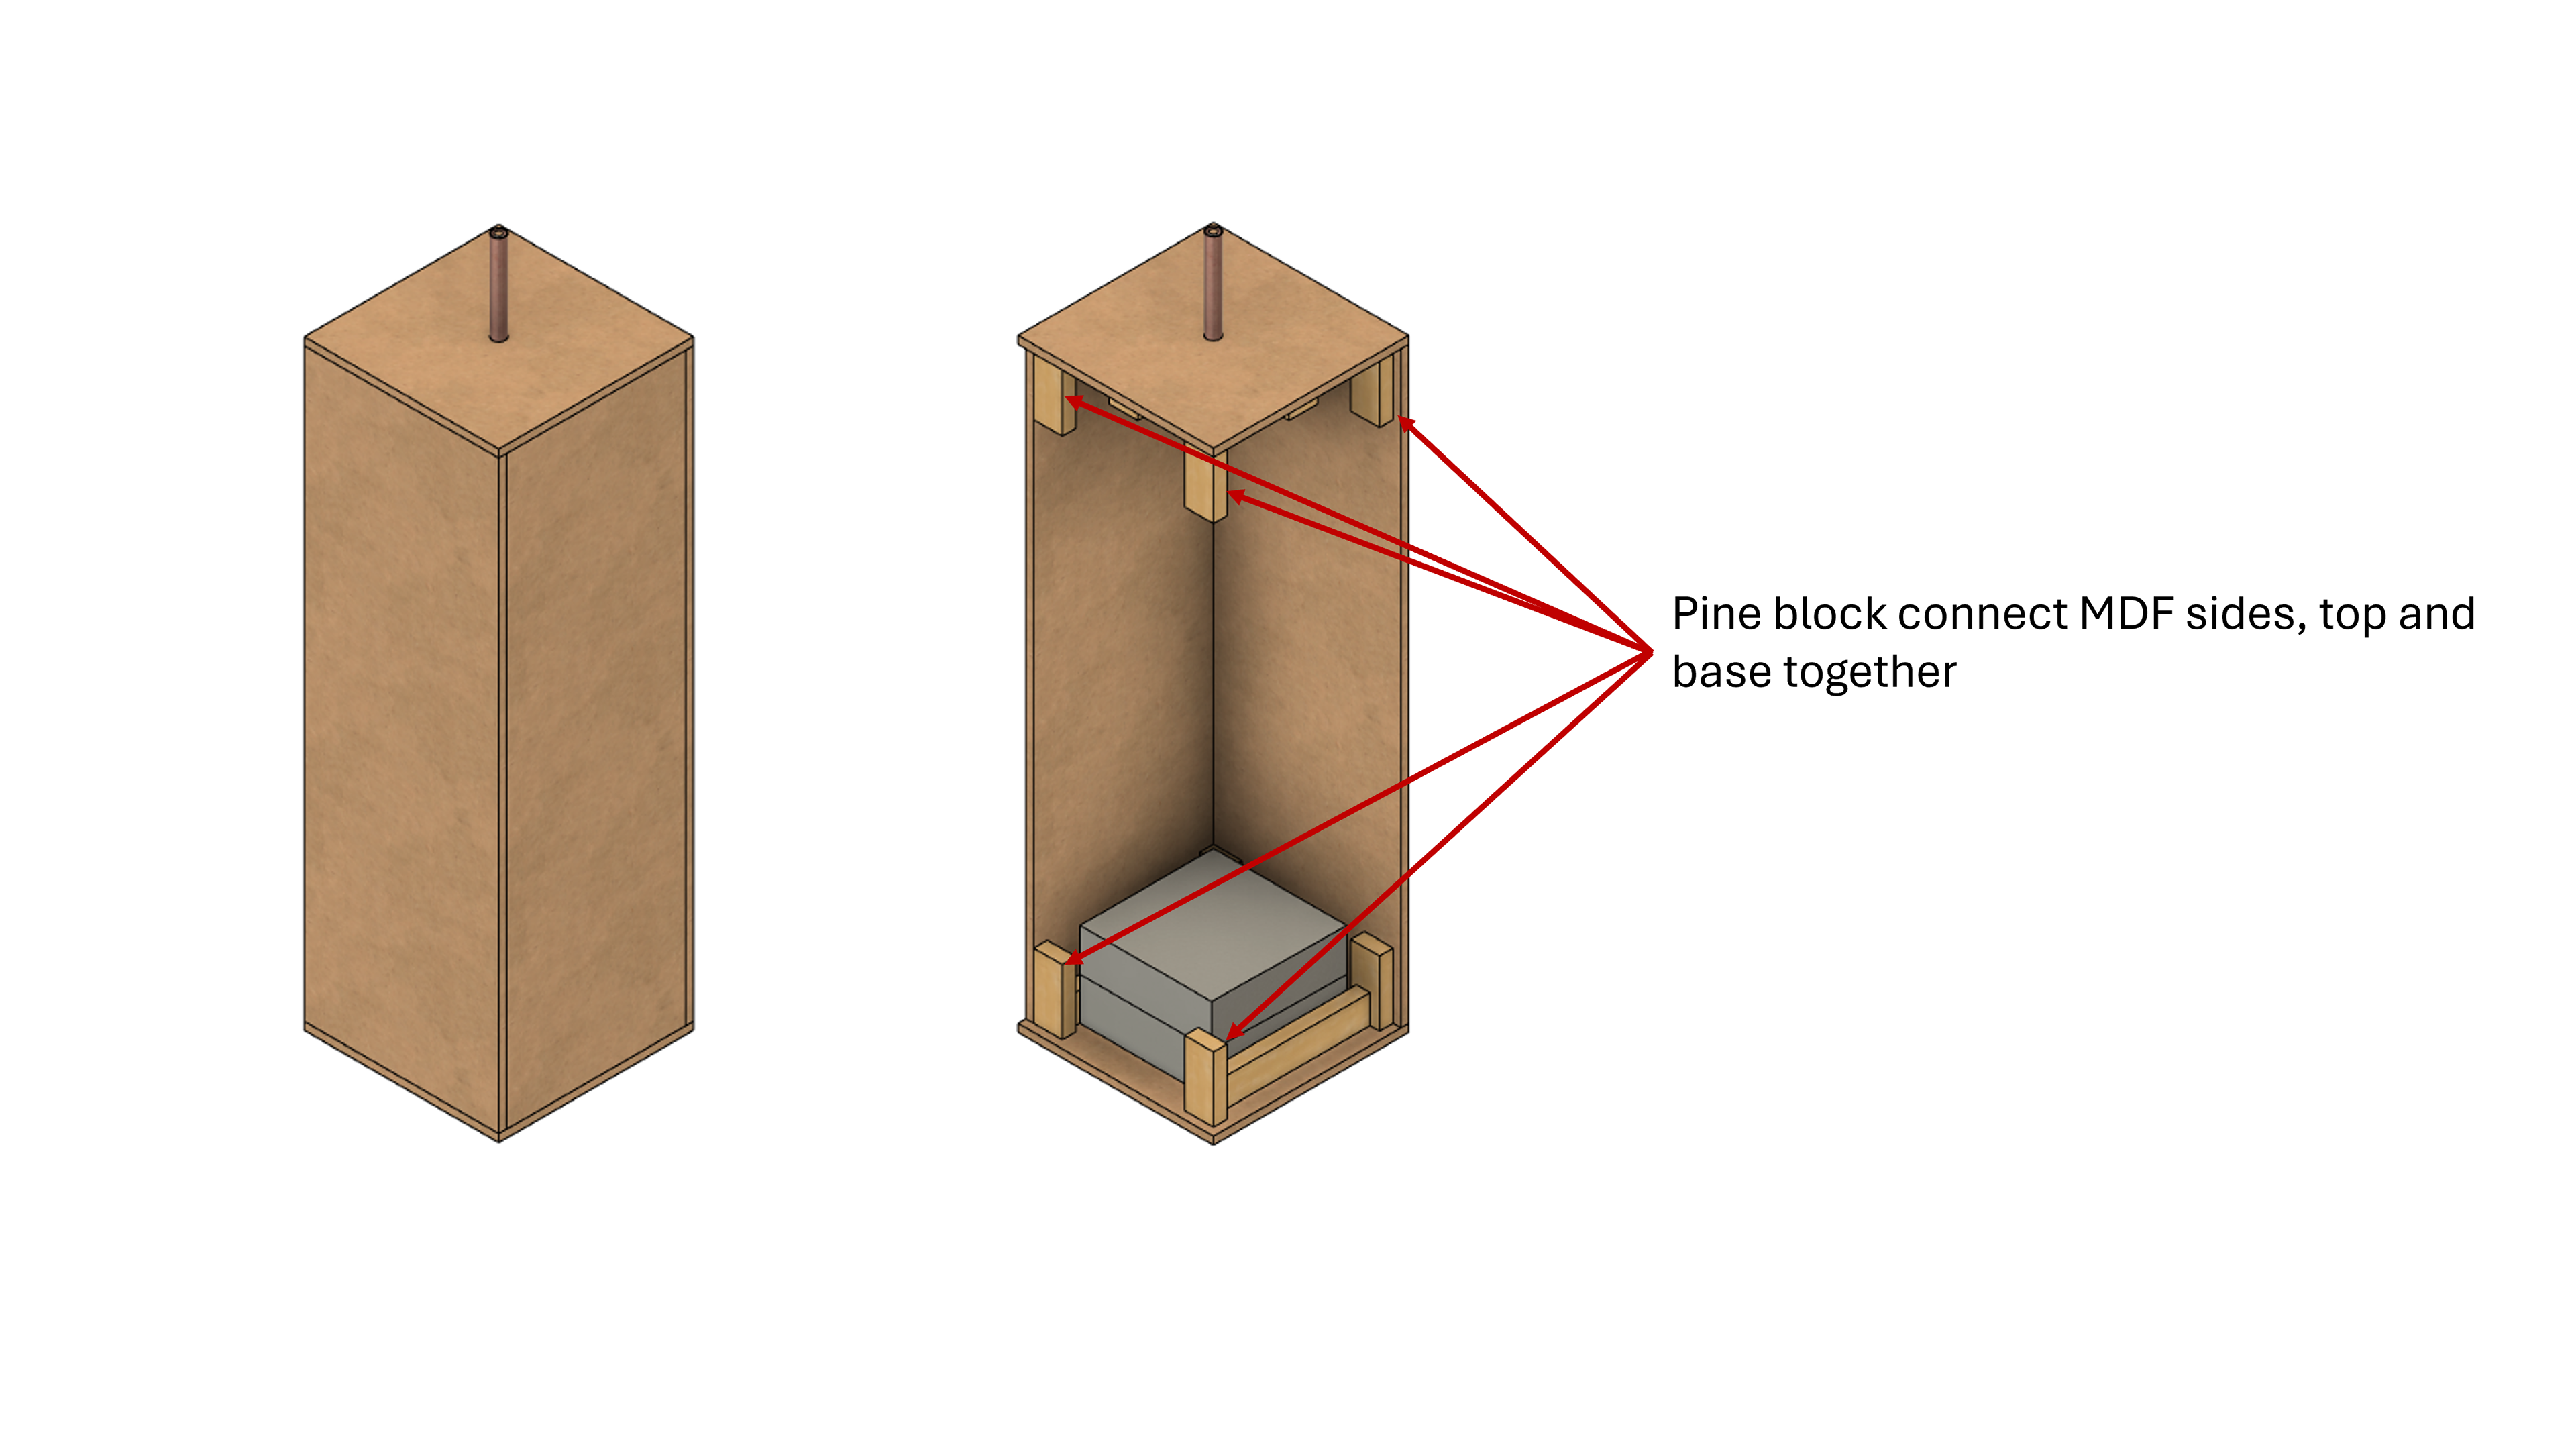
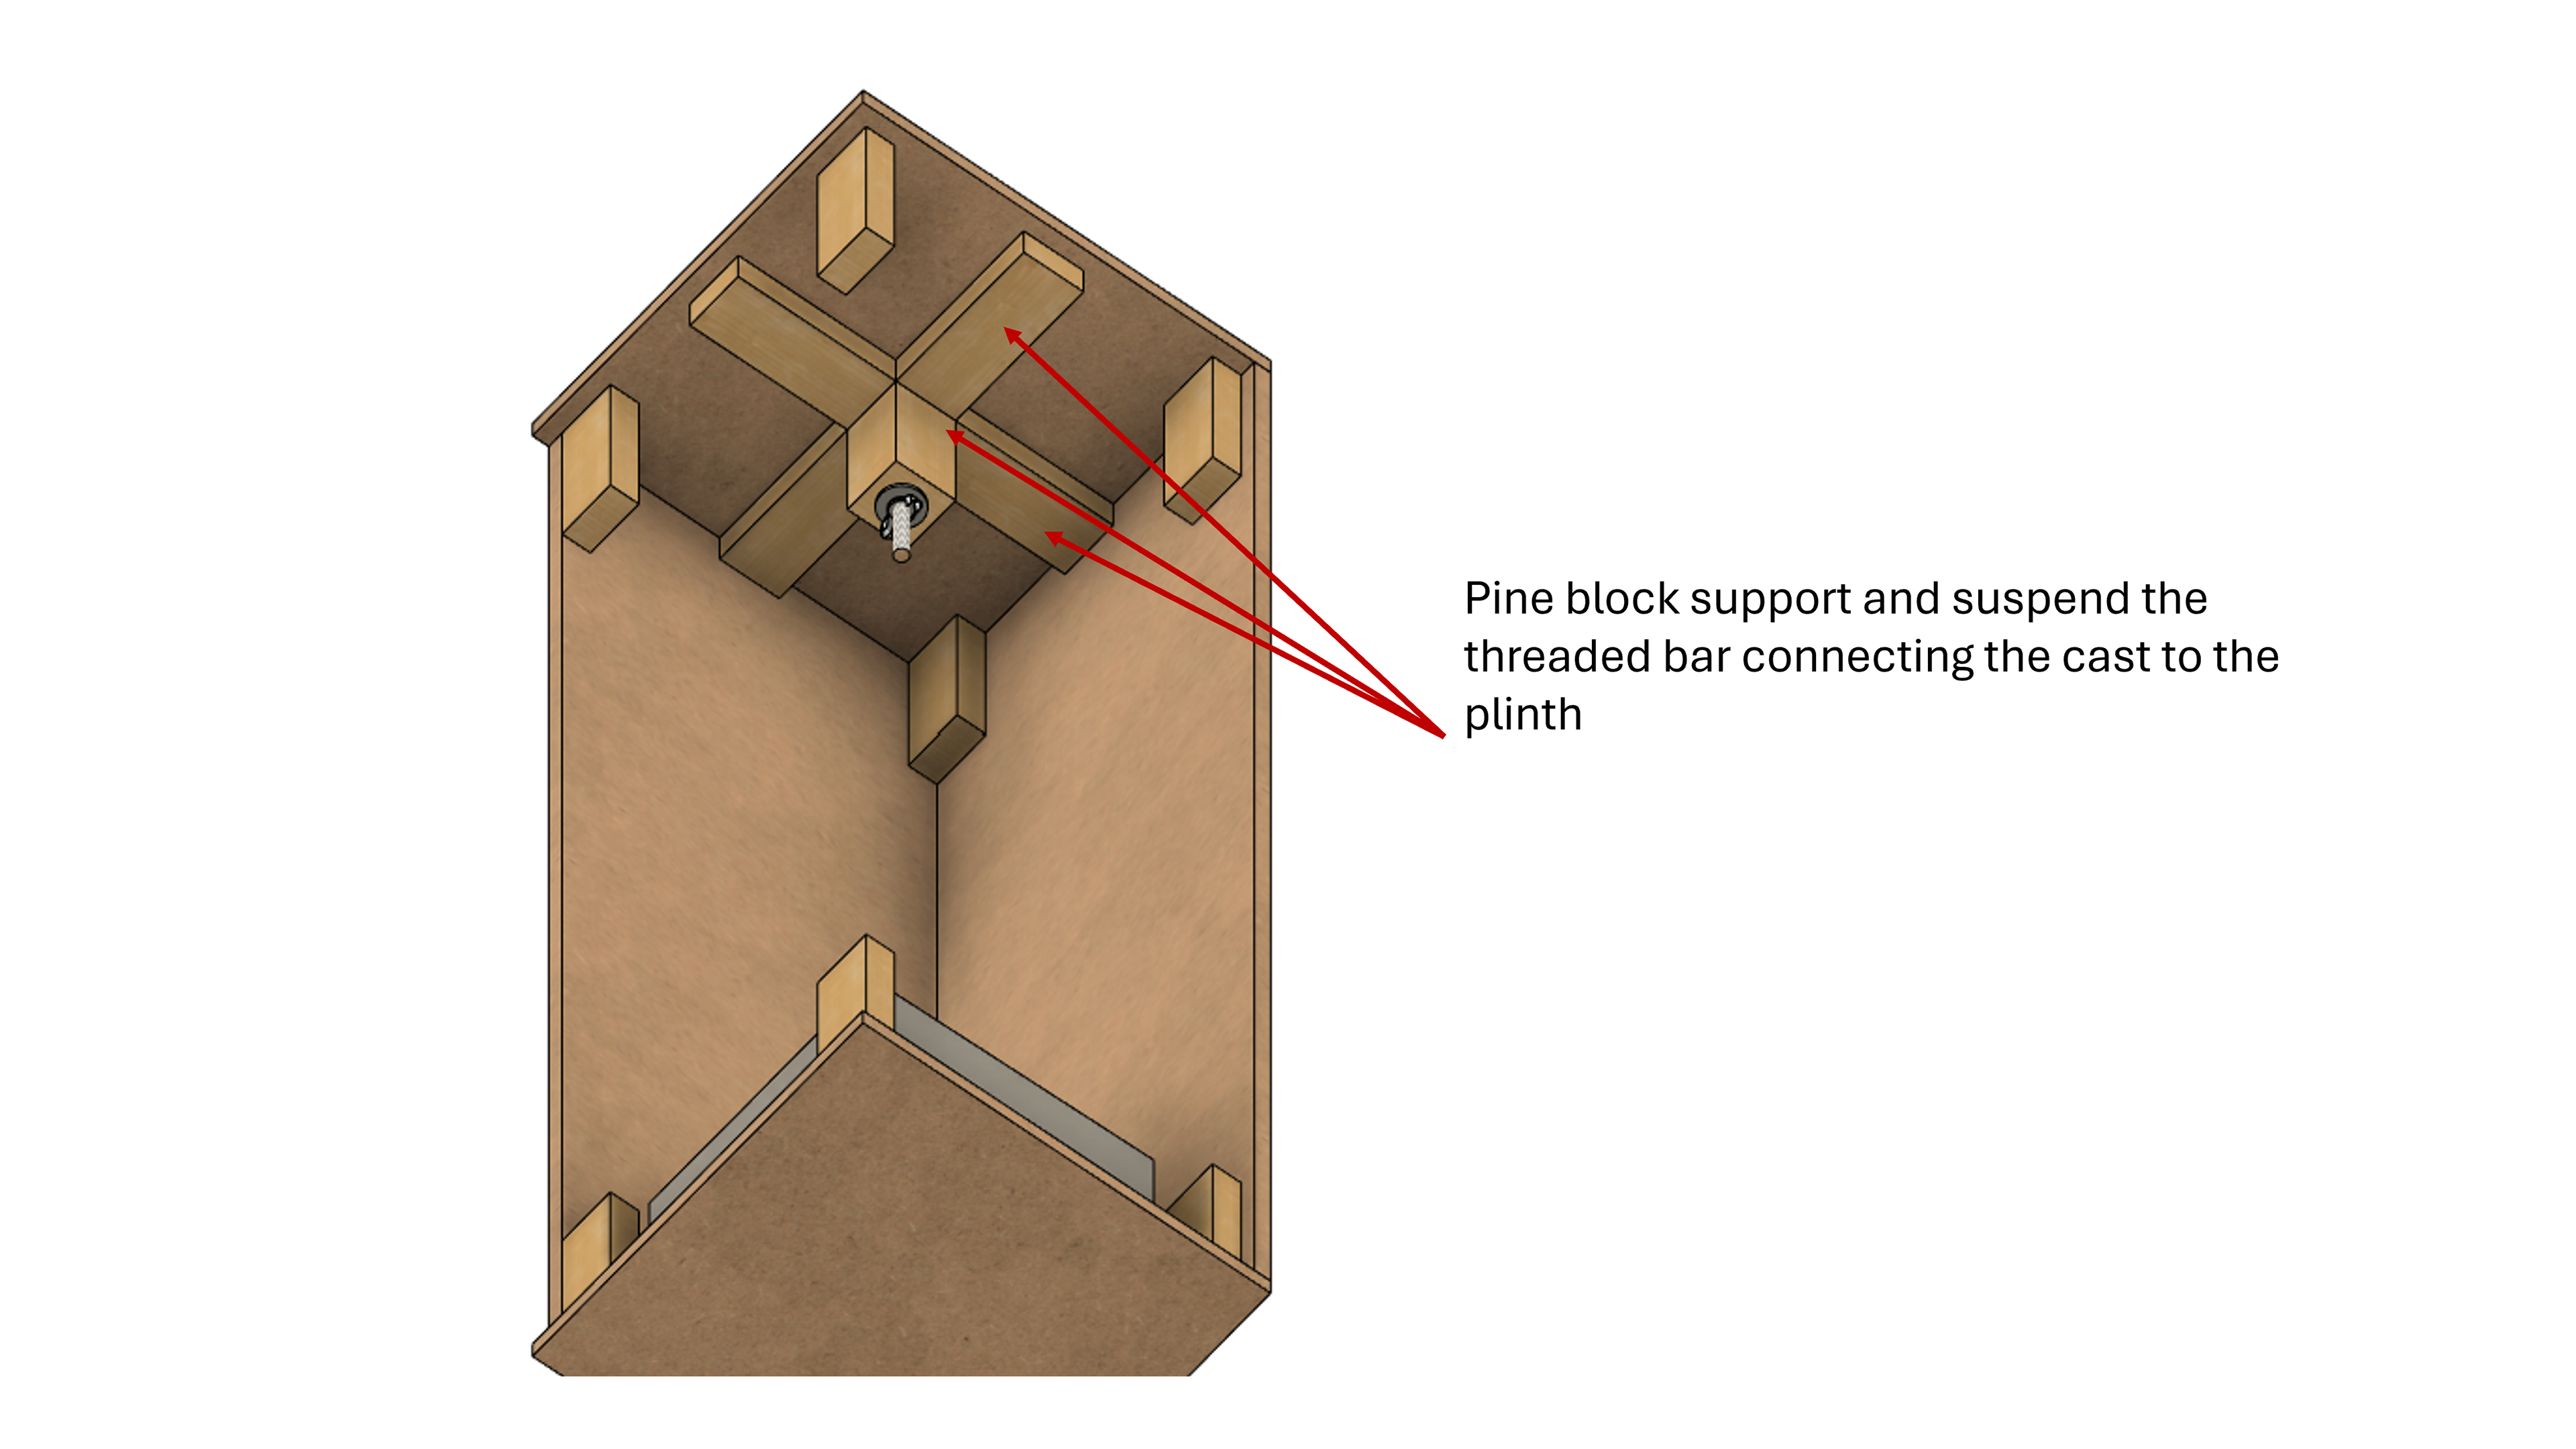
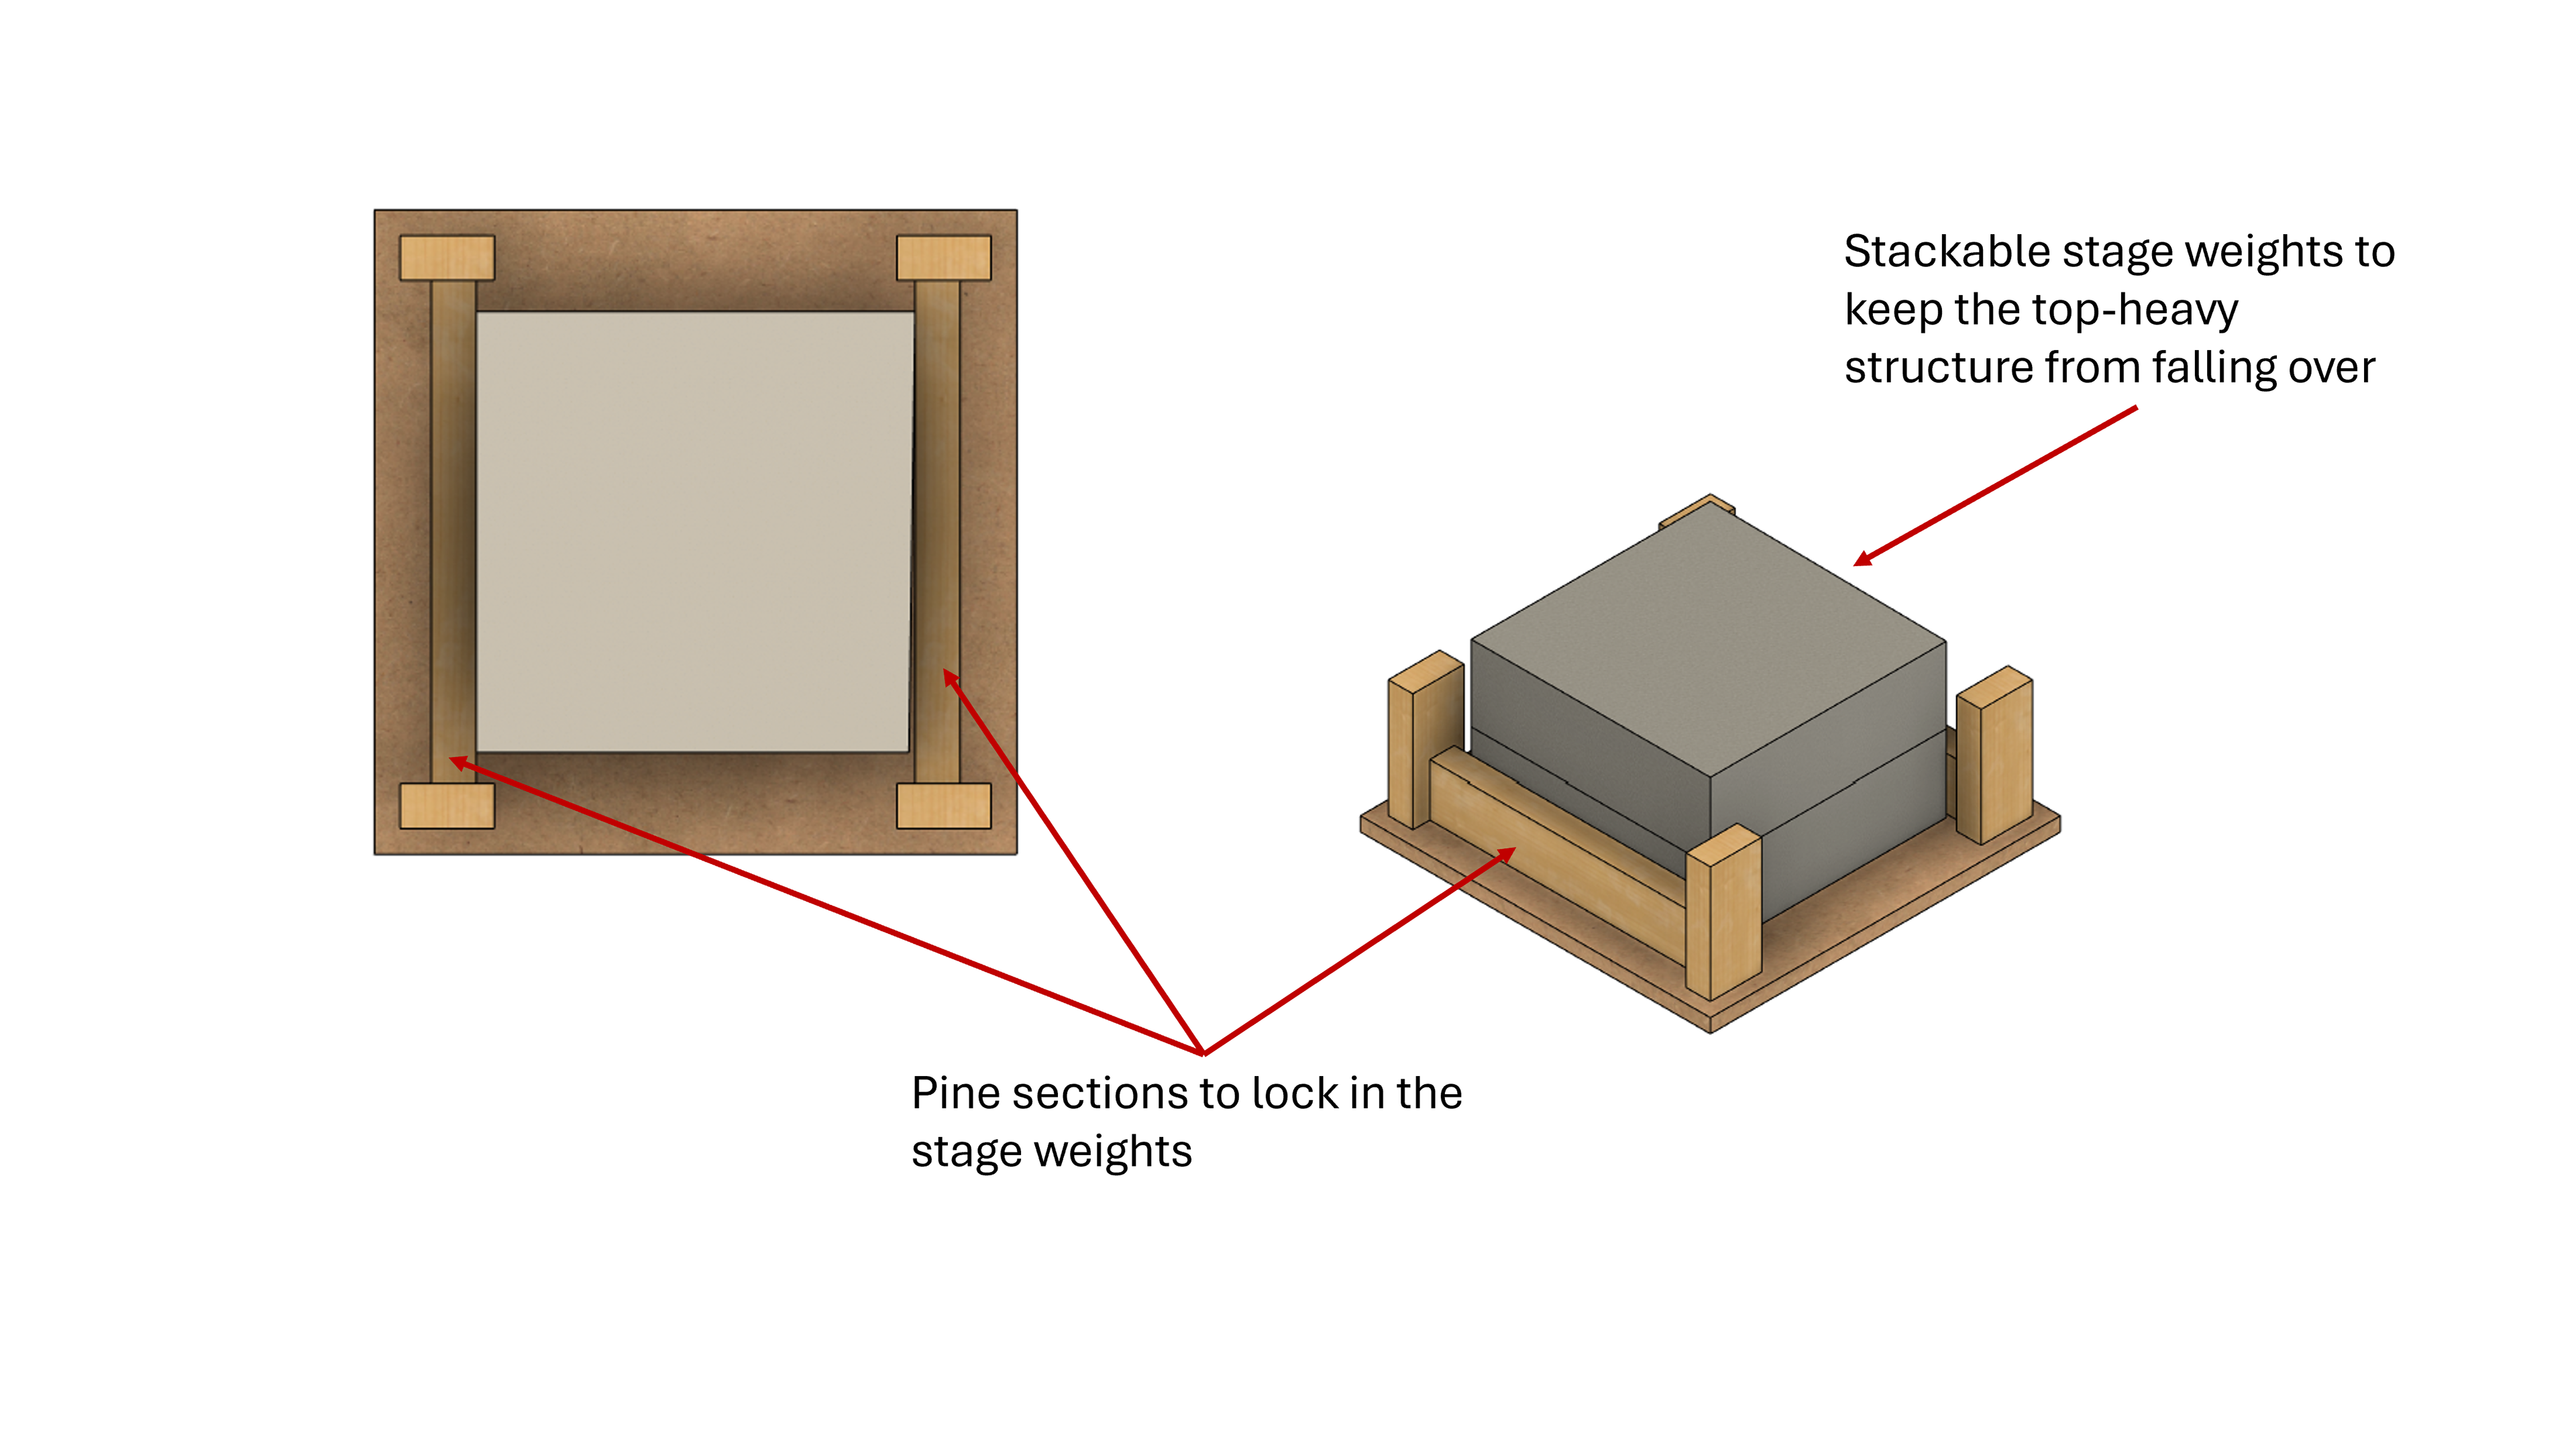
I designed the plinth in Fusion 360 and worked around the size of stage weights that I can stack in the base of the plinth to move the centre of mass of the structure lower to the ground. I worked out the height I wanted my work to sit at by placing the shoulder at the same height as mine to represent how the piece would look when worn. I also added additional supports around the area where the threaded bar would enter the top of the plinth joining the cast to the base. A key feature was to ensure the cast could be slid into the plinth and then safely bolted in place. Therefore, I kept one side removable which can be slid in and out, making access to the inner mechanisms of the plinth easy. I also wanted the construction to be both simple and strong, so I designed it to all be glued and screwed together using internal pine blocks for additional support. The screw holes can be filled and painted over making a uniform finish.